
If you want your eCommerce site to succeed, it’s vital to customize every aspect of its design for maximum effect. The combination of WooCommerce, Beaver Builder, and the Beaver Themer add-on makes it easy to take your online store to the next level.
In this article, we’ll discuss how to integrate Beaver Builder tools with WooCommerce. Plus, we’ll introduce some of the most useful Beaver Builder WooCommerce modules and how you can use them on your website. Let’s get started!
Table of Contents:
How Beaver Builder Can Help You Design a Better eCommerce Site
One challenge of building eCommerce websites is that they tend to be expansive. Even a small online store needs shop sections, individual product pages, a checkout screen, contact forms, and more. All of those elements can take a lot of time to put together, especially if you’re not using the right tools.
WooCommerce is at the core of most WordPress eCommerce sites. This plugin enables you to transform any WordPress website into a full-fledged online store. However, WooCommerce is all about adding functionality, which leaves the design aspect up to you.
By adding Beaver Builder to your toolset, you get access to a page builder that integrates with WooCommerce right out of the box. Our plugin enables you to customize your site’s design in any way you like, so your store looks and functions exactly as you want.
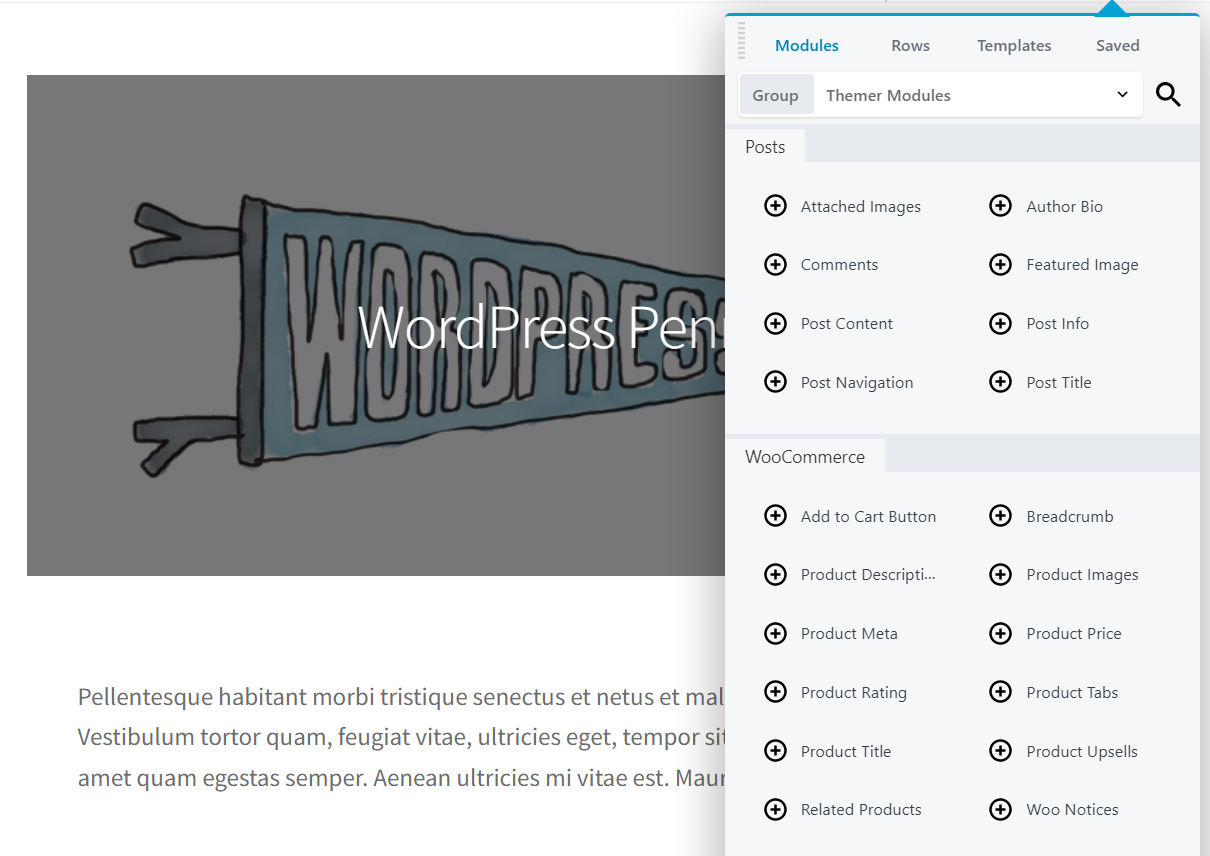
Plus, if you have both Beaver Themer and WooCommerce installed, you get access to advanced WooCommerce modules that you can use to customize your store’s layout:

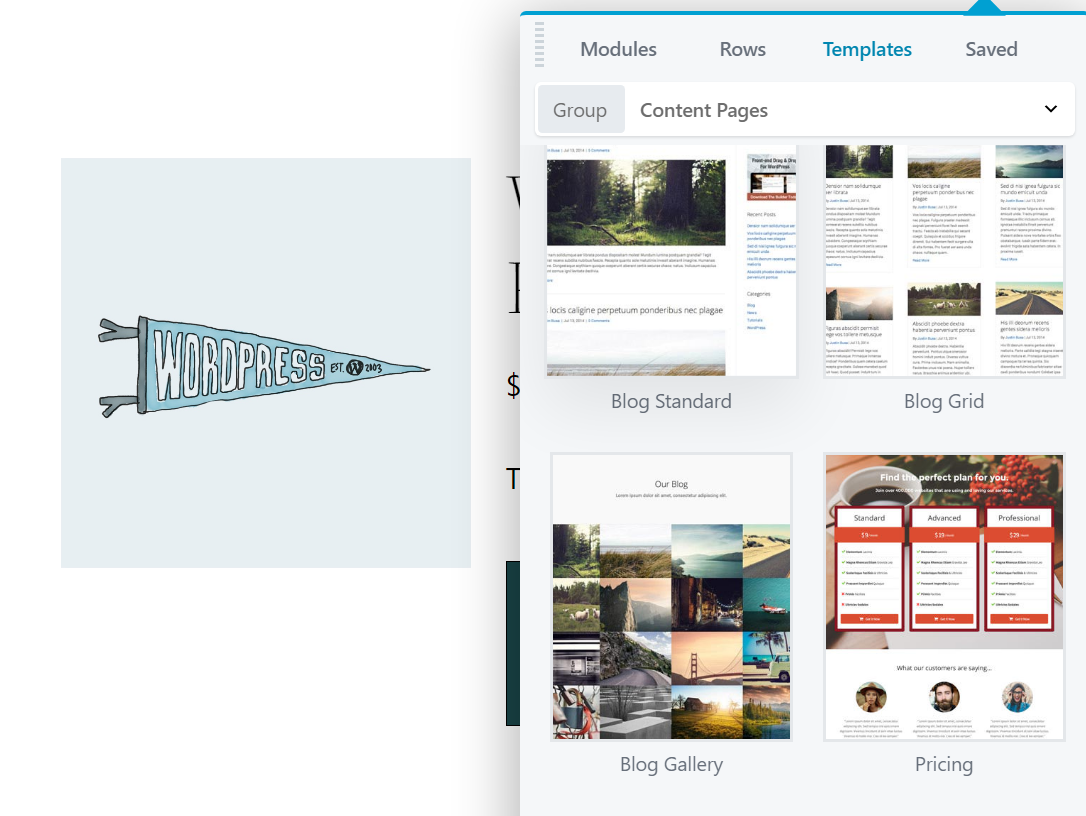
Along with modules, Beaver Builder also enables you to use templates. These are pre-built designs that you can use for all kinds of WooCommerce pages. You’ll find options for landing pages, special offer sections, Pricing Tables, Frequently Asked Questions (FAQs), and many more:
Although the shop and product pages are at the core of any online store, you’ll also need other types of content. Most successful eCommerce stores also have About Us pages, blog posts, and so on. With Beaver Builder, you can get all of these pages up and running quickly, and easily customize them to fit your store’s style.
An Introduction to Beaver Builder WooCommerce Modules
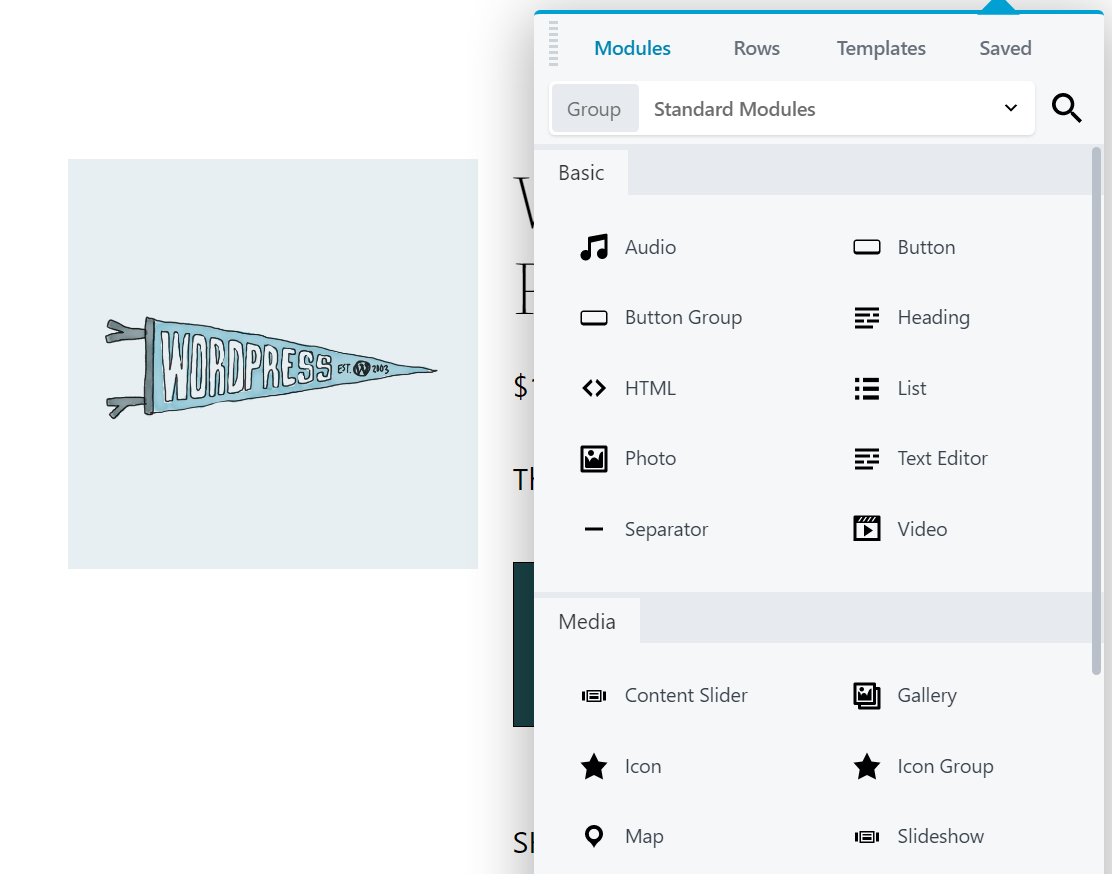
Beaver Builder modules are similar to WordPress blocks in functionality. You get to choose and place elements such as buttons, lists, headings, galleries, and more on any part of your site you want. The advantage of Beaver Builder is that you get access to more modules with greatly expanded customization options:
What’s more, when you add the Beaver Themer plugin to your site, you get access to an expanded toolset to help you build a better website. You’ll get fine-grained control over just about every aspect of your site’s functionality and appearance. For instance, you’ll be able to create layouts that you can apply to multiple posts, pages, and/or custom post types across your site, making it quick and easy to create a cohesive design.
Most importantly for our purposes here, if you use Beaver Themer alongside WooCommerce you can use a set of dedicated eCommerce modules. These work just like any other Beaver Builder module, but you can use them to customize layouts instead of individual pages.
That way, you can build designs and use them throughout your entire store. For instance, you could create a dedicated layout for product pages, and use it to feature each item in your shop to best effect. With the various modules on offer, you’ll be able to customize that layout to look and work precisely as you desire.
How to Use Beaver Builder WooCommerce Modules (5 Top Options)
At this point, you may be wondering just what you can do with our WooCommerce modules. In this section, we’ll show you how several of the most useful and versatile options work.
You might also like to watch this video tutorial that explains how to customize your WooCommerce single product page using Beaver Builder WooCommerce Modules and Beaver Themer:
1. Add to Cart Button
First up, let’s talk about “Add to Cart” buttons. These elements are crucial for making it easy to purchase the products you’re offering. Each one is a key Call To Action (CTA), encouraging visitors to buy what they’re looking at.
For that reason, it’s a good idea to include plenty of “Add to Cart” buttons in your WooCommerce store. While the default locations are a start, you may want to ensure that these buttons are more frequently placed and more prominently featured.
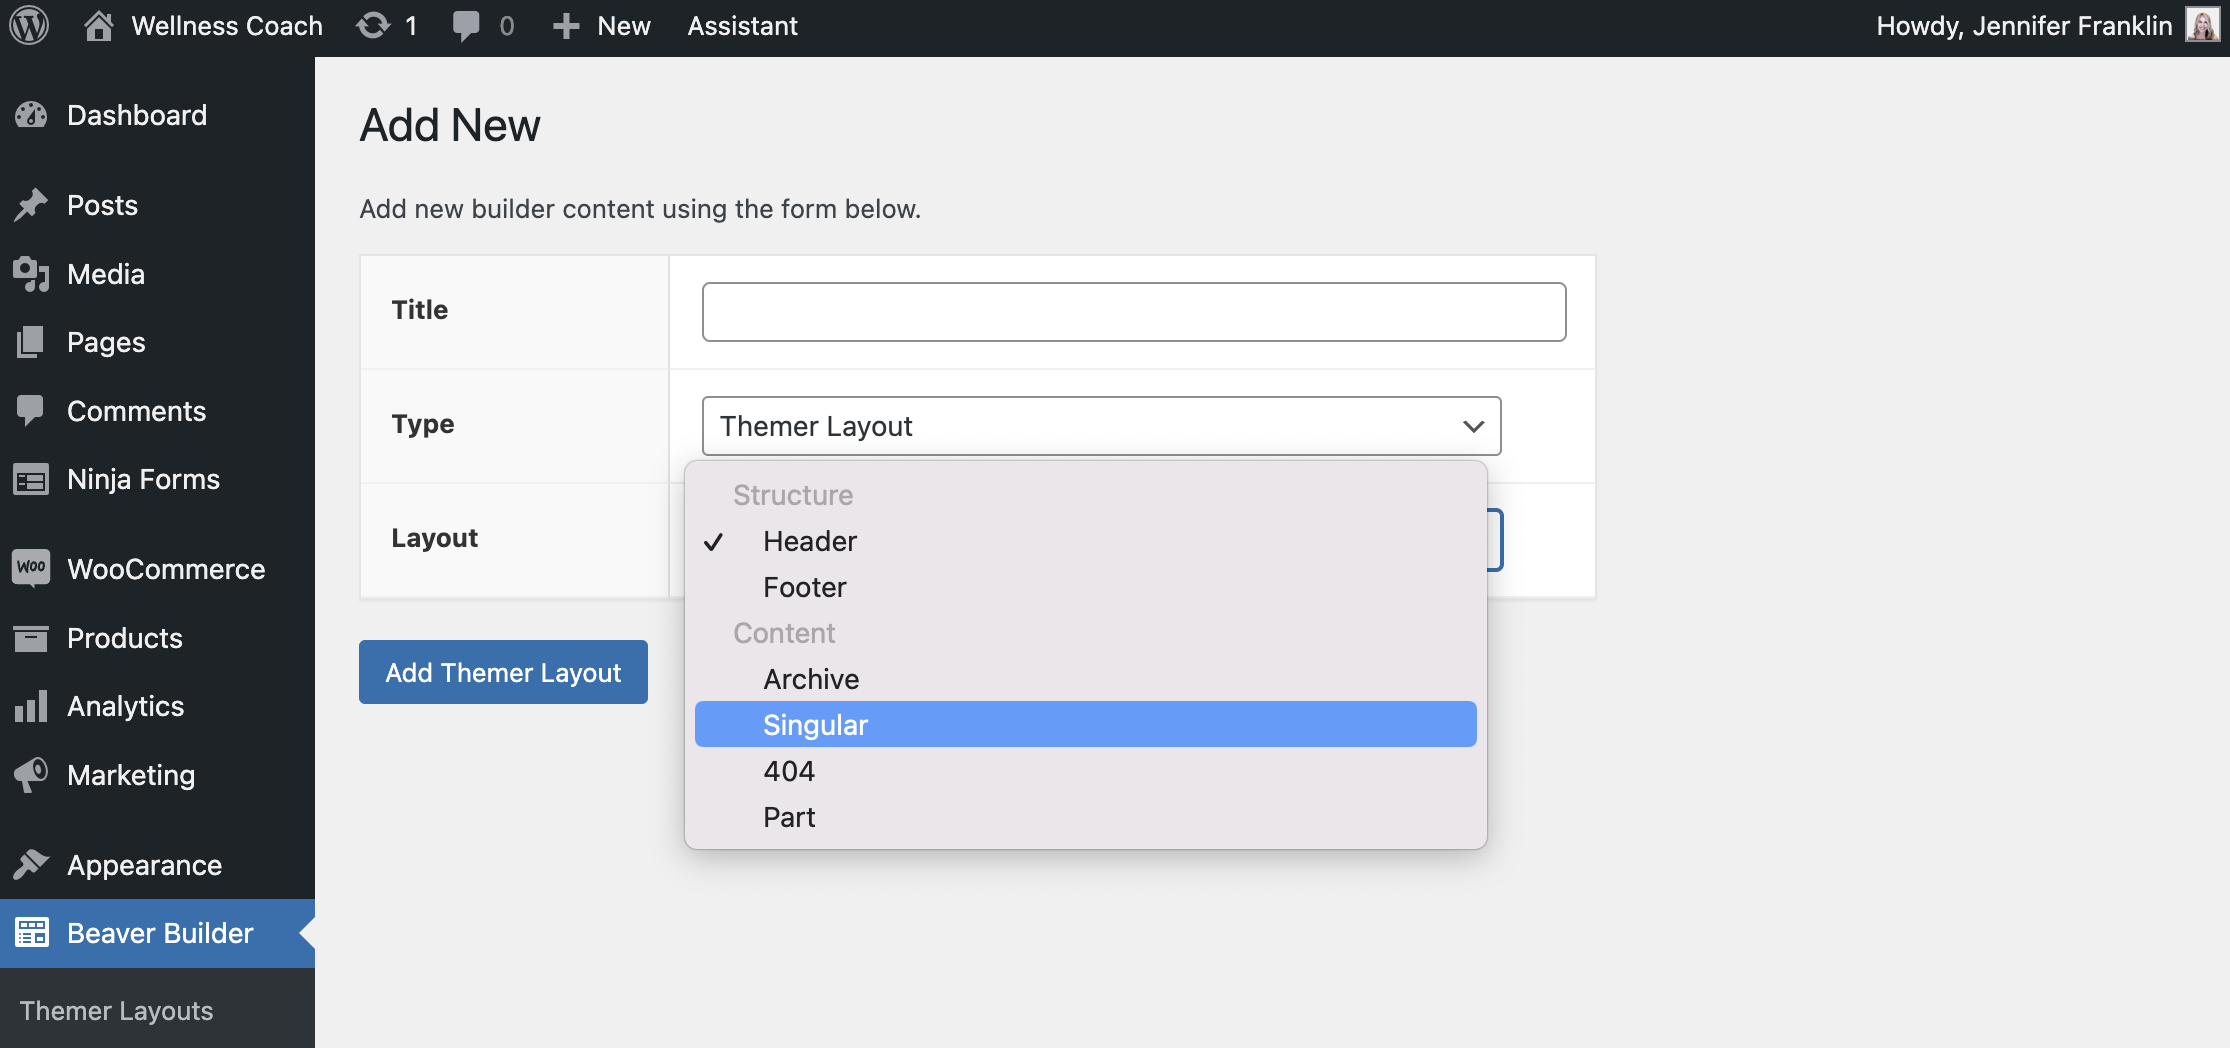
To do that, you can make use of a dedicated module. You’ll first need to create or open a Themer layout for editing. From your WordPress dashboard, go to Beaver Builder > Themer Layouts. Click Add New.
In order to access all of the WooCommerce modules we’ll discuss, your layout type should be set to “Singular”:
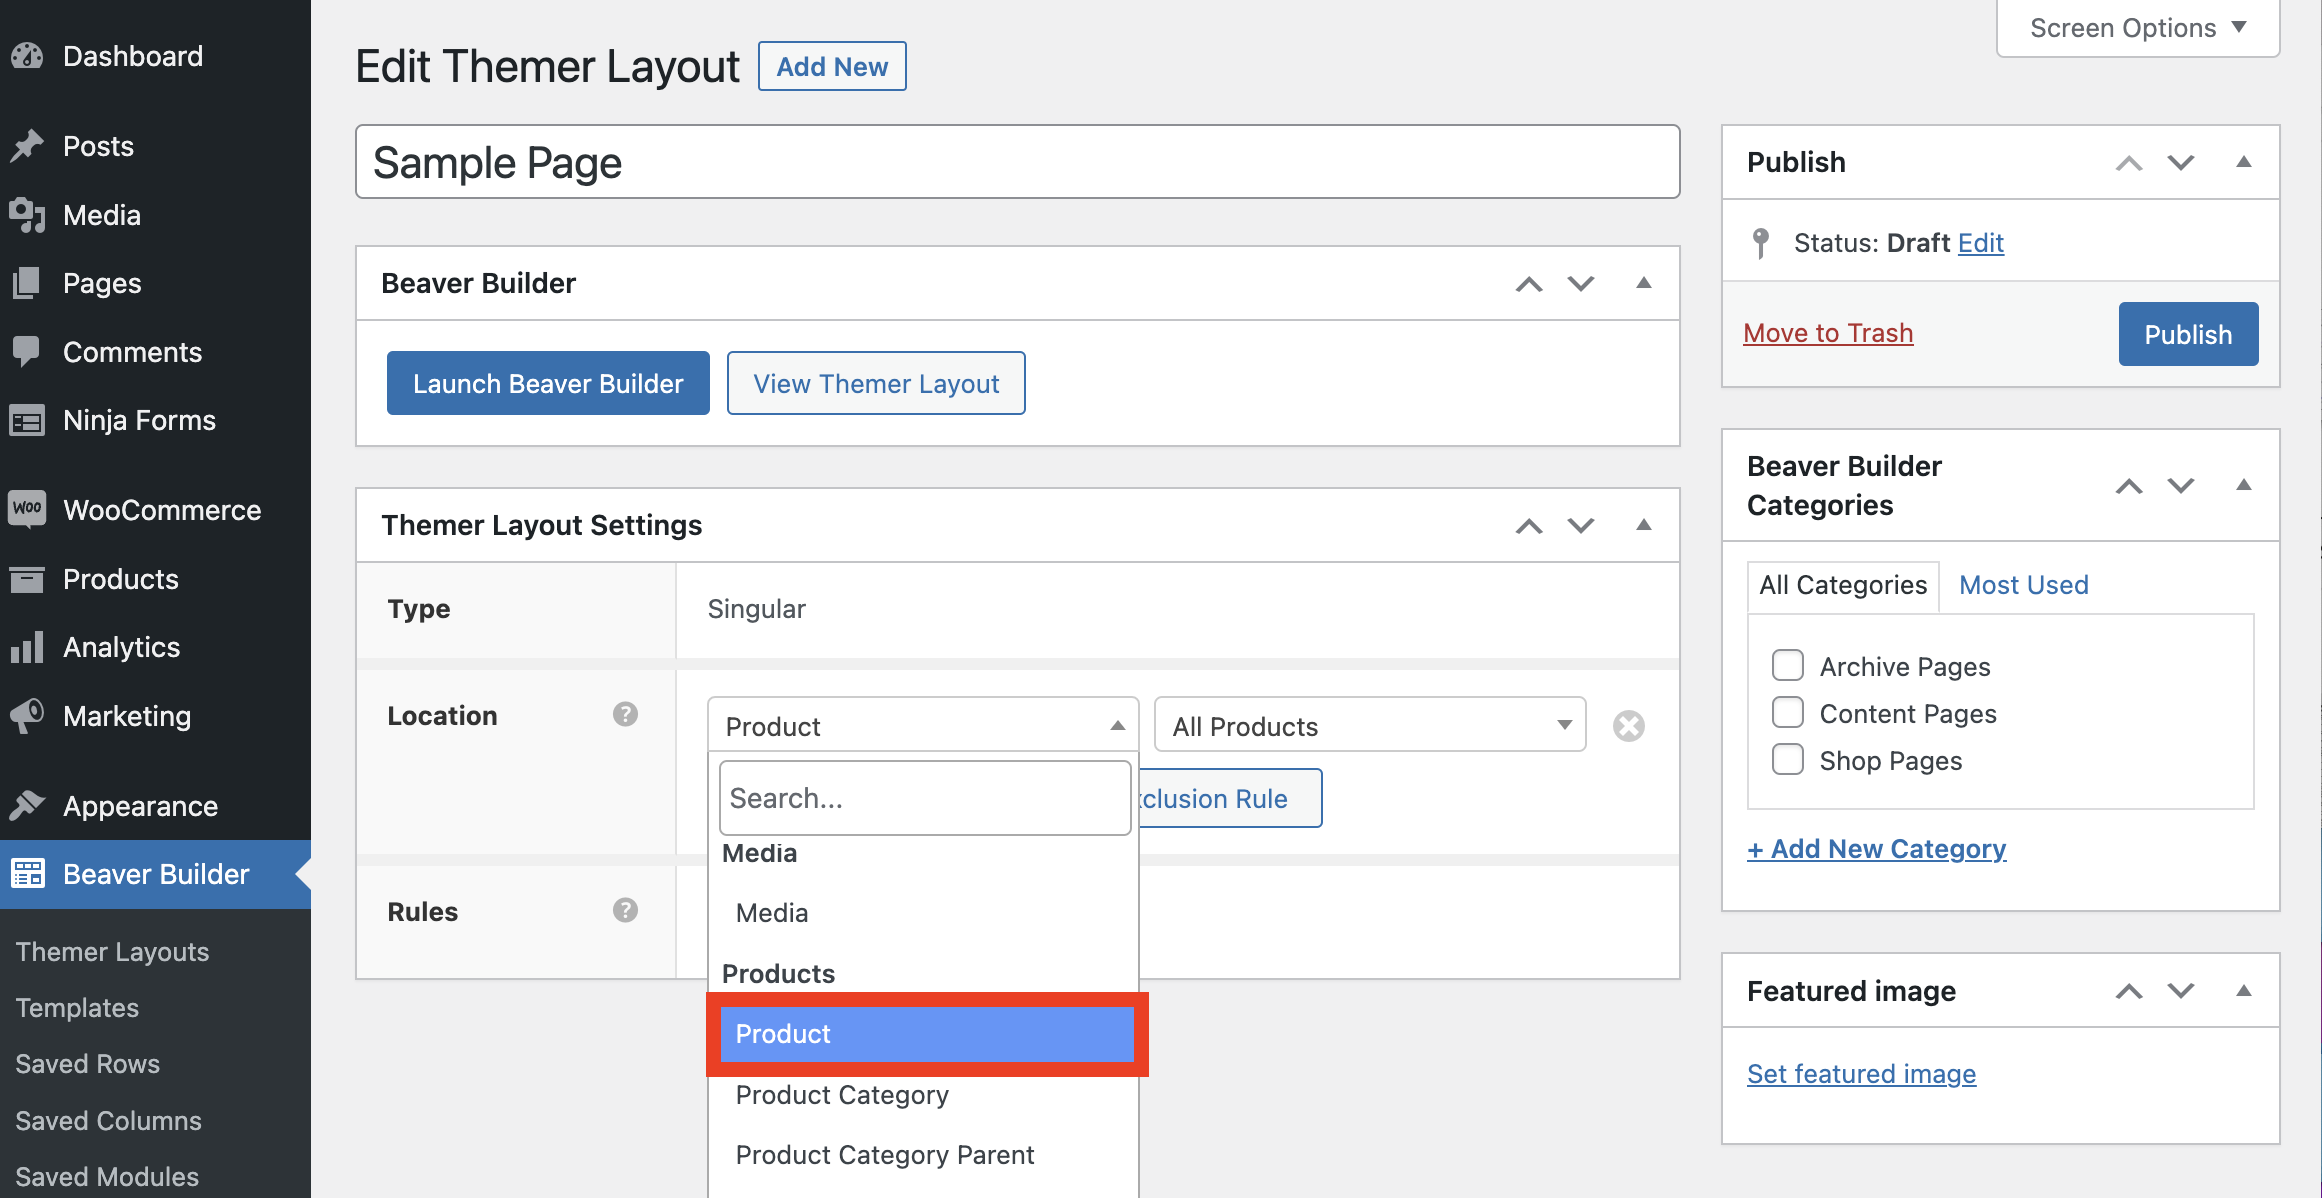
Next, you should have a single product page assigned as the location:
Then, click the Launch Beaver Builder button to open up the editor. In the upper right hand corner, select the Modules menu from the content panel. Choose the Themer Modules option under Group. In the WooCommerce section, you’ll find the Add to Cart Button module:
To use this module, drag and drop it anywhere on the layout you’re editing. This process works just the same as when you’re using the Beaver Builder page builder to create a regular page or post. It’s a good idea to place this element on a prominent part of the layout, make sure it’s ‘above the fold’ (visible without scrolling), and leave plenty of white space around it.
Once you add the module, you can click on it to edit its style. The Add to Cart Button module enables you to change the colors of all its elements, including the text and background:

This is vital, because the colors you choose for your “Add to Cart” buttons can have a significant impact on how many conversions they generate.
In addition, you can conduct A/B tests to try out multiple color combinations and determine which is the most effective. You may also want to test various placements for your “Add to Cart” buttons.
2. Product Description
No product page is complete without a description of the item you’re trying to sell. When you add products to your WooCommerce site, you’ll want to make sure to include a thorough description of each item. That text should be clear and easy to follow, highlight the key benefits of the product, and include relevant keywords for Search Engine Optimization (SEO) purposes.
To choose where this text will appear, you can use the Product Description module:
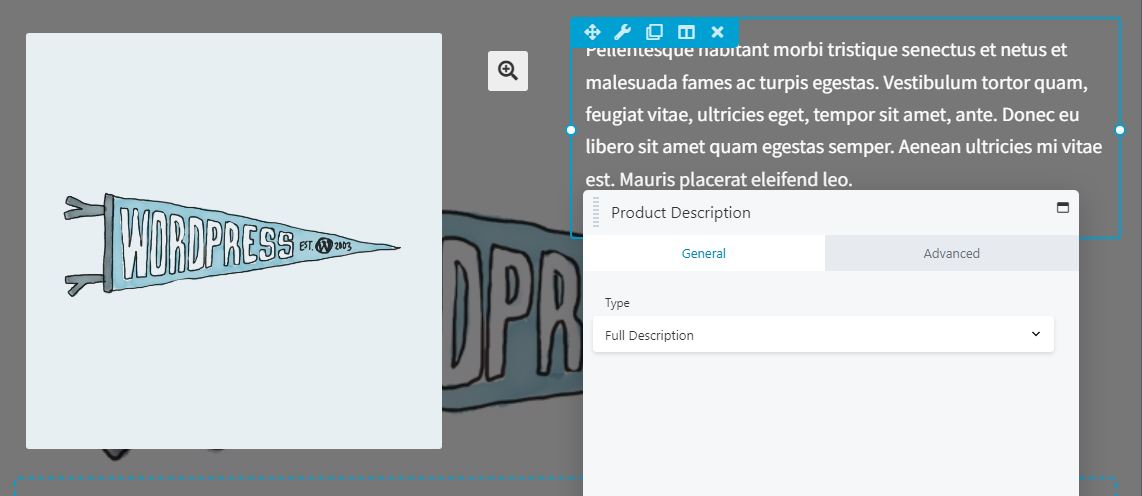
Note that once you place it, you won’t be able to edit the text directly. Instead, you can choose between including an excerpt of the description, or its full text.
Since you’re building a product page, you’ll want to make sure the entire description is displayed. Still, even when you’re not using excerpts, it’s a good idea to make sure that your product descriptions are front-loaded. The first few sentences should include the product’s key details, and hint at why it will improve the customer’s life in some way. That way, you can grab visitors’ attention and encourage them to read on.
If you like, you can also edit the Product Description module’s visibility settings, and add animations to it. As with any module, you can even use the Advanced settings to add custom CSS IDs and classes.
3. Product Images
The text you use to describe your products and their benefits plays a significant role in how well they’ll be received. Just as important, but more easily overlooked, are product images.
If you’re running an online store, customers won’t be able to touch and examine the items you’re offering. So you’ll want to offer them as much visual information as you can. If you can demonstrate what your products look like, visitors should feel more confident in taking a chance on them.
For that reason, a single product image is rarely sufficient. Instead, it’s a good idea to feature as many photos as you can of each item. You’ll want to include high-quality images that show the product from multiple angles, and maybe even demonstrate what it looks like in use.
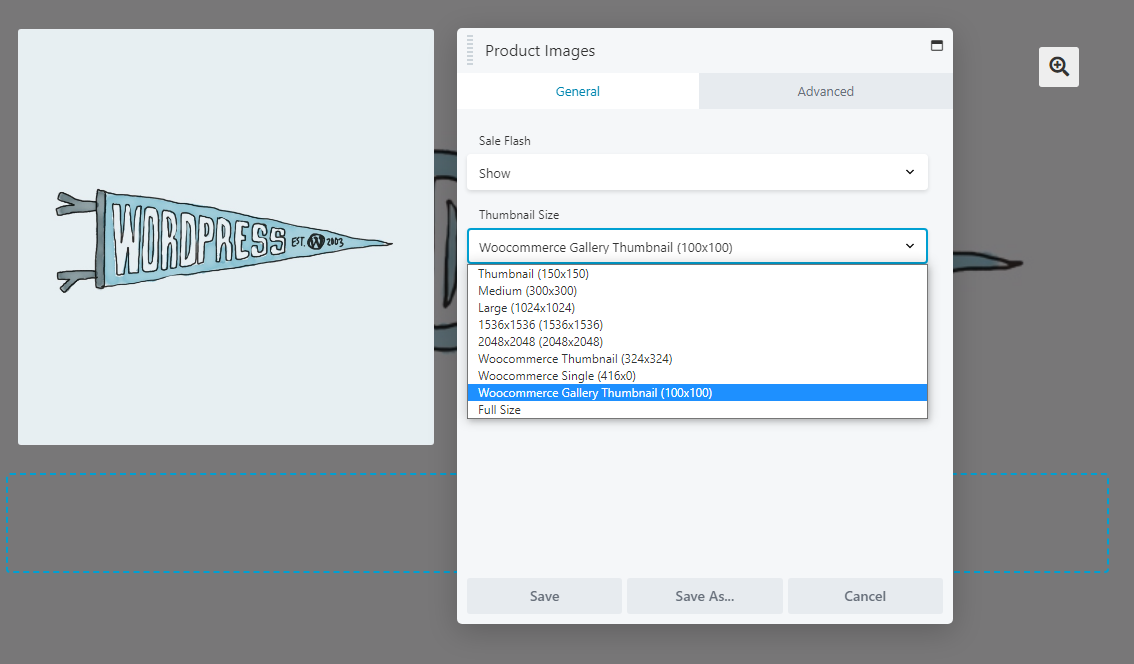
To display all of those images in a compact and easy-to-understand way, you can use the Product Images module. This element enables you to choose between multiple types of galleries for displaying all of the images associated with a particular product.
When you place the module, you can choose the thumbnail size for your images:
On the front end, this module will include a zoom icon, which visitors can use to see images at full size. That icon will appear to the right of the product images gallery.
So even if you choose a smaller thumbnail size, make sure to upload high-quality, high-resolution product images. That way, they don’t have to take up too much room on the page by default, but interested customers can see what your items look like in plenty of detail.
4. Product Price
Customers usually aren’t eager to buy products when they don’t know their price. Some stores choose to give out prices on contact only, but for most eCommerce ventures, you’ll want to include specific numbers on your product pages.
If you offer your items at competitive rates or run a lot of sales, you may also want to ensure that your prices are prominently featured. To customize where this information appears on your product pages, you can use the Product Price module.
Once you place it, this module will automatically display the price (or price range) that you’ve set for each item:
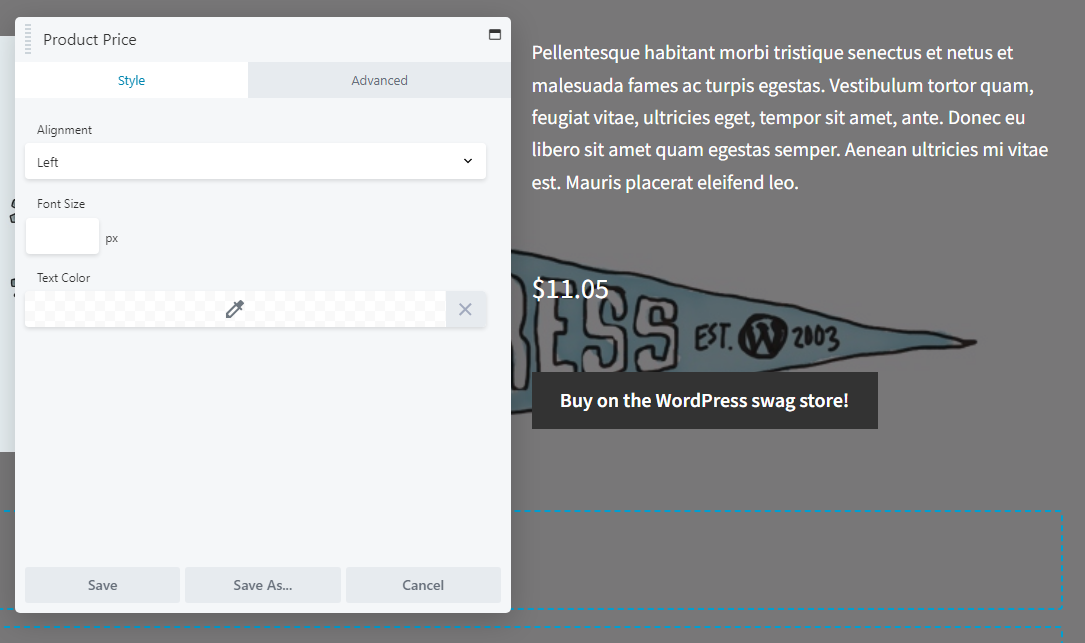
You can also modify this element’s alignment, font size, and color. As a general rule, you’ll want the price of a product to pop visually, so users can spot it without too much effort.
As for placement, it’s usually best to display the price near the “Add to Cart” or “Buy Now” button. This makes it seamless for customers to view the product, see its pricing, and then immediately add it to their carts. However, this is another key element where you may want to experiment with placing and color via a few A/B tests.
5. Related Products
Last but not least, a product page doesn’t have to be devoted to a single item. Along with the primary product, you can also display related items.
This is a great way for any store to increase its sales. Related products sections show customers other potential products they might like, without requiring them to navigate through pages of options. This technique is referred to as ‘cross-selling’, and it increases the odds that visitors will place larger orders.
Fortunately, you can get the job done easily with the Related Products module:

This module automatically determines what to show by searching your WooCommerce store for items with the same tags and/or categories as the page’s primary product. If there’s nothing relevant to display, the module simply won’t appear on the front end.
It’s best to place this element below all of the modules containing information about the page’s primary product. You don’t want it to draw attention away from the main CTA. Alternatively, if you want to feature related items more heavily, you can position them in a sidebar.
After placing the Related Products module, you can decide whether to display “Add to Cart” buttons for each featured item. In most cases, users will likely prefer to visit individual product pages before adding more items to their carts. So these buttons aren’t necessary, although you might want to experiment with enabling them to see if that increases conversions.
Conclusion
eCommerce websites can be among the most time-intensive projects to build. One online store might include a number of landing pages, along with hundreds (or even thousands) of product pages. Using tools such as Beaver Builder and WooCommerce can make designing this ambitious type of website much simpler.
The modules we’ve discussed above will help you create functional and conversion-generating product pages. Just keep in mind that there are many more WooCommerce modules available depending upon your needs. They’ll enable you to add product ratings, upsells, and more to your layouts!
Get started using Beaver Builder WooCommerce modules in our online course: Build E-Commerce Sites with Beaver Themer + WooCommerce
Related Questions
Why aren’t WooCommerce modules appearing in Beaver Builder?
The Beaver Builder plugin includes a WooCommerce module that allows you to add eCommerce features to your posts and pages. The rest of the WooCommerce modules require the Beaver Themer plugin. To see the full range of options, you will need WooCommerce, Beaver Builder, and Beaver Themer installed on your site.
How do I edit WooCommerce page layouts using Beaver Themer?
As noted above, head to Beaver Builder > Themer Layouts in your WordPress dashboard. Selecting Add New will enable you to create a new layout, which you can then edit and customize. To access the full range of WooCommerce modules, select “Singular” layout and assign a single product page as the location.
Our Newsletter
Our newsletter is personally written and sent out about once a month. It's not the least bit annoying or spammy.
We promise.
Try Beaver Builder Today

Related articles
How to Create Headers and Footers with Beaver Themer
Page builders are great for creating beautiful pages, but they often don’t extend customization to headers and footers. This limitation…
How to Customize WordPress Website Header
Many elements make up a well-designed website. Your WordPress website header is particularly important because it’s the first thing visitors…
How to Use a Header Template in WordPress
Customizing a WordPress header isn’t often an easy process. If you’re not comfortable editing theme files, there aren’t many ways…
Join the community
We're here for you
There's a thriving community of builders and we'd love for you to join us. Come by and show off a project, network, or ask a question.
Since 2014
Ready to build?
The WordPress page builder agencies and freelancers have trusted since 2014.