
How to Build a Paid Membership Site Using ProfilePress and Beaver Builder (In 4 Steps)
Creating a paid membership website is a great way to position your content as exclusive, boost engagement, and generate more income. However, it might seem challenging to build a membership site from scratch. Fortunately, with Beaver Builder, you can design beautiful web pages. Then, you can add the functionality of a paid membership site using ProfilePress.
In this post, we’ll look closely at paid membership websites and why you might consider creating one. Then, we’ll show you how to build your membership site with the help of two handy plugins. Let’s get started!
An Overview of Paid Membership Websites
A paid membership website requires users to log in to access your content. Alternatively, you can give visitors the option to sign up for your site to unlock specific types of content. Members might need to submit payments, create an account, or subscribe to your mailing list to view your pages.
The most common membership sites include online courses and e-learning platforms, subscription-based services, booking websites, and e-commerce stores. If you run a blog, you can also utilize a membership model by giving members access to exclusive resources:
A membership model can make your content seem more appealing. What’s more, since users have expressed an interest in your content (by signing up as members), you’ll often find that engagement is higher.
How to Build a Paid Membership Site Using ProfilePress and Beaver Builder
The easiest way to build a membership site is by using plugins. Our Beaver Builder plugin is an excellent tool that helps you quickly and easily create beautiful web pages.
Then, you can pair it with a WordPress membership plugin to gain membership functionality. With ProfilePress, you can easily restrict content, create user profiles, and provide payment options.
Step 1: Design Members-Only Content and Pages With Beaver Builder
You can design exclusive members-only content (including pages and posts) once the Beaver Builder plugin is installed and activated in WordPress.
Then, simply navigate to Pages > Add New > Launch Beaver Builder:

Here, you’ll find lots of modules to help you design your pages, including video, audio, images, and text blocks. Or, rather than starting from scratch, you can take advantage of our pre-designed templates that are fully customizable to match your unique branding.
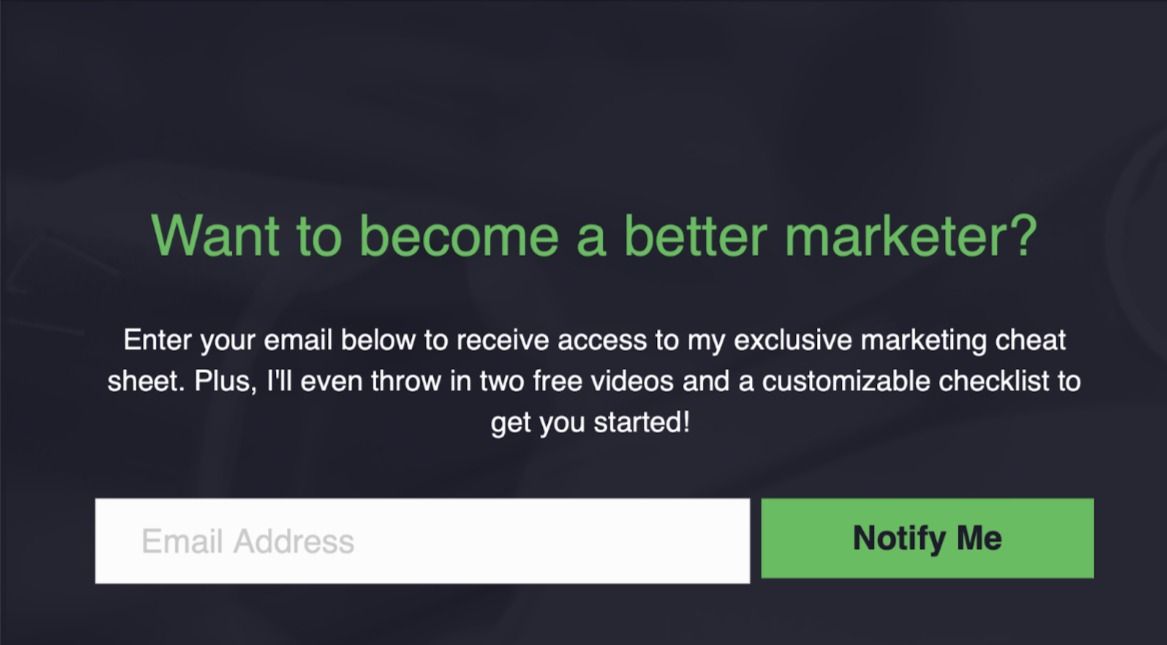
As a membership website, you’ll likely need a landing page that prompts visitors to sign up as members. Here you can include modules like a header, text, and buttons:
You can also create content pages for members-only materials, such as blog posts that only your subscribers can access. Or, you might design pages to showcase your online learning materials:

We achieved this effect by using one of our beautiful templates. Then, visit the General tab to upload custom images and write your own messaging.
You might also consider building a pricing page to display your membership options. For instance, a user subscribed to your mailing list might be able to access exclusive blog content. However, only users that have paid for full memberships can enroll in your courses or download additional resources.
We used our Pricing content template to do this. You can remove pricing boxes or add more membership options by clicking on Add Pricing Box:
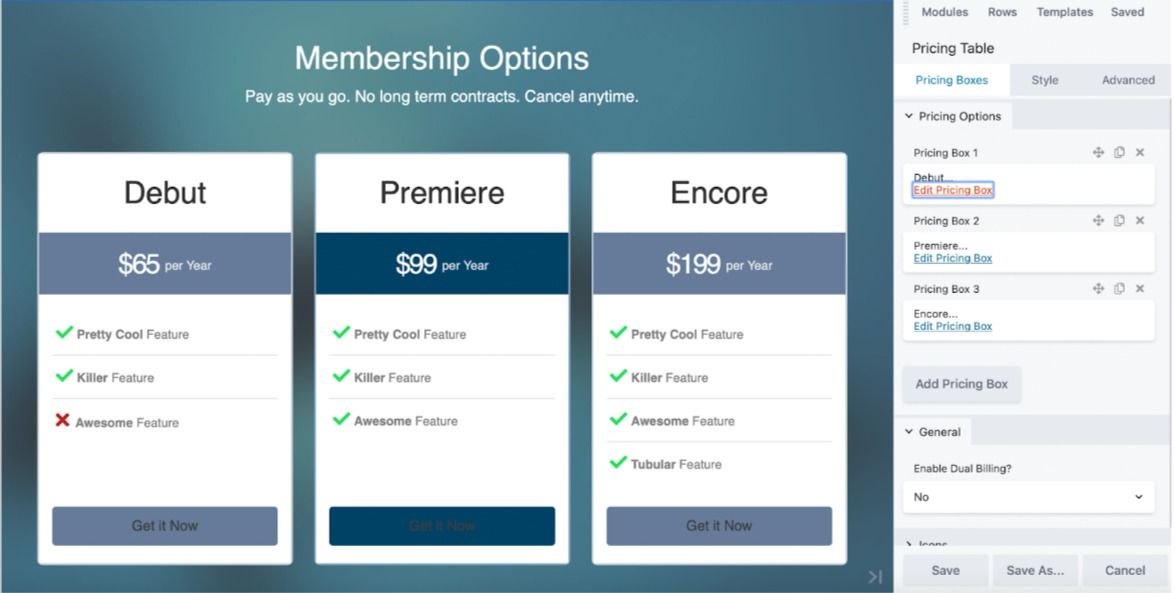
You can edit each pricing option to enter custom prices, choose an appropriate name for your membership tier, customize the text in the button, and apply custom colors.
Step 2: Create Custom Forms With ProfilePress
Make sure you’ve installed and activated the ProfilePress plugin. Then, to start creating custom forms, head to ProfilePress > Settings > Pages.
Now select the page you want to use as your default login page from the dropdown menu:

You can use ProfilePress’s default form options for your login, registration, lost password, and account pages. Alternatively, you can choose one of your existing WordPress pages.
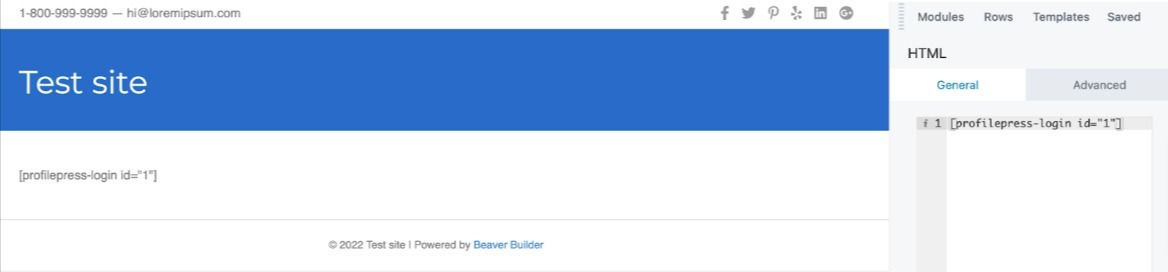
You can also add the default forms to a brand-new page by embedding the shortcode into Beaver Builder. If you opt for this method, find the HTML Beaver Builder module and drag it onto your page. Then, paste the form’s shortcode:
Alternatively, you might prefer to design custom forms (rather than using the default form options). This can give your forms a unique look and feel. Plus, you will have greater control over the form fields and settings.
To get started with this method, navigate to ProfilePress > Forms & Profiles:
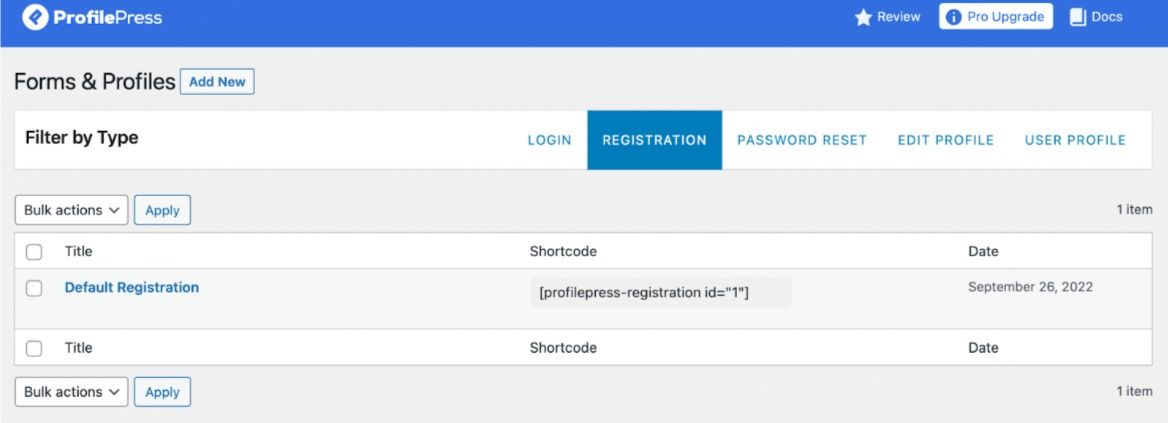
You’ll see multiple tabs on the screen, including LOGIN, EDIT PROFILE, and PASSWORD RESET. These are the form types you can implement on your pages.
So, go ahead and select the relevant tab. We’ll start by creating a login form. You’ll see ProfilePress’ default form option, or click on Add New to create your own:
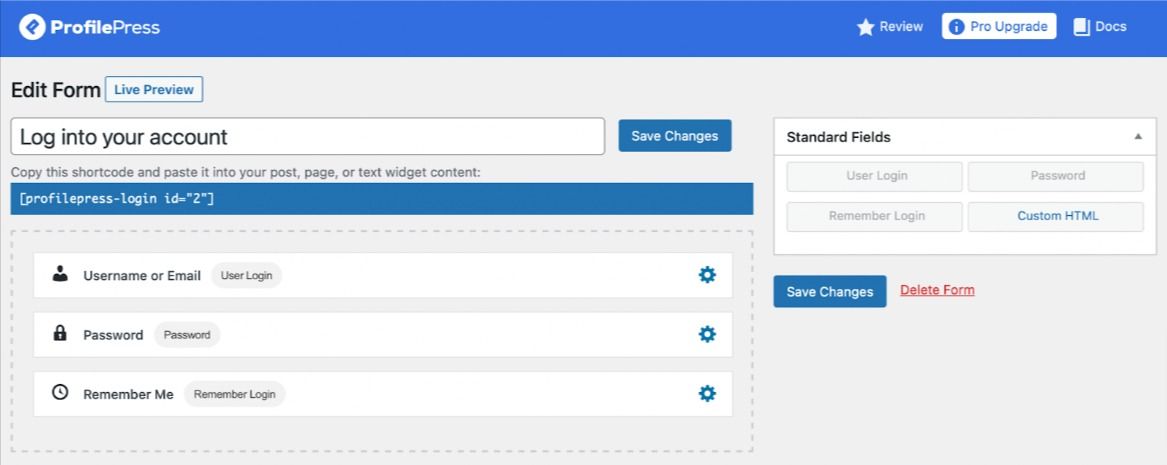
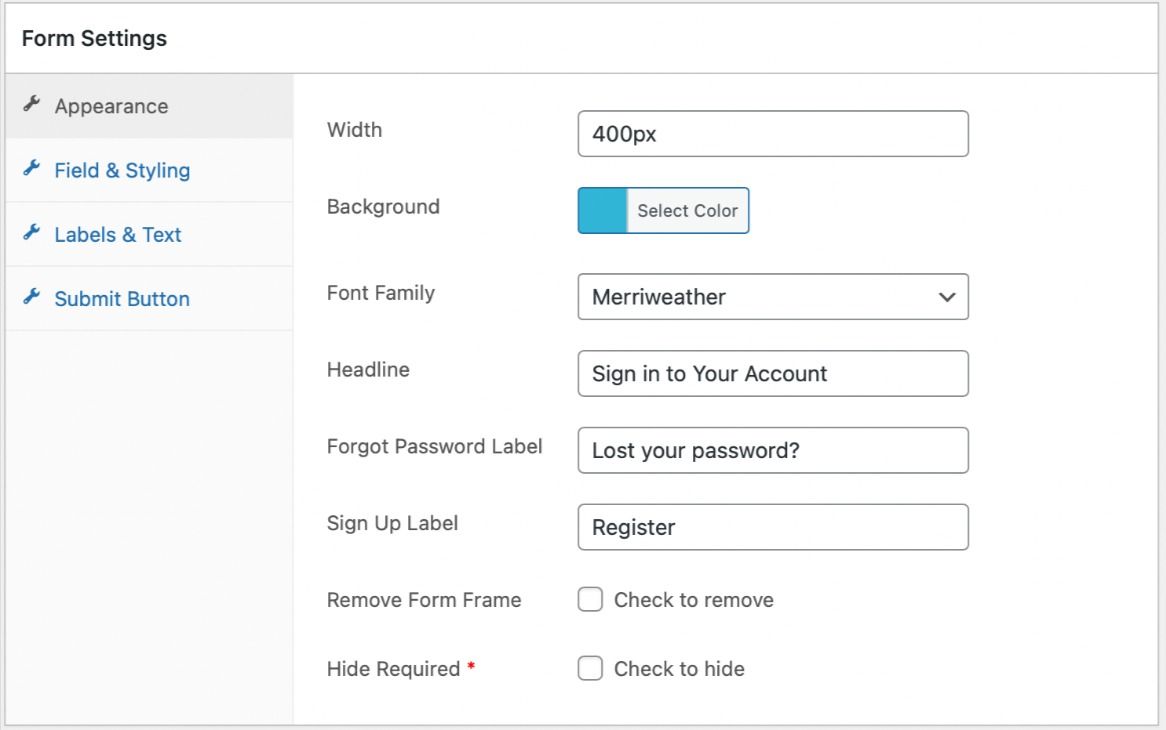
Give your form a title and re-order the form fields. Plus, if you scroll further down to Form Settings, you can change the text, select custom colors, and adjust the layout of your form:
Then, click on Save Changes at the top of the screen. You can repeat this process for all the form types you want to include on your membership website.
Step 3: Add Your Membership Forms to Your Beaver Builder Pages
At this stage, you’re ready to add the custom form you created in the previous step to the web page you designed in the first section of this tutorial.
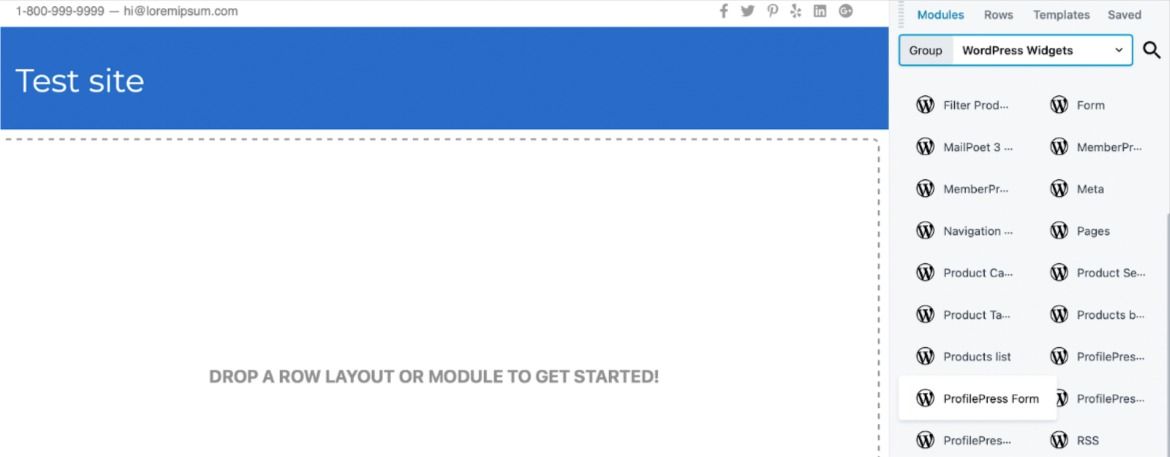
To add your custom forms to your Beaver Builder pages, find the ProfilePress Form module and drag it onto your screen. You’ll have to switch from Standard Modules to WordPress Widgets to see this:
A popup will appear where you can give your form a title and select it from the dropdown:
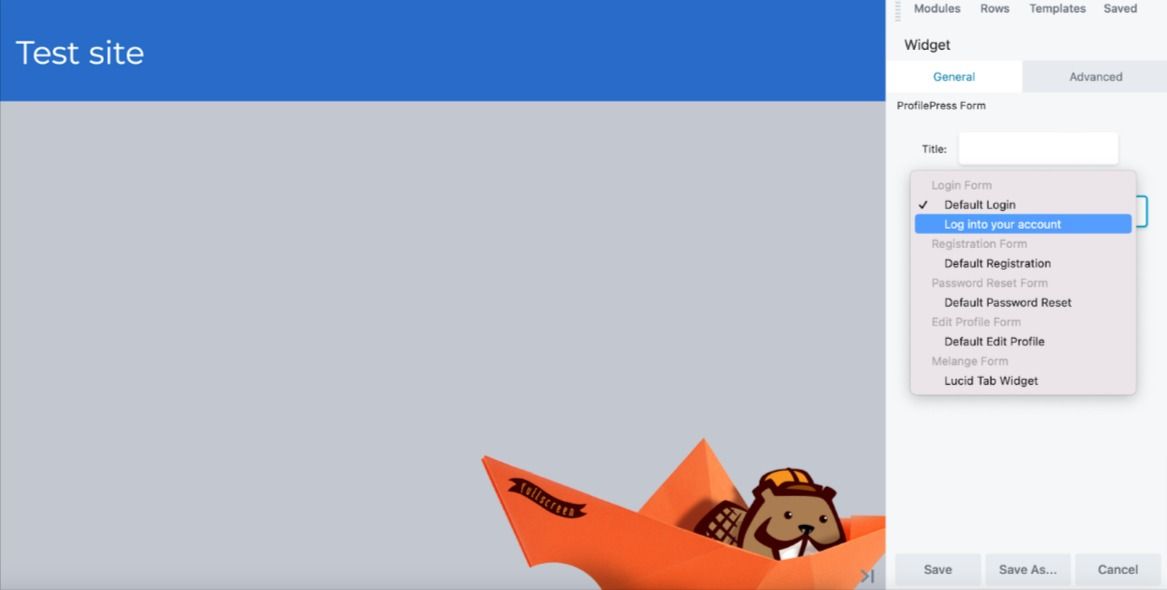
Next, under the Advanced tab, you can adjust the visibility, add animations, and insert HTML elements to make your forms more engaging. When you’re happy with your new form page, click on Done > Publish:

You can preview your page on the front end to check you’re happy with it:
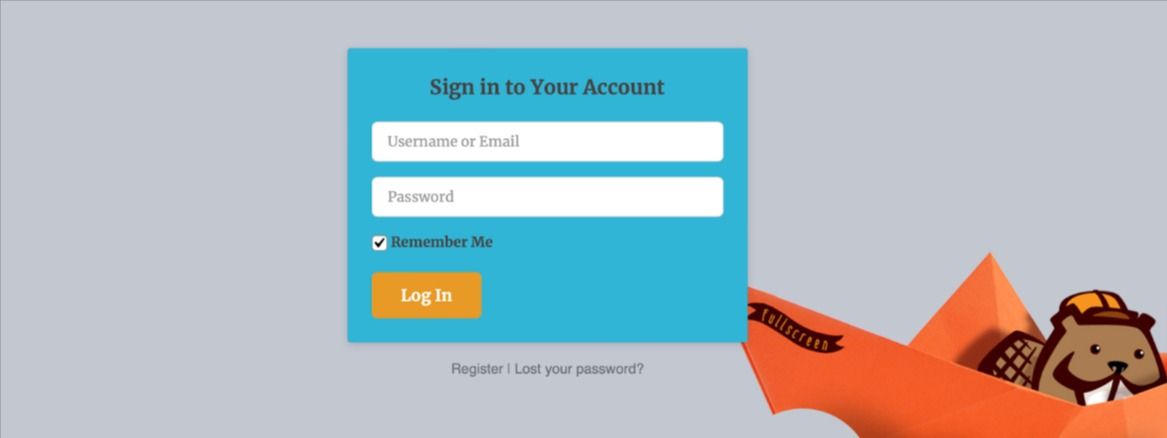
Sometimes, these pages (like a login form) will only be available to logged-out users. Therefore, you’ll need to log out of your WordPress admin to see how the form displays on your page.
Step 4: Restrict Access to Your Membership Site Using ProfilePress
Most membership websites will restrict access to specific web pages or the entire website. You can set up conditions in the ProfilePress plugin’s settings. Head to ProfilePress > Content Protection:
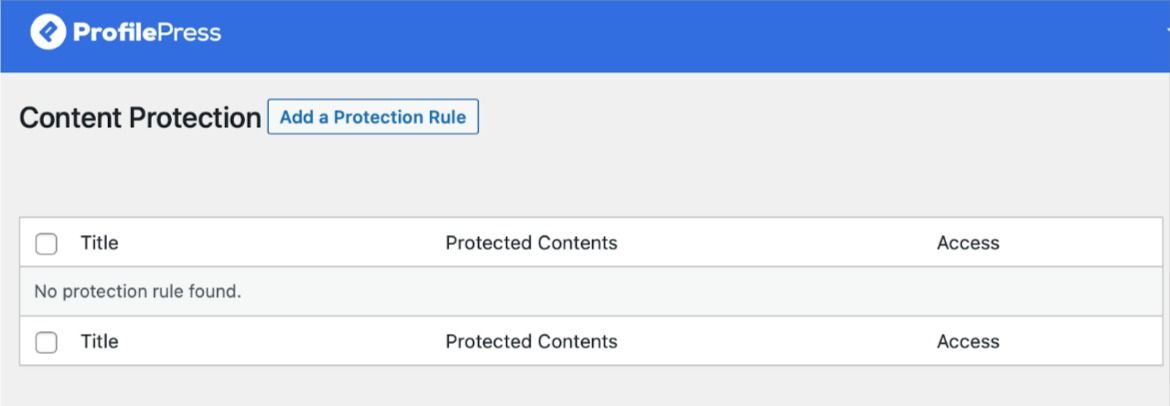
Here, click on Add a Protection Rule. You can select specific pages using AND/OR, and then under Access Condition, choose who the rule applies to:
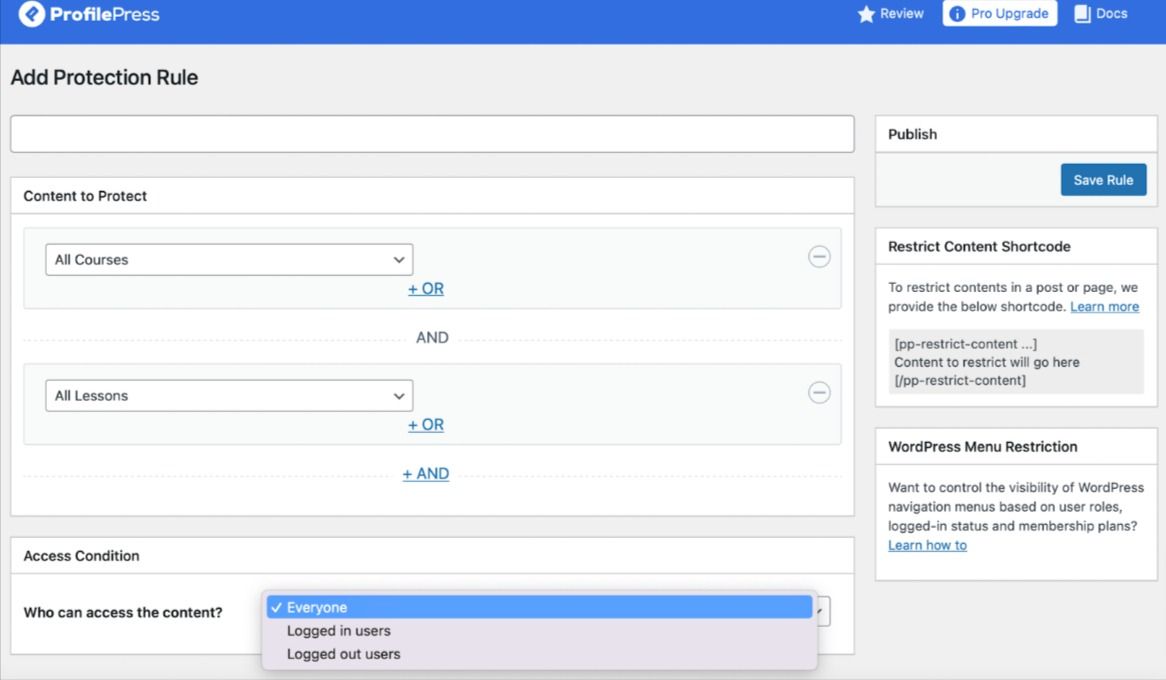
For instance, you might make all lessons and courses accessible only to logged-in users. Or, you can make certain posts on your blog only viewable to your subscribers.
Once you’ve selected the role, you can configure the settings for your content protection:
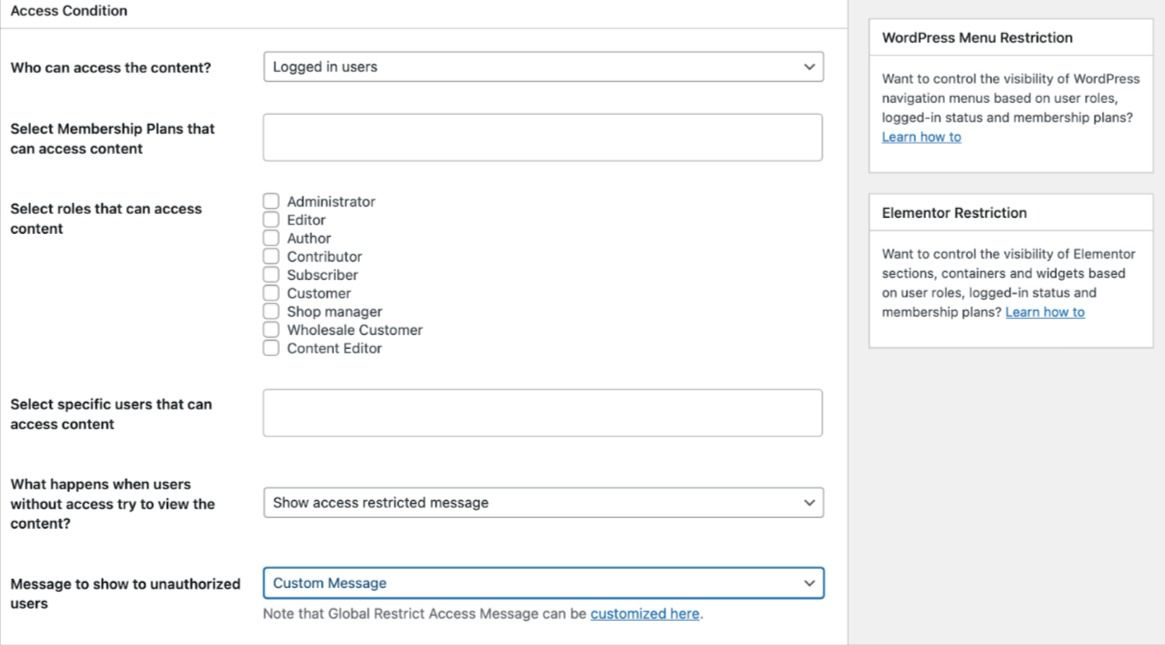
Now, you can choose the membership plans or specific users that can view your content. Plus, you have the option to customize the message shown to unauthorized users that land on your members-only pages.
Conclusion
Creating a paid membership site is a great way to gatekeep content on your site. This way, you can boost engagement and make your content appear more desirable. While a membership setup might seem challenging to achieve, it’s easy with the help of Beaver Builder and ProfilePress.
To recap, here’s how to build a paid membership site using ProfilePress and Beaver Builder:
- Design members-only content and pages with Beaver Builder.
- Create custom forms with ProfilePress.
- Add your membership forms to your Beaver Builder pages.
- Restrict access to your membership site using ProfilePress.
Related Questions
How Do I Create a Successful Membership Site?
To create a successful membership site, you’ll need to find a platform to manage your content, such as WordPress. Then, you can design your web pages using a page builder plugin like Beaver Builder. Next, utilize ProfilePress to enable membership functionality by restricting content access and creating user roles.
How Do I Create a Paid Membership Site on WordPress?
The easiest way to create a paid membership site on WordPress is to use plugins. Plugins can speed up the task and give you access to pre-designed templates and membership forms. With ProfilePress and Beaver Builder, you can create engaging members-only content and high-converting membership pages.
What Is a Paid Membership Site?
A paid membership site is a space that features gated content that only members can access and use. Most sites will make this content available once a user takes a particular action, such as purchasing a membership or creating an account. Fortunately, it’s easy to create a paid membership site with Beaver Builder and ProfilePress.
Our Newsletter
Our newsletter is personally written and sent out about once a month. It's not the least bit annoying or spammy.
We promise.
Try Beaver Builder Today

Related articles
How to Display a Beautiful Events List with Beaver Builder’s Loop Module
If you use Beaver Builder on your site and need to display a list of events, you can use the…
Why You Should Avoid Nulled WordPress Plugins and Themes
When you’re building a site, whether for yourself, a business owner, or a client, premium WordPress plugins can feel like…
How to Design Responsive Web Design Without Code
Responsive web design is no longer a “nice-to-have.” People move between phones, tablets, laptops, and desktops all day, and they…
Join the community
We're here for you
There's a thriving community of builders and we'd love for you to join us. Come by and show off a project, network, or ask a question.
Since 2014
Build Your Website in Minutes, Not Months
Join Over 1 Million+ Websites Powered By Beaver Builder.