
It can be challenging to make creative decisions about websites based on subjective opinions, or even data-backed predictions. As such, ensuring that the websites you build for clients are optimized for conversions and sales is tough. Fortunately, AB or ‘split’ testing eliminates this uncertainty, by enabling you to measure which variations of your pages deliver the best results.
In this post, we’ll explore some of the benefits of AB testing, and introduce you to the AB Split Test plugin. Then we’ll guide you through six easy steps for running these tests on your clients’ sites. Let’s get started!
Table of Contents:
The Benefits of AB Testing
AB testing is a marketing experiment that allows you to test variations of online content to find the one that delivers the best results. You can test entire pages, or specific elements like buttons and images.
To conduct these tests, you need to segment your audience. For example, you might create two versions of a web page: A and B. When users visit the page, 50% will automatically be redirected to version A, and 50% will be sent to version B.
Then you can compare the results, and choose to make the page that performs better permanent. If pages A and B both contain a ‘Buy Now’ button, you can measure how many visitors to each page click on that button (or even how many ultimately make a purchase).
As such, AB testing enables you to present your Calls To Action (CTAs) in the most effective way possible, which can help boost conversions and increase sales. As such, you can use it to:
- Increase web traffic. You can test different titles for pages and posts, to increase the number of users who click through to read more content.
- Generate more conversions. Testing multiple CTAs can help you boost conversions for your clients.
- Lower bounce rates. You can increase the time users spend on-site by optimizing blog copy, images, emails, and even contact forms.
- Reduce cart abandonment. You can test out different product images and checkout pages, to find out which variations have the lowest abandonment rates.
One of the best aspects of AB testing is that you get quick results that are easy to analyze. Your goals are set ahead of time, so it’s clear which metrics you need to measure, whether that is impressions, conversion rates, or engagement.
AB split testing takes much of the guesswork out of building new websites and updating existing ones. As such, you can feel more confident about the decisions you make, knowing they’re proven to deliver the best results.
An Introduction to the AB Split Test Plugin
While possible, it’s difficult to set up an AB test manually in WordPress. Fortunately, as with so many other tasks you might want to perform on this platform, plugins can get the job done quickly and efficiently.
There are several options to choose from, but right now we’re going to focus on the AB Split Test plugin:
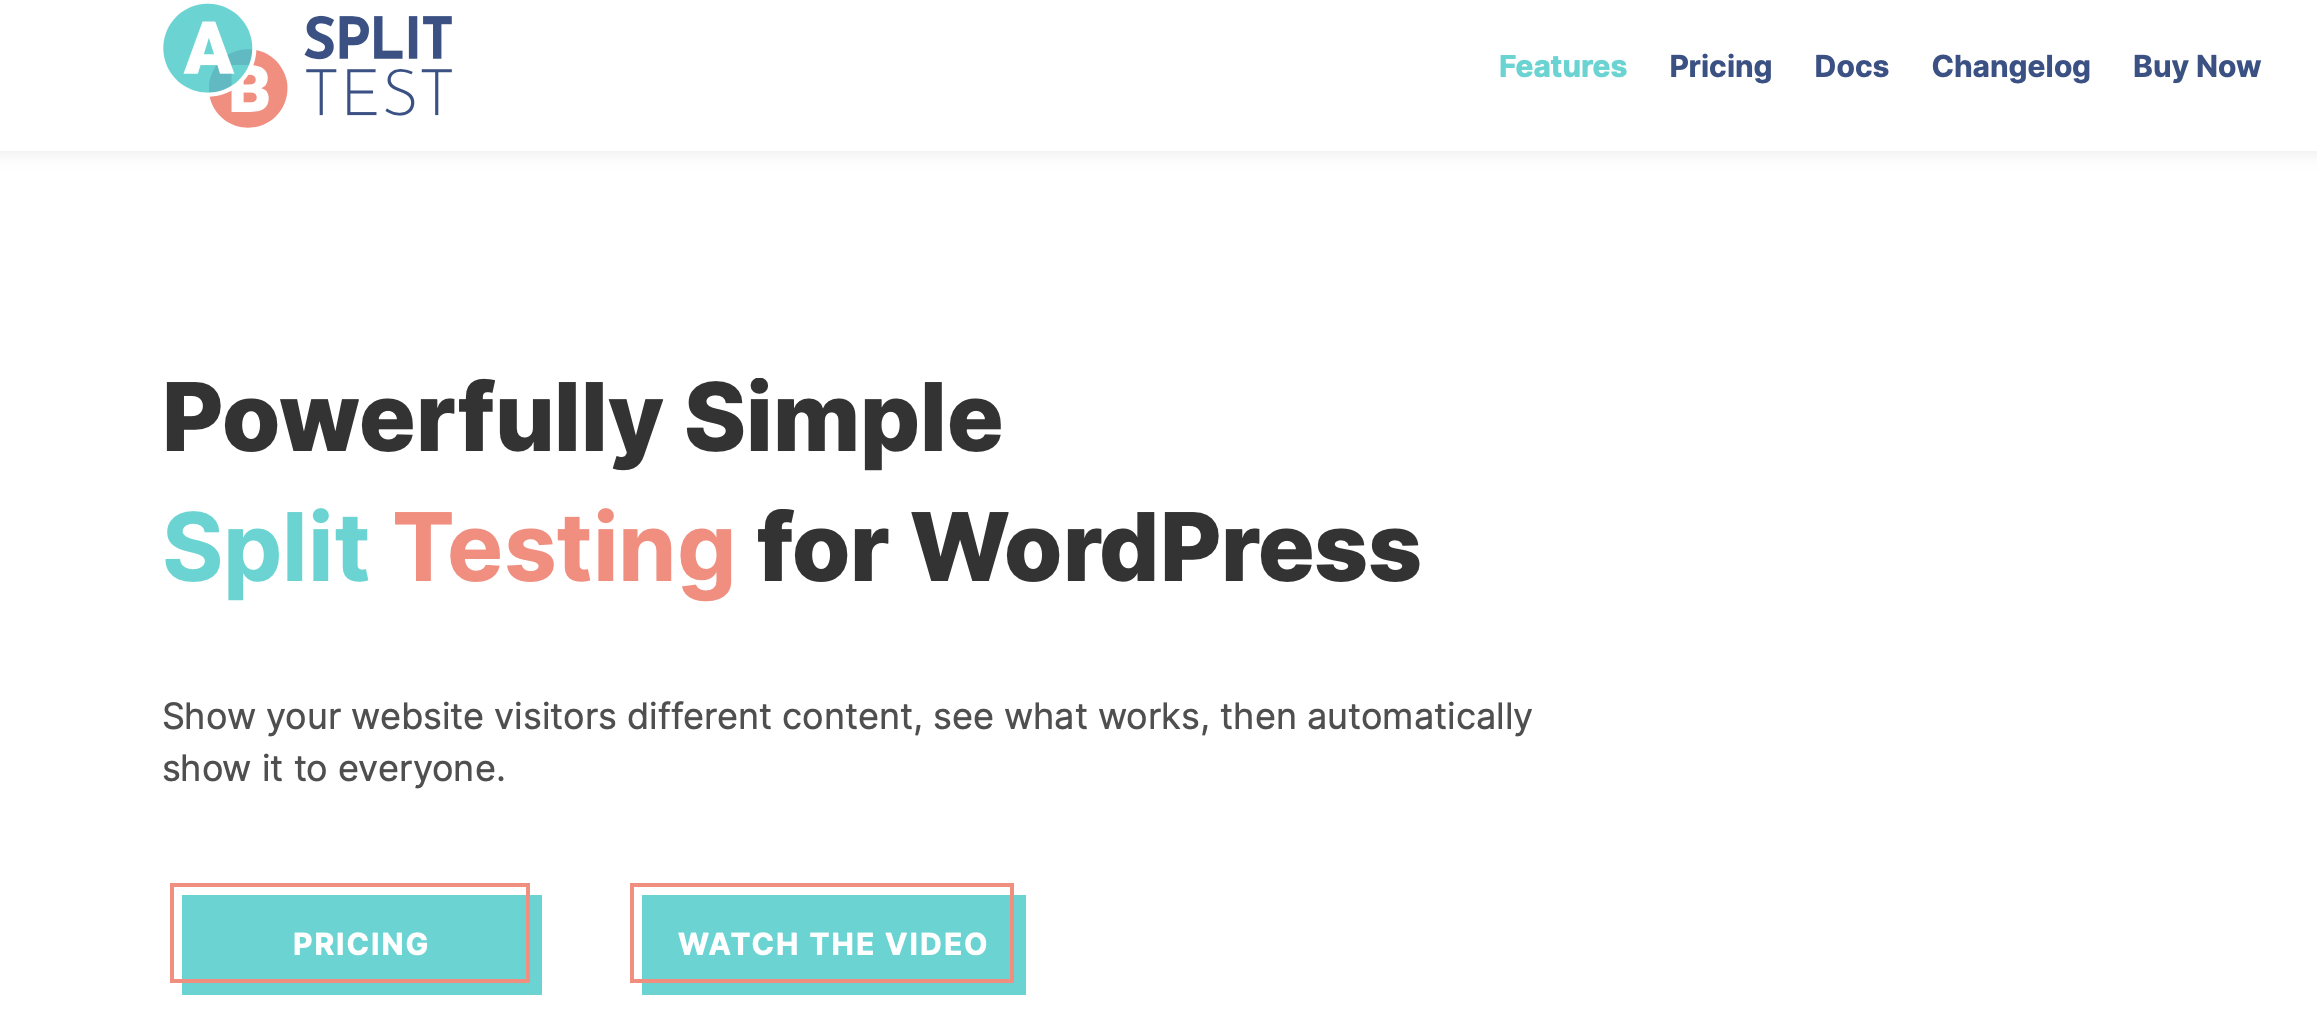
This tool lets you easily create custom tests within the WordPress admin area. You’re able to work in a familiar environment, without needing to learn a new interface. You can create tests using a dedicated dashboard, or simply tag the on-page elements you want to vary within the Block Editor or by using a popular page builder like Beaver Beaver.
One of this plugin’s best features is that it can automatically apply your winning variations. You can set a minimum number of days you want your test to run for, and a minimum amount of views you want to generate for your variations. At the end of the process, AB Split Test hides the losing variation, leaving the winner on display for all visitors.
Since it offers both white labeling and webhooks, the Split Test plugin is a particularly smart option for agencies. It also generates fast results, boasts tight privacy regulations, and integrates with a range of plugins. For example, if you want to take a deeper dive into your results, you can link the plugin to Google Analytics, Matamo, or Microsoft Clarity.
How to Use the AB Split Test Plugin with Beaver Builder (In 6 Steps)
At this point, we’ve discussed the benefits of AB testing and why we recommend the AB Split Test plugin in particular. Now we’ll guide you through six easy steps to carry out split tests on your Beaver Builder websites.
Step 1: Install and Activate the AB Split Test Plugin
To download the plugin, head over to the AB Split Test website to make your purchase. If you’d just like to try it out, you can get a demo version to run five tests on one website.
Alternatively, the premium plans will let you run as many split tests as you like on unlimited websites, starting at $149 per year (or $299 per year for the agency version). After making your purchase, visit the Your Orders & Account page to download the plugin files and find your license key.
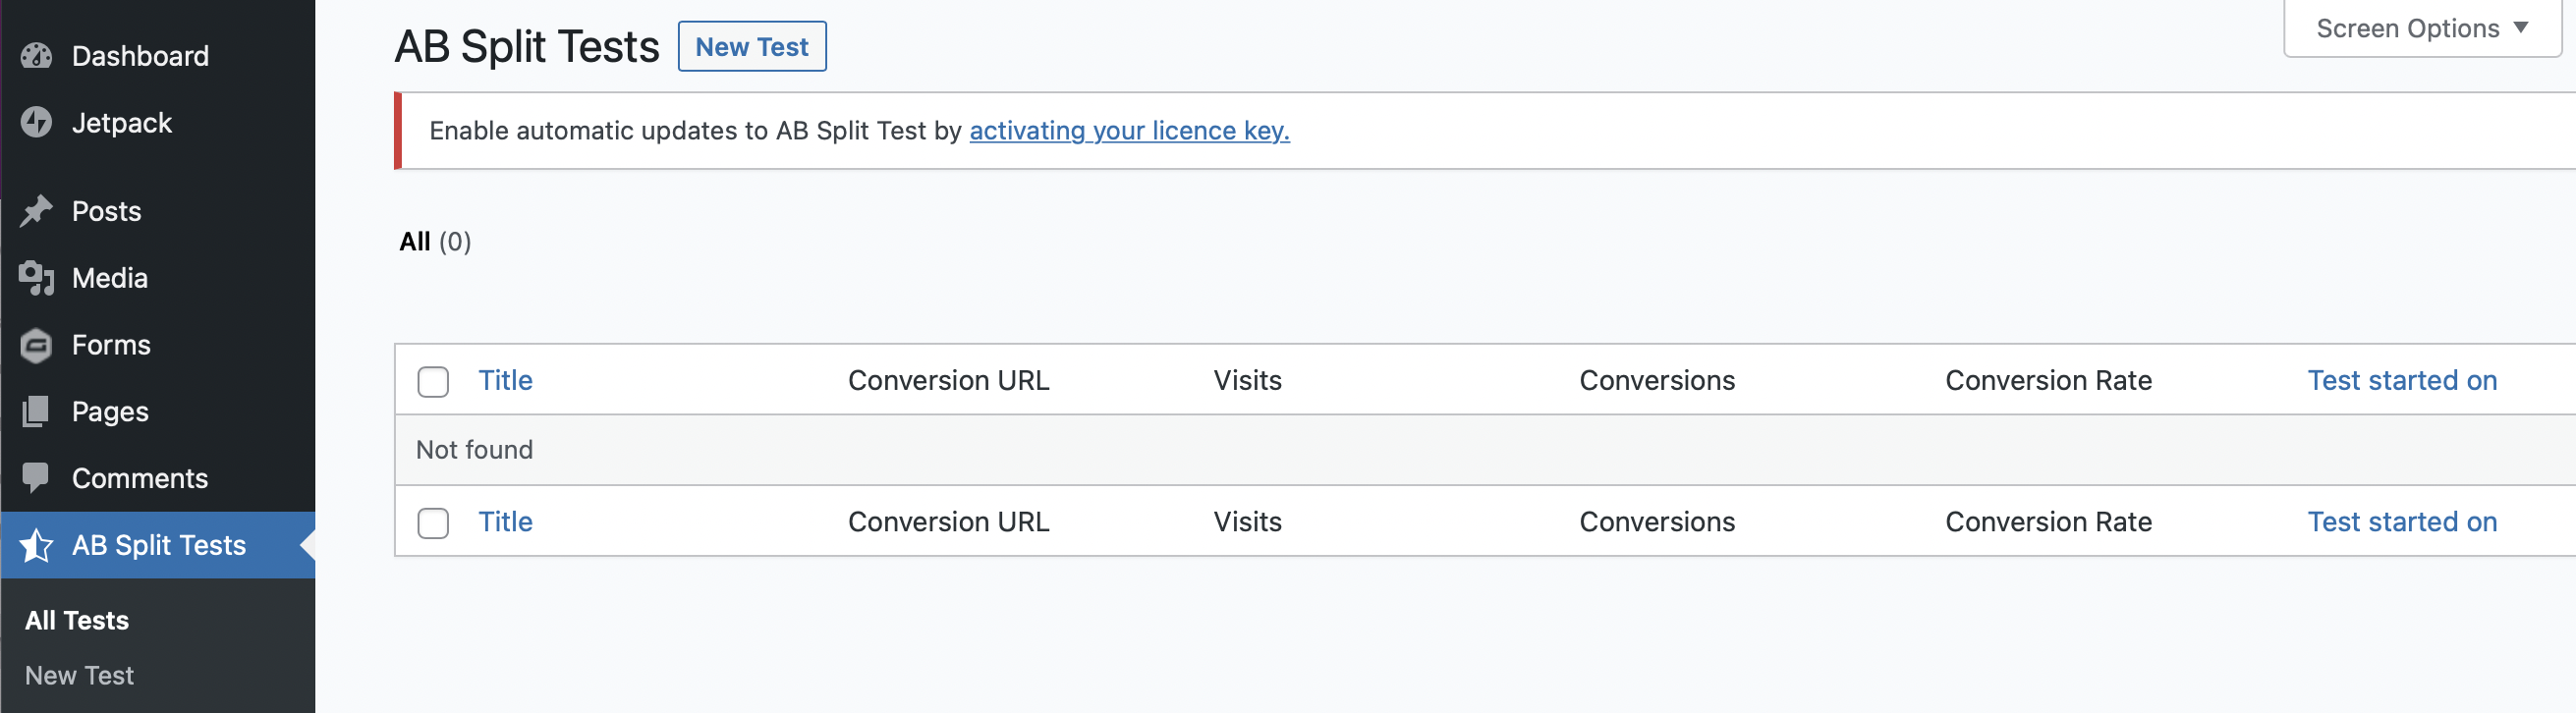
Then head to Plugins > Add New in your WordPress dashboard. Upload the plugin from your computer, and click on Install Now > Activate. After that, an AB Split Tests item will appear in the sidebar of your dashboard, where you can insert your license key.
Step 2: Start a New Test
Now it’s time to set up your first AB test. To do so, go to AB Split Tests > New Test:
Give your test a name, then select whether you want to compare full pages or specific on-page elements. For full-page tests, you can use existing content or create new pages. If you already have the content you want to test, simply choose it from the drop-down menus:
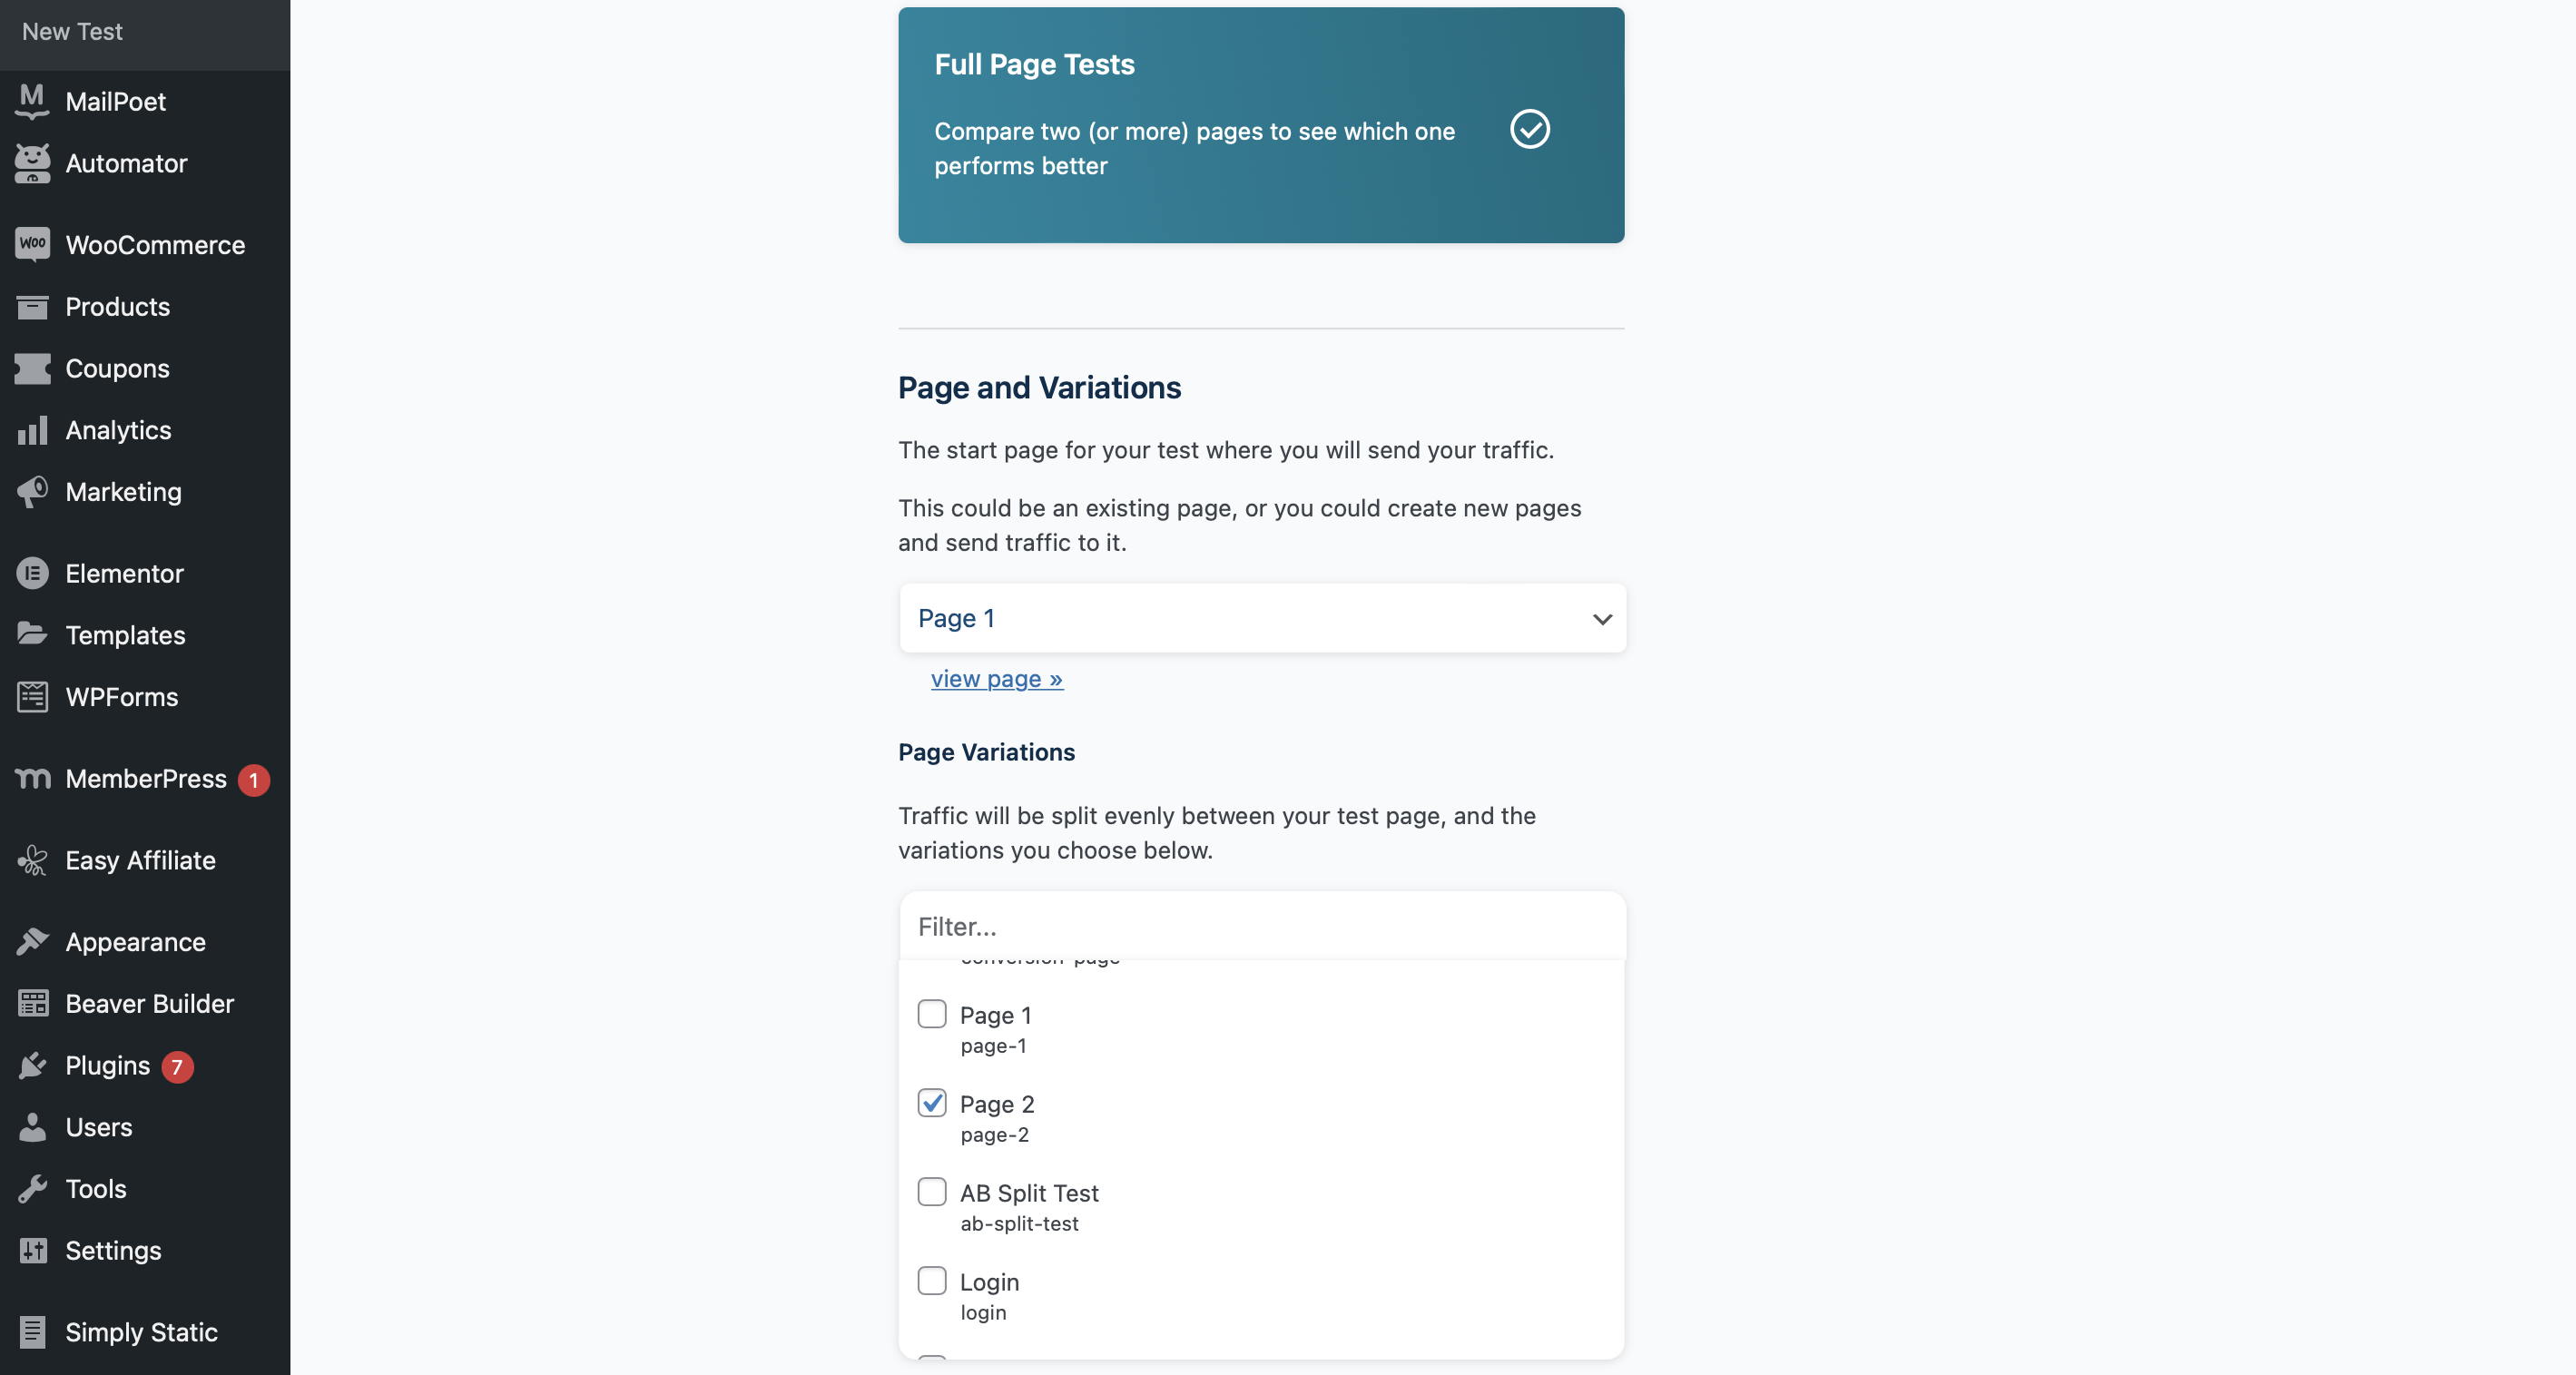
To test elements or modules on your pages, such as buttons and images, select On Page Elements. Within this screen, you can also adjust settings for measuring conversions and audience segmentation. When you’re ready, you can hit Start Test.
If you haven’t set up the pages or elements you’ll be testing just yet, don’t worry. For now, just create a test and give it a name. Then follow the next couple of steps to create the pages and/or elements you’ll require.
Step 3: Create Your First Variation
Now, let’s look at how you can build content for your AB test. As an example, we’re going to create a page with two different CTA buttons, to see which one receives the most conversions. Whenever you run an AB test, it’s best to change as few elements as possible, so you know for sure what’s causing any difference in results.
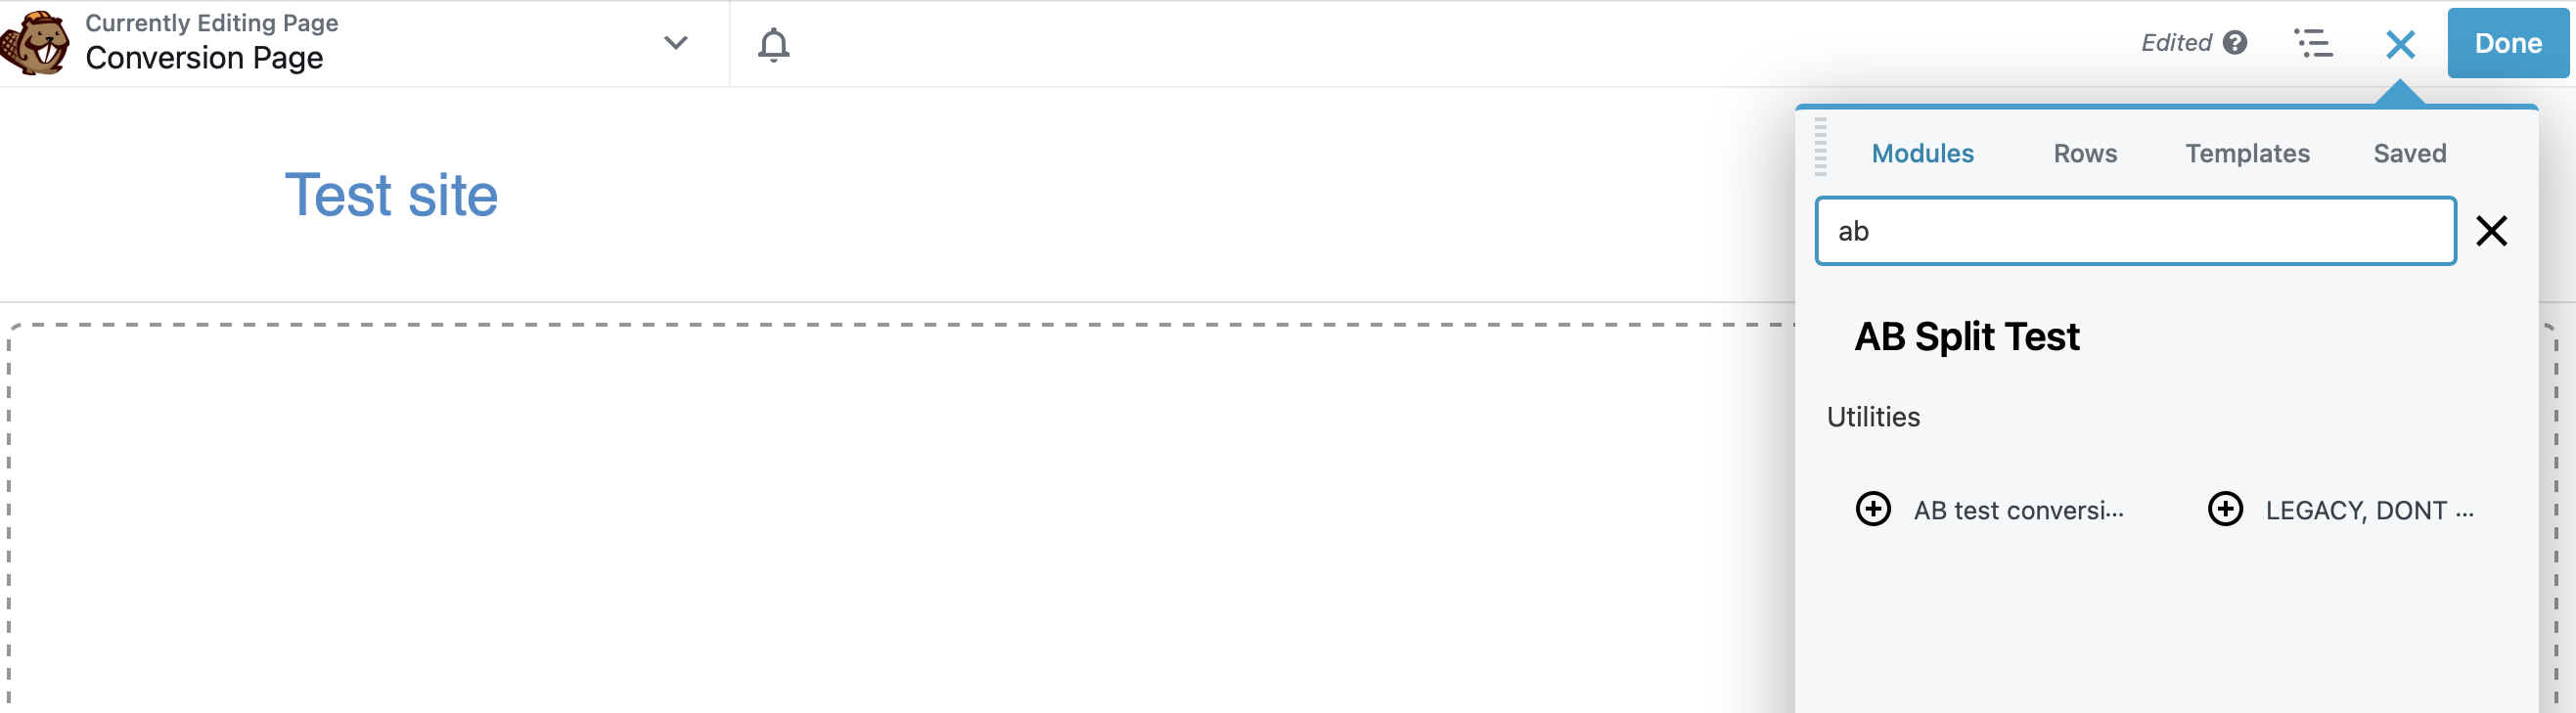
To get started, head to Pages > Add New > Launch Beaver Builder. To add elements to your page, you can click on the + plus to expand a wide range of modules. Find a button module and drag it onto your page:
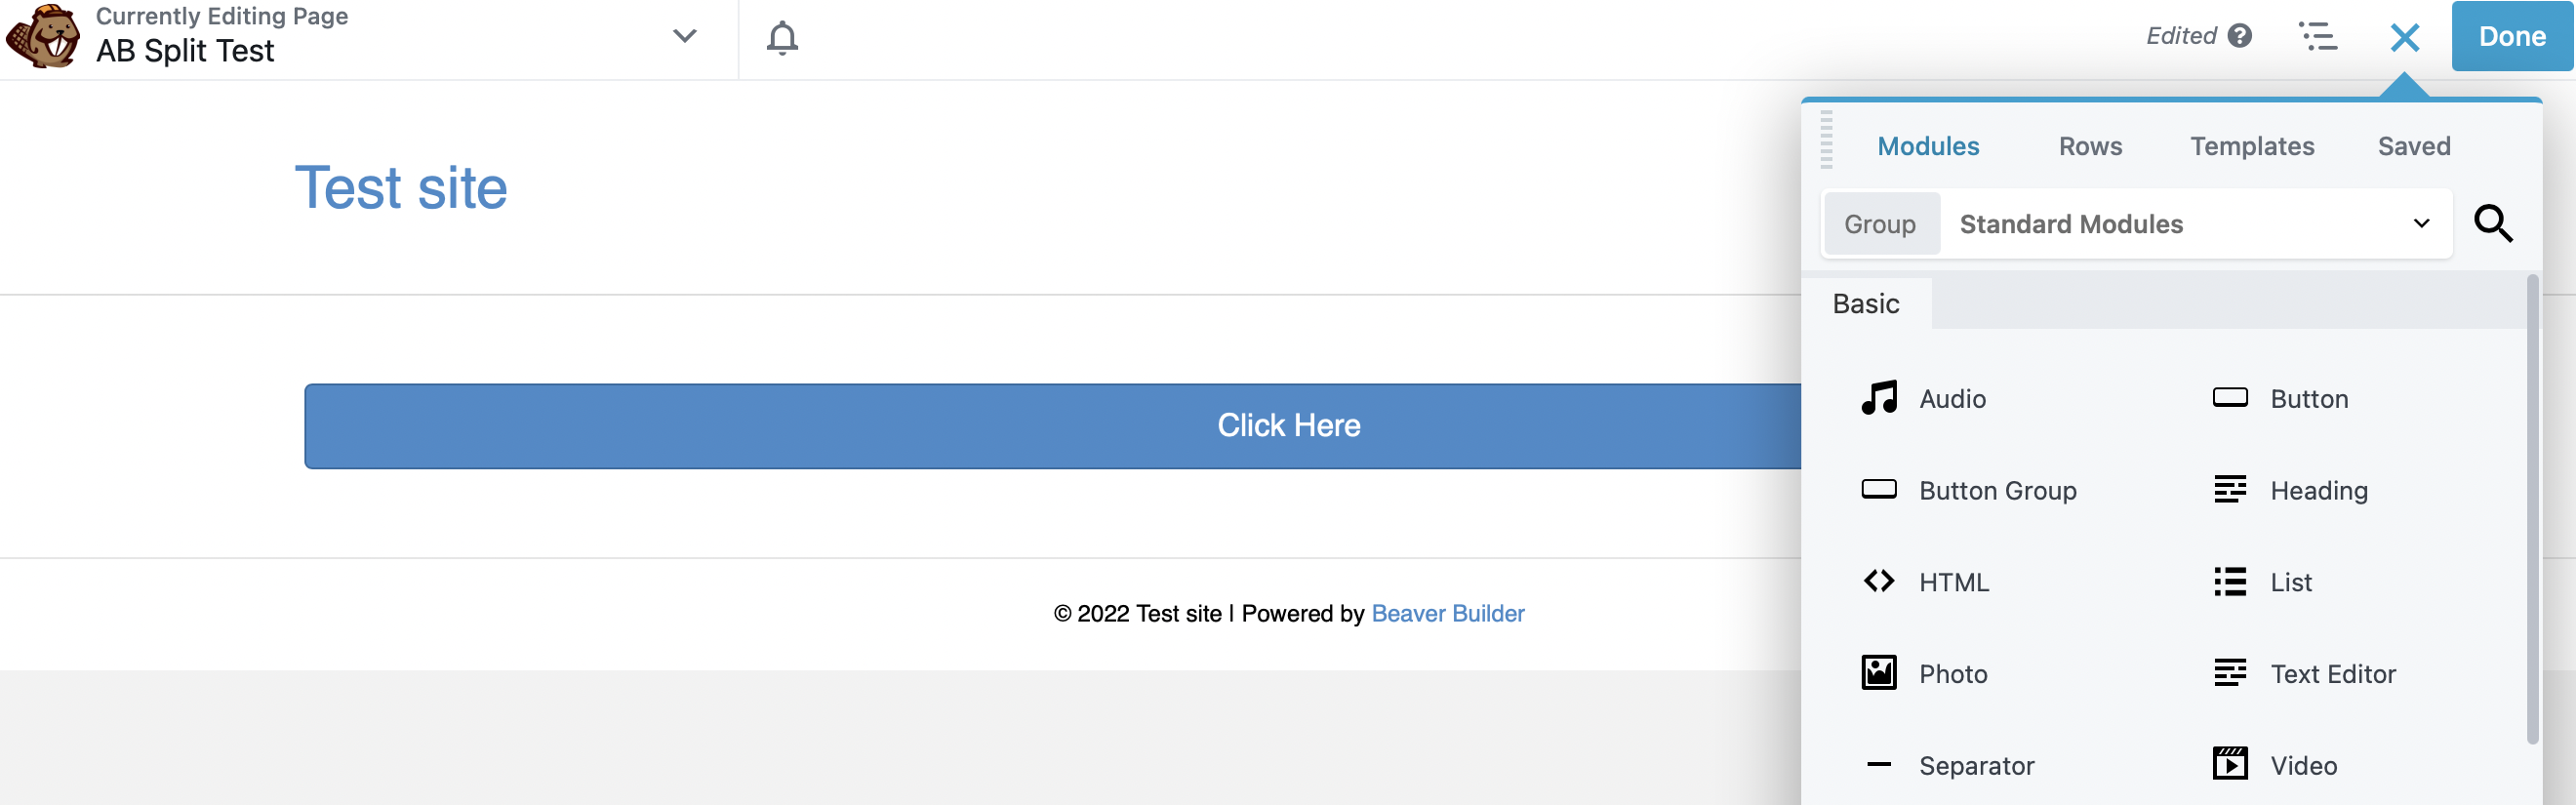
Then highlight the button to make changes. For example, you can give your button a name, and alter its color under the Style tab. We’re making our first button green:
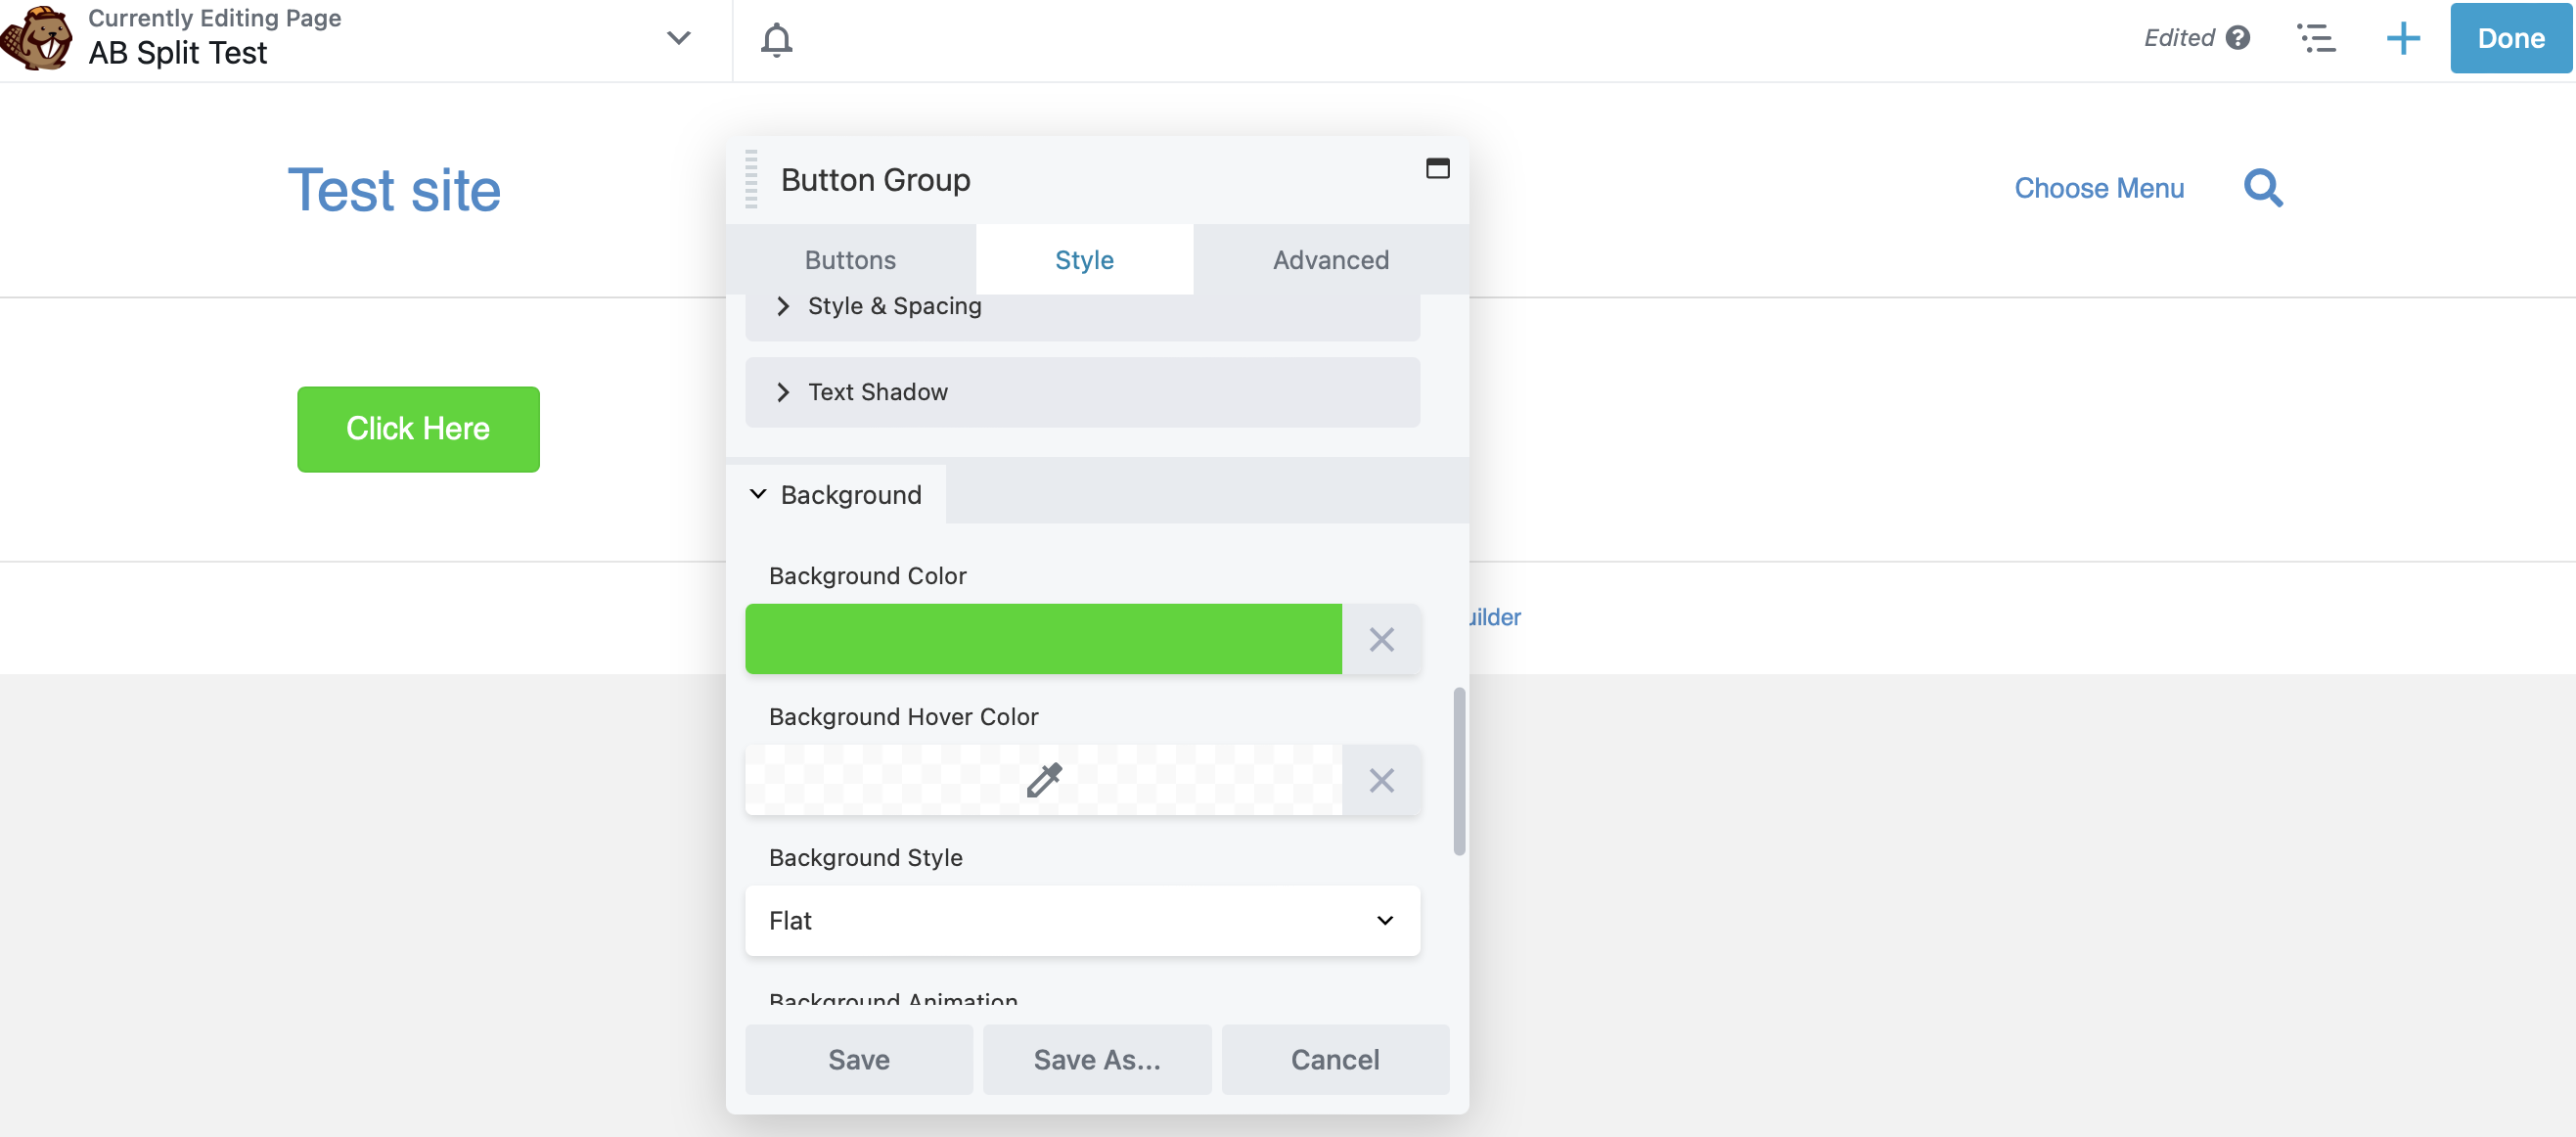
Then navigate to the Advanced tab and scroll to the bottom to find the AB Split Test section:
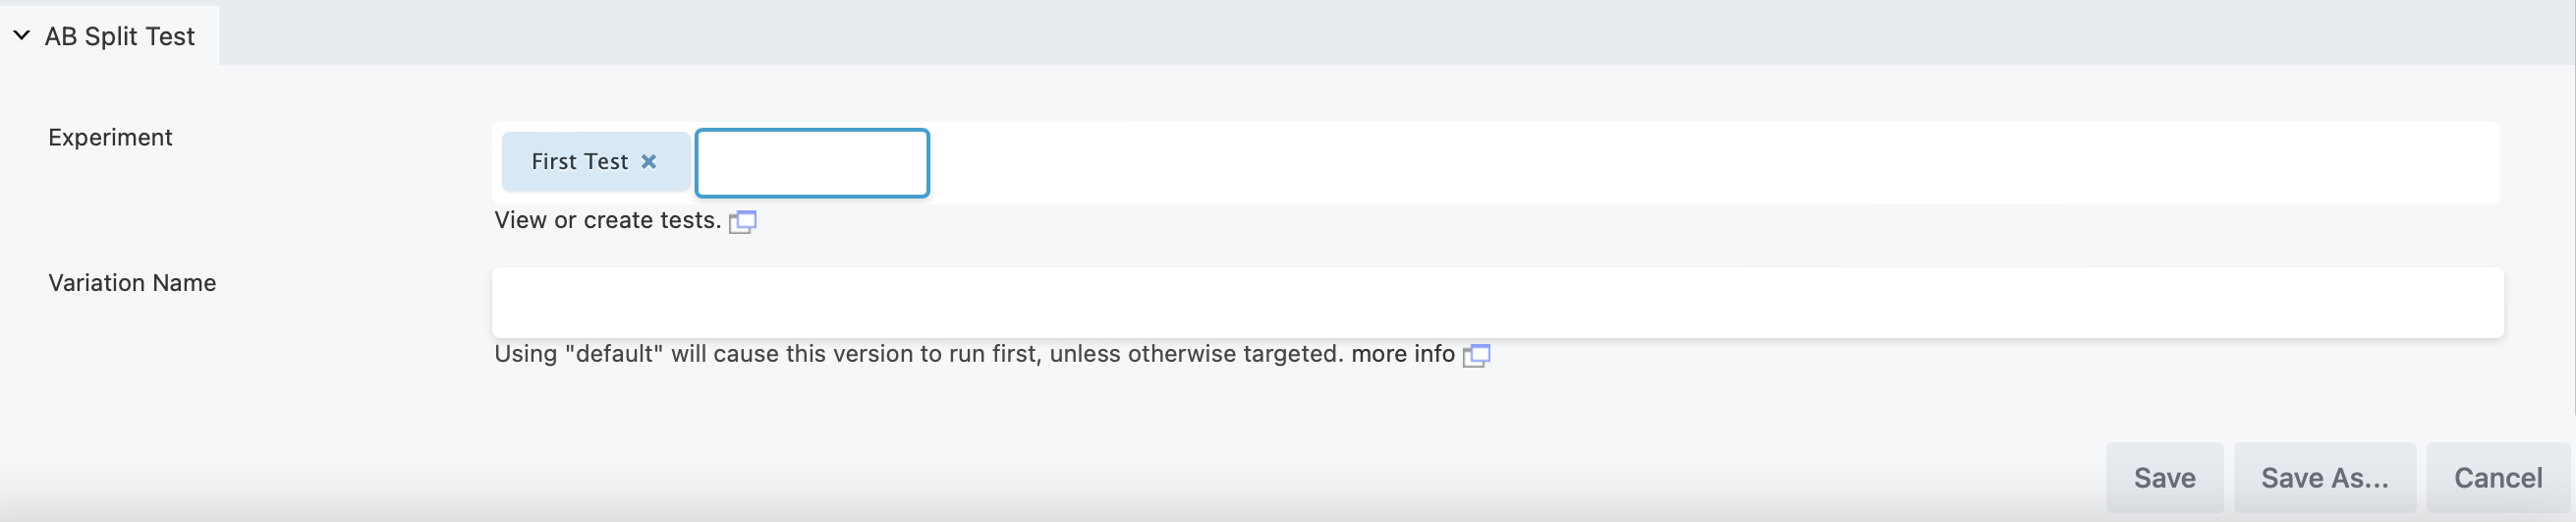
Under Experiment, select the test you created in the previous step. Then, choose a unique Variation Name for your element (such as “green CTA button”).
Step 4: Create Your Second Variation
Now, you need to create a variation of the element you’ll be testing. So go ahead and duplicate the button by clicking on the relevant icon:

Again, give your button a name and alter the color (we chose red this time). At this point, you should see two buttons on your page:
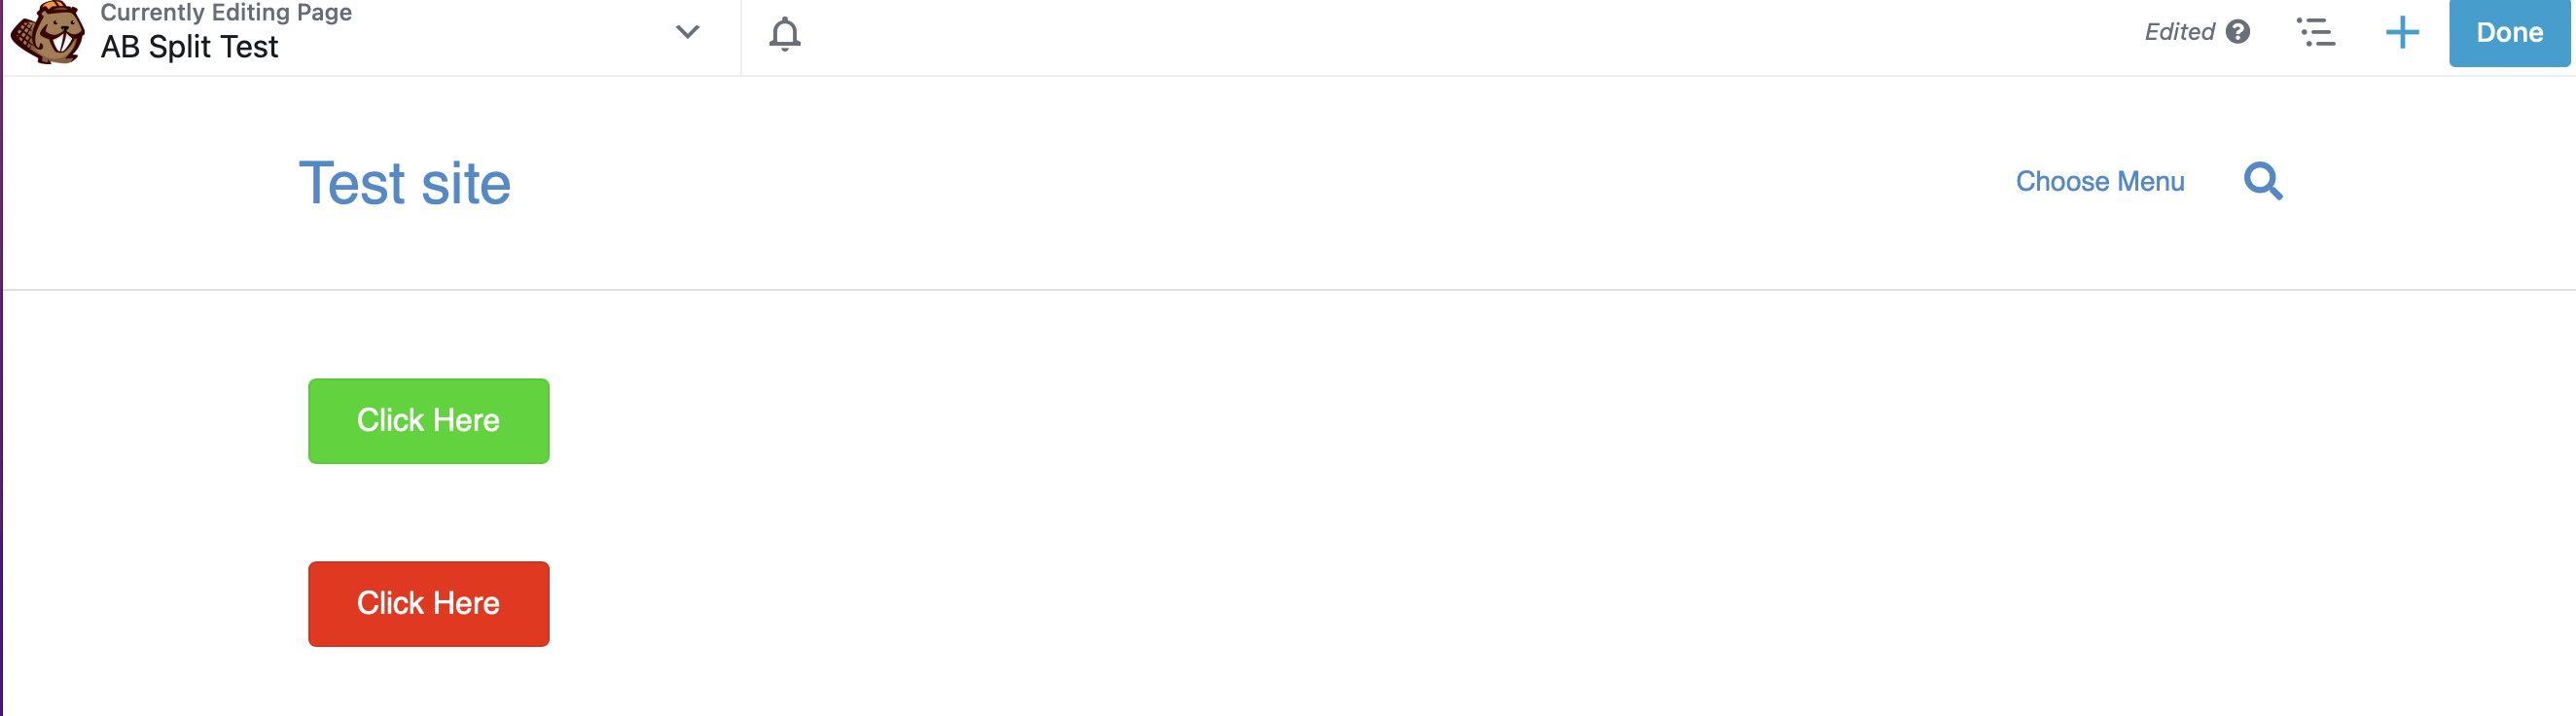
However, your visitors will only see one of these buttons. For consistency, each visitor will also see the same colored button each time they visit your page.
Head to the Advanced tab and select your test under Experiment. Then give the second button a Variation Name, and click on Save:

Now you can add a link to each of your buttons to send visitors to a conversion page on your website. For example, you might
Select the button and add your link in the General tab. You can choose your conversion page from the drop-down menu. Remember to do this for each button, and click on Save:
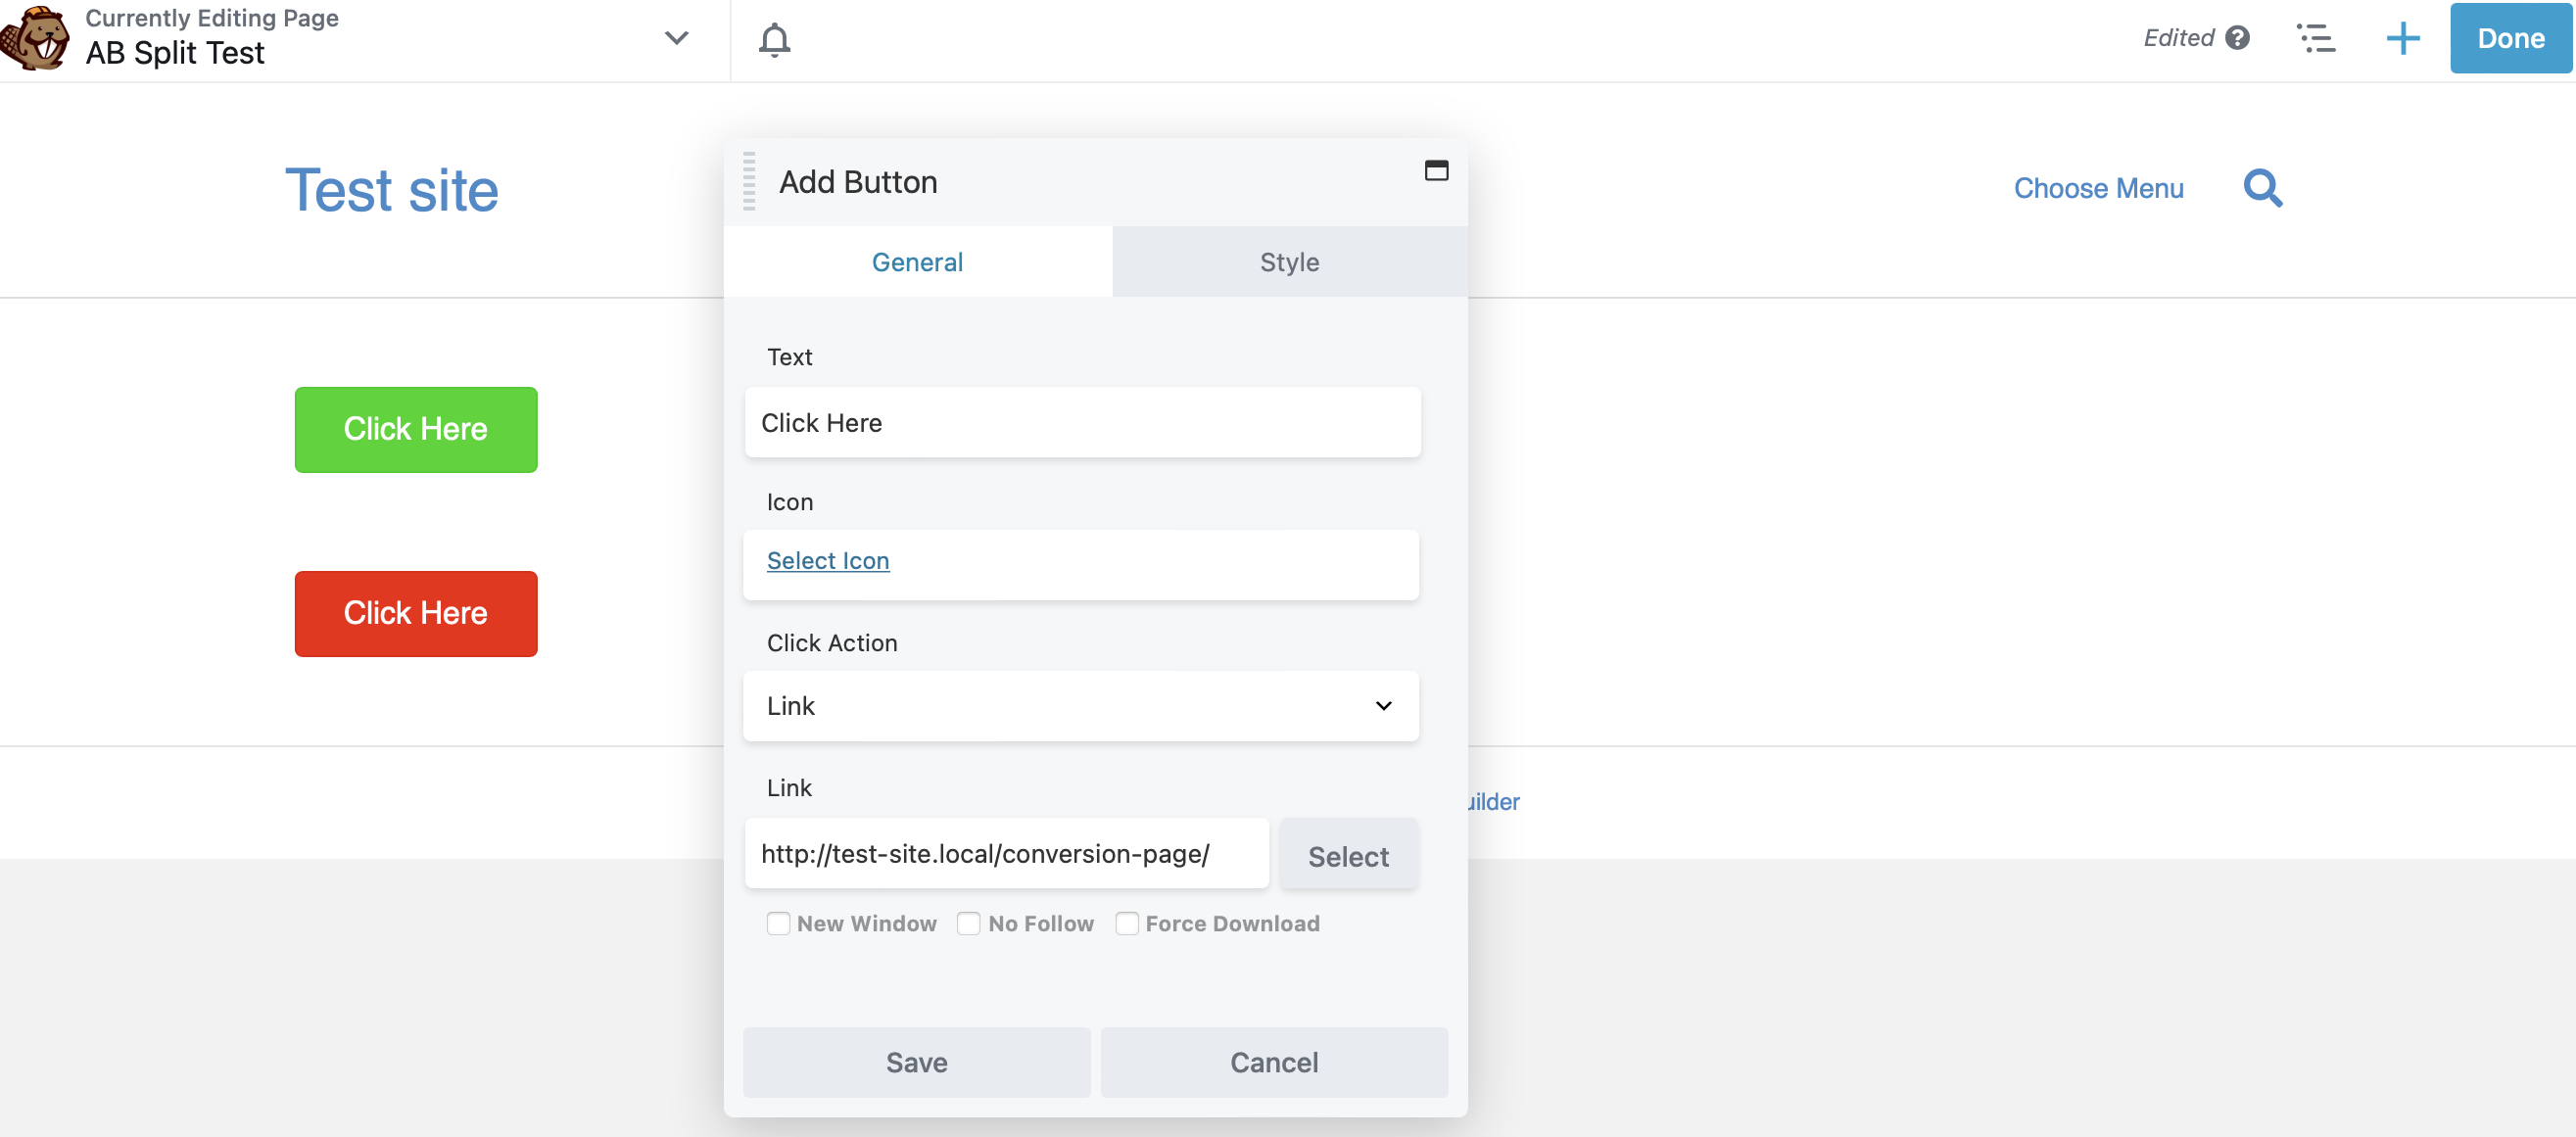
Now you can finish designing the rest of your page, and publish it by hitting Done > Publish.
Step 5: Add a Conversion Module to Your Conversion Page
At this point, you’re ready to add a conversion module to your linked page. This is how the plugin will keep track of how many times your buttons are clicked on.
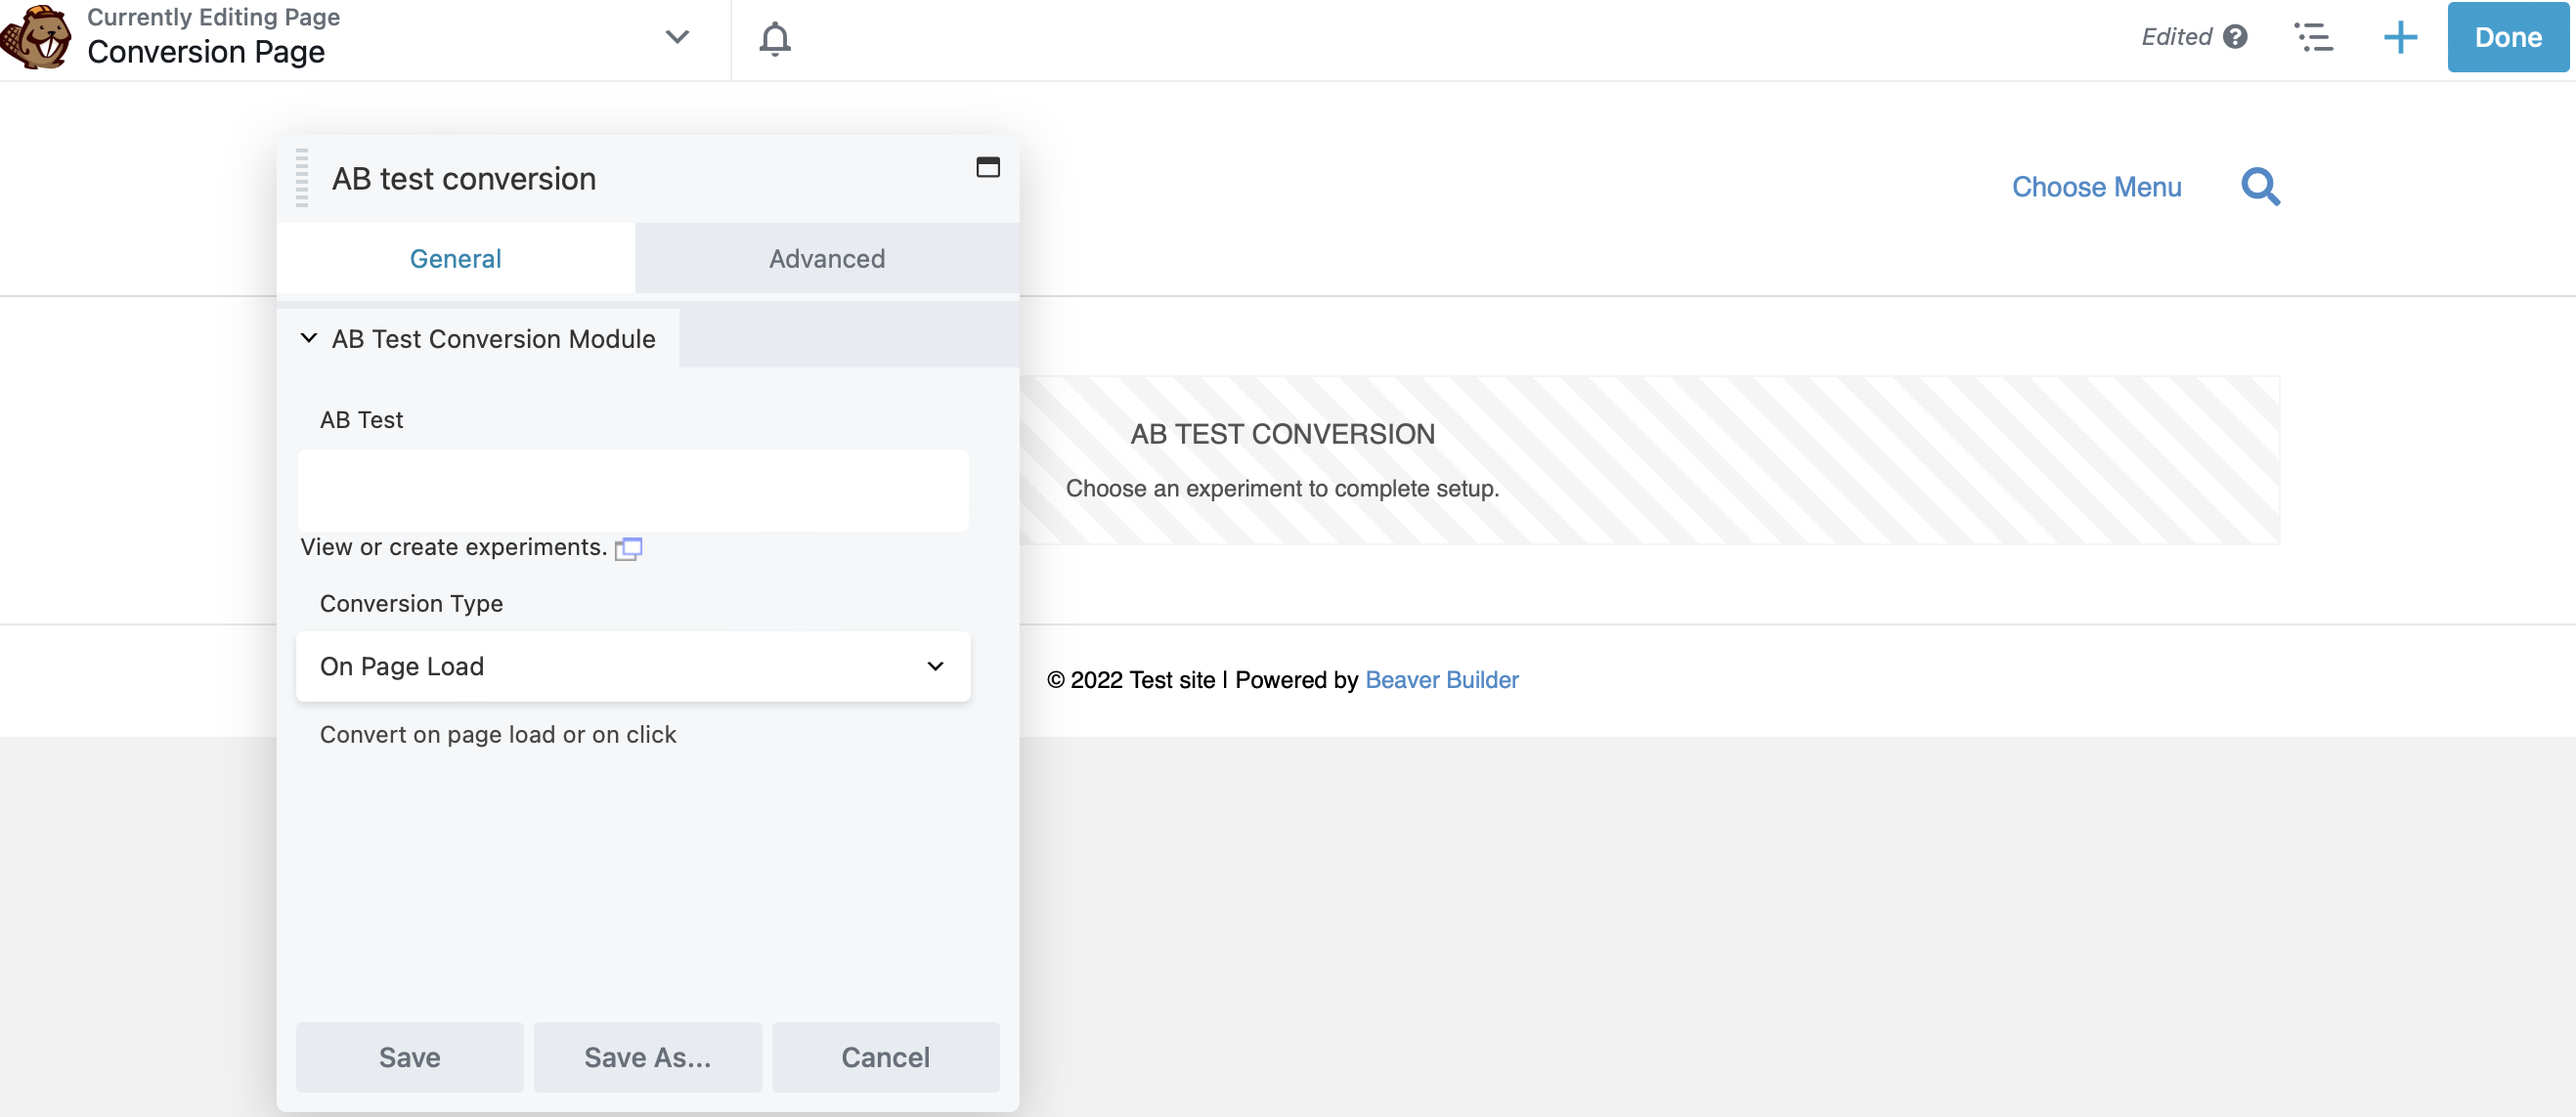
Therefore, you’ll need to visit your ‘conversion page’ and add the AB test conversion module:
Visitors will never see this module. It’s just there so the plugin can track when conversions take place on that page. In the pop-up box, choose the test you created earlier, and make a selection under Conversion Type. We chose Page Load:
This means that every time this page loads as the result of a user clicking the red button, that version of the page scores a point (and vice versa). Don’t forget to publish your changes to this page.
Step 6: Track Your Test Results
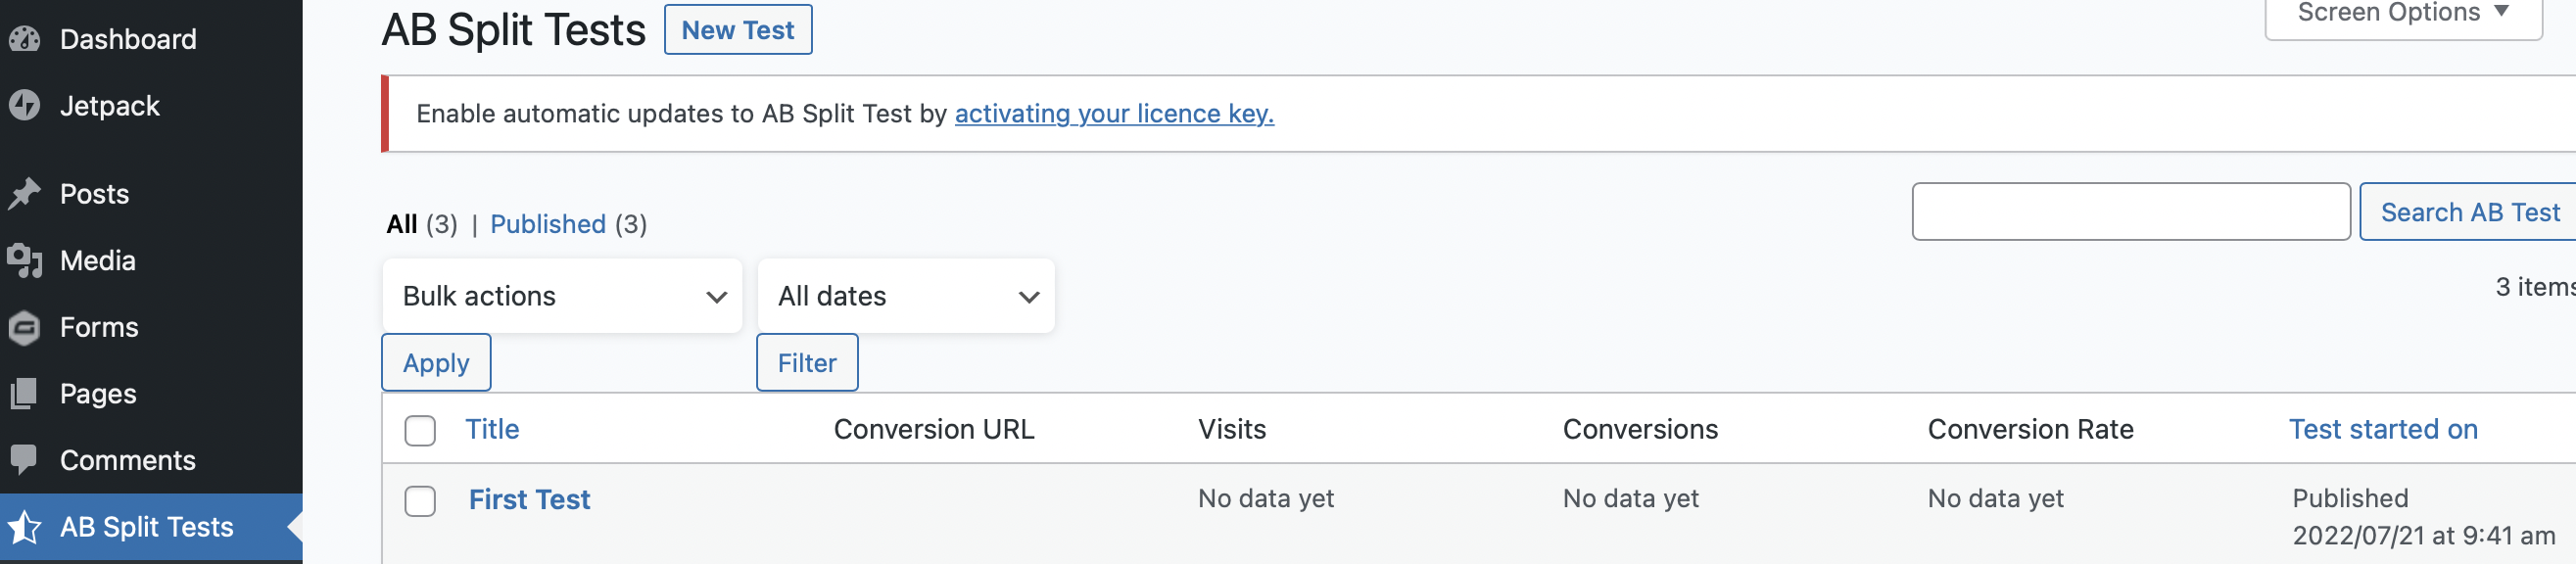
Once your test is published, you can still make edits by heading to AB Split Tests > All Tests to view your split test dashboard. Select your test to make changes:
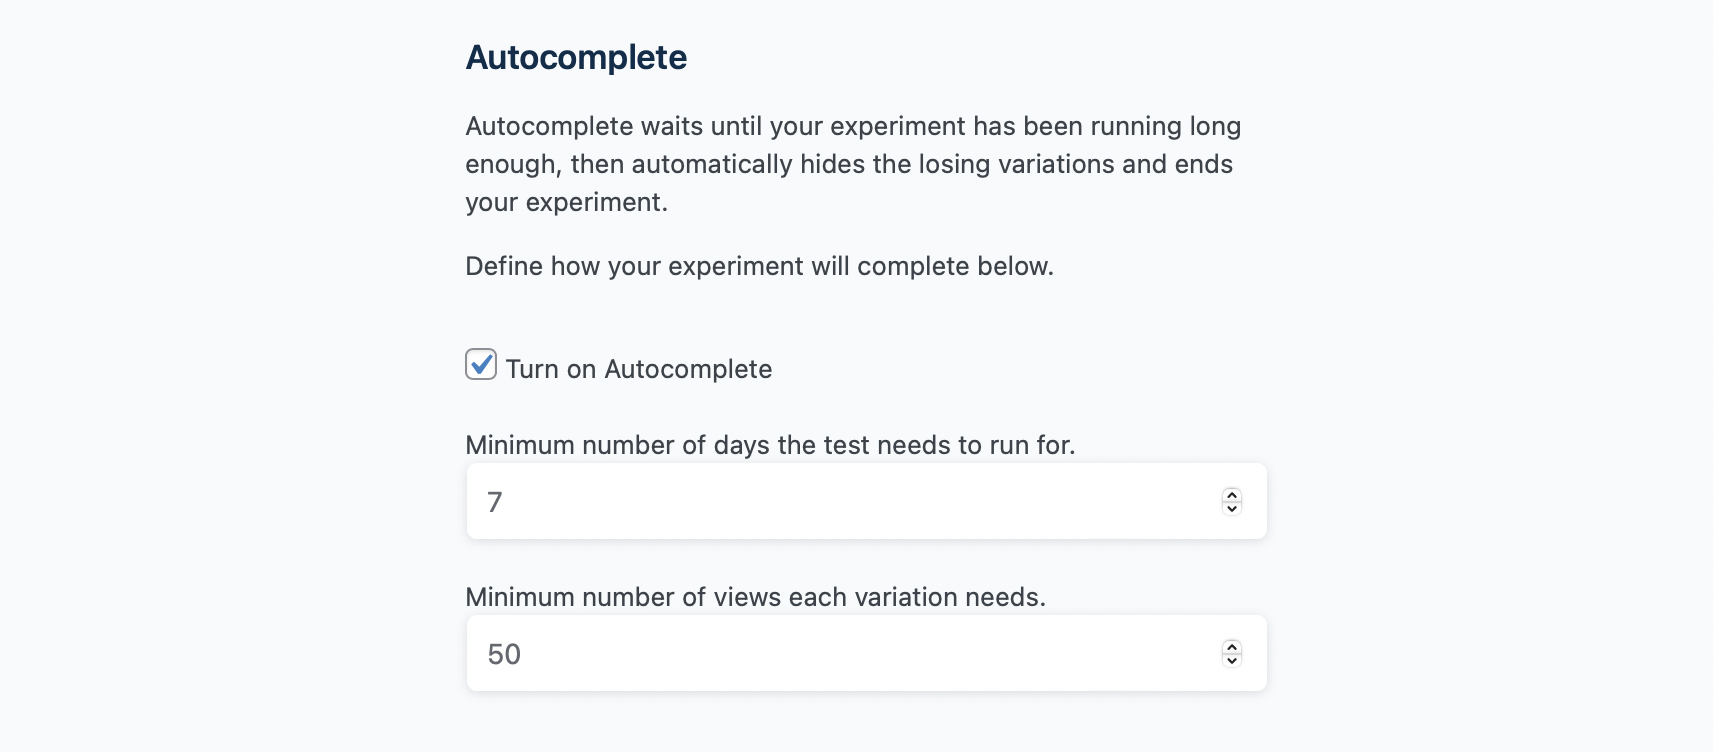
Here, you can also enable autocomplete by ticking the check-box and setting a minimum number of days and views for your test. When enough data is collected, the winning variation will automatically be shown to visitors:
You can also filter who sees your variations. For example, you may only want to show variations to subscribers or customers. Alternatively, you can choose to run your test on all logged-out users.
If you want to check on the progress of your test before it’s complete, you can visit the Results tab:
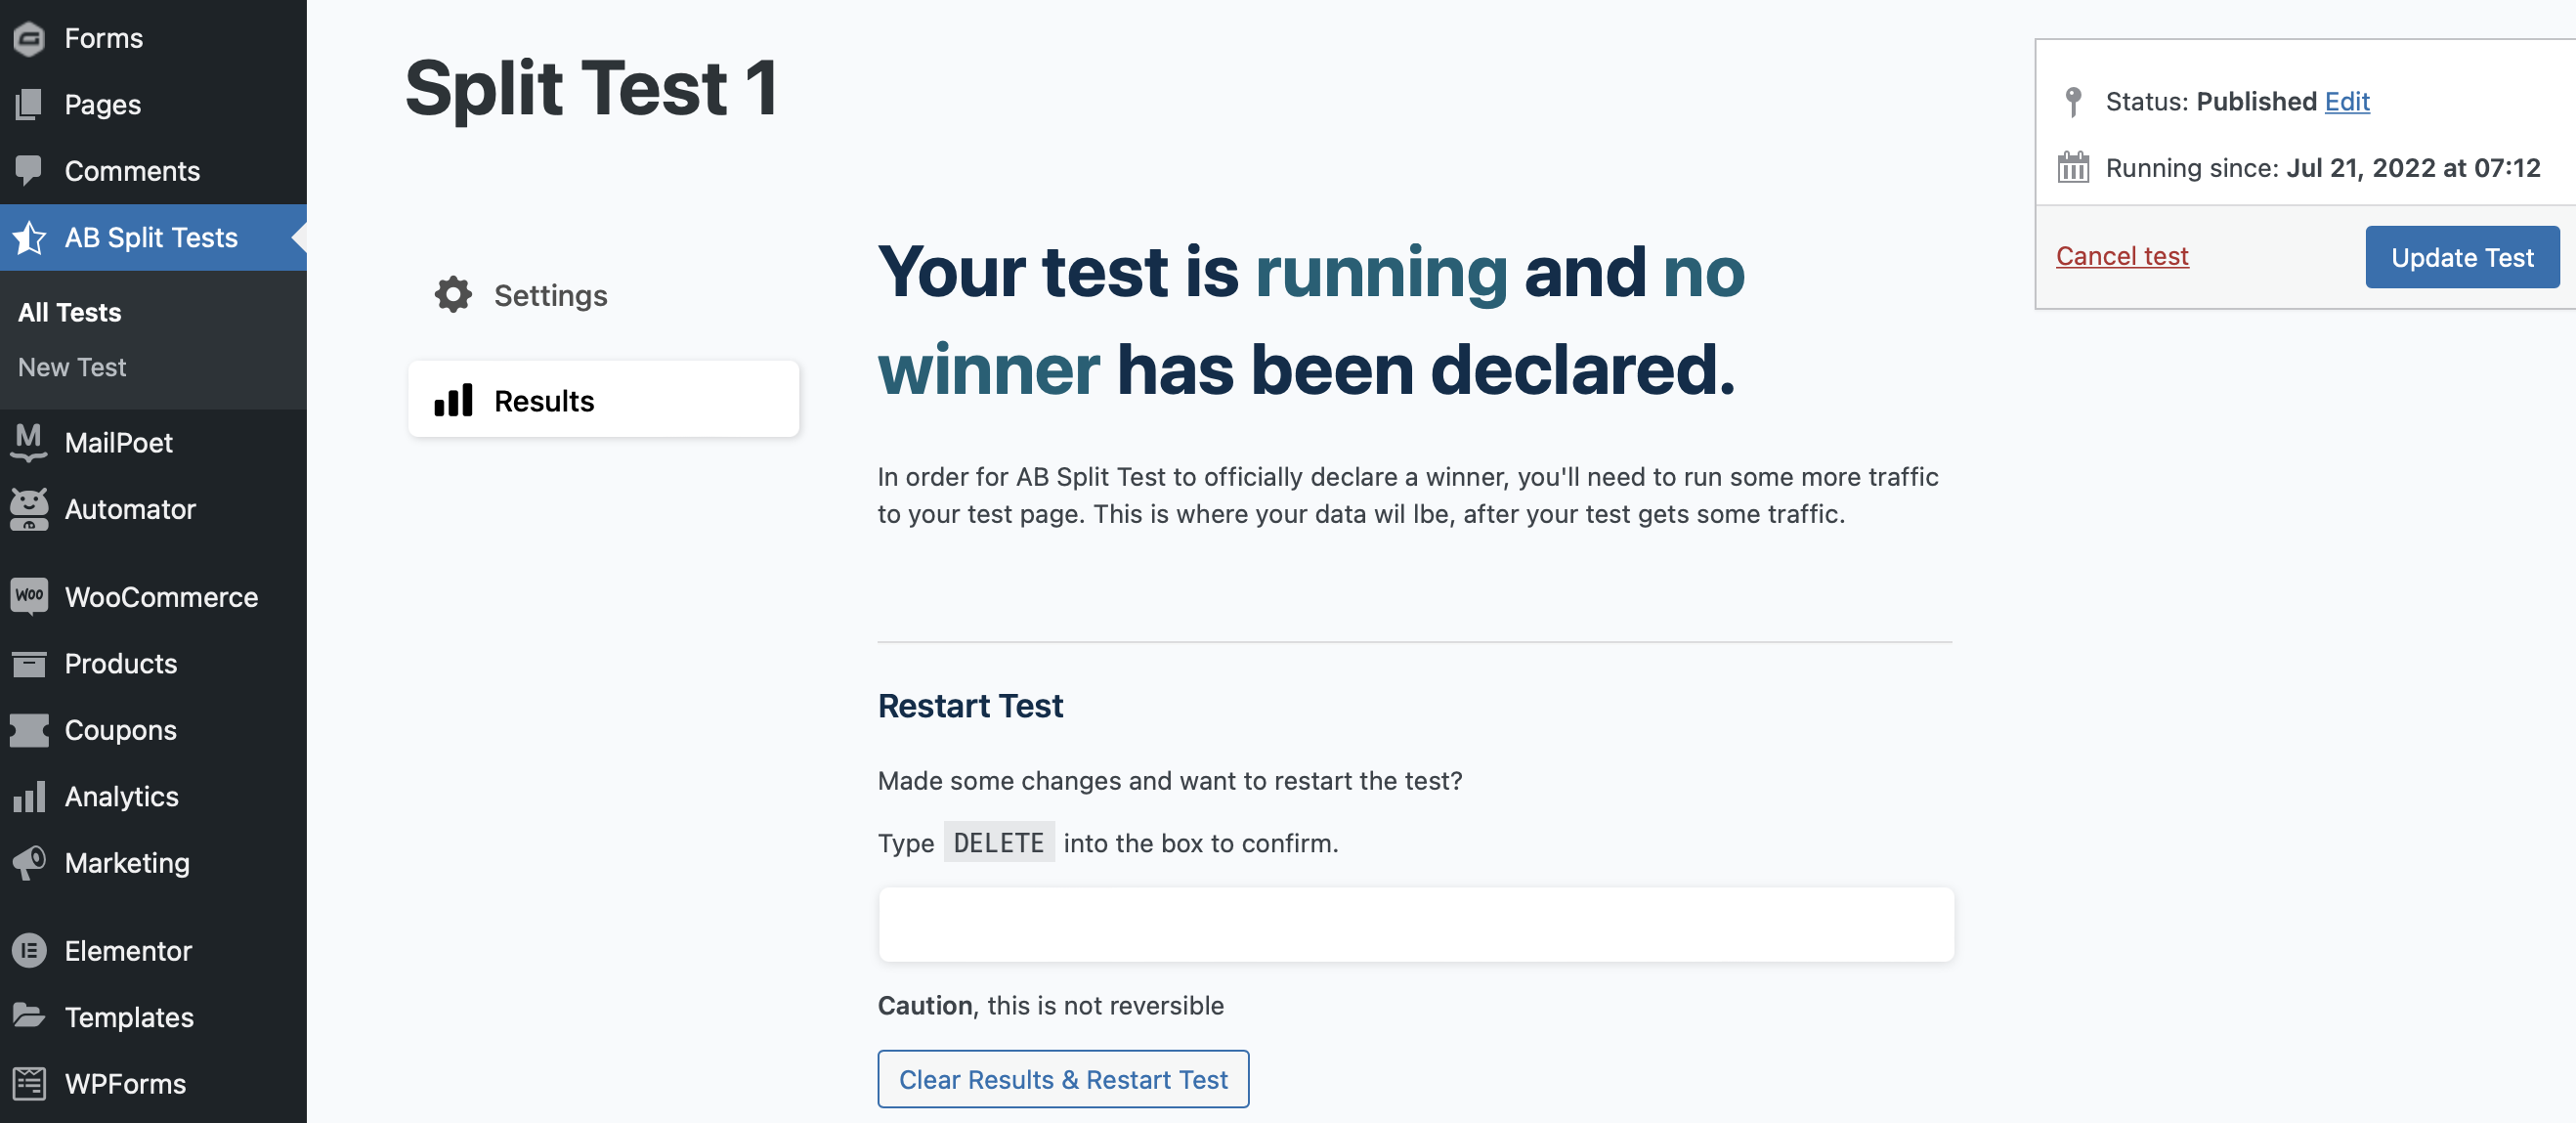
With the Agency plan, you can take a deeper dive into your results by integrating the AB Split Test plugin with analytic platforms like Google Analytics.
Conclusion
If you want to make your clients happy, you’ll need to make sure their websites do more than perform well. It’s important to ensure that the pages you build actually convert visitors. Fortunately, with the AB Split Test plugin, you can test multiple variations of your content and on-page elements to see which deliver the best results.
To recap, here are six steps for creating AB tests on your Beaver Builder site:
- Install and activate the AB Split Test plugin.
- Start a new test.
- Create the first variation of your Beaver Builder page.
- Create your second variation.
- Add a conversion module to your conversion page.
- Track your test results.
RELATED QUESTIONS
Can I Run AB Tests on an Existing Beaver Builder Website?
With a plugin like AB Split Test, it’s easy to run AB tests on a new or an existing Beaver Builder website. You can test old pages on your site to determine how they can be improved, and measure the impacts of brand-new elements.
Can I AB Test My Headers and Footers?
You can run AB tests using the AB Split Test plugin on variations of just about any aspect of your website you like, whether it’s on-page or in a header or footer. If your site is built with Beaver Builder, you can use the Beaver Themer add-on to make custom changes to your headers, footers, and other site-wide elements.
You might also like this video tutorial, How to Set Up a Button AB Split Test with Beaver Builder:
Our Newsletter
Our newsletter is personally written and sent out about once a month. It's not the least bit annoying or spammy.
We promise.
Try Beaver Builder Today

Related articles
How to Build Card Layouts in Beaver Builder (Flexbox + Box Module Tutorial)
If you’re using the Beaver Builder Box Module to build responsive layouts, you’ve likely noticed two things: it’s incredibly powerful…
How to Center Content in Beaver Builder (Flexbox, Rows & Modules Guide)
Wondering how to center content in Beaver Builder? The most reliable way is to use the Box Module with Flexbox:…
Struggling with CSS Grid? Turn This On in Beaver Builder
CSS Grid is powerful, but it can be hard to work with when you can’t clearly see your layout. Beaver…
Join the community
We're here for you
There's a thriving community of builders and we'd love for you to join us. Come by and show off a project, network, or ask a question.
Since 2014
Build Your Website in Minutes, Not Months
Join Over 1 Million+ Websites Powered By Beaver Builder.