How to Use a Header Template in WordPress
Customizing a WordPress header isn’t often an easy process. If you’re not comfortable editing theme files, there aren’t many ways that you can change the way a header looks outside of switching themes.
Fortunately, you can use a Beaver Themer header template in WordPress to easily adjust your theme header’s appearance. Choose from a selection of customizable header layout templates and use them for any website.
In this article, we’ll talk about how header templates work and why you might want to modify yours. We’ll also show you how to use templates with Beaver Themer. Let’s get to it!
Table of Contents:
What Are WordPress Header Layout Templates?
Newer versions of WordPress enable you to modify theme template files using the Block Editor. This is called Full Site Editing; however, this feature is still pretty limited.
If you want better control over your header’s appearance, you might consider using header layout templates instead. These templates come with our Beaver Themer plugin and enable you to switch header styles almost immediately.
Beaver Themer is a robust plugin for Beaver Builder that lets you modify theme template files and access full site editing using the page builder editor. Moreover, Beaver Themer is fully tested and functional, whereas WordPress’s full site editing is still in beta and not fully stable.
On top of getting access to templates, our tool gives you a great degree of control over how the header functions. You can use Beaver Themer to create sticky headers, configure overlays, and design unique elements for specific pages.
How to Use a Header Template In WordPress (In 3 Easy Steps)
To access header template layouts, you’ll need Beaver Themer, which is included with any Beaver Builder Premium Plan. This powerful tool allows you to customize theme templates, headers, footers, and more, giving you complete control over your site’s design.
Be sure to pair Beaver Themer with a compatible theme. The Beaver Builder Theme, also included with all premium plans, is the ideal choice if you want to customize various aspects of your website with ease. If you prefer other options, you can explore our guide to the best Beaver Builder-compatible themes.
To give any of our Beaver Builder products a try, check out our demo site.
Step 1: Add a New Themer Layout and Configure Its Rules
After installing and activating Beaver Themer, you’ll see several new options appear in your WordPress dashboard. These include Themer Layouts and Templates.
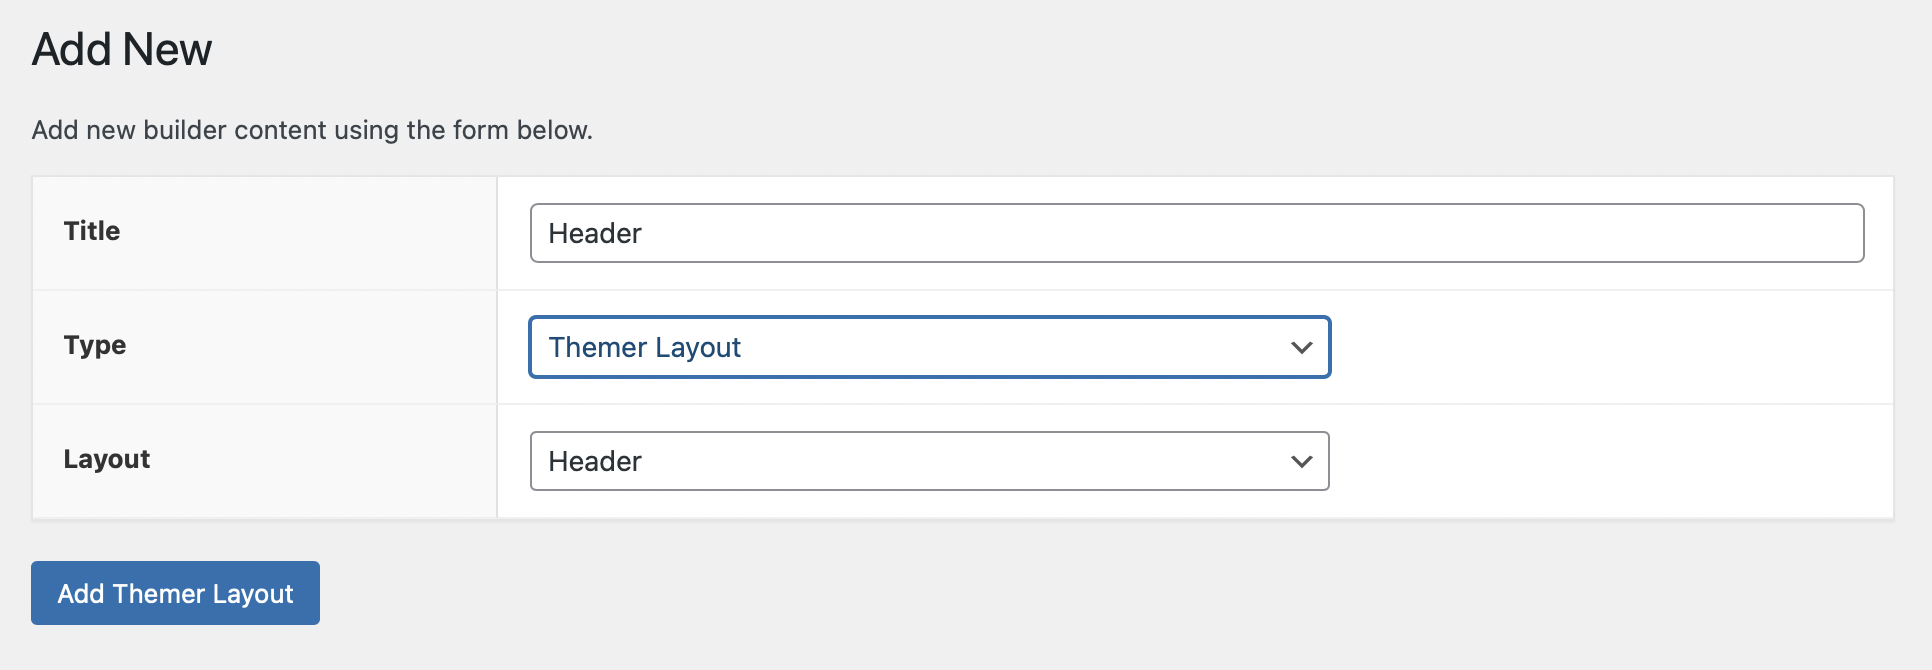
To add a new Themer layout, go to Beaver Builder > Themer Layouts and click on Add New:
In the next screen, set a title for the template and select Themer Layout under the Type menu. For the Layout menu, select the Header option:
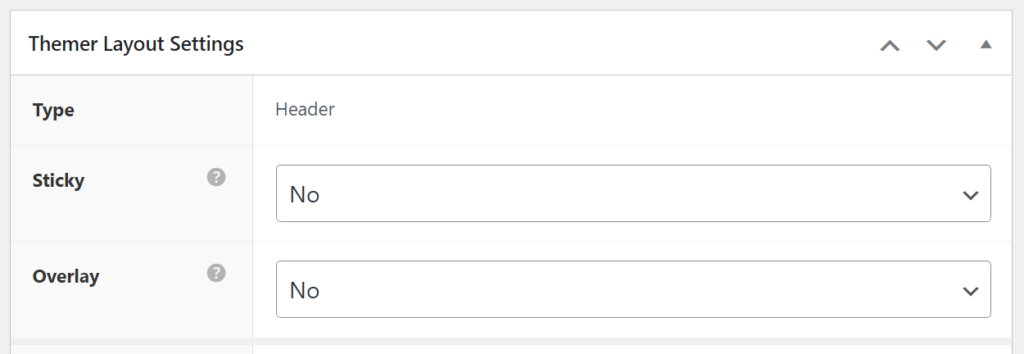
Click on Add Themer Layout and proceed to the next screen. Here you can configure some of the layout’s behavior.
Enabling the Sticky option means the header will remain visible as visitors scroll down each page. The Overlay setting works similarly, but it adds a level of transparency to the header:
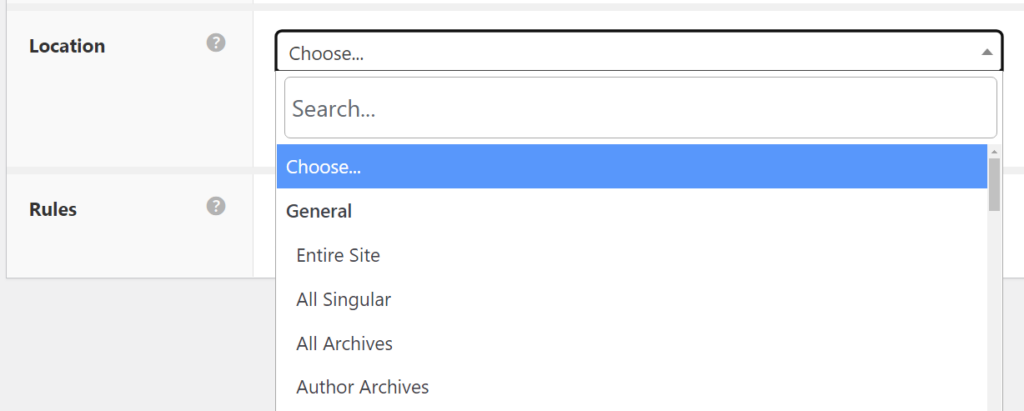
The Location settings let you add location Rules for the header. That means you can choose on which page(s) this header template will appear:
If you want the new header design to appear on all pages, select the Entire Site option. Alternatively, you might use separate header templates for different parts of your website.
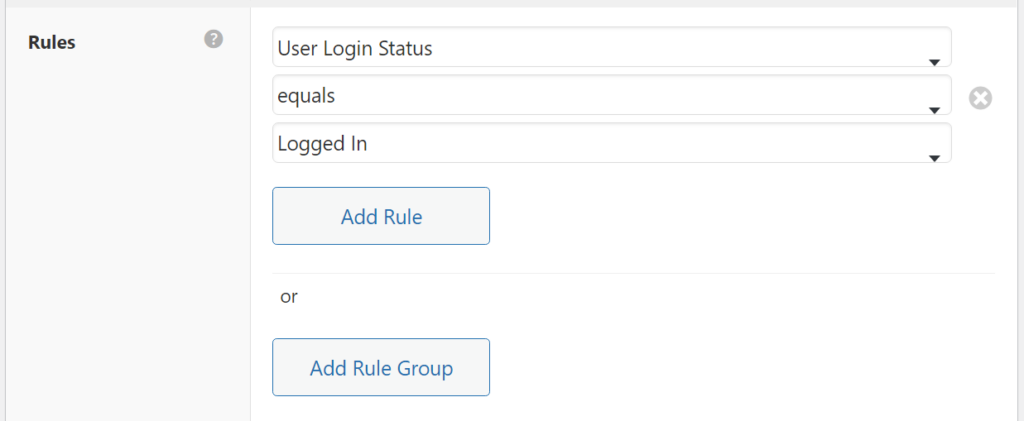
Finally, the Rules settings configure specific parameters that must be met for the header to appear. For example, you might display the template for only logged-in users. This setting can come in handy if you want to lead registered users to private parts of your website:
If you want to make your header template appear on all pages for all users, select the Entire Site option under Location, and don’t add any further rules. Finally, when you’re done with these settings, click on the Launch Beaver Builder button at the top of the page to open up the editor.
Step 2: Select a Header Template
Once you launch the Beaver Builder editor, you’ll see the default header layout template automatically populates for your. Here’s what it looks like:
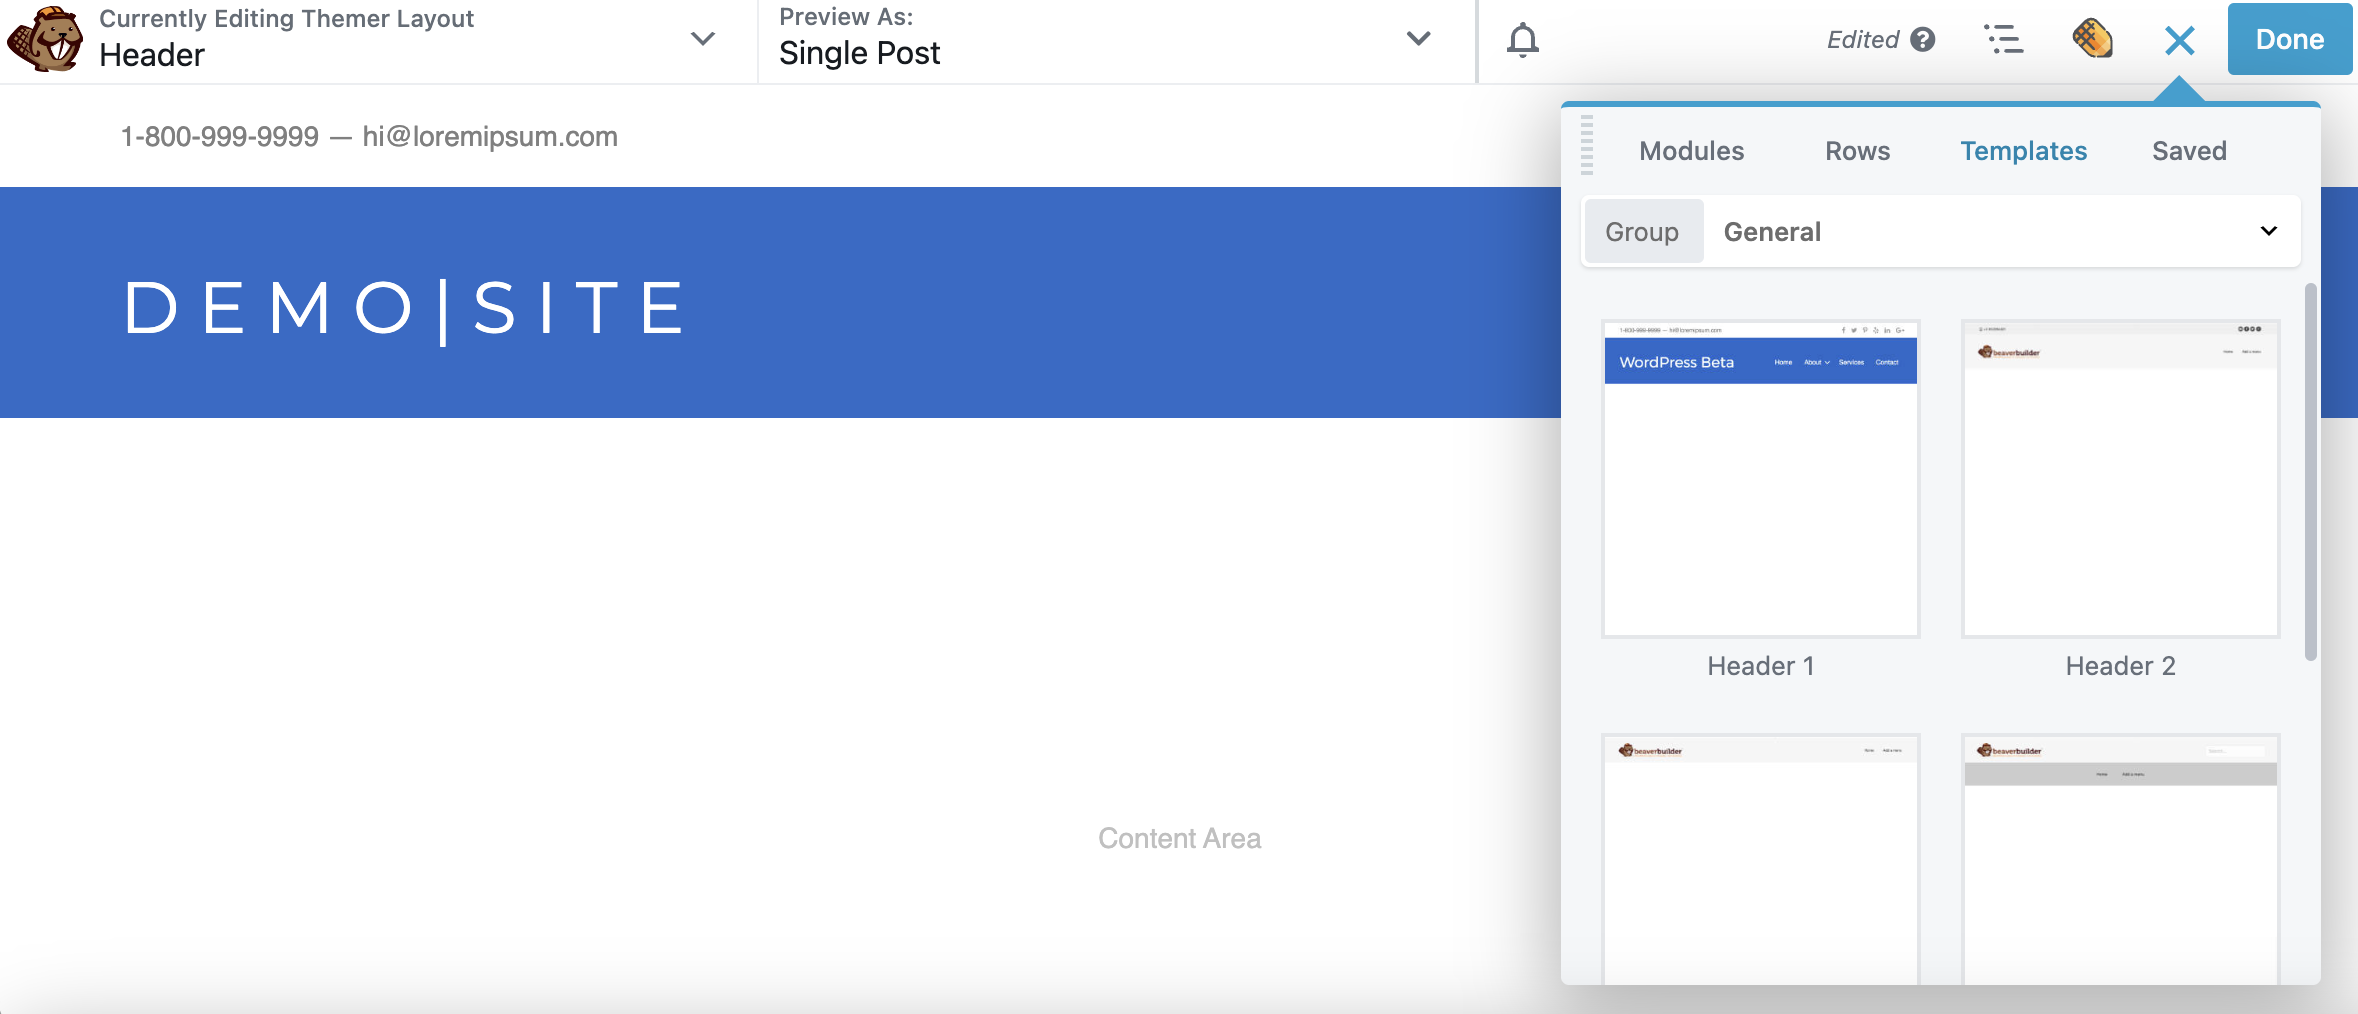
The default header template includes two rows — one with contact information and links to social media and the other with space for your website title and main navigation menu.
To change this template, click on the plus icon in the top-right corner of the screen. Go to the Templates tab and look at the options inside. Beaver Builder includes five header layout templates, one of which you’re using right now.
Select any template, and Beaver Builder will ask if you want to replace the current layout or append it to the existing design. Select the first option:
Every header template has a different design and layout. Here’s another example from the Beaver Builder header template options:
Once you select a template, you can modify any of its modules. That means you can use the template as a starting point to help you quickly create the header you want for your website. Simply swap out the content with your own.
Step 3: Customize Your Header Layout Template
Since we’re using Beaver Builder to edit your header layout, you can easily update or swap out any of the modules you see here. In addition, you can modify any other aspect of the header’s layout and style.
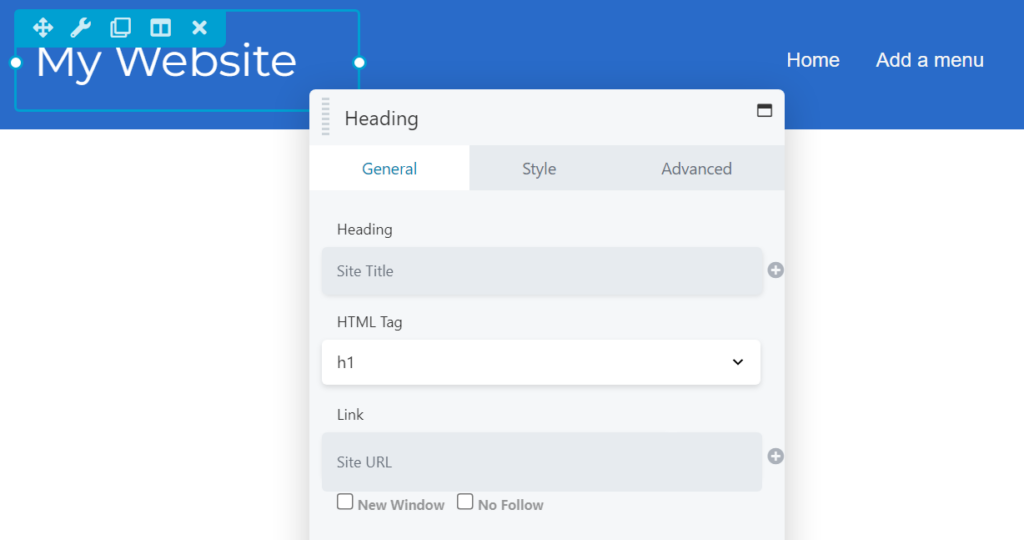
For example, if the header template you’re using has a text heading, you can modify its text, size, color, and font, among other options. To do this, select the module, and its settings menu will open:
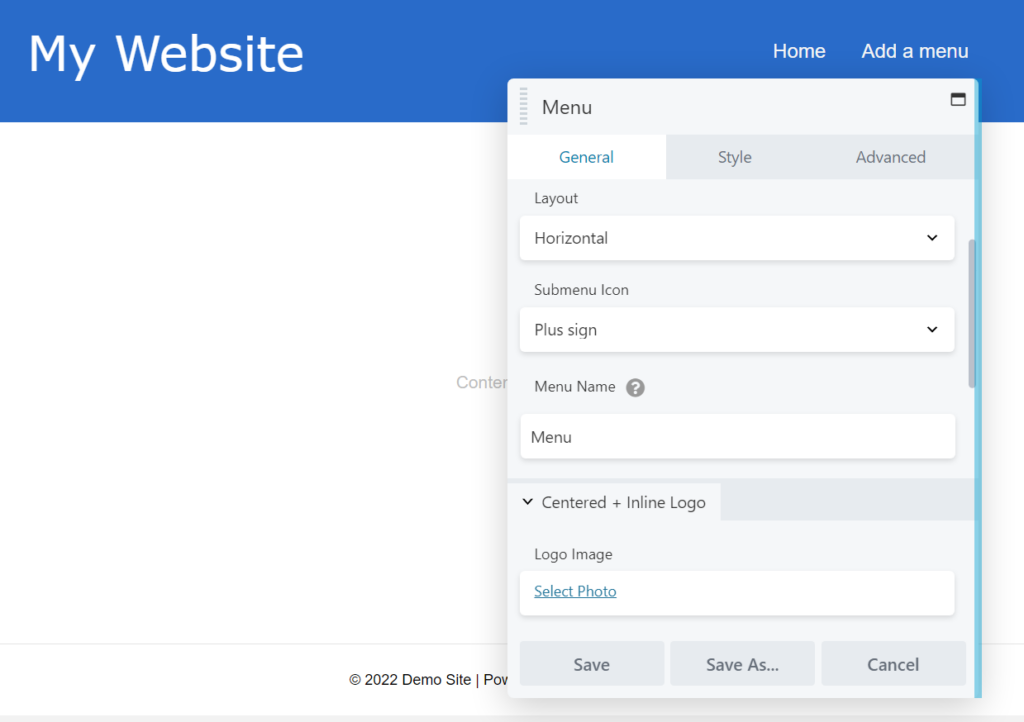
Every element in the header layout corresponds to a Beaver Builder module. For instance, if you select the Menu element, Beaver Builder will let you choose from existing menus on your site, change their orientation, use an accordion, add a logo, and more:
Note that if you don’t see any available menus to choose from here, you will first need to create one in the WordPress dashboard by going to Appearance > Menus.
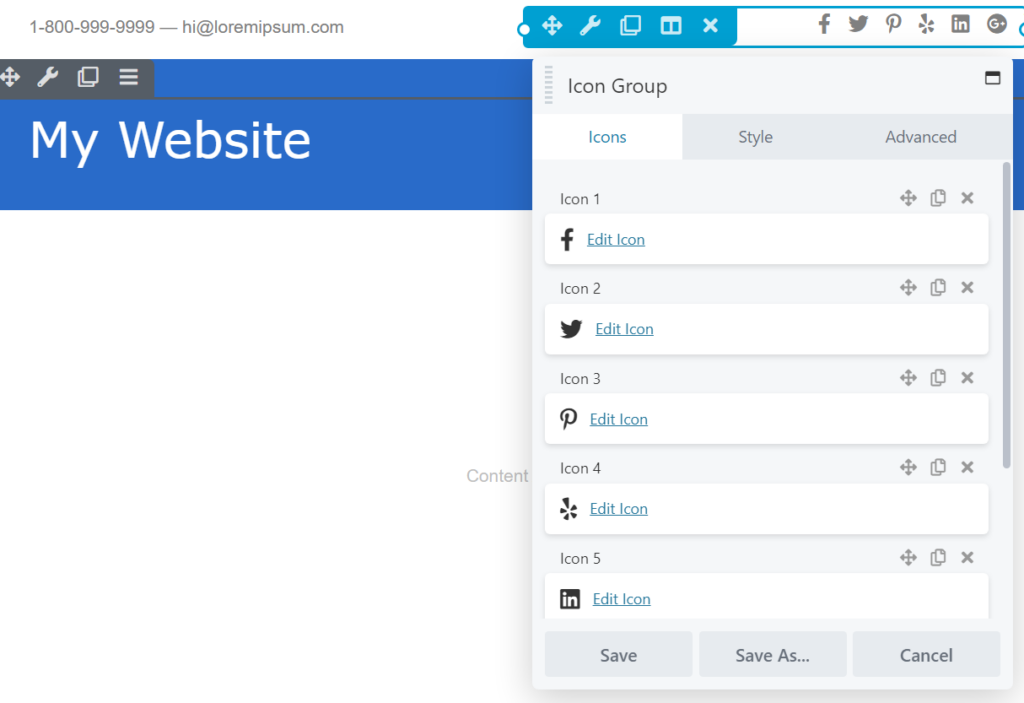
Another useful element found in most Beaver Themer header templates is the collection of social media icons. We include these icons using the Icon Group module since most modern websites use social media for marketing purposes.
The Icon Group module enables you to change the icons for each platform, rearrange them, and remove elements you don’t need:
Before you finish customizing the header layout, remember you can add other Beaver Builder modules and rows to it. This process works the same as editing any page or post using our builder.
For example, you can add a Search module to the header if you’re using a template that doesn’t include one by default:
When you’re happy with the header’s design, click on Done and then Publish. That’s it!
If you set up the header to appear for the entire website, you should see the change right away. Otherwise, you’ll need to navigate to the page in question to see your new header.
Conclusion
With Beaver Themer, you can choose from a selection of header layout templates and use them for any website. Every template is fully customizable, and the process is very straightforward especially if you’re already familiar with Beaver Builder.
If you want to use and edit header layout templates on your WordPress site, you’ll need our Beaver Themer add-on. Once you activate the add-on, just follow these three easy steps:
- Add a new Themer layout and configure its rules.
- Select a header template or create one from scratch.
- Customize your header layout template.
Related Questions
Do I Need Beaver Themer to Use Header Layout Templates?
Beaver Builder includes a broad collection of page templates you can use throughout your website. However, you’ll need Beaver Themer to edit theme templates for headers, footers, and other elements.
Does Beaver Themer Work Like Full Site Editing?
Both Beaver Themer and Full Site Editing enable you to edit theme templates. With Full Site Editing, you can edit and customize these elements using WordPress blocks. On the other hand, Beaver Themer lets you edit theme templates and parts with Beaver Builder modules. Additionally, Beaver Themer offers a collection of templates you can use to kickstart designs.
How Do You Add a Header and Footer to a WordPress Theme?
With Beaver Themer, you can choose from various header and footer templates. Our theme-building tool comes with attractive and user-friendly headers and footers, which you can edit to match your website’s design. Then, you don’t have to worry about manually editing your theme files and potentially breaking them.
Related articles
How to Create Headers and Footers with Beaver Themer
Page builders are great for creating beautiful pages, but they often don’t extend customization to headers and footers. This limitation…
How to Customize WordPress Website Header
Many elements make up a well-designed website. Your WordPress website header is particularly important because it’s the first thing visitors…
How to Create a WordPress Author Page with Beaver Themer (In 5 Steps)
If your blog has multiple contributors, readers may want to browse posts by a specific author. While WordPress provides a…
Join the community
We're here for you
There's a thriving community of builders and we'd love for you to join us. Come by and show off a project, network, or ask a question.
Since 2014
Build Your Website in Minutes, Not Months
Join Over 1 Million+ Websites Powered By Beaver Builder.
 Beaver Builder
