
A menu can offer clear navigation for your site’s visitors, which is vital for creating an optimal user experience (UX). However, WordPress’s default menu settings come with their limitations. Fortunately, the Beaver Builder page builder has a menu module that enables you to create more advanced menus that are sleek and easy-to-use.
In this post, we’ll discuss the important role that menus play in a website’s User Experience (UX). Then, we’ll walk you through how to add, use, and customize the Beaver Builder Menu module. Let’s get to work!
Table of Contents:
- Why a Navigation Menu Is Key for a Positive User Experience (UX)
- How to Add and Use the Beaver Builder Menu Module (In 5 Steps)
- Step 1: Create a Menu
- Step 2: Add the Menu Module to Your Page
- Step 3: Configure Your Menu Settings
- Step 4: Customize Your Menu
- Step 5: Publish the Page and Test Your Menu
- Conclusion
- Related Questions
Why a Navigation Menu Is Key for a Positive User Experience (UX)
A menu on a website is a list of categories or features that are usually presented together as a set of links or icons. It has a clear design that makes it distinct from the rest of your webpage:
There are different types of menus that you can choose from. These include:
- Drop-down menus. This style displays a list of submenus when you click or hover over an item on the list. It is one of the most common approaches.
- Flyout menus. Also referred to as Off-Canvas menus. It is similar to a drop-down menu, but the submenus ‘fly out’ from the side, rather than from the bottom of each menu item.
- Mega menus. This kind of menu is in drop-down style and usually contains numerous columns. It can even have videos or images within the menu itself.
A menu can be located anywhere on your website, but they are usually found in navigation bars at the top of your page. This helps users easily cruise through your site’s pages without hassle:

As you build your WordPress site, you are likely to need a more powerful navigation system that displays your content. That’s when a menu can come in handy.
Displaying your site content in an organized way improves the UX for visitors by presenting them with the information they are looking for in an accessible manner. This in turn can help mitigate confusion or frustration and encourage them to stay on your site for longer.
Therefore, improved UX can help boost your conversion rates. It can even benefit your Core Web Vitals and increase the chances of your site getting featured in top search results.
How to Add and Use the Beaver Builder Menu Module (In 5 Steps)
Now that you know some of the advantages of using a menu, it’s time to learn how to implement one on your website. For this tutorial, you’ll need the Beaver Builder page builder installed on your WordPress site. Let’s dive right in!
Step 1: Create a Menu
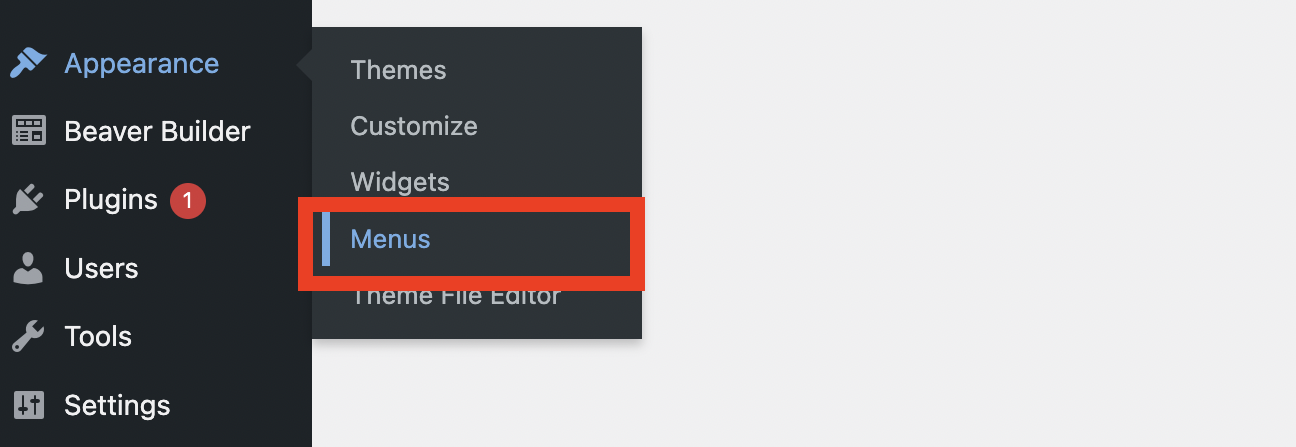
Before you begin, you’ll need to make sure that you have a menu available for your module. You can do this by going to Appearances > Menu in your WordPress dashboard:
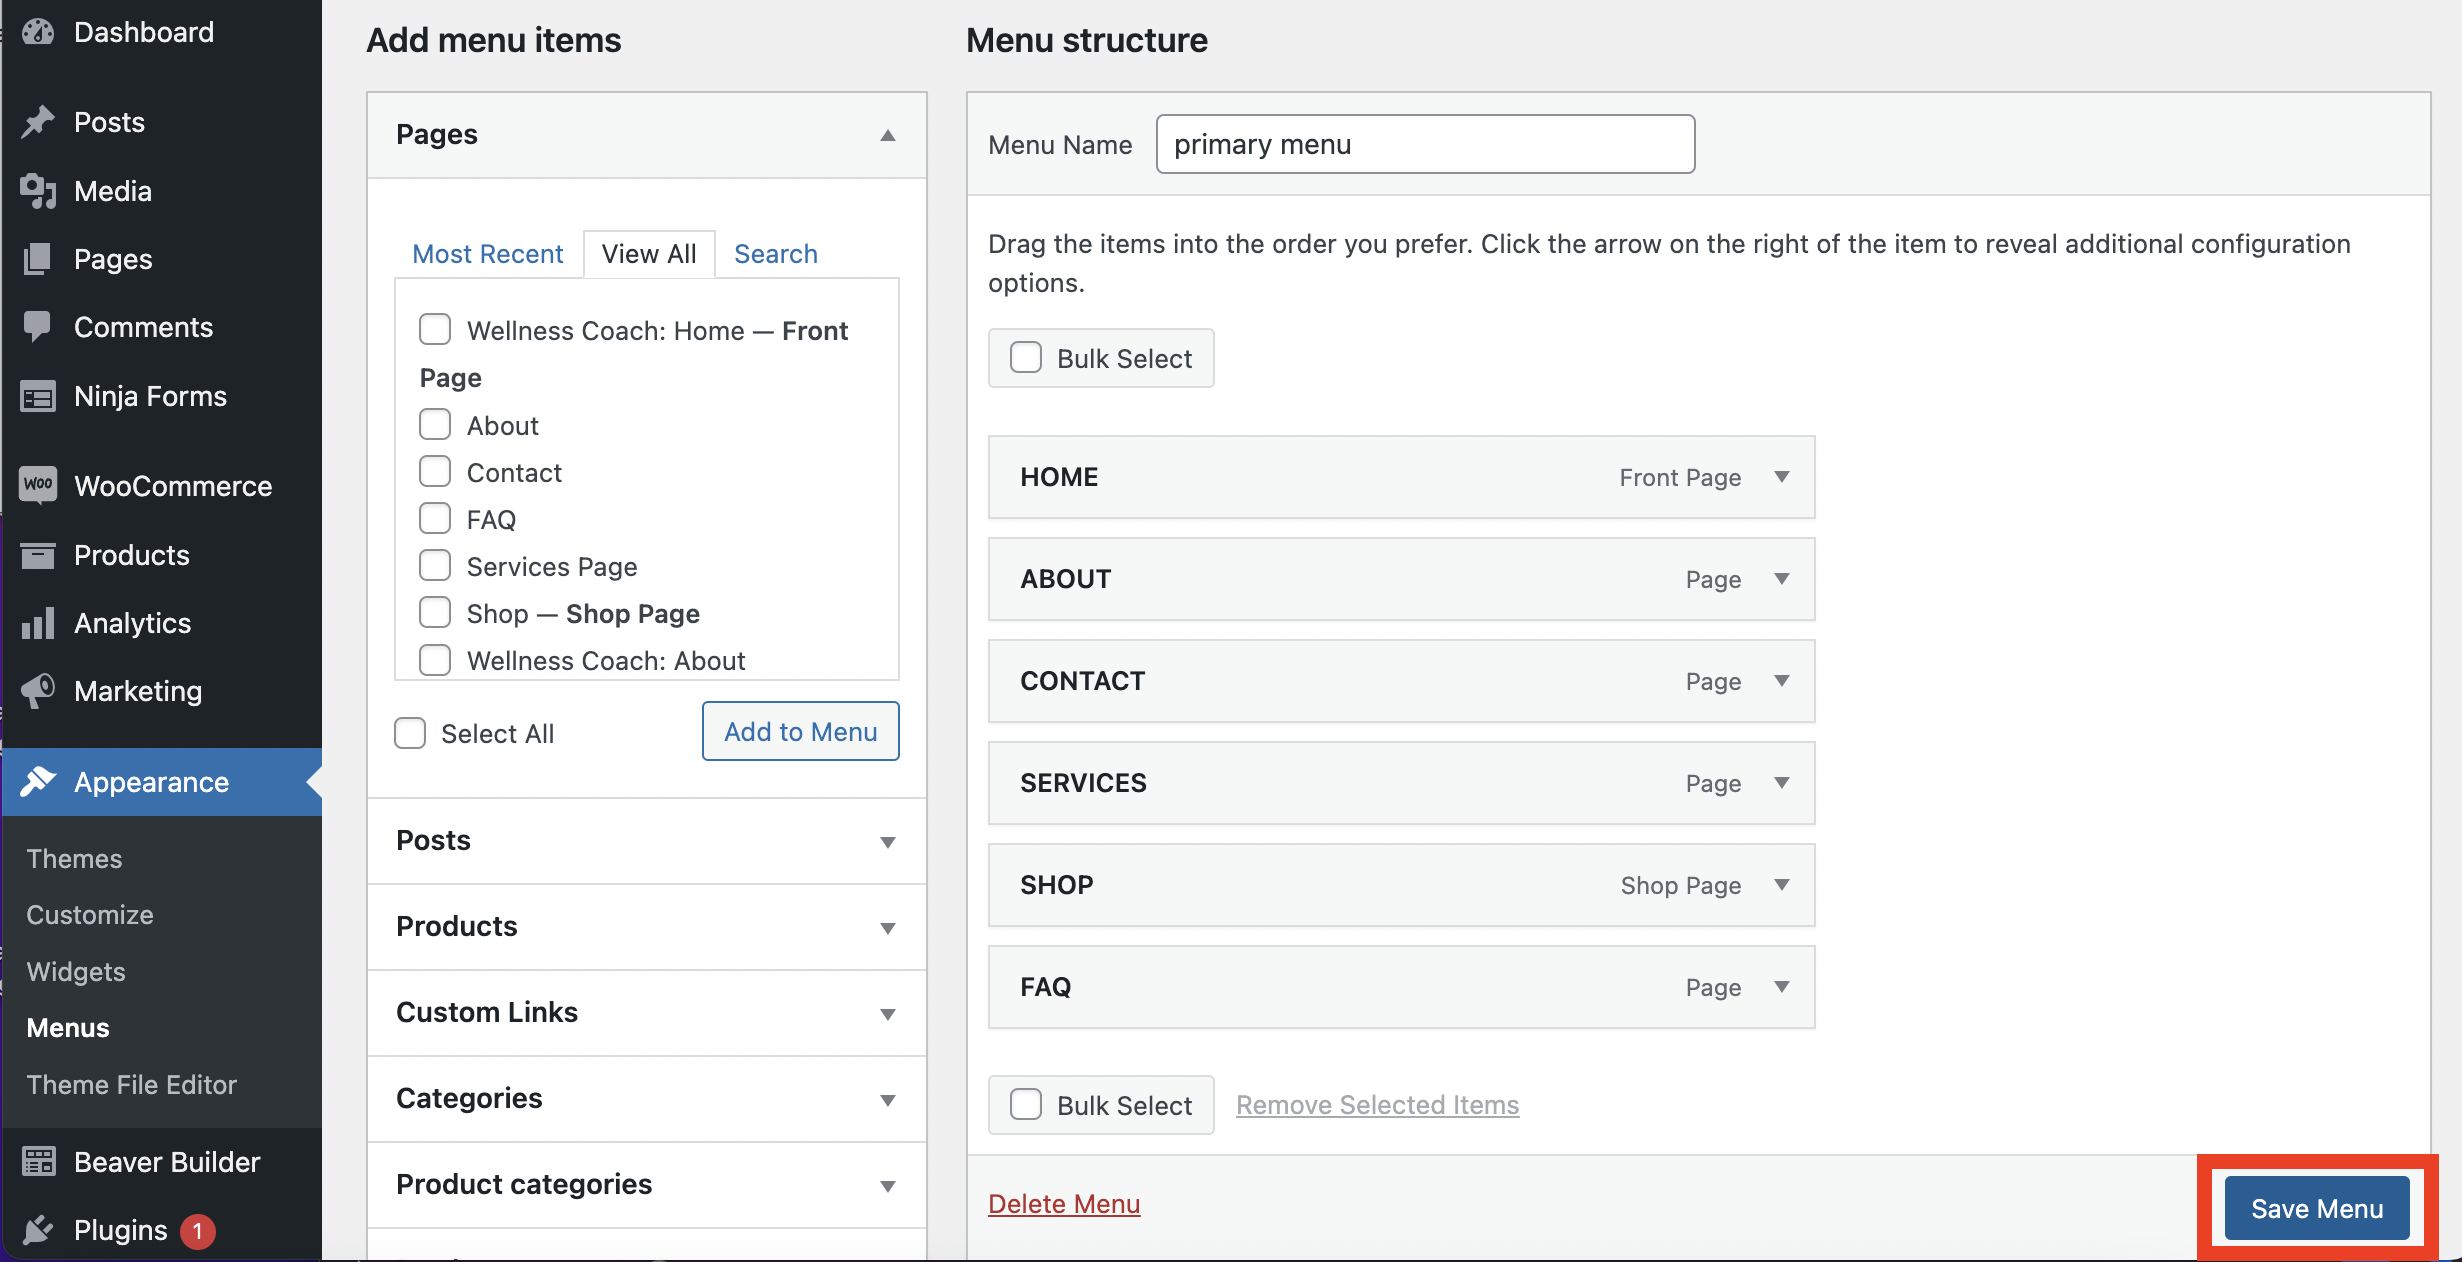
Depending on what you want in your menu, you can select from your available pages. You can find them in the Pages box under Add menu items:
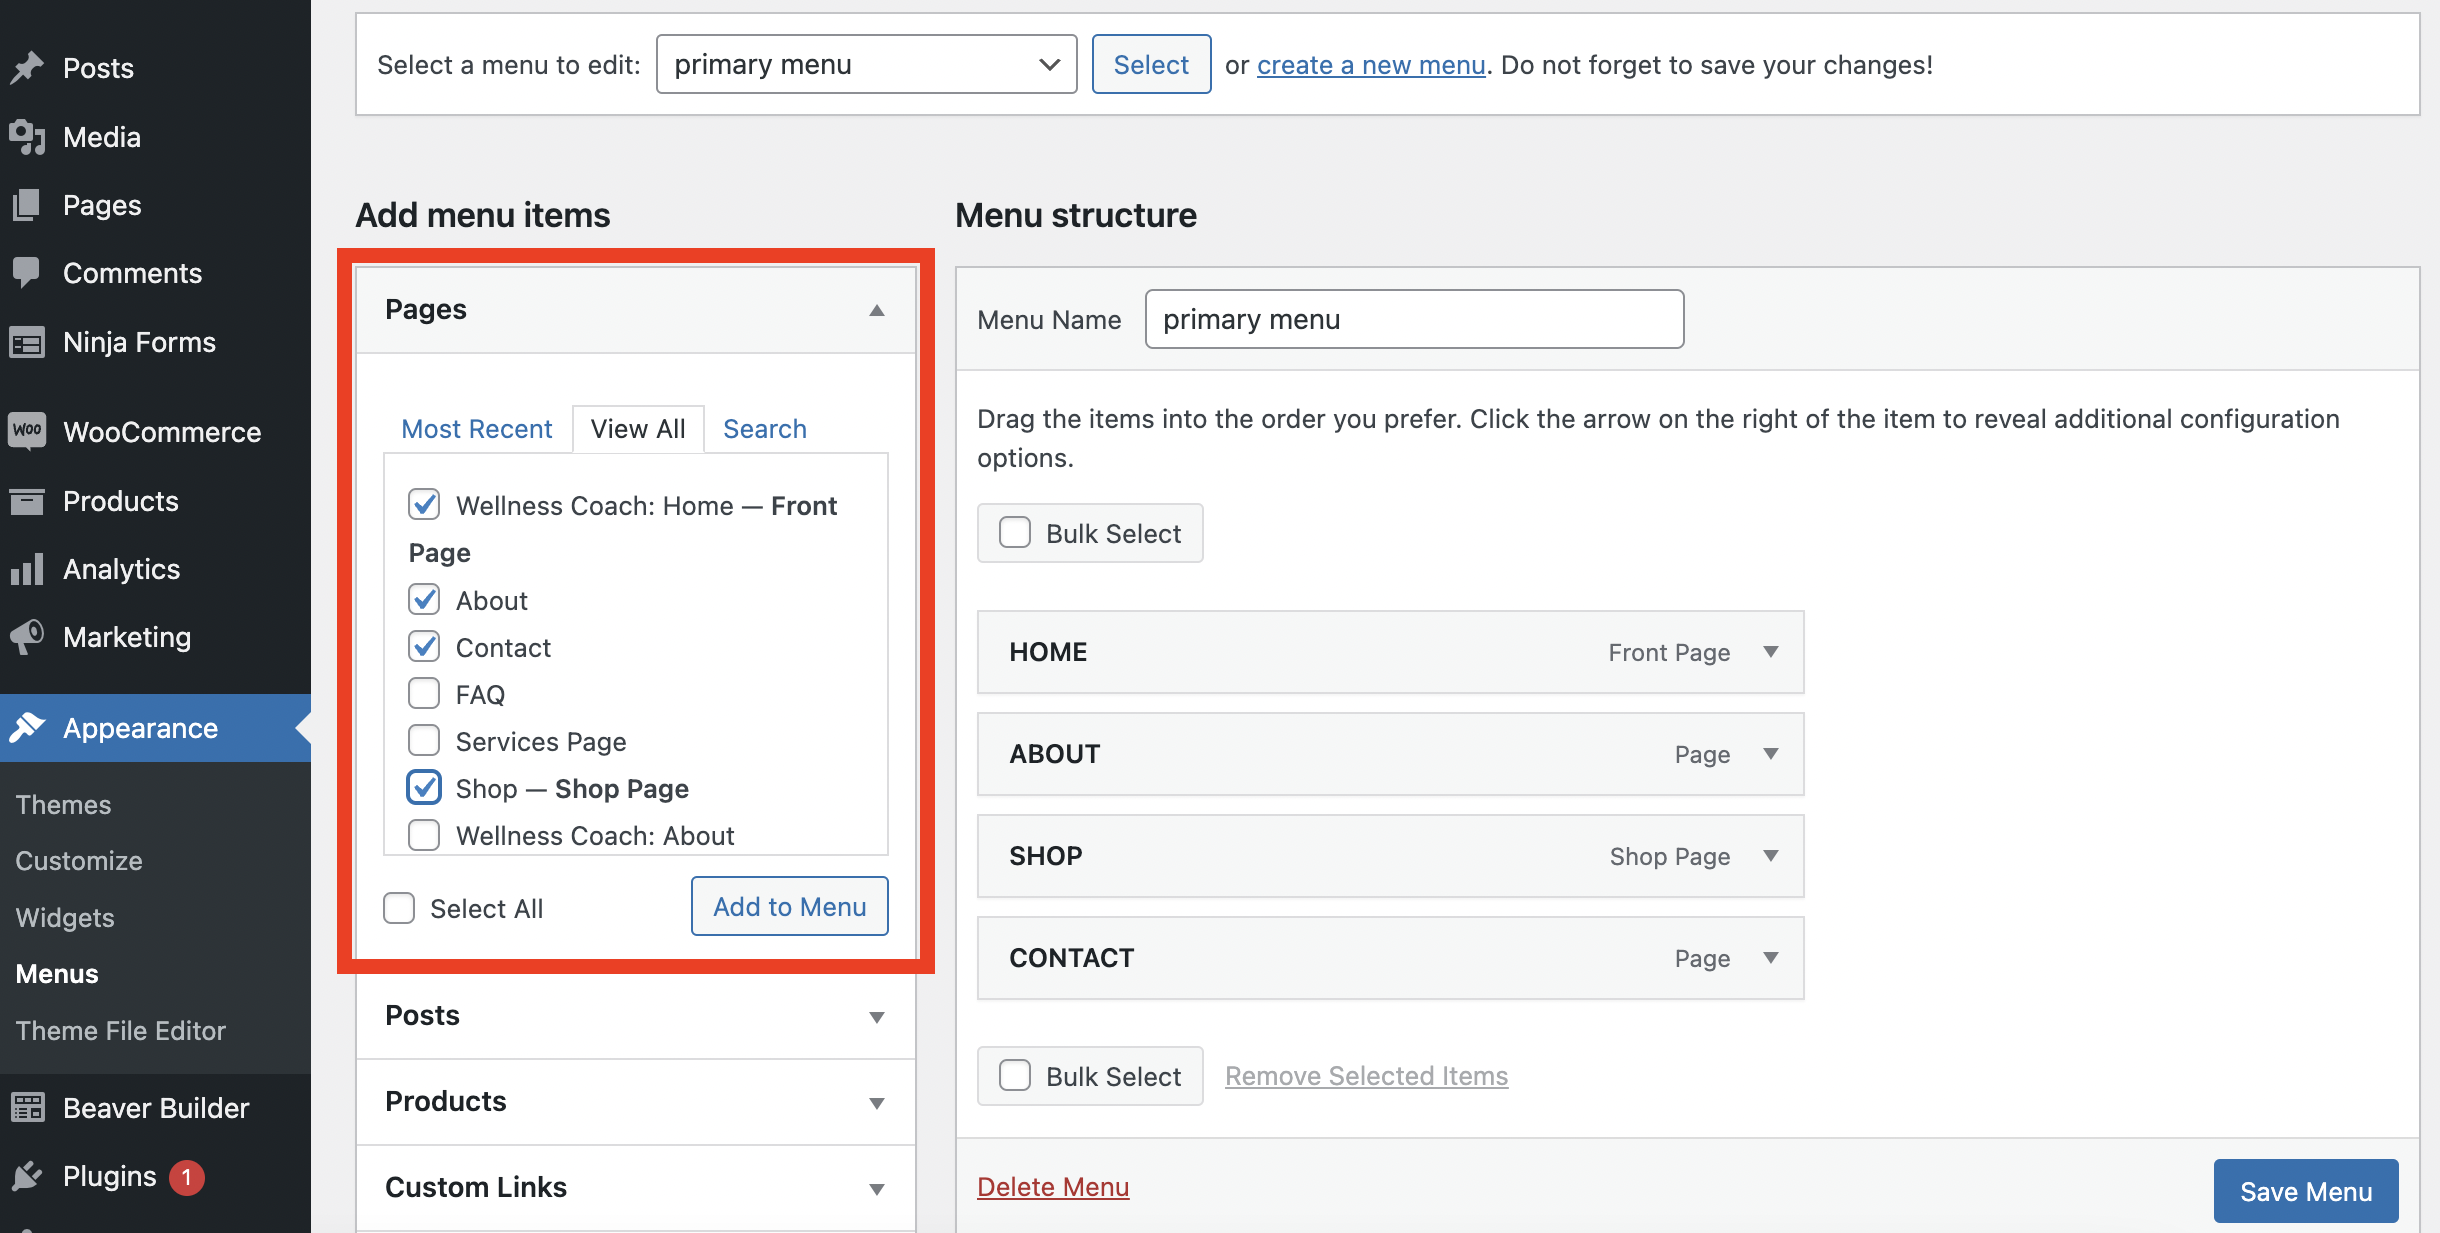
From here, you can choose any of the pages you want to be displayed on your menu. After you’ve made your selections, click on Save Menu at the bottom right of the page:
Now you’re ready to add a menu to your page.
Step 2: Add the Menu Module to Your Page
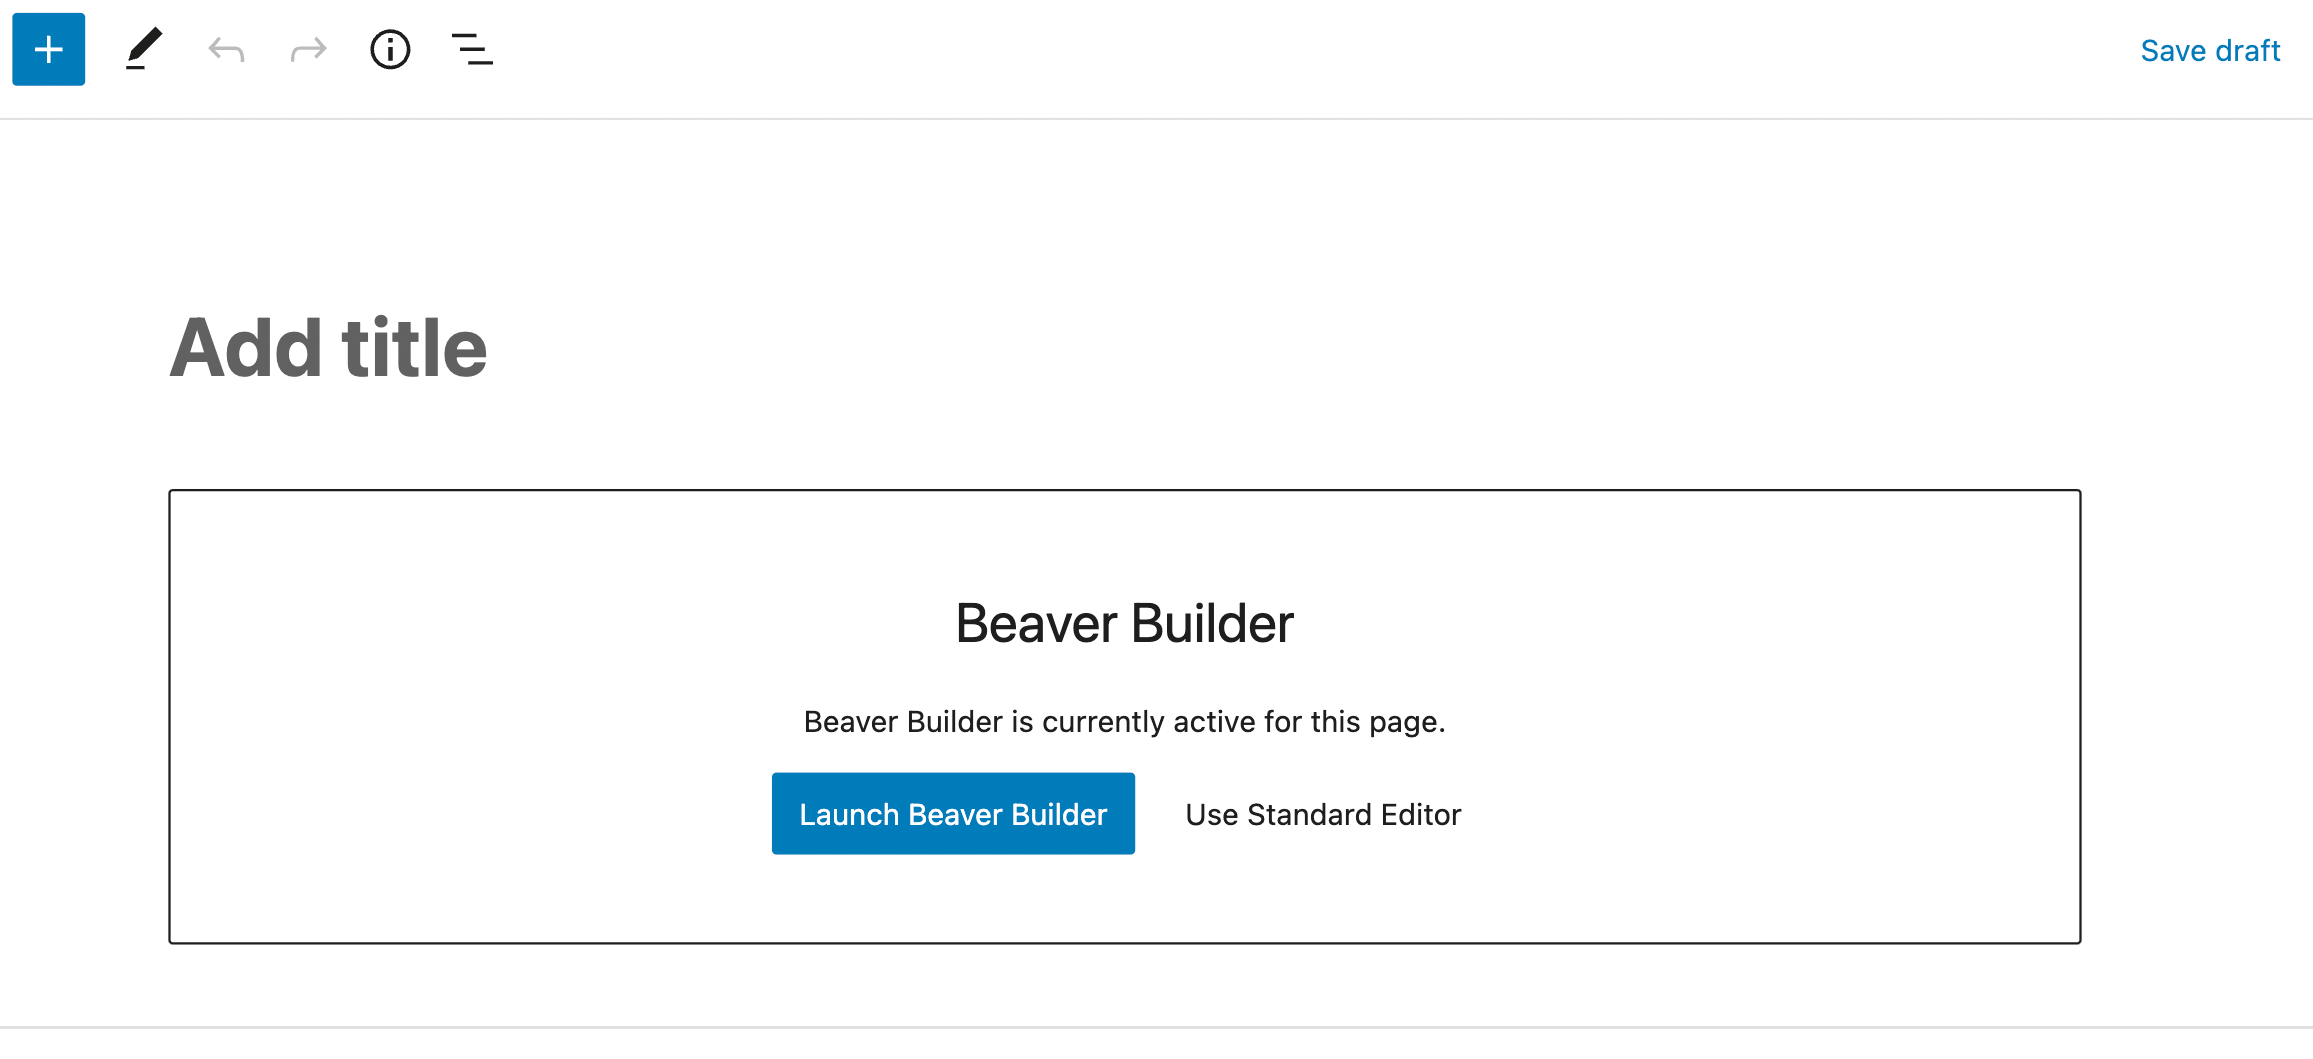
From your WordPress dashboard, go to PAGES, and choose the page where you want to add a menu. Click the Launch Beaver Builder button to open up the editor:
In the editor box, you’ll see a large selection of modules. You’ll be able to find the Menu module underneath the Actions tab:
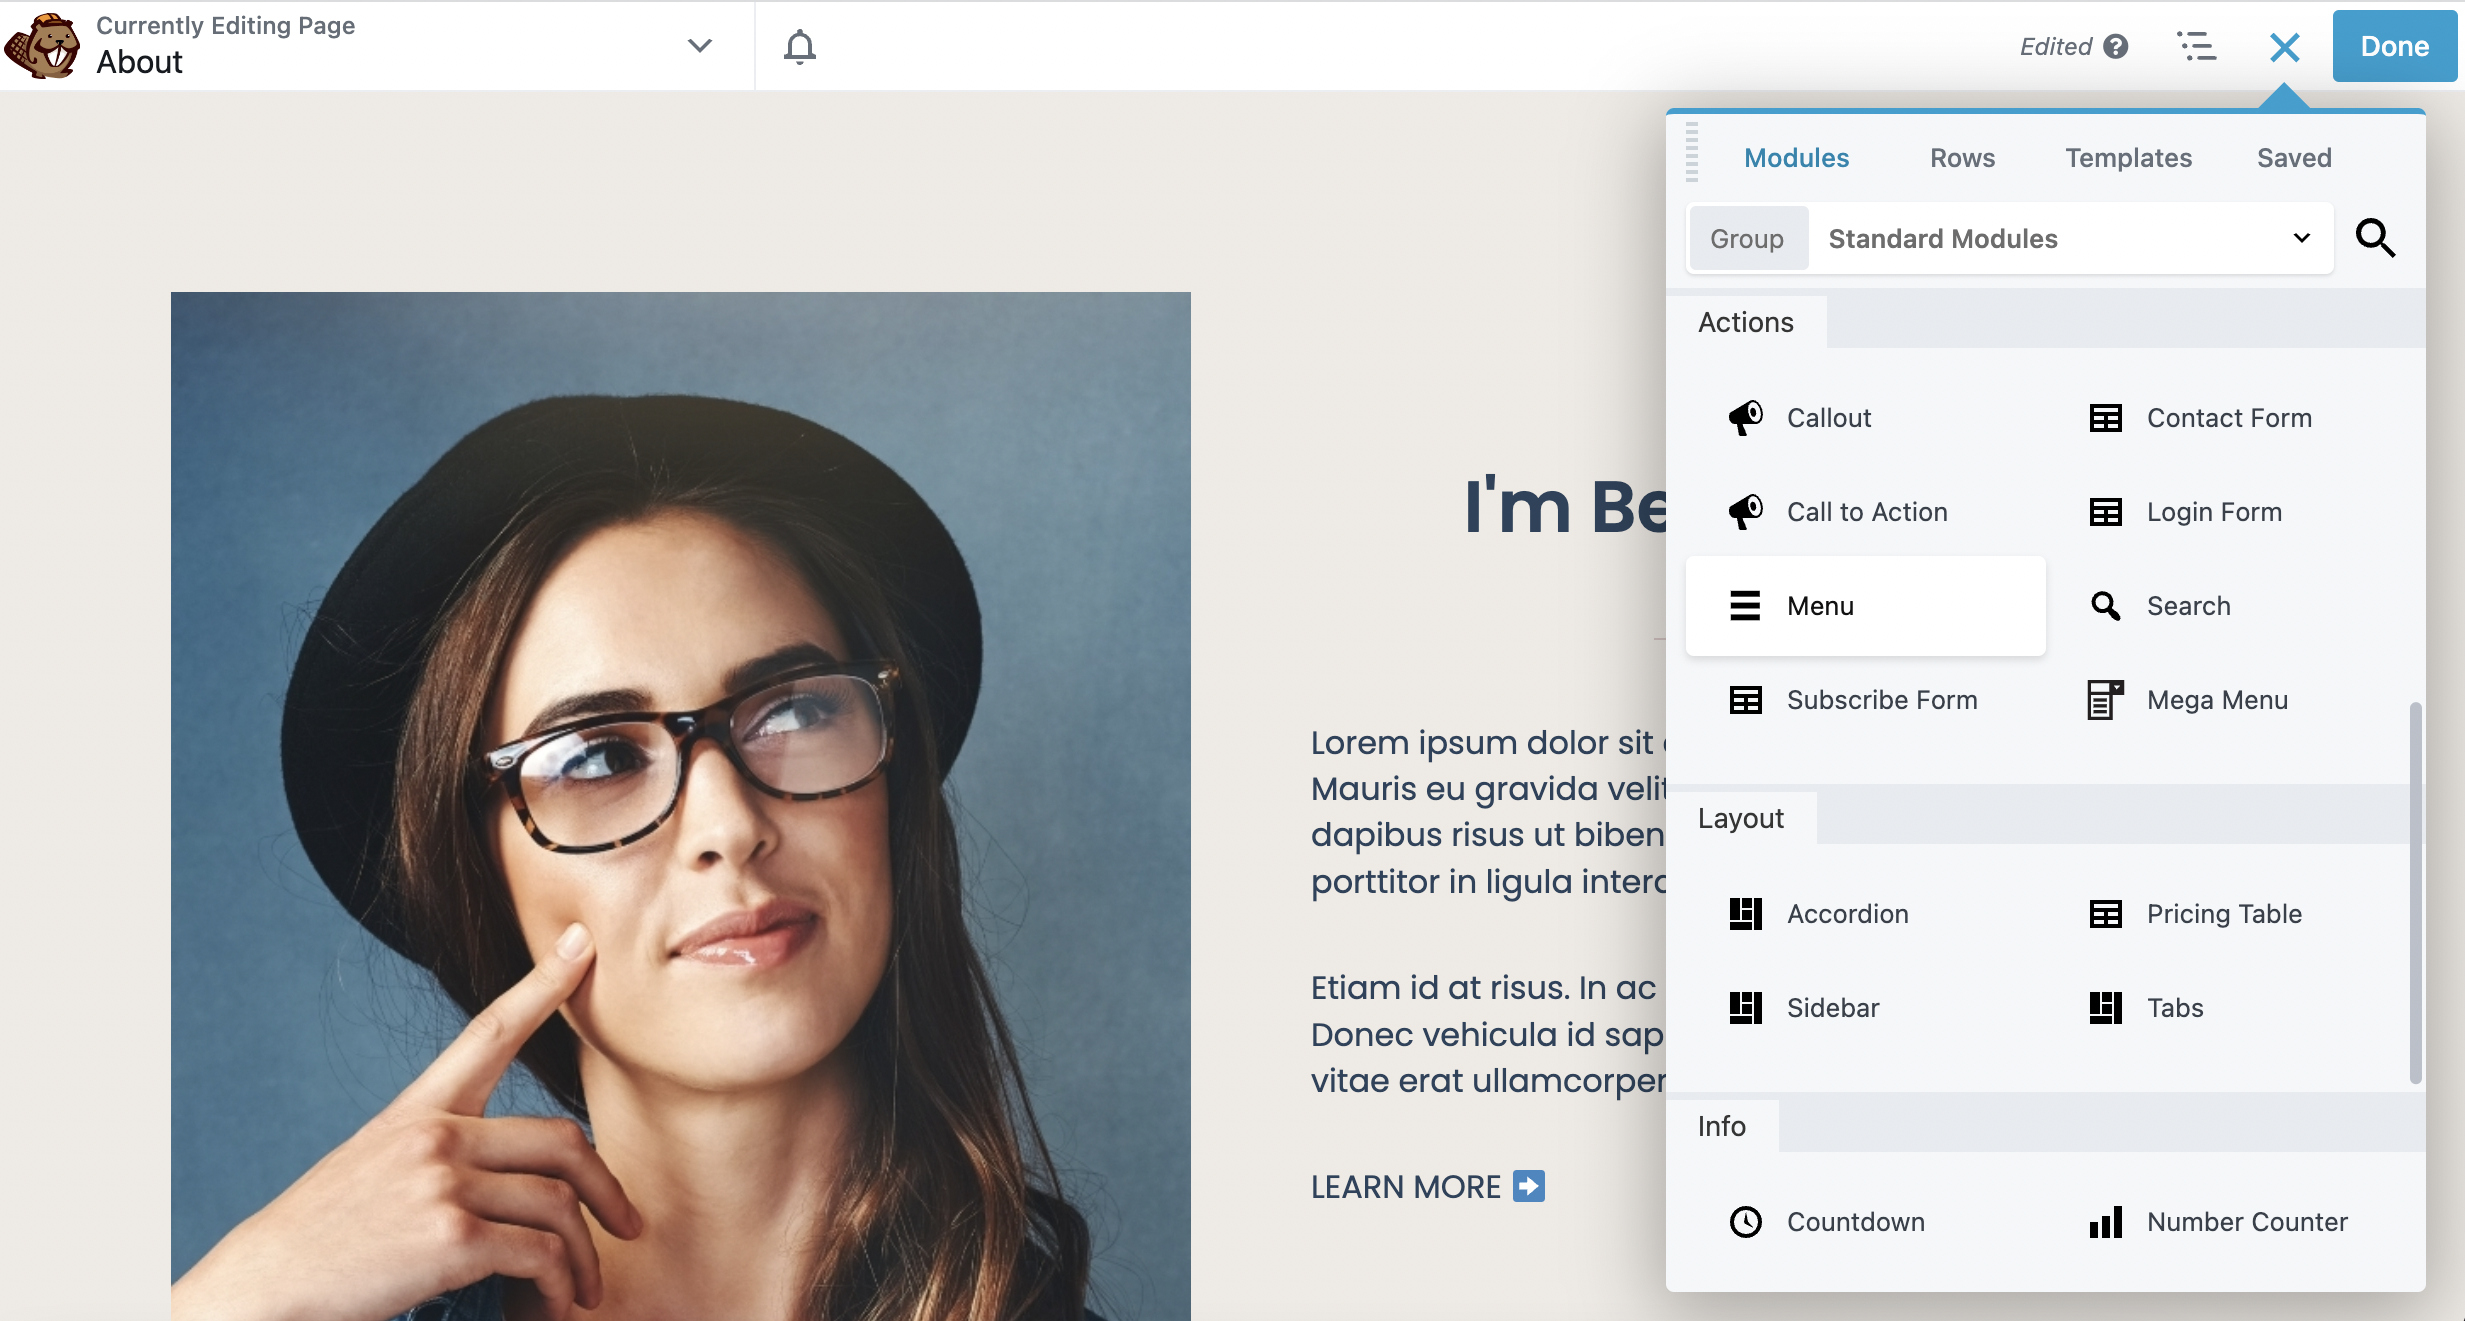
Once you locate it, simply drag and drop this module onto your page. You can put it wherever you want; however, in this example we are going to place it at the top of the page:
This way, your site visitors will be able to access it easily.
Step 3: Configure Your Menu Settings
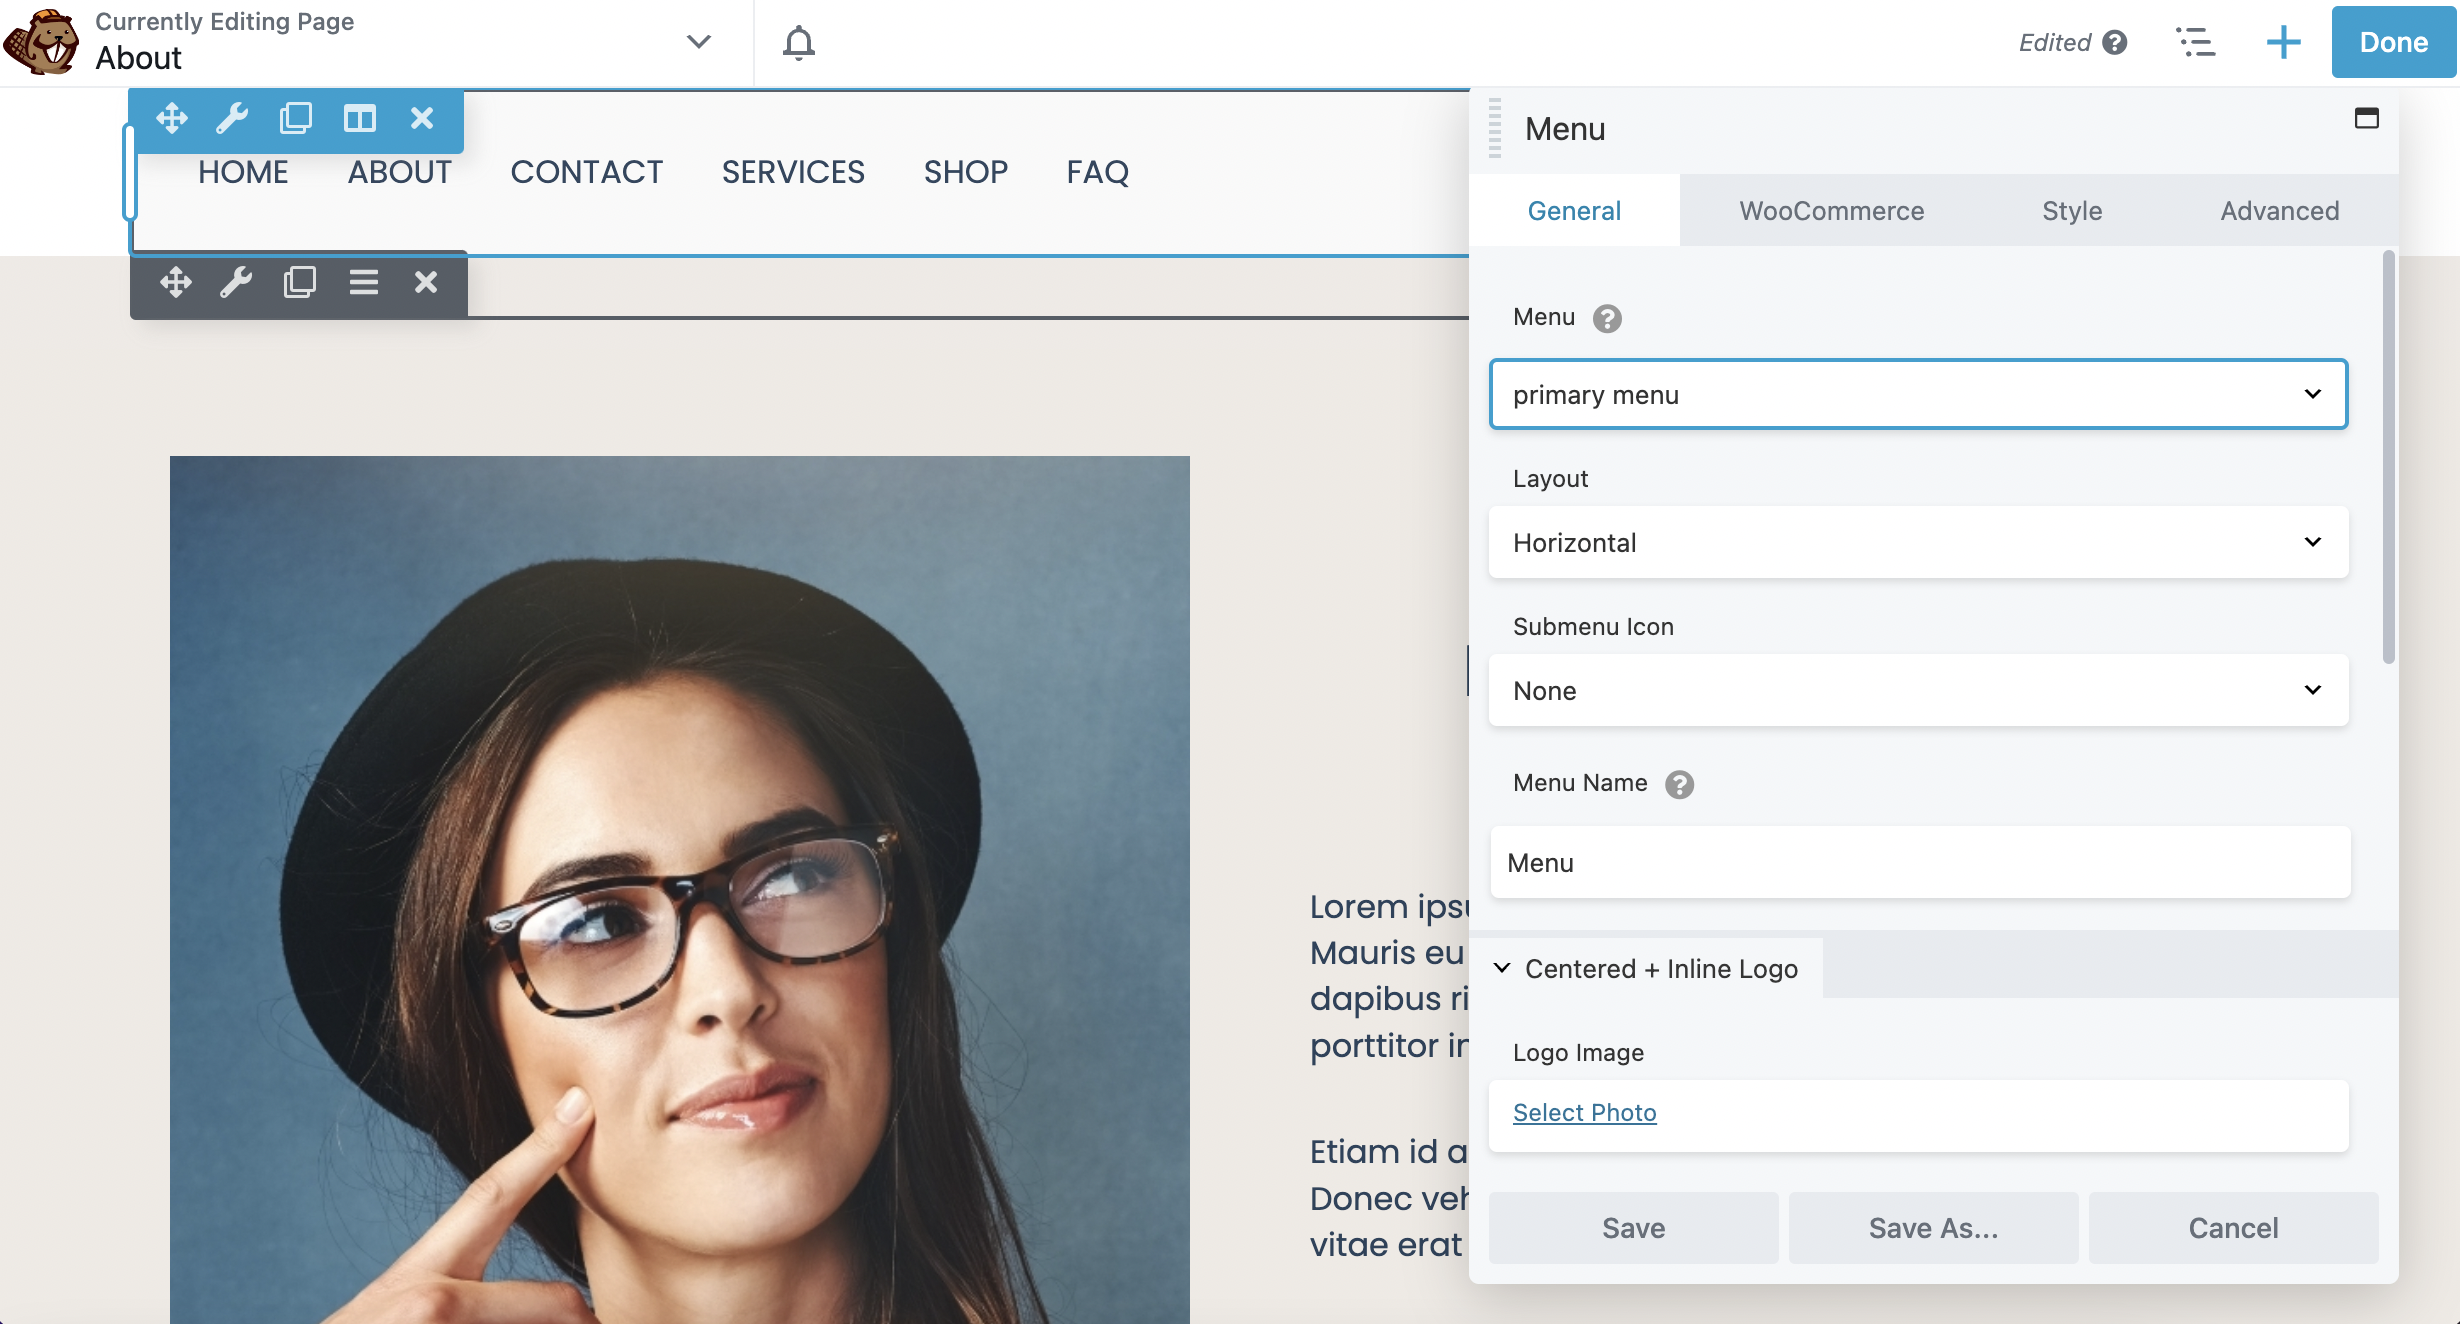
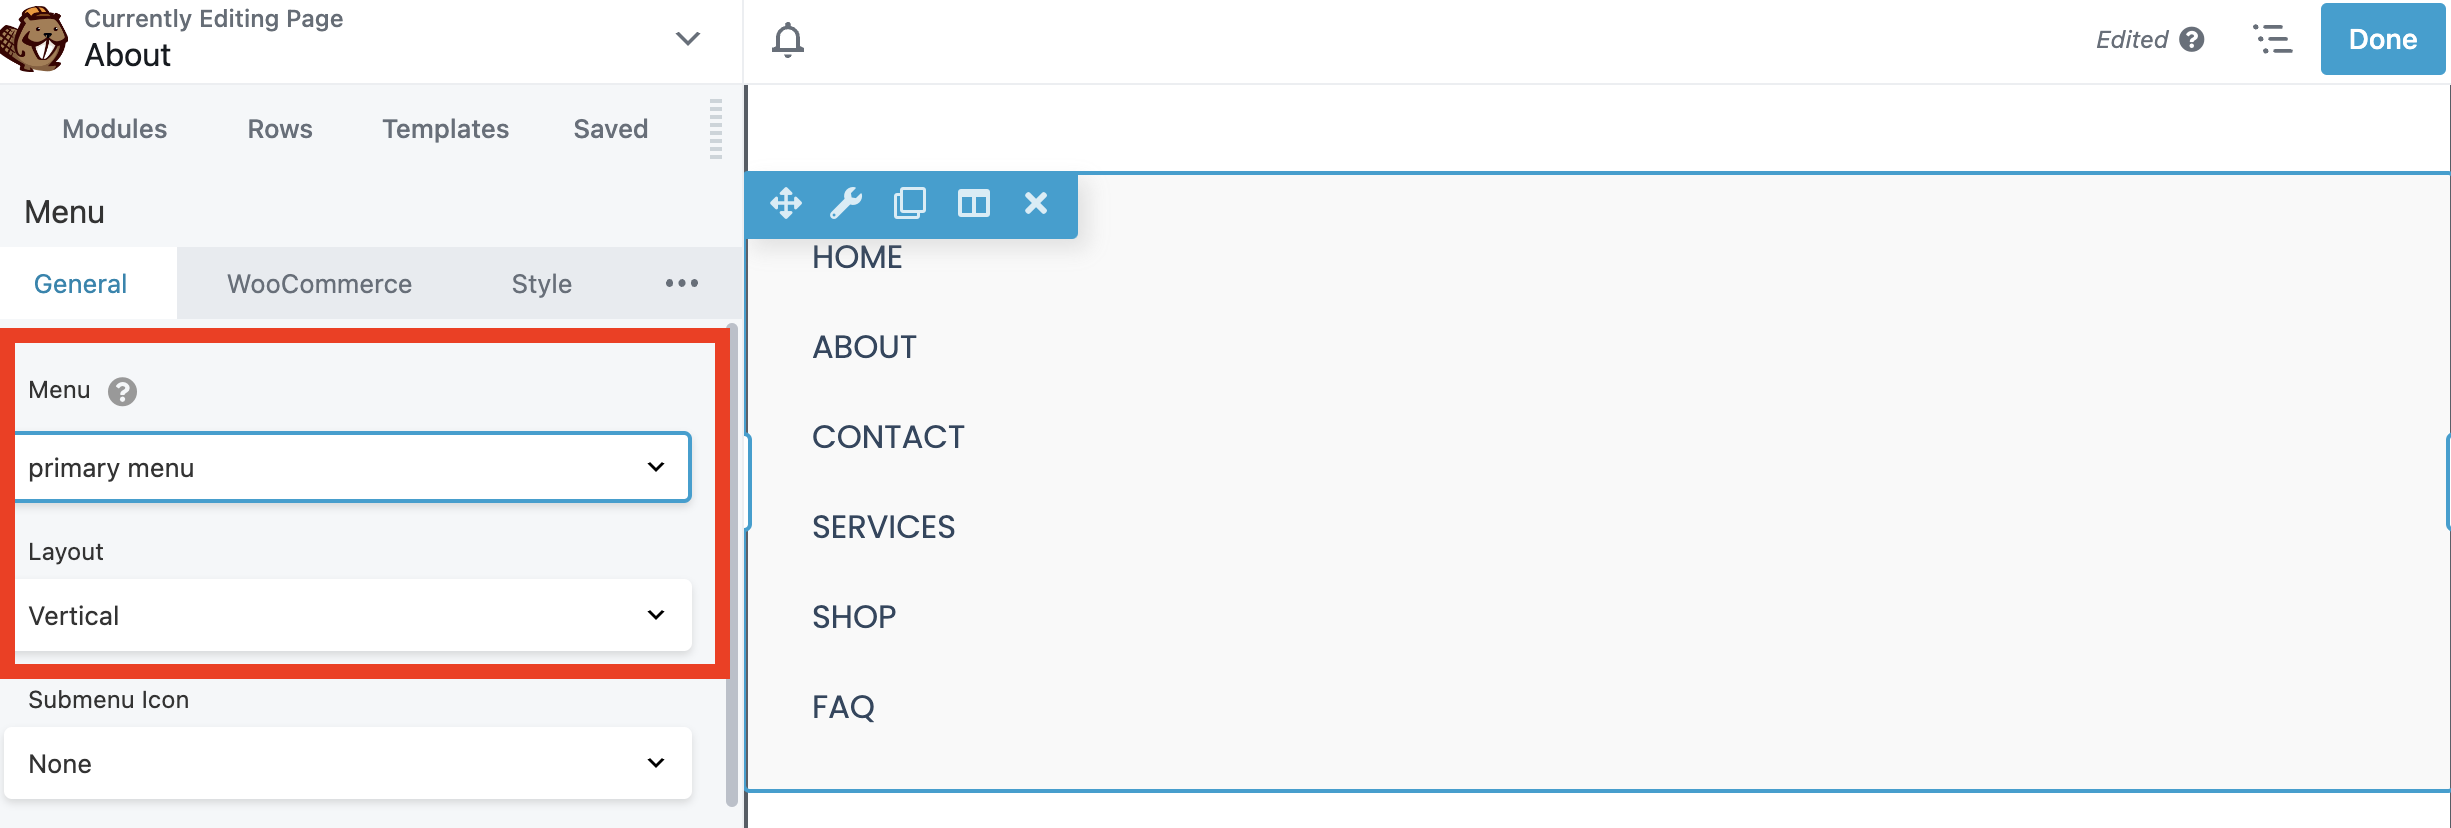
At this point, you’re ready to configure your menu settings. In the editor box under General, the first thing you’ll want to do is select which menu to display. Then you can alter the layout, submenu icons, and the menu name.
The default layout is horizontal. However, you can make it vertical if you prefer that look:
You’re also able to choose what kind of icon is displayed in your submenu. You can select Arrows, Plus sign, or None:
Note that this feature will be displayed on the front end of your site only when you have submenus nested below your main menu items.
Additionally, in the General tab, you can even add your logo to your menu to align with your visual brand. To do this, scroll down to the Logo Image section and click Select Photo to choose your logo from the Media Library:
Regardless of what type of website you have, you’ll also want to make your menu mobile-friendly. To do this, scroll down to the bottom of the Menu Module editor box.
Here, you’ll find the Responsive tab:

The Responsive Toggle default is the Hamburger Icon, which you may be familiar with.
It’s the three horizontal lines stacked on top of each other, which is used to display menus on mobile devices. This icon will optimize your menu for search engines when users are on their smartphones or tablets.
Here you can choose from the following options: Hamburger Icon, Hamburger Icon + Label, Menu Button, or None:
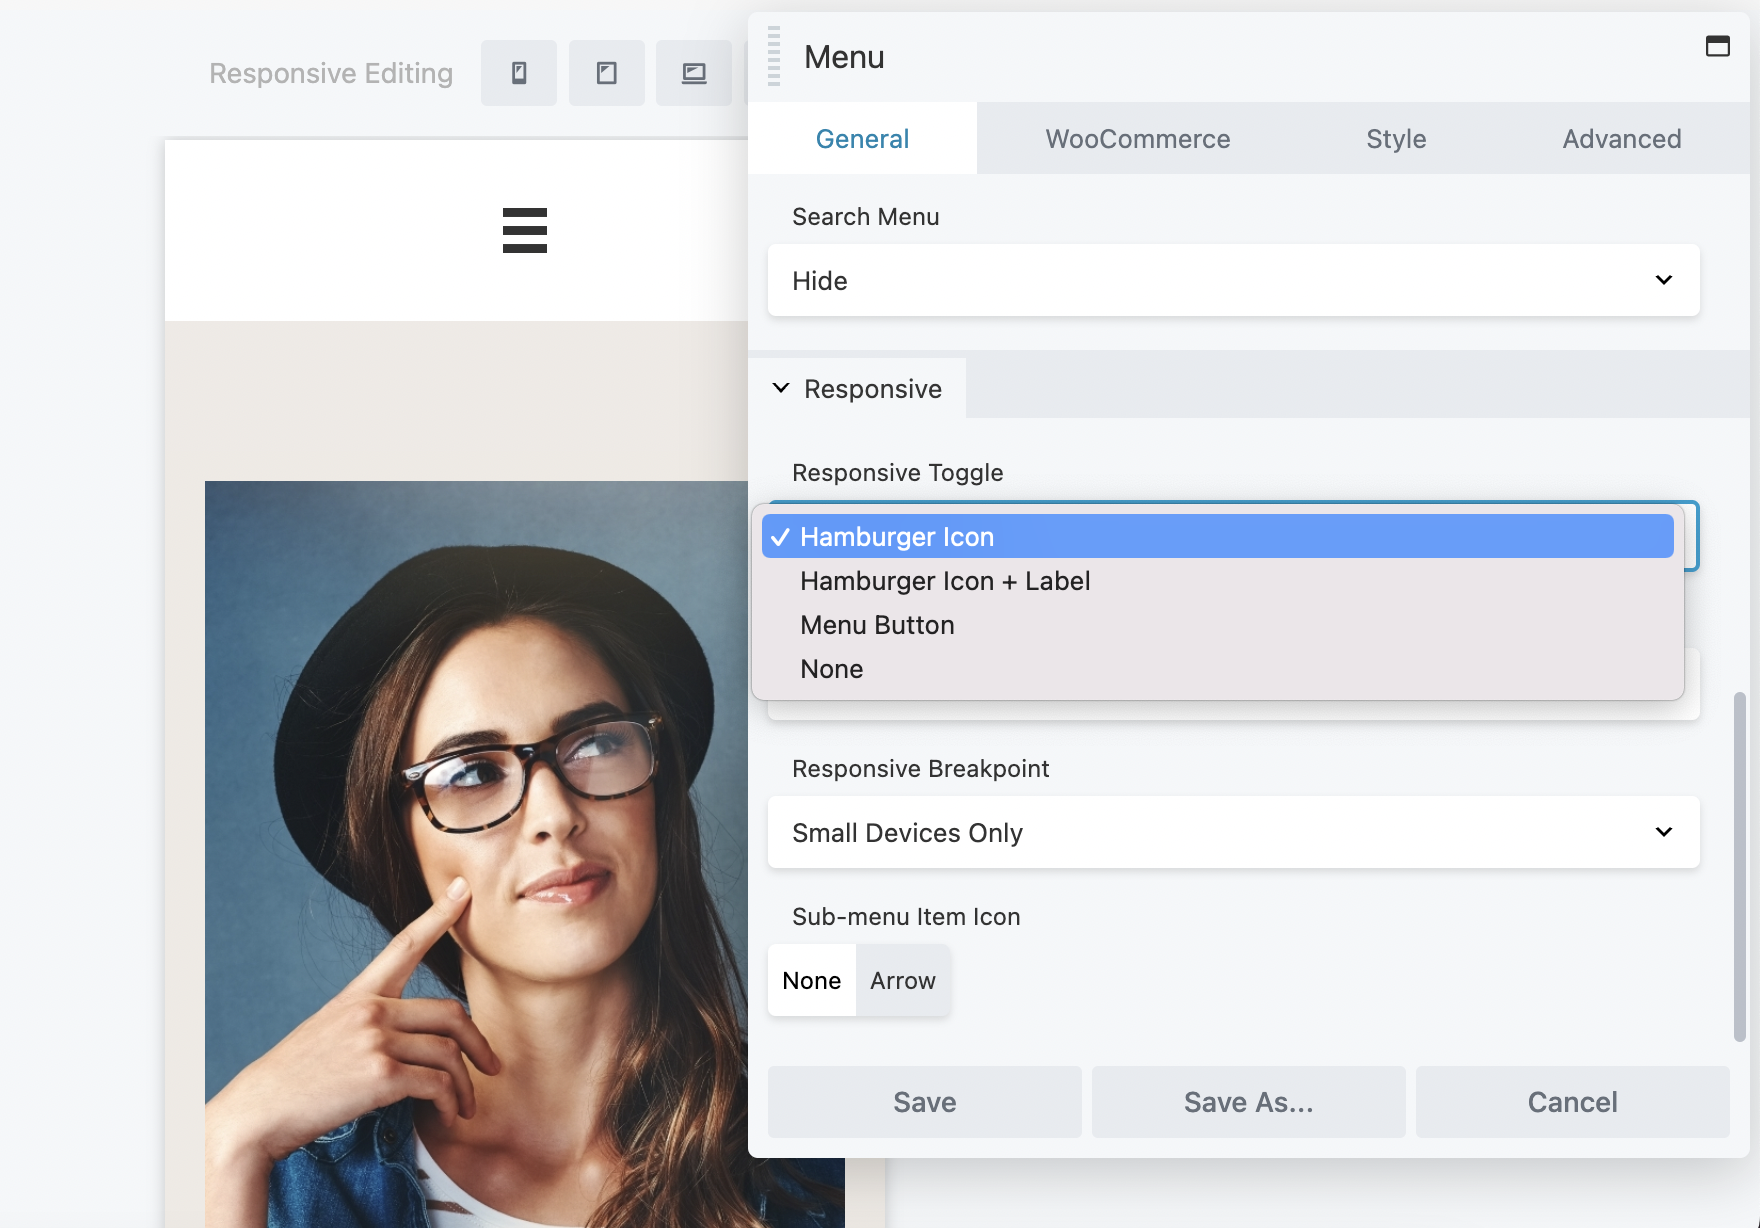
You’re also able to modify the responsive style and breakpoint in this tab. Once you’re done making your selections, click Save.
Step 4: Customize Your Menu
Now it’s time to customize your menu. To get started, click on the Style tab in the Menu Module editor box.
This tab allows you to edit your menu to your liking. You can begin by setting the Menu Alignment. Here you can choose from left, center, or right alignment:
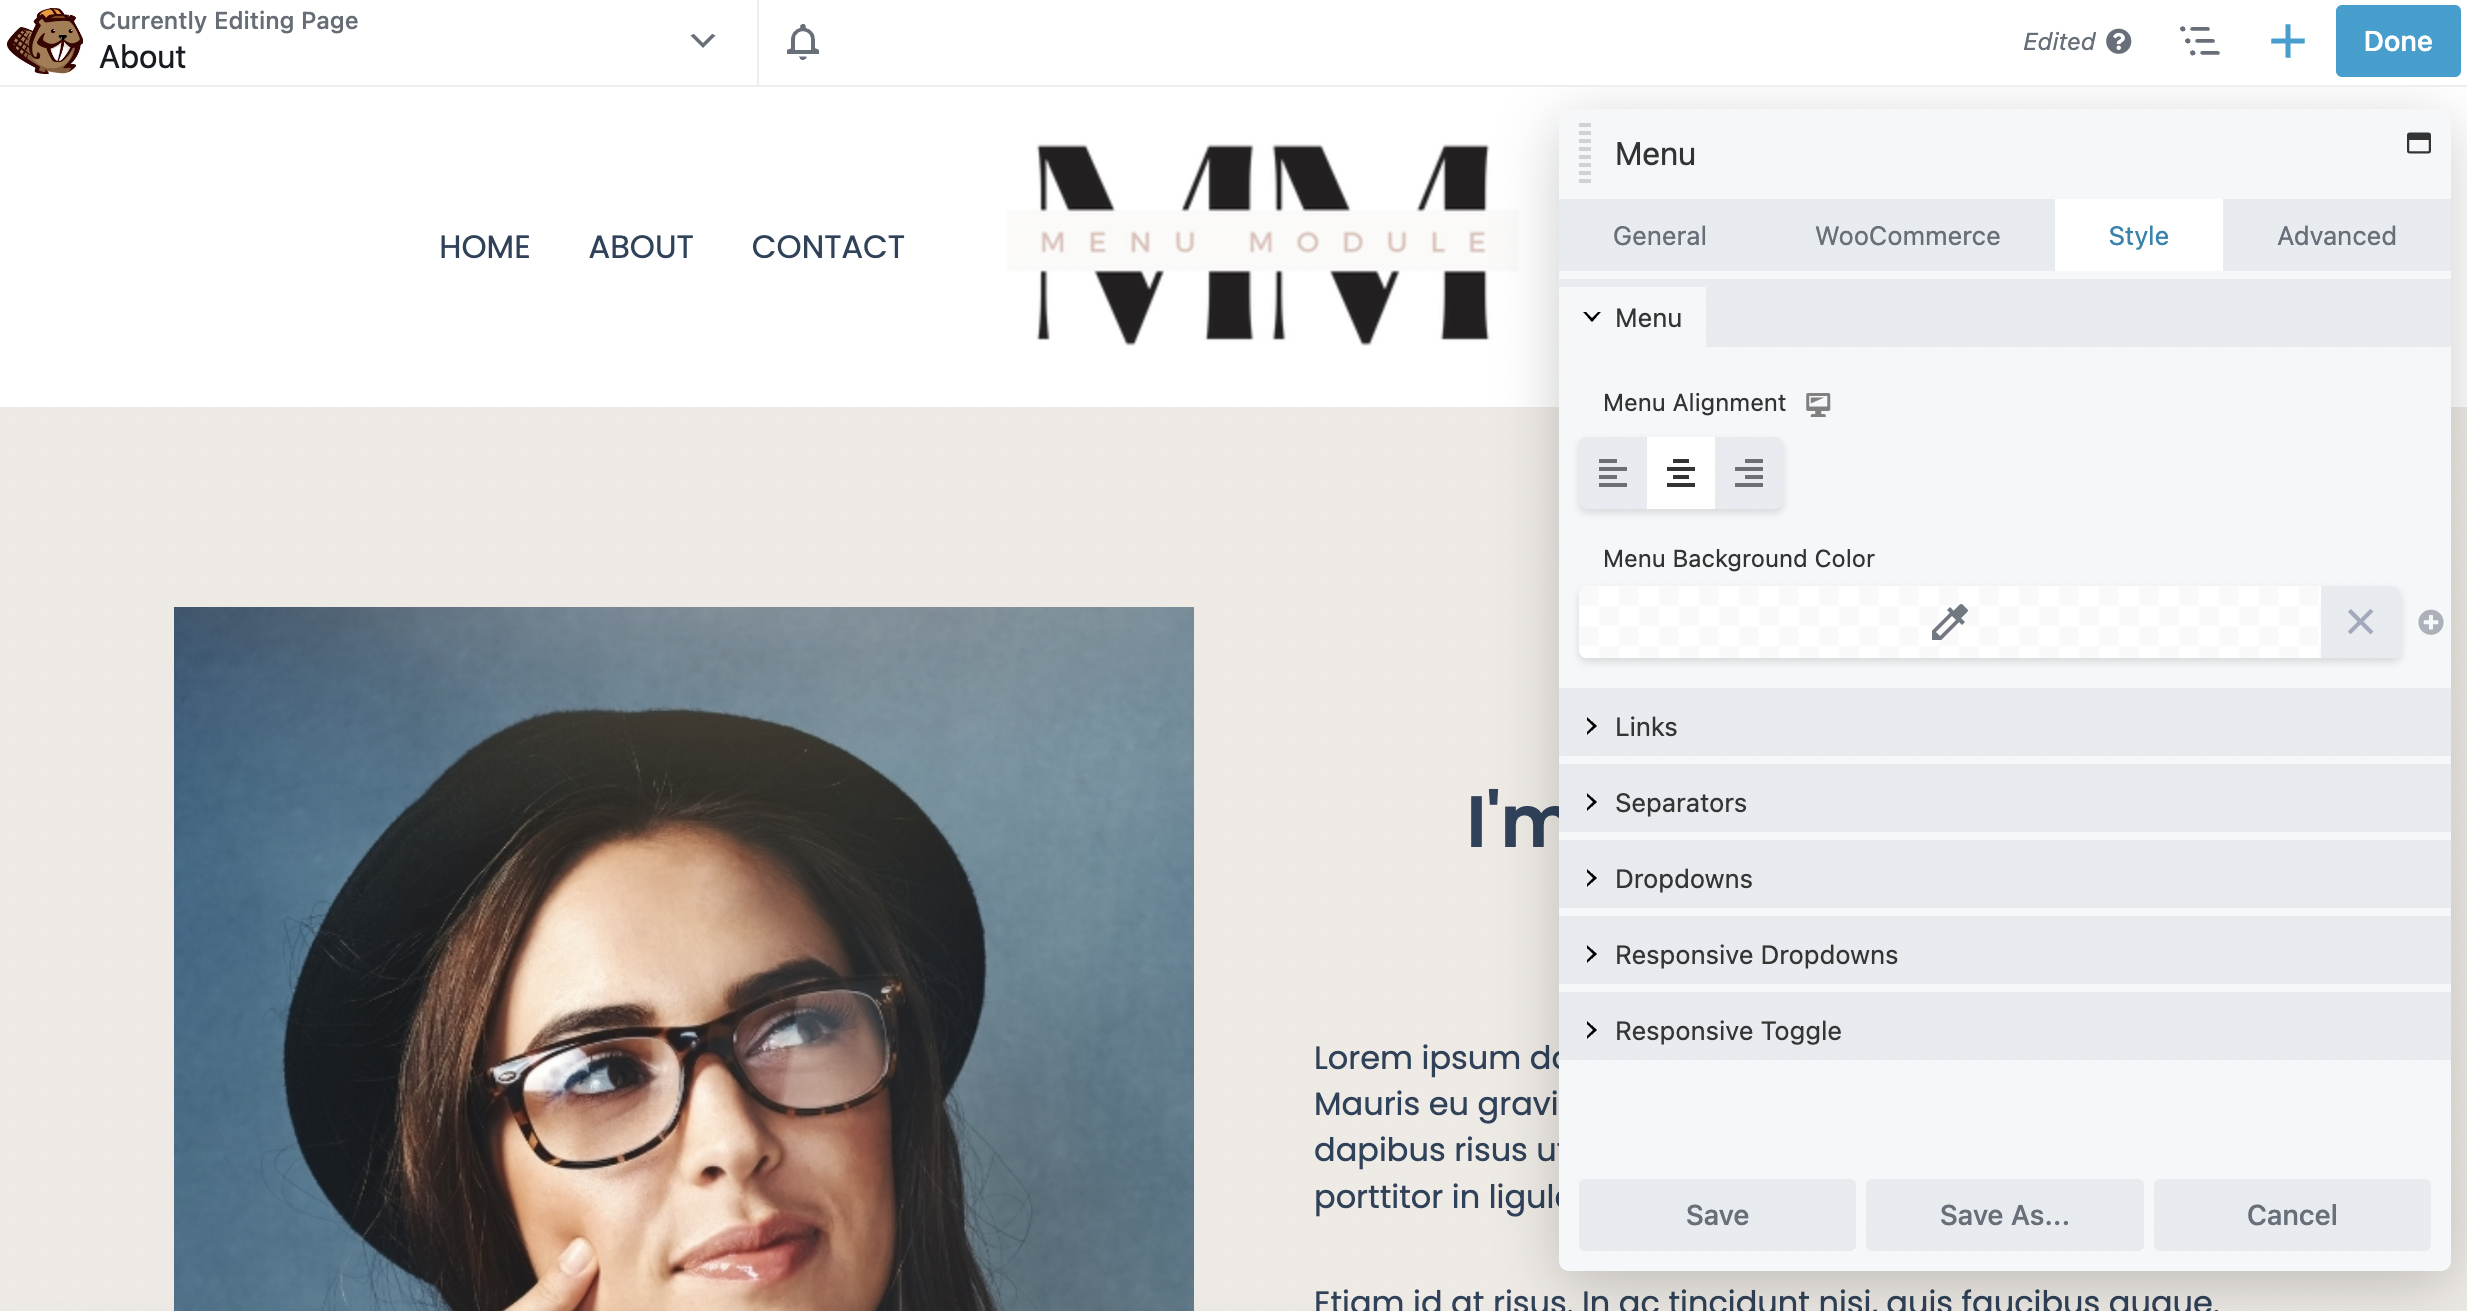
Next, if you wish, you can choose a background color for your menu.
Just below this section, click on Links to edit the link color, link hover color, and link hover background color:
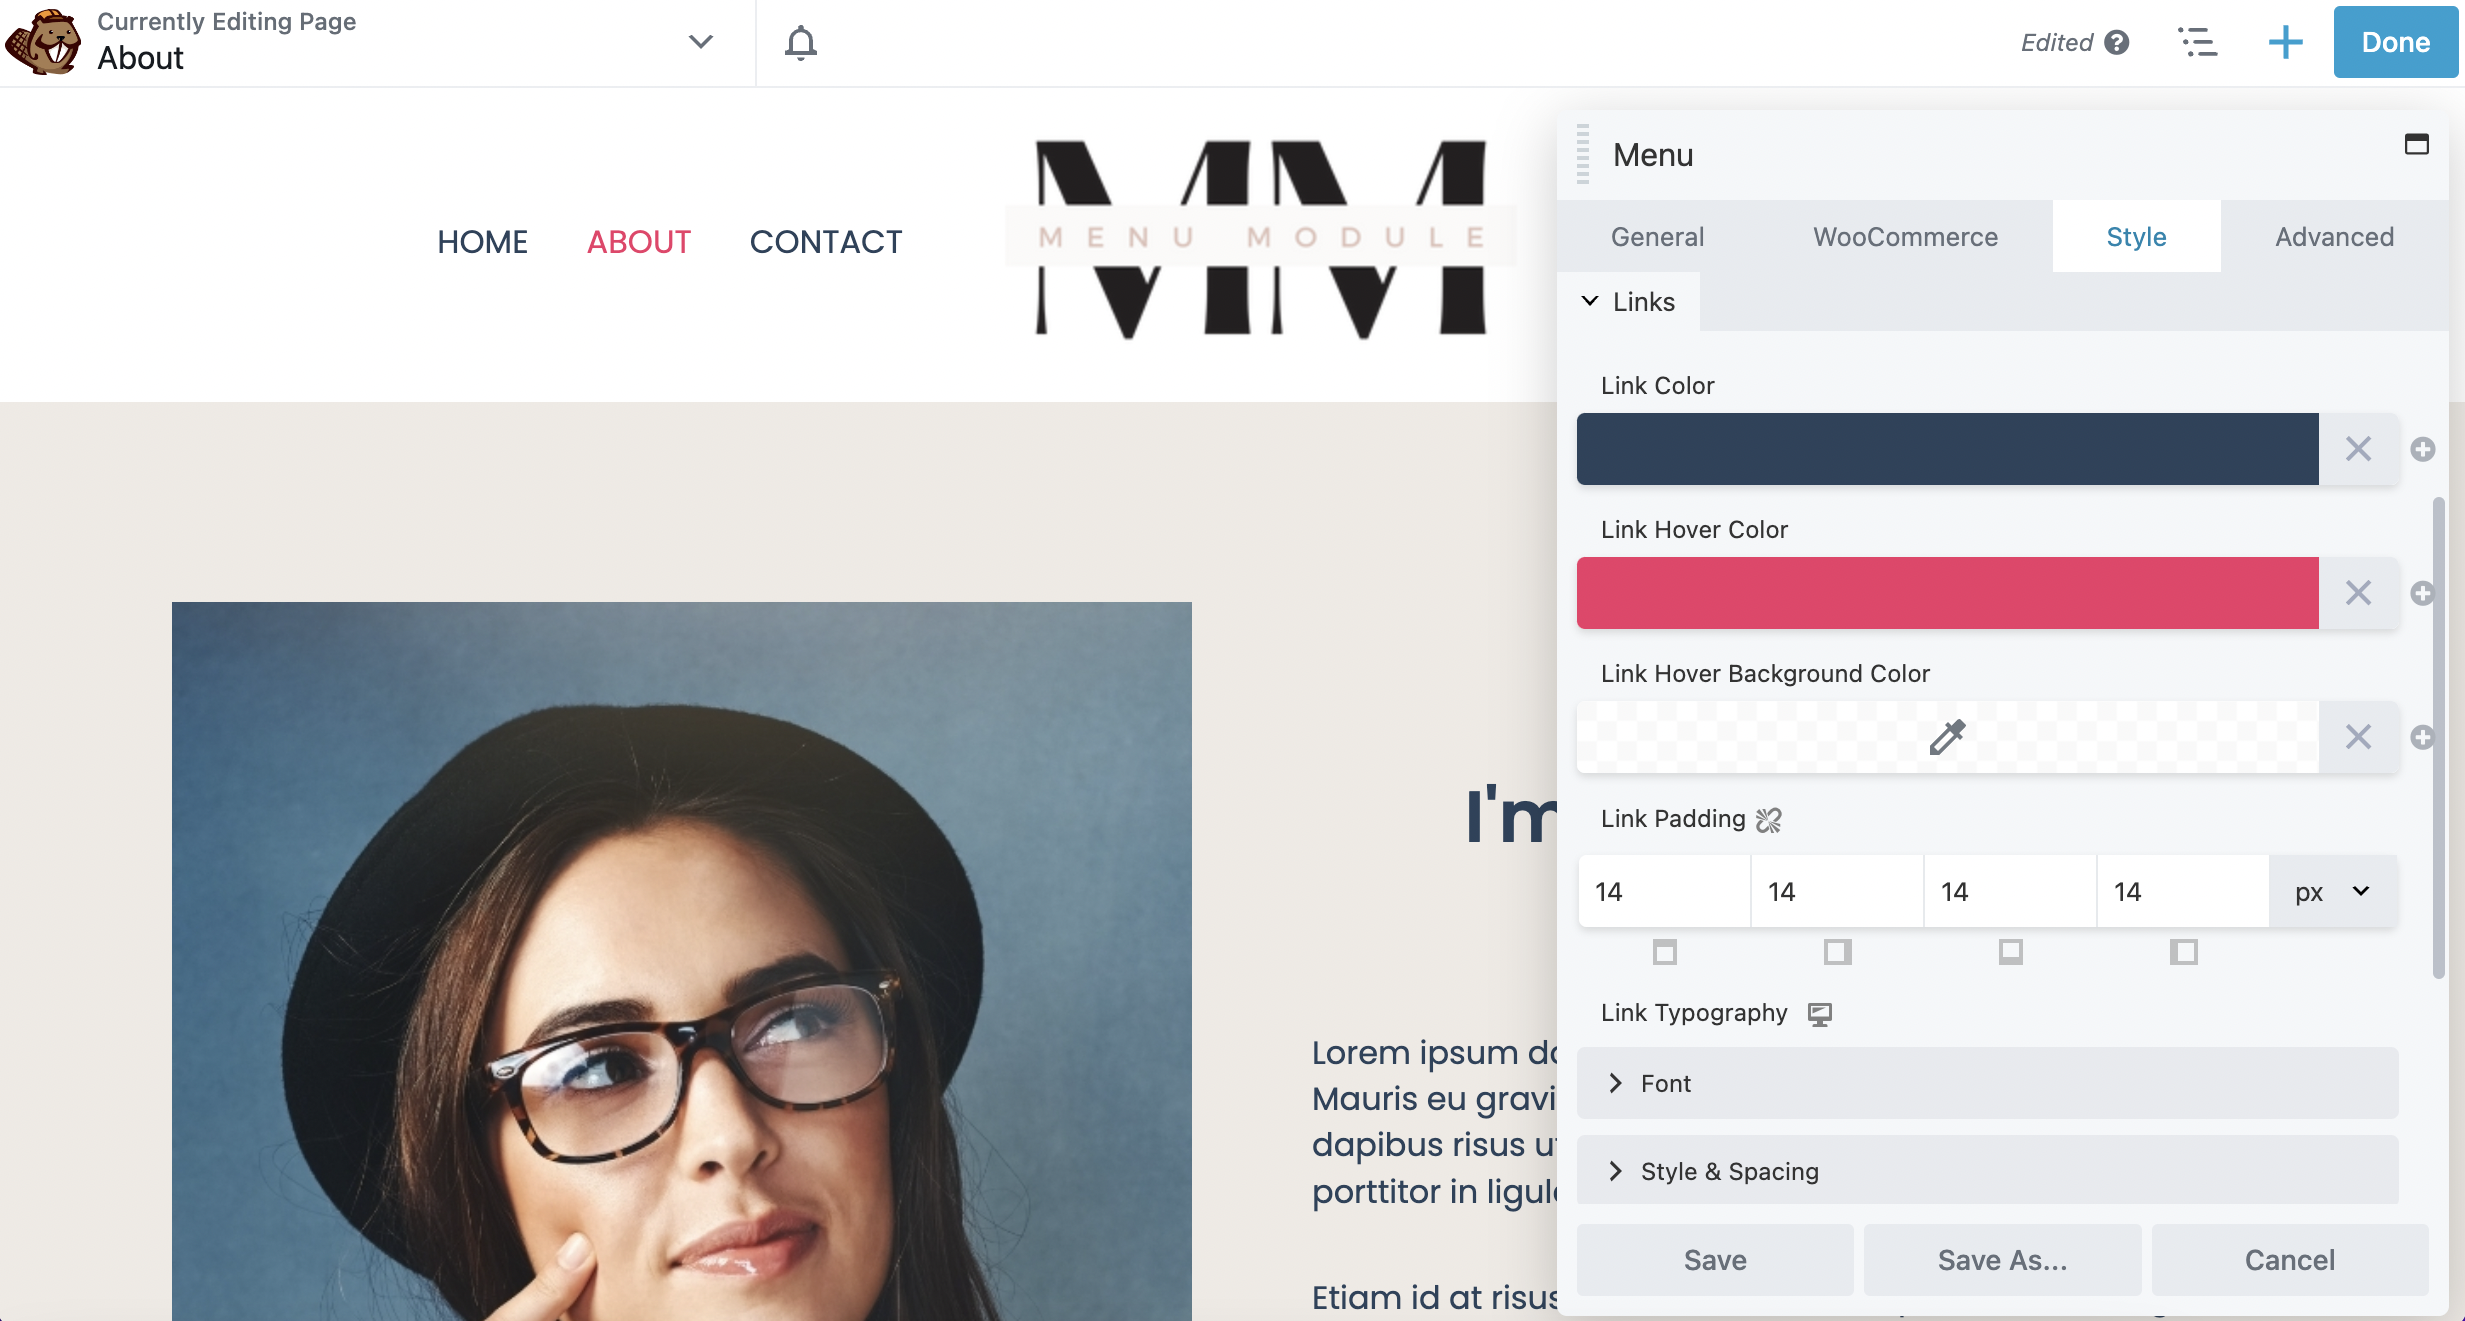
Note that you will only be able to see the hover colors on the front end of your site. Link Padding changes the spacing between your menu items. Scroll down and you can also modify the font family, size, style, and spacing in the Font section.
If you want to edit the style further, you’re able to do so under Style & Spacing. For example, you can switch the font to all uppercase or lowercase under Transform:
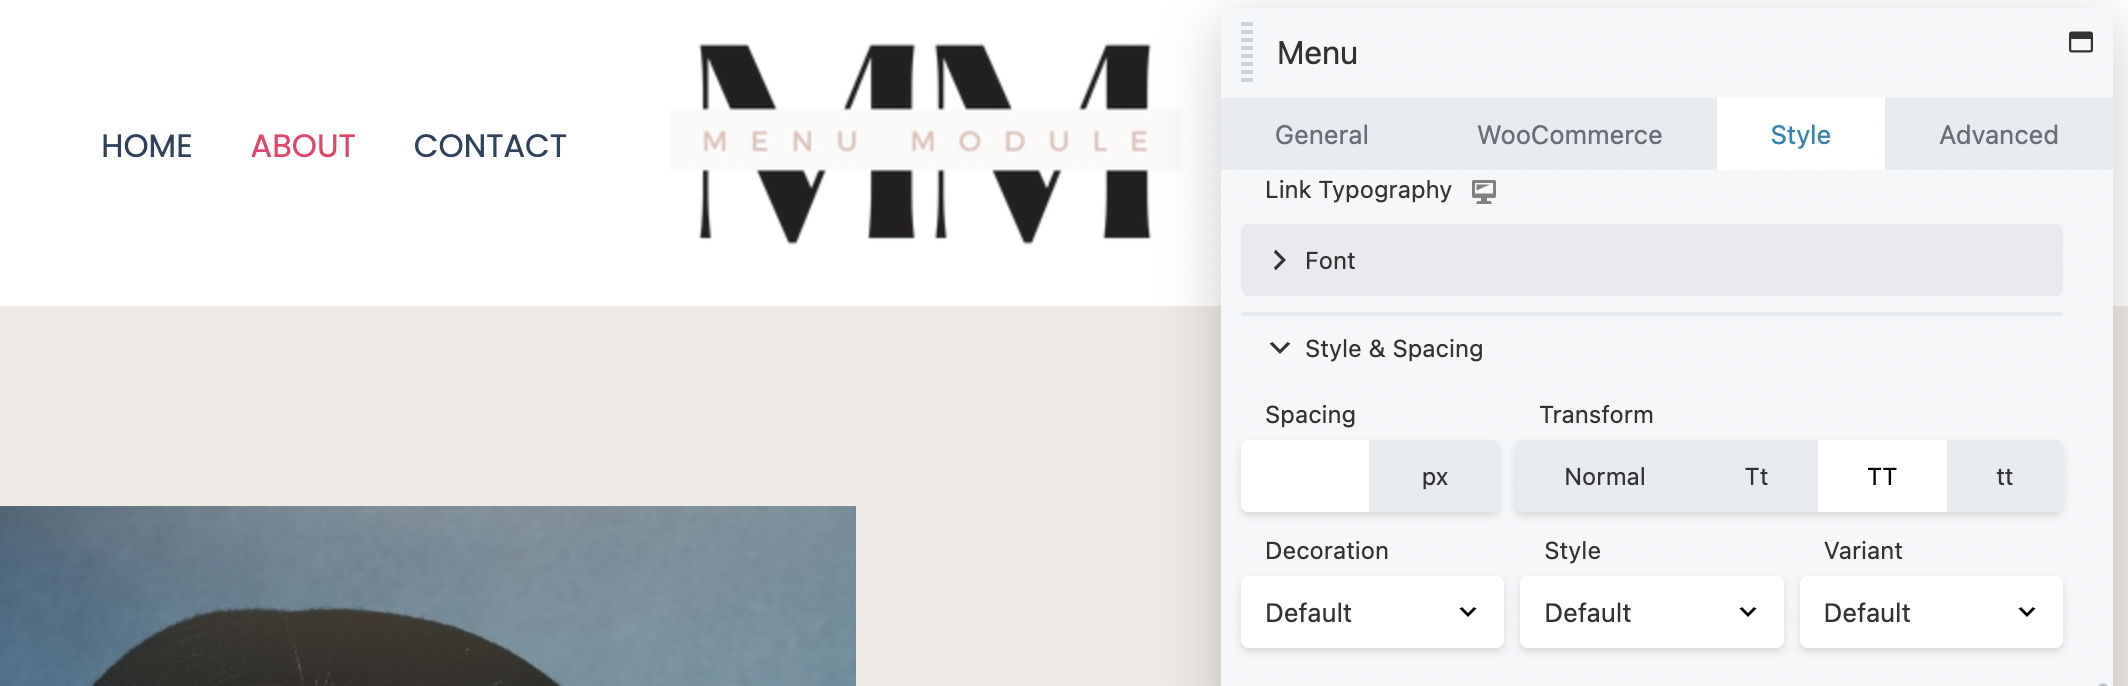
Moreover, you can add an underline or italicize the text using Decoration and Style.
You have the capacity to edit other aspects of your menu as well. For instance, the Dropdown section allows you to style the submenu items including color, link hover color, background color, and padding.
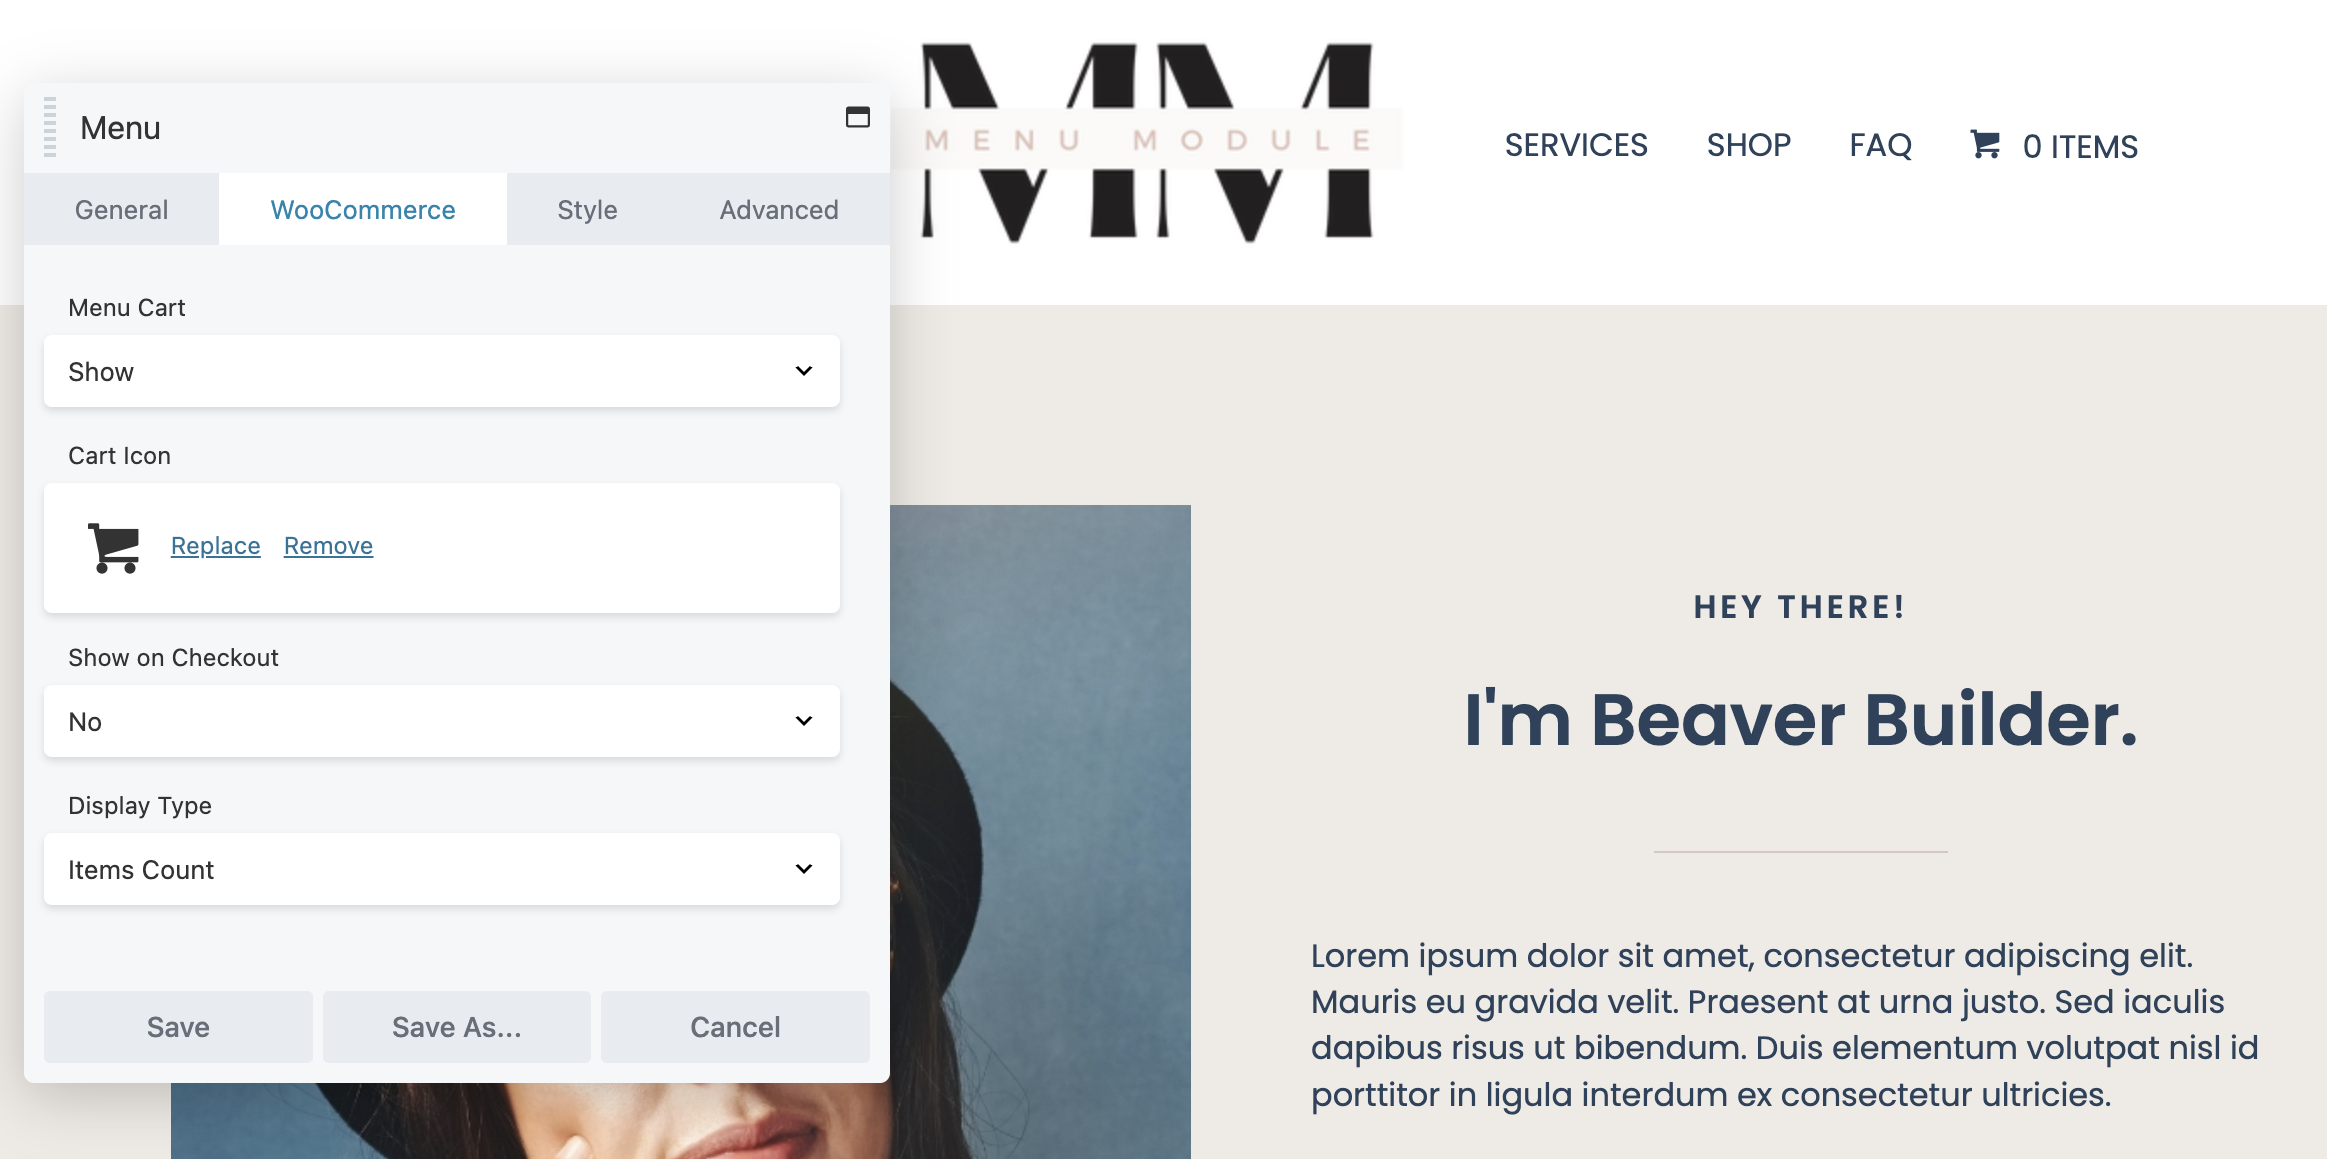
Additionally, if you have a WooCommerce store and want to display a cart item on your menu, go to the WooCommerce tab:
Here, from the Menu Cart dropdown, you can select Show or Hide. In this example, we chose to Show this feature. You can modify elements of your menu cart, including your cart icon and display type:
Once you’ve edited your menu to your liking, simply click on Save at the bottom of the editor box. For even more detailed instructions on adding a Beaver Builder Menu module, you can check out our documentation on the subject.
Step 5: Publish the Page and Test Your Menu
Finally, if you’re satisfied with your menu, you can go ahead and click Done and Publish at the top right of the page:
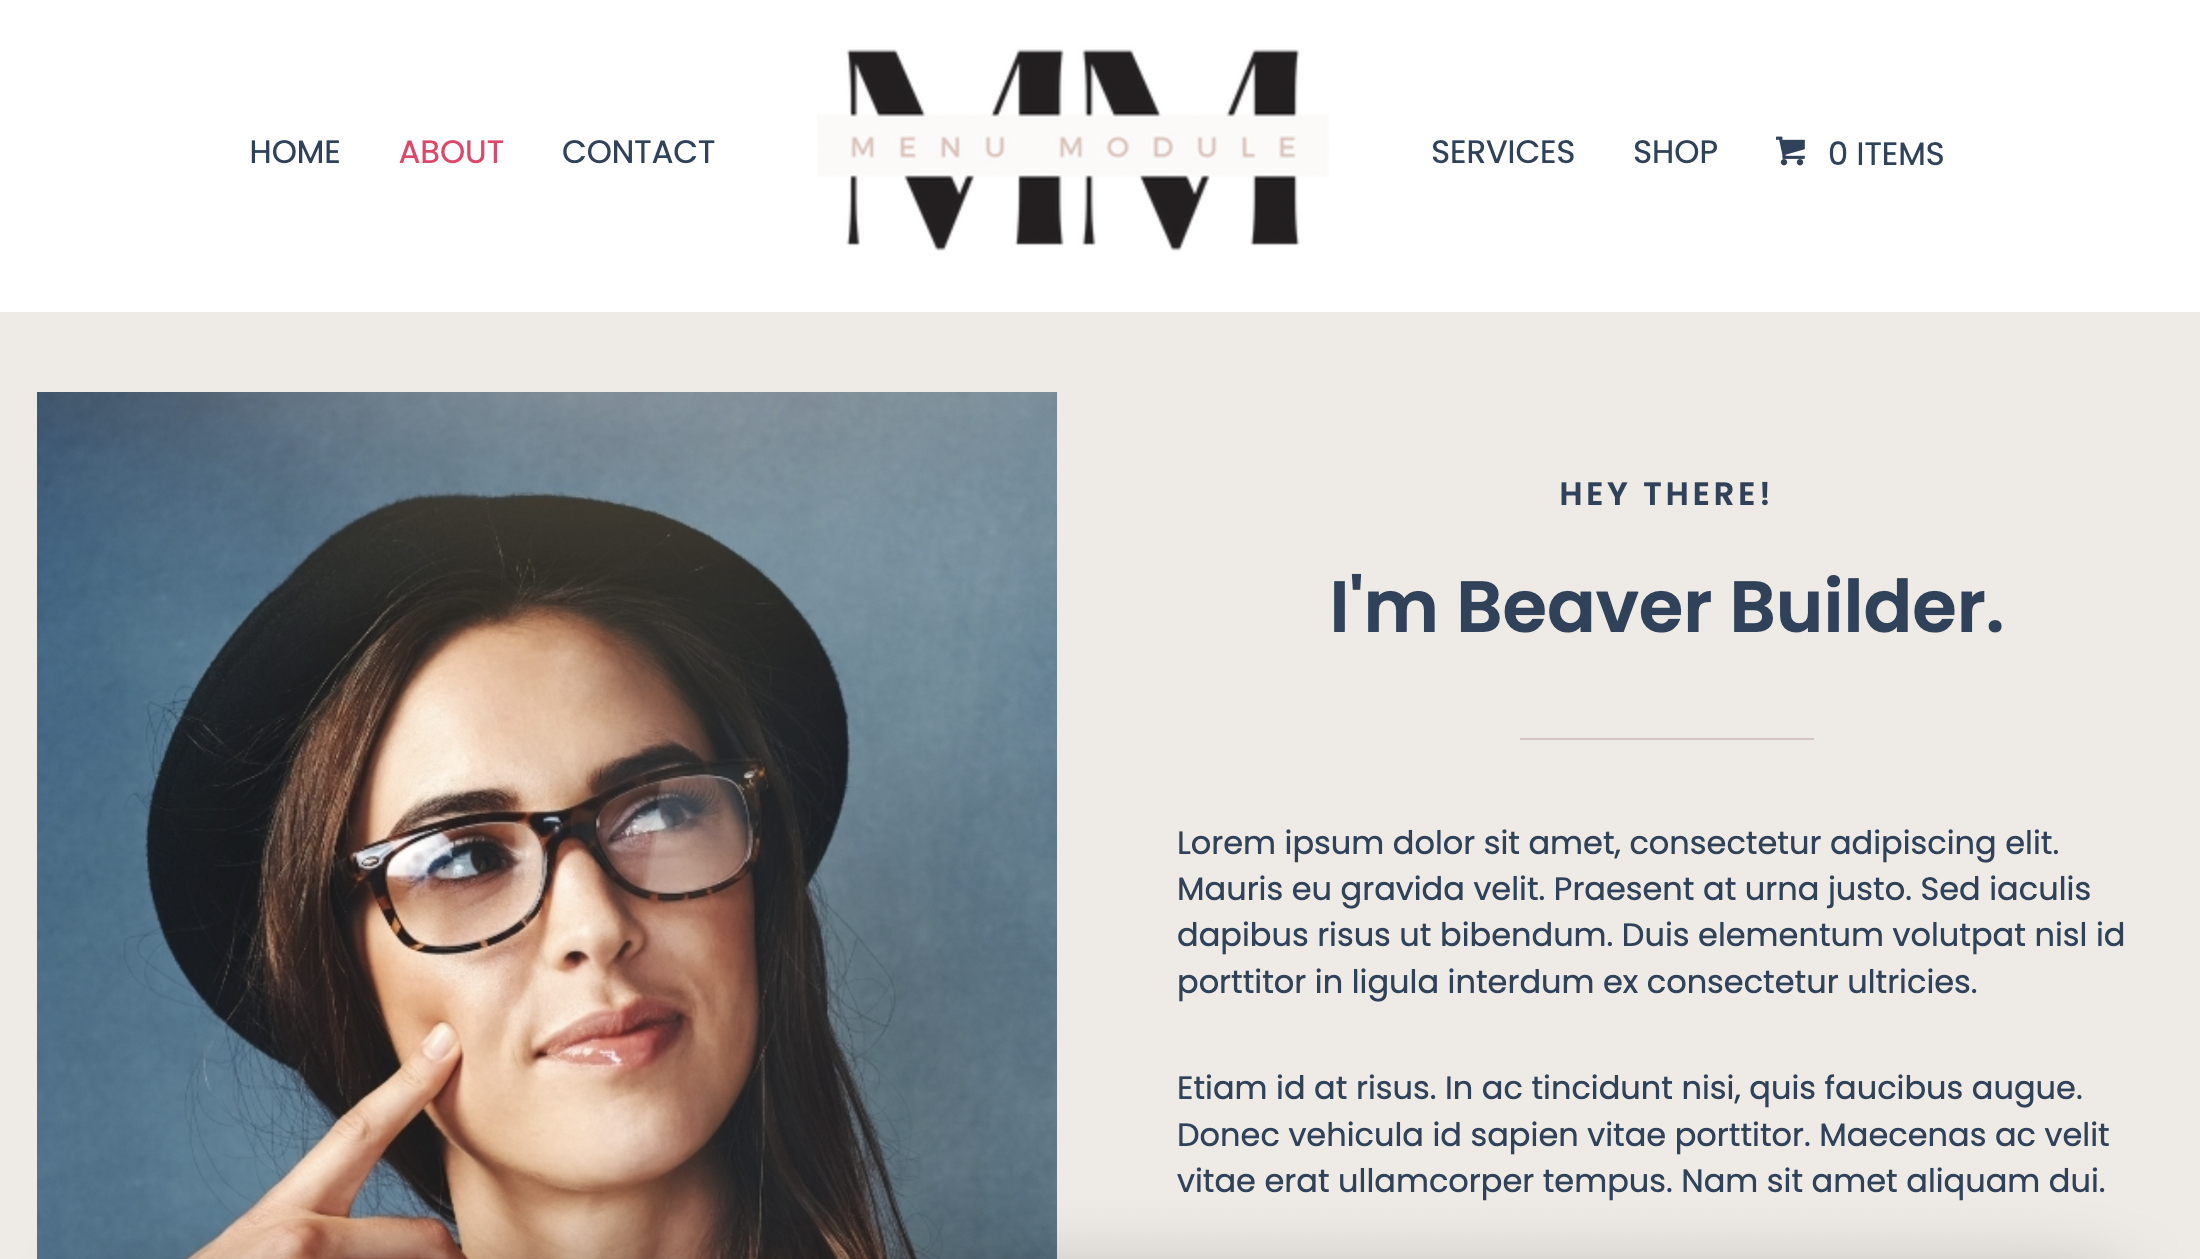
You can click on some of the navigation menu items to make sure they go to the correct pages. It might also be a good idea to test out your shopping cart link.
If you’re looking for enhanced customization options, you might consider using the Menu module with Beaver Themer. Combining these two powerful tools will give you even more control over your menu designs.
For example, you’ll be able to add the Menu module to the Beaver Themer Header template. This enables you to easily choose which pages to display your menu on.
That’s it! You should now have a fully functioning menu. This new feature will help your site’s visitors find what they’re looking for more easily.
Conclusion
When you add a menu to your WordPress site, you can easily present content to visitors in an organized and professional way. The Beaver Builder Menu module enables you to create a user-friendly and accessible webpage. This can result in better SEO performance and a smoother user experience.
To recap, here’s how to add and use the Beaver Builder Menu module in five steps:
- Create a menu.
- Add the Menu module to your page.
- Configure your menu settings.
- Customize your menu’s appearance.
- Publish the page and test your menu.
Related Questions
What is a module in Beaver Builder?
Modules are the basic building blocks used in the Beaver Builder page builder to create pages. The premium plugin features a large selection of modules to suit nearly any layout, from basic text and photos to advanced sliders and Call to Action (CTA) elements.
What’s the difference between the Beaver Builder Page Builder and Beaver Themer?
The Beaver Builder Page Builder plugin helps you create pages in WordPress; whereas, Beaver Themer is a Beaver Builder add-on that enables you to create theme templates, theme parts, and more. Meaning you’re able to fully control and customize the appearance of your website’s design.
Our Newsletter
Our newsletter is personally written and sent out about once a month. It's not the least bit annoying or spammy.
We promise.
Try Beaver Builder Today

Related articles

Beaver Builder AI: Build WordPress Layouts with AI (Now in Alpha)
Hey everyone! Big news. After a long time of building behind the scenes, Beaver Builder AI is here. The alpha…

How Beaver Builder Products Work Together to Build Flexible WordPress Websites
Building a WordPress website often means stitching together a theme from one developer, a page builder from another, and a…

From Azeroth to WordPress: How Warcraft Tavern Uses Beaver Builder
Since releasing Beaver Builder 12 years ago, a feeling will come up from time to time that just never gets…
Join the community
We're here for you
There's a thriving community of builders and we'd love for you to join us. Come by and show off a project, network, or ask a question.
Since 2014
Build Your Website in Minutes, Not Months
Join Over 1 Million+ Websites Powered By Beaver Builder.