
Google introduced its Core Web Vitals as a way to measure how quickly websites load and become usable. These metrics factor heavily into Search Engine Optimization (SEO), and can have a major impact on how well your pages rank in search results. Fortunately, there are steps you can take to improve these vitals on WordPress sites.
In this post, we’ll explain what the Core Web Vitals are and why it’s important to pay attention to them. Then we’ll share seven steps for optimizing your WordPress site for these metrics.
An Introduction to the Core Web Vitals
Google introduced its Core Web Vitals to focus on the User Experience (UX) of websites. These metrics are designed to measure page load speed, interactivity, and how stable a page is upon loading.
The first Core Web Vital we’ll discuss is Largest Contentful Paint (LCP). This measures the elapsed time between a user clicking a link and the content becoming visible. The critical thing to remember is that LCP is measured from the user’s point of view.
Next, we have First Input Delay (FID). Once again, this metric is considered with the end user in mind. FID evaluates how long a user must wait before being able to interact with a website. Interaction might include anything from clicking on a navigation link to entering information into a field.
Finally, Cumulative Layout Shift (CLS) measures a page’s visual stability. If a page has a high CLS, the content isn’t stable and it shifts as it loads. This shifting can be highly frustrating for users, especially those on mobile devices.
Why the Core Web Vitals Are Important
Soon, page experience will start affecting search rankings. While the Core Web Vitals aren’t the only pieces of the UX puzzle, they do make up a significant part of it.
Page load speed has been a focus for website owners for a long time now. While this metric is crucial, the Core Web Vitals recognize that there is more to a quality website than how fast content is displayed.
Late last year, Google announced that the Core Web Vitals would be used for ranking purposes starting in May of 2021. Other UX-related signals, including mobile-friendliness, safe browsing, and implementation of HTTPS, would also factor into rankings.
It’s also possible that Google will launch a visual indicator on search results that meet this new criterion. As more websites begin to adhere to these user-focused guidelines, those that ignore them will likely suffer on the Search Engine Results Pages (SERPs).
Fortunately, Google is very clear about its expectations, and there are plenty of tools available to help with these improvements. Even if you haven’t started bringing your site up to par, you still have time to do so.
How to Optimize Your Site for the Core Web Vitals (In 7 Steps)
Now that we’ve covered what the Core Web Vitals are and why they’re essential, let’s explore how to optimize your site with them in mind.
Step 1: Determine Your Current Core Web Vitals Score
Before you attempt to improve your site’s performance, you should have an idea of where it currently stands. You can quickly do this using Google’s PageSpeed Insights:
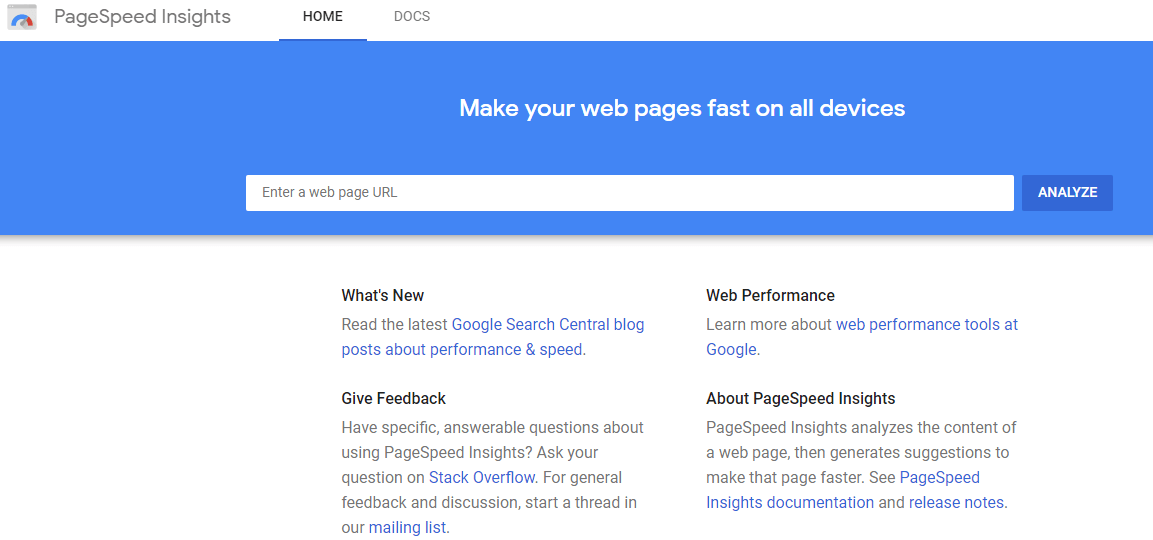
You can get started by typing in your site’s URL and clicking on the Analyze button. You should have results for both mobile and desktop in a minute or two. The Core Web Vitals are displayed near the top of the results:
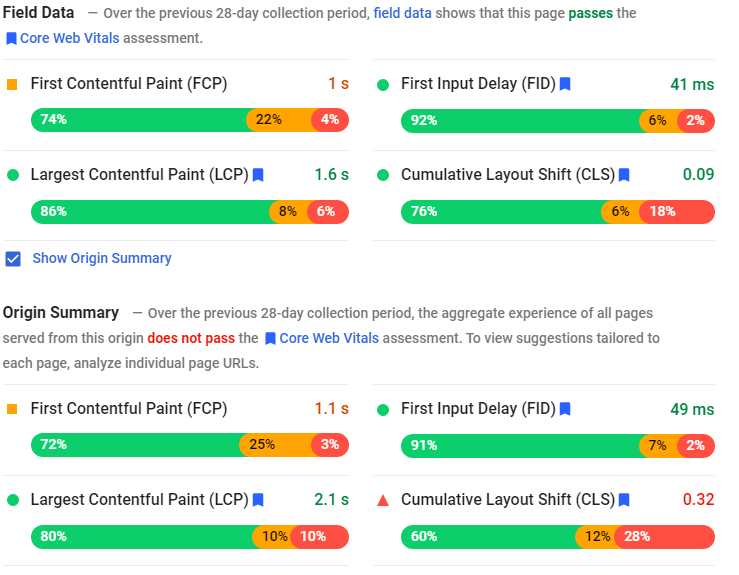
The report also gives you suggestions for improvements. Now that you have an idea of your site’s current ranking and its weak areas, you can begin optimizing your site to improve your score.
Step 2: Take Advantage of Lazy Loading
Implementing lazy loading is an excellent place to start, primarily if you use large images on your website. With lazy loading enabled, media won’t be displayed until a user scrolls to that point on the page. This can potentially improve your LCP score.
Lazy loading also comes with some other benefits. It should help you use less bandwidth, as unnecessary elements won’t be loaded. You may even see an improvement in your site’s overall performance when there’s less demand for its resources.
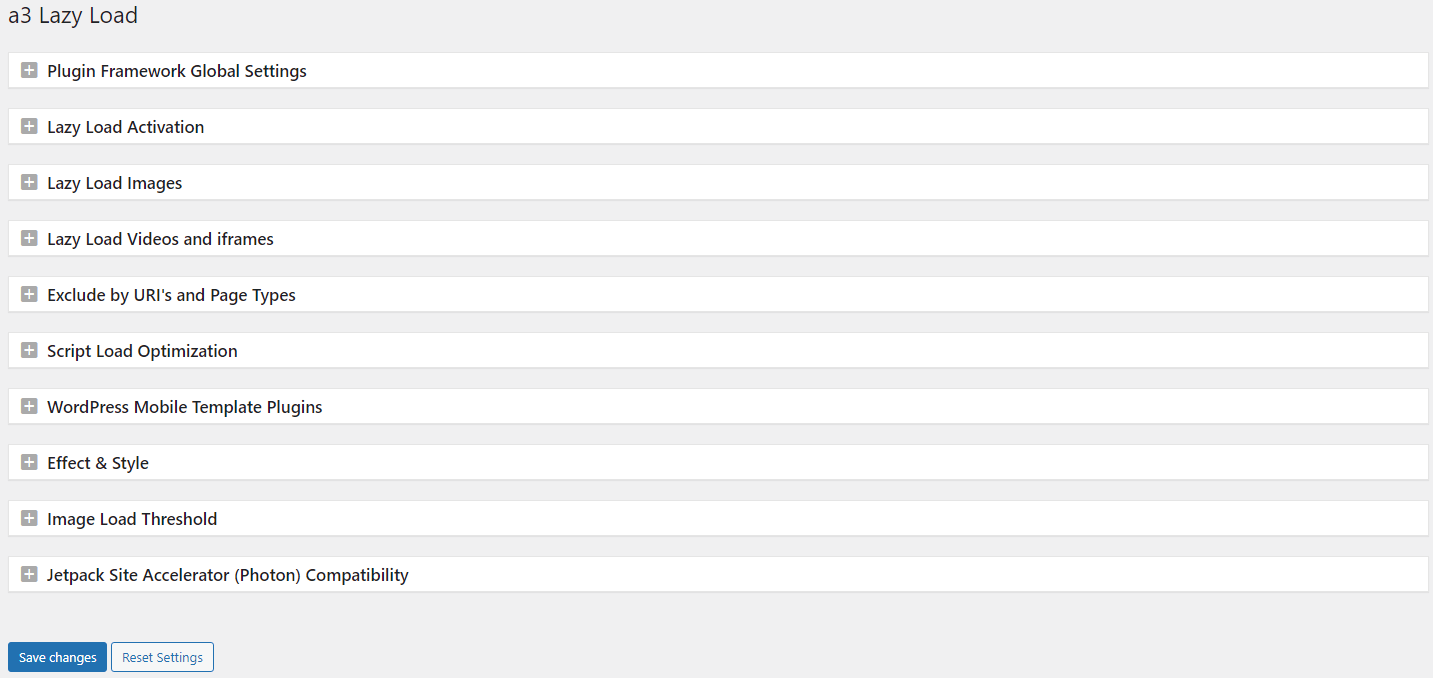
While WordPress introduced lazy loading for most images in past updates, it’s possible that some may have slipped through the cracks. a3 Lazy Load is a free WordPress plugin you can use to handle lazy loading for media not covered by WordPress:

After you install and activate the plugin, the configuration is relatively simple. From the WordPress admin dashboard, head to Settings > a3 Lazy Load. This will bring you to the plugin’s settings screen:
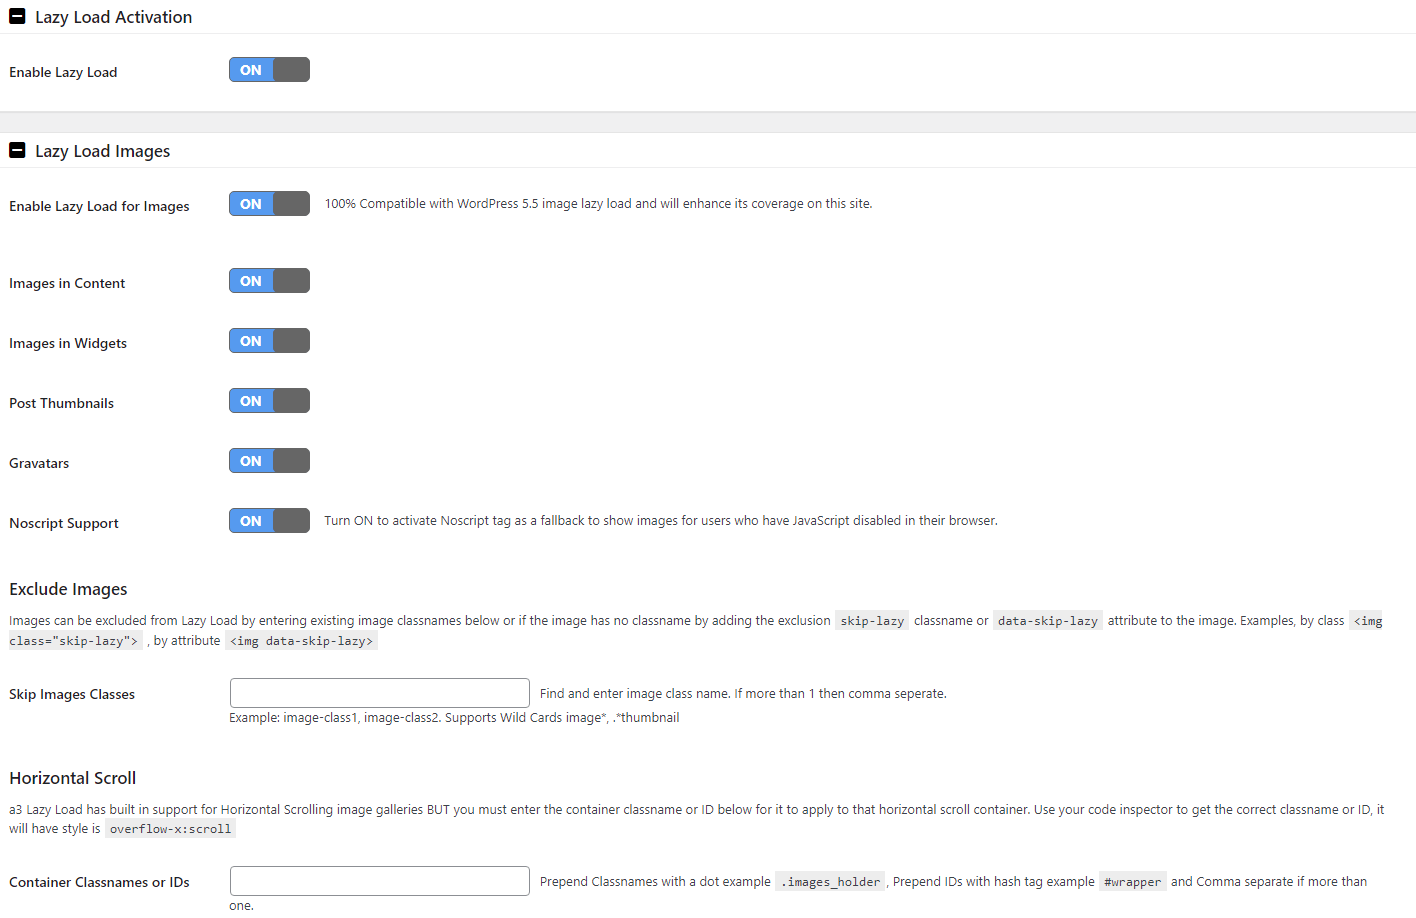
You can likely leave most of the defaults on this screen alone. However, you can configure the plugin to ignore particular image classes if you need to:
With a3 Lazy Load implemented, you can run another Page Speed Insights test to check for any improvements in your LCP score.
Step 3: Try a Caching Plugin
A caching plugin can not only help boost site performance but also improve your FID score. PageSpeed Insights often recommends removing render-blocking elements such as JavaScript and CSS. While this is a common issue, it can be frustrating and time-consuming to fix.
JavaScript can negatively impact FID. This slowdown may be due to code that loads earlier than necessary or isn’t needed at all. A caching plugin such as WP Rocket can help by deferring JavaScript:
WP Rocket makes this process as simple as checking a box. You can also direct the plugin to exclude particular files because sometimes changes to the code cause a site not to work as expected.
Step 4: Minify JavaScript and CSS
Another way to address render-blocking elements is by minifying code. When JavaScript or CSS code is minified, comments and white space are removed, resulting in faster loading.
While this is effective, it can take a long time to comb through code and remove elements by hand. Using a plugin like Autoptimize is a lot more efficient:

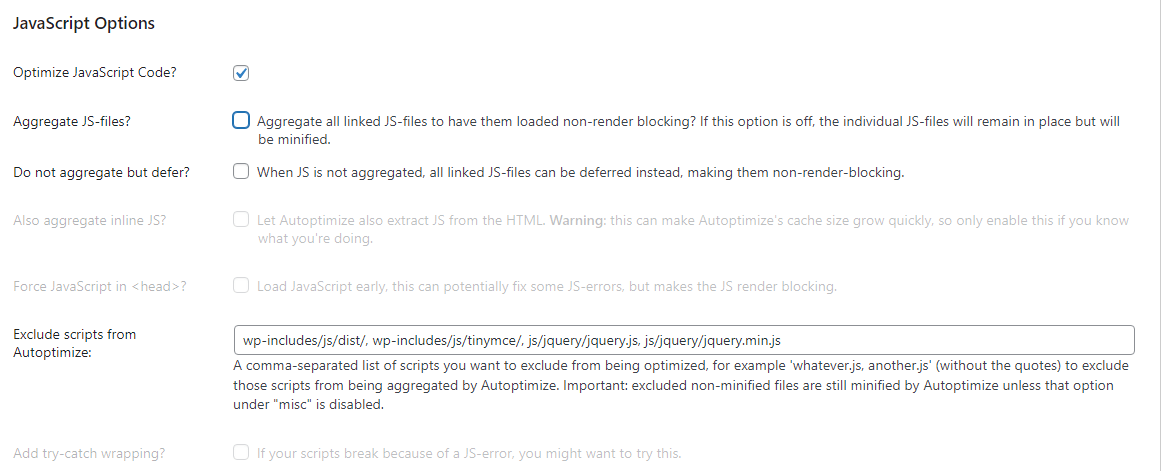
With the plugin installed and activated, you can navigate to Settings > Autoptomize to configure it. On this screen, you’ll first need to check the Optimize JavaScript Code box and uncheck the Aggregate JS-files box:
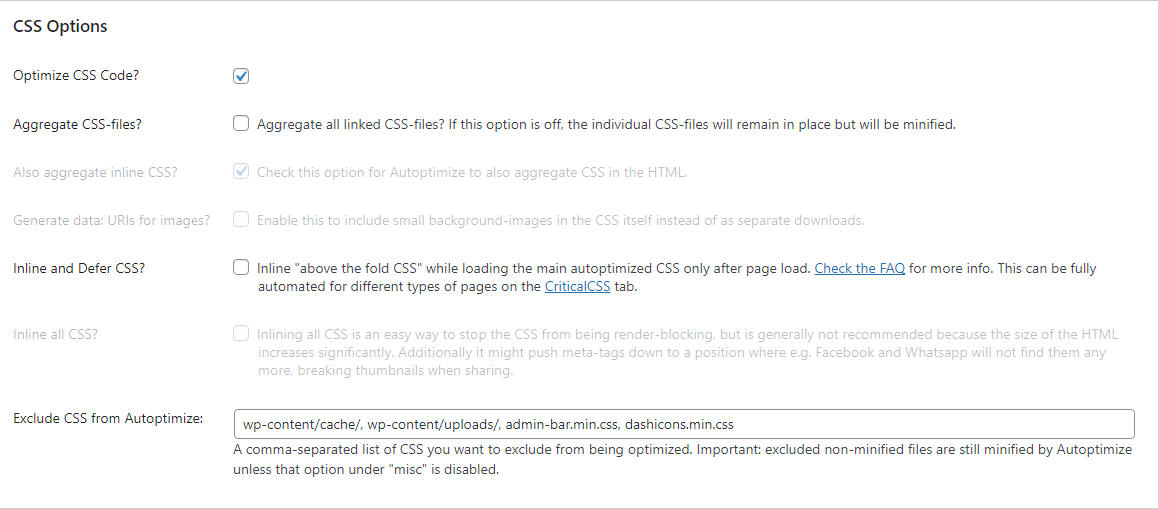
You’ll do the same thing under CSS Options. Check the Optimize CSS Code box and uncheck the Aggregate CSS-files box:
Now you can click the Save Changes and Empty Cache button. Once you’ve completed these steps, you can test your site again on PageSpeed Insights.
Step 5: Optimize and Size Images Properly
Large images may be visually pleasing, but they can really drag down your site’s performance. If you haven’t optimized your photos, you may be using much larger files than you actually need.
Optimized images have other benefits besides improving Core Web Vitals. You’ll likely use significantly less bandwidth and storage, which can save on hosting costs.
Incorrectly optimized images are especially noticeable on mobile devices. Large images are even slower to load on small screens. It’s essential to check the mobile results from PageSpeed insights, because some media that work on desktop might be problematic on other devices.
You can use a plugin like ShortPixel to handle sizing and compression automatically. This plugin sizes, scales, and optimizes images as you upload them, so you don’t need to worry about doing it beforehand:
![]()
Don’t worry if you’ve already uploaded a lot of large images to your media library. ShortPixel can compress all of them with a single click.
Step 6: Use a Content Delivery Network (CDN)
A Content Delivery Network (CDN) can improve your overall Web Vitals score by serving cached versions of your content and reducing latency through an extensive network of servers. You have a lot of options when it comes to CDNs, including Cloudflare:
Cloudflare even has a plugin, so you can quickly install and optimize the CDN for your WordPress site. With the plugin installed and activated, navigate to Settings > Cloudflare.
From here, you can either create a new account or sign in to an existing one. You’ll be prompted to enter your API key. There’s also a link to retrieve your key or to sign up to get one:
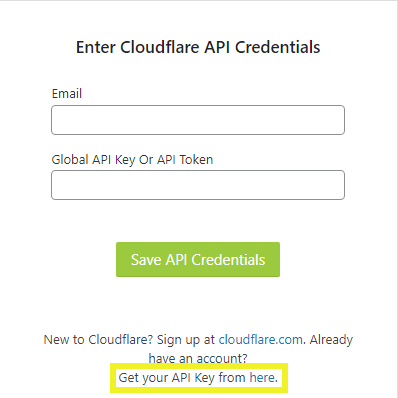
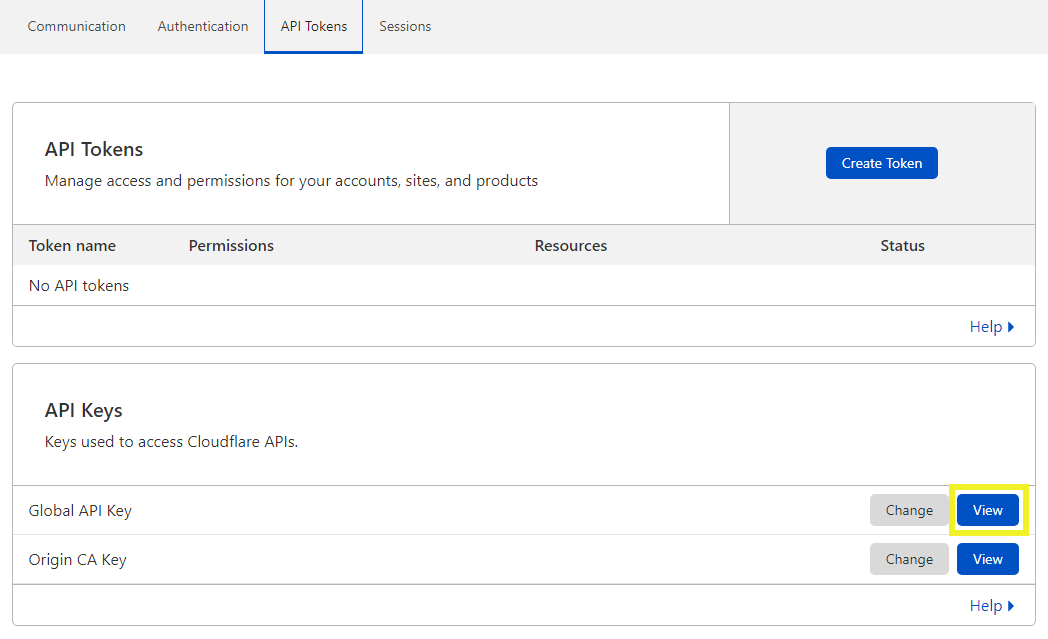
If you click the link to retrieve your key, navigate to your profile and select the API Tokens tab. Click the View button next to Global API Key. You may be prompted to enter your password, after which you’ll be able to copy your API key and paste it into the field on your WordPress dashboard:
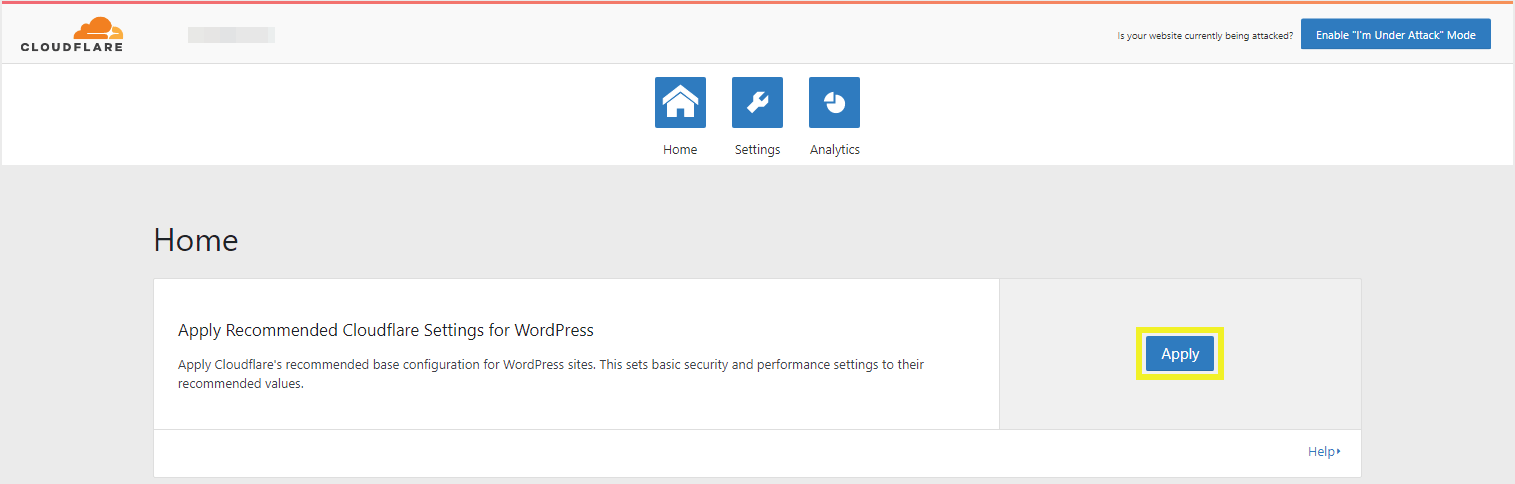
After you click on the Save API Credentials button, you’ll be able to access Cloudflare from your dashboard. Click the Apply button next to Apply Recommended Cloudflare Settings for WordPress, and you’re all set:
Cloudflare comes with a lot of other settings, which you can access by clicking the Settings button. However, some of them are only available with a paid plan.
Step 7: Be Mindful of Your Largest Content
Typically, your largest content is an image, such as the featured image on a blog post or a header on a landing page. Even if your website is primarily text, you can still improve your LCP score.
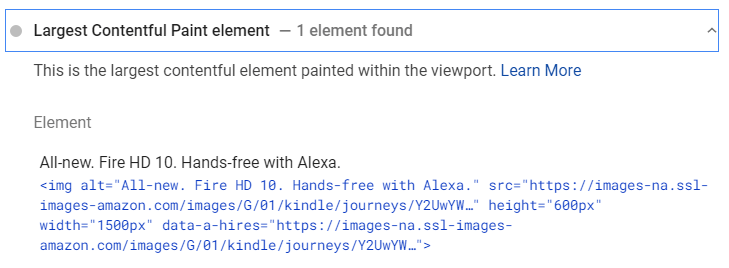
You can find the largest content in your PageSpeed Insights test results. Scroll down to the Diagnostics section and click the dropdown arrow next to Largest Contentful Paint element:
Depending on what this element is, there are a few ways you can minimize its impact on the page’s score. For images, make sure it’s adequately optimized, as we described above. You can try using a lower-quality image if it continues to be an issue.
If it’s a large chunk of text that’s dragging down your LCP, you can still optimize it. Try breaking it into smaller paragraphs or using headings and lists to create smaller blocks of text. This formatting will also make your content easier for people to read.
Conclusion
Paying attention to the Core Web Vitals score of a WordPress site can help to pinpoint potential weaknesses. Making changes to improve these metrics can result in better SEO performance and create a smoother user experience.
Let’s recap the steps we shared to optimize a WordPress site for the Core Web Vitals:
- Determine your current Core Web Vitals score.
- Take advantage of lazy loading.
- Try a caching plugin.
- Minify JavaScript and CSS.
- Optimize and size images properly.
- Use a Content Delivery Network.
- Be mindful of your largest content.
Do you still have questions about any of these optimization techniques? Ask us in the comments section below!
Our Newsletter
Our newsletter is personally written and sent out about once a month. It's not the least bit annoying or spammy.
We promise.
Try Beaver Builder Today

Related articles

How Beaver Builder Products Work Together to Build Flexible WordPress Websites
Building a WordPress website often means stitching together a theme from one developer, a page builder from another, and a…
Growing a Facebook Group to 14,000 Members: Community Management Tips with David McCan
David McCan grew the Dynamic WordPress Facebook group to over 14,000 members. We sat down to talk about his moderation...
Why Agencies Are Switching to Beaver Builder: Performance Testing Results
By Chris Smith – HYPEsites.com For WordPress agencies, page builder choice directly impacts the metrics that matter most: project margins,…
Join the community
We're here for you
There's a thriving community of builders and we'd love for you to join us. Come by and show off a project, network, or ask a question.
Since 2014
Build Your Website in Minutes, Not Months
Join Over 1 Million+ Websites Powered By Beaver Builder.