
Beaver Builder makes creating a website a breeze with its simple drag-and-drop design. However, there may be styles or features you want to use on your pages that aren’t available in the builder.
That’s where custom CSS (Cascading Style Sheets) comes in.
Custom CSS opens up an incredible number of options for your site’s design. To help you get started, we’ll give you a crash course in this coding language and why you might want to use it.
Then we’ll walk you through how to implement it on your Beaver Builder site.
An Introduction to CSS
At this point, you might be wondering what exactly CSS is. You may have seen the term used online, but if you’re not a developer, there’s a chance you have no idea what it means.
Under the hood, webpages are written using HTML, or HyperText Markup Language.
This is the standard coding language used to create online content. Pages written in HTML are made up of elements, much like Beaver Builder pages are made up of modules.
Examples of HTML elements are headings (<h1>, <h2>, etc.), paragraphs (<p>) and images (<img>).
HTML elements provide browsers with the page structure but don’t look like much until you add some styling to them. This includes font type and color, background colors, and even animations.
CSS tells your site how to apply these features.
For example, say you want all your H1 headings to look the same. You can write the CSS code to style the <h1> element and then any your site will automatically display every <h1> element in that style.
When it comes to WordPress sites, the CSS is generally handled by your theme. Every theme includes a file named style.css that takes care of the default design of your webpages.
Beaver Builder also includes CSS for each module so that you can change elements’ colors and fonts as well as apply effects. Between the page builder and your theme, you don’t have to code your site’s styling if you don’t want to.
In short, CSS enables you to customize the look of your site.
It’s very flexible, and there are a vast number of tweaks you can make to the layout and style of your site using it. We provide some more examples later in this post.
Why You Might Want to Use Custom CSS on Your Beaver Builder Site
As we already mentioned, WordPress users don’t have to write CSS thanks to themes and page builders such as Beaver Builder.
However, while Beaver Builder is a very flexible page builder, there might be an effect or other styling option you want to use that’s not available with any of our modules or your theme.
If that’s the case, the simplest solution is to write the necessary CSS yourself.
Once you get the hang of it, adding a bit of CSS here and there can be much faster than playing with the options in themes and plugins. You can go right to the source and make your site look exactly how you want it to.
With that said, it’s generally best to use custom CSS sparingly. It can add to the complexity of your site and can make it harder to maintain.
Plus, too much custom code can also lead to slower page loading and site performance.
How to Apply Custom CSS in Beaver Builder
There are two steps to adding custom CSS: 1) add a CSS class to the module you want to apply the CSS to; 2) add a CSS rule that will apply to that class.
Add a Custom CSS Class to a Beaver Builder Module
Here’s how to add a CSS class to a row, column, or module.
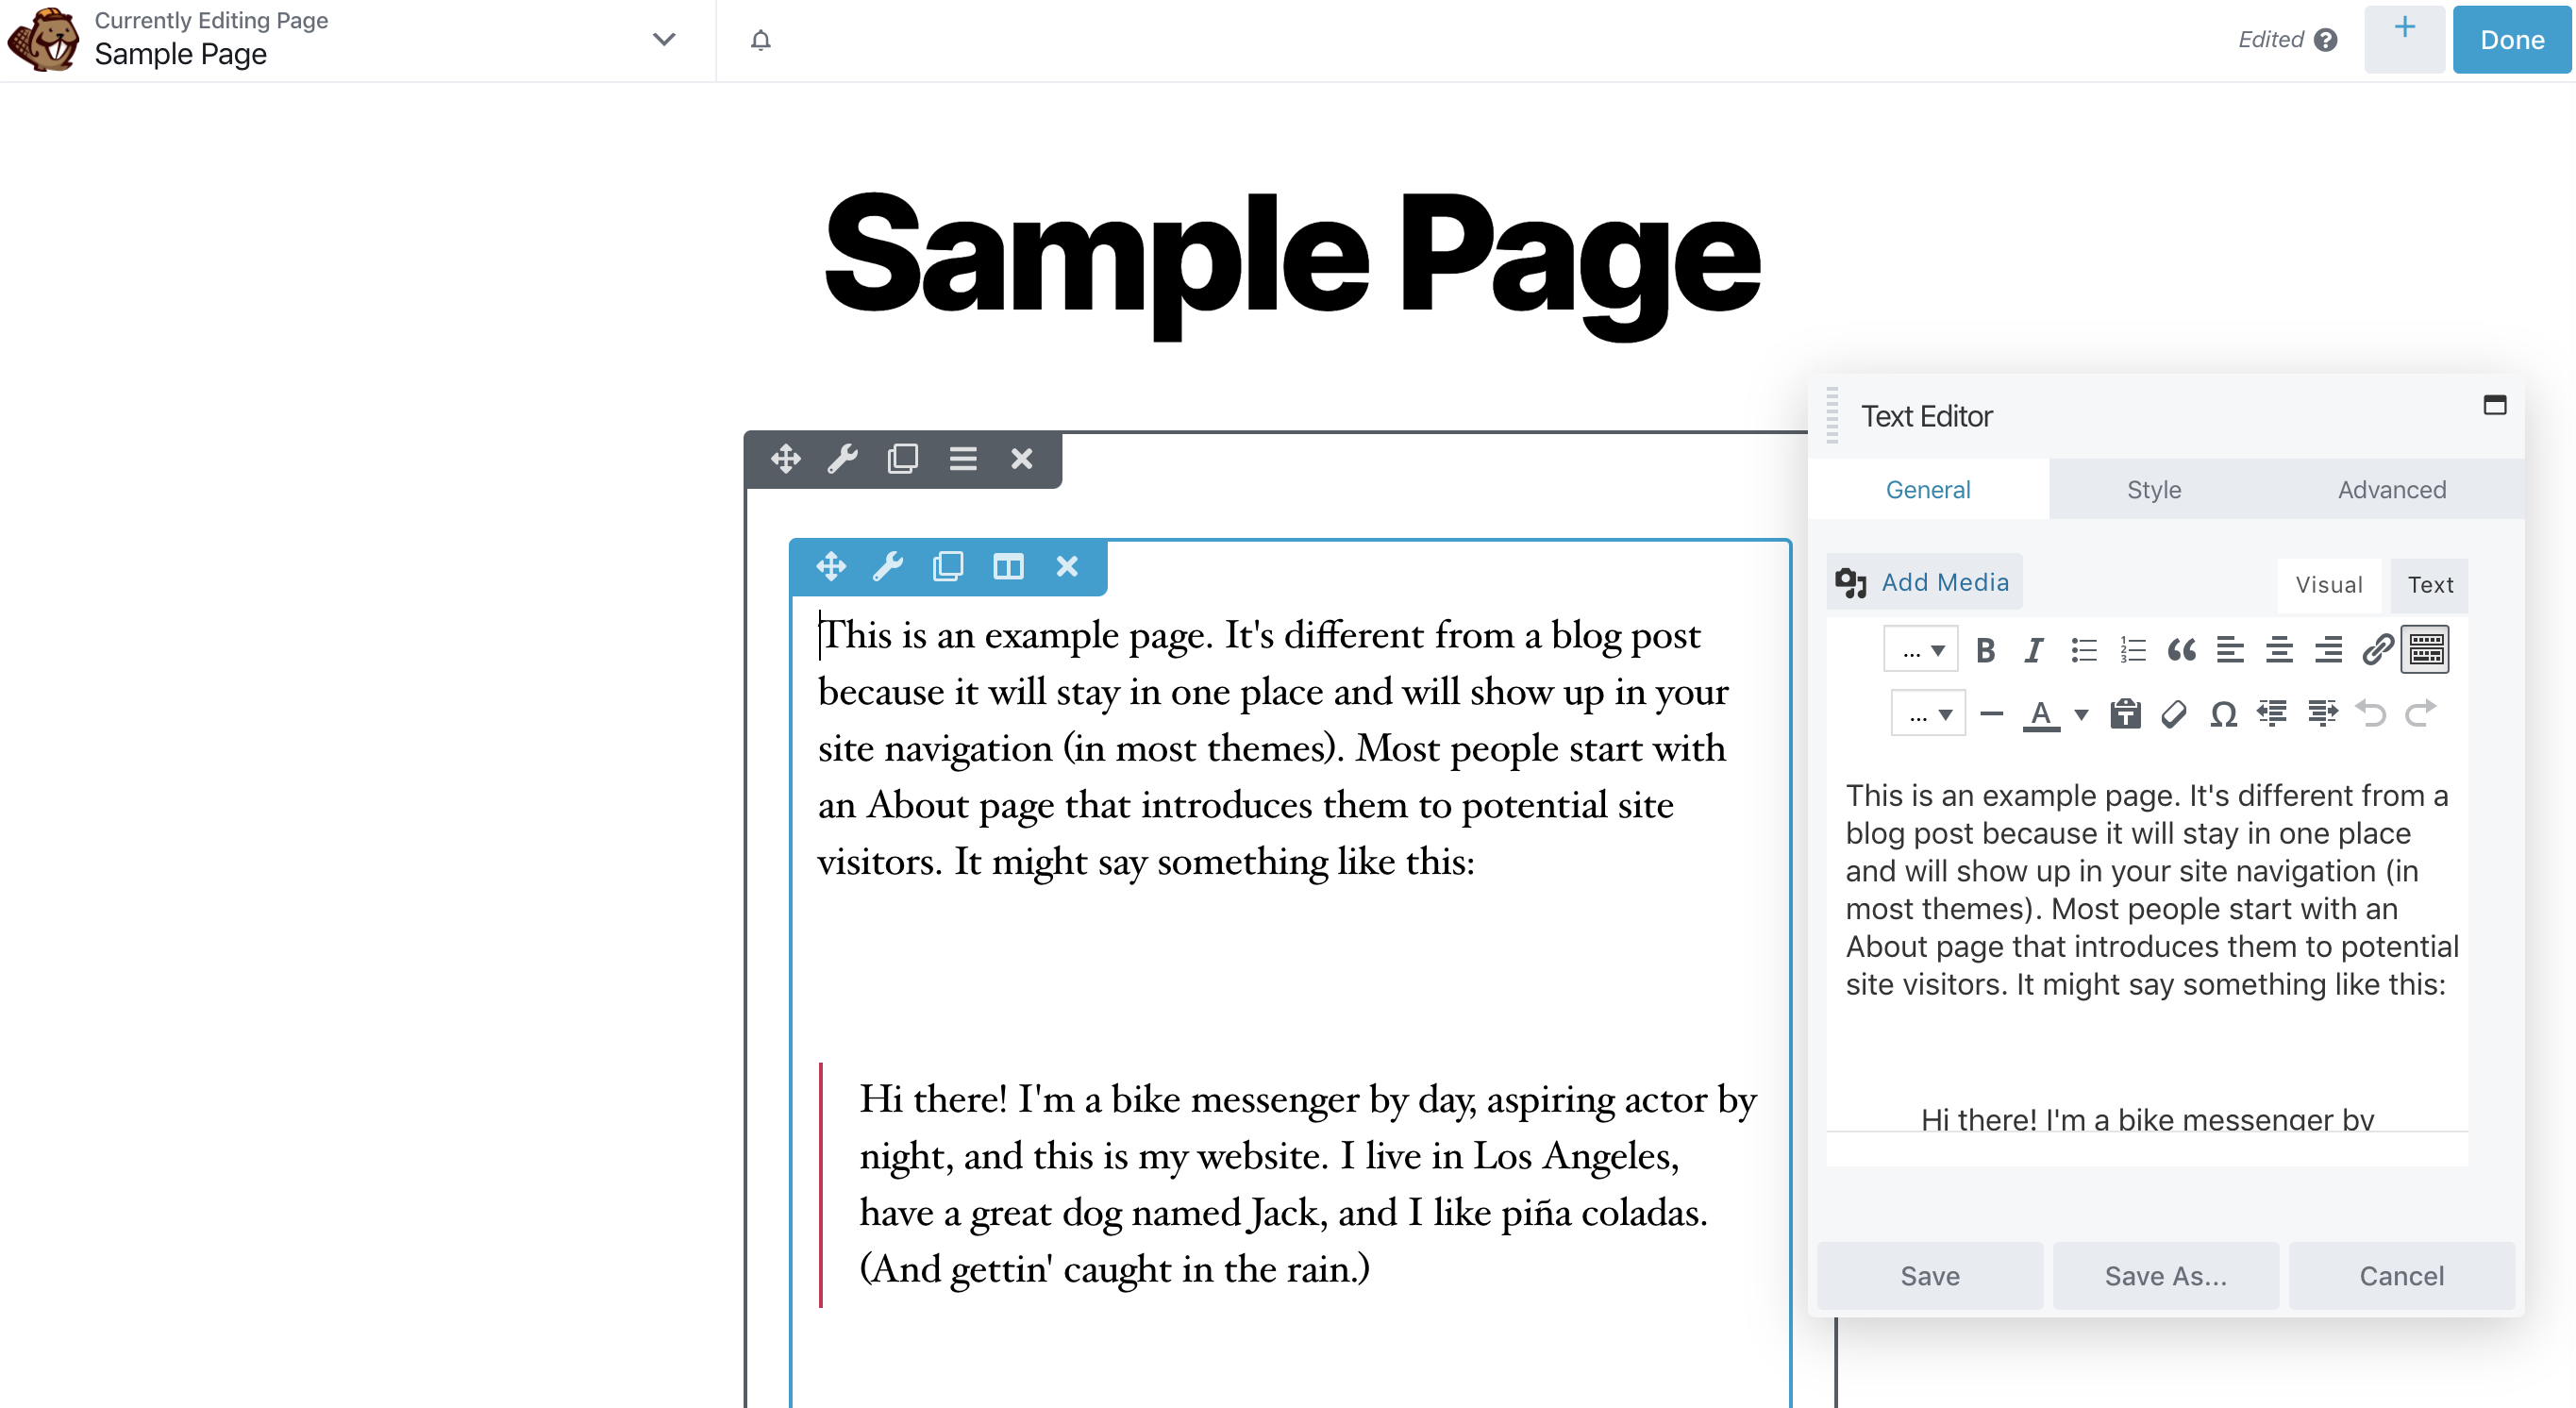
- Hover your mouse over the row, class, or module and click the wrench icon to open its settings.
This screenshot shows a Text Editor module with its Settings panel displayed.
2. Click the Advanced tab and scroll down to find the field labeled Class:
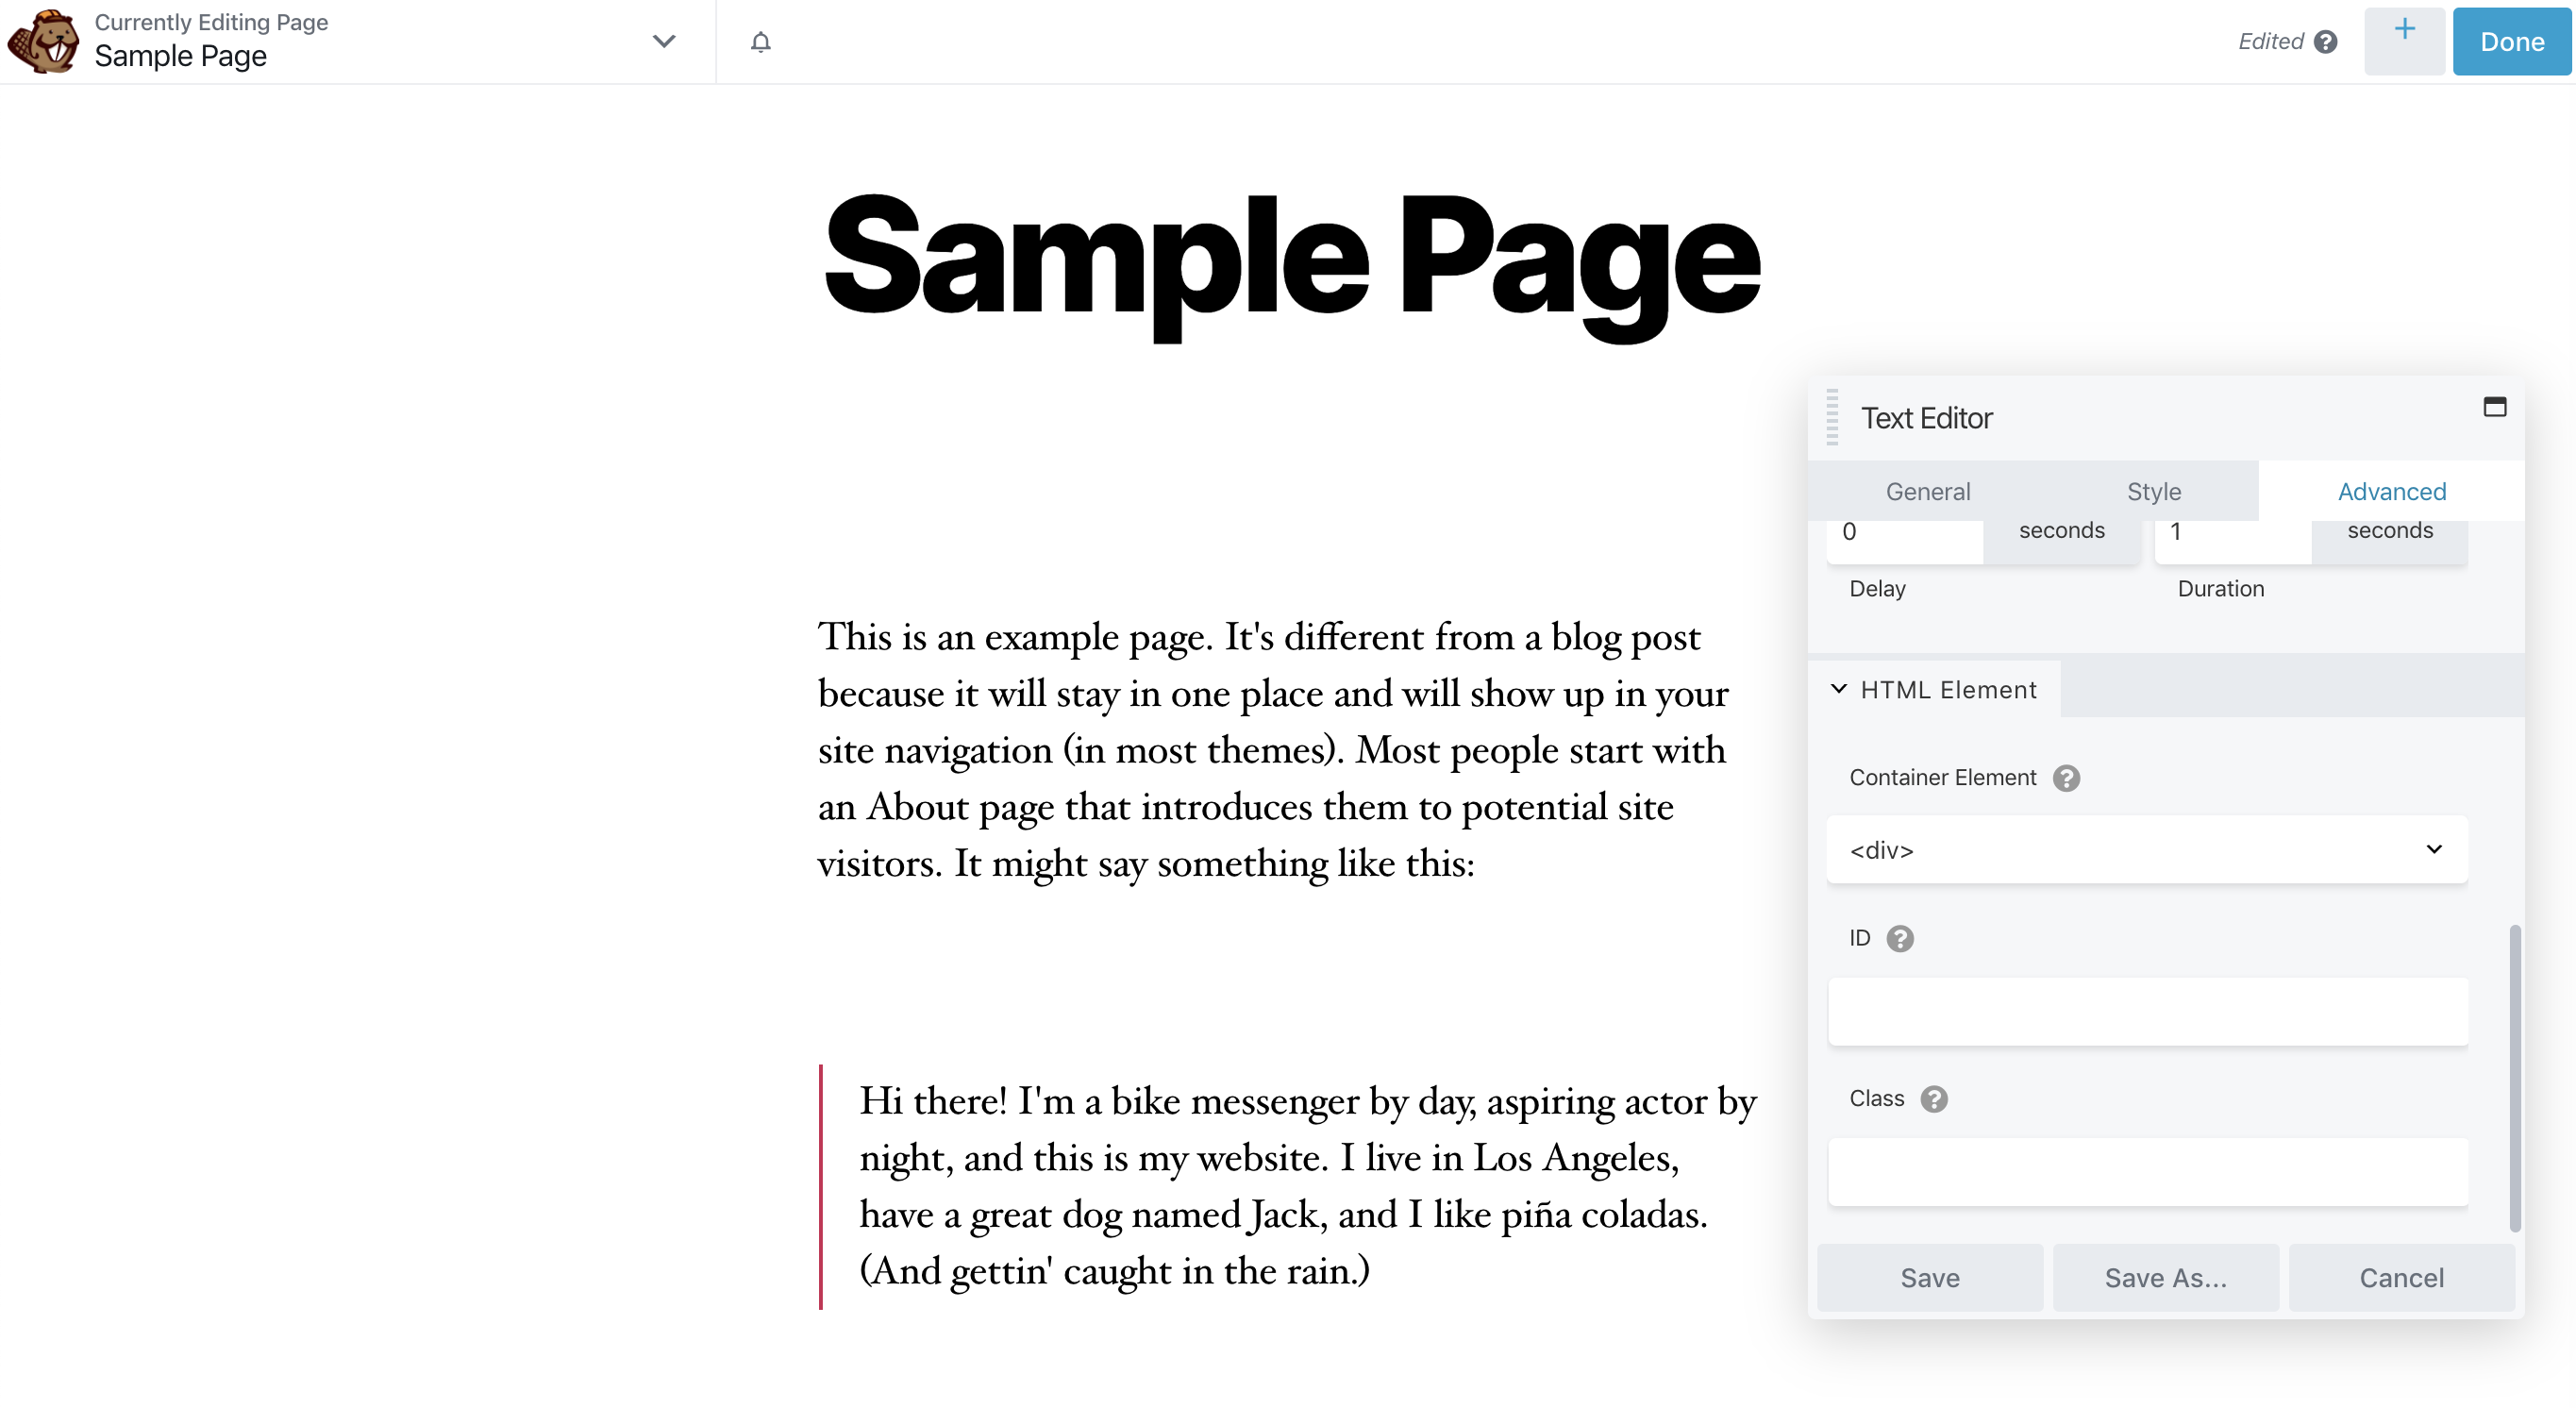
3. Assign a CSS class label to this module.
The CSS label can be anything you want it to be, but there can be no spaces, and a class name cannot start with a number.
Also, some words are reserved for use by the code or they might compete with other CSS rules used by your theme or other plugins.
So it’s a best practice to assign a namespace prefix to your classes so that you can be reasonably confident that you won’t have any conflicts.
And then it’s a best practice to use that namespace for any class you assign and any custom rule you write.
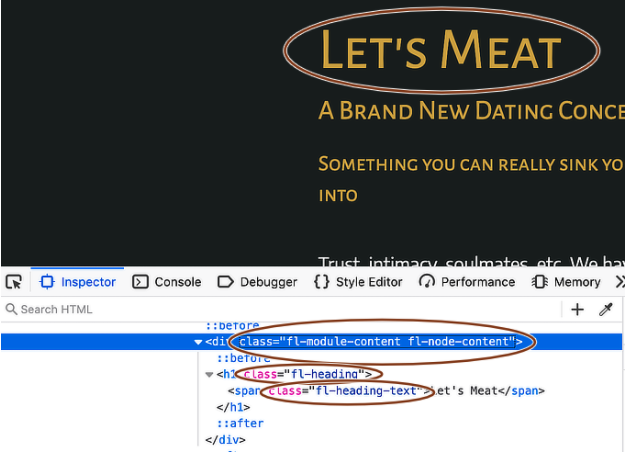
For example, Beaver Builder uses the fl- namespace. Here’s a screenshot of part of the HTML for a Heading module in a Beaver Builder layout, with all classes identified by fl-.
Note that if you want a CSS rule to apply uniquely to one single element, it’s a best practice to use an ID instead of a Class.
IDs can’t be used for more than one element on a page, whereas you can use a Class label in one place but you can’t prevent it from being used elsewhere. \
In this article, we’ll stick to classes, but if you want more information, see the Selectors page at w3schools.com.
Add a Custom CSS Rule That Applies to a Single Page
If you only want your rule to apply to one or more items with that class on a single page, you can add the rule right in the Beaver Builder editor. Launch Beaver Builder for the relevant page, then open the Tools menu in the top left corner:
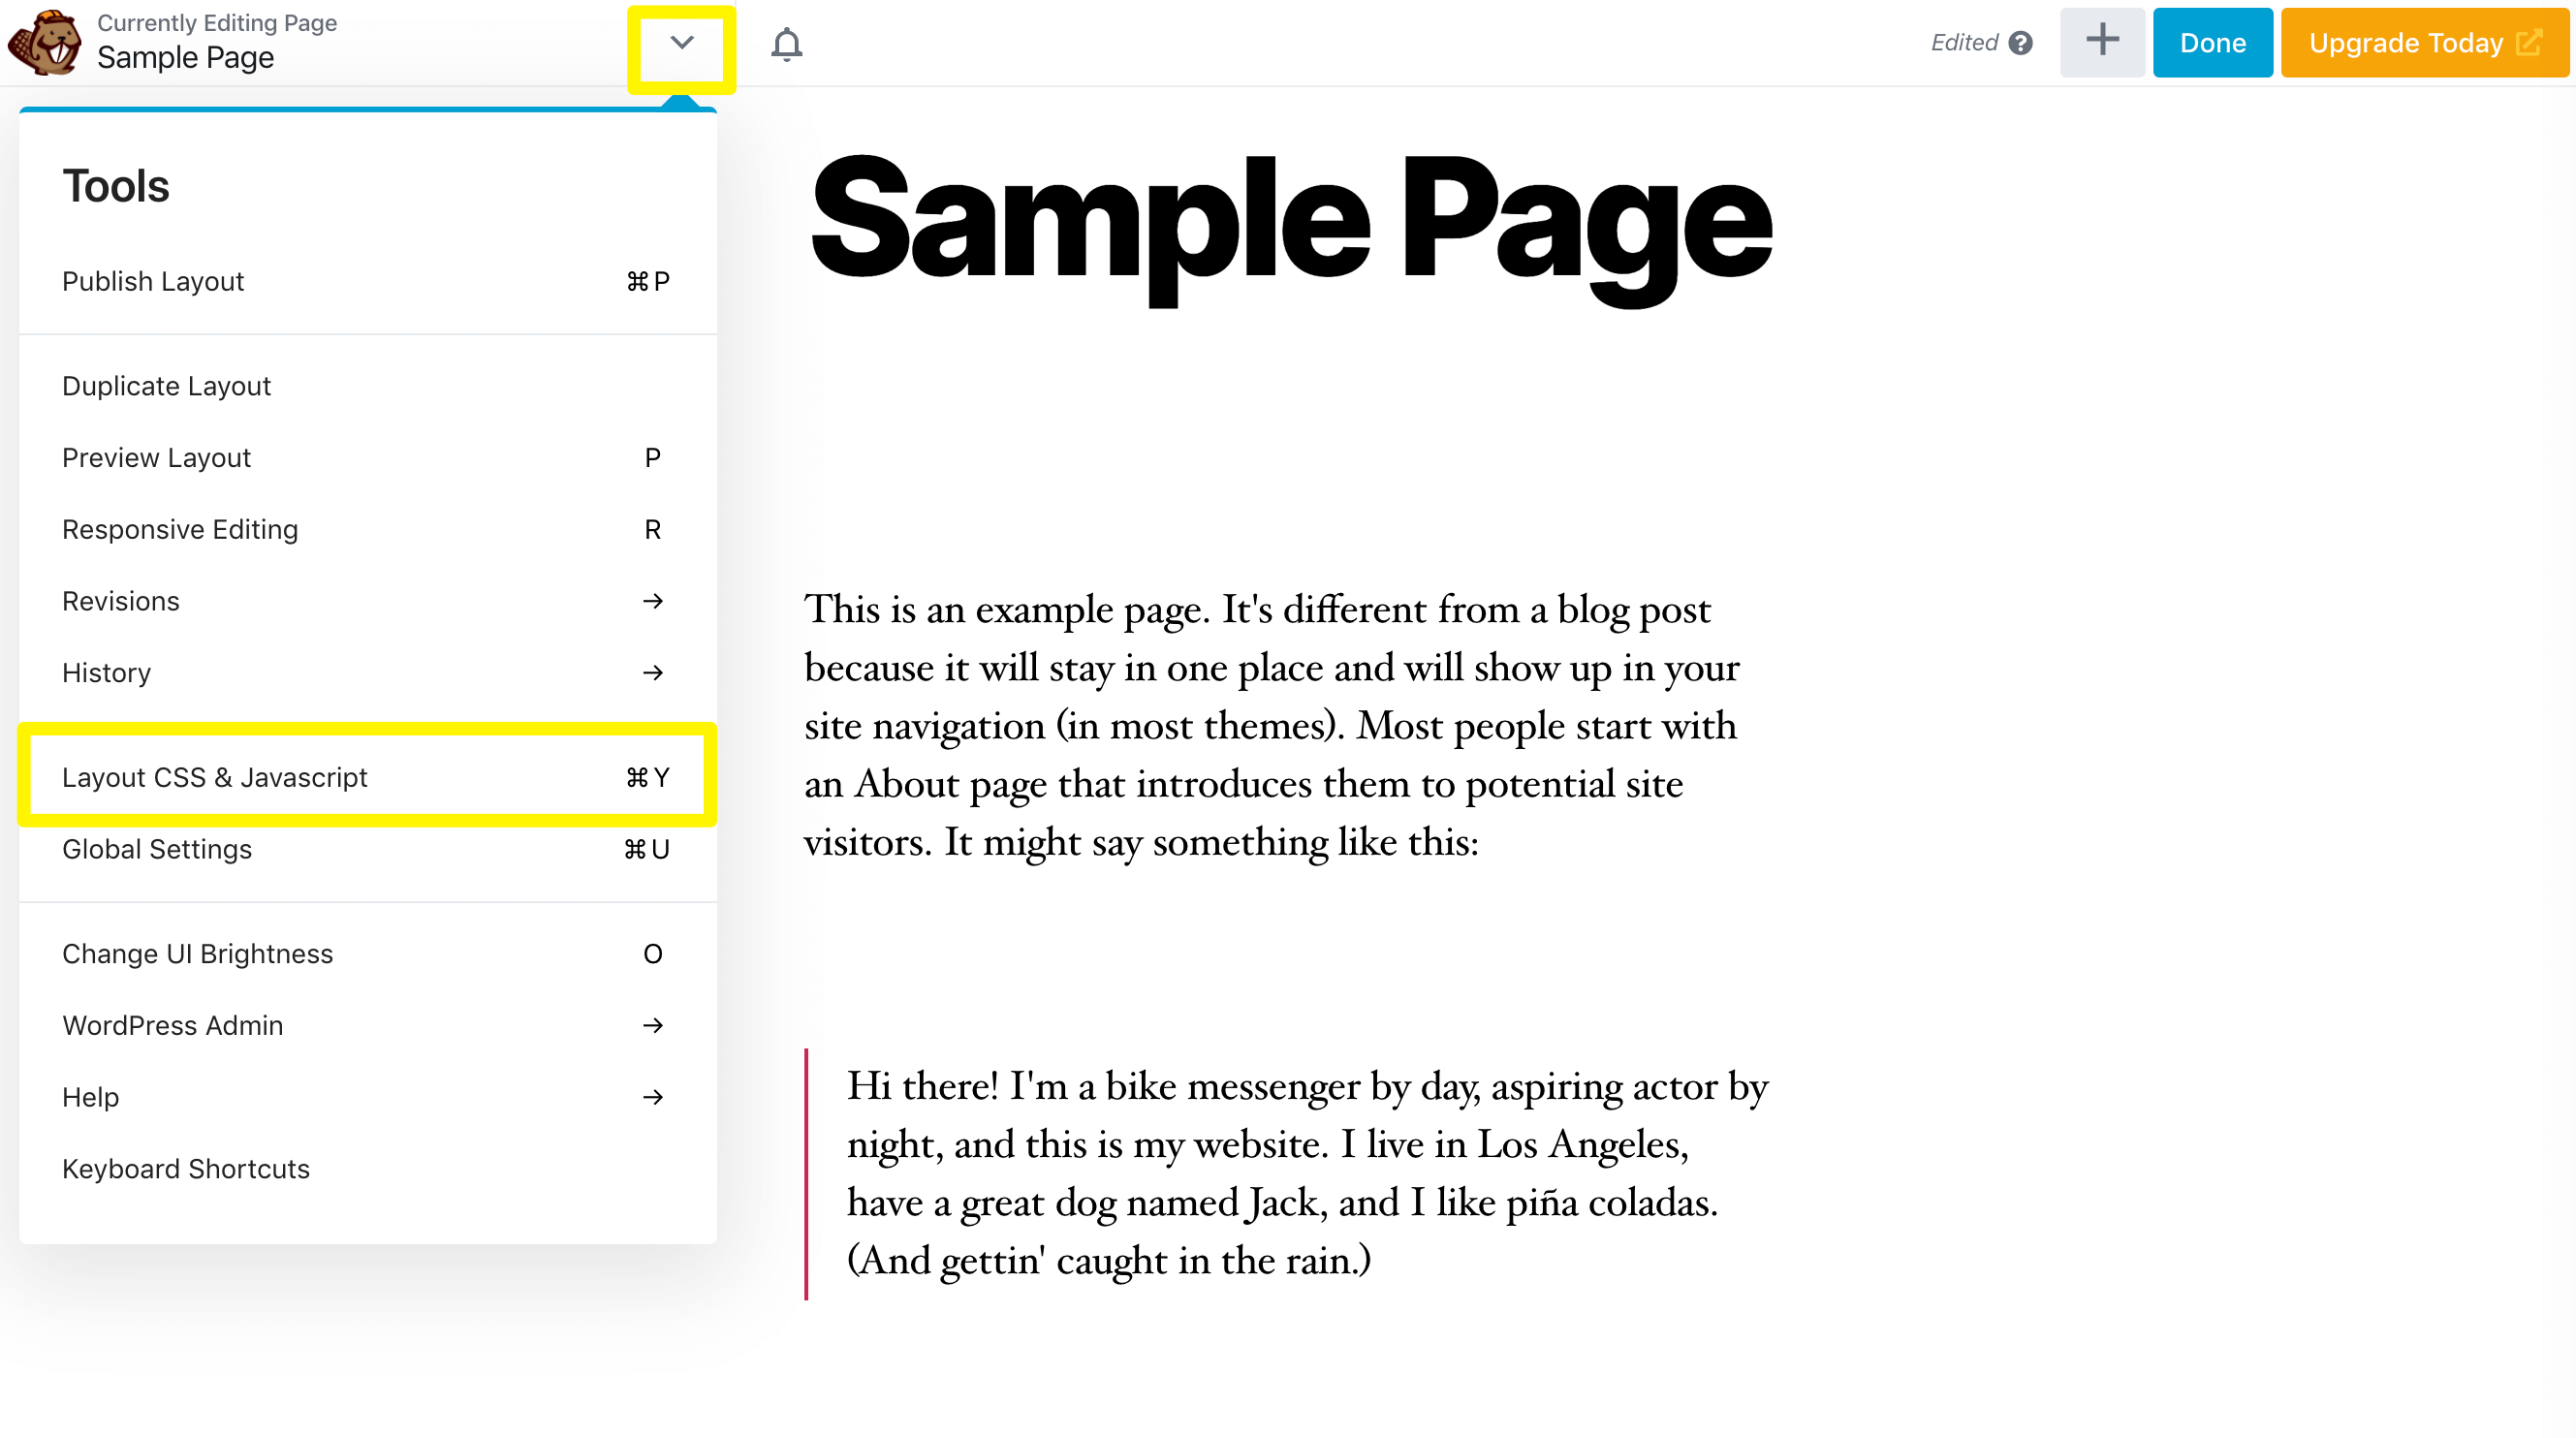
Select the Layout CSS/JavaScript option. This will open a small code editor window:
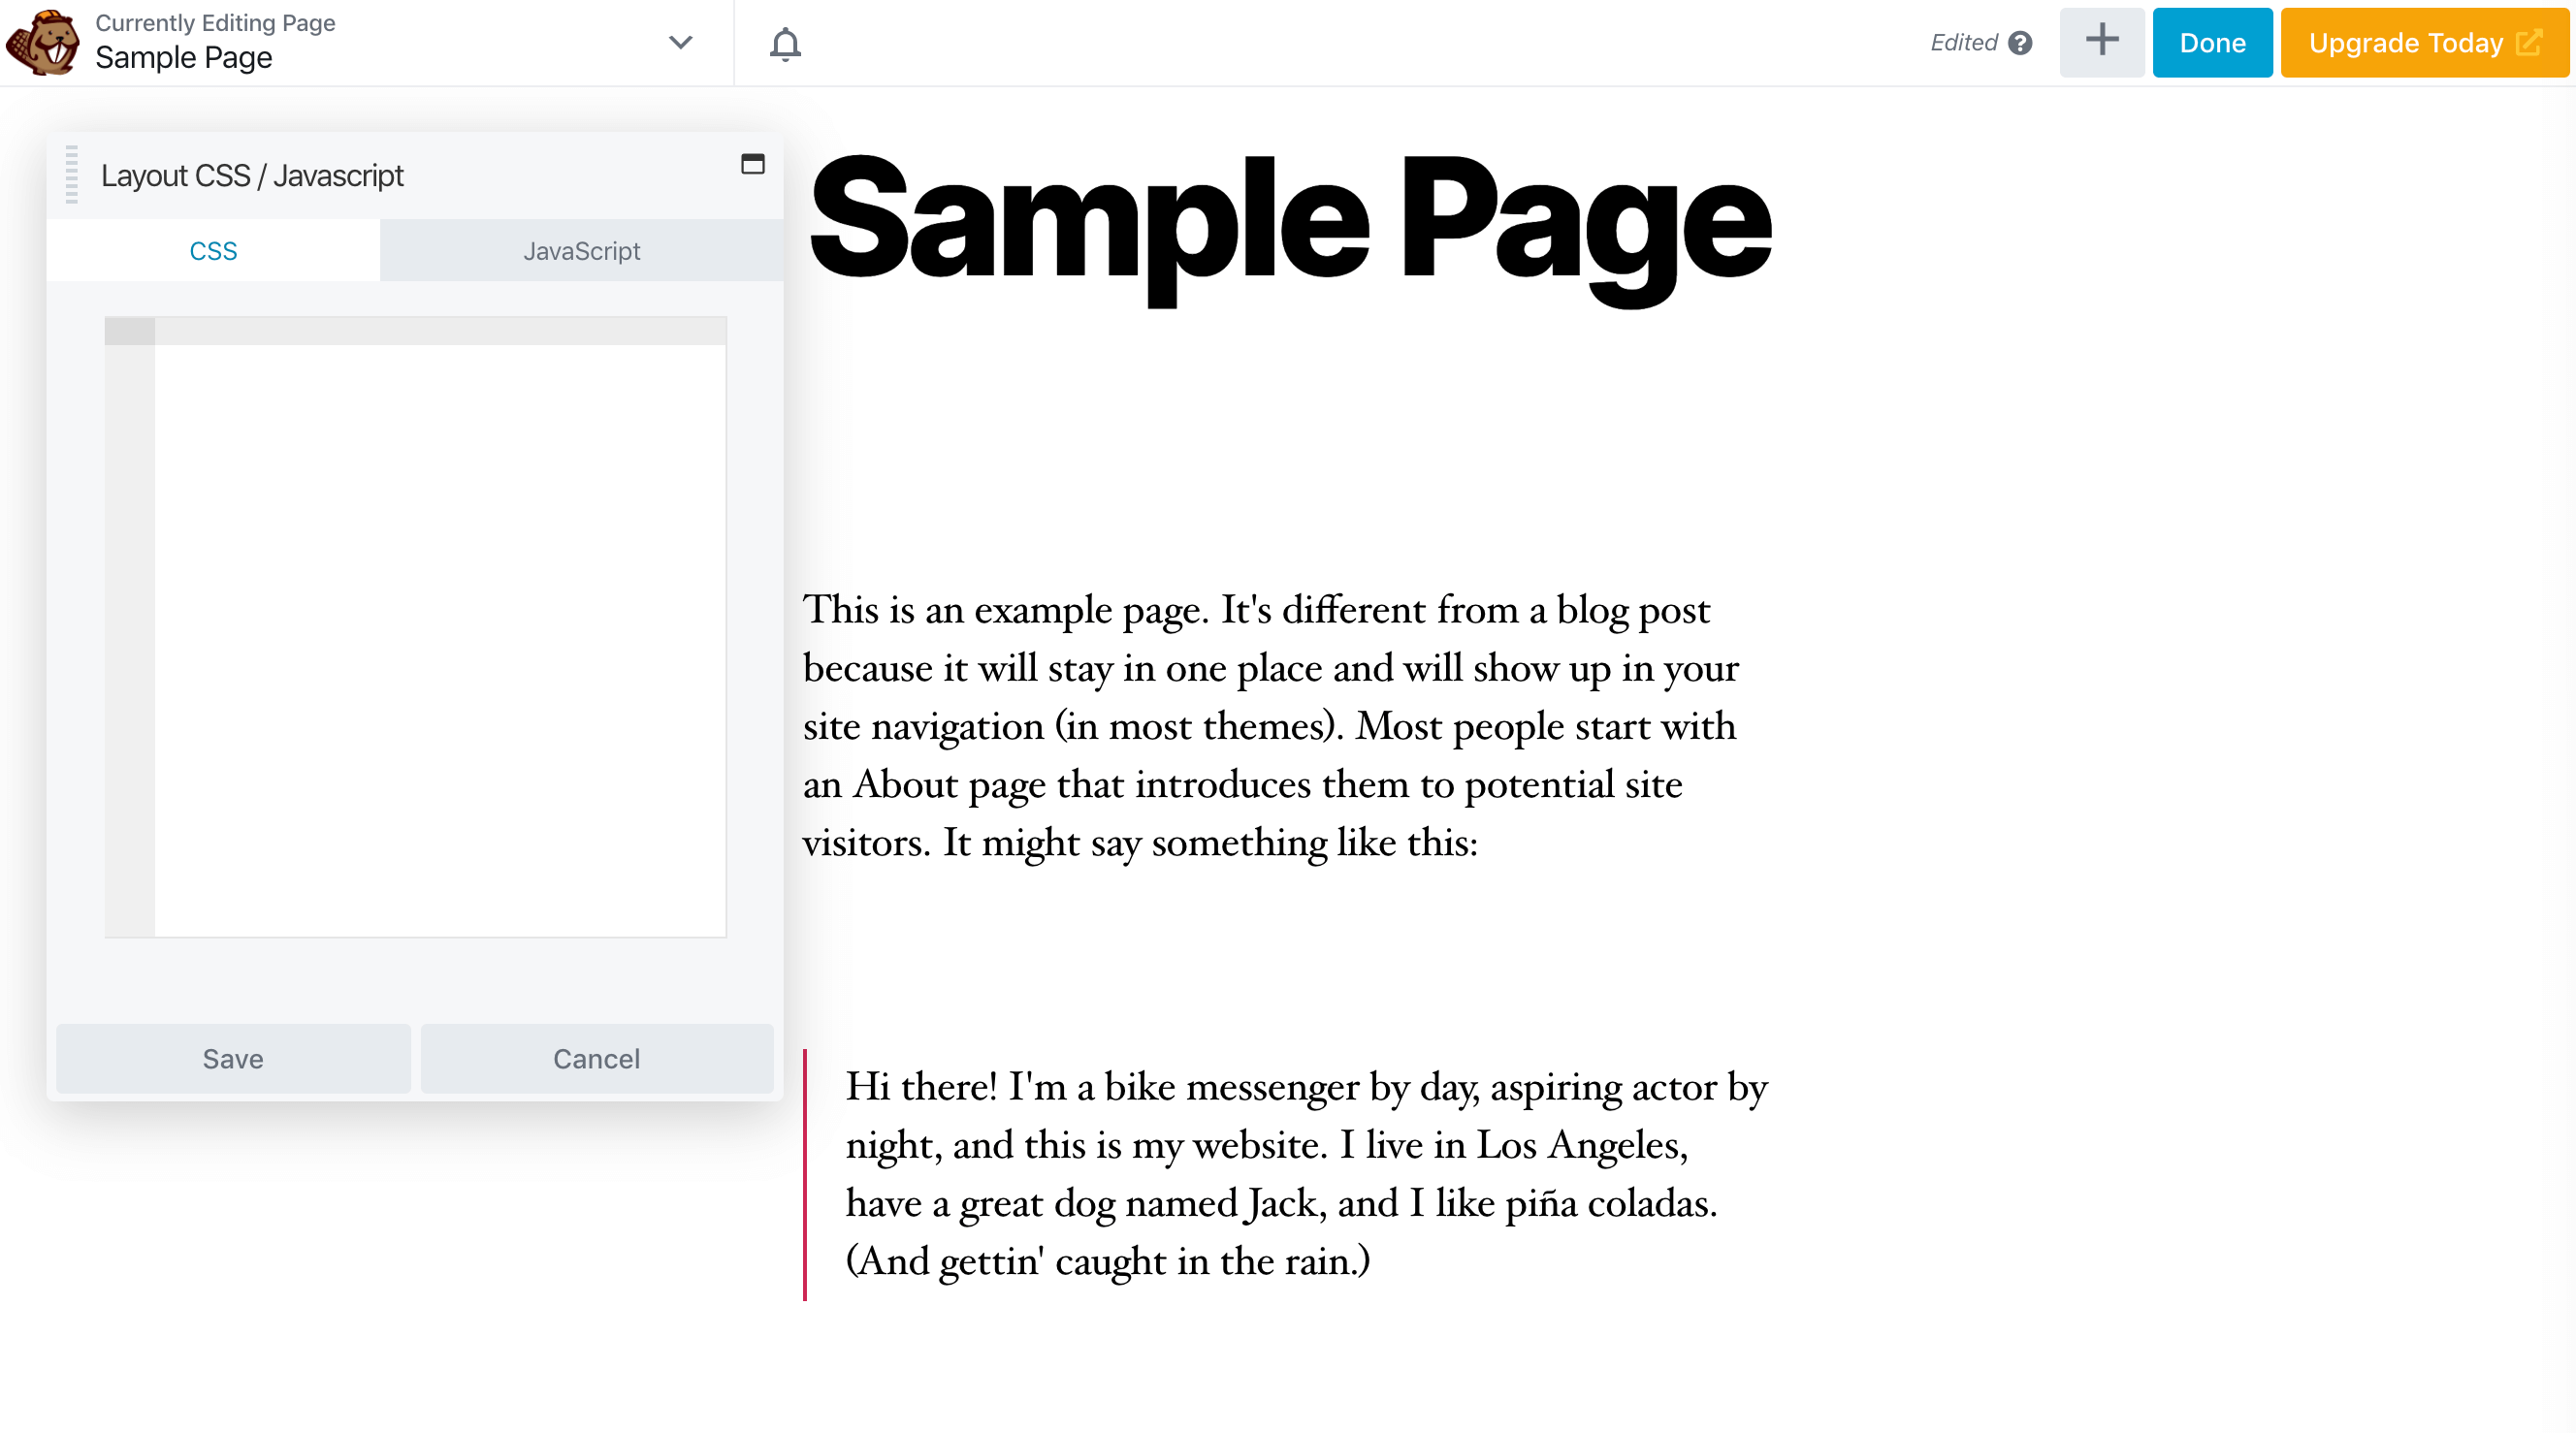
Here you can add your CSS rule.
To make changes to the styling of a module, row, or column to which you’ve added a custom class, use a selector in your rule that references that class, as we’ll demonstrate later in this post.
Implement Custom CSS Site-Wide
If you want your rule to apply to more than one page, there are three locations you can choose from to add the rule.
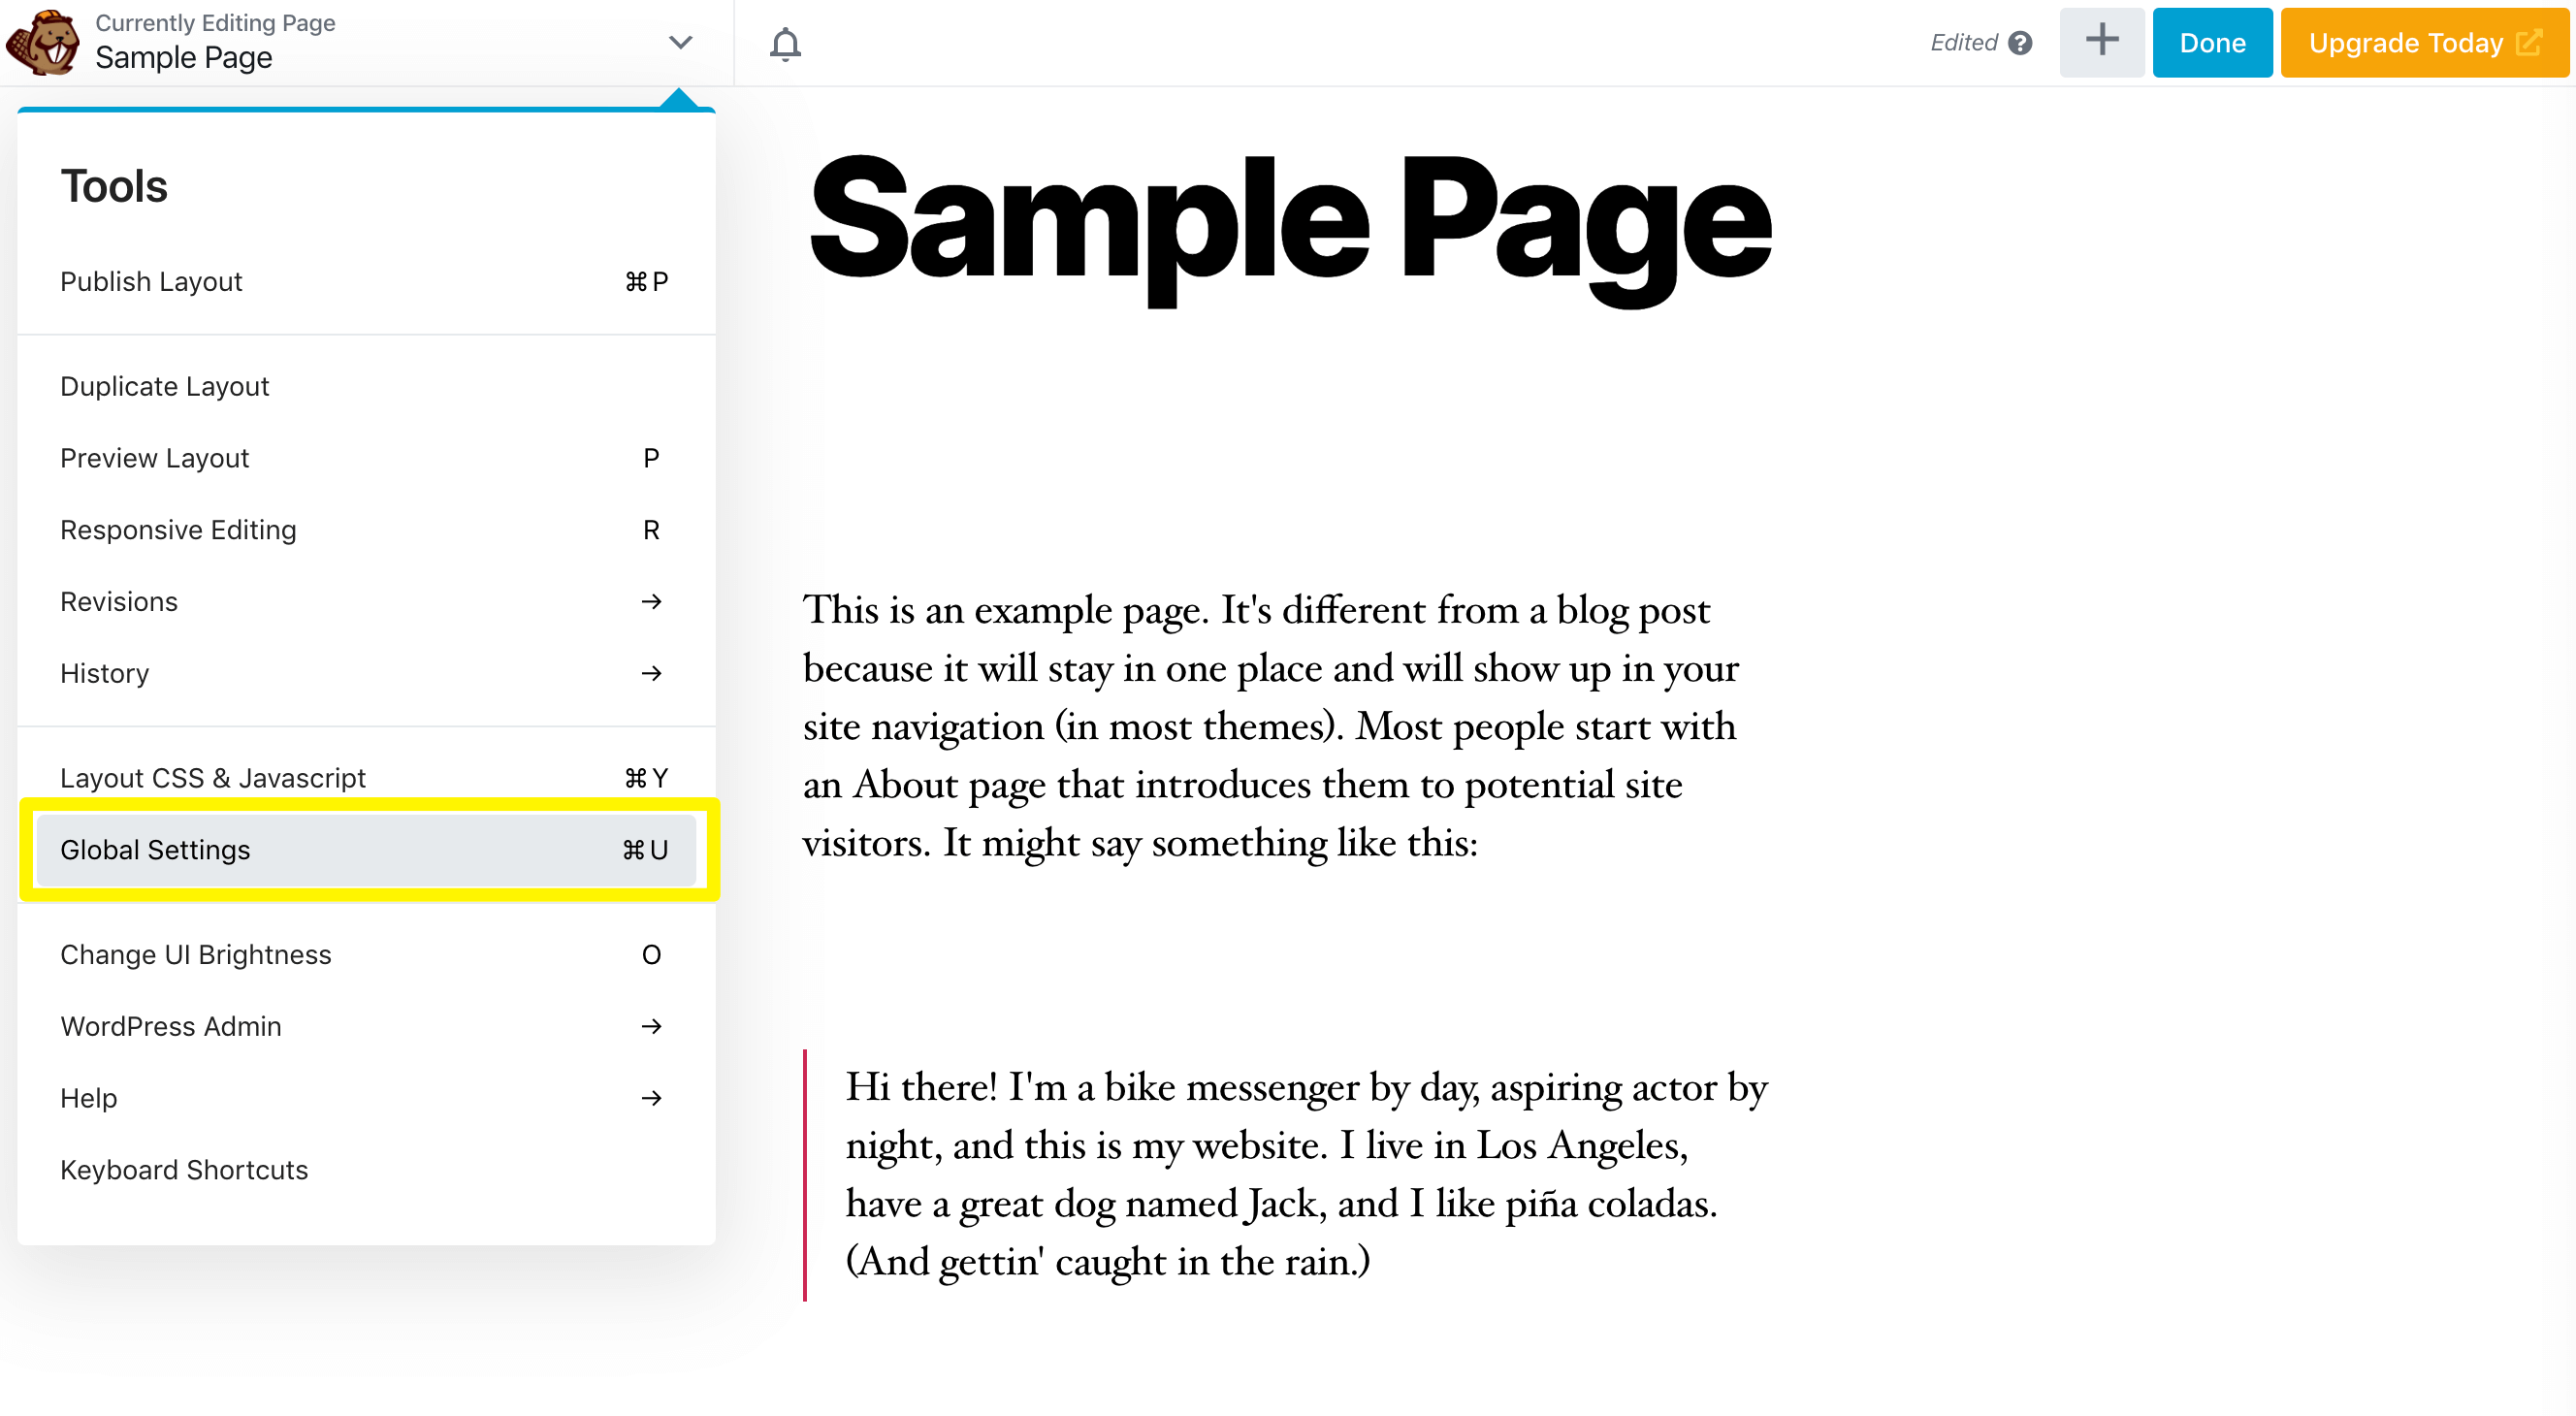
Beaver Builder Editor’s Global Settings
If you want to add a rule that applies to any Beaver Builder layout on your site, you can add global CSS right within the Beaver Builder editor. Open the Tools menu and select Global Settings:
Click the CSS tab in the resulting window and add your custom rule. You can edit this code in Beaver Builder from any page using the same procedure.
Customizer’s Additional CSS Tab
To apply the rule everywhere on your site that uses that class, including non-Beaver Builder pages or areas outside the content area, the simplest method is to click Appearance > Customize in your WordPress dashboard:
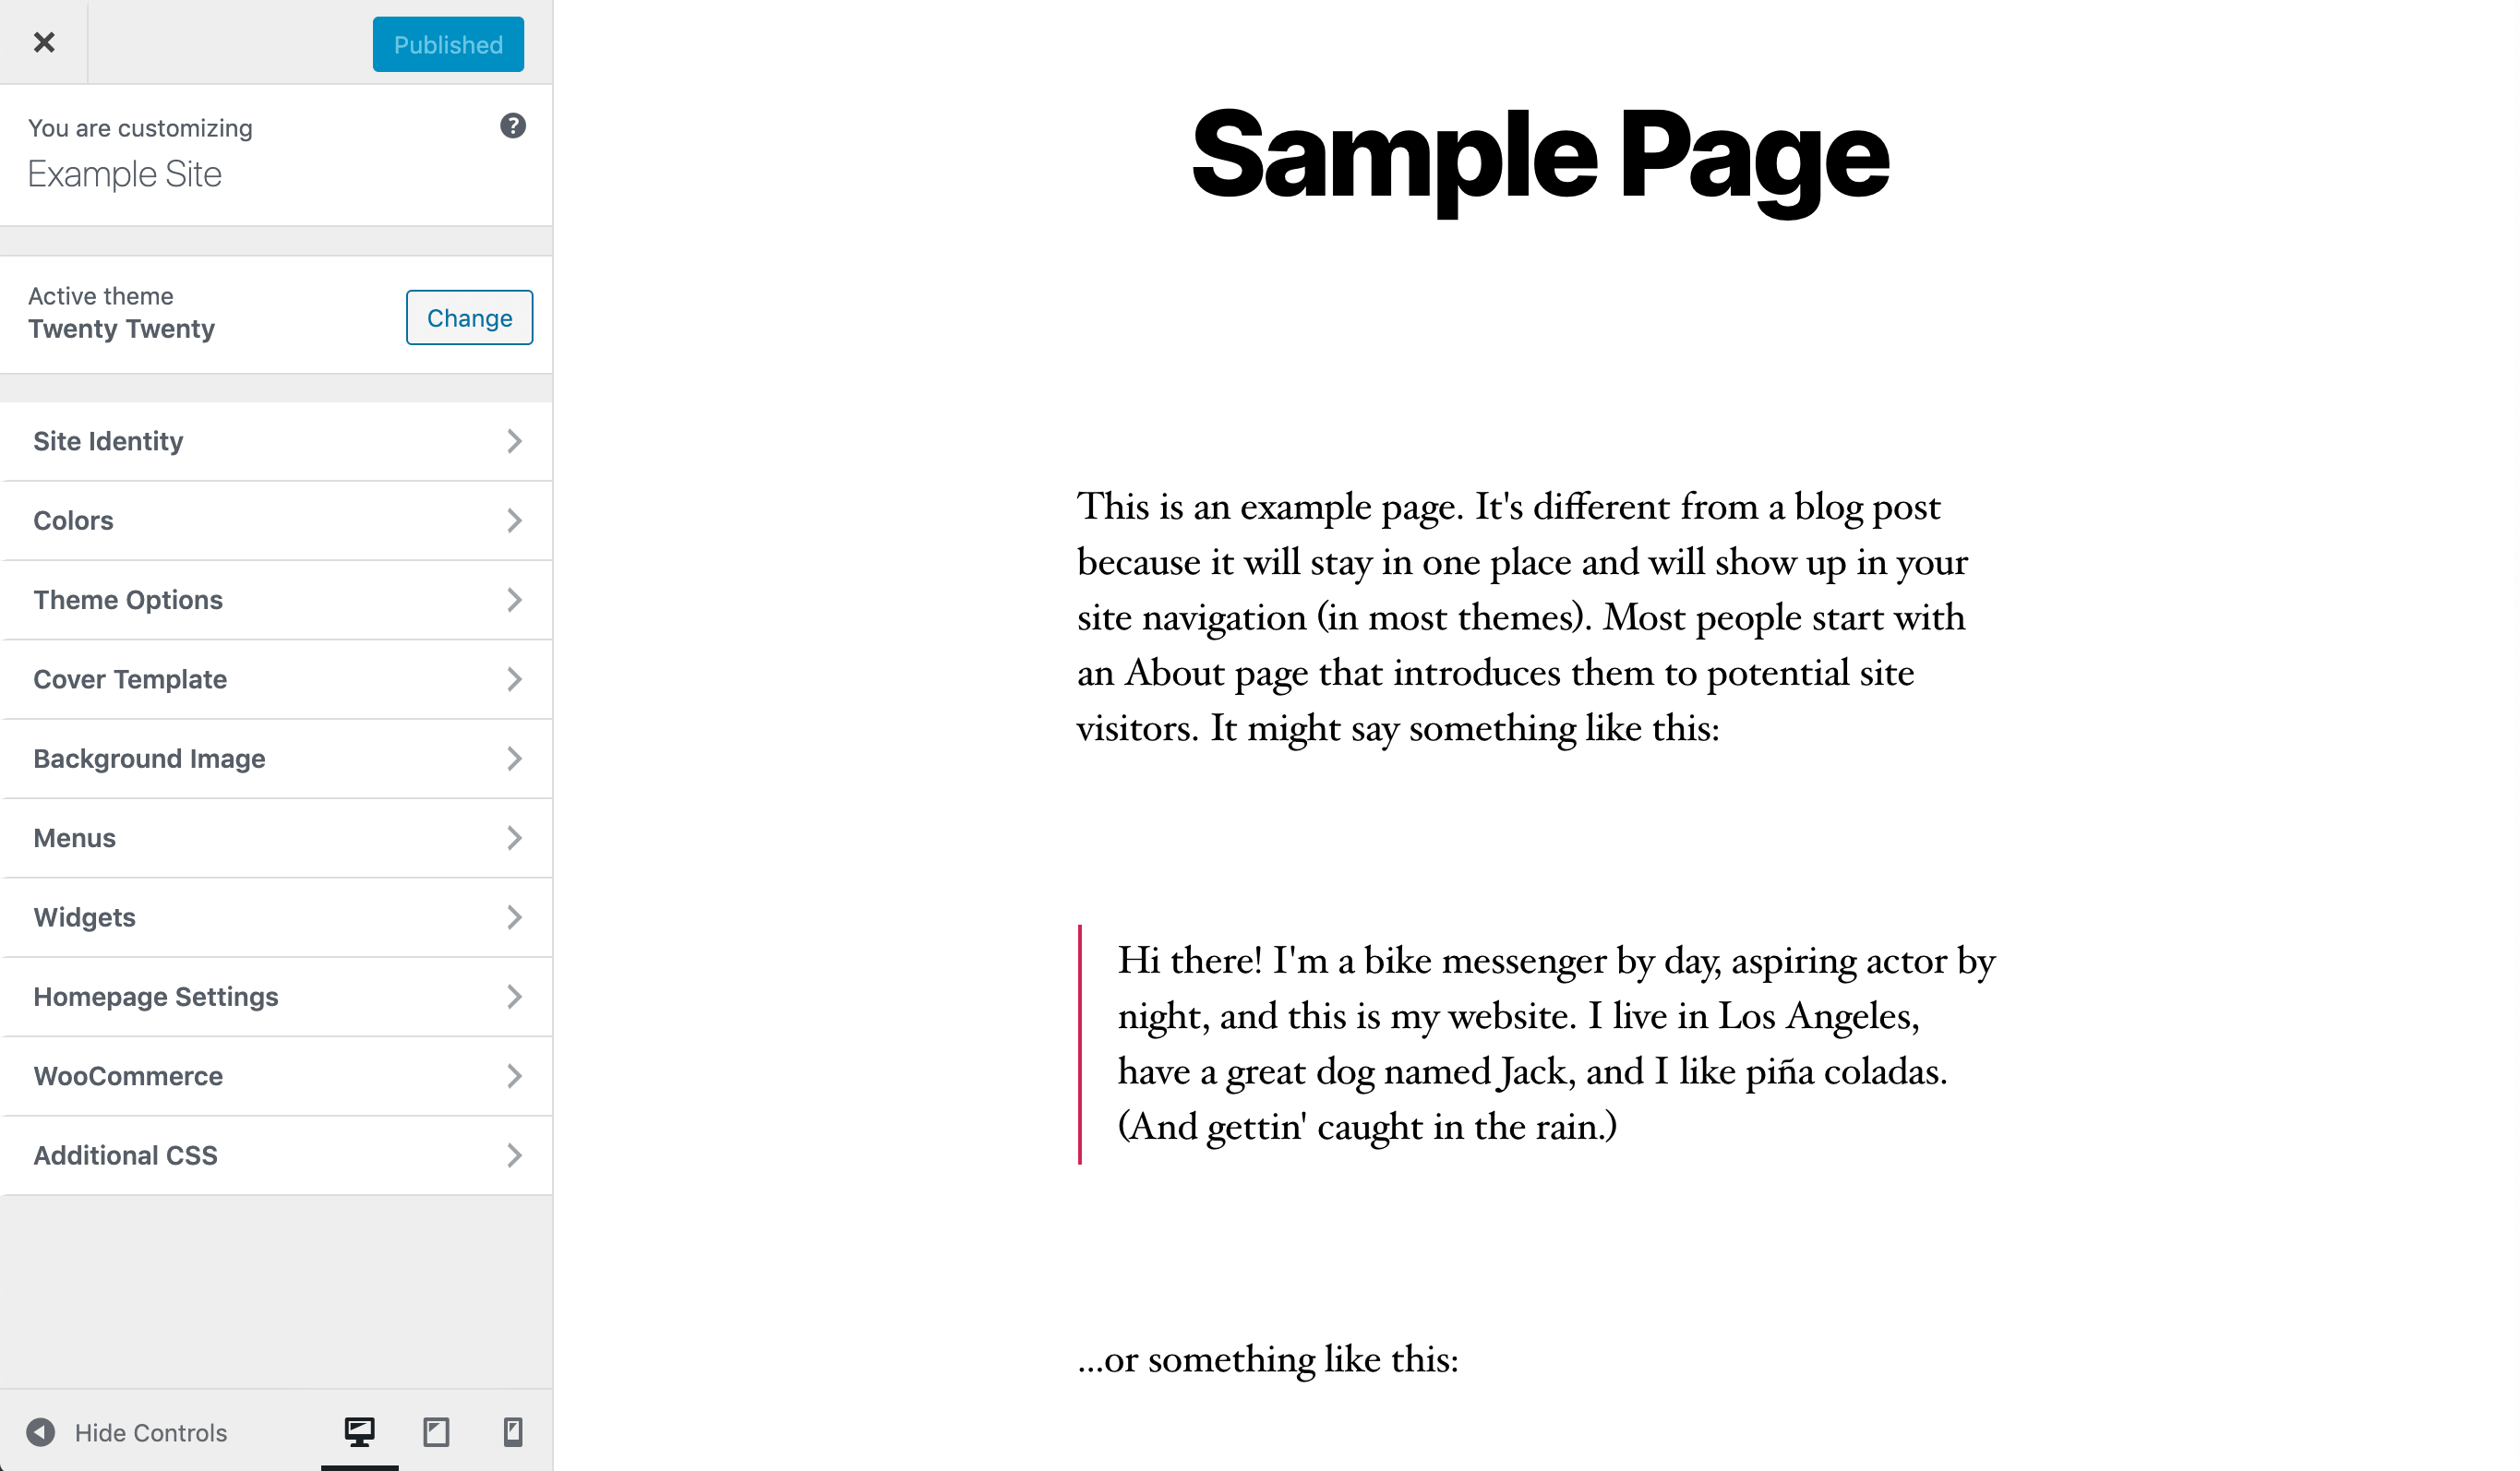
This opens the WordPress Customizer. Near the bottom of the menu on the left, click Additional CSS. This opens a code editor where you can enter your CSS rule.
The Additional CSS tab is a WordPress feature that adds the CSS to your database, so you should see this tab no matter what theme you’re using.
Note that if you change themes, you’ll lose access to any CSS on the Additional CSS tab – but you’ll get it back if you restore the old theme.
Style.css File
Another place where you can add site-wide CSS is in your theme’s style.css file. You can access it by navigating to Appearance > Theme Editor in your dashboard and selecting it from the list to the right of the editor:
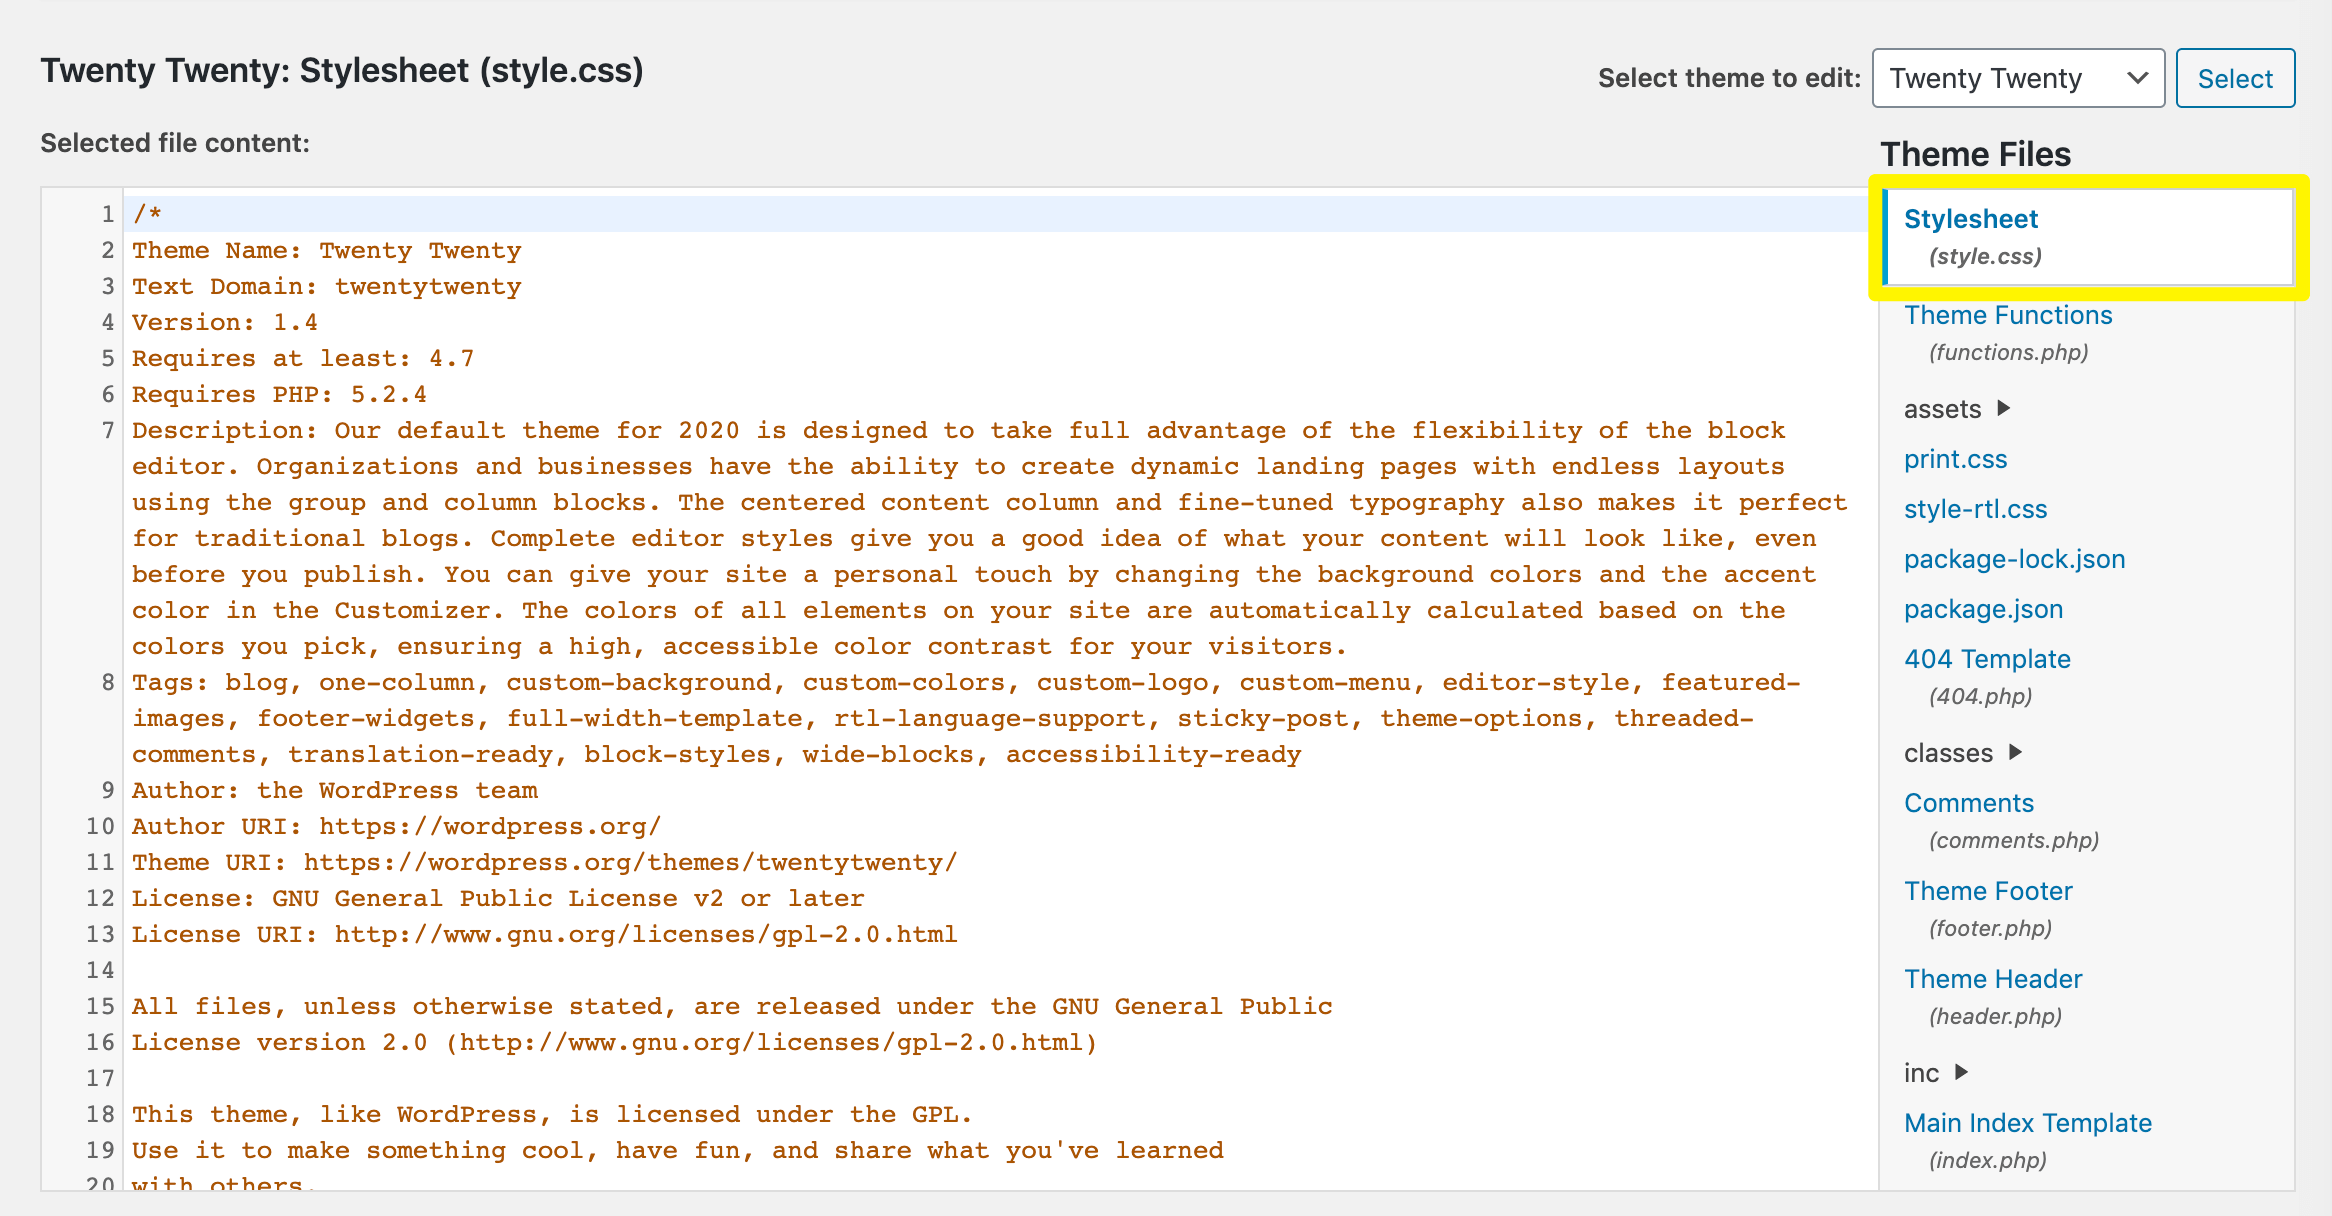
Here you can edit your CSS as described above, as well as make changes to your theme’s default styling.
The drawback to this method is that your custom code will be overwritten when you update your theme unless you use a child theme.
Note also that if you can’t find a Theme Editor as a submenu item under Appearance in your WordPress dashboard, it may have been removed for security reasons.
If your hosting provider offers a File Manager or you have FTP access to your site, navigate to /wp-content/themes/<your-child-theme-directory>, open the style.css file for editing, and add the CSS rule to the file.
Examples of Using Custom CSS with Beaver Builder
Now that you know how and where to apply custom CSS within WordPress and Beaver Builder, let’s take a look at a few use cases.
The following examples demonstrate how to use CSS to achieve specific effects – some practical and some just plain cool.
We’ll provide the code for you in these examples. If you want to create custom CSS and don’t know what it should look like, there are some excellent code generators available to help.
We recommend the Ultimate CSS Generator:
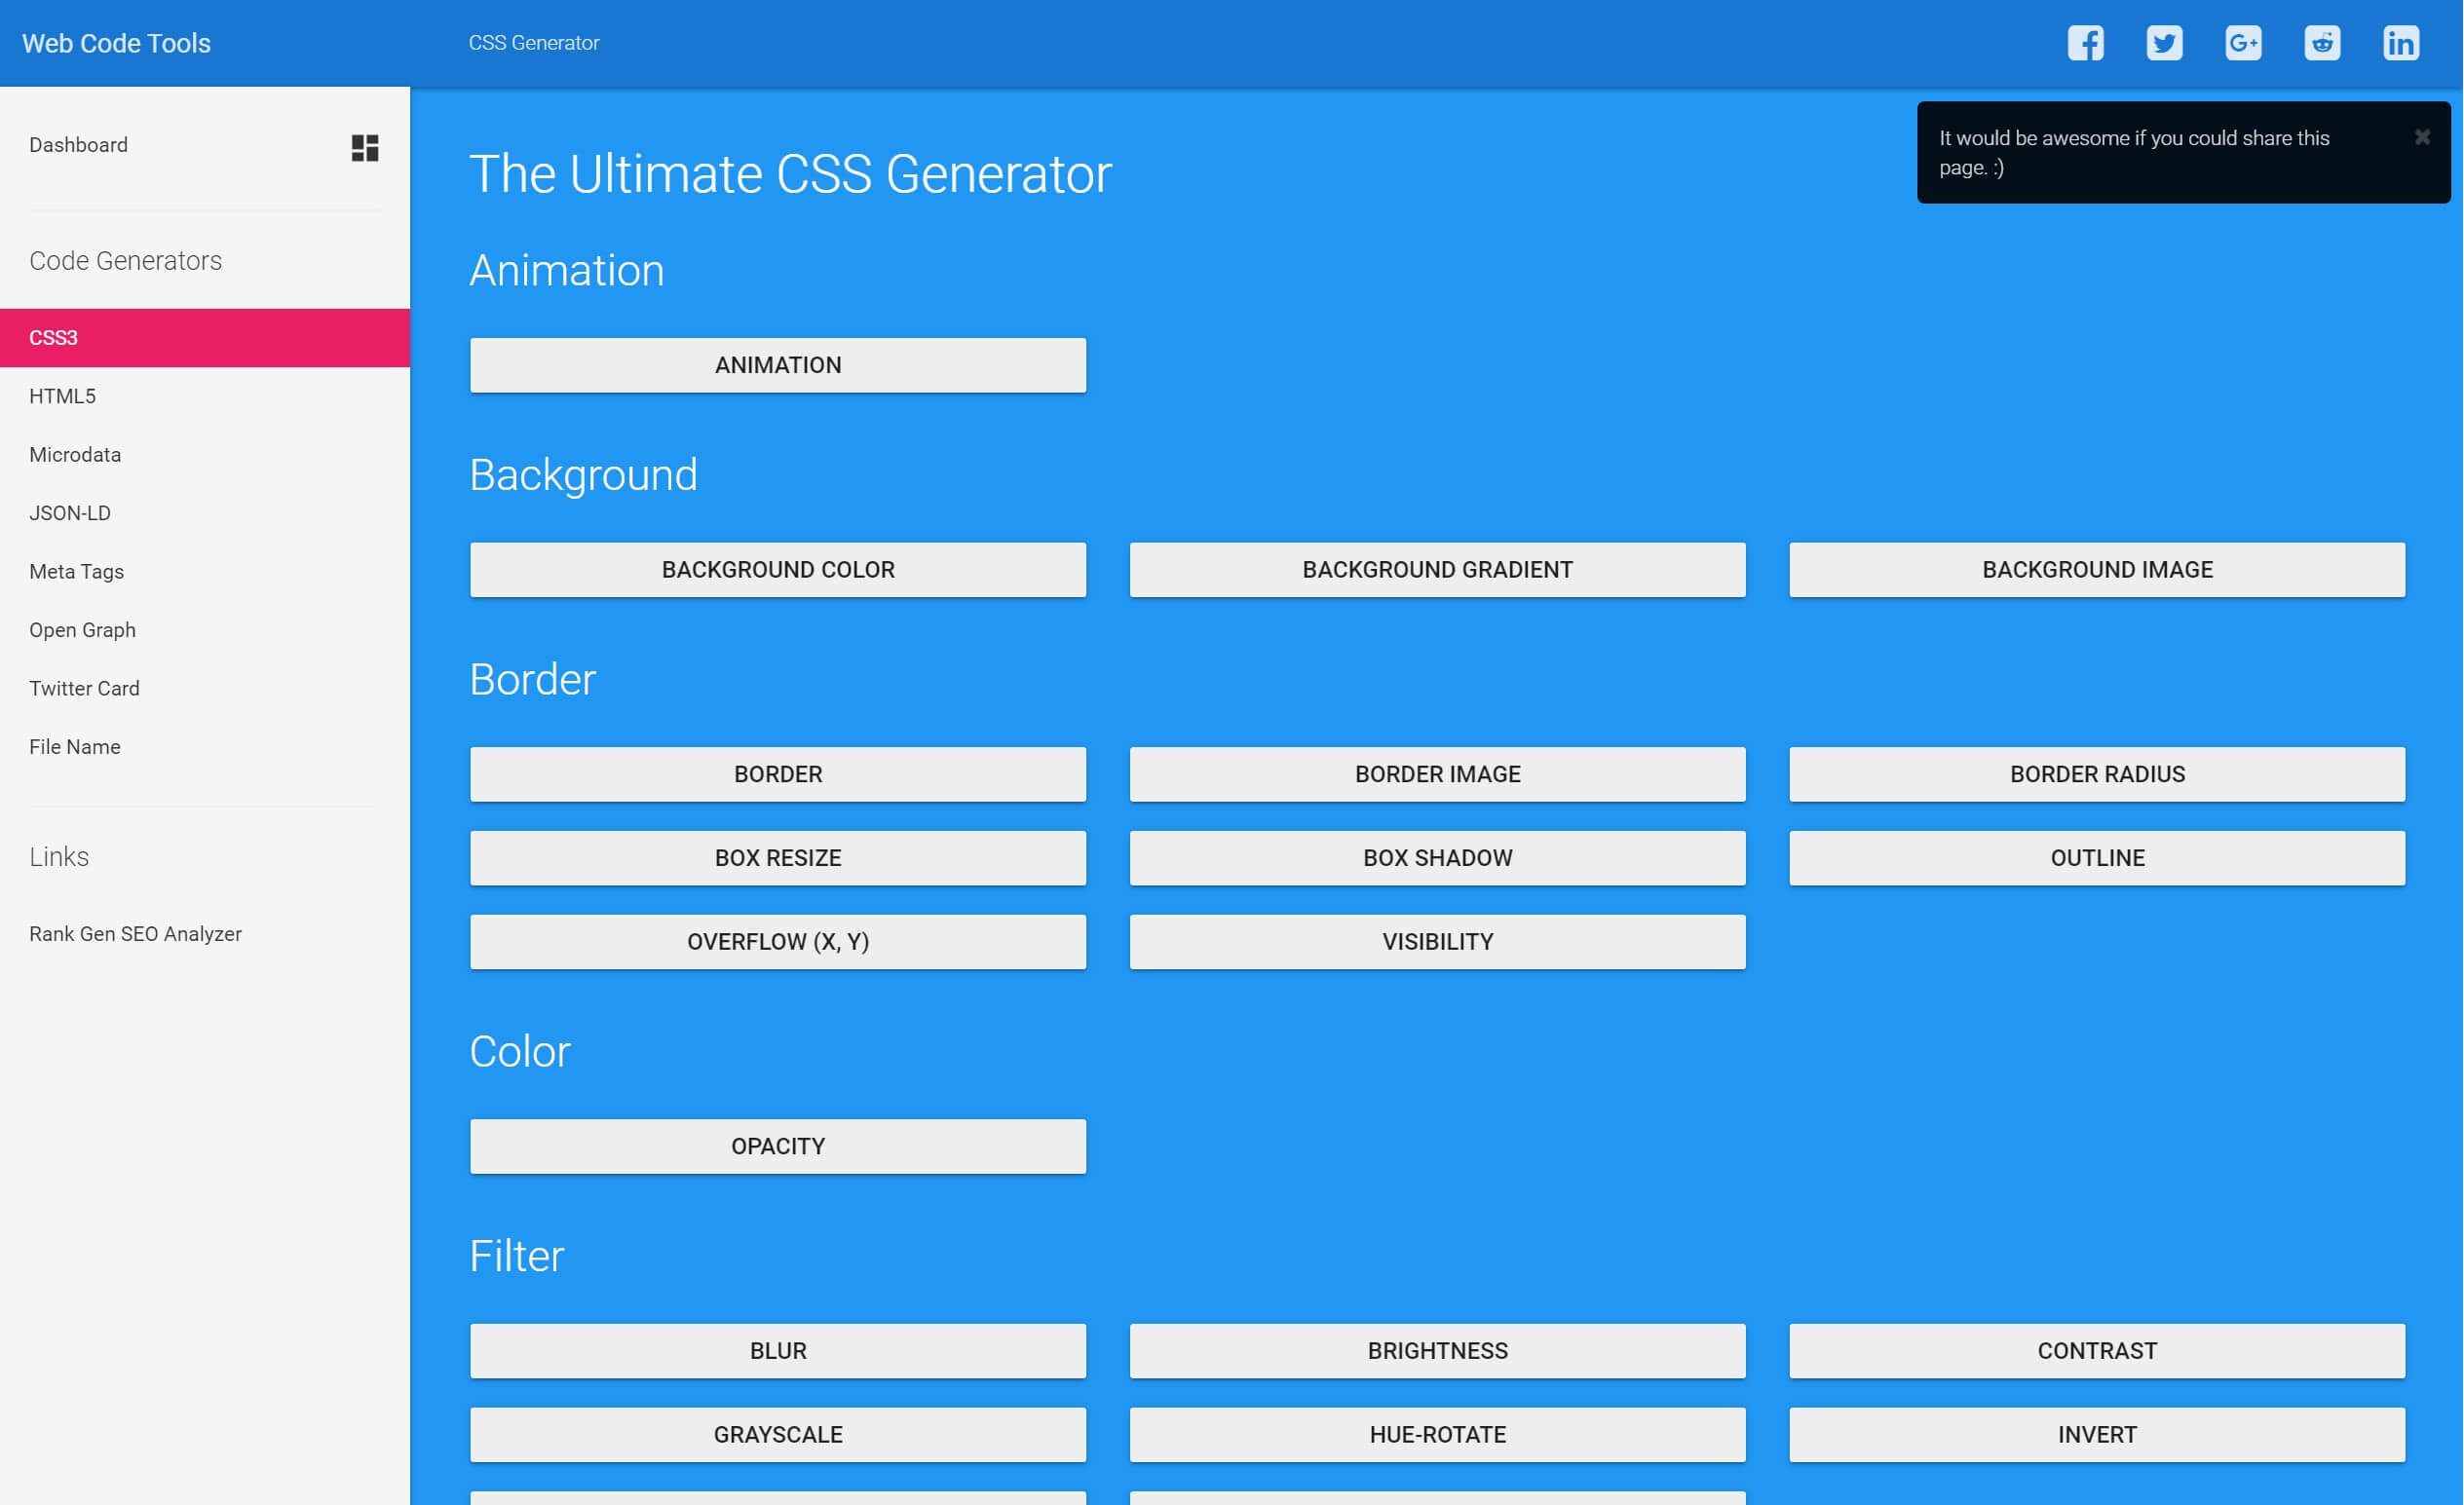
Just tell the code generator what you want to do, and it will supply CSS you can copy and paste to achieve that effect.
Let’s dive into some examples.
1. Make Images Round
Rounded photos are commonly used when displaying portraits to set them off from other images on a page. For this example, we’ll apply custom CSS to a single gallery of images on a specific page.
In the Gallery module, you can round the corners of images on the Style tab by adding a Radius setting in the Photo border section, but you have to use pixels.
We’ll set up a CSS rule that uses % as the measurement unit instead of px, ensuring that square photos will end up perfectly round.
First, give the gallery a CSS class name, as we described above: in the Beaver Builder editor, open the Gallery module settings and head to the Advanced tab:
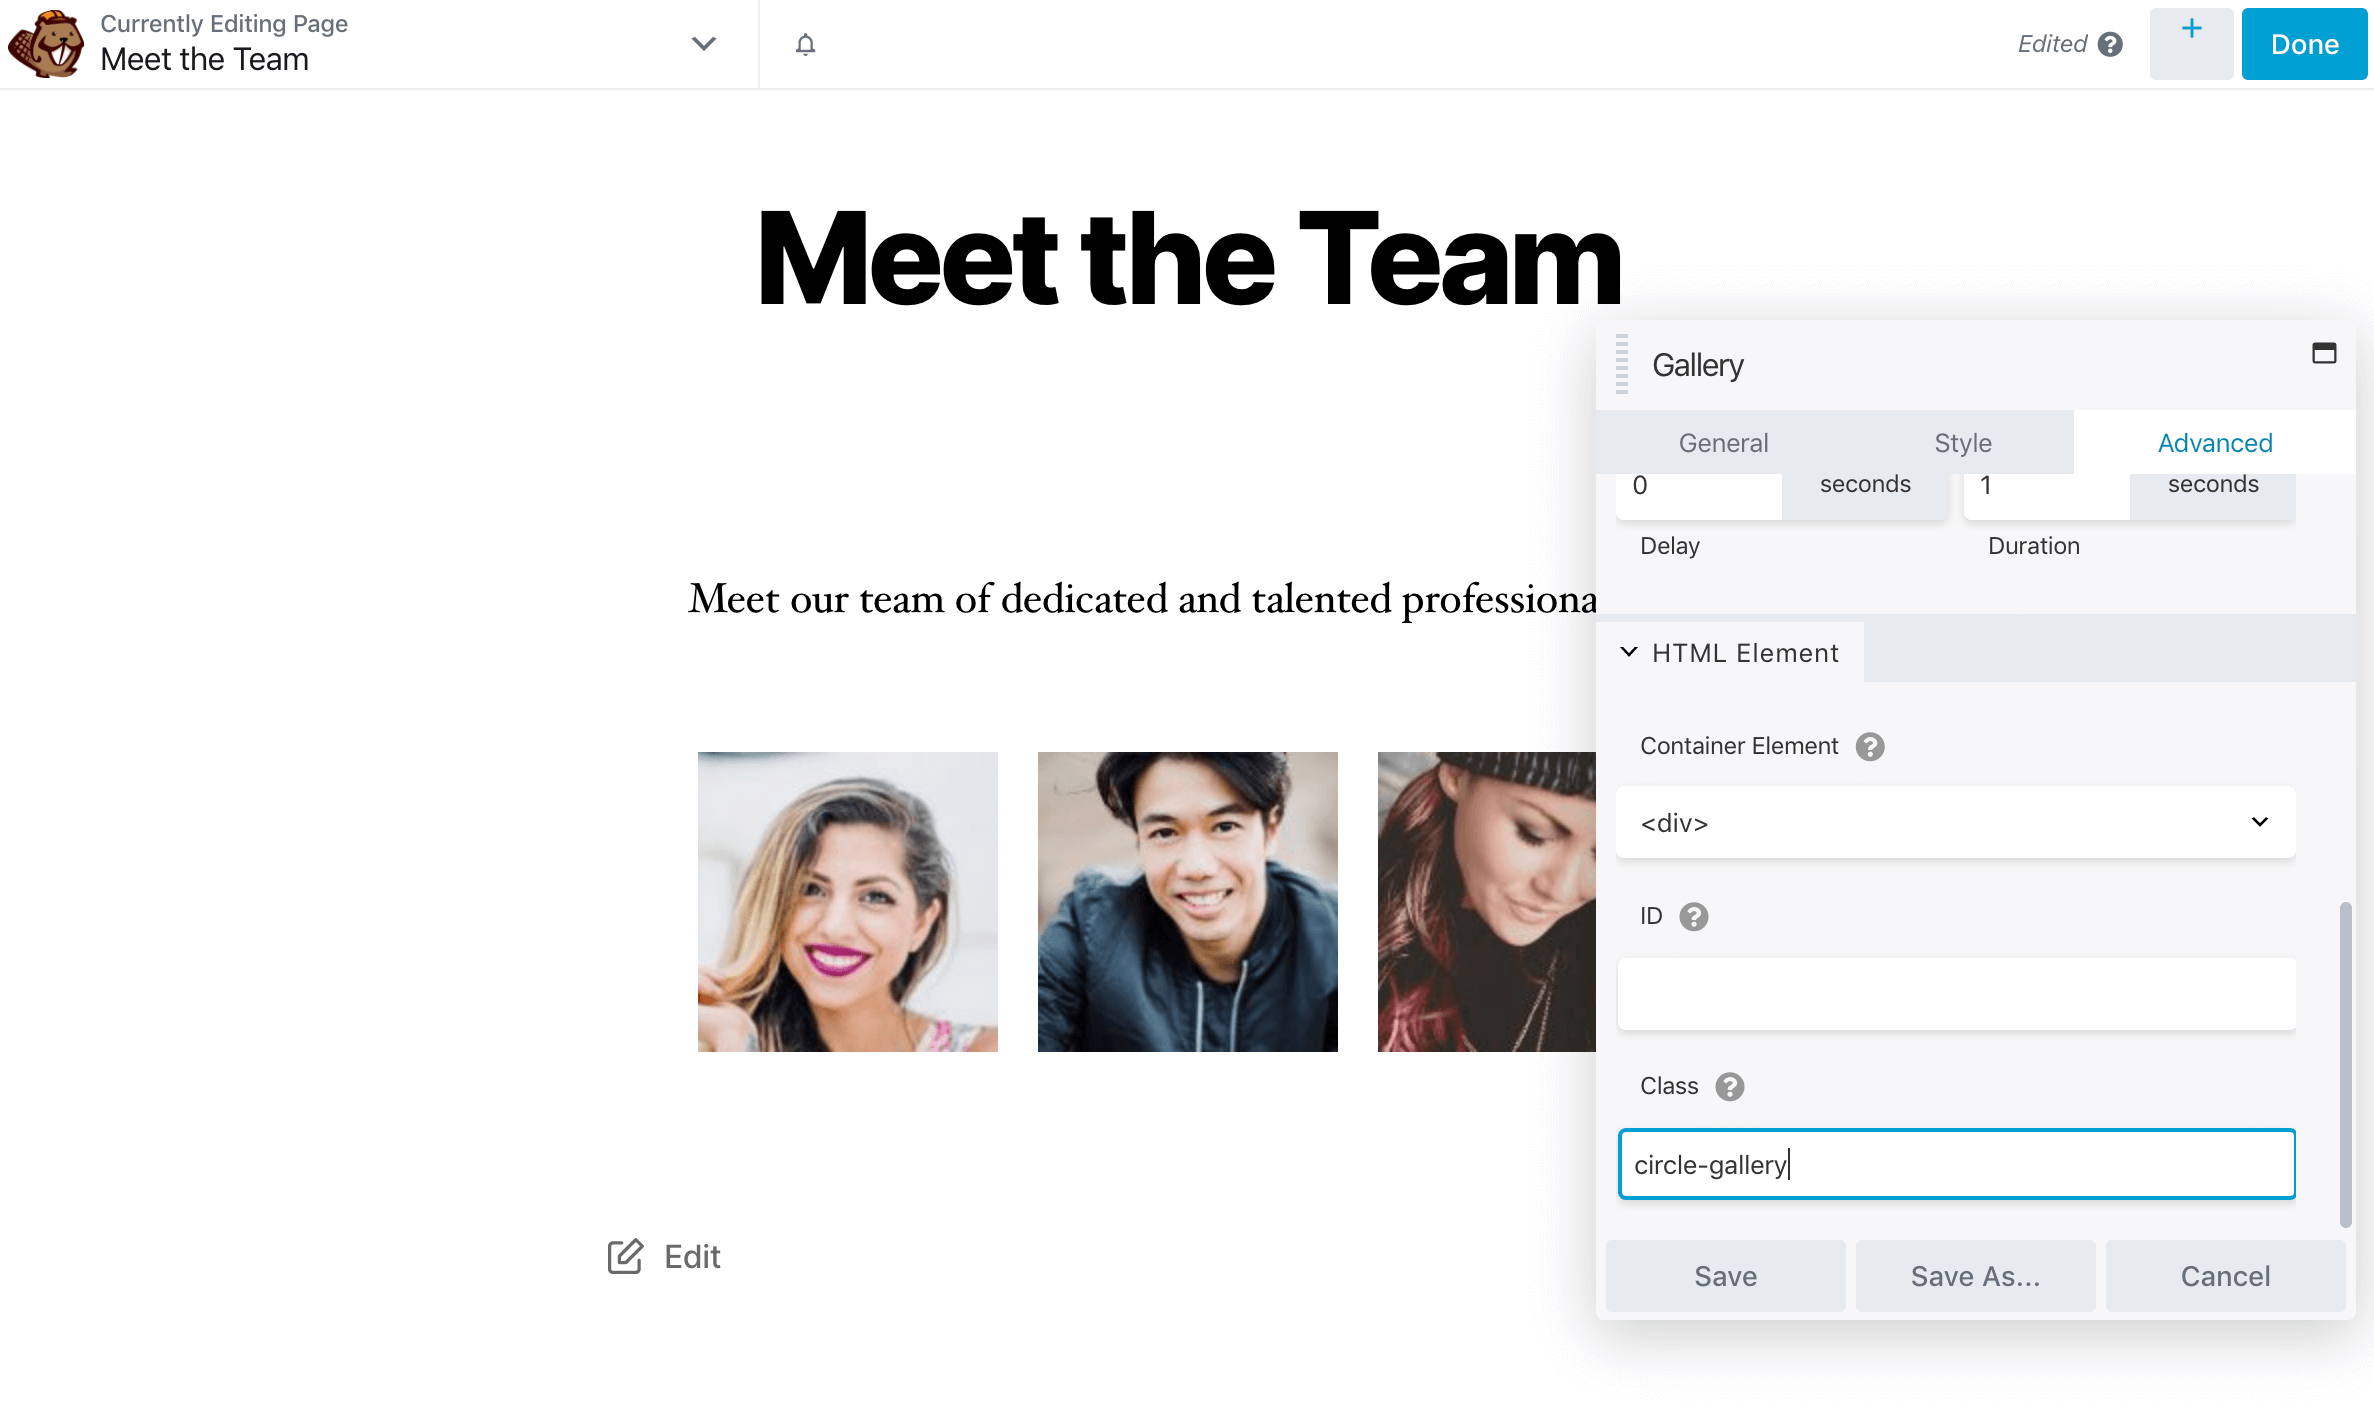
We’ll call the CSS class circle-gallery. When you’re done, click Save.
Next, open Tools > Layout CSS/JavaScript to tell Beaver Builder what to do with the circle-gallery class. Here’s the code we need:
.circle-gallery img {
border-radius: 50%;
}
And here’s the result:
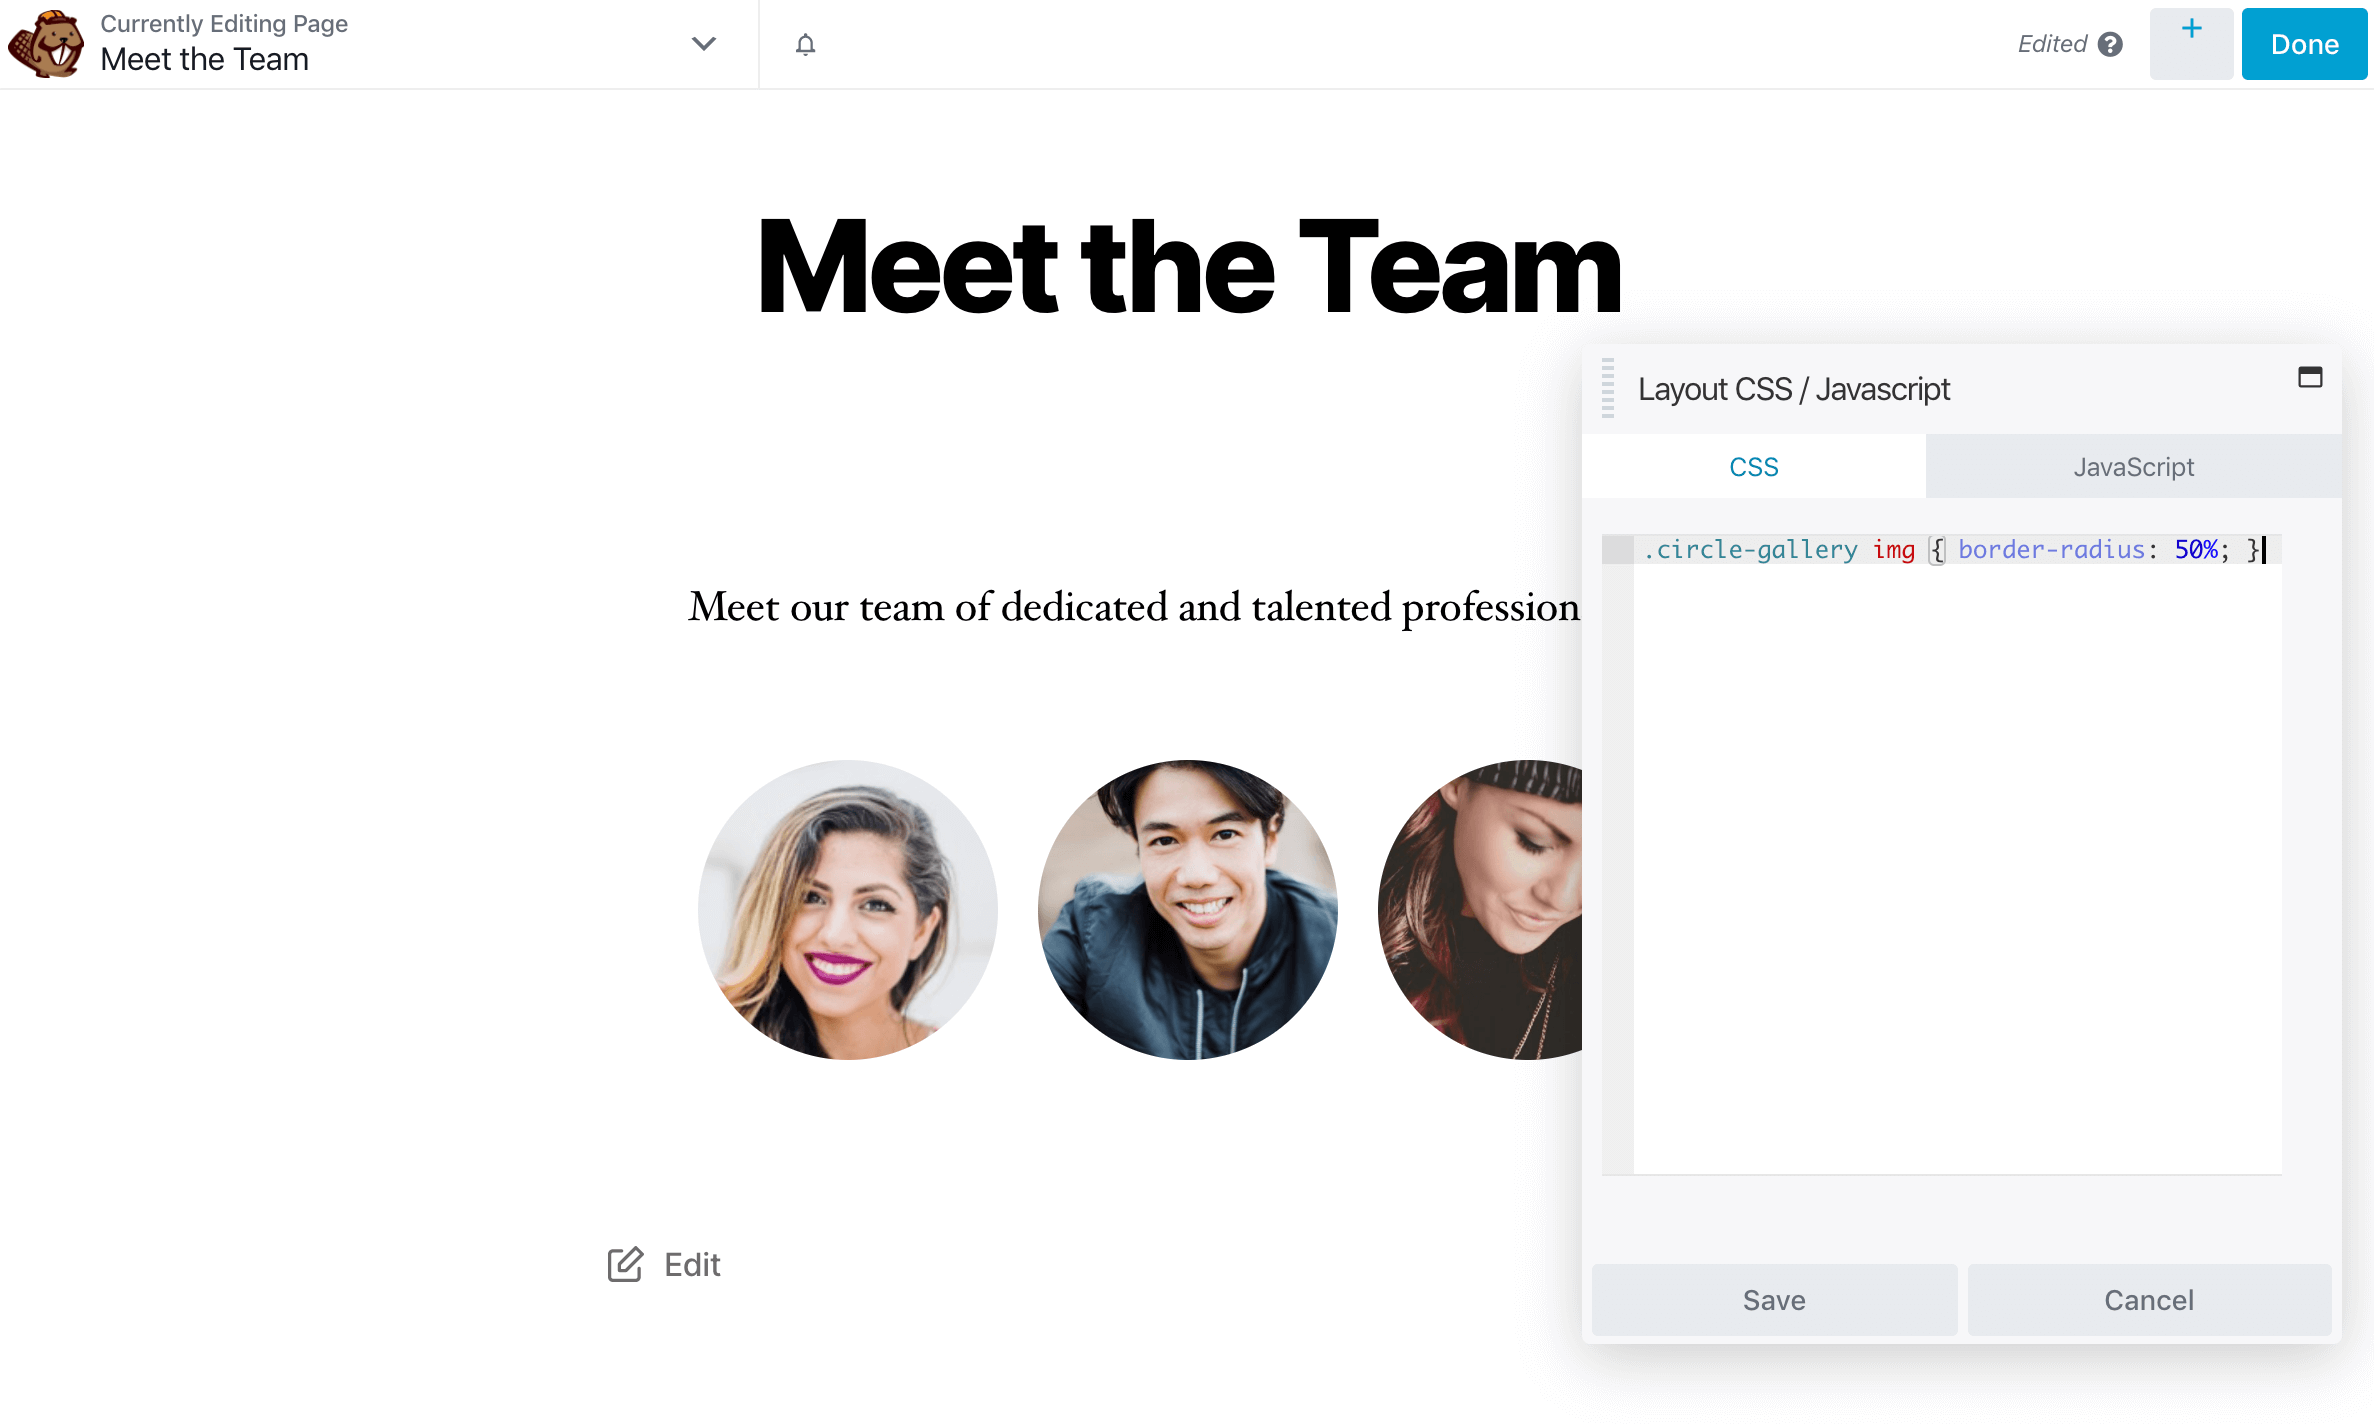
As you type or paste in the CSS rule, you’ll see the gallery change before your eyes. When you’re done, click the Done > Publish to publish the changes.
Note that, because of where we’ve added this code, the circle-gallery class styling will only apply to this particular set of images on this specific page.
2. Add a Background Color to a Single Element
Next, let’s give that gallery a colored background to help it stand out.
Since we’ve already assigned the module a class, we can skip that step. Add the following code to the Layout CSS/JavaScript tool in Beaver Builder:
.circle-gallery {
background: #6EA6D1;
}
This gives our gallery module a nice slate-blue background:
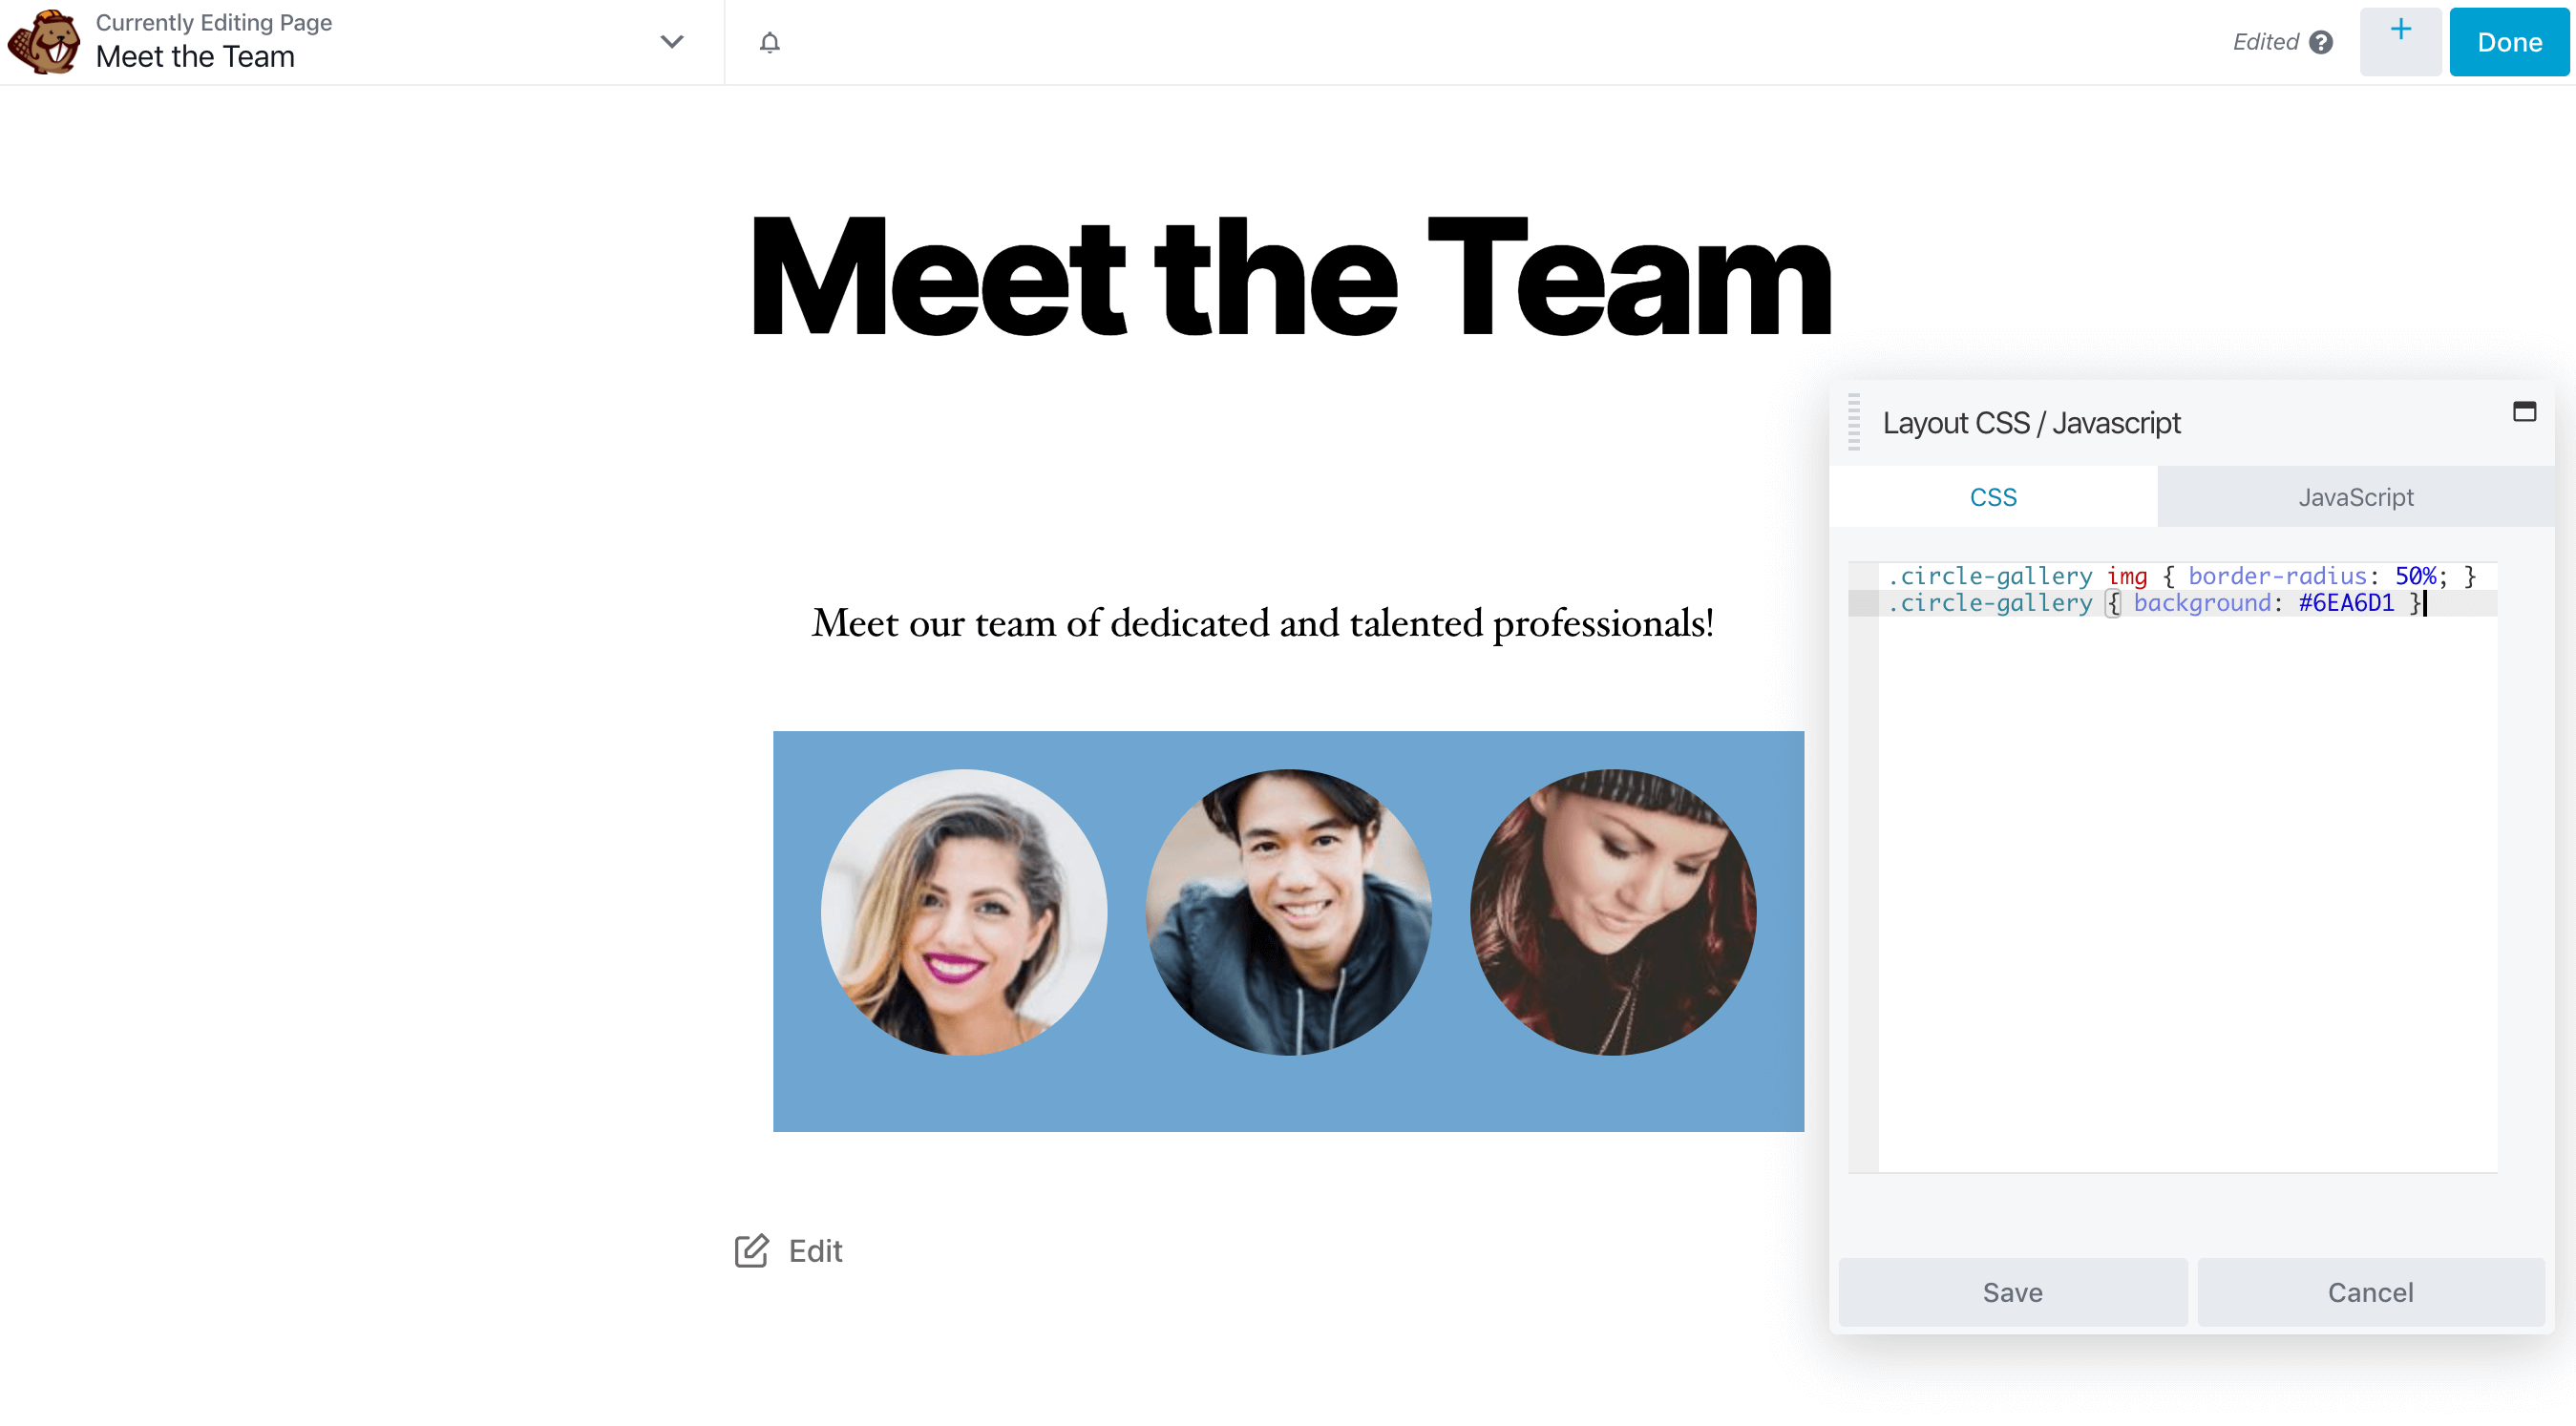
This snippet uses an HTML color code to identify the background color. Simply replace “#6EA6D1” with the appropriate code for the shade you want to use.
If you want more space between the background edge and the images, you can simply add a line to your rule to add padding:
.circle-gallery {
background: #6EA6D1;
padding: 20px;
}
3. Change the Selection Highlight Color
If you want to kick your site’s branding up a notch, you can change features such as the color of the highlight effect when the user selects parts of the page such as text or images.
Here’s what our highlight effect looks like by default:
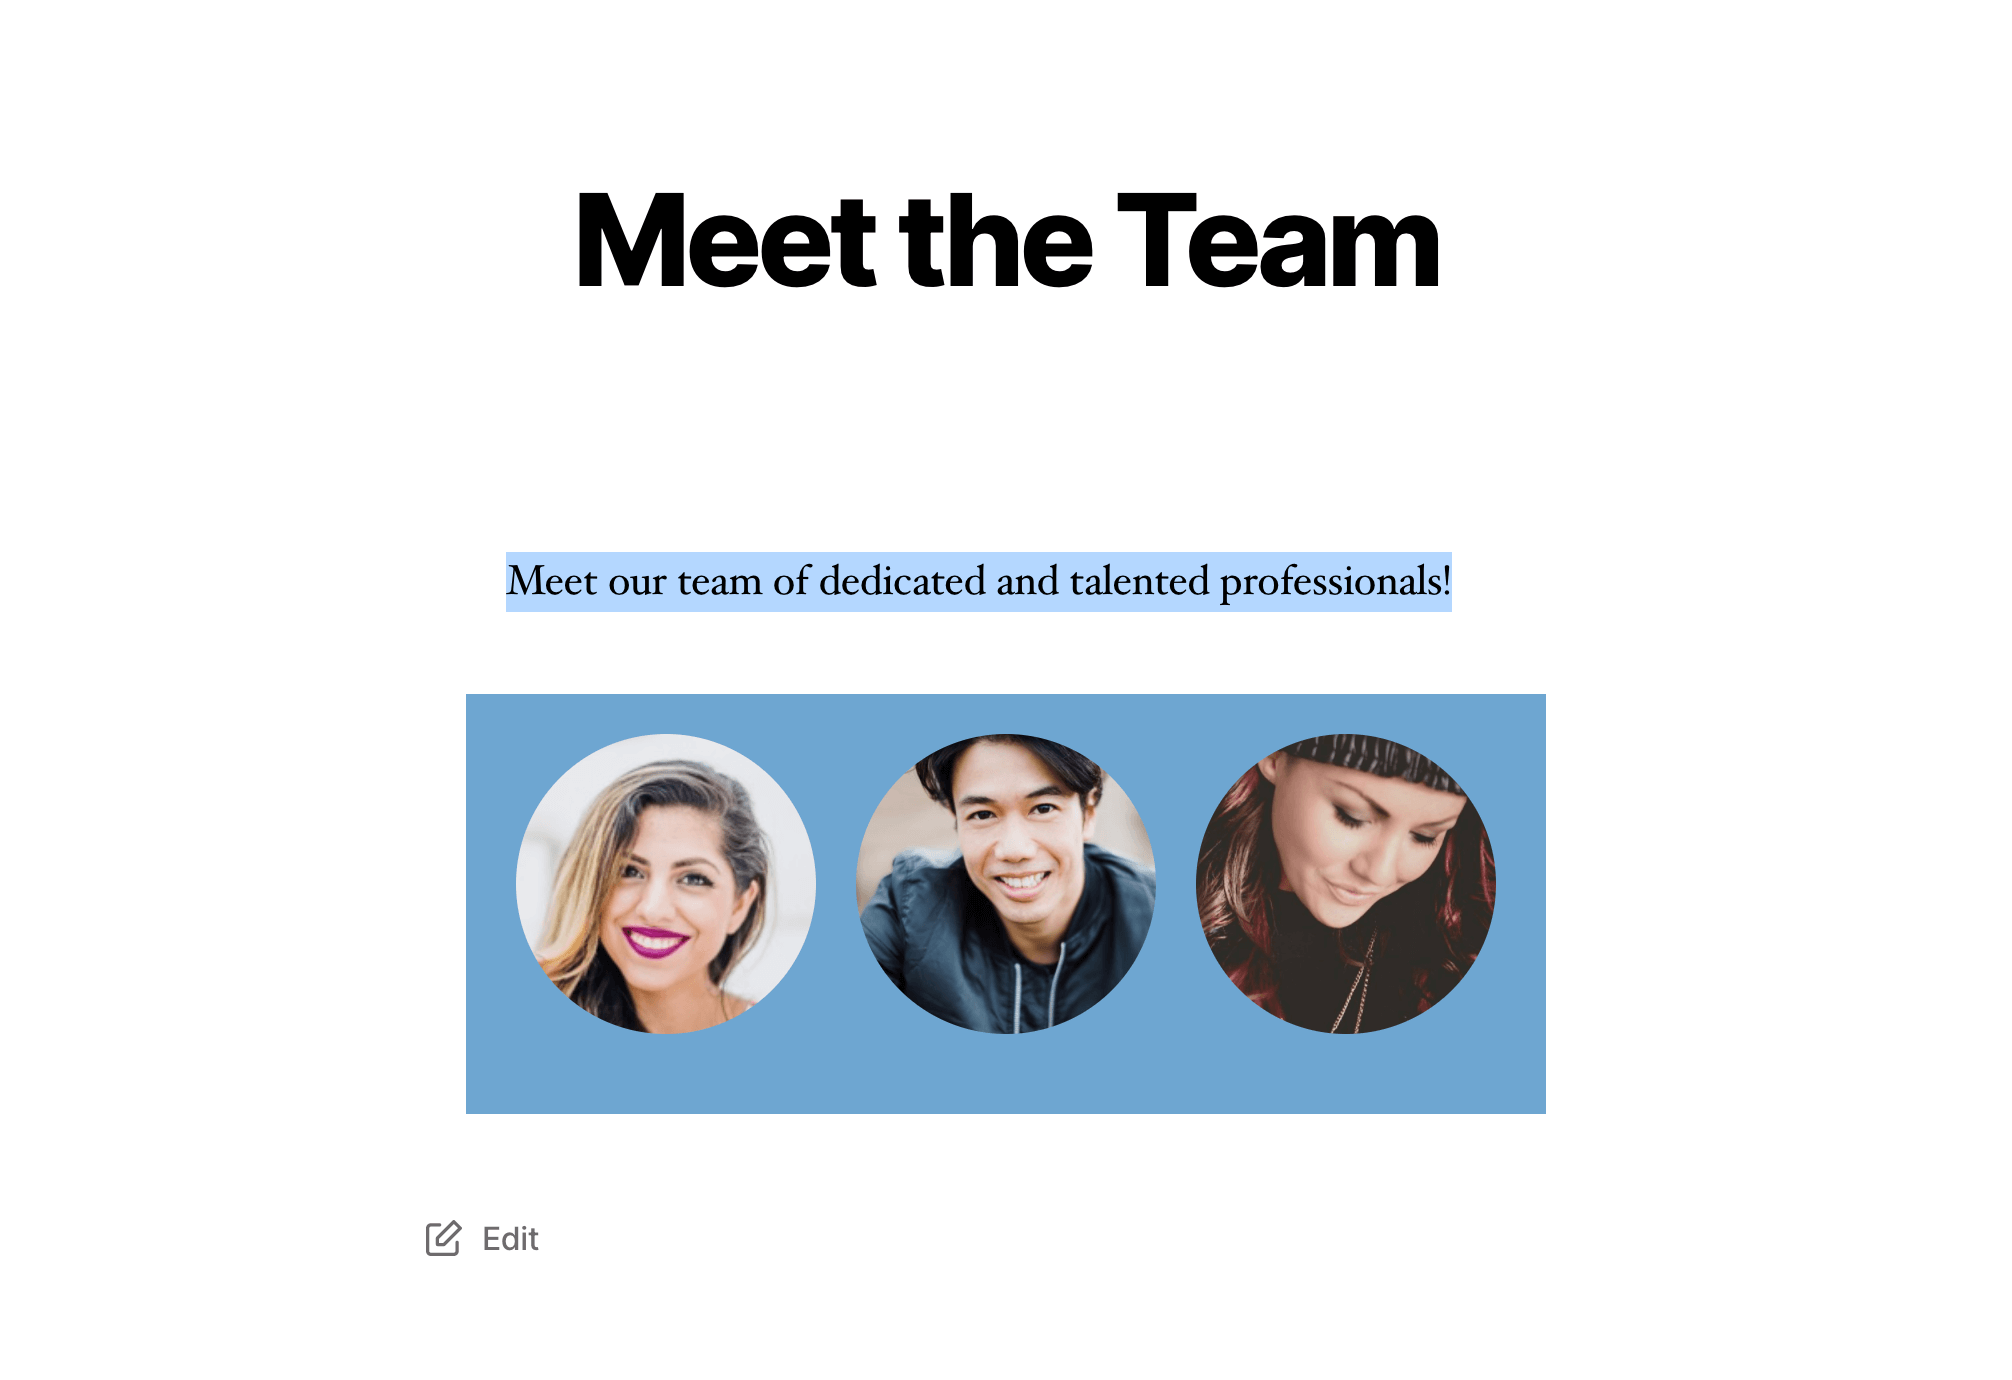
Notice that the blue in the selected text is not the same as the background gallery color.
Let’s change the highlight color to match the blue background of the image gallery.
We’ll also change the text color to an off-white if the selected area includes text. Here’s the CSS snippet:
::selection {
color: #fdfefe;
background: #6EA6D1;
}
Unlike the past two examples, we’re going to apply this customization to the entire site by adding the snippet in the Customizer > Additional CSS section:
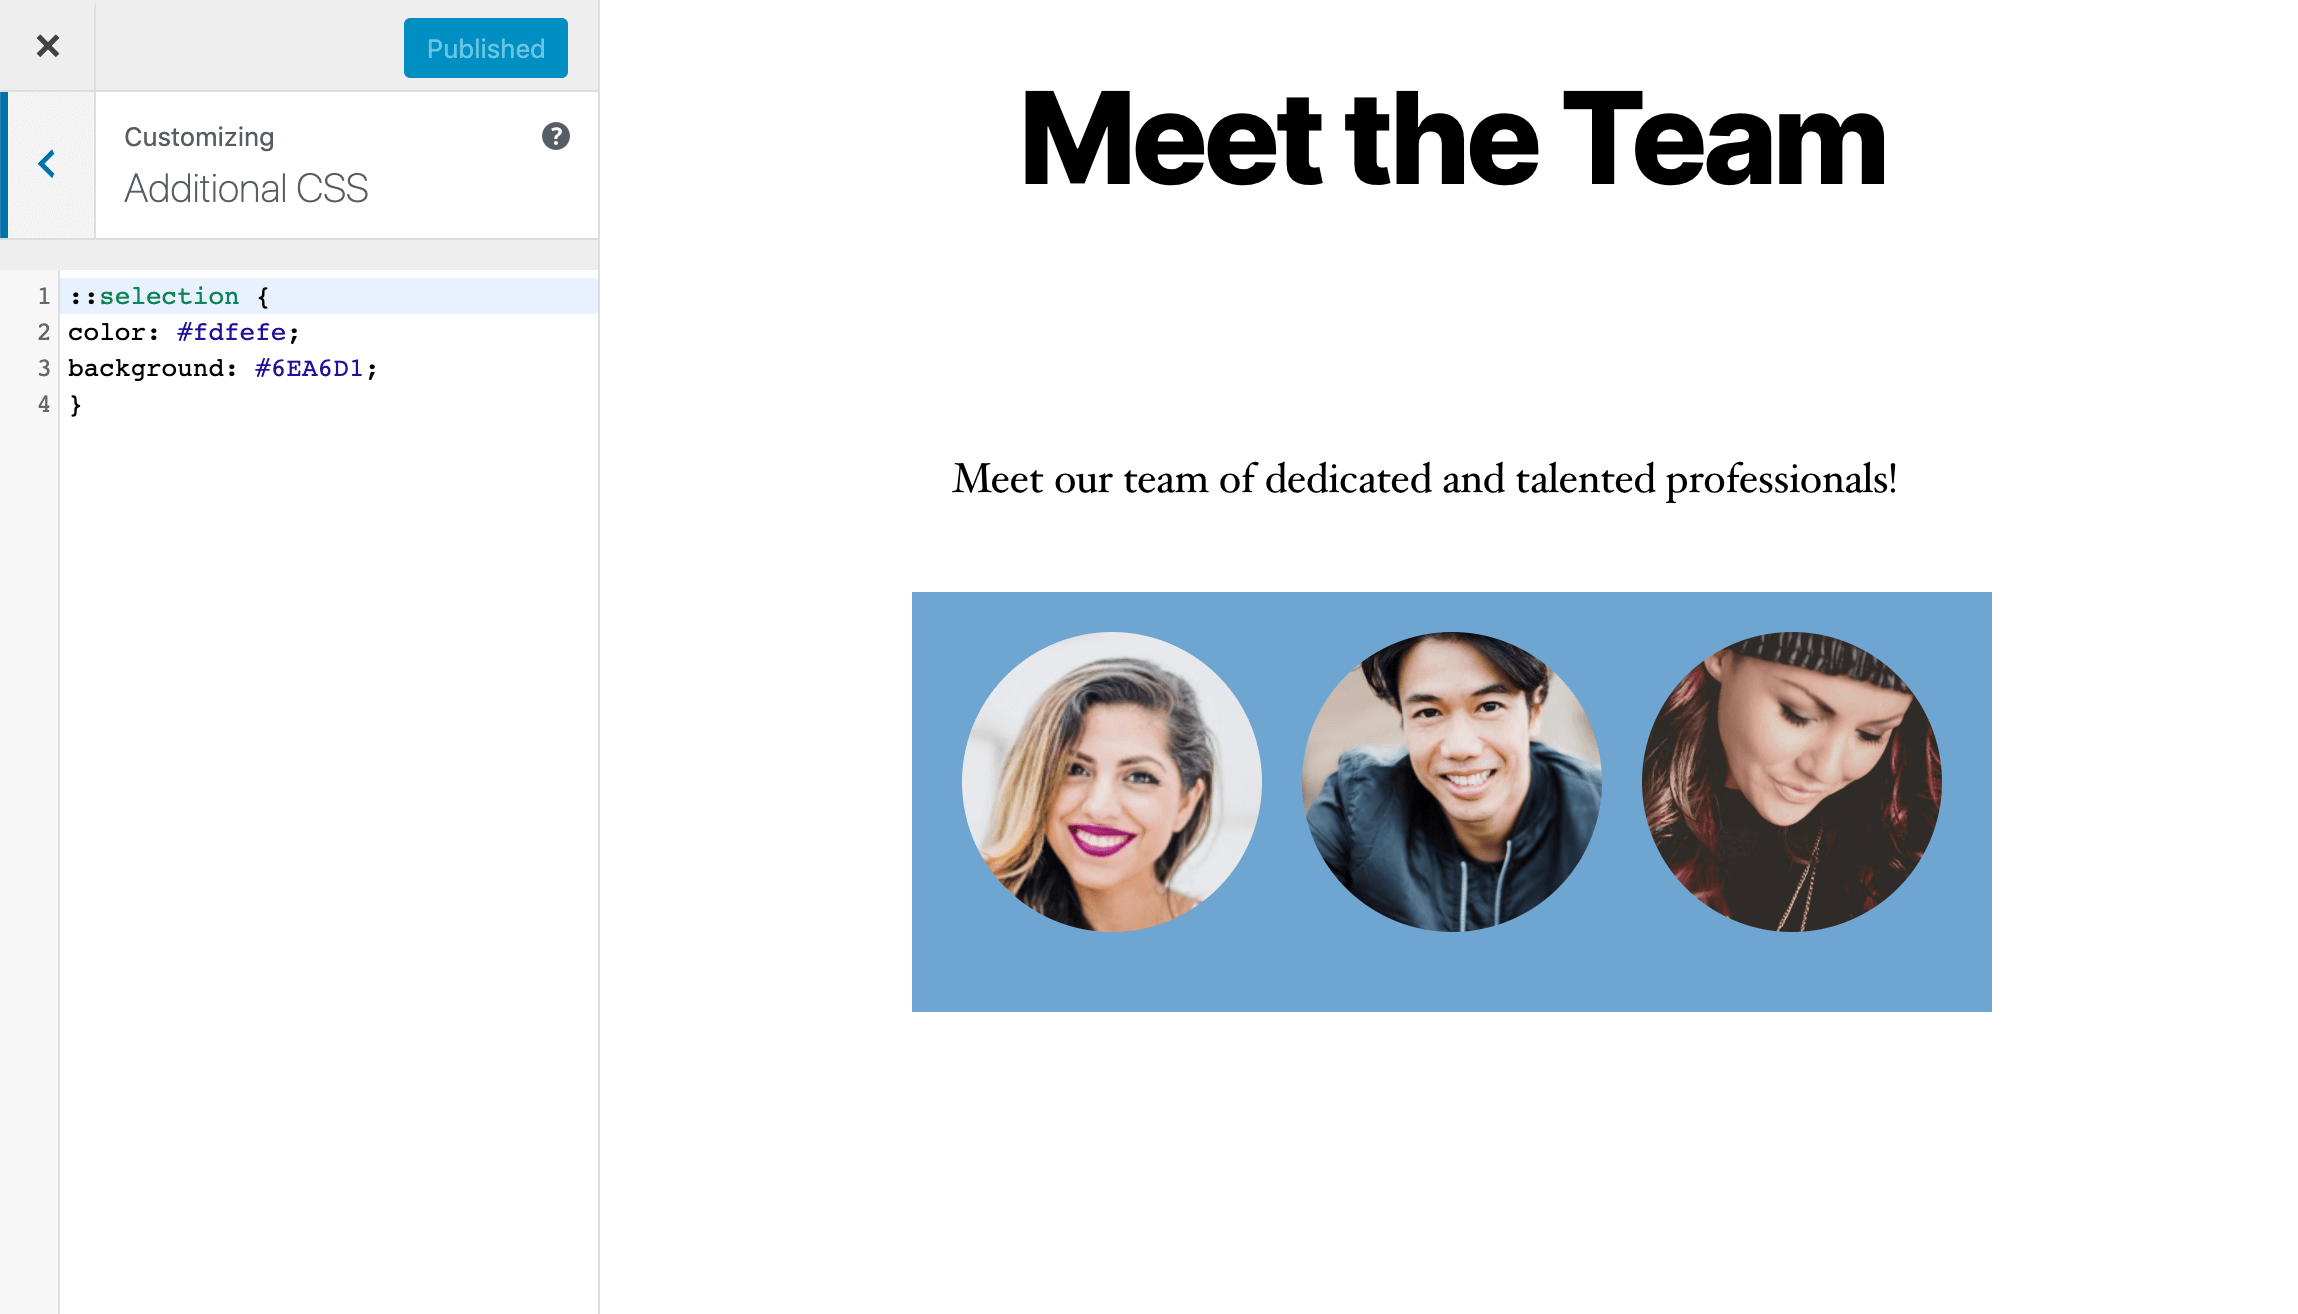
After pasting the snippet, click Publish. The new highlight effect looks like the text in this screenshot:

Note how this rule is a little different from the other rules we’ve used so far.
Rules that have class selectors start with a period, such as .circle-gallery.
In the rule we just added, ::selection is a pseudo-element selector that applies only to the portion of an element that is highlighted – in this case, the text above the gallery.
There are many more tweaks you can implement using custom CSS and Beaver Builder to make your site’s design and branding feel unique and memorable.
At this point, you should have a general idea of how to make simple changes like these to suit your style.
Conclusion
Custom CSS code is the perfect solution to add a little pizazz to your existing Beaver Builder site without shaking up its entire theme and layout. From rounding off images to adding a splash of color, if you can think of it, you can probably achieve it with CSS.
We covered a lot of ground in this article, including how to add CSS to both individual Beaver Builder modules and your entire website.
We also walked you through how to make some small but powerful tweaks, such as adding a background to an element or changing your text selection highlight color to match your site’s theme.
Do you have any favorite CSS tricks for customizing Beaver Builder sites? Share them in the comments section below!
2 Comments
Our Newsletter
Our newsletter is personally written and sent out about once a month. It's not the least bit annoying or spammy.
We promise.
Try Beaver Builder Today

Related articles

Beaver Builder AI: Build WordPress Layouts with AI (Now in Alpha)
Hey everyone! Big news. After a long time of building behind the scenes, Beaver Builder AI is here. The alpha…

How Beaver Builder Products Work Together to Build Flexible WordPress Websites
Building a WordPress website often means stitching together a theme from one developer, a page builder from another, and a…

From Azeroth to WordPress: How Warcraft Tavern Uses Beaver Builder
Since releasing Beaver Builder 12 years ago, a feeling will come up from time to time that just never gets…
Join the community
We're here for you
There's a thriving community of builders and we'd love for you to join us. Come by and show off a project, network, or ask a question.
Since 2014
Build Your Website in Minutes, Not Months
Join Over 1 Million+ Websites Powered By Beaver Builder.
“With that said, it’s generally best to use custom CSS sparingly. It can add to the complexity of your site and can make it harder to maintain.”
Good point, Will.
When using a page builder it’s best to rely as much as possible on its design features. The more custom CSS, the more one will end up in doubt as to whether a given site aspect was customized via the page builder, or custom CSS. Best avoided:)
Nice breakdown, to be honest, I used to hand-code a lot of CSS before and then discovered microthemer, this does all the heavy lifting for me, is compatible with beaver builder, and keeps the code separate from the theme. It also has a lifetime licence too.