
How to Build a Website With WordPress and Beaver Builder: A Complete Guide
If you’re thinking about building a website, figuring out where to start can be difficult. There are many options when it comes to site builders, hosts, and management systems. However, there are notable benefits to choosing WordPress.
WordPress is a Content Management System (CMS) designed with a user-friendly interface. Without any coding knowledge, you can use WordPress to create a visually stunning website or even an online store. It’s also free and open-source, giving you full control over your content with low startup costs.
You don’t have to take our word for it, though. Currently, WordPress powers 43% of the internet, which translates to around 472 million sites using this platform.
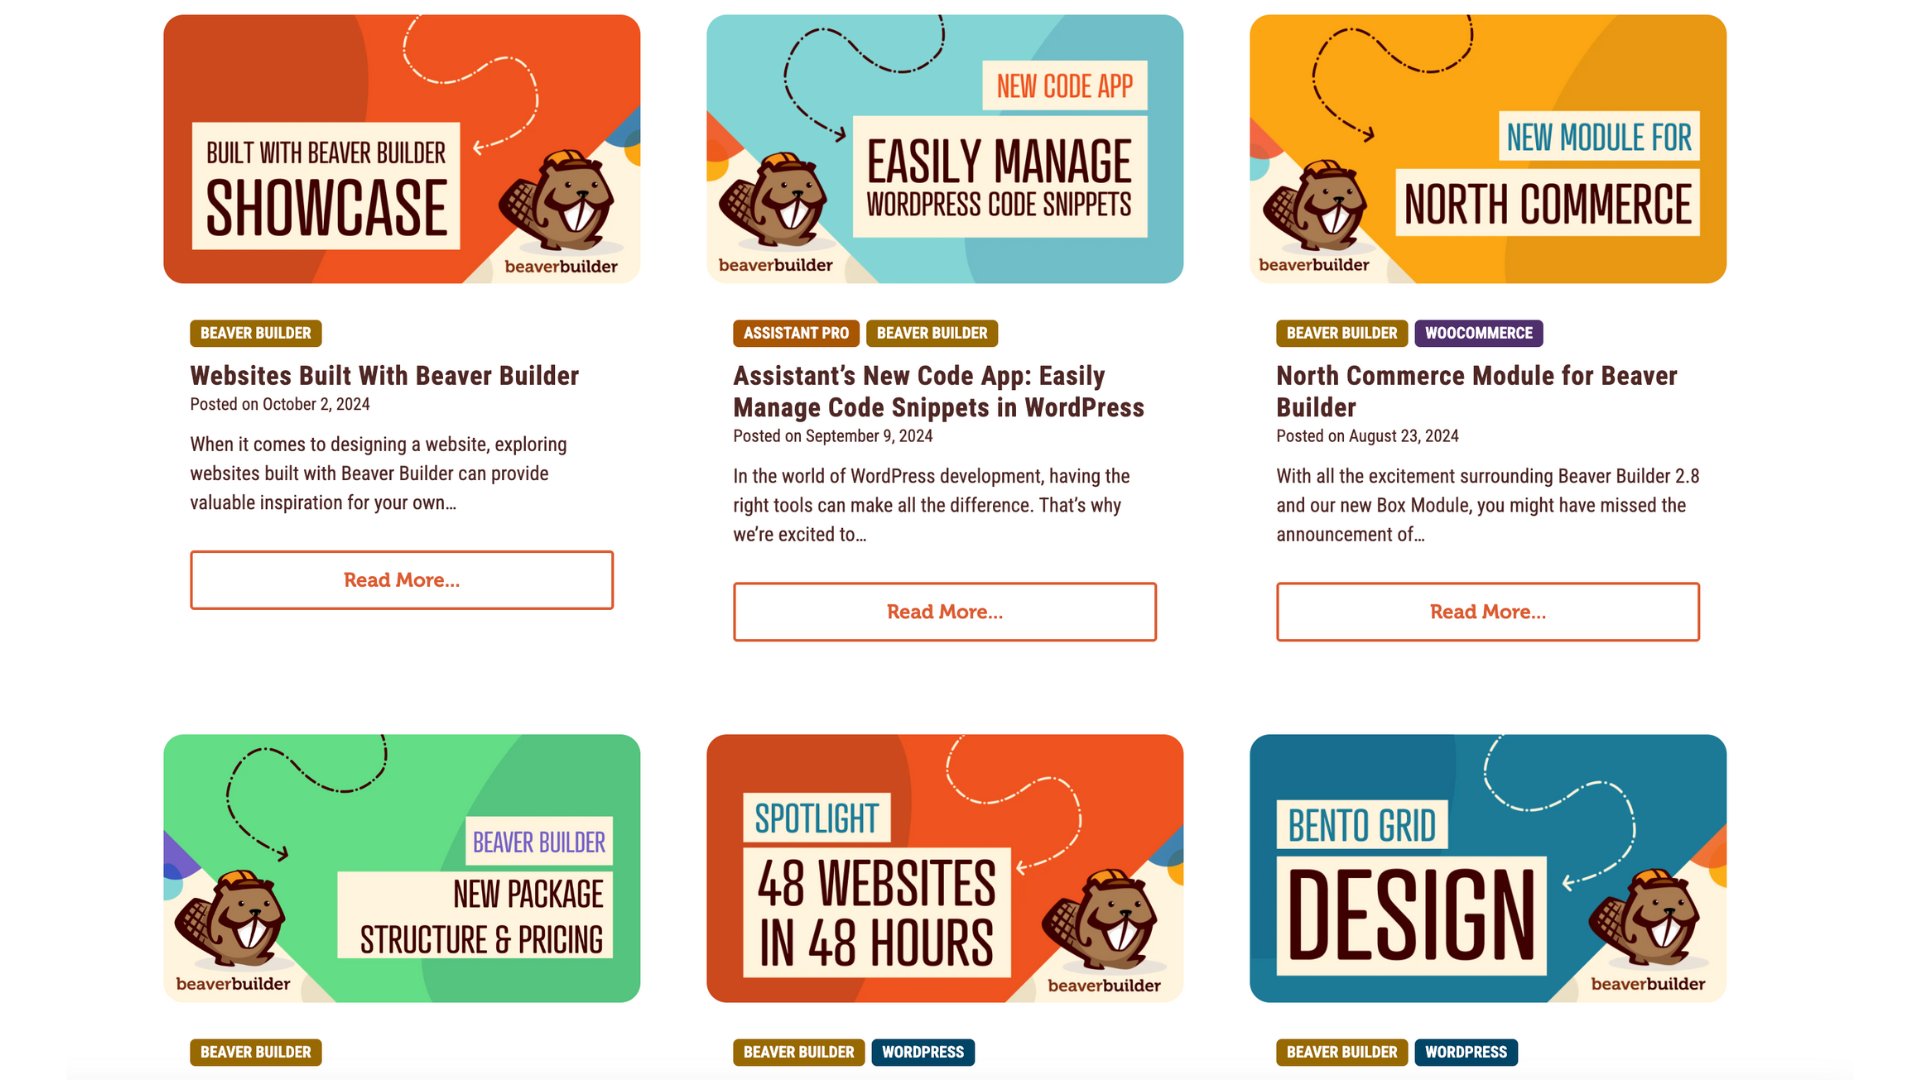
Here’s an example of a website built with WordPress and Beaver Builder:

WordPress Concepts
WordPress Dashboard
In order to get started with WordPress, there are a few terms you’ll need to know. Let’s start with the dashboard:
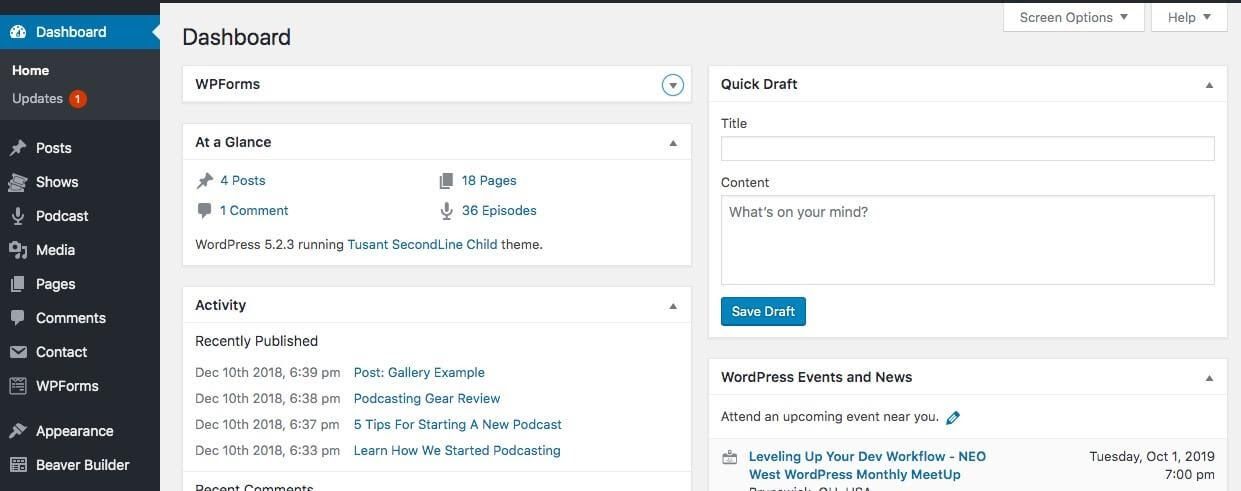
This is the main control center or “back end” of your website. Only you and other authorized users can see it. Use the WordPress admin panel on the left to change your site’s settings, customize its design, and add content.
WordPress Content Types
There are two primary types of content in WordPress: Posts and Pages.
Posts are typically topical and dynamic in nature. They usually appear in a feed in order of publication:
The term post is leftover from the early days of WordPress when the platform was mainly used for blogging.
Now, however, posts encompass a wide variety of styles and formats. Navigation and archiving can be easily accomplished by applying categories and tags.
On the other hand, pages tend to have more static content and contain foundational information about your website and brand.
An About page is a common example:

Another example of static content is using a landing page to market a single product, where you have a funnel that leads to commitment.
WordPress Theme
WordPress requires a theme, which is a package of code that wraps your website in a set of styles.
Primarily, themes are concerned with your site’s appearance or design. Among other things, they determine the fonts, colors, and layout of your website. They mainly control parts of the page outside the content area, such as headers, footers, and sidebars.
We’ll talk more about themes later when you’re ready to choose one.
WordPress Plugins
WordPress also allows the use of plugins, which are packages of code that focus on functionality. Plugins add new options to the native functionality of Wordpress.
They can be very specific, such as blocking the Comments area from displaying in WordPress posts, or they can be comprehensive, such as shopping platforms, event calendars, or forms. If you can dream it, someone has probably built a plugin for it.
You can purchase premium plugins or install free plugins from the WordPress Plugin Directory found by navigating to the Plugins tab in your WordPress dashboard:
WordPress Page Builders
Page builders are a specific kind of plugin that brings an entirely new set of content design tools into your site. Our own Beaver Builder plugin is a prime example of a page builder:
With Beaver Builder, you can elevate your site to the next level—whether you’re a beginner or a professional—thanks to our free plugin and various premium plans. We’ll explore how to build a website using WordPress and Beaver Builder step-by-step, covering topics like:
- Choosing a WordPress hosting provider
- Installing and configuring WordPress
- Selecting and installing a theme
- Managing plugins
- Creating pages and posts
- Utilizing categories and tags
- Structuring your site’s navigation
Plus, we’ll show you how Beaver Builder Page Builder, Beaver Builder Theme, and Beaver Themer can simplify your design process and help your site stand out. Let’s dive in and get started!
Step 1: Choosing a WordPress Hosting Provider
Before we can look at WordPress itself, we have to cover some basic needs that all websites share. One is a server. This is where your site is stored, or “hosted,” so that web browsers can access it and deliver your content to the public.
Many companies offer specialized hosting packages designed specifically for WordPress. There are also many types of hosting available, and it’s important to understand what each has to offer so you can choose the one best suited to your goals.
Understanding the Various Types of Hosting
Let’s take a look at some of the various kinds of hosting you’re likely to encounter when getting started with WordPress:
- Shared Hosting. This is a common and cost-effective type of hosting in which multiple websites share a single server. These plans tend to be highly affordable, but security and performance can be concerns, so it’s good to choose your web host carefully. If you have one or more small websites, this can be an economical option.
- Virtual Private Servers (VPSs). Similar to shared hosting, VPS plans offer space on a server that stores multiple sites. However, each is allotted separate resources to minimize the impact the websites have on each other. This improves security and performance while keeping the cost budget-friendly.
- Dedicated Servers. True to its name, a dedicated server is yours alone. This approach to hosting means your site speed and security are not going to be impacted by any other site. You’ll also be able to fully customize your server specifications. As you might imagine, this can get quite costly.
- Managed WordPress Hosting. For a truly turnkey experience, this is the way to go. In addition to the usual hosting services, these plans take care of the setup, maintenance, and security of your WordPress installation. They’re usually available for a moderate price.
Regardless of the hosting type you choose, it’s wise to research the company that will provide your server. Here are some key features to look for.
Three Key Features to Look for in a Web Hosting Service
If you’re new to website building, the feature lists of your potential hosting providers might seem overwhelming. To help you separate what matters from the bells and whistles, we’ve broken down three features we think are particularly important for getting started with WordPress.
1. Adequate Technical Support and Security
Investigating the support offered with your hosting plan is vital. This is where you’ll turn if errors occur on your site, you have trouble installing WordPress, or any other technical issues arise.
A high-quality support team is available 24/7 and has multiple contact options. At a minimum, you should be able to call, send an email, or open a ticket according to your preference. Live chat can also be extremely helpful.
Additionally, all hosting providers handle security a little differently. Features such as server firewalls and Secure Sockets Layer (SSL) certificates are strong signs a company takes site protection seriously. You’ll also want to look into your provider’s approach to website backups and restoration in case something does go wrong.
2. A User-Friendly Control Panel
Your host’s control panel is where you can find all your account information. This includes billing statements, domains, email setup, and all the technical tools they provide to build and maintain your site.
We suggest looking for a live demo of your potential host’s control panel. Many use cPanel, a moderately user-friendly option. Other providers have created their own interfaces.
3. The Latest PHP and MySQL Versions
To ensure WordPress runs smoothly, it’s crucial to have the correct software versions installed on your server. Currently, there are three items to check with your host about, including:
Keeping these software versions up to date will improve your site’s speed, security, and compatibility with the latest WordPress features.
WordPress Hosting Providers to Consider
Now that you know a bit more about some of the features and important terminology, check out the Beaver Builder website for a list of reputable hosting providers that we stand behind.
If you want opinions from our Beaver Builder community based on their experience, ask on our Beaver Builder Community Forum, the Beaver Builders Facebook page, or the Beaver Builders group on Slack.
Domain Names
Another very important element for any website is its address. Your domain name is part of your branding – a welcome mat to your site. It’s also how users will find you online.
Every domain name includes a Top Level Domain (TLD). This is the part of the URL that follows the “dot.”
If we look at the Beaver Builder website as an example, the .com portion of wpbeaverbuilder.com is the TLD.
The .com TLD is the most common and usually fairly affordable. However, there’s an ever-expanding list of new and interesting options becoming available.
Quite often, you can acquire domain names through your web host but there are also stand-alone registrars such as hover.com. Especially if you have more than one domain, it’s handy to keep them all with the same registrar, no matter which hosting provider you’re using at the time.
Domain name pricing can range pretty widely. Some go for just a few dollars per year. Newer TLDs, such as .inc, start in the $2,000 range. Others, such as .org or .net, usually run between $10 and $20.
Whichever you choose, remember you’ll need to renew your registration regularly.
Step 2: Installing and Configuring WordPress
Now that you’re set up with a web host and domain, you can get to work on your actual website. There are many elements that make up a successful site, but WordPress makes it easy to set them all up.
We’ll walk you through the steps needed to install, configure, and use WordPress. This includes a quick tour of the main dashboard and key settings you’ll need to get your site off the ground.
Install WordPress
WordPress is a content management system, which means it requires a database. Usually, that means setting up a MySQL database in your hosting account and assigning a user to it. Then you install WordPress and provide those database and user credentials during the installation.
Many hosting providers offer a one-click installation option for Wordpress. Any prerequisite tasks like setting up a database and user are taken care of for you. This WP Beginner article has instructions for how to install WordPress with several of the installers that hosting companies use.
If your hosting provider doesn’t have this option or you just prefer to do it the hard way, the article mentioned above includes instructions for manual installation, or you can follow the official WordPress instructions.
The last step during WordPress installation is to enter a user name and password for yourself, which is what you’ll use to access WordPress in the next section. Notice that the WordPress administrative user is different from the user associated with the database that WordPress accesses in the background.
Navigate Your WordPress Dashboard
To log into your website, in your browser’s URL address field, type your domain followed by /wp-admin. Log in using the credentials you created during the WordPress installation.
After login, you’re greeted with the WordPress administration dashboard. The left sidebar contains the main WordPress menu. Here you’ll find access to key tools to create content and customize your site:
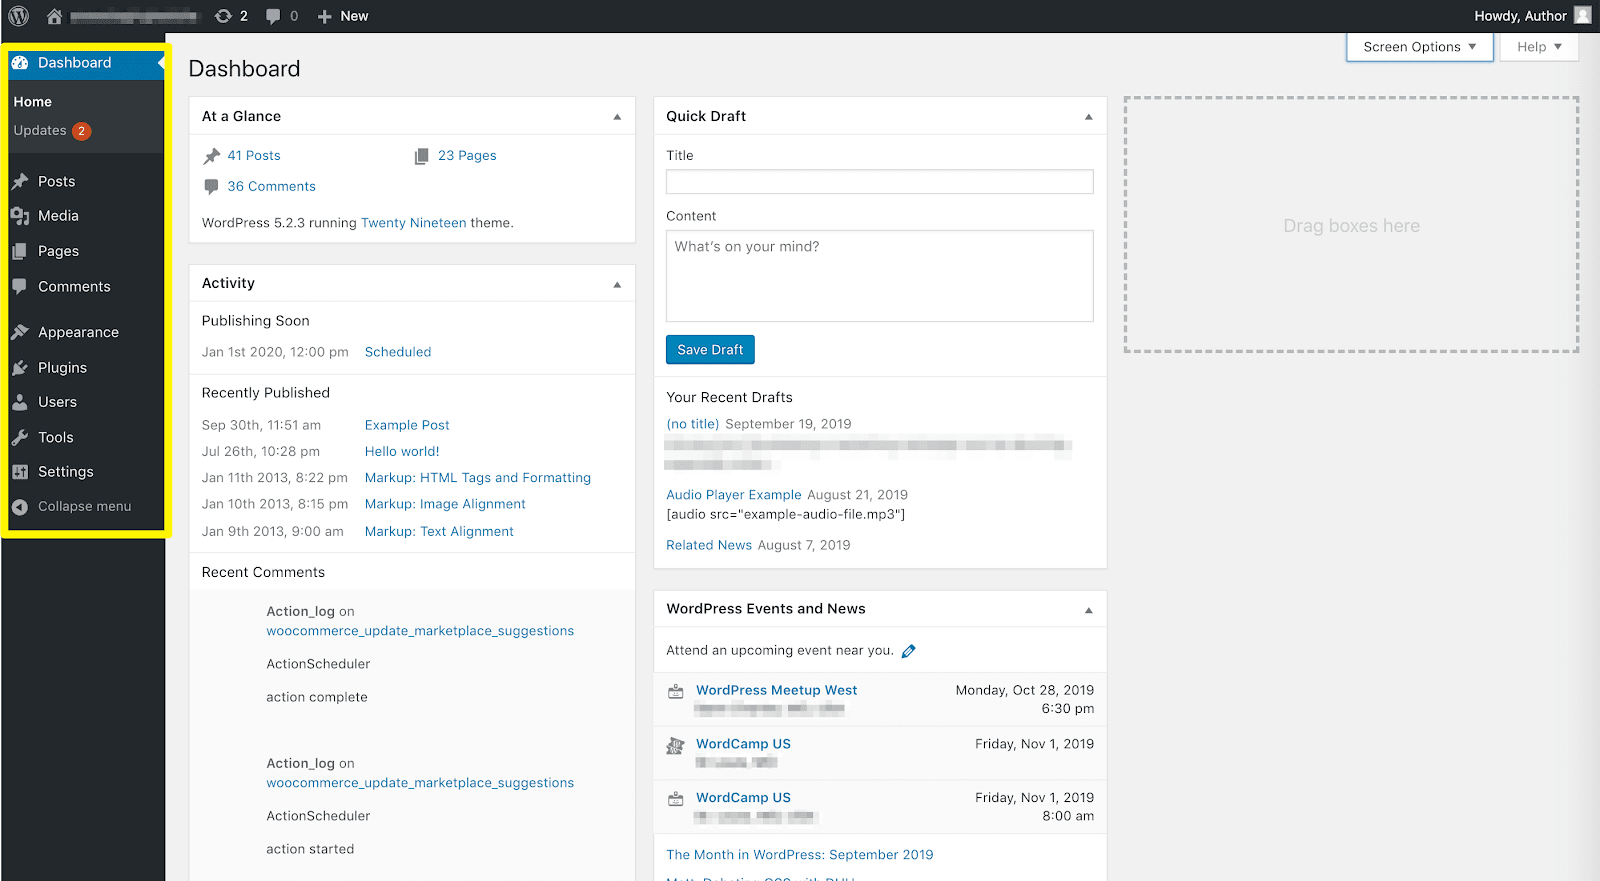
Here’s a quick tour:
- Dashboard. Your site’s home base. It includes several widgets that note recent and upcoming activity on your website, as well as basic information such as your installation’s version.
- Posts. Add new posts, view a list of existing ones, and manage categories and tags.
- Media. Any media files, such as images or videos, are stored and managed here.
- Pages. Add, edit, and organize pages in this area.
- Comments. Whenever a user leaves a comment on a post, you can go here to approve it, delete it, or mark it as spam.
- Appearance. This area contains many key features. You can choose your theme, create your own menus and widgets, and add custom code via this section.
- Plugins. Install, activate, and update plugins here.
- Users. Anyone with an account on your website is listed here. You can manage their roles and permissions to allow or deny access to certain parts of your site.
- Tools. This section includes a variety of tools for importing and exporting data, monitoring site performance, and more.
- Settings. Change basic settings that control your site’s functionality.
We’ll cover many of these areas in more depth later in this guide. For now, we’ll focus on Settings.
Configure Your WordPress Settings
The Settings tab contains important information for your website:
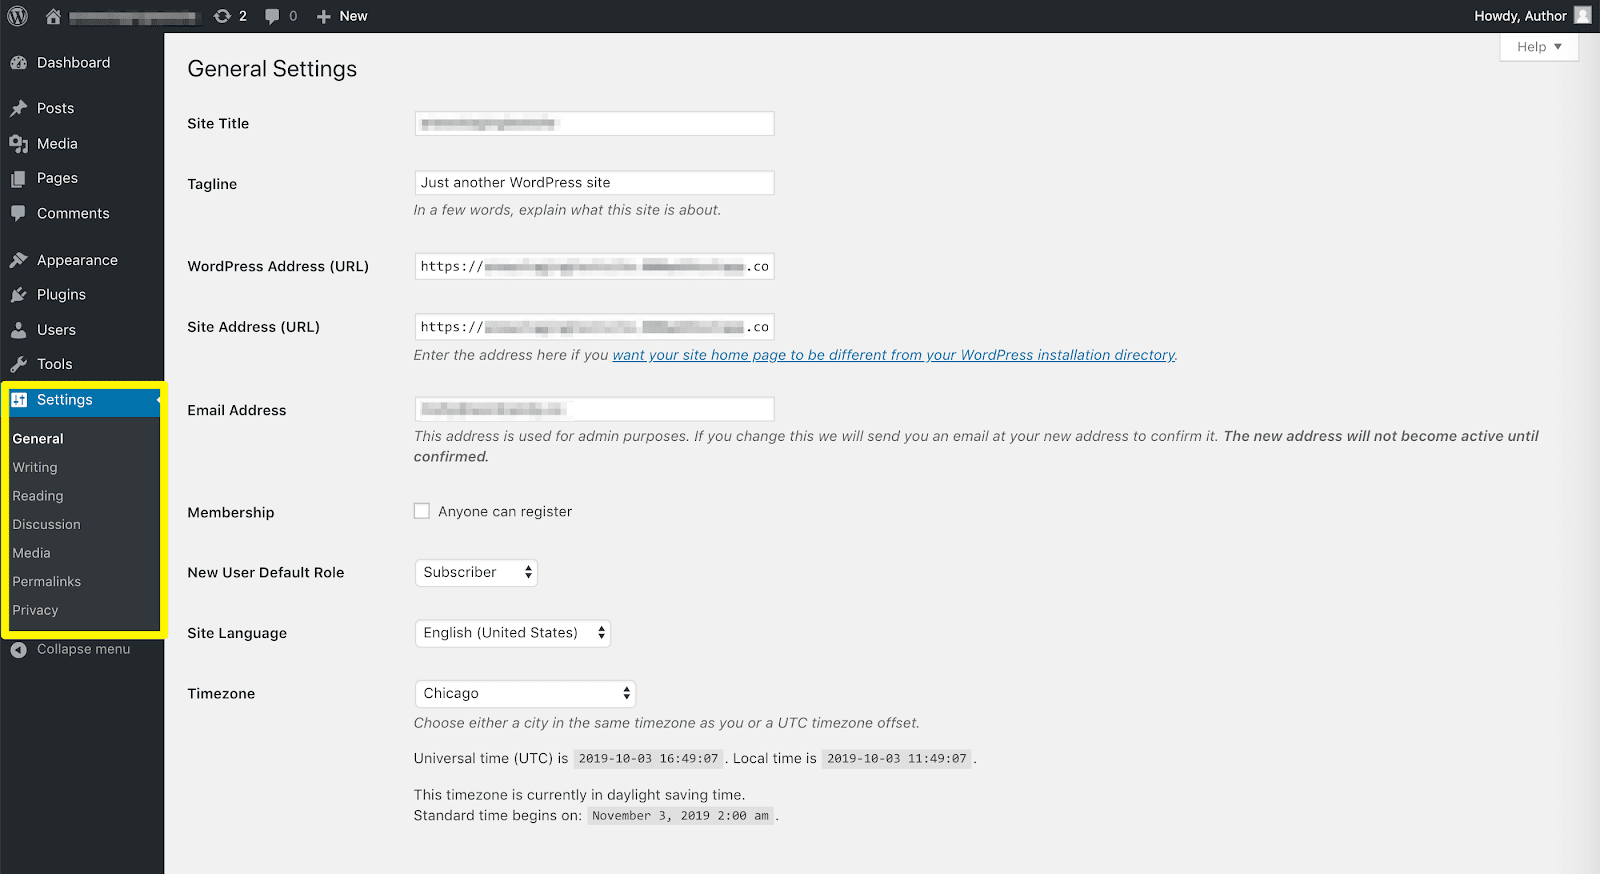
There are seven tabs to go through:
- General. Edit your site title, tagline, and email address. You can also enable users to create accounts, set their default permissions, and manage date and time formatting.
- Writing. Establish a default category for all your posts and set up the ability to post via email.
- Reading. This tab includes the option to create your front page as a feed of recent posts (ideal for blogs) or establish a static front page (better for businesses).
- Discussion. Manage the default settings for user comments.
- Media. Modify image sizing and uploading procedures.
- Permalinks. Define the default URL structure for your posts and pages.
- Privacy. You can generate a Privacy Policy page for your site, which is recommended for legal reasons.
Once you’ve configured all of the above settings, you’re ready to start working on your site’s appearance.
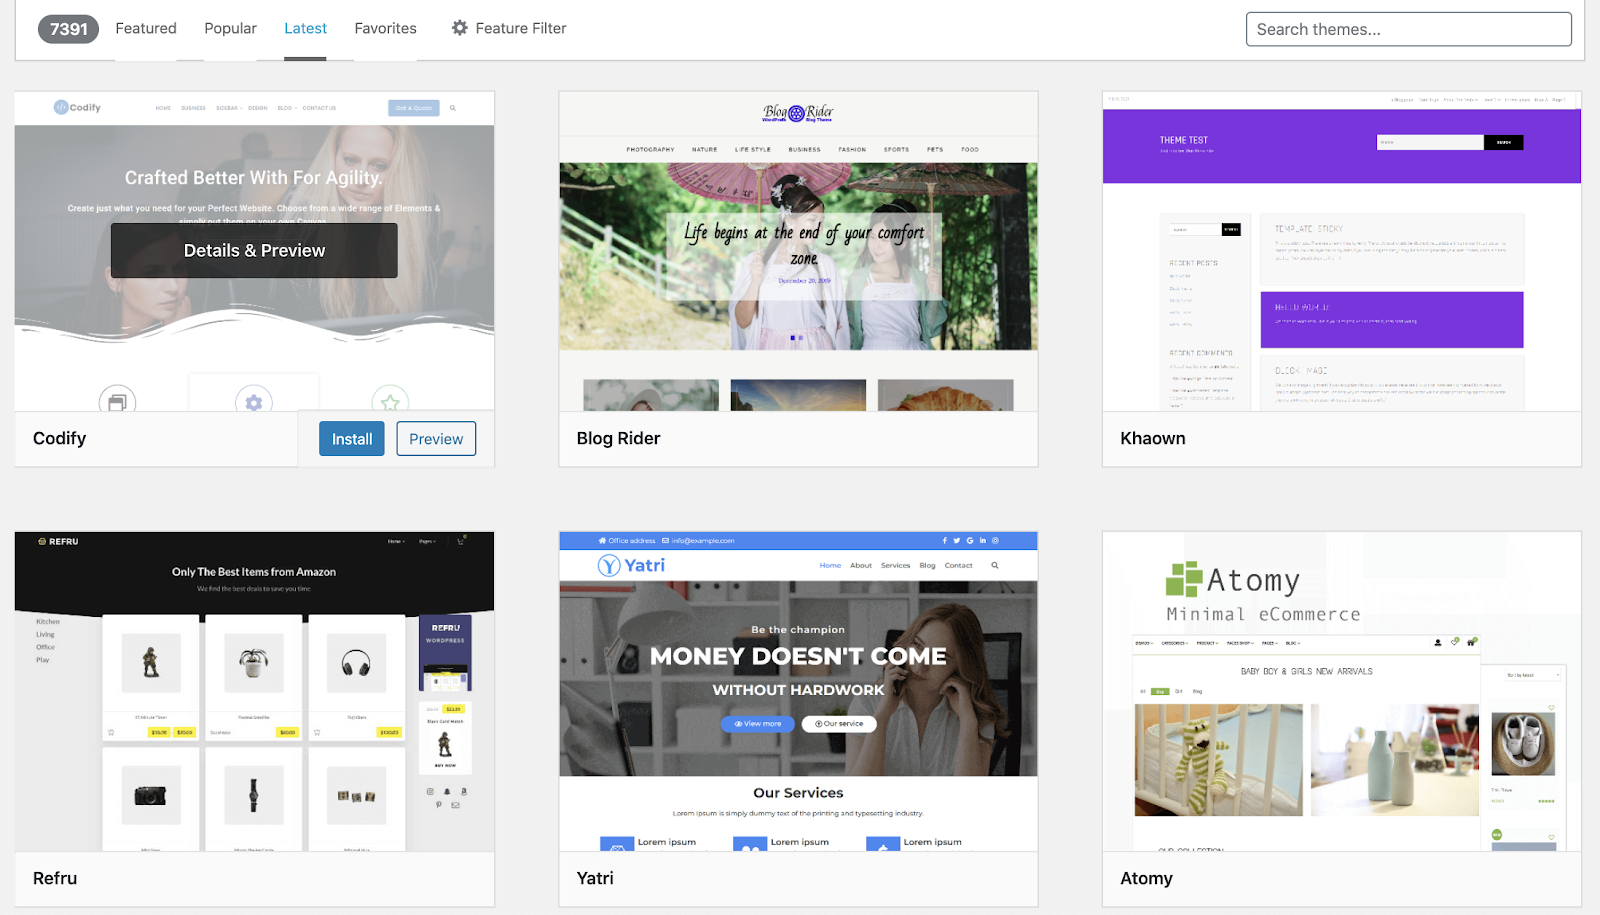
Step 3: Selecting and Installing a Theme
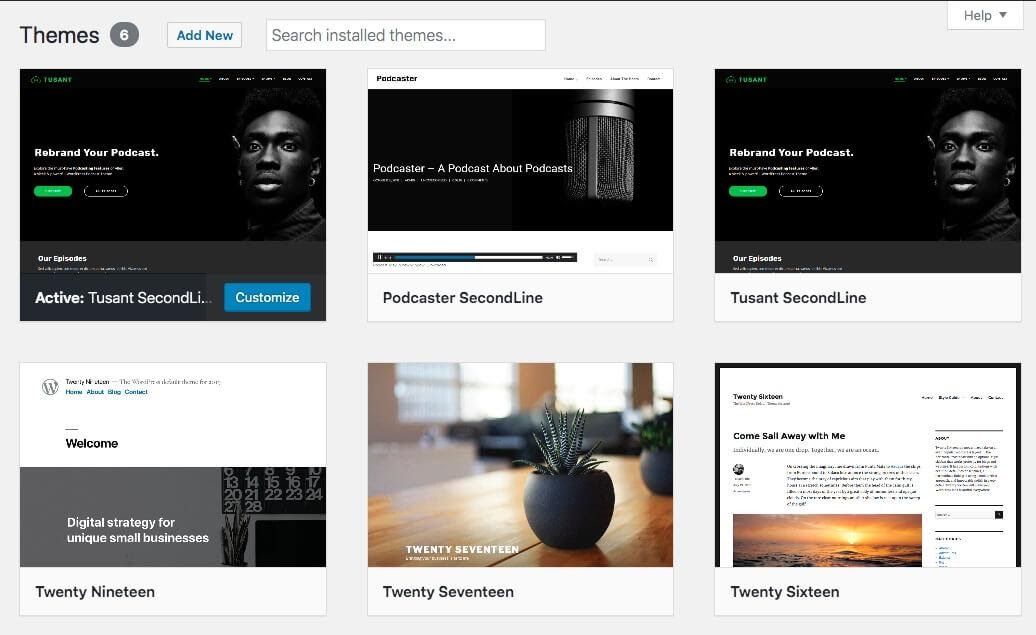
WordPress requires a theme and comes with one of its own default themes enabled. These themes are very basic and can be replaced by any of the thousands of free and premium themes available Here’s a screenshot of some of the latest free themes for WordPress, which you can access through the WordPress admin panel by clicking Appearance > Themes > Add New.
Choosing a theme for your WordPress website can be a fun and creative part of the building process, but there are several factors that affect the decision of which one to use:
- The layout and style you’re looking for
- The compatibility of the theme with your page builder, if you’re using one
- Whether or not you’ll use the Beaver Themer add-on
- Any technical features you might need, such as a theme that’s optimized for eCommerce.
Do the theme’s layout and style match what you’re looking for?
The theme controls the style and layout of the header, footer, and sidebar, which tend to present the same information on every page of your site. These areas are distinguished from the content area, which contains content unique to each page.
Themes may have default style settings for the content area, such as font family, font size, and color, but the layout and content are created either in the WordPress editor or in a custom editor provided by a page builder plugin.
Even if you use a page builder, you’ll still want a theme that offers headers, footers, and sidebars close to the way you want and lets you tweak the settings.
Themes also control the pages related to blogs that are automatically generated by WordPress and categorize the posts in various ways, by date, author, category, and so on.
Here’s a screenshot of some WordPress themes that show part of their design of an index page showing a list of posts.

Is your theme compatible with your page builder?
The Beaver Builder plugin is compatible with most themes, but there can be some incompatibilities, such as not allowing a full-width content area or not offering the option to suppress the WordPress page title so you can add one in the layout.
Or the theme may have customized the basic WordPress architecture in a way that clashes with the page builder. For the ultimate compatibility, we recommend our Beaver Builder Theme.
Do you plan to use the Beaver Themer plugin?
The Beaver Themer theme builder plugin lets you design Beaver Builder layouts for parts of the page normally controlled by the theme: headers, footers, blog post archive pages, 404 pages, and so on. The plugin is included with all new Beaver Builder premium plans.
In this case, you only need a bare-bones framework theme that’s compatible with Beaver Themer, because the Beaver Builder system can handle the rest, so your decision about the theme might center on its performance, to minimize page loading times.
Again, we think the Beaver Builder Theme excels in performance and integration, but you can choose any theme compatible with Beaver Themer.
Does your site have special requirements?
Your site might have some special requirements, such as integrating eCommerce, events, or \databases such as real estate listings. There are themes that are optimized for particular uses.
In summary, your choice of theme is dependent on the layout and style you’re looking for, the compatibility of the theme with your page builder, whether or not you’ll use the Beaver Themer plugin, and any additional requirements.
An Introduction to The Beaver Builder Theme
We developed the Beaver Builder Theme to complement our page builder. They work together seamlessly to help you create a highly customizable site that can adapt to your needs:
Our theme fully incorporates the WordPress Customizer. When you pair it with our plugin, you can really turbocharge your website creation workflow.
Some additional features include:
- Presets: Theme templates with headers, footers, and colors that you can further customize
- Search Engine Optimization (SEO) built into the code to improve your site’s visibility
- Access to Google Fonts for typography customization
- Prebuilt header and footer layouts that you can swap out with the click of a button
- Clean code for fast loading
- Integrated Customizer settings for WooCommerce and BigCommerce.
We think the Beaver Builder Theme is a top contender, but don’t take our word for it. You can try our live Customizer demo to see just how many options it brings to the table.
How to Install and Customize Your Theme In WordPress (In 2 Steps)
Step 1: Install your theme
You can choose and install a free theme through WordPress. If you’re using a free or premium theme that you download, it’s easy to install your downloaded version. Instructions for both installation methods can be found at the WP Beginner site.
One extra note: if you think you might someday customize your site with your own CSS or PHP code, it’s a good idea to install a child theme along with the theme you choose.
The child theme behaves just like the parent theme, but any custom code is stored with the child theme so it’s not erased by future theme updates.
There are many plugins that generate a child theme from the parent theme automatically. See the WP Beginner site for instructions.
The Beaver Builder Theme comes with a child theme you can download and install along with the parent theme.
Step 2: Make Adjustments with the Customizer
Most themes take advantage of the WordPress Customizer, a built-in WordPress tool that lets you make adjustments to your site’s appearance without code. Depending on the theme, you can change site identity features, including your logo, as well as choose layouts and styles for headers, footers, and blogs.
Access the Customizer by going to Appearance > Customize from the WordPress admin panel. The Customizer has a number of tabs in the left sidebar, as shown in this screenshot for the Beaver Builder Theme:
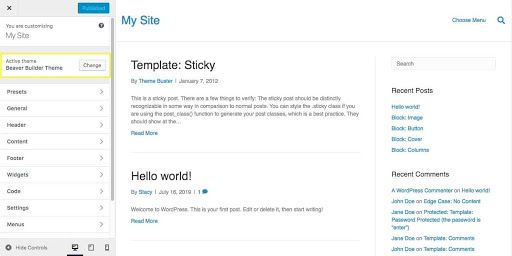
Once you’re happy with your site’s look, click Publish to make the changes appear on your external website.
If you’ve decided to use our Beaver Themer plugin, it installs as a plugin and has its own location for creating layout templates that will override at least some of your theme’s settings.
Step 4: Managing Your Plugins
The third piece of the WordPress puzzle is plugins. They’re key to customizing your website’s functionality so that it can carry out all the tasks you need it to.
In this chapter, we’ll show you how to put plugins to work to improve your site. We’ll discuss the installation process, management best practices, and some popular options to try out.
Understanding WordPress Plugins
Plugins are useful add-ons that can extend the functionality of your website. They make it easier to handle a wide variety of responsibilities, including website maintenance and optimization.
WordPress Core is built with flexibility in mind. It doesn’t come with every possible feature installed because websites aren’t one-size-fits-all. Bloggers don’t need all the same tools as online retailers, for instance.
Although it doesn’t provide everything you might need out of the box, WordPress still manages to offer all the functionality you could want through plugins. By picking and choosing the right ones, you’ll end up with a custom website that caters just to you.
How to Install and Manage WordPress Plugins (In 5 Steps)
Installing and managing plugins is quite similar to the steps needed to handle themes. There are, however, a few unique aspects to consider.
Step 1: Search for a Plugin to Enhance Your Site
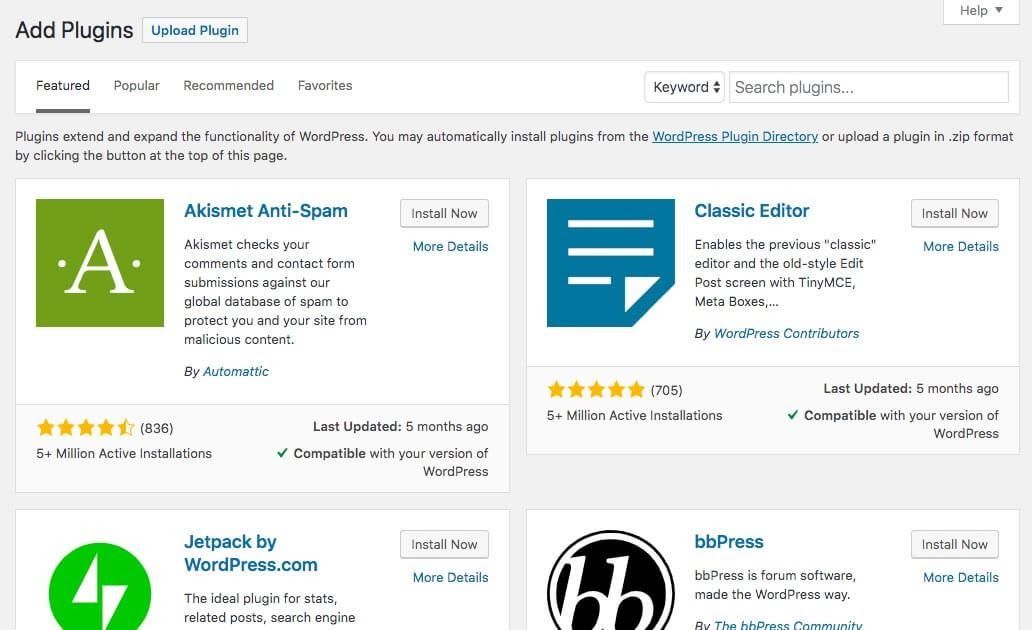
Much like themes, you can search thousands of free tools in the WordPress Plugin Directory. You can access the free plugin directory via your dashboard by navigating to Plugins > Add New:
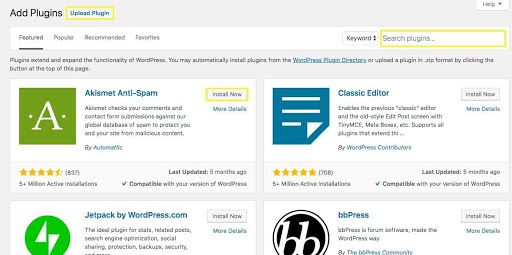
On the plugin directory page, you have a couple of methods for adding plugins to your site. You can search by keyword to browse available options, or use the Upload Plugin button to import plugin files from third-party marketplaces.
Step 2: Review Plugins for Compatibility and Quality
When you’re searching for plugins, there are a few important elements to keep in mind. Not all plugins are created equal, so make sure you have the best for your site.
To gain more insight regarding plugins in the Directory, you can look to the right of the main description:
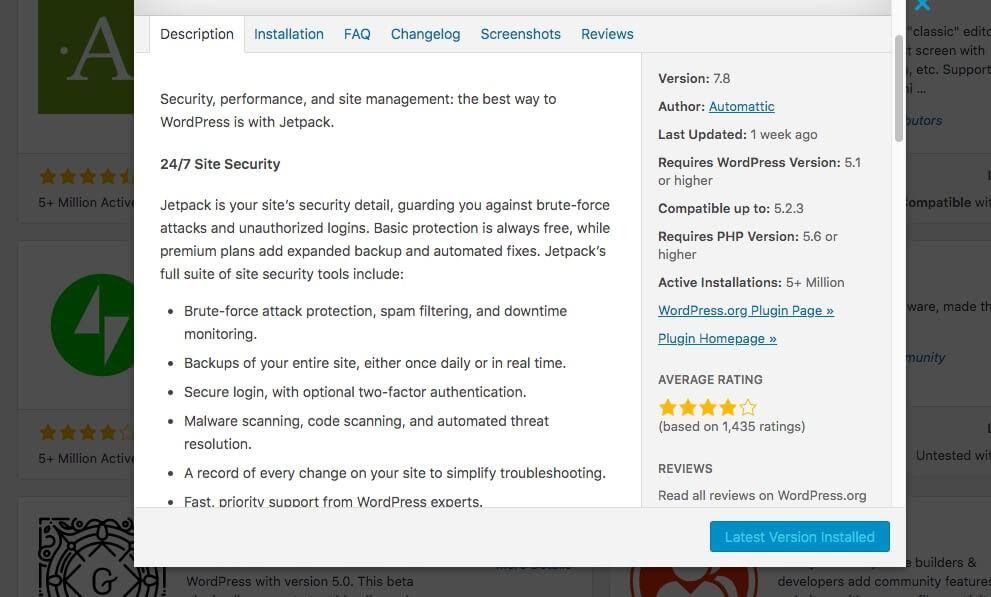
Here you’ll find three key pieces of information:
- Last Updated. This will tell you when the developer last released a new version. Outdated plugins are vulnerable to security breaches, so avoid those that aren’t regularly maintained.
- Average Rating. The star rating lets you know what current users think of the plugin. Note the number of reviews as well to determine how accurate this information may be.
- Compatibility. This lets you know which versions of WordPress the plugin is compatible with. As long as both it and your site have been updated recently, this shouldn’t be an issue.
If all seems well, you’re ready to install your plugin.
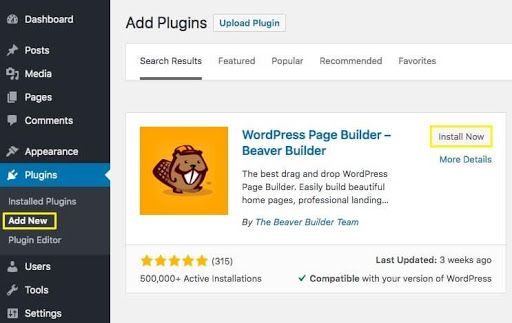
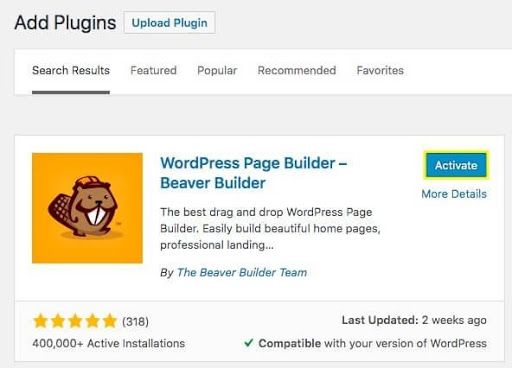
Step 3: Install and Activate Your Chosen Plugin
If you find a plugin you want to install from the plugin directory, click the Install Now button for your chosen plugin, then click Activate to add it to your site. Here’s a screenshot of the free Beaver Builder plugin listed in the plugin directory:
If you’ve purchased and downloaded a plugin from a third-party website, including premium versions of the Beaver Builder plugin, use the Upload Plugin button to import your files.
After the files are uploaded using either method, click Activate to begin using it:
To see a list of all the plugins installed on your site, go to Plugins > Installed Plugins from your WordPress admin panel.
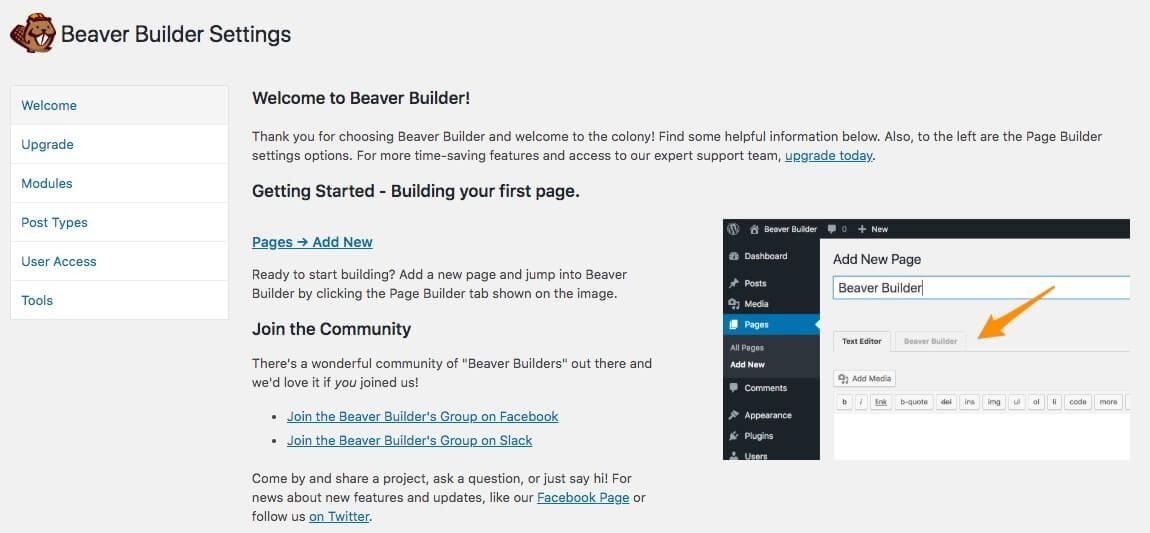
Step 4: Configure Any Necessary Plugin Settings
After you have your plugin installed and activated, you might need to configure some settings.
For example, with Beaver Builder you can go to Settings > Beaver Builder from the WordPress admin panel and configure various settings, such as which modules are visible in the page builder, which post types the page builder can be used for, and which types of users have access:
Many plugins offer settings that enable you to customize their functionality. One way to access plugin settings is to navigate to Plugins > Installed Plugins from your dashboard and click the Settings link below the tool’s name:
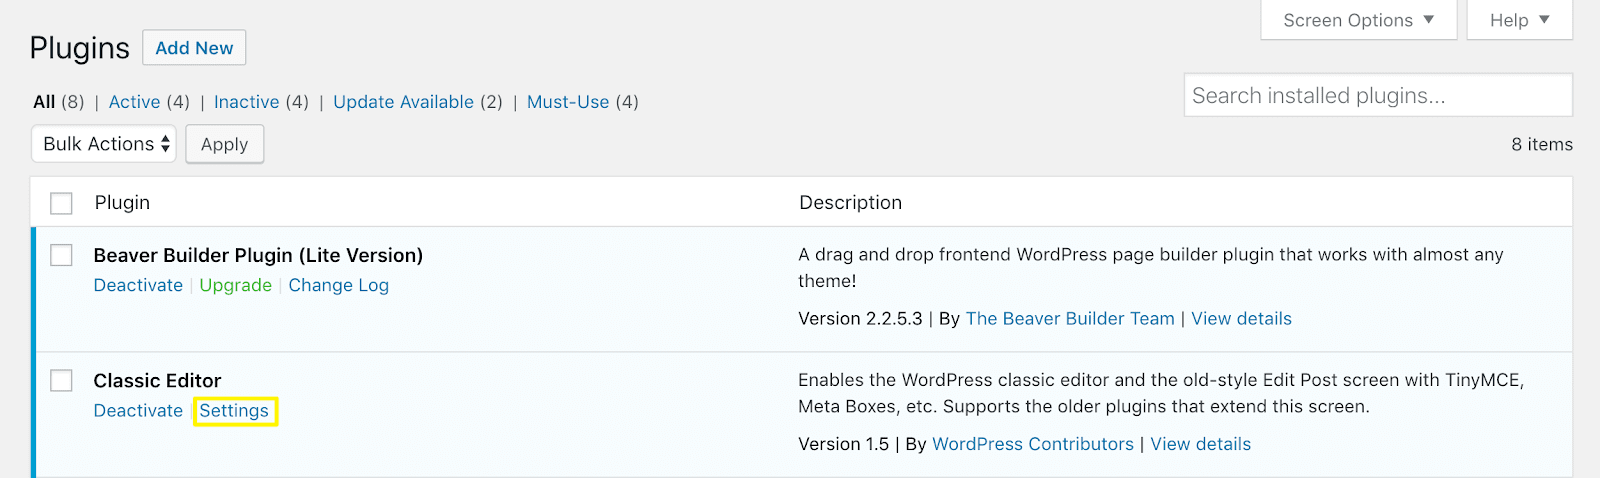
Some plugins also add their own link to your WordPress admin sidebar, providing an alternative access point for their settings.
Step 5: Review Relevant Plugin Documentation and Run Updates
From your plugin list in WordPress, you can access more information about each tool as needed:
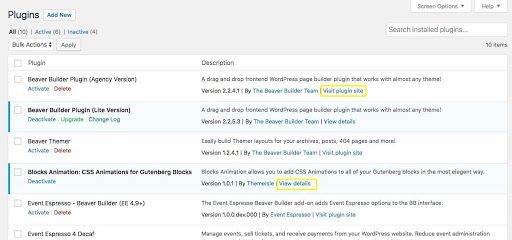
Typically, you can find a link to the developer’s website or view details and documentation here. If you run into issues with your plugin, this is a smart first stop for finding help.
You can also update your plugins here when their developers release new versions. Keeping your plugins updated is an important security measure, so don’t ignore the notifications.
Examples of WordPress Plugin Functionality
With so many plugins to choose from, you might be wondering if there are any go-to options you should check out when setting up a website. Here are some categories of plugins that we recommend you explore:
- Custom styling: If you don’t know CSS but want to add some custom styles, there are plugins to help you do that.
- Backup, migration, cloning: Protect your site by doing regular backups. These plugins often include the ability to move your site to a new location.
- Search Engine Optimization (SEO): Use tools that help you enhance your site so it does better in search results.
- Performance: Add tools that cache your site or perform other tasks that help your site load faster.
- Calendars and events: List events and display them in calendars with these tools. The Beaver Builder plugin and Beaver Themer have integrations with The Events Calendar plugin.
- Ecommerce: There are several plugins that let you sell products or services online. Beaver Builder has integrations with WooCommerce, BigCommerce, and Easy Digital Downloads.
Note that occasionally plugins can conflict with each other. With thousands of WordPress plugins available it’s not possible to test them all. Beaver Builder works with most plugins, and there’s a list of some recommended plugins on the Beaver Builder site. These plugins extend the page builder functionality or fall into some of the categories mentioned here.
Step 5: Creating Pages and Posts
With theme selection and plugins under control, you can start working on your content. Most websites are primarily for sharing information, so this is a vital part of the process.
Below are some tips for creating pages and information in the WordPress default editor. We’ll also discuss how Beaver Builder fits into the picture and make crafting key content faster and easier.
An Introduction to the WordPress Block Editor
Creating content in WordPress has always been pretty user-friendly. However, in 2018 the platform revamped its default publishing interface and released the Block Editor.
This has both simplified and enhanced the editing process. The Block Editor gives you a palette of design and content options that can be added in “blocks” to your posts and pages:
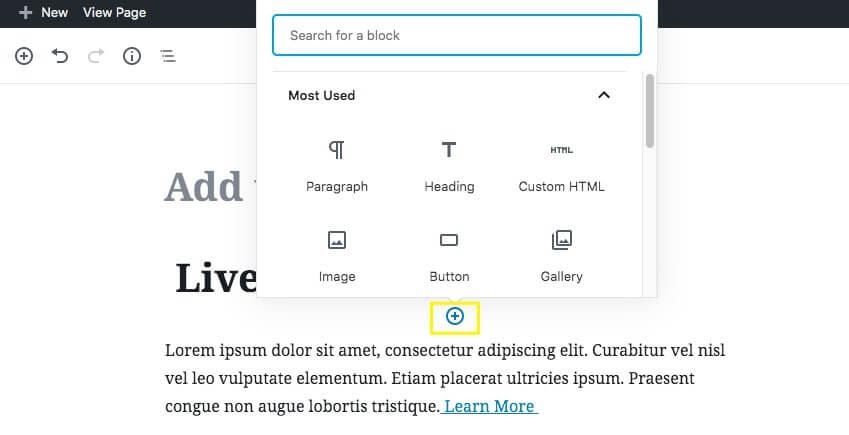
Adding content takes just a click of the plus sign (+) wherever you want the block to appear. You’ll then be able to search for the element you need or select it from the choices in the pop-up window.
You’ll find some options related to your post or page on the Document tab in the right sidebar:
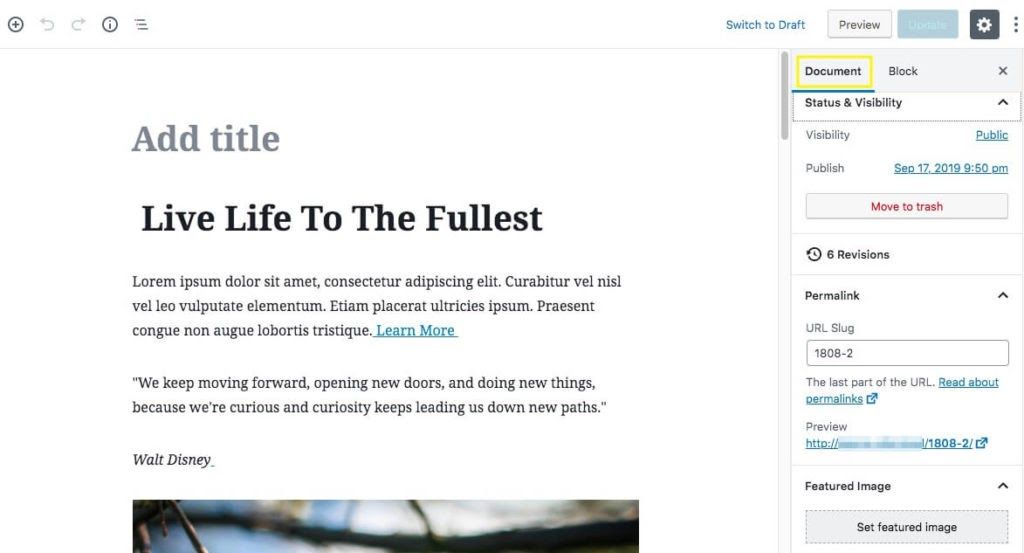
These include:
- Publication options: You can designate your new page as a draft, publish it immediately, or schedule it for automated publication later.
- Permalinks: Customizing your permalinks will set your page’s URL so users can find it.
- Featured images: These images will appear at the top of your post or page and in your blogroll or other areas where content is listed on your site.
The streamlined approach of the Block Editor brings many efficient content creation features right to your fingertips. However, some users prefer to use the original Classic Editor, which is still available as a plugin.
Understanding the Difference Between Beaver Builder and the Block Editor
Because the WordPress Block Editor also uses prebuilt content elements, you might be wondering how a page builder such as Beaver Builder is any different. There are a few key factors to consider.
First and foremost, the Block Editor is not considered a page builder by WordPress developers. It is, however, a modern and efficient way to create and edit content in WordPress.
Beaver Builder’s interface is more customizable and includes drag-and-drop functionality. Each module in the Content panel can be clicked and dragged to the part of your page where you want it to appear:

The builder breaks your page down into columns and rows so you can incorporate each module exactly where you need it. Once the module is in place in your layout, click it to open its settings:
Beaver Builder shows you a front end view while you’re editing. The Block Editor’s white screen doesn’t give you a clear picture of how your content will look once it’s published, so you have to keep previewing.
How to Create Pages With Beaver Builder (In 4 Steps)
Building pages with our plugin can be a lot of fun. You can create them from scratch or drop in beautiful templates to use as launchpads. Here’s how to get started.
Step 1: Add a New Page to Your Site
Adding pages to your WordPress website is easy. There are many essential areas of your website for which you’ll want a page, including a Contact, About, and Home page.
First, navigate to Pages > Add New:
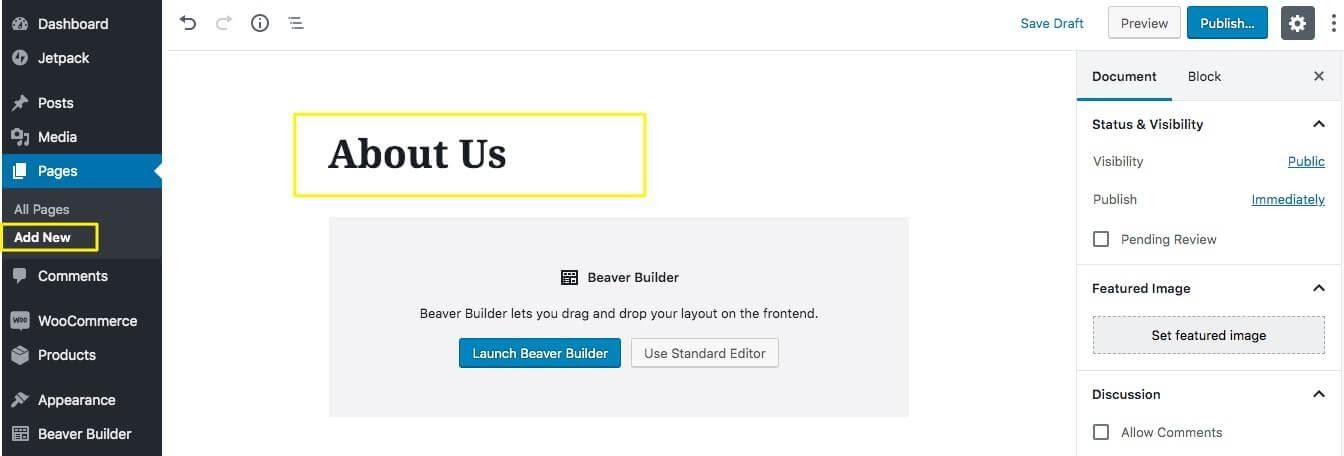
Add the page title in order to access other important settings in the next steps.
Step 2: Set the Permalink and Featured Image
Before you launch Beaver Builder, set your page’s permalink and optional featured image:
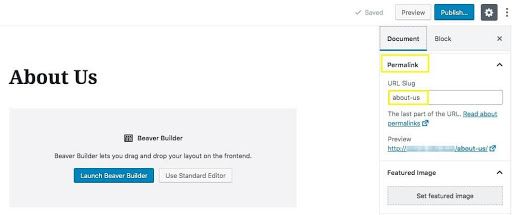
In the Permalink section of the Document tab, type in a URL slug, which becomes the last part of that page’s URL. Most of the time the page’s title or a close variant is the best choice.
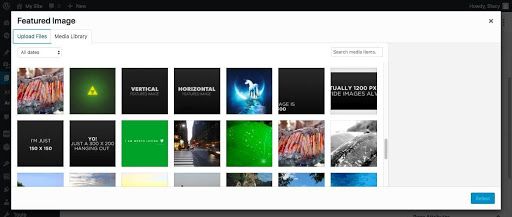
If you want to add a featured image click Set featured image. Note that not all themes display the featured images for pages, whereas most themes display the featured images for posts.
You can upload a new file or choose one from your Media Library:
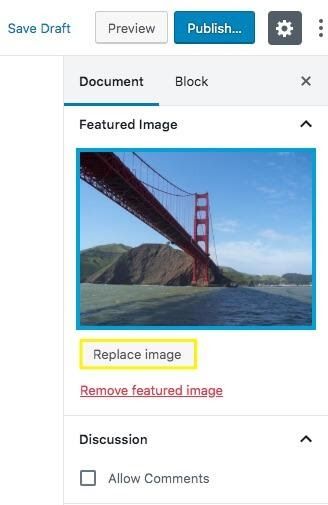
Once you select the image you want, it will appear in the sidebar. You’ll be able to use the Replace image button at any time to change it:
With those tasks out of the way, you can start editing your layout in the page builder.
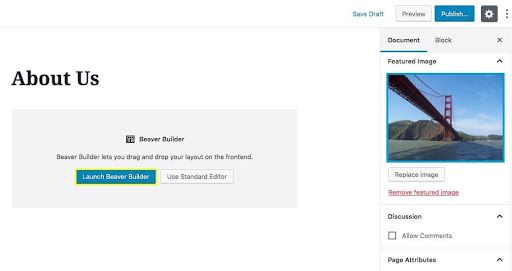
Step 3: Launch Beaver Builder and Start Adding Content
Next, click the blue Launch Beaver Builder button:
This opens a different editing interface where your live page is previewed while you make design changes. You can start dragging and dropping modules or choose from our template options:
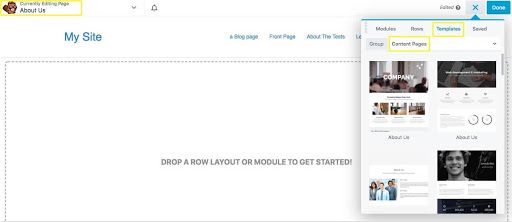
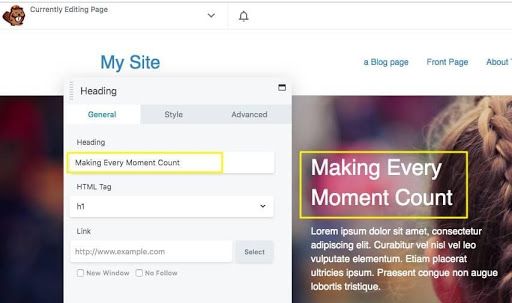
Click the template you want to load onto your page. You can then click on any module in the template and its settings will open. Let’s take a look at one of the “About Us” templates and a Photo module in that template:
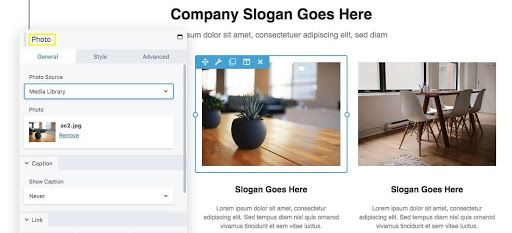
Directly from the module customization panel you can choose your image source, change the file, edit the caption, add a link, and more. You can modify every component in the template: change content and settings, move items around or add new ones, and change the layout to create your perfect page.
Step 4: Publish Your Page
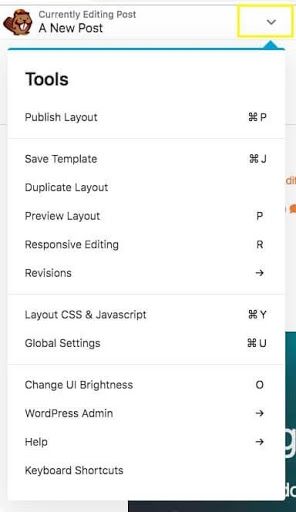
You have some options within Beaver Builder for saving and publishing your layout. In the upper left-hand corner of the page there’s a dropdown Tools menu:
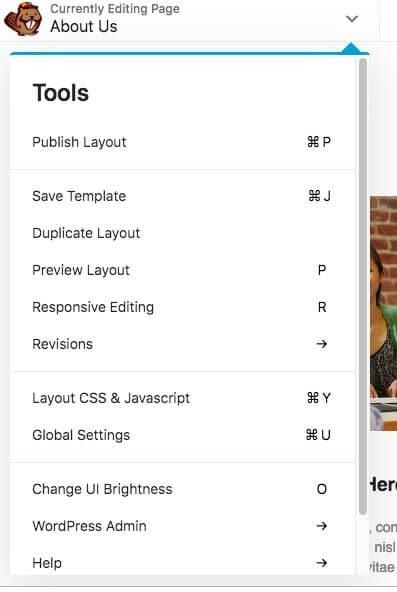
Here you can save your layout as a template or publish it, among other options.
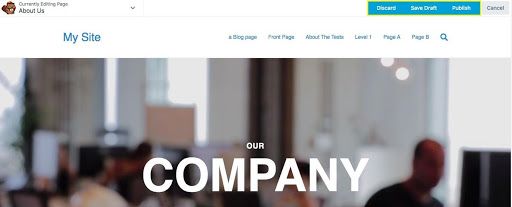
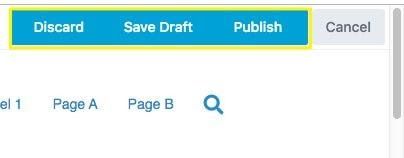
As an alternative, you can click the Done button in the upper right-hand corner of the editor. This will enable you to Discard, Save Draft, or Publish your page:
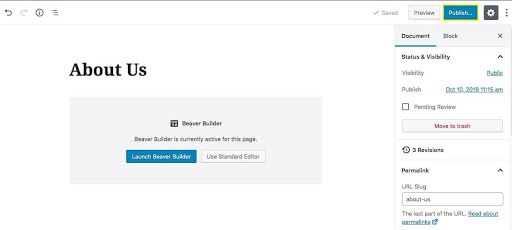
If you save your work in Beaver Builder as a draft, you can also open the page in the Block Editor later. You won’t see your excellent design, but you can use the Publish button to make it live:
If you want to schedule the page to go live later, click on the date listed next to Publish in the sidebar. Then select when you want your content to go up on your site.
Step 6: Creating Posts
While pages are ideal for static-content staples such as your Home, About, and Contact pages, it’s better to publish content such as articles, recipes, reviews, and other recurring additions as posts.
Although the differences between these two types of content are subtle, it’s important to understand them so you can choose the most effective format for each type of content.
We explore the nuances below and provide steps for publishing posts with Beaver Builder.
Understanding the Difference Between Posts and Pages
Since we’ve already discussed pages at length, let’s dive into posts. These are timely pieces of content rather than foundational information that isn’t likely to change frequently.
As we mentioned at the start of this guide, their name is leftover from when WordPress was primarily a blogging platform.
There are notable differences in how posts and pages operate within the WordPress ecosystem.
Something like an About page shouldn’t really need to be updated all that often. It’s also more likely that you’ll want to include direct links to pages in your navigation menu, as we’ll discuss in an upcoming chapter.
Additionally, there are a few other central elements that make posts stand apart from pages, including:
- Syndication: Designed to supply content to blog feeds, posts can also be incorporated through Really Simple Syndication (RSS).
- Shareable: Post content is meant to be highly shareable, making it important for SEO efforts.
- Archived: Posts are “archived,” meaning they appear in summary lists of posts that share some feature. The default archive lists posts in reverse chronological order, but posts can also be archived using categories and tags, making them more searchable and flexible in terms of navigation.
Posts do have some similarities to pages; however. Permalinks, slugs, and featured images can all be customized for both. They also contain many of the same types of content, including text and media (images and videos).
How to Create Posts with Beaver Builder (In 5 Steps)
We’ve mentioned categories, tags, and navigation in this chapter, and we’ll cover them later. For now, let’s take a closer look at how to create posts with Beaver Builder.
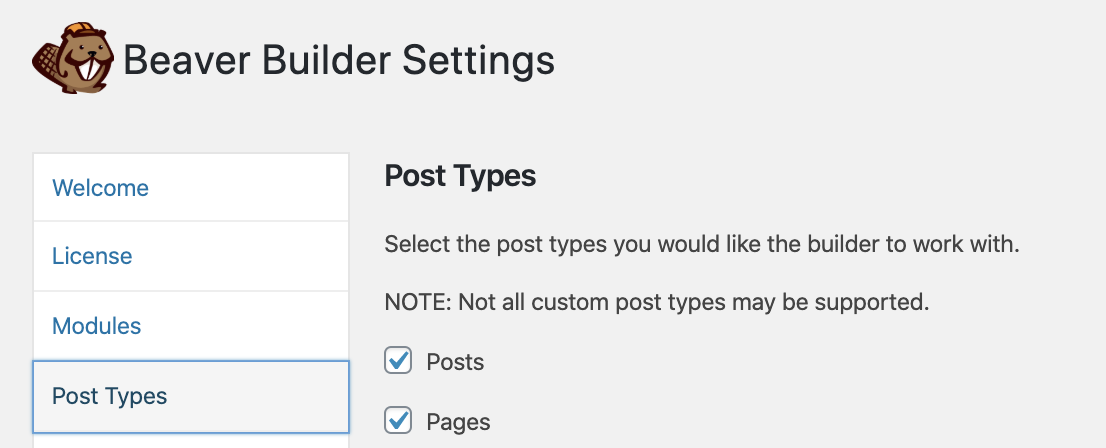
But before you start, you need to enable Beaver Builder for post layouts. From the WordPress admin panel, go to Settings > Beaver Builder > Post Types and make sure Posts is selected.
Step 1: Add a New Post in WordPress
The first step in post creation is very similar to setting up a page. In your WordPress dashboard, navigate to Posts > Add New:

This opens the WordPress post editor. It looks exactly like the page editor, except that the Document tab in the sidebar includes a few additional options.
Step 2: Set Your Permalink and Featured Image
Customizing your post permalink is a good way to increase your shareability and SEO. You can use keywords in your URL that tell users and search engines more about what to expect when they click your link.
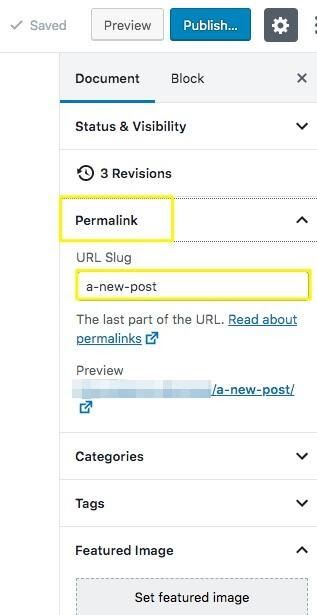
First, add a title and save the post as a draft. The Permalink menu appears on the right in your post editor, and you can modify the URL slug:
Just below the Permalink section is the Featured Image section. Click the gray box to upload a file or choose a file from your Media Library to be included at the top of your post and in thumbnails in archive listings. Note that where your featured image appears on your site usually depends on settings in your theme.
Step 3: Launch Beaver Builder
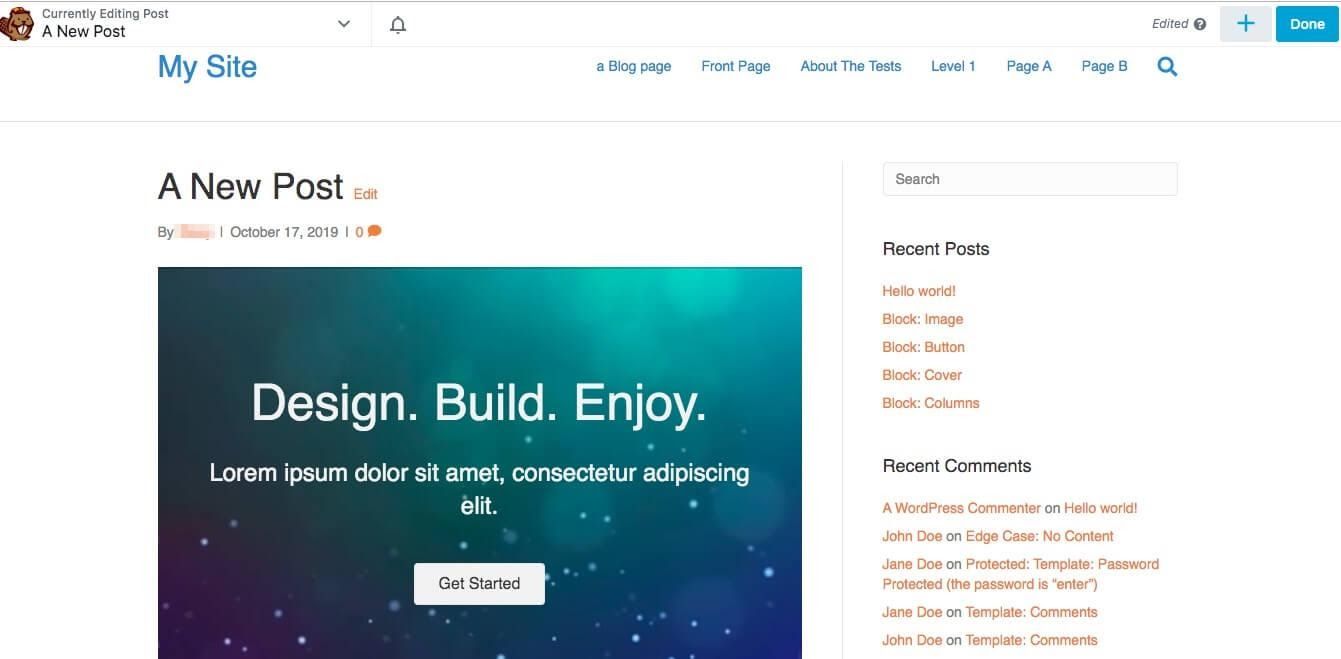
Click the Launch Beaver Builder button:
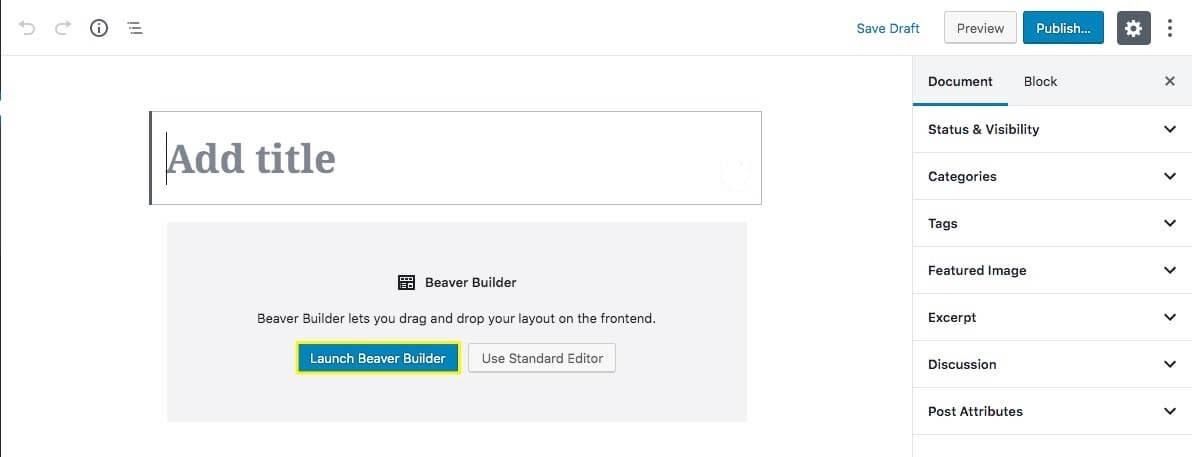
This opens the front-end, drag-and-drop editor. You’ll be able to see a live preview of what your published post will look like while you’re editing it.
Step 4: Use Templates and Modules to Design Your Post Layout and Add Content
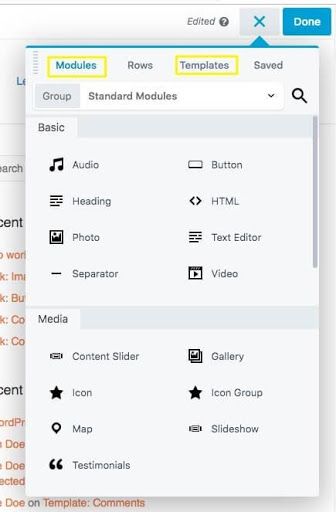
In order to access all the helpful Beaver Builder tools, click the plus (+) sign in the upper right-hand corner of the screen. This reveals a palette of options, including Modules and Templates:
If you want to use a template, click the template you want. A notification appears, asking if you want to replace the existing layout:
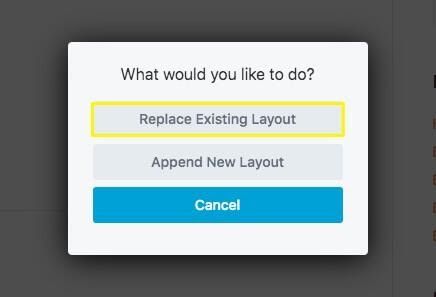
Select Replace Existing Layout to overwrite any content already in your post with your chosen post template:
Notice the template is constrained to the post content area. Your headers, footers, widgets, and sidebars remain in place, as determined by your theme’s settings.
If you use a template, \edit the placeholder modules to include your own text, images, and any other content your post requires. Simply click on a module in the layout to open its settings and make the necessary modifications.
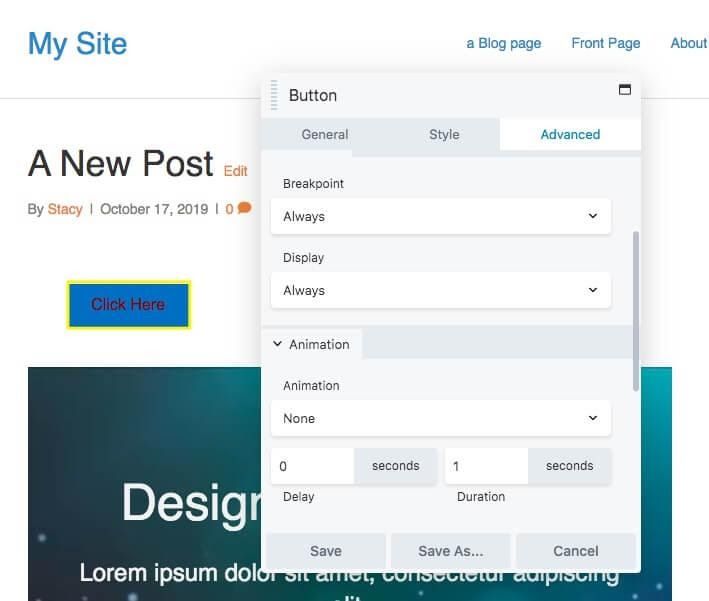
If you’re starting from scratch or need to make some changes to your template, you can add a module to the post by accessing the content panel again. You can easily drag and drop any modules you need into your post where you want them to appear. After you drop a module into the layout, the settings window automatically opens:
Step 5: Save or Publish Your Post
When you’re done customizing your layout and content, you’ll have several options for saving and publishing your post. You can click the Done button in the upper right-hand corner of the editor. This gives you the option to Save Draft, Discard or Publish your post:
Alternatively, you can toggle open the Tools menu in the upper left-hand corner of the editor. This reveals several other options, including saving your post as a template for later use. You can also publish your post layout, duplicate it, or preview it, among other things:
If you save a draft, you can always open the post from your dashboard and launch Beaver Builder again to resume editing your content before it appears to the public.
Step 7: Exploring Categories and Tags
One of the many benefits of working with WordPress is that you have a lot of control and flexibility when it comes to organizing your website’s content.
If you plan to use posts within your website, categories and tags are two of the ways you can catalog them for later archiving and navigation options.
This chapter explains the benefits of incorporating these features on your site, as well as how to use them in conjunction with Beaver Themer to create an Archive page.
We’ll also share a few useful plugins for extending the functionality of categories and tags.
Understanding Post Categories and Tags
Within the WordPress ecosystem, categories and tags are considered taxonomies. They give you the ability to group posts together based on relationships that you create. By assigning categories or tags to your posts, you make it easier for visitors to find relevant content on your site.
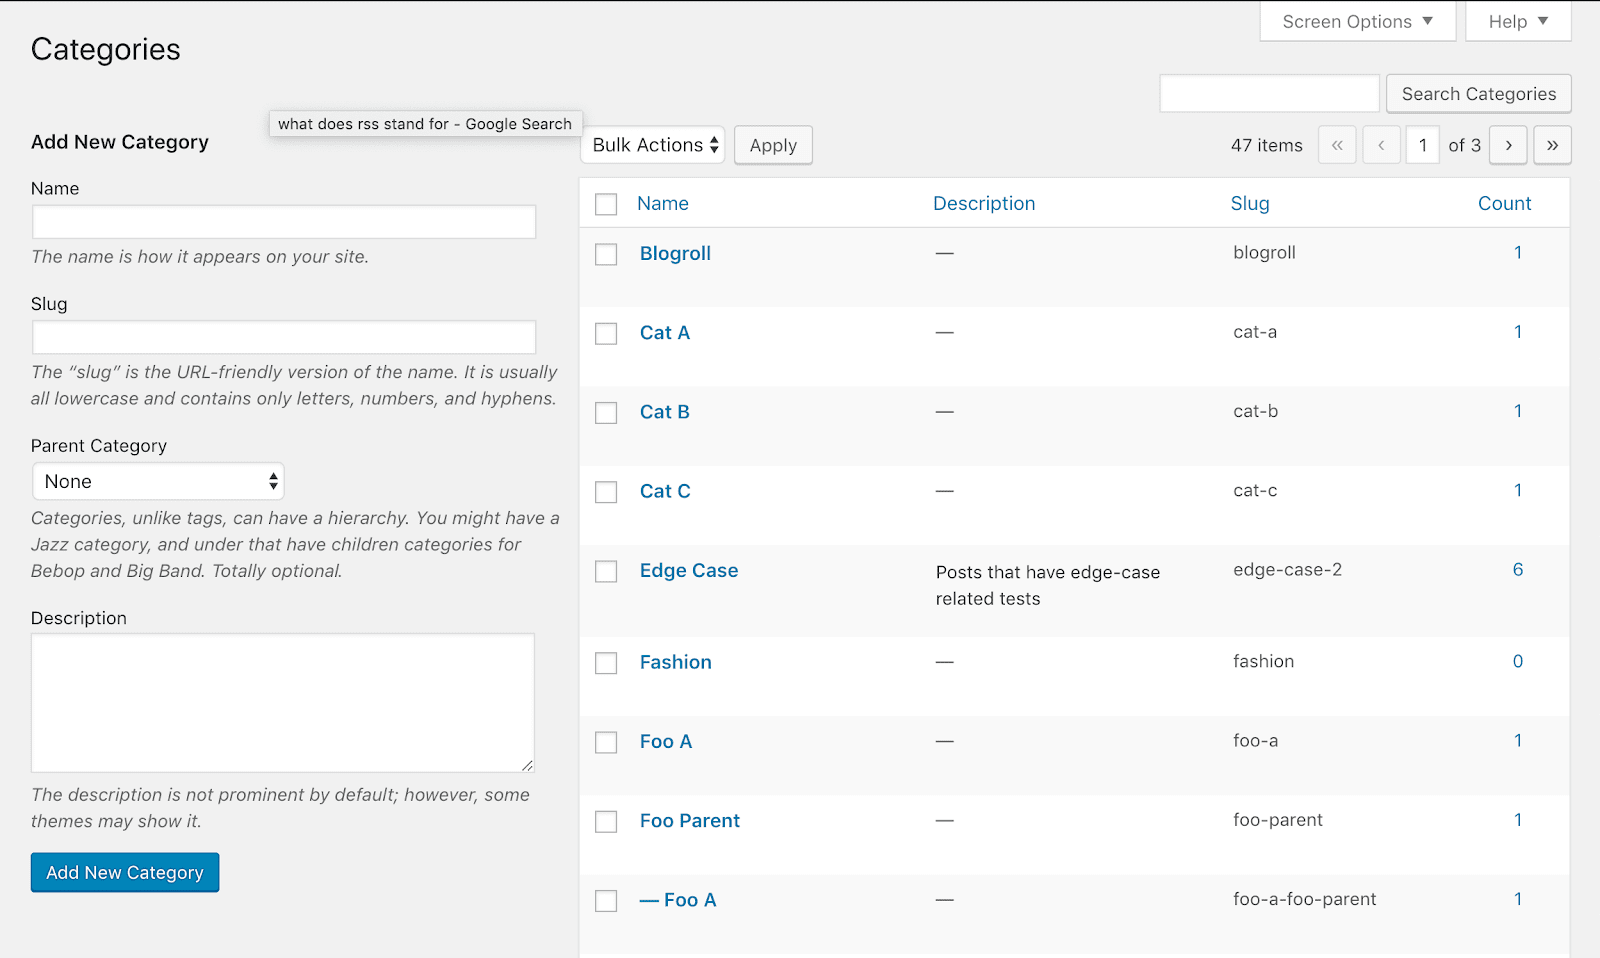
To add a new category to your site, navigate to Posts > Categories and create one. This screenshot shows some example categories we created:
You can then assign categories from the editor sidebar for individual posts:
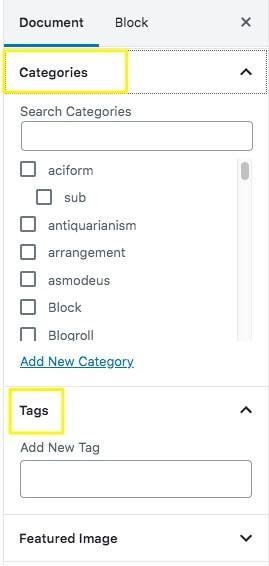
You can also add tags here. Simply type them into the relevant field in the sidebar. You’re free to type any words you want to use as tags. You don’t have to create them ahead of time.
It’s important to note that categories can be created in parent-child hierarchies.
In other words, you can add subcategories under broader topics for more detailed organization. Tags, on the other hand, are simpler and don’t exist in nested levels.
When you use categories and posts, your theme usually displays them somewhere on the individual post. If a visitor clicks on a particular category or tag, it opens up a different type of archive page that shows all the posts that have been assigned that category or tag.
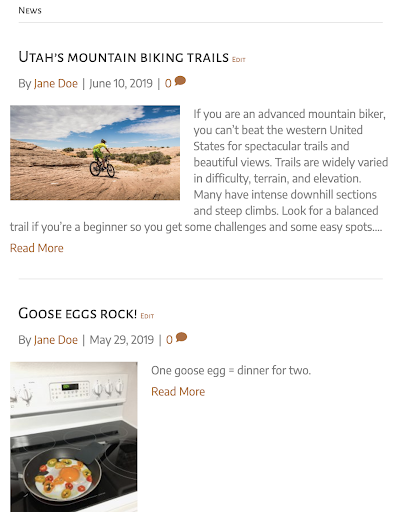
For example, if you have a category called News, there’s a page generated by WordPress that lists all of the posts assigned to the News category, as in this screenshot.
When you add taxonomies to your site, visitors can quickly find the content they’re looking for. Additionally, categories can be added to menus, making it easy to navigate view all of the posts on a specific topic.
How to Configure Archive Pages
Standard WordPress installations automatically create various types of archive pages: the standard index or archive page listing posts by date and a page for each category, tag, and author. Because these archive pages are automatically generated by WordPress, your theme controls layout options for these pages.
For example, to configure your Archive Layout settings in the Beaver Builder Theme, navigate to Appearance > Customize > Content > Archive Layout in your dashboard:
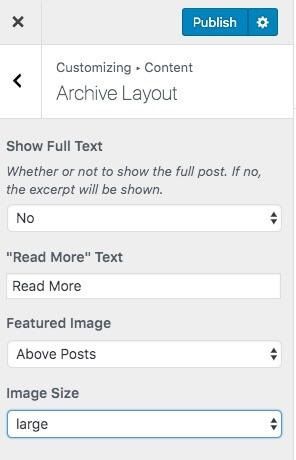
Here you have a few options regarding how posts will appear on all of your archive pages. You can specify if you want to show the full text for each post in the archive list or just an excerpt, as well as what text the link should display to guide visitors to the full post.
You can also determine where the featured image should be positioned and its size.
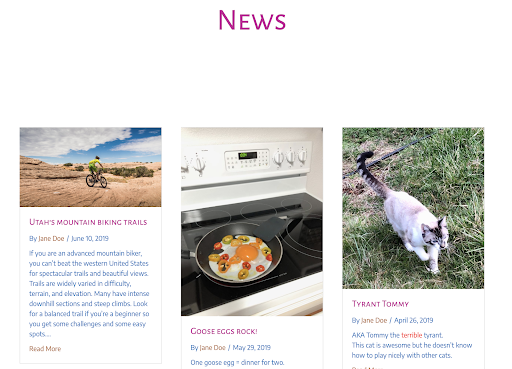
If you use Beaver Themer, the theme builder plugin for Beaver Builder we mentioned previously, you have much more flexibility in creating your own layouts for archive pages. Depending on the locations you specify, you can apply your layout to all archives, all archives within a type, or even a single archive.
For example, instead of the usual page scroll for an archive page displayed for a News category, you could use a Posts module with a Columns or Masonry layout to achieve a different look specifically for your news articles:
You can also refine how each post is laid out in this archive by designing a custom HTML layout, which lets you remove and add fields.
For example, you might want to suppress the author of each item or add a date the post was modified. An Archive-type Themer layout overrides your theme’s settings in any archive location that you specify.
Step 8: Building Your Site’s Navigation
Now that we’ve discussed creating content and organizing it with tags and categories, let’s tackle site navigation. If users make their way to your website but can’t find the content they want, they’re likely to go elsewhere. Intuitive navigation is a key element to a well-rounded website.
Setting up site navigation includes up to three different steps. The details depend on your theme, but we’ll use the Beaver Builder Theme as an example here.
- Create a menu that determines what your menu items will be and how they’re organized.
Depending on the theme, you may be able to create more than one menu and use them in different locations in your theme. - Associate your menu or menus with a display location (header, footer, etc.).
- Set Customizer options for where your theme will occur within the display location.
For example, the header layout would determine if the menu appears in the site title area or below it.
With all these menu options you can create a truly helpful and engaging navigation strategy for your website visitors.
Step 1: Create and Manage Menus
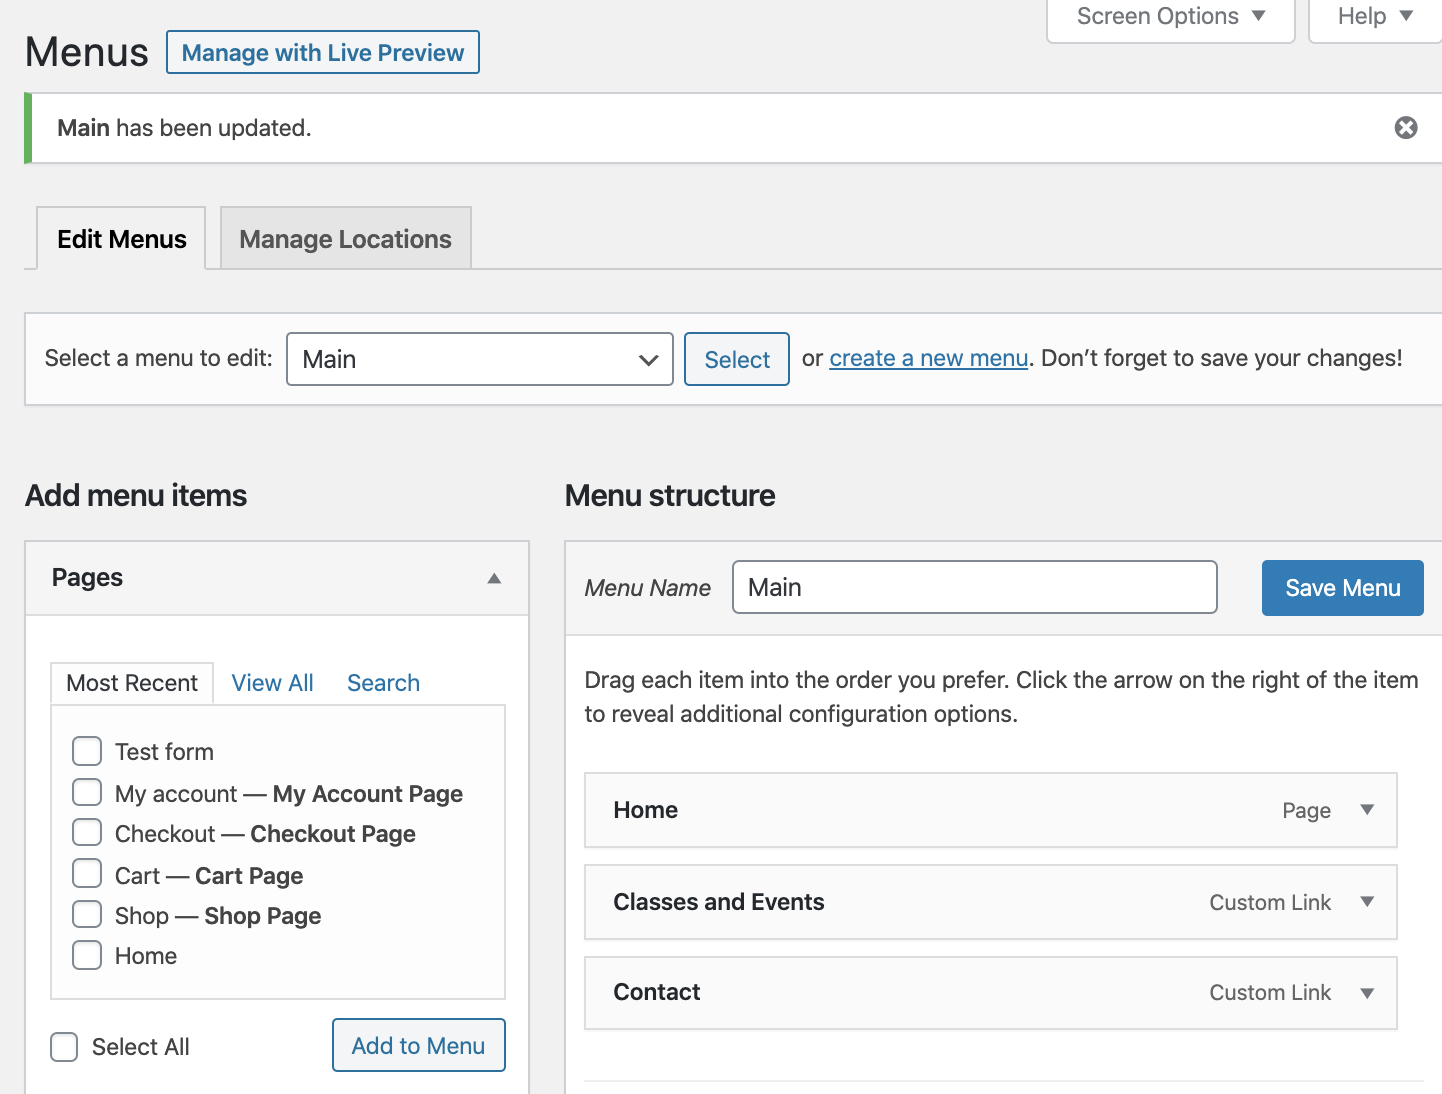
From your WordPress admin panel, go to Appearance > Menus. There you can create or select a menu, assign a name to it, and choose items from the Add menu items section to include in the menu, as shown in this screenshot:
After you add items to the menu, you can rearrange them and create submenus by dragging the items around.
You can include a number of website elements in your navigation menus, including:
- Posts: If you want to highlight a popular post, you might include it in your menu to make it easy to find.
- Pages: Most sites include links to their Homepage, About page, and Contact page in their menus so that visitors can find key information.
- Custom URLs: This can enable you to link out to related platforms, such as your social media pages, an Etsy store, or any other brand elements that aren’t directly included in your site.
- Categories: Adding links to each of your post categories can help your visitors easily browse through your content.
Step 2: Associate your menu with a location
On that same page at Appearance > Menus where you created a menu, you can set the display location in the Menu Settings section.
The location choices are set by your theme, and in this case, the Beaver Builder Theme allows three locations: top bar, header, or footer:

Step 3: Use Customizer Settings to Tweak the Menu Location
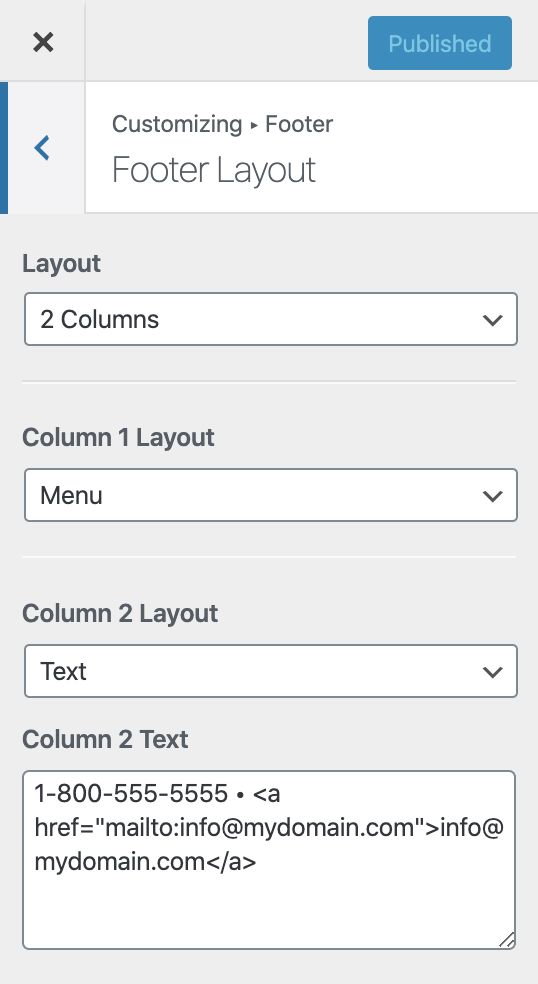
Let’s say you chose the footer to display a particular menu in the Beaver Builder Theme. Then you’d go to Appearance > Customize > Footer > Footer Layout to specify where in the footer to place the menu. In this example, two columns are specified for the footer, and Menu is chosen for the left column:
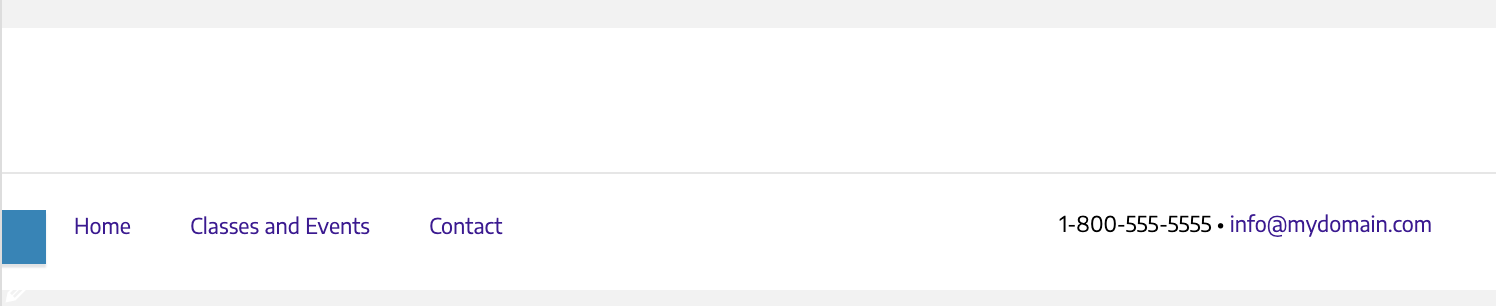
The result appears like this:
You can control the menu font size and colors at Appearance > Footer > Footer Style:
Use Beaver Builder to Add a Menu to the Content Area
For even more variety, the Beaver Builder plugin has a Menu module that lets you place a menu into the content area of any layout.
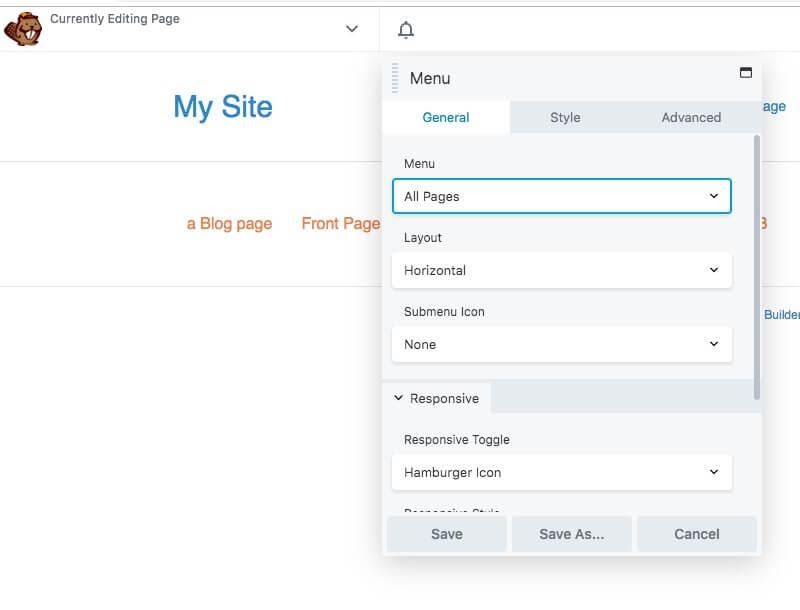
Just drag and drop the Menu module onto your page in the Beaver Builder editor and the settings window will appear, where you can select which menu to use and select responsive and style options:
Ultimate Menu Control with Beaver Themer
The Beaver Builder Theme gives you a variety of preset options of where to put your theme in your top bar, header, or footer, but Beaver Themer gives you ultimate control.
For example, you can create a Header-type Themer layout in the Beaver Builder editor. You’d just add a Menu module to the layout and position it anywhere in the header you like, along with your site title, logo, etc.
Here’s a website page with a Header-type Themer layout with a page title, a logo, and a menu, overlaid on a background image:
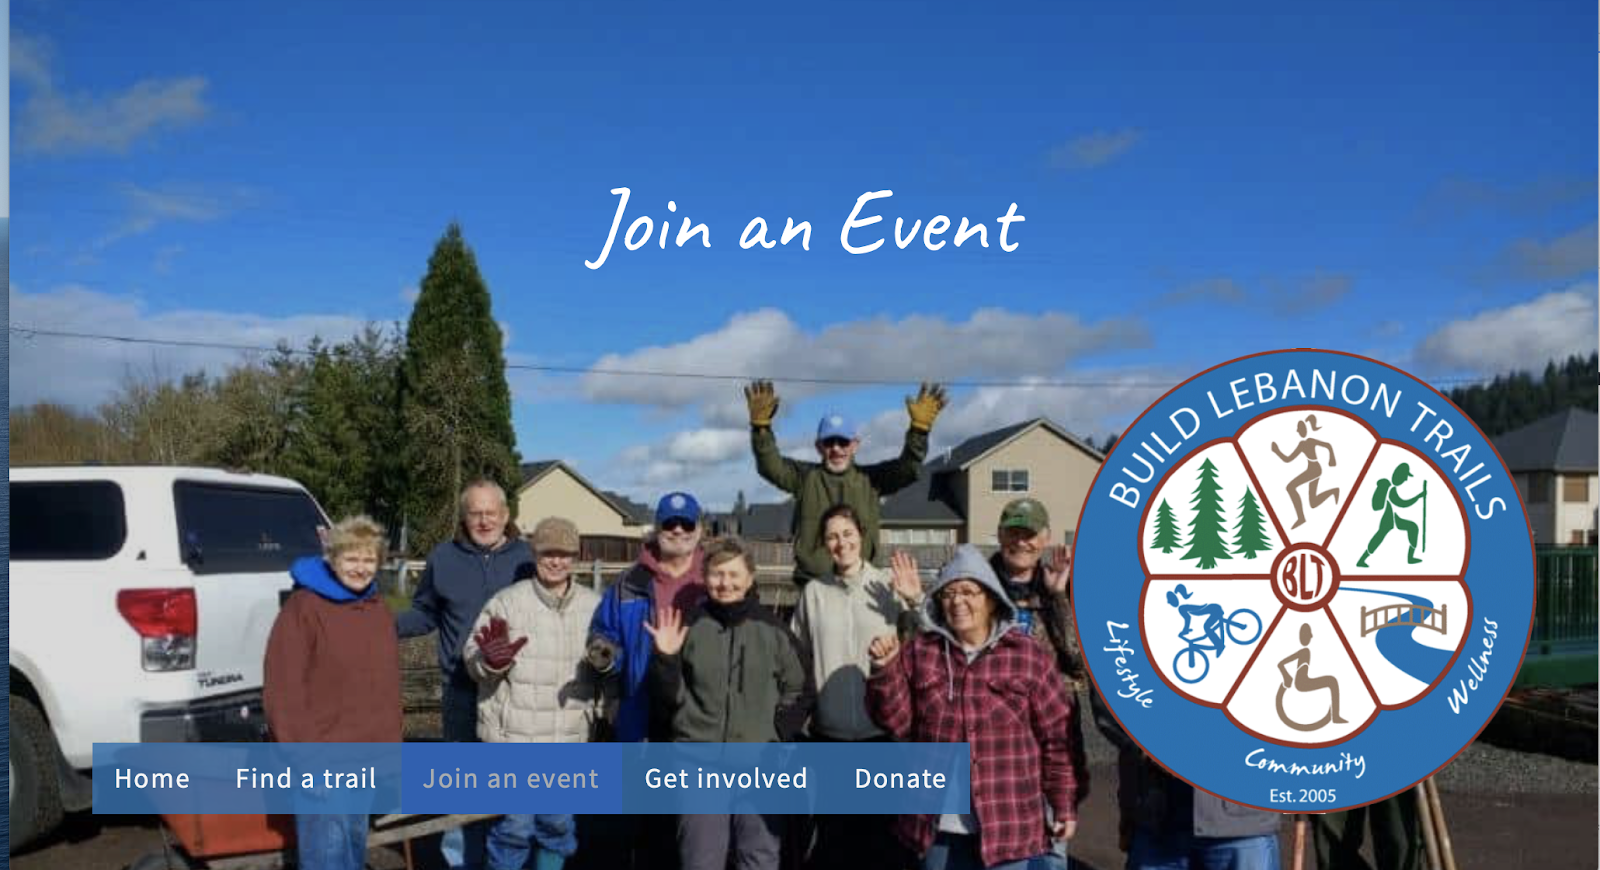
You can literally create any header layout and content you like with Beaver Themer.
Conclusion
Building a website can seem overwhelming. There are so many different ways to approach design, organization, layout, and structure.
We’ve covered a lot of ground in this guide regarding how Beaver Builder and WordPress can help you create a dynamic and engaging online presence.
We also hope we’ve persuaded you that our Beaver Builder plugin is a best-in-class page builder. It’s often rated #1 in independent review.
Our premium plans cover all levels of users, from single site owners to agencies:
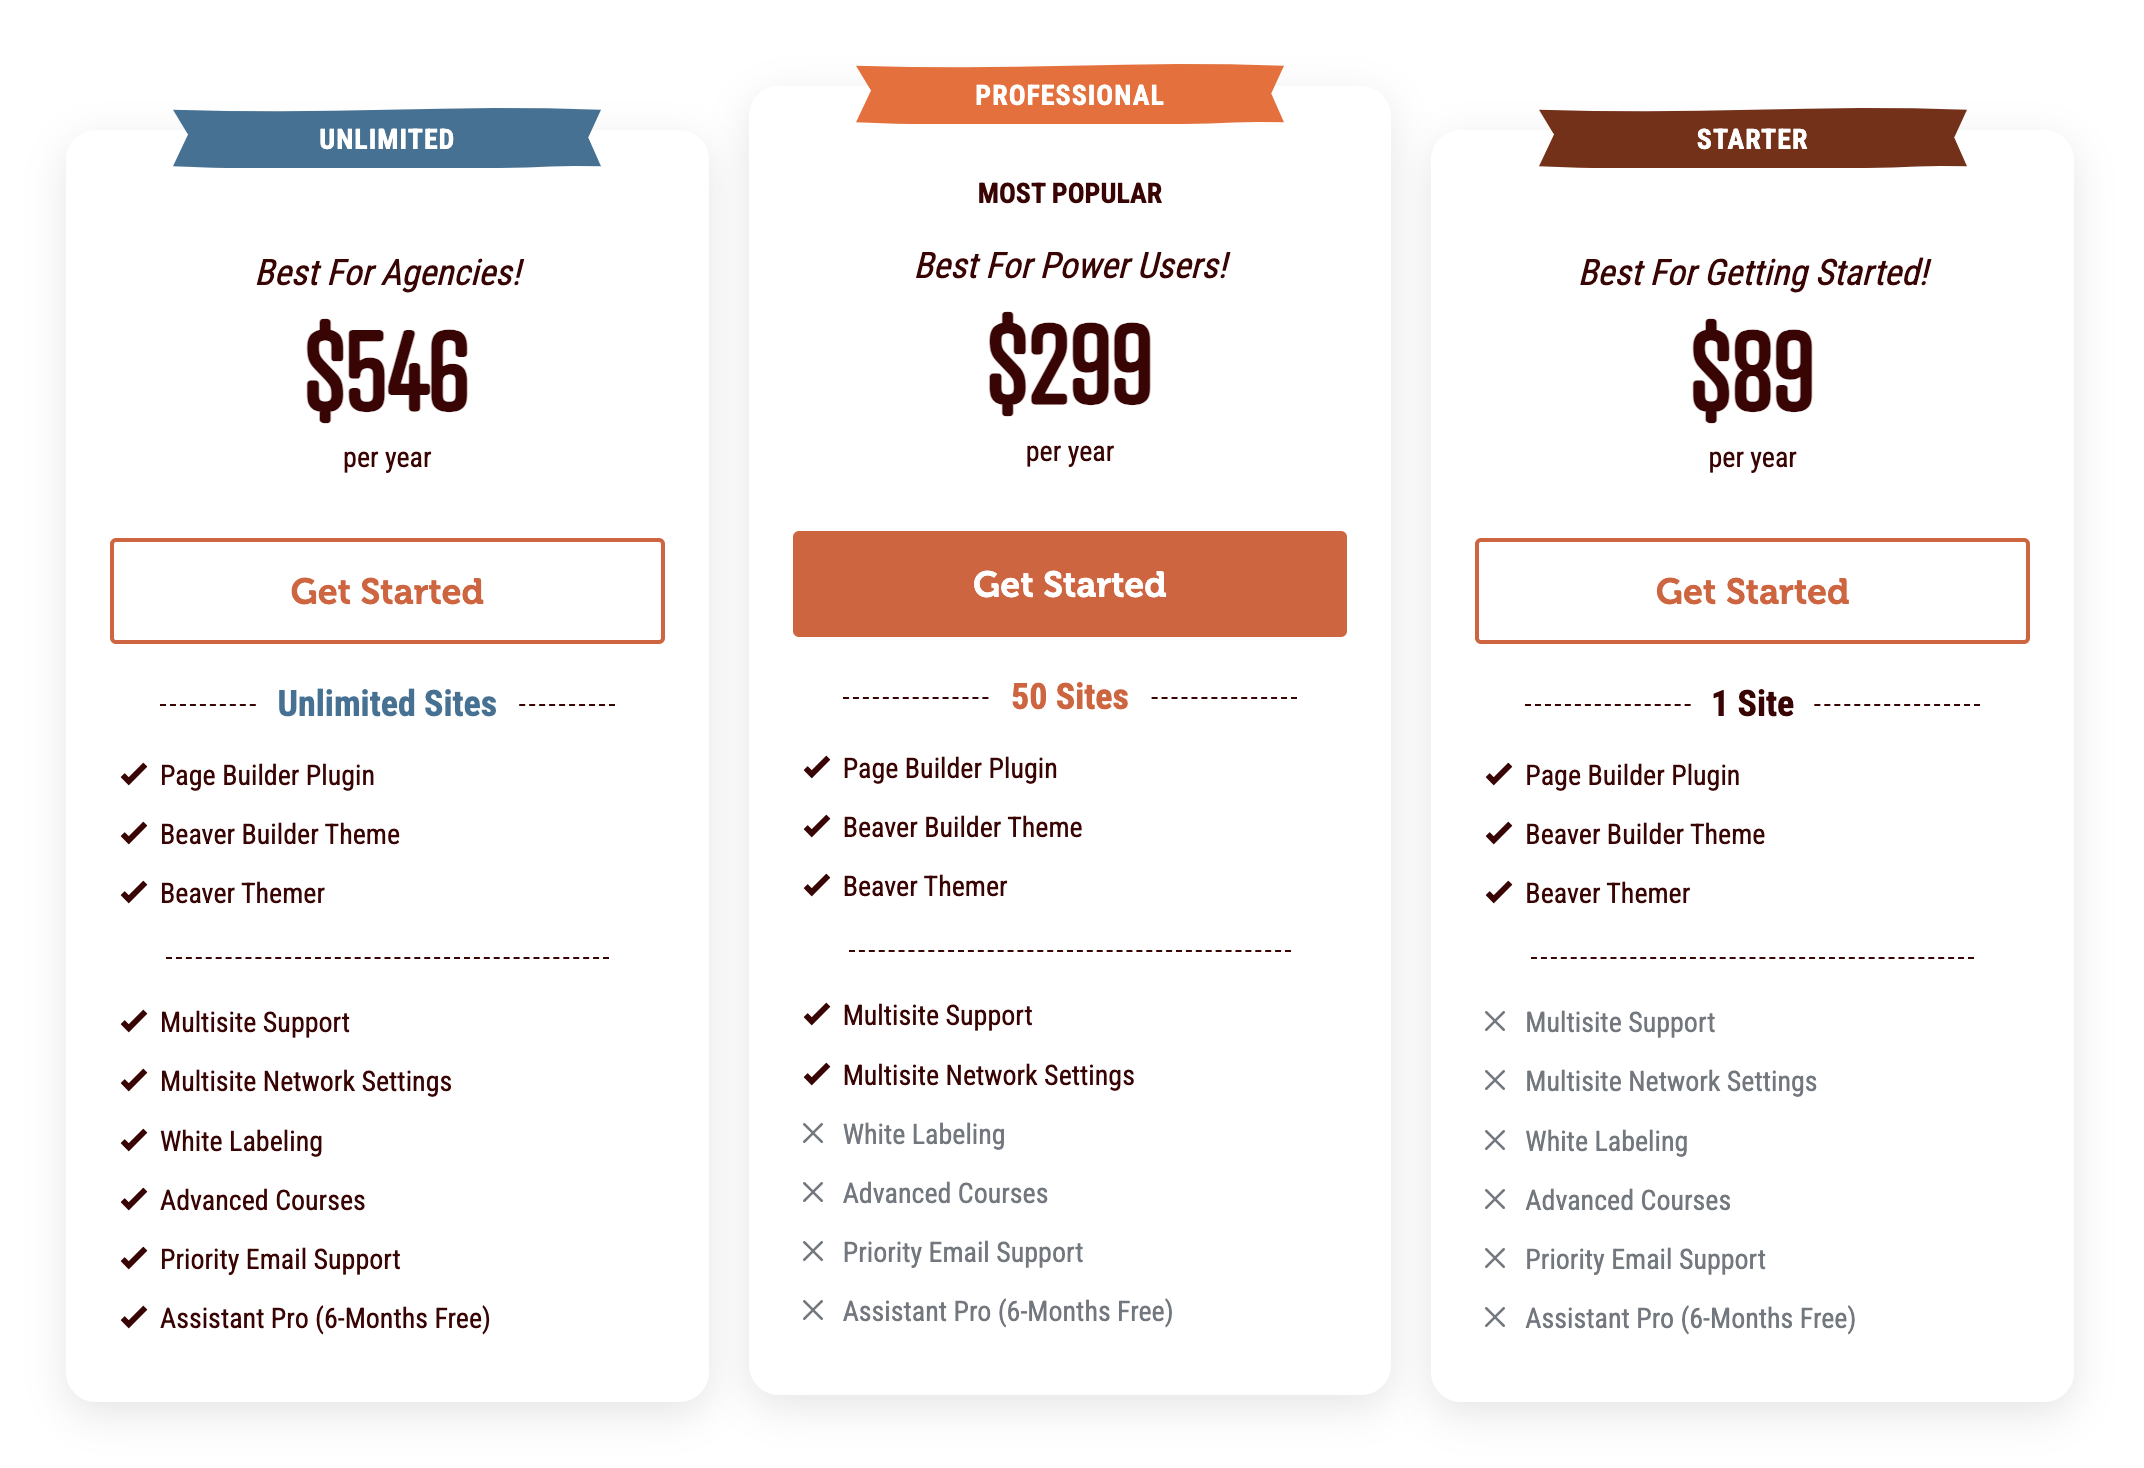
Here’s a breakdown of the Beaver Builder pricing plans:
- Lite: Free version with limited functionality.
- Starter: $89 per year for a single site. Includes the Beaver Builder Page Builder Plugin, Beaver Builder Theme, Beaver Themer, premium modules, and templates.
- Professional: $299 per year for up to 50 sites. Includes everything in Starter, plus Multisite Support.
- Unlimited: $546 per year for unlimited sites. Includes everything in Professional, plus White Labeling and six months of free access to Assistant Pro.
If you’re ready to start your WordPress website design process with Beaver Builder, we’re happy to have you. Join a thriving community of helpful professionals and begin enjoying the enhanced capabilities the Beaver Builder suite of tools provides!
3 Comments
Our Newsletter
Our newsletter is personally written and sent out about once a month. It's not the least bit annoying or spammy.
We promise.
Try Beaver Builder Today

Related articles

Beaver Builder AI: Build WordPress Layouts with AI (Now in Alpha)
Hey everyone! Big news. After a long time of building behind the scenes, Beaver Builder AI is here. The alpha…

How Beaver Builder Products Work Together to Build Flexible WordPress Websites
Building a WordPress website often means stitching together a theme from one developer, a page builder from another, and a…

From Azeroth to WordPress: How Warcraft Tavern Uses Beaver Builder
Since releasing Beaver Builder 12 years ago, a feeling will come up from time to time that just never gets…
Join the community
We're here for you
There's a thriving community of builders and we'd love for you to join us. Come by and show off a project, network, or ask a question.
Since 2014
Build Your Website in Minutes, Not Months
Join Over 1 Million+ Websites Powered By Beaver Builder.
Nice summary on building a website with Beaver Builder! A person with this guide, some basic knowledge about web design, and a few hours could spin up a great website. Good job!
I have been a BB subscriber for years and I really like this article.
I would like to translate it into Hungarian and display it on my blog. Of course, indicating the original source.
OK?
Thank you for the feedback and sure you can share it on your blog =)