
WordPress is a beginner-friendly platform that can have your website up and running in no time. Still, there are some basic concepts to learn before you can start building your site. If you master the difference between WordPress pages and posts, you will understand the most basic part of WordPress architecture.
In this article, we explain what posts and pages are, show you how to create them, and discuss other types of content the platform has to offer. Let’s get to work!
An Introduction to WordPress Pages vs. Posts
After you install a new WordPress website and log in, you’ll see an admin dashboard that looks like this:

The left sidebar contains various tabs that direct you to the platform’s most important features. You can choose your WordPress theme and change your site’s look under Appearance and tweak its default setup under Settings.
Two important sections in the sidebar are Pages and Posts. This is where you’ll create the content that makes up your website – what visitors see. There are other types of content, which we’ll talk about later, but these two are the most fundamental and versatile.
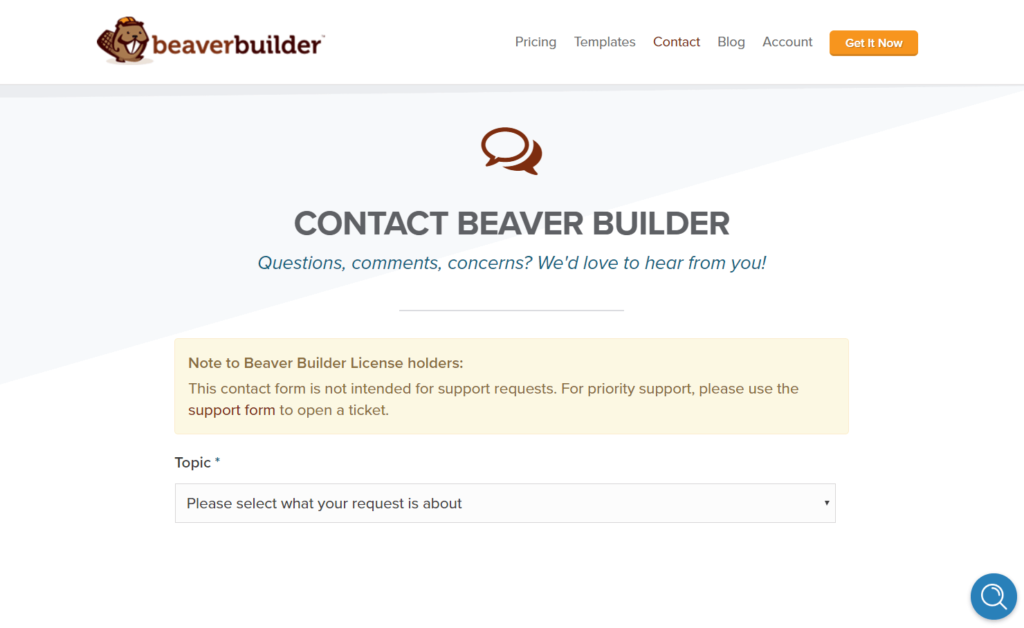
As the name implies, the Pages section is where you create your site’s static web pages. These might include your home page, Contact page, About page, and so on:
While pages can be updated and changed, they’re meant for information that doesn’t change much over time.
Posts, on the other hand, are designed for dynamic and time-sensitive content, where you want your users to see the latest post first, or the most important post first, or some other “most” that you choose to categorize. This might include blog posts, news articles, updates, reviews, and so on.
An example is the summary list of blog posts in this screenshot. The posts are listed in reverse chronological order, with a summary of each one and a link to the full post.
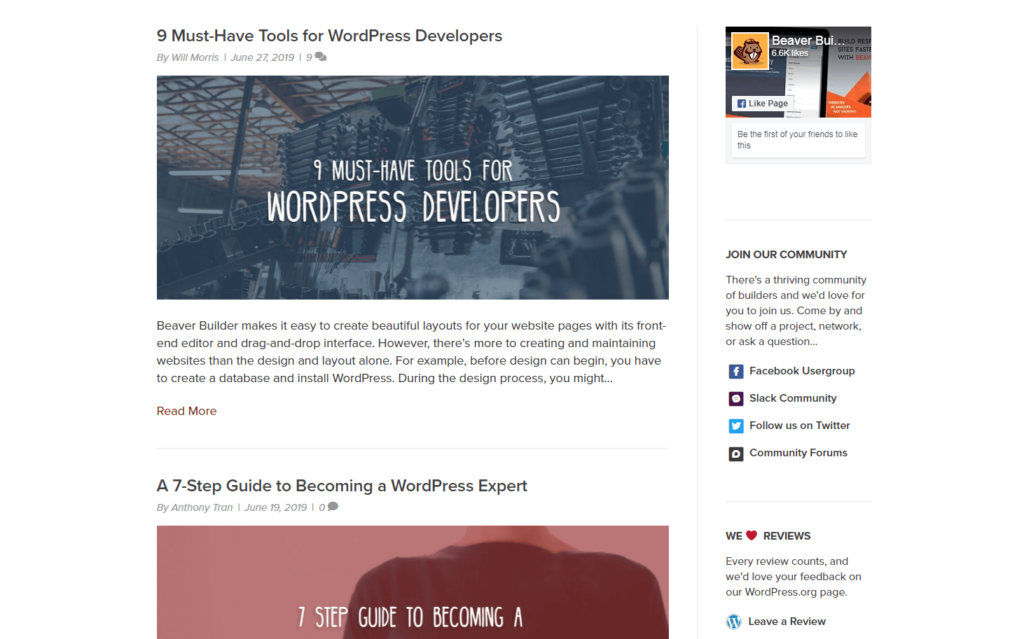
By default, WordPress posts display a publication date. The summary page on which the posts are displayed in reverse chronological order is called an index or an archive, and the post itself is often called a single post. Single posts often have comments enabled, so your visitors can respond and start discussions about your content.
WordPress was started as a blogging platform, and it has very powerful machinery to organize this type of content. It saves you having to update a bunch of pages every time you write a new piece of content.
Here’s how everything works behind the scenes, though your theme may tweak things to work differently here and there.
If the main purpose of your website is to be a blog, WordPress automatically generates an index of your posts on your home page, or it generates an archive list of your posts on any other page that you specify. WordPress generates other archives automatically too. Author names, post categories, and post tags each have a link that takes the reader to archive pages that list all posts by that author, in that category, or with that tag, respectively. Even the search results page that WordPress creates is a type of archive. Think how long it would take you to manually build all this in and change it every time you publish a post!
Note that some WordPress sites have pages but not posts, some have posts but not pages, and some have both.
You should now see the difference between pages and posts. Posts appear in various automatically generated lists (archives) usually display a date, the author’s name, and the categories they belong to. On the other hand, we usually don’t want pages with static content to show the date or name of the author or have archive pages listing them.
Just to confuse things, though, there’s some overlap in terminology in the use of the word “page.” We often talk about “web pages” in a general sense when we’re referring to a website. For example, we often refer to an “archive page” because it does appear as a page in your website, even though it has nothing to do with a Page in the WordPress sense.
How to Create WordPress Pages and Posts
Understanding the basic differences between WordPress pages vs. posts is a good start, and to deepen your knowledge, it helps to know how to create them and what options you have for customizing them.
With that in mind, let’s look at how to set up your first few pieces of WordPress content.
1. Creating Your Website’s Pages
To create your first WordPress page, navigate to Pages > Add New in your dashboard:
This brings you to the WordPress Block Editor, which you use to build your page using blocks that represent various types of content. Let’s try it out.
First, give your page a title. Right underneath, select the + symbol labeled Add block, as shown in this screenshot.
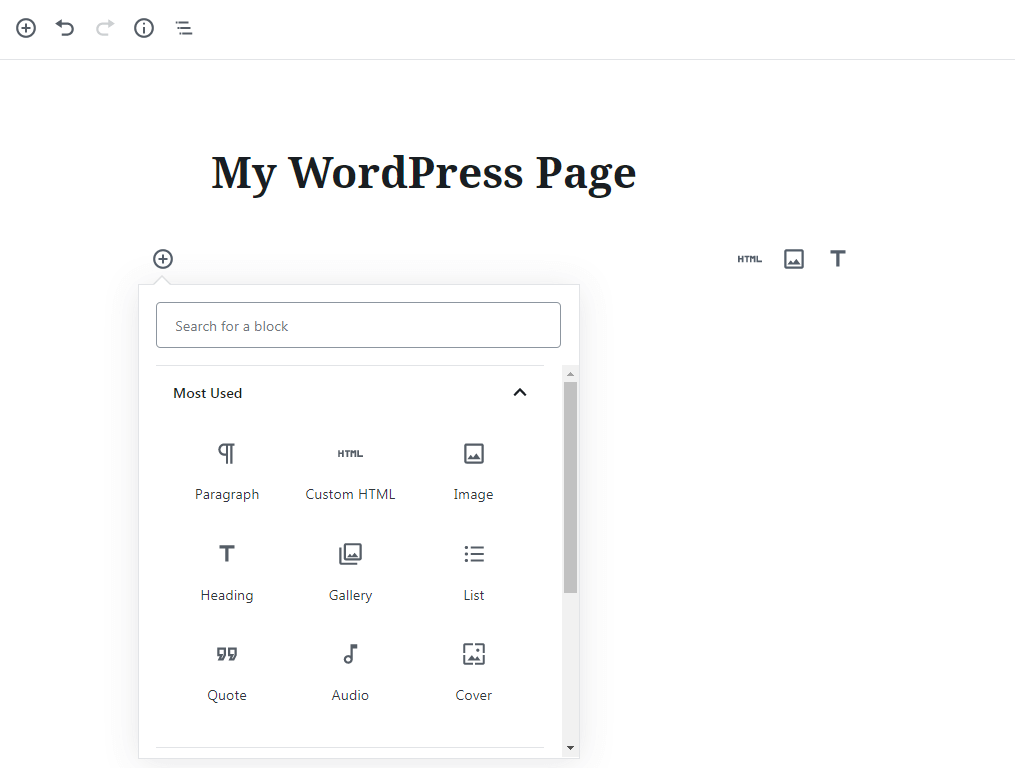
You’ll see a list of the available blocks. Select a Heading block to enter a heading and a Paragraph block to enter text. In the editing bar over the typing window in the following screenshot, you can see some text formatting options, such as text style, alignment, the ability to add links, and more options that you can access by clicking the icon with three vertical dots.
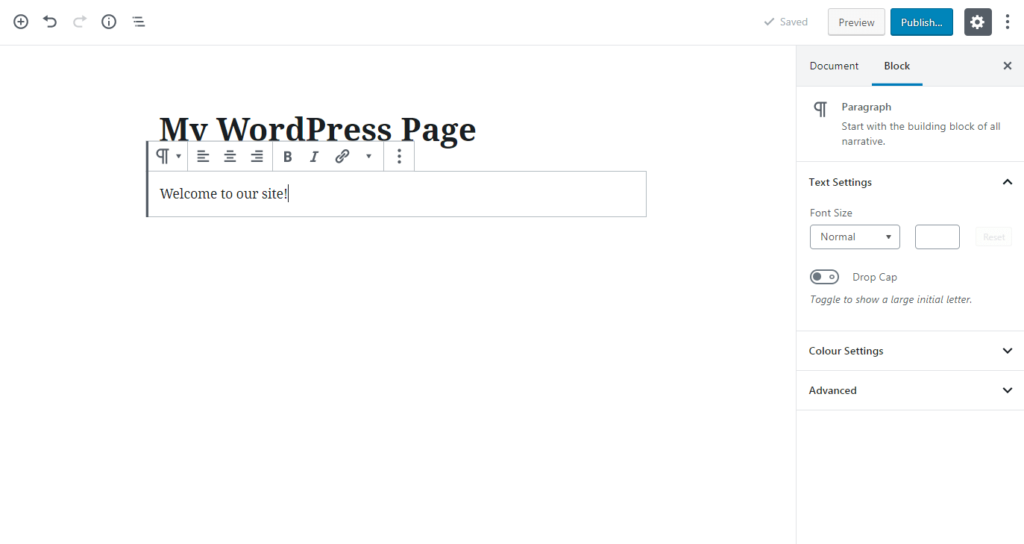
Check out the right sidebar, which displays other options for that block, such as tweaking its font size and color.
Hit Enter, and you can add another block right underneath. This time, we’ll insert an Image block, shown in this screenshot.
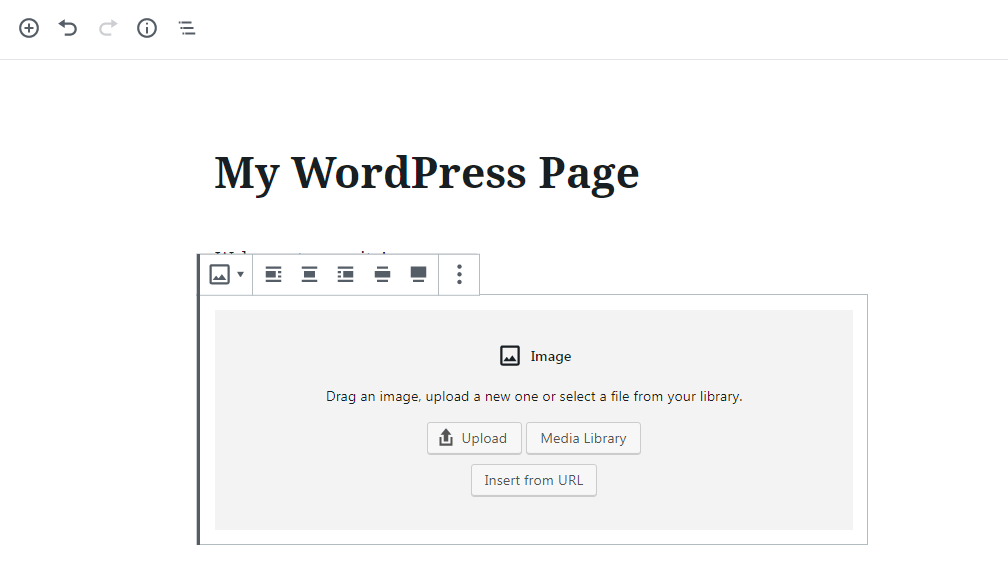
You can upload an image to your site’s Media Library, choose an image that’s already in the Media Library, or create a link to an online image not in the library. After adding the image, new settings appear in the right-hand sidebar. For instance, you can change the image dimensions and add ‘alt’ text for search engines and accessibility.
You can move blocks up and down to reorder them and use the Columns block to create a multi-column layout.
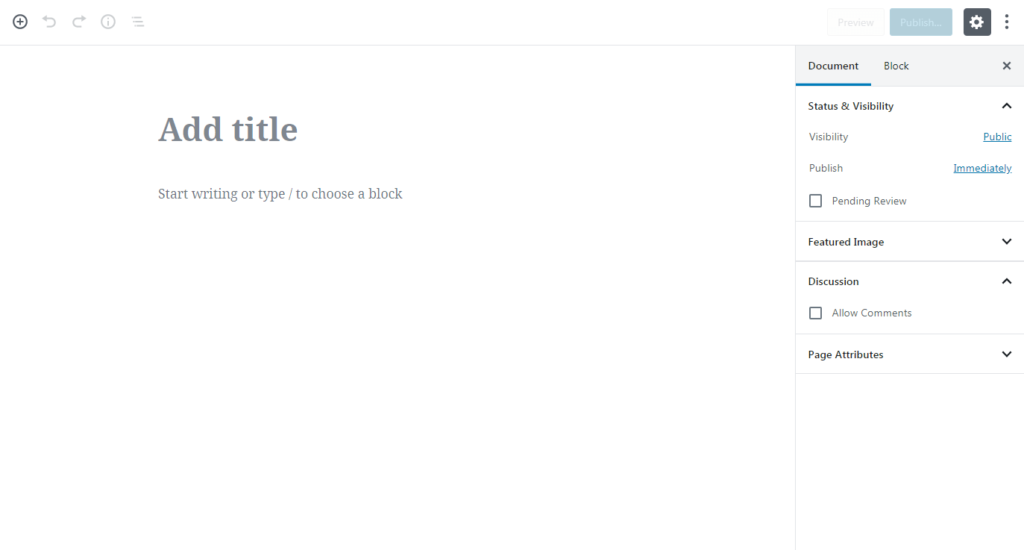
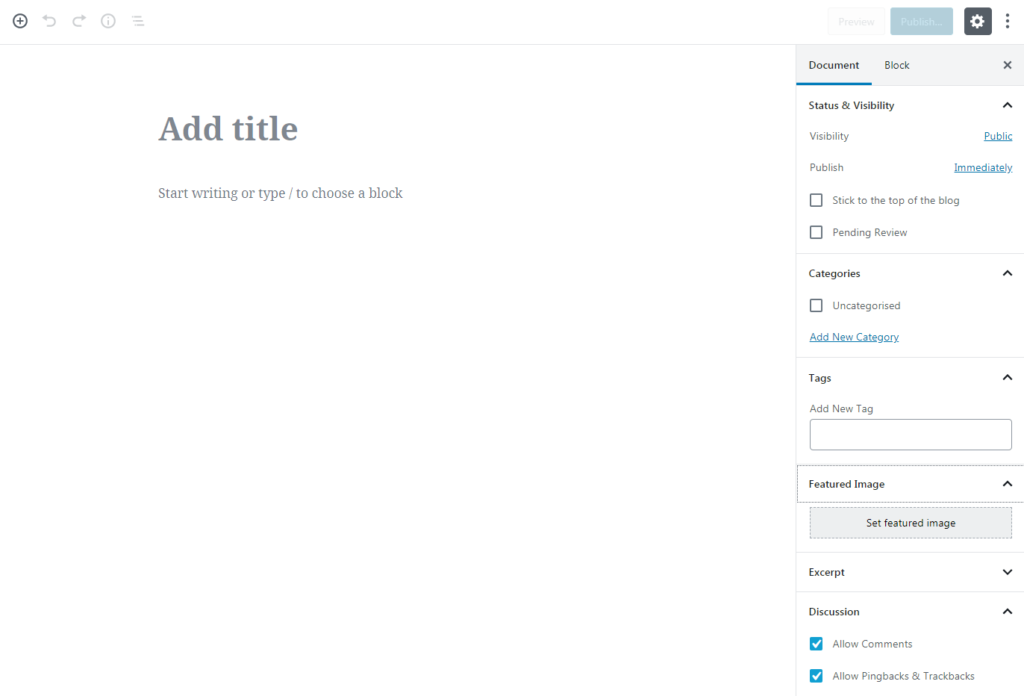
There are a few other options for customizing and managing your page. Click the Document tab in the right sidebar and you’ll see settings that relate to the page as a whole, as shown in this screenshot.
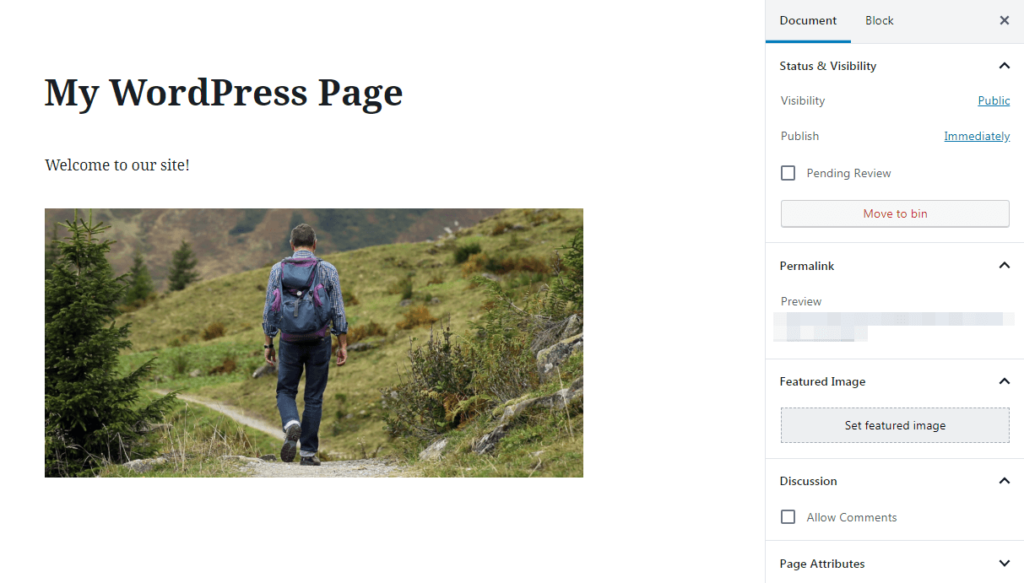
You can customize the page’s URL (its ‘permalink’), add a featured image, and enable comments.
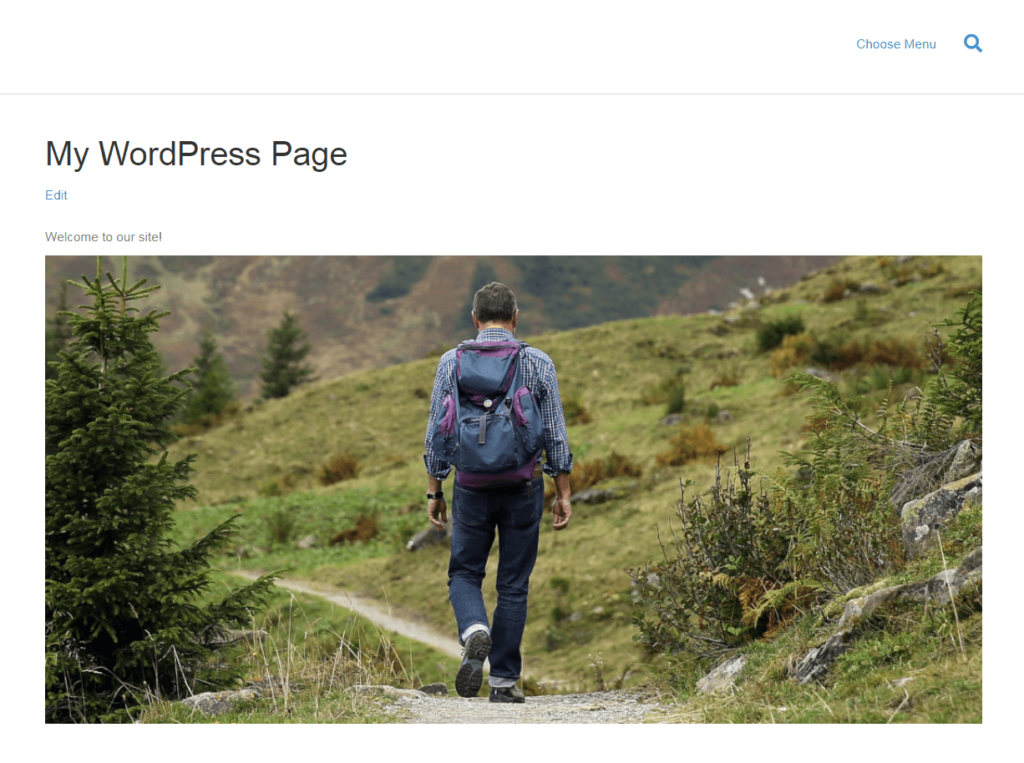
At the top of the editor, use the Preview button to see what your page looks like on the front end. This screenshot shows an example of a preview:
When the page is ready to go, hit the Publish button to make it live. Otherwise, it will be automatically saved as a draft. Either way, you can come back later and make changes.
2. Adding WordPress Posts
To get started, head over to Posts > Add New:
At this point, this screen should look very familiar. The way you create WordPress post content is identical to the process we outlined above for pages. You’ll use the same selection of blocks, and get access to the same settings for customizing them.
Let’s focus on what’s different about posts. Right away, you may notice that the options in the Document tab in the right sidebar are different. It includes two additional settings – Categories and Tags. These settings let you organize your posts. Categories are a way to group similar content. On a cooking blog, for example, you might create categories such as “Healthy Recipes”, “Cooking for Two”, and “Family Meals”.
Tags, on the other hand, are words or phrases that describe the content of a post more specifically. A specific recipe on the cooking blog might feature tags like “vegetarian” and “pasta dish”. You can think of these like hashtags on social media – they help readers who are searching for specific content to find the right posts.
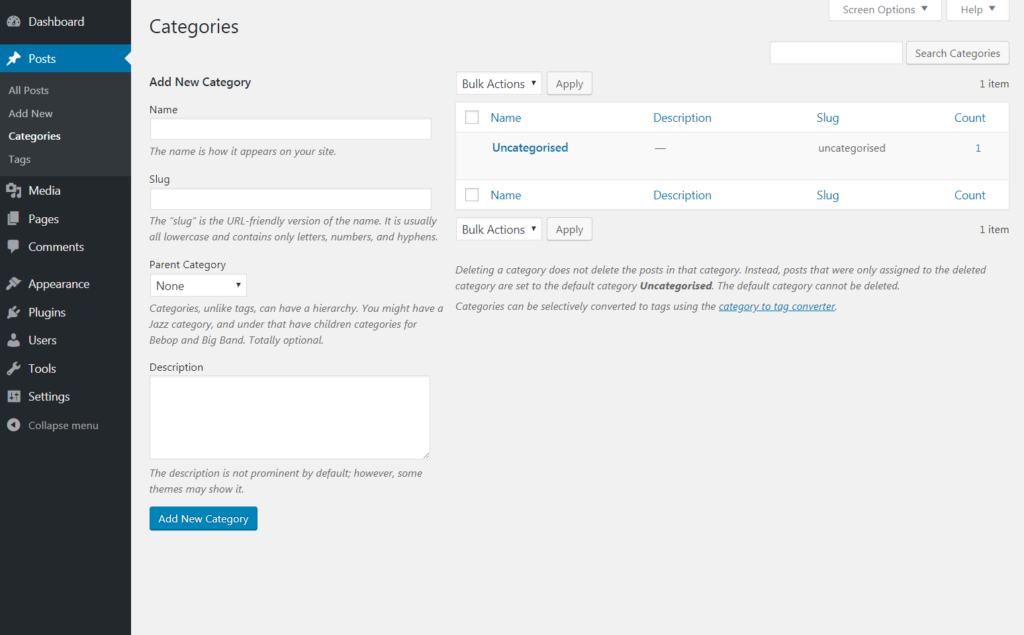
If you take a look back at the left sidebar of your WordPress dashboard, you’ll also find that under the Posts tab, there are subtabs for Categories and Tags. Here’s a screenshot of the page where you can add and manage categories:
Let’s return to the post editor. You’ll find a Featured Image section. The image you upload here will be included in the post (location determined by your theme), and a thumbnail version of the image appears on your blog archive and search pages if your theme allows it.
Finally, you’ll see that comments are enabled by default under Settings > Discussion. However, you can turn them off if you like.
3. Creating WordPress Content With a Page Builder
While the Block Editor is user-friendly and offers a number of content types you can use, there are some things it can’t do. To gain more control over your content, consider using a page builder instead of the WordPress block editor.
Page builders are handy WordPress plugins you can use to build layouts and content for your pages and posts. Page builders, such as our Beaver Builder plugin, make creating and editing content faster, simpler, and more powerful.
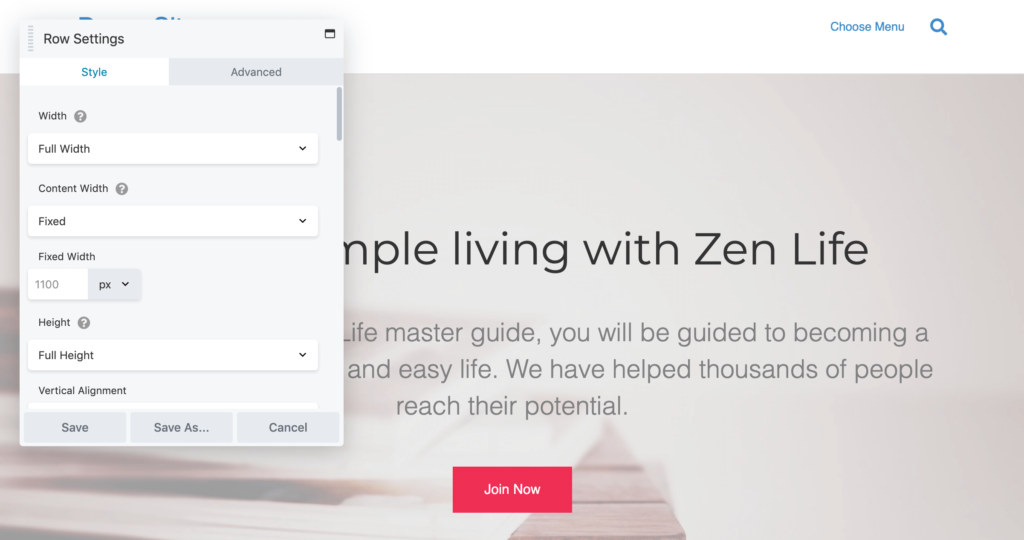
For instance, page builders typically include templates for popular pages such as your home page, Contact page, and About page. They also make it easy to create custom layouts using columns and rows:
Another advantage is that good page builders display your content exactly as it appears on the front end, including styling and animation features such as sliders. The WordPress block editor, on the other hand, shows your content without your theme’s styling applied.
Especially for those without coding knowledge, a page builder is a useful tool for taking control of your posts and pages. If you want a better look at how they work, we suggest checking out our live Beaver Builder demo.
Choosing Your Website’s Home Page
If your site includes both pages and posts, you have to decide whether you want your page to show static content (a page) or a list (index) of your most recent posts. The option you choose depends on your site’s focus. If you want to spotlight your blog, news articles, reviews, or other similar and usually time-sensitive content, it’s smart to have your posts front and center. This is the default setup for a new WordPress site, revealing its origin as a blogging platform.
If you don’t have a blog, or you want your posts to be only one part of a larger site, you can create a static home page instead. This is a good idea for business sites.
To set which type of home page you want, head over to Settings > Reading from your WordPress admin sidebar:
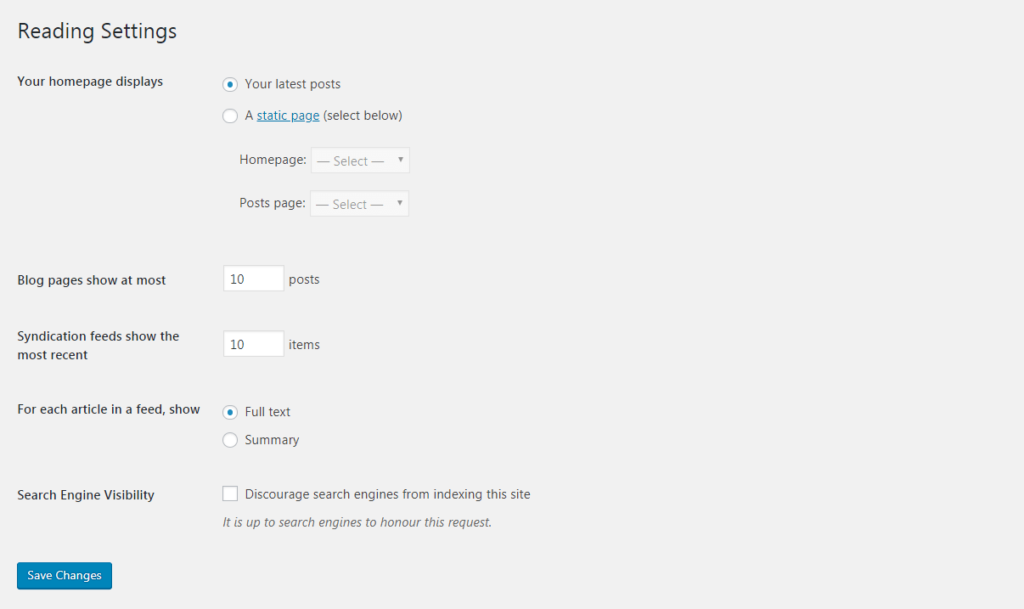
The first setting on that page is labeled Your homepage displays, with several choices. The first choice,Your latest posts, displays an index of your latest posts, usually as excerpts with links to the full posts. If you select A static page, in the Homepage field choose which WordPress page you want to use as your home page.
The Posts page choice in the screenshot above is only required when you have posts and want to display a list (archive) of recent ones on a page other than the home page. To do this, create a WordPress page with a title but no content, then select that page in the Posts page dropdown list.
You’ll find a few other options on the Settings > Reading page. You can customize how many posts and how much of the post content to display on the index and archive pages. Don’t forget to hit the Save Changes button when you’re done.
The WordPress Architecture of Post Types
Besides posts and pages, the WordPress platform has other built-in post types. This architecture, and the name “post type,” again reveals WordPress’s start as a blogging platform. Pages were created as another type of post with different properties. Here’s the complete list of post types that WordPress includes out of the box:
- Posts
- Pages
- Attachments (images, files in your Media Library)
- Revisions
- Navigation Menus
- Custom CSS
- Changesets
Most of these post types work behind the scenes, and you won’t need to think about their post type properties unless you’re a developer.
WordPress Custom Post Types
WordPress also allows custom post types (abbreviated to “CPTs”) and their organizational schemas, which are called “taxonomies” and function like categories and tags.
It’s not hard to find examples of custom post types, because many plugins and themes install them, plus the taxonomies, templates, and coding to tell WordPress how the content is entered on the back end and how to display the results on the front end.
The most common example is e-commerce plugins, such as the very popular WooCommerce. These plugins generally add a new Products tab to your dashboard:
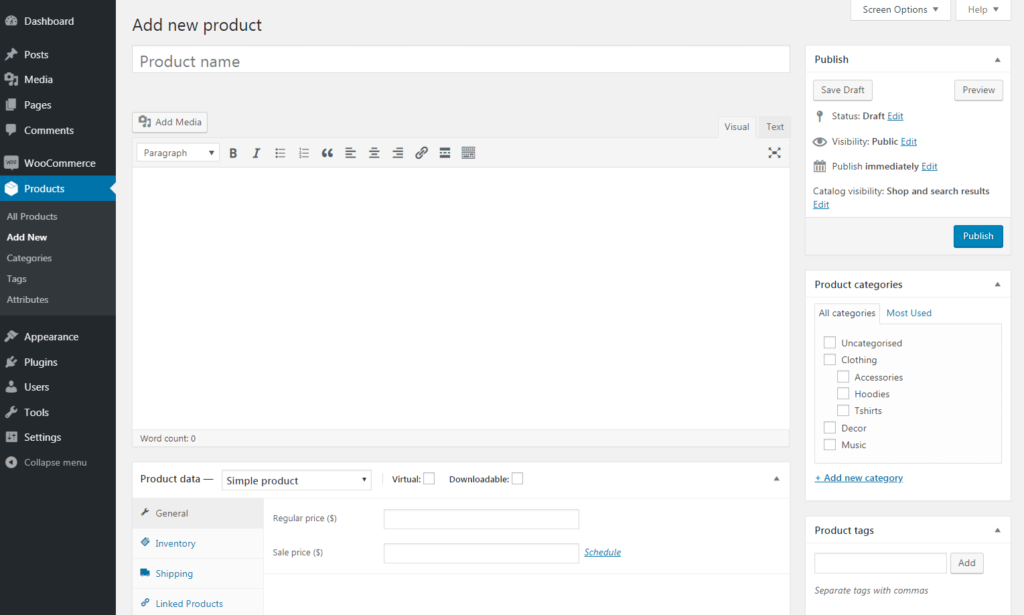
Having a Products custom post type lets you keep your store’s product pages separate from your regular web pages and your posts. Each product in WooCommerce is a single post that includes some custom fields, such as pricing and shipping details. The archive pages for WooCommerce display products categorized in various ways, such as the full list of products, product categories, recent products, or popular products.
The sky is the limit when it comes to custom post types. For example, a podcasting plugin might add an ‘episodes’ post type, while a review plugin might add a ‘reviews’ post type.
If you can’t find a plugin with a post type for the content you want to organize, it’s not too hard to create your own, particularly when you use Beaver Themer to style the custom post type pages. There are free plugins that create custom post types for you, such as the Custom Post Type UI plugin, or the Pods plugin. These plugins also lets you create a custom taxonomy for your CPT and control other options.
Since CPTs are ideal for organizing and displaying structured information, they often go hand in hand with custom fields, which you can use to insure that the same type of information appears for every item. For example, with home listings, you usually want size, number of bedrooms, types of rooms, age of the house, and so on. WordPress offers custom fields, but more powerful options are either the Advanced Custom Fields plugin or the Pods plugin. Either one lets you create custom fields for your custom post types or add custom fields to standard posts.
Beaver Themer Makes Custom Post Types Sing
The only problem with plugins that help you create custom post types and custom fields is that they set up the custom structure in the back end but then leave you to do some coding to get the content to display on the front end. That where Beaver Themer comes in!
Beaver Themer is an add-on to the Beaver Builder plugin. It lets you use Beaver Builder to layout and style content in areas of pages and posts that are normally controlled by your theme. Beaver Themer lets you control layouts and content in those areas much better than your theme could ever offer.
You can create Themer layouts for standard and custom posts and archives, plus headers, footers, 404 pages, and bits of content such as banner rows that you might want to show across a set of pages or posts. Themer layouts are powerful templates because you can add field connections to the database, and the correct information is displayed dynamically.
Beaver Themer is integrated with both the Advanced Custom Fields and Pods plugins, as well as WooCommerce, The Events Calendar, and Easy Digital Downloads (and a BigCommerce integration is currently in alpha), so you can add and style custom fields just about anywhere.
Here’s an example of a custom Events post type, which was created to display information about monthly events and organize them into archives of the monthly events for each year. This screenshot shows a web page for a single event post:
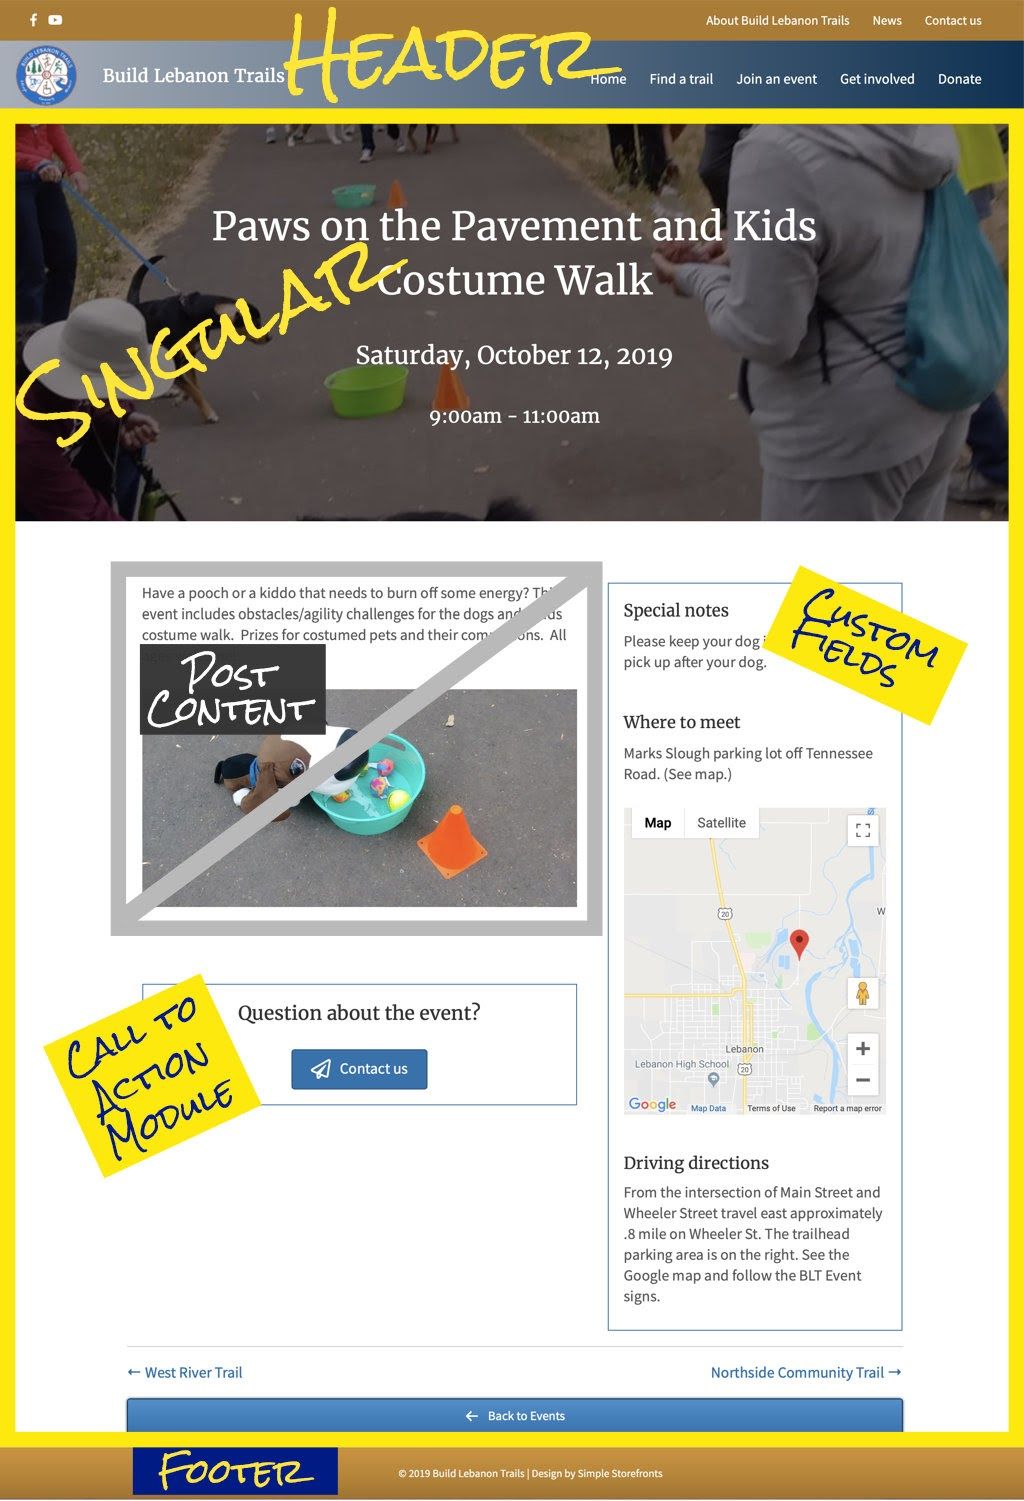
The screenshot shows a Header Themer layout and a Footer Themer layout, which replace the theme’s header and footer respectively. Then there’s a Singular-type Themer layout, which is outlined in yellow, and it includes everything else on the page except the post content.
In the Themer layout, the post’s featured image is displayed in a row background, overlayed with the event/post title and custom fields for date and time. The right sidebar displays other custom fields: notes, where to meet, a map, and driving directions.
The layout includes a Call to Action module and navigation to the next event, previous event, and the archive of monthly events for that year.
Except for the call to action, all of the modules that make up this layout use dynamic field connections, so when you input the data in the back end, every event page displays it beautifully, The user experience is that they know exactly where to look on every event post to find the information they’re looking for. See this blog post for instructions on how to create a Themer layout for a single post.
All of this work, from creating the custom post type and custom fields to creating the Themer layout that serves as a template, was done without writing a single line of code!
Conclusion
If you’re building a website for the first time, you can’t go wrong with WordPress. After installing the software, you’ll probably be eager to start creating content. Fortunately, setting up WordPress pages and posts is a quick and intuitive process. And if you know how to create posts and pages, you’ll know how to work with just about any kind of WordPress content.
The WordPress Block Editor enables you to create these two distinct types of content. Knowing how to use each effectively is key to creating a well-organized and fleshed-out website.
For even more control over the look and layout of your pages and posts, you can also consider picking up a page builder plugin. And for total control over your pages and posts, we recommend our premium Beaver Builder plugin with the optional Beaver Themer add-on.
Do you have any questions about how to set up pages, posts, and other custom post types in WordPress? Let us know in the comments section below!
Our Newsletter
Our newsletter is personally written and sent out about once a month. It's not the least bit annoying or spammy.
We promise.
Try Beaver Builder Today

Related articles

How Beaver Builder Products Work Together to Build Flexible WordPress Websites
Building a WordPress website often means stitching together a theme from one developer, a page builder from another, and a…
Growing a Facebook Group to 14,000 Members: Community Management Tips with David McCan
David McCan grew the Dynamic WordPress Facebook group to over 14,000 members. We sat down to talk about his moderation...
Why Agencies Are Switching to Beaver Builder: Performance Testing Results
By Chris Smith – HYPEsites.com For WordPress agencies, page builder choice directly impacts the metrics that matter most: project margins,…
Join the community
We're here for you
There's a thriving community of builders and we'd love for you to join us. Come by and show off a project, network, or ask a question.
Since 2014
Build Your Website in Minutes, Not Months
Join Over 1 Million+ Websites Powered By Beaver Builder.