
If you run an e-commerce store, offering a frictionless buyer journey is crucial for success. However, WooCommerce creates a separate page for each product by default, which can slow down your visitors. Keep reading to learn how to build a WooCommerce order form so that you can conveniently display a list of products all in one place:
In this post, we’ll explain what an order form is and how it can optimize the user experience for consumers. Then, we’ll walk you through how to create and customize an order form in WooCommerce using Beaver Builder. Let’s dive right in!
Table of Contents
- An Introduction to WooCommerce Order Forms
- How to Build a WooCommerce Order Form (In 5 Steps)
- Step 1: Install WooCommerce Product Table Lite
- Step 2: Create a Table for Your Products
- Step 3: Modify Products in Your Query Table
- Step 4: Edit Your Product Table’s Columns and Rows
- Step 5: Customize Order Form Details and Appearance
- Conclusion
An Introduction to WooCommerce Order Forms
WooCommerce is one of the most common solutions for creating online businesses with WordPress. This WordPress plugin is known for its simplicity and user-friendliness.
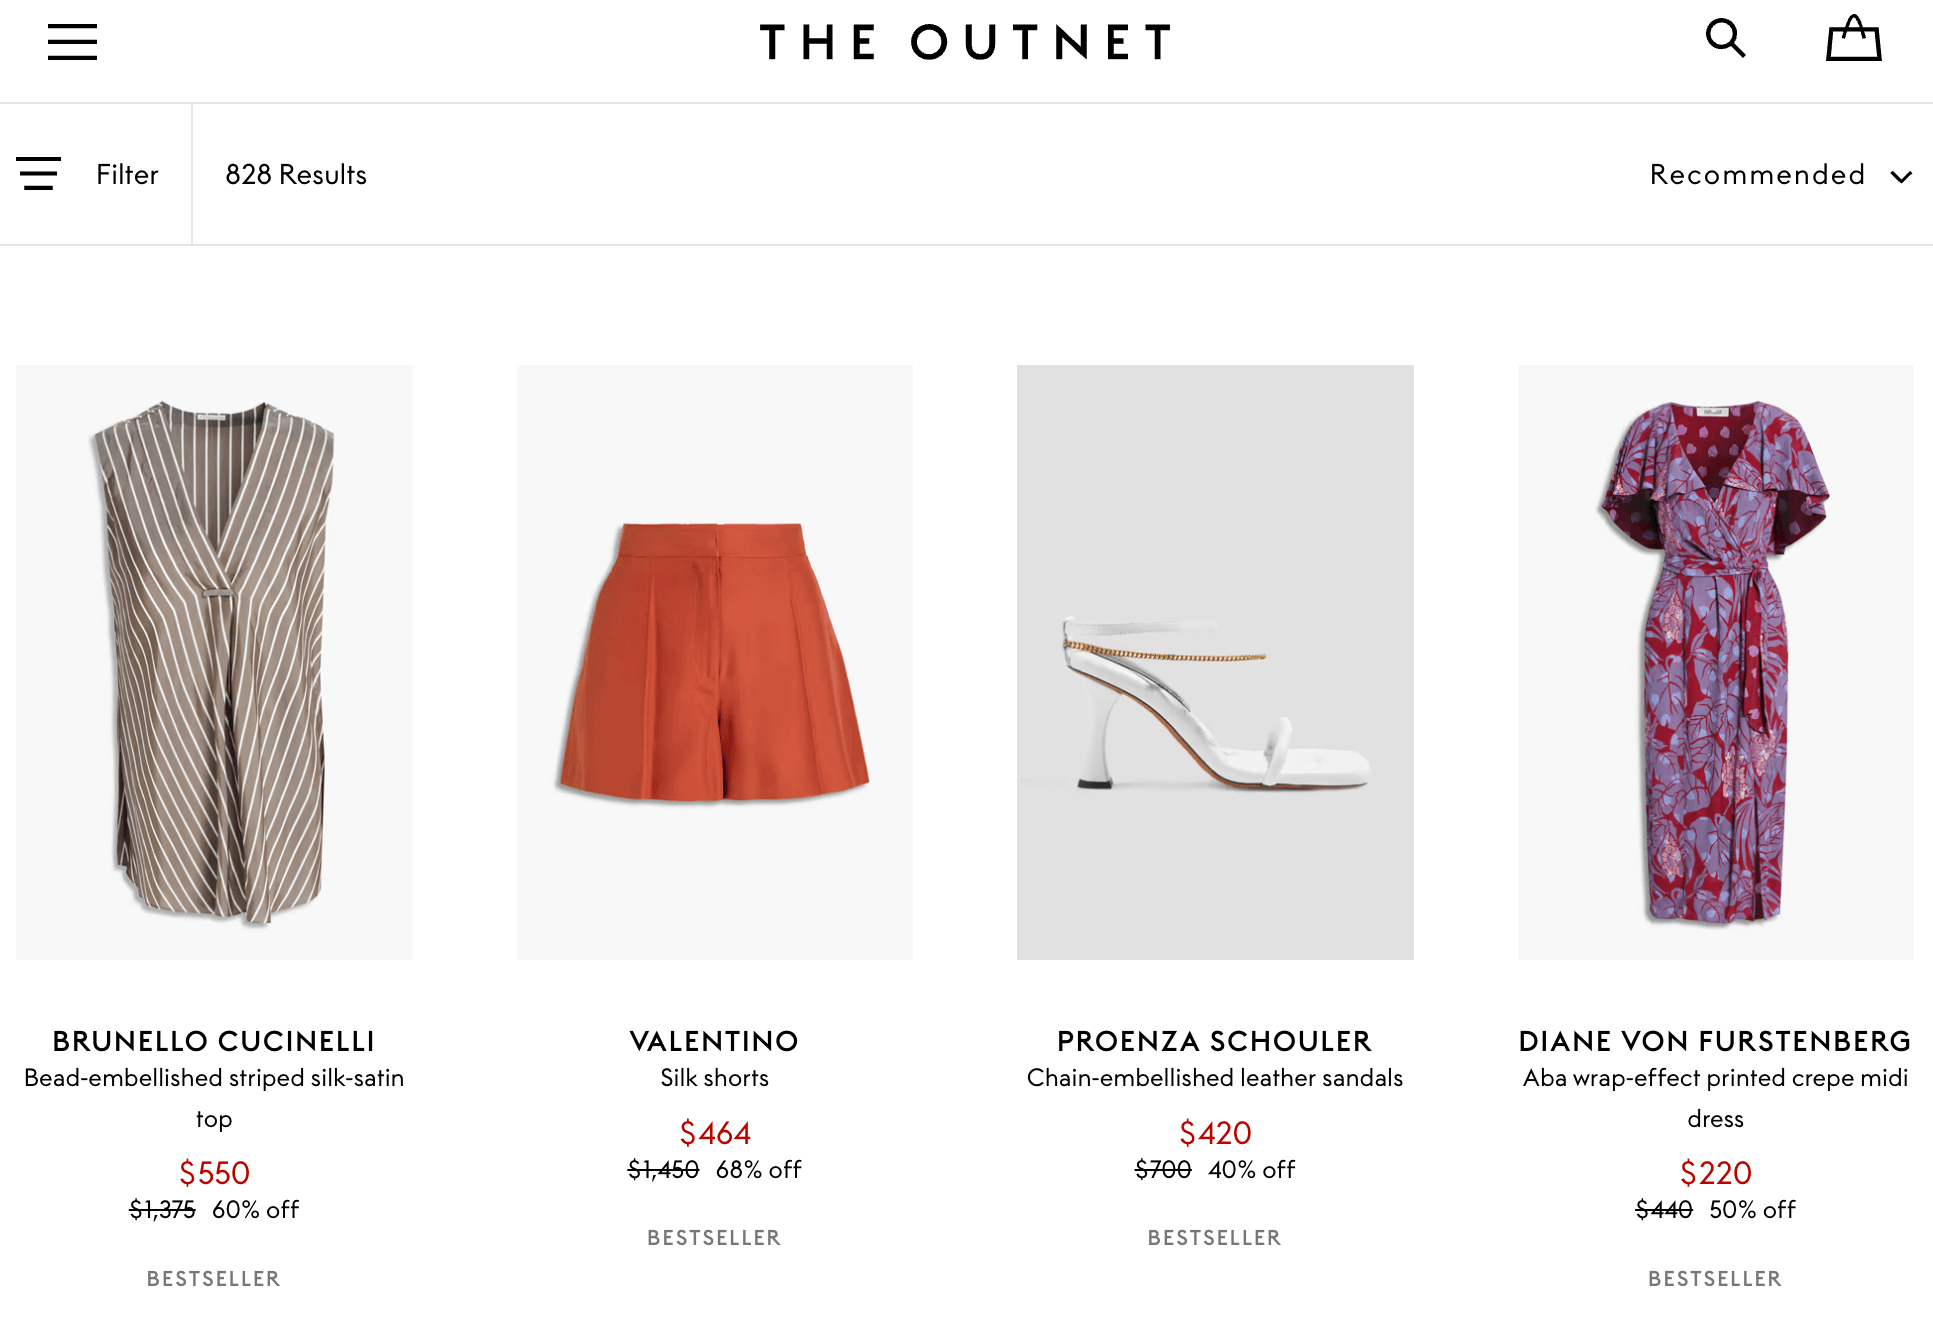
The default settings in popular themes for WooCommerce stores typically display items with large images and prices:
Sometimes, they include an Add to Cart button. Moreover, product images are usually presented in a grid of three or four items per row. This can take up a lot of space on the page.
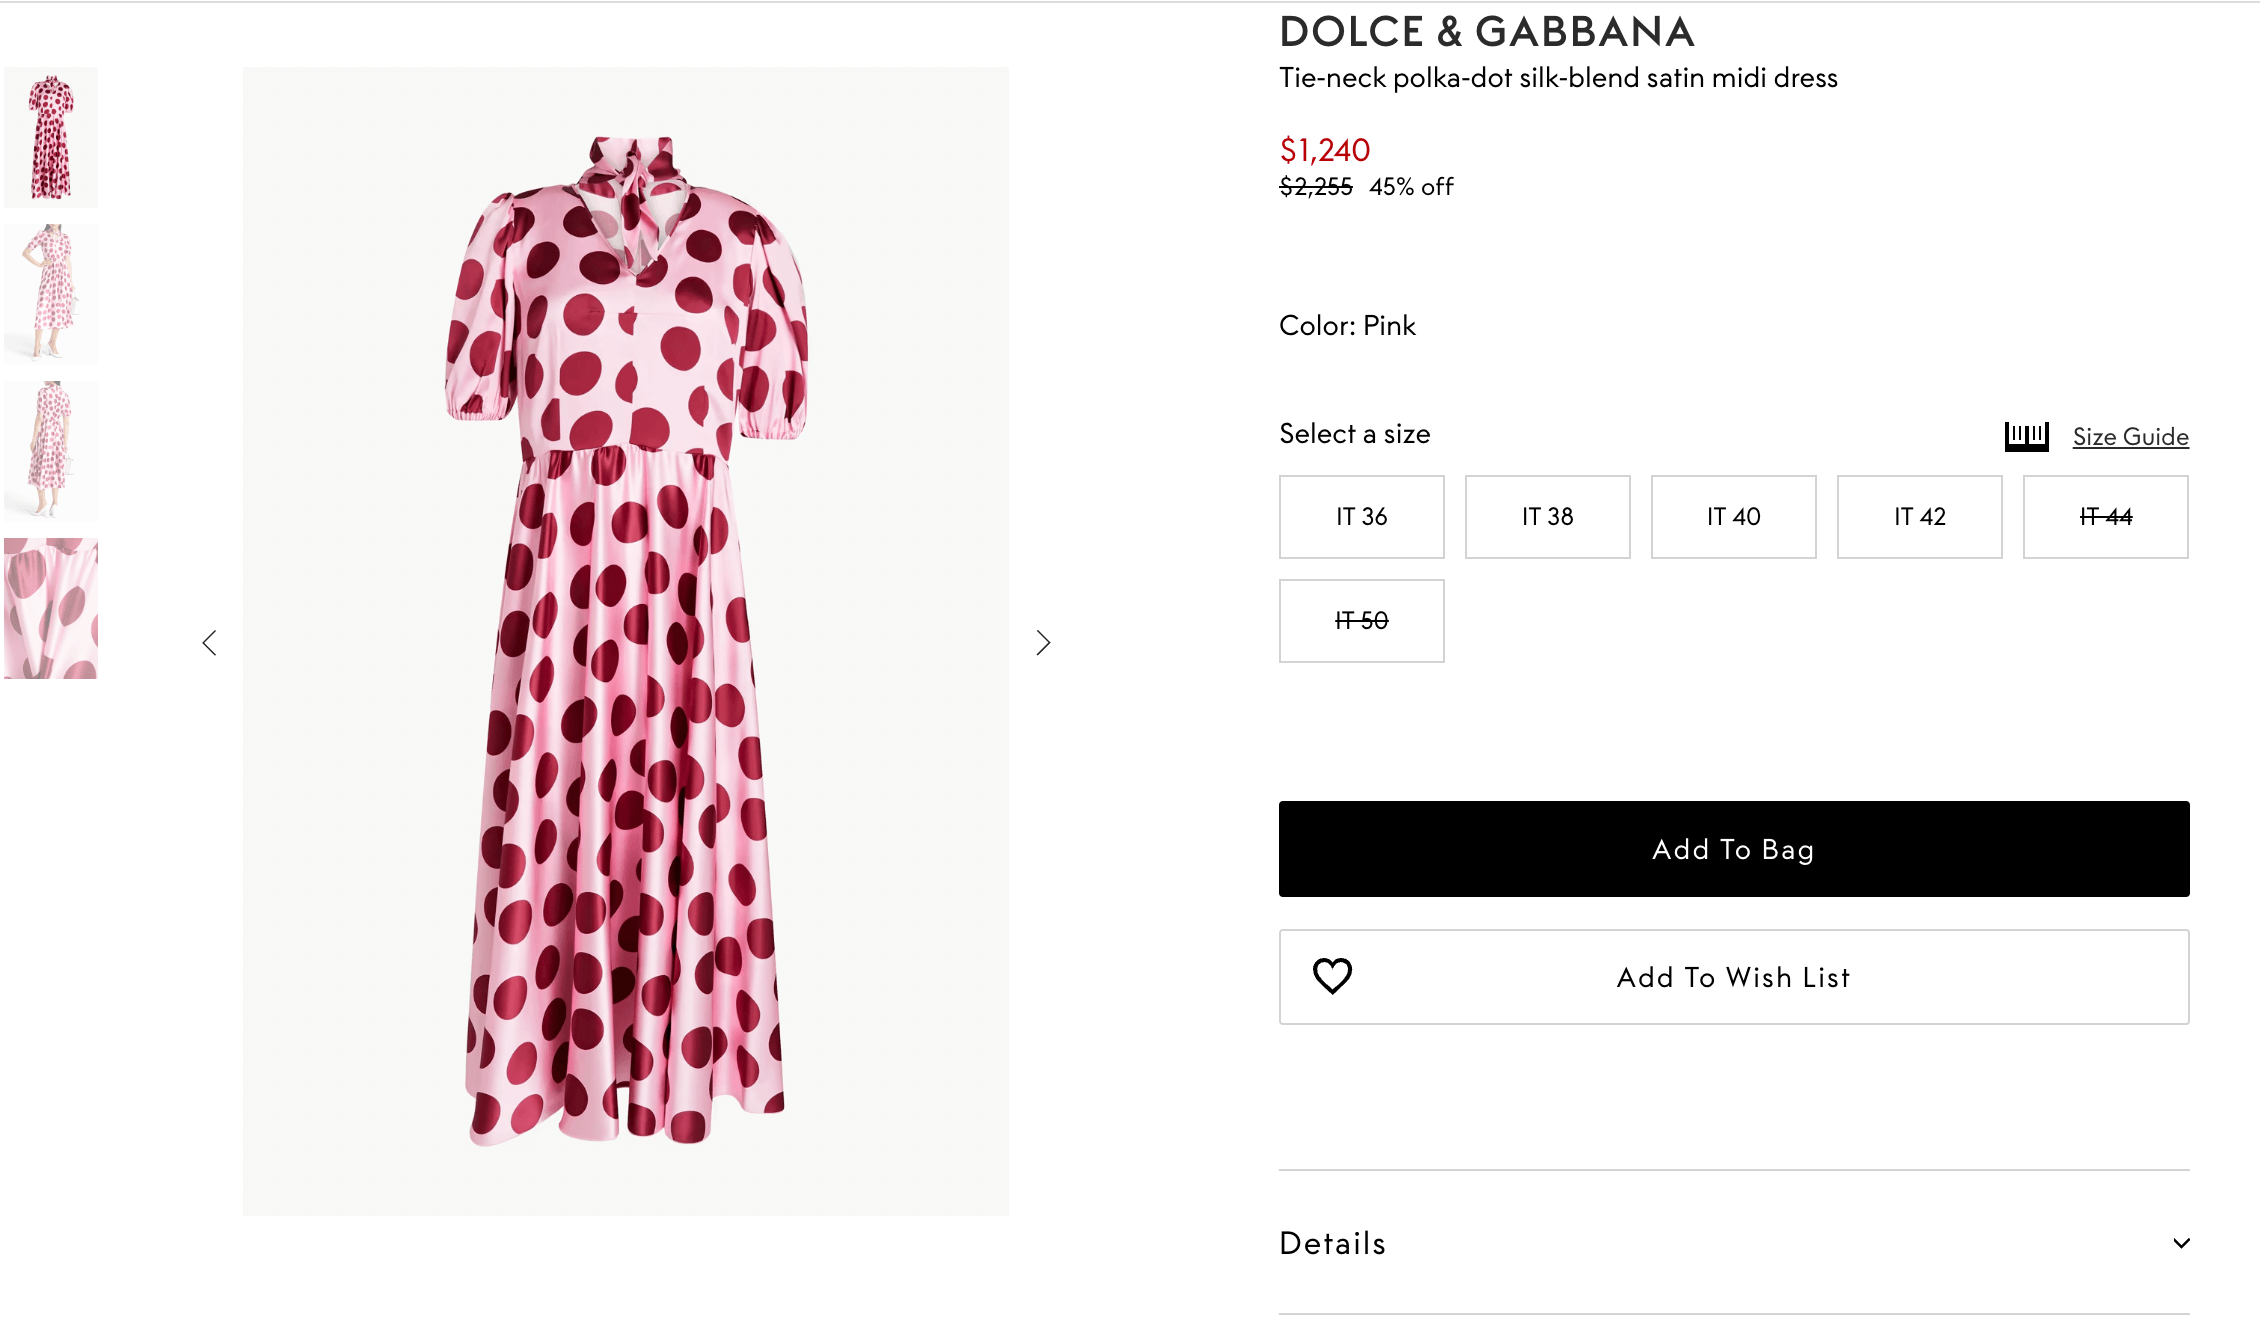
Typically, users can browse product pages or type what they’re looking for in the search bar. This layout offers customers a standard e-commerce experience:
In most cases, this basic web design works well because it lets shoppers browse products while also viewing their details. However, this layout isn’t ideal for every e-commerce store. Simply put, so many WooCommerce shop pages might be too complicated for your store’s needs.
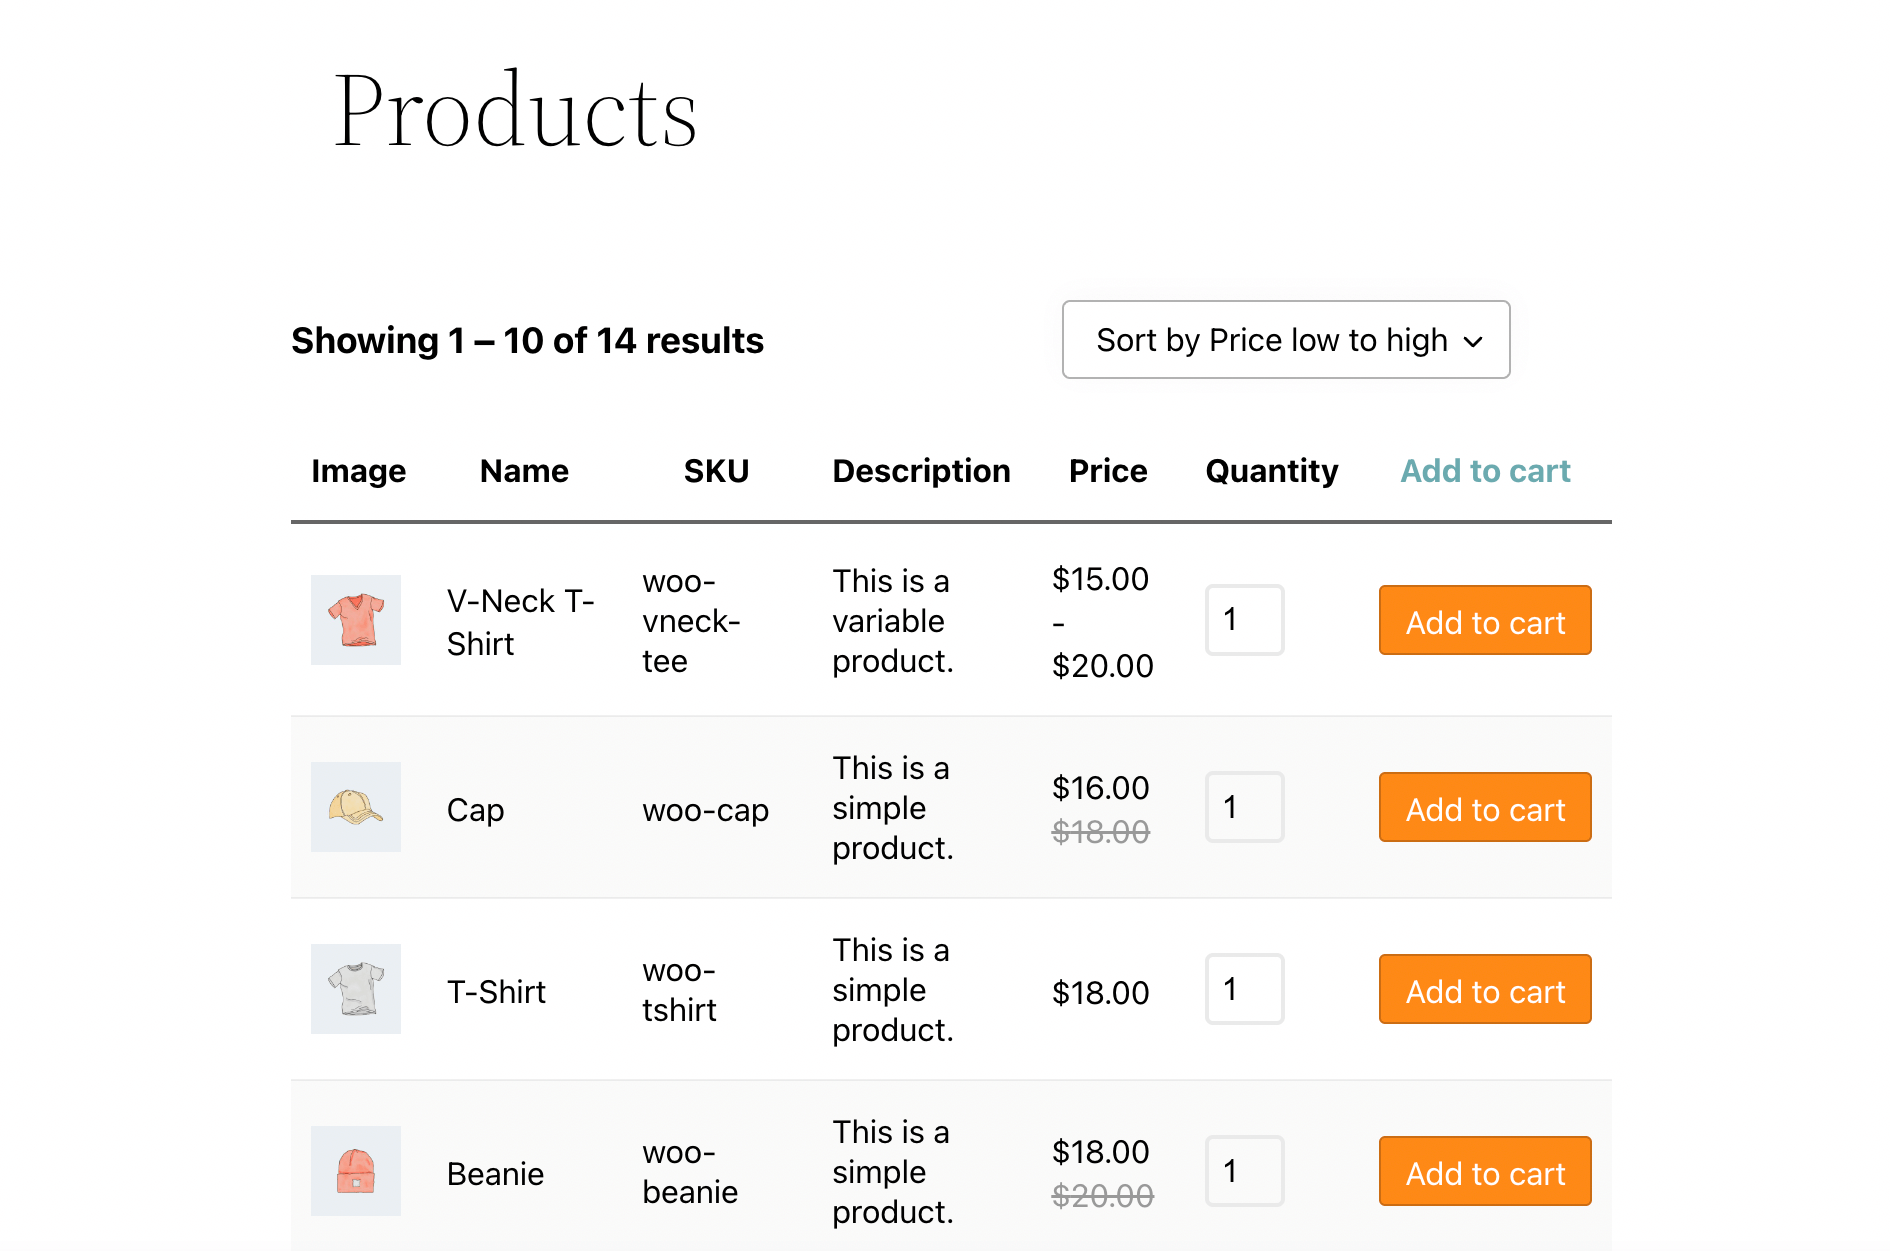
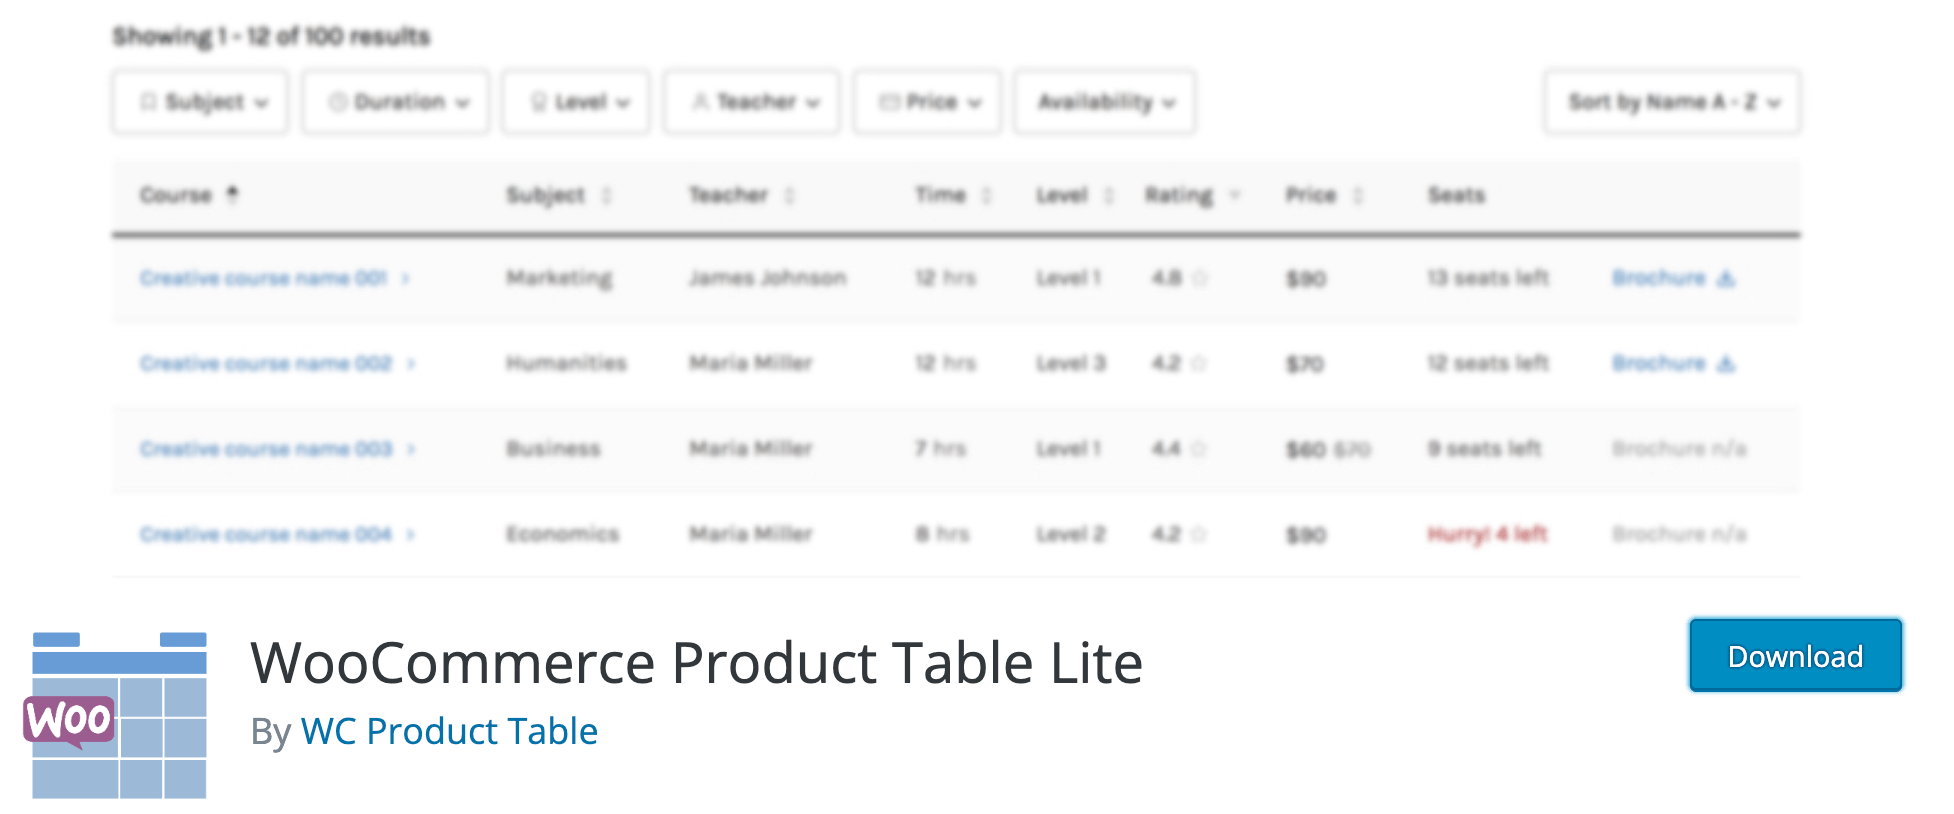
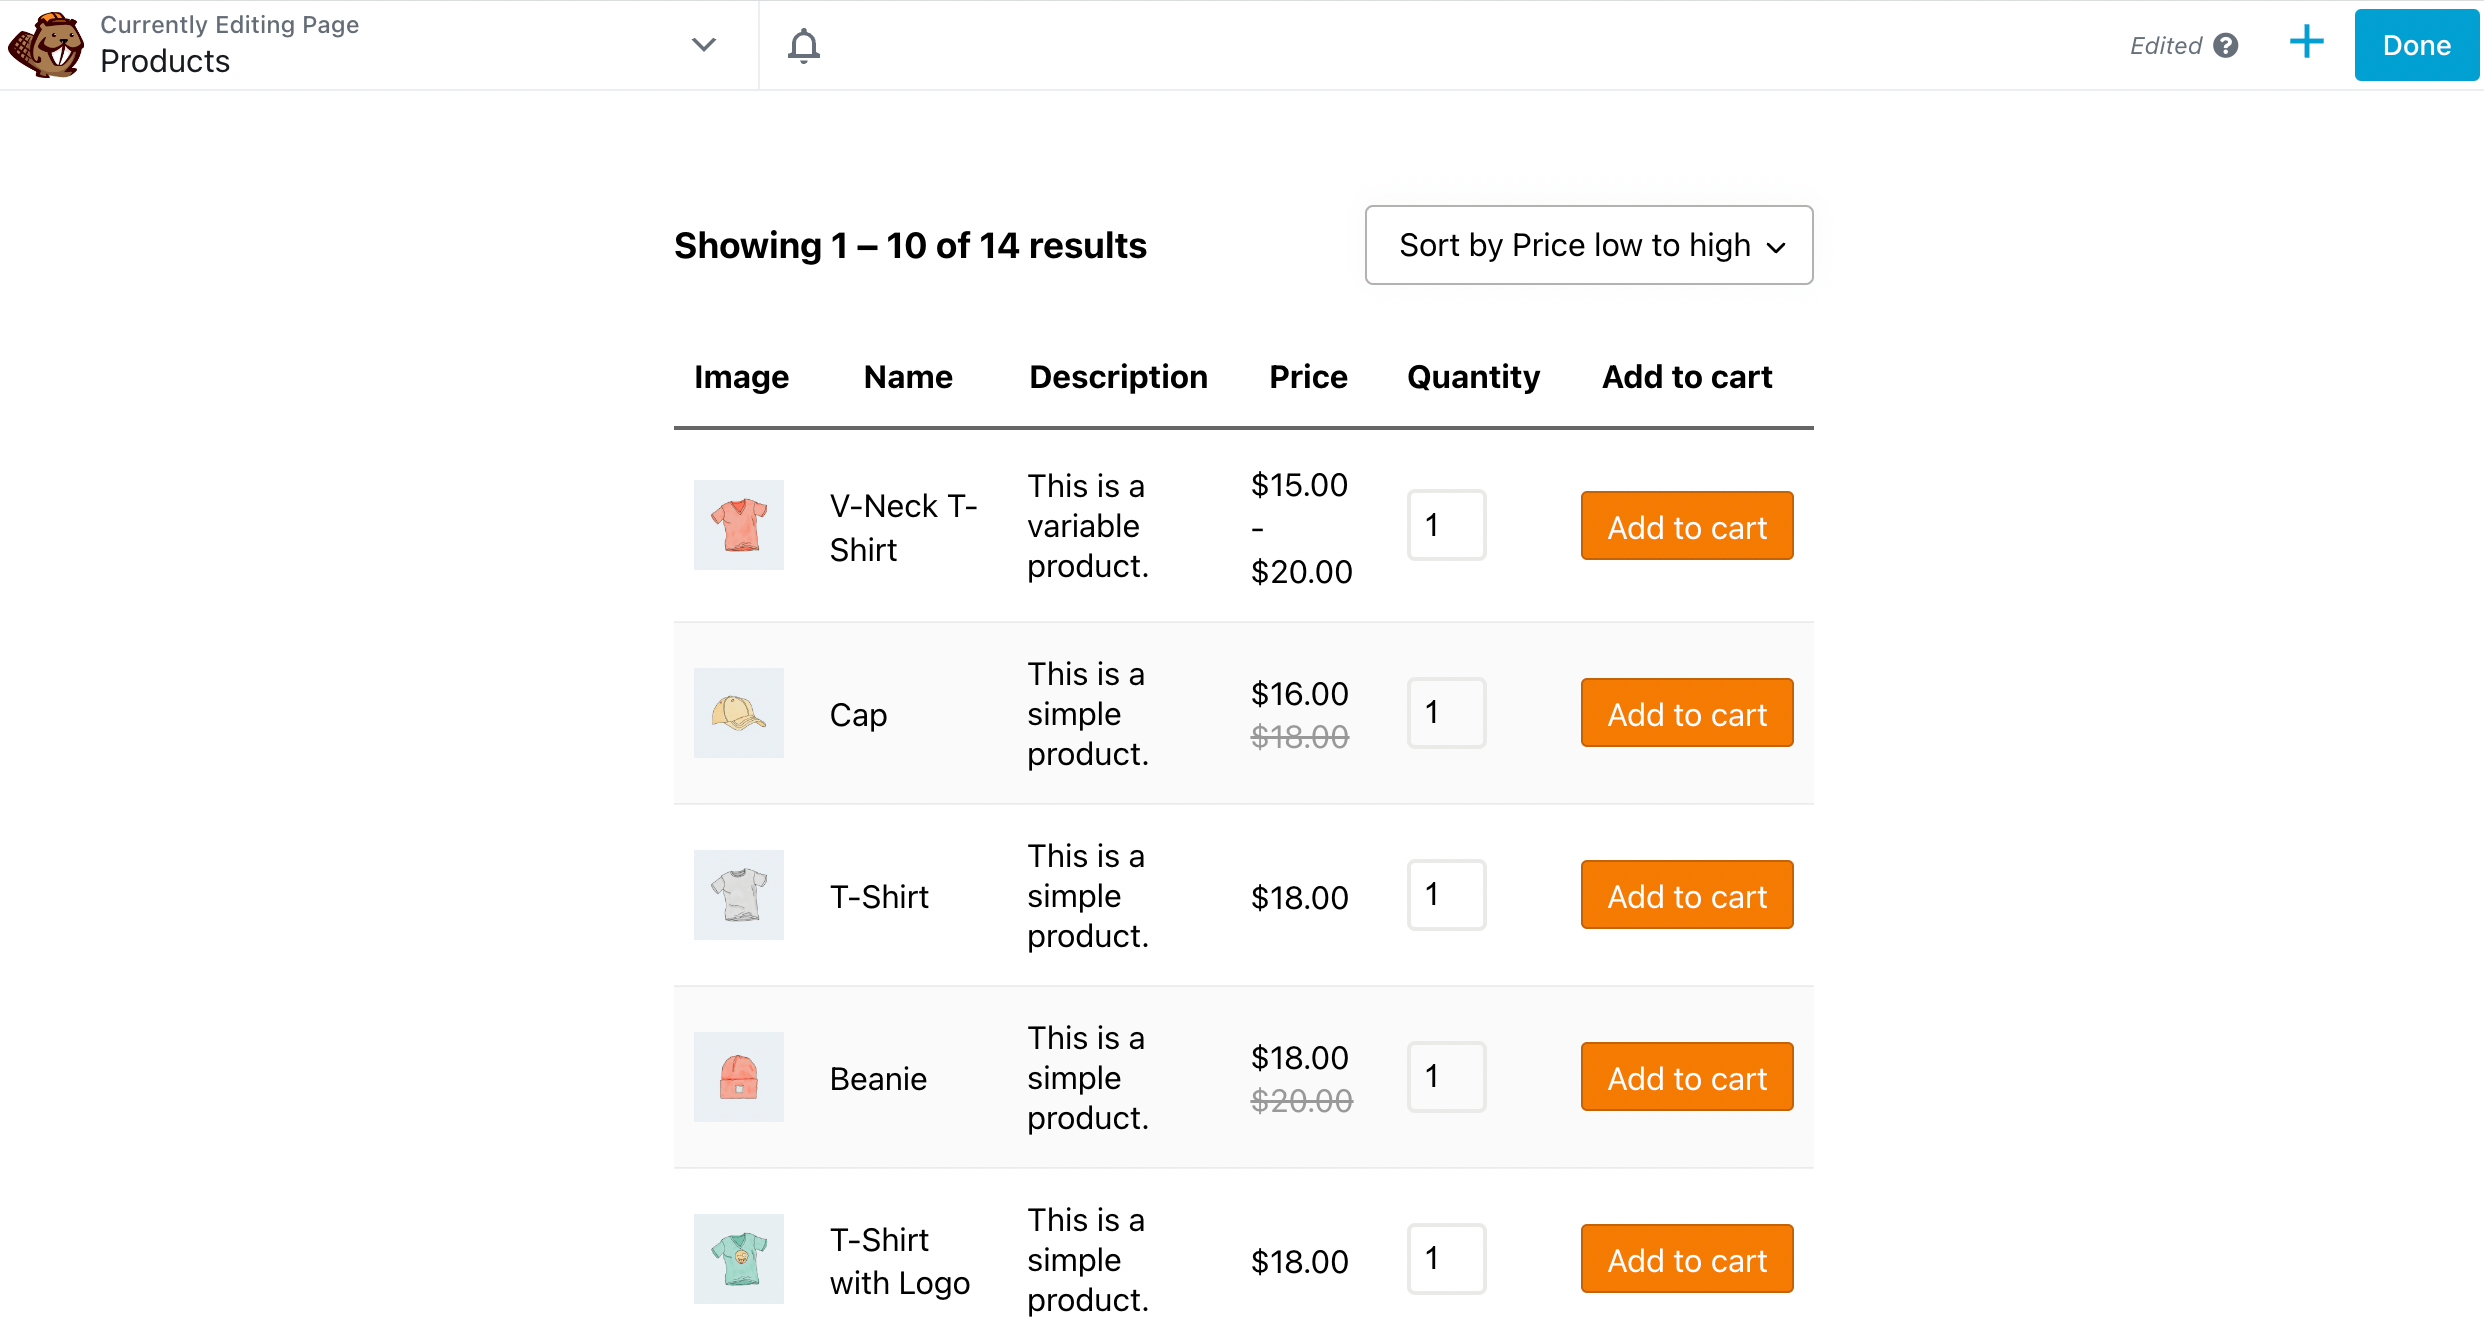
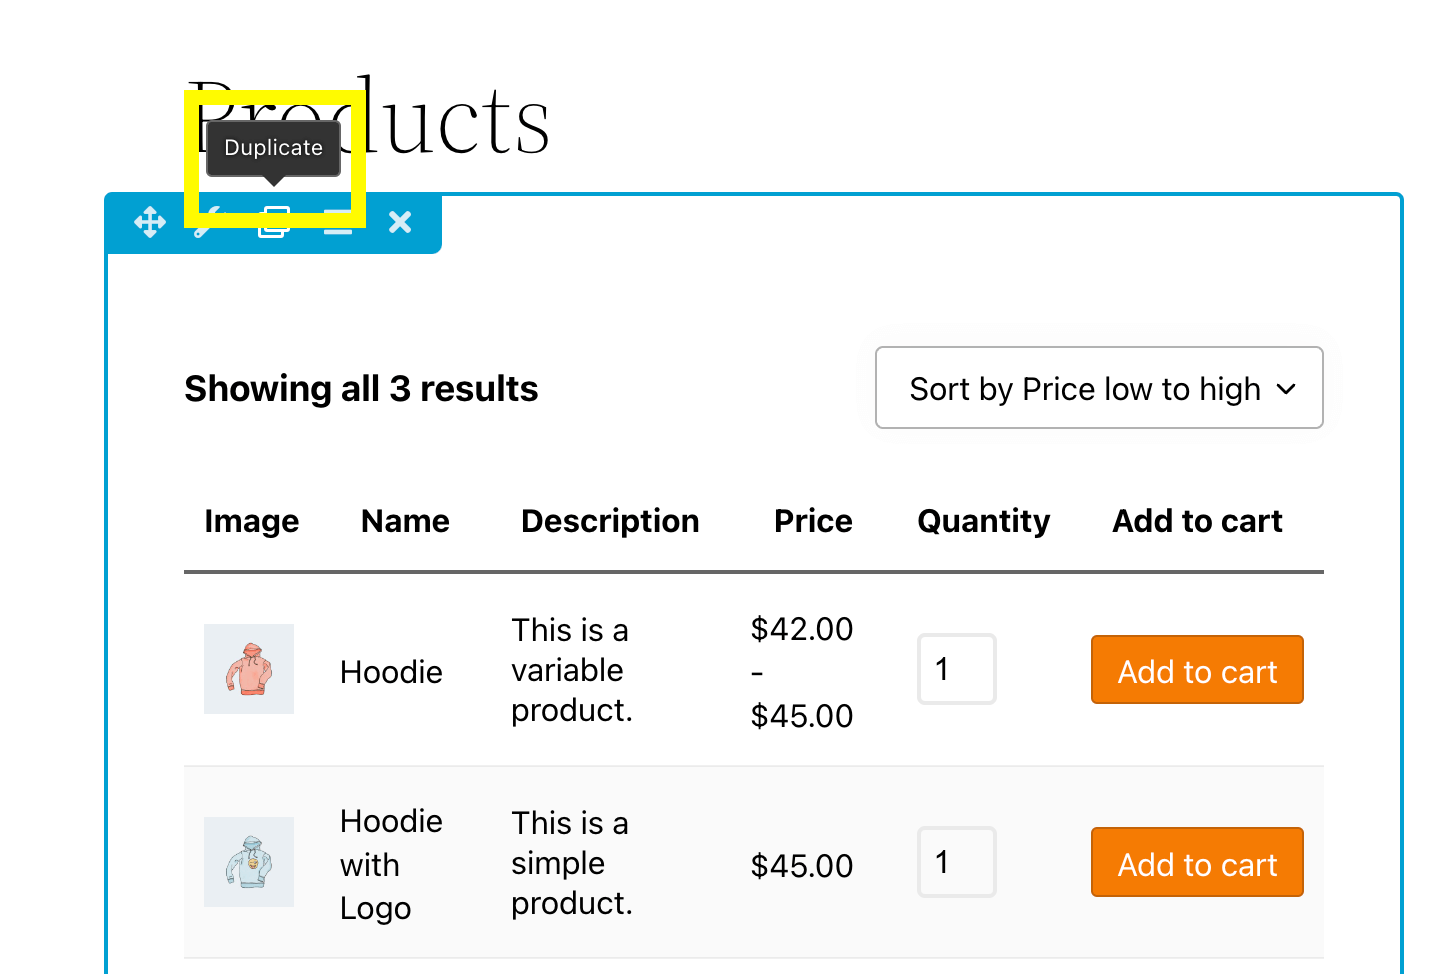
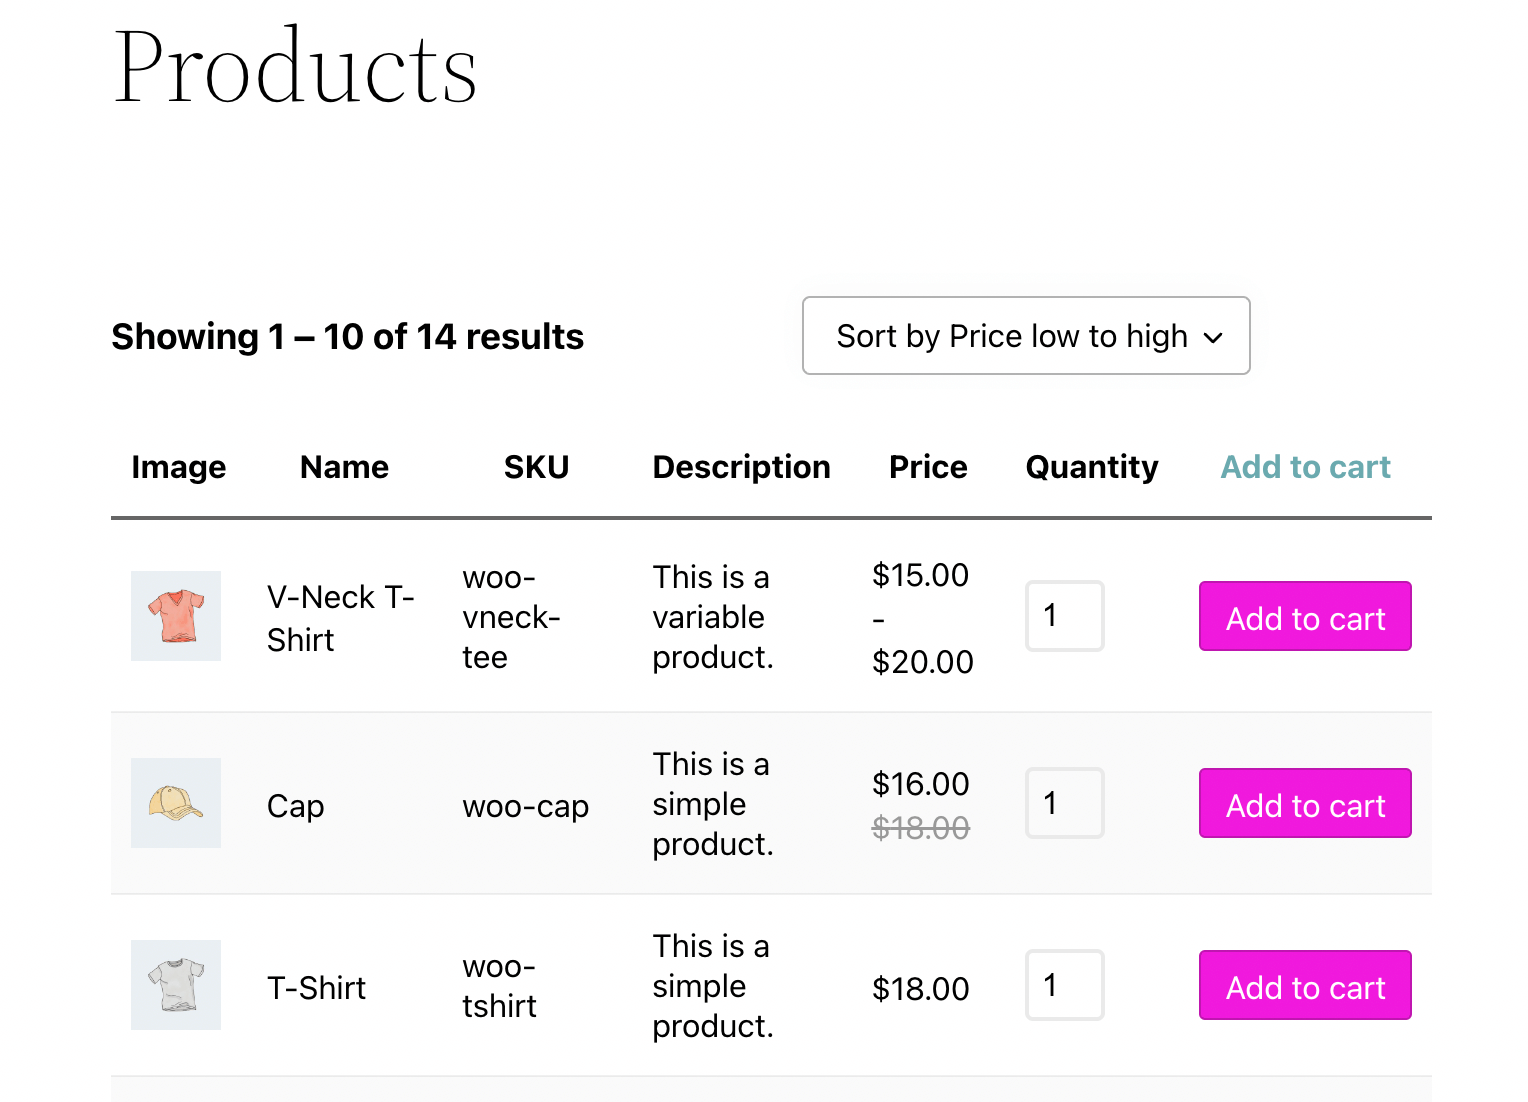
That’s when order forms can come in handy. This simplified format condenses all your products onto one page. Items are presented in a table, where each product has its own row:
Order forms provide many benefits. For example, they allow your customers to more easily select the number of products they want to add to their cart, which can speed up the checkout process.
They might be especially appealing to bulk and wholesale buyers because of how easy it is to add a large number of products at once. As a result, this can improve user experience (UX) and boost sales for your business.
Order forms might not be for everyone. For instance, certain shops with a limited product catalog don’t necessarily need this kind of display. While a streamlined buying experience can benefit certain small businesses, you could risk underwhelming buyers if you don’t have enough products to showcase.
How to Build a WooCommerce Order Form (In 5 Steps)
Now that you know the difference between the standard WooCommerce storefront and an order form, let’s take a look at how you can use one for your WordPress e-commerce site. Keep in mind, you’ll need an active WooCommerce store and the Beaver Builder page builder for this tutorial.
Step 1: Install WooCommerce Product Table Lite
For this walkthrough, we’re going to use WooCommerce Product Table Lite. This is a powerful, highly-rated plugin for creating simple yet professional product tables:
To get the tool, navigate to your WordPress dashboard. Go to Plugins > Add New and look for the plugin using the search tool in the upper right-hand corner of your screen.
Simply install and activate the plugin as you normally would. After you’ve installed it, you should see a new tab for the tool in your left-hand panel.
Step 2: Create a Table for Your Products
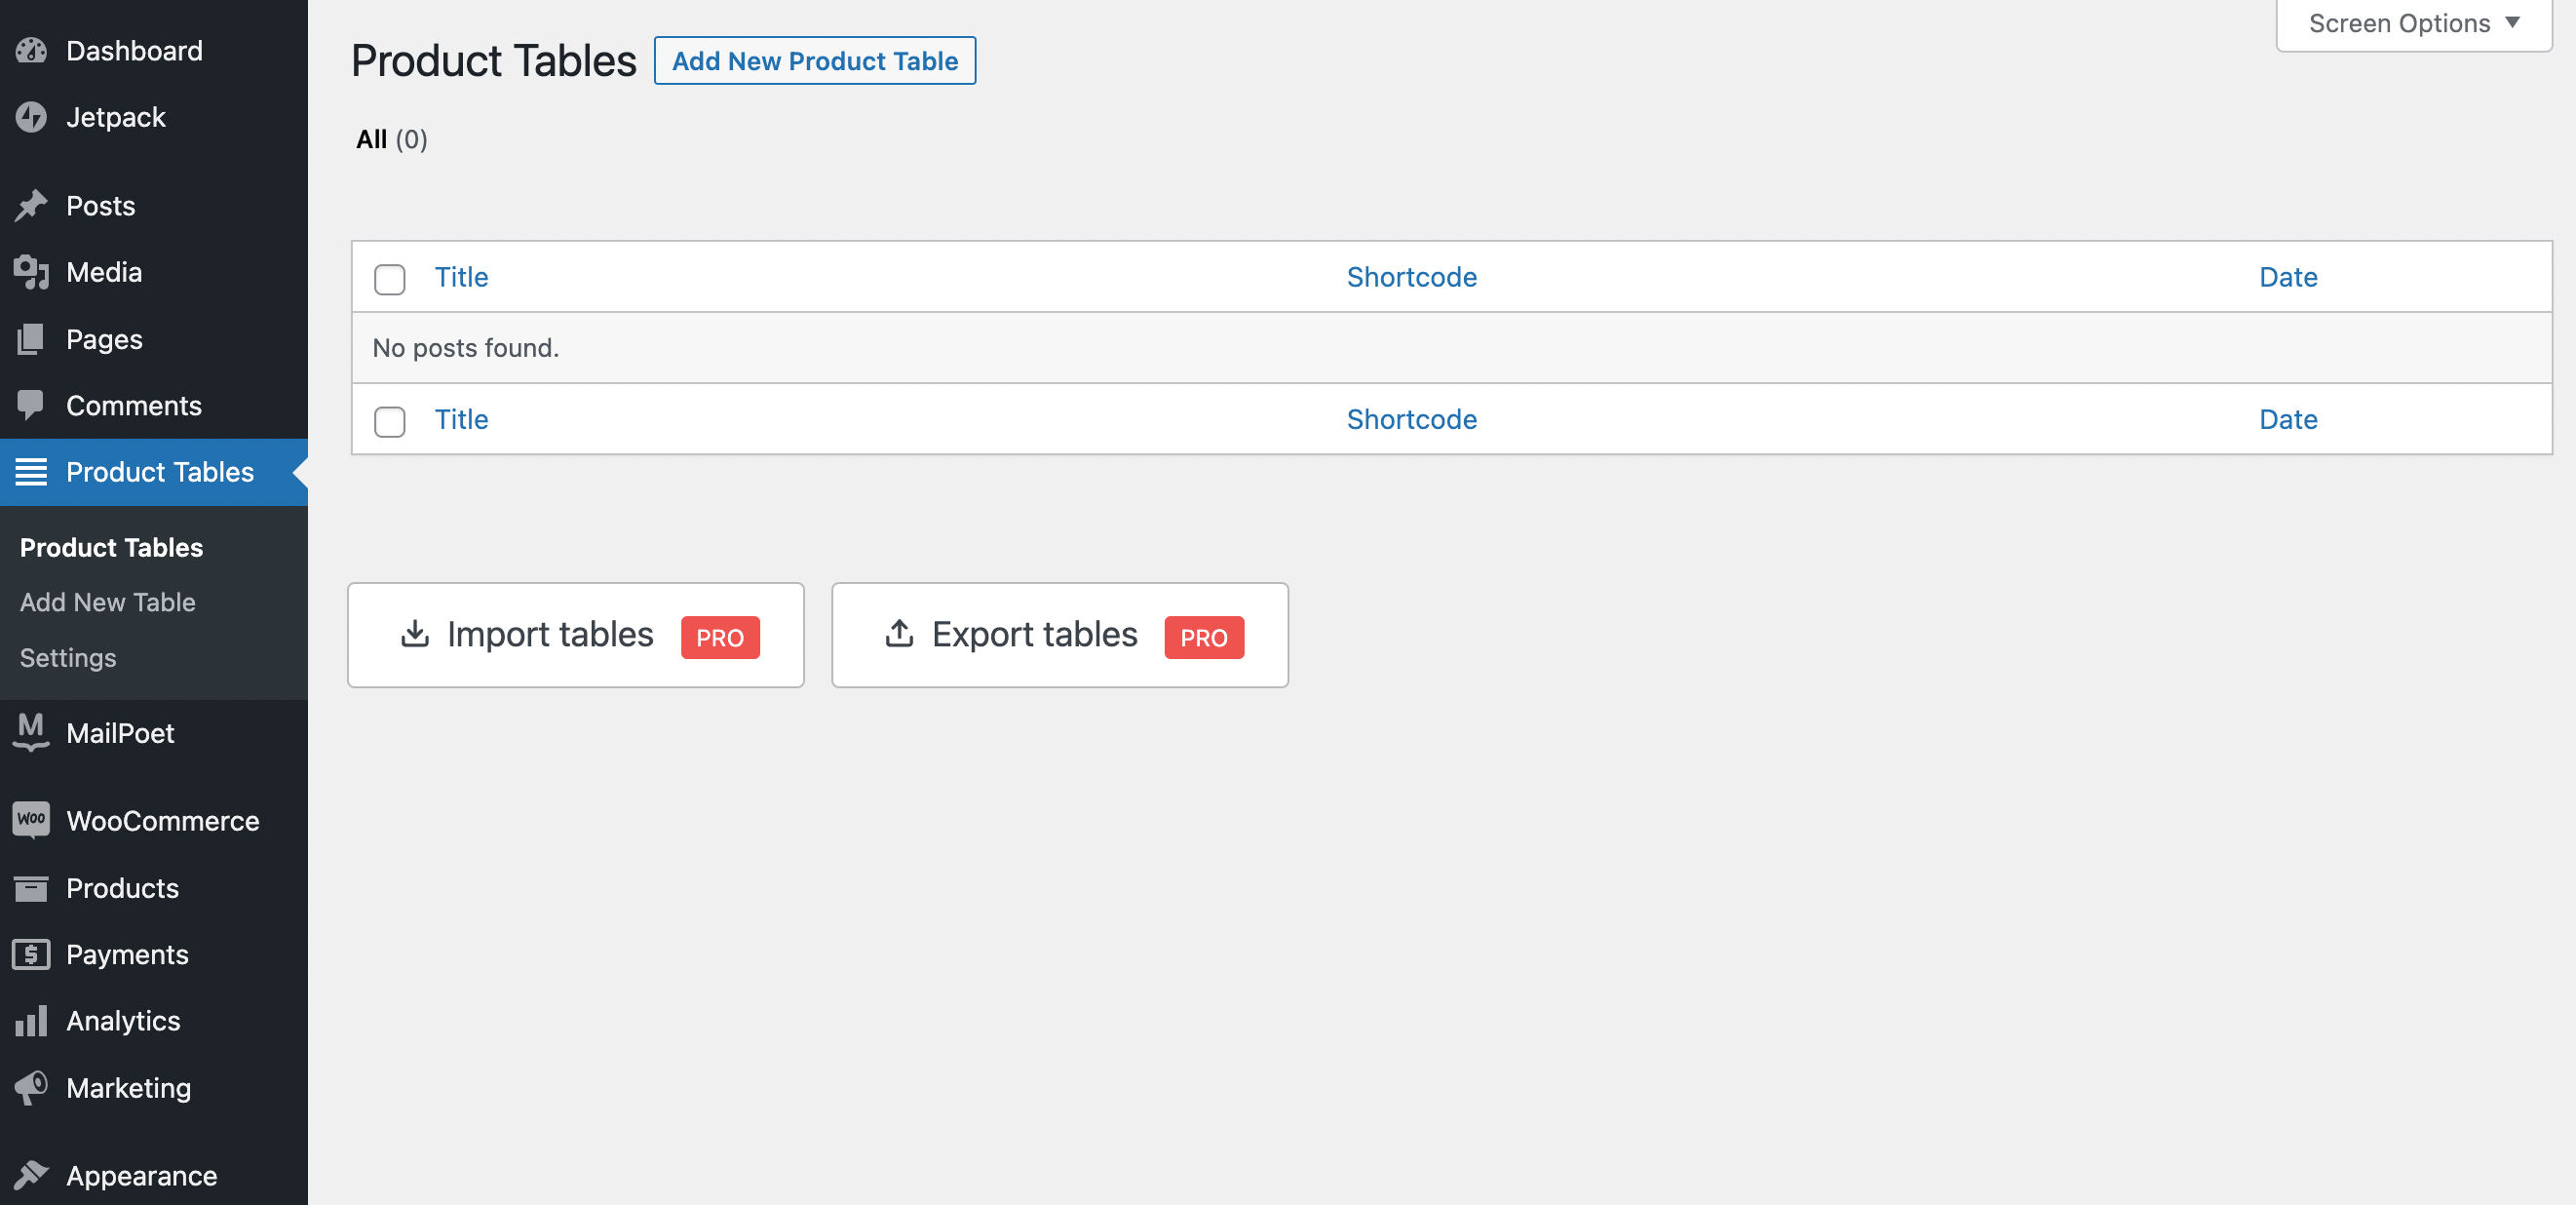
Now you’re ready to create a table for your products. To get started, navigate to Product Tables > Add New Product Table:
On the following screen, you should see two available presets, which are Regular table and List layout. You can select whichever you’d like to start with, or choose an empty table editor using the Blank option:
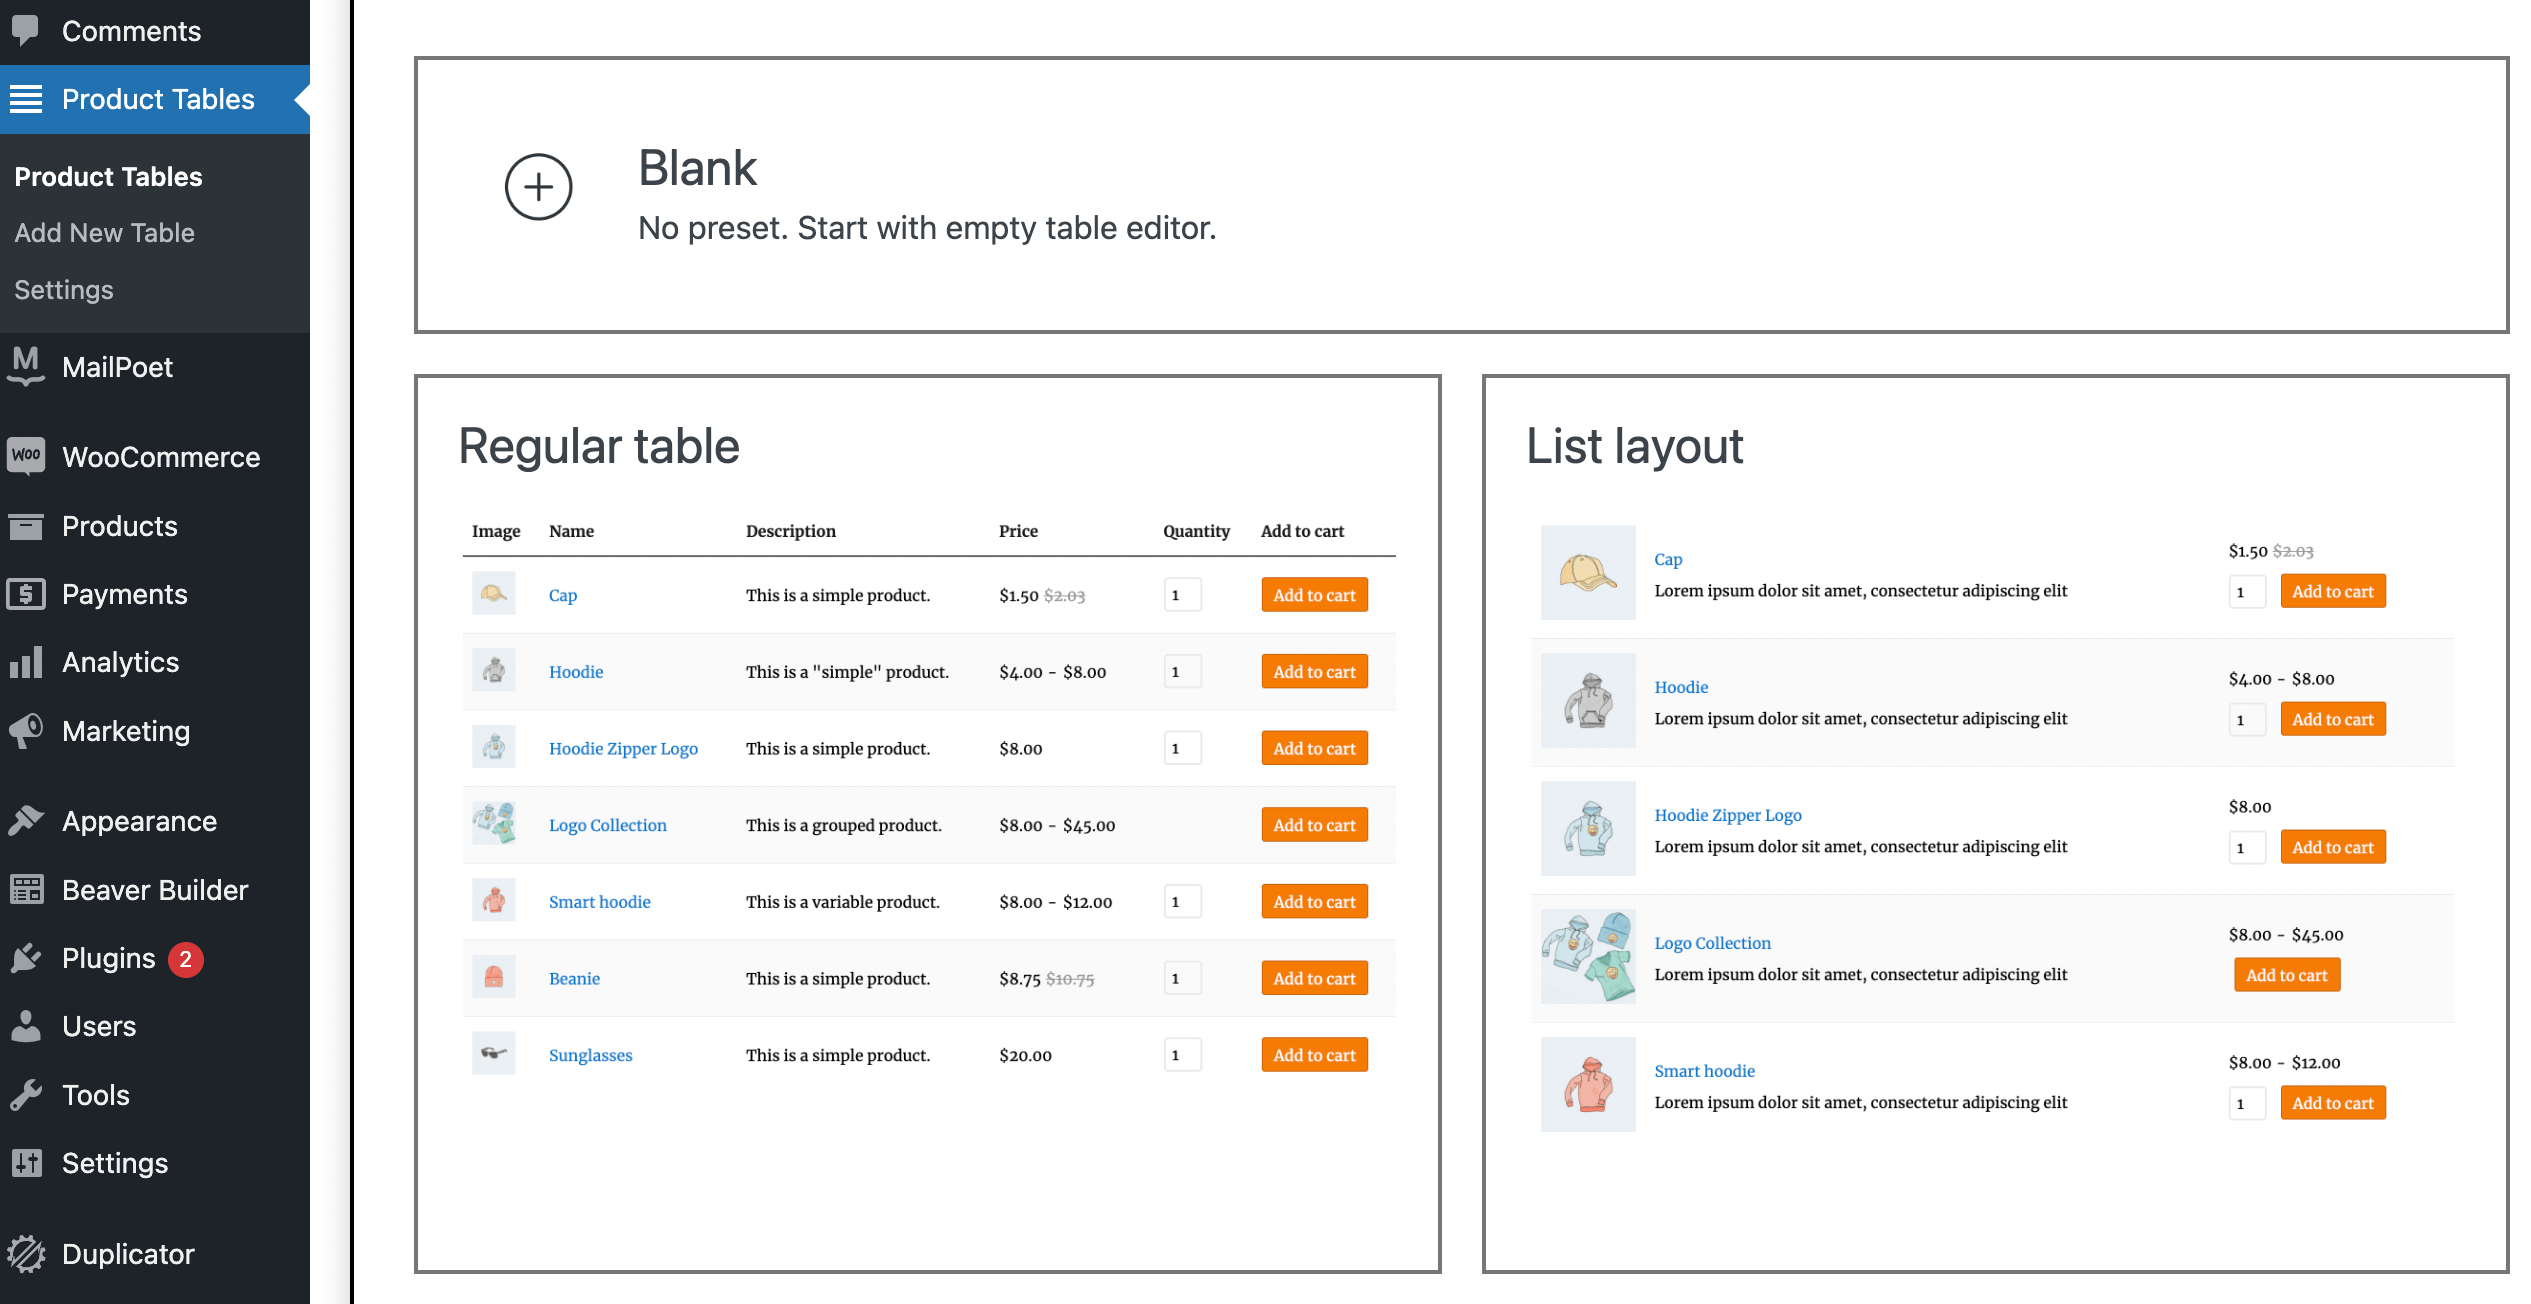
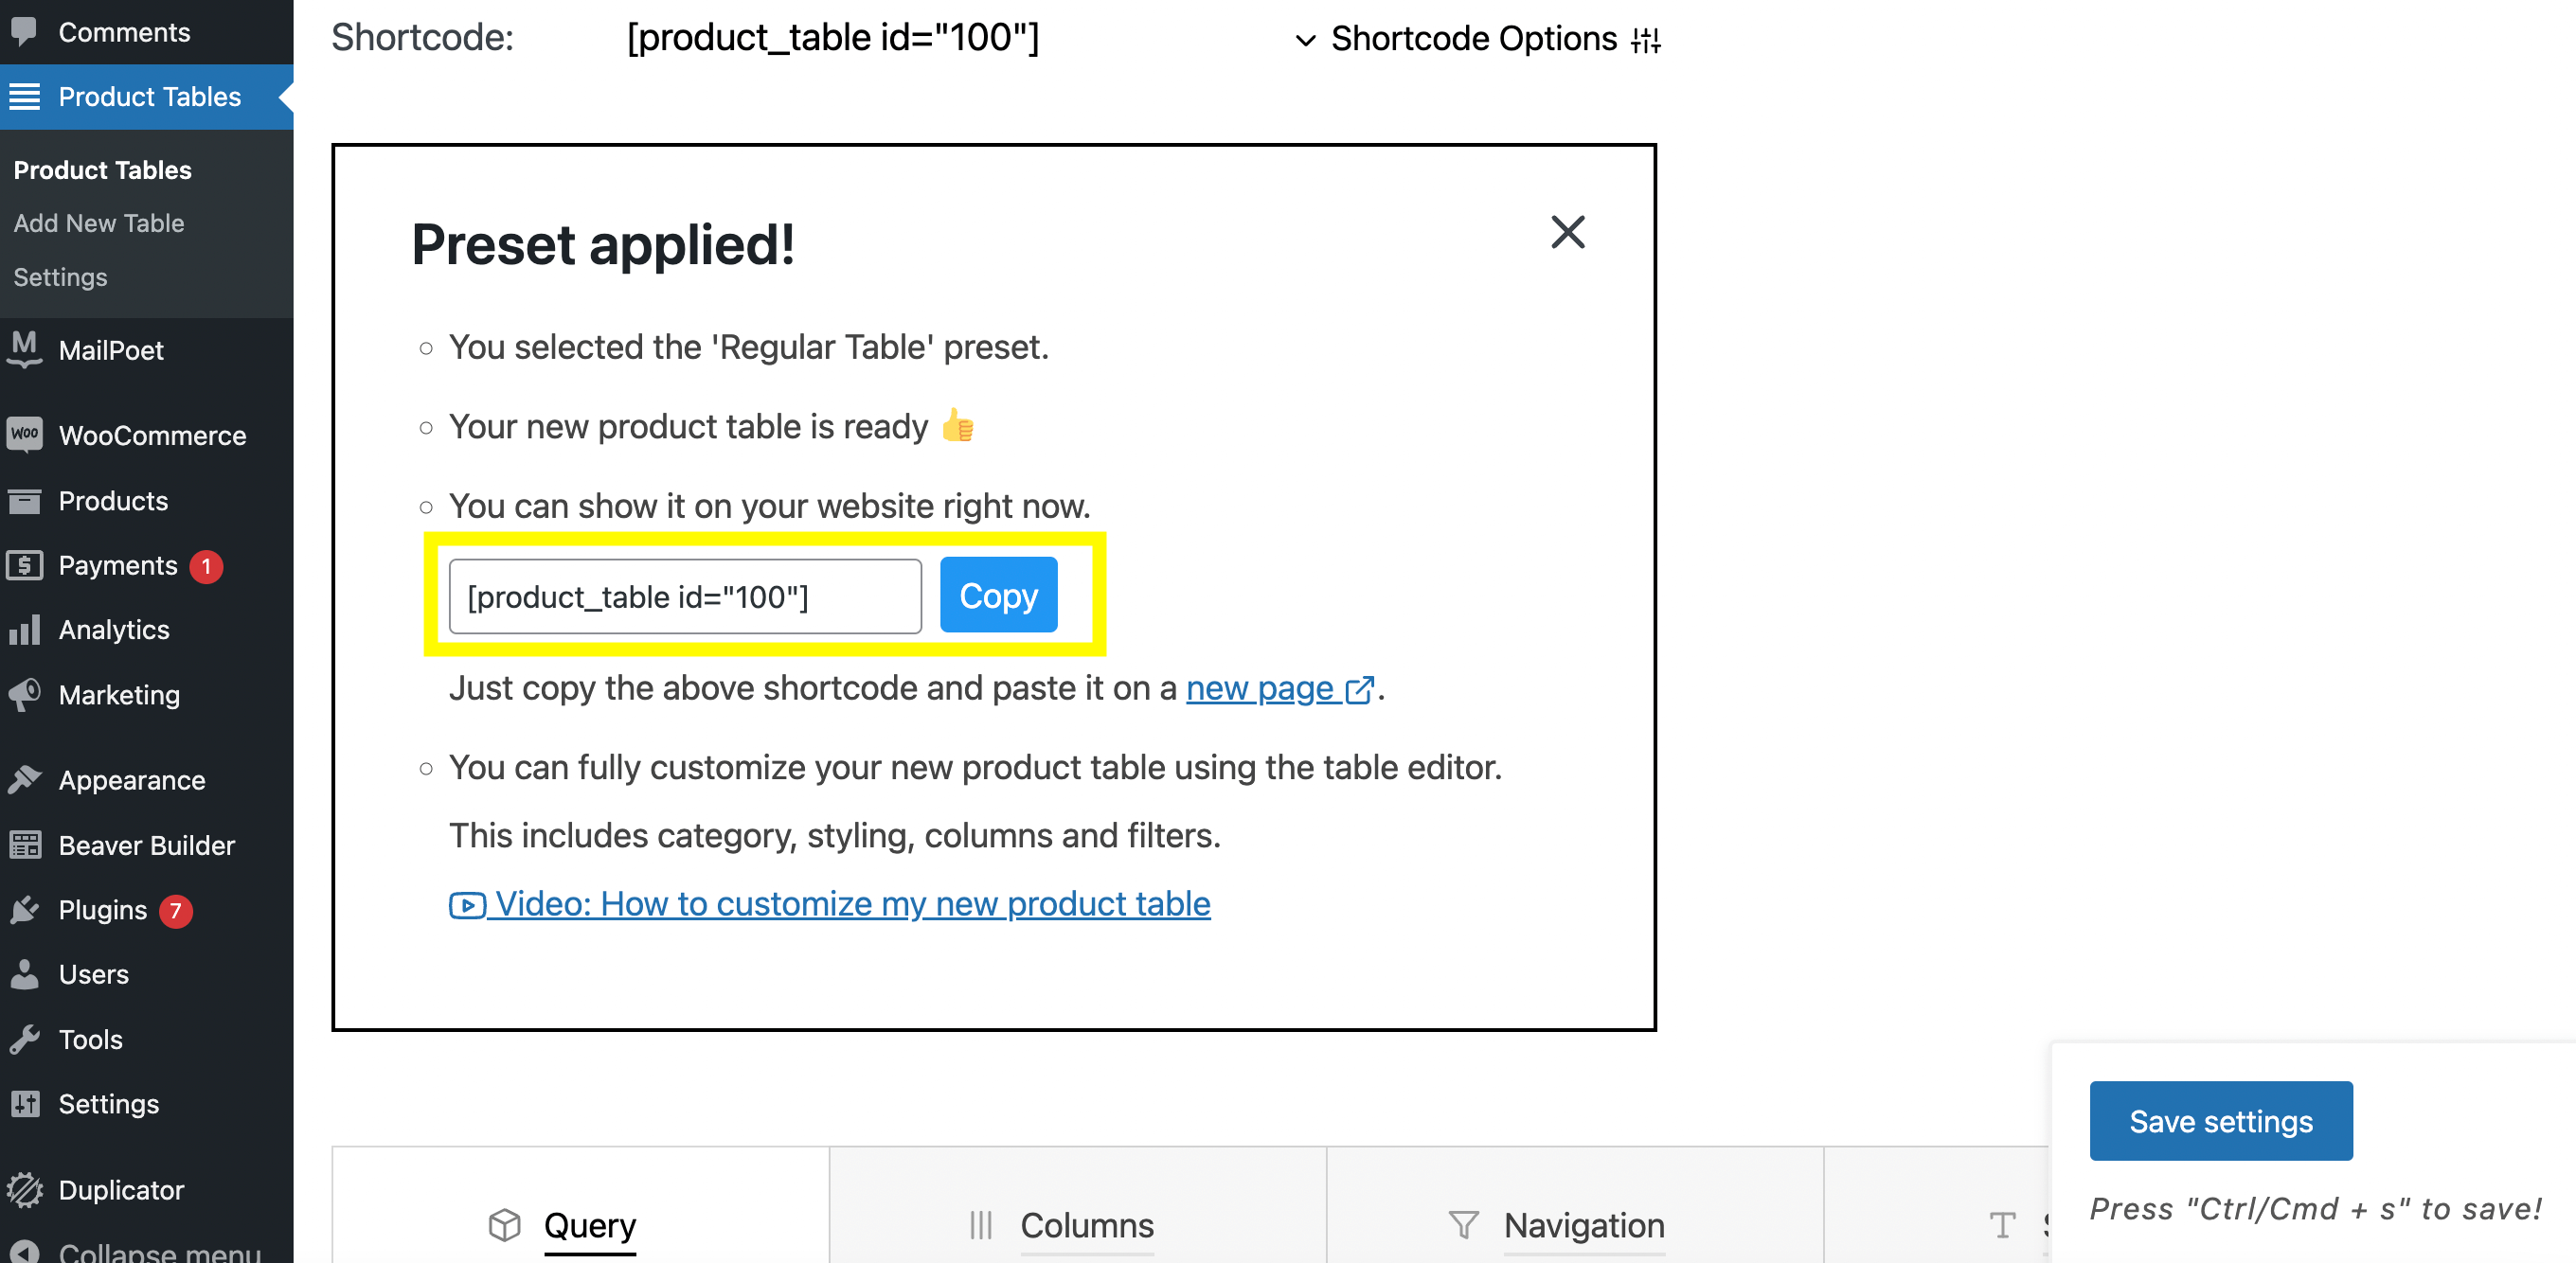
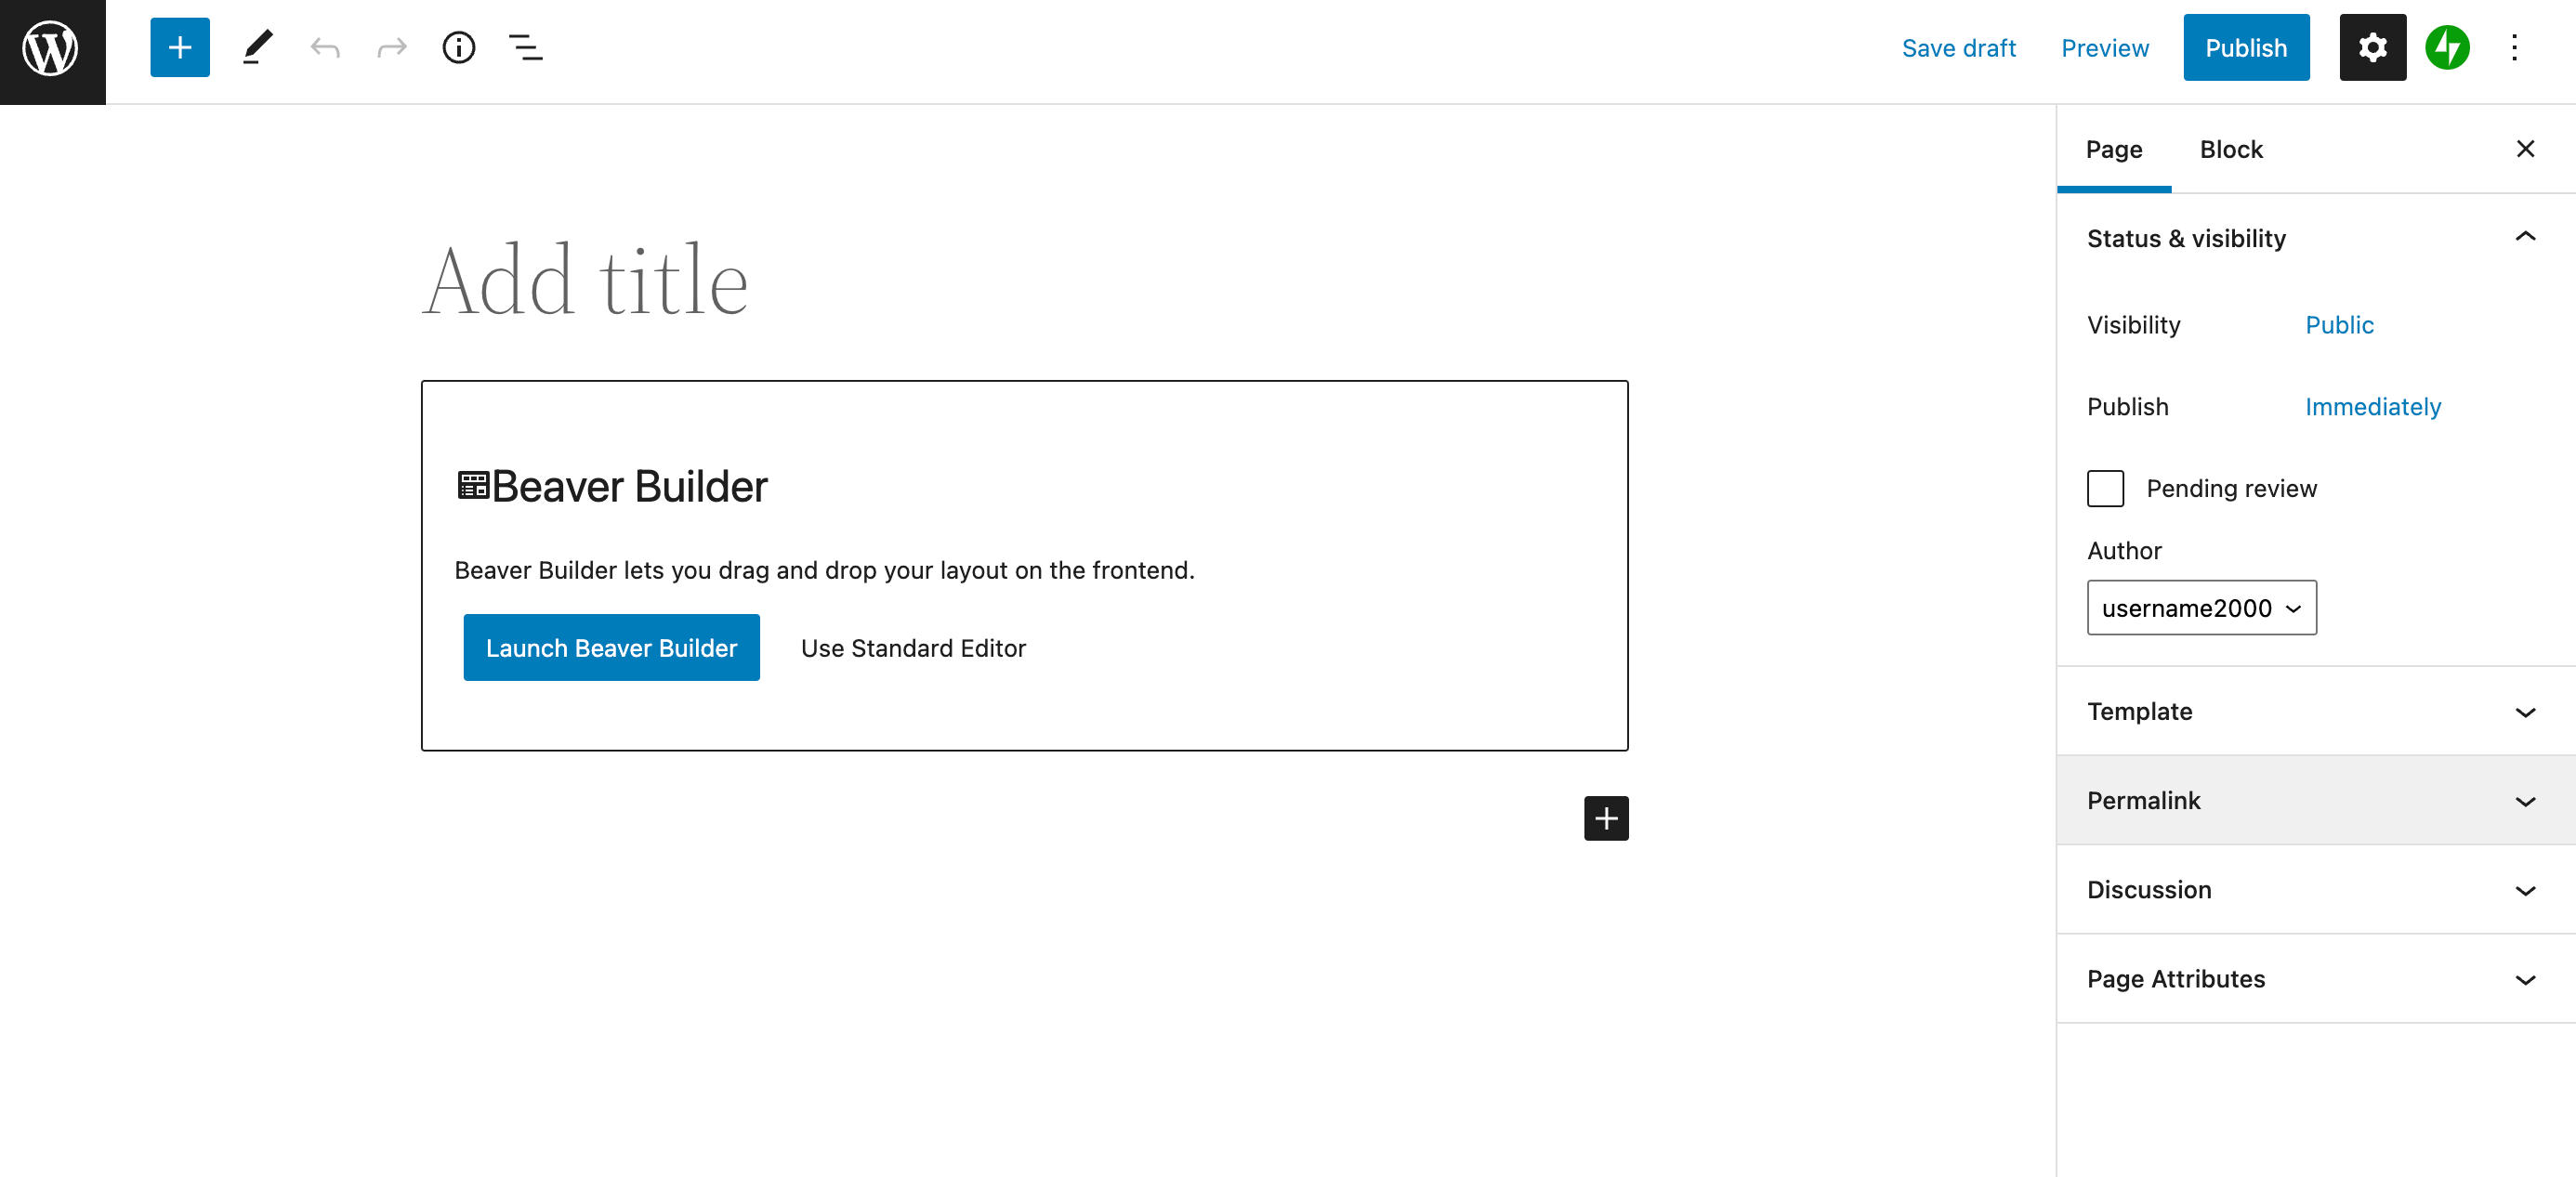
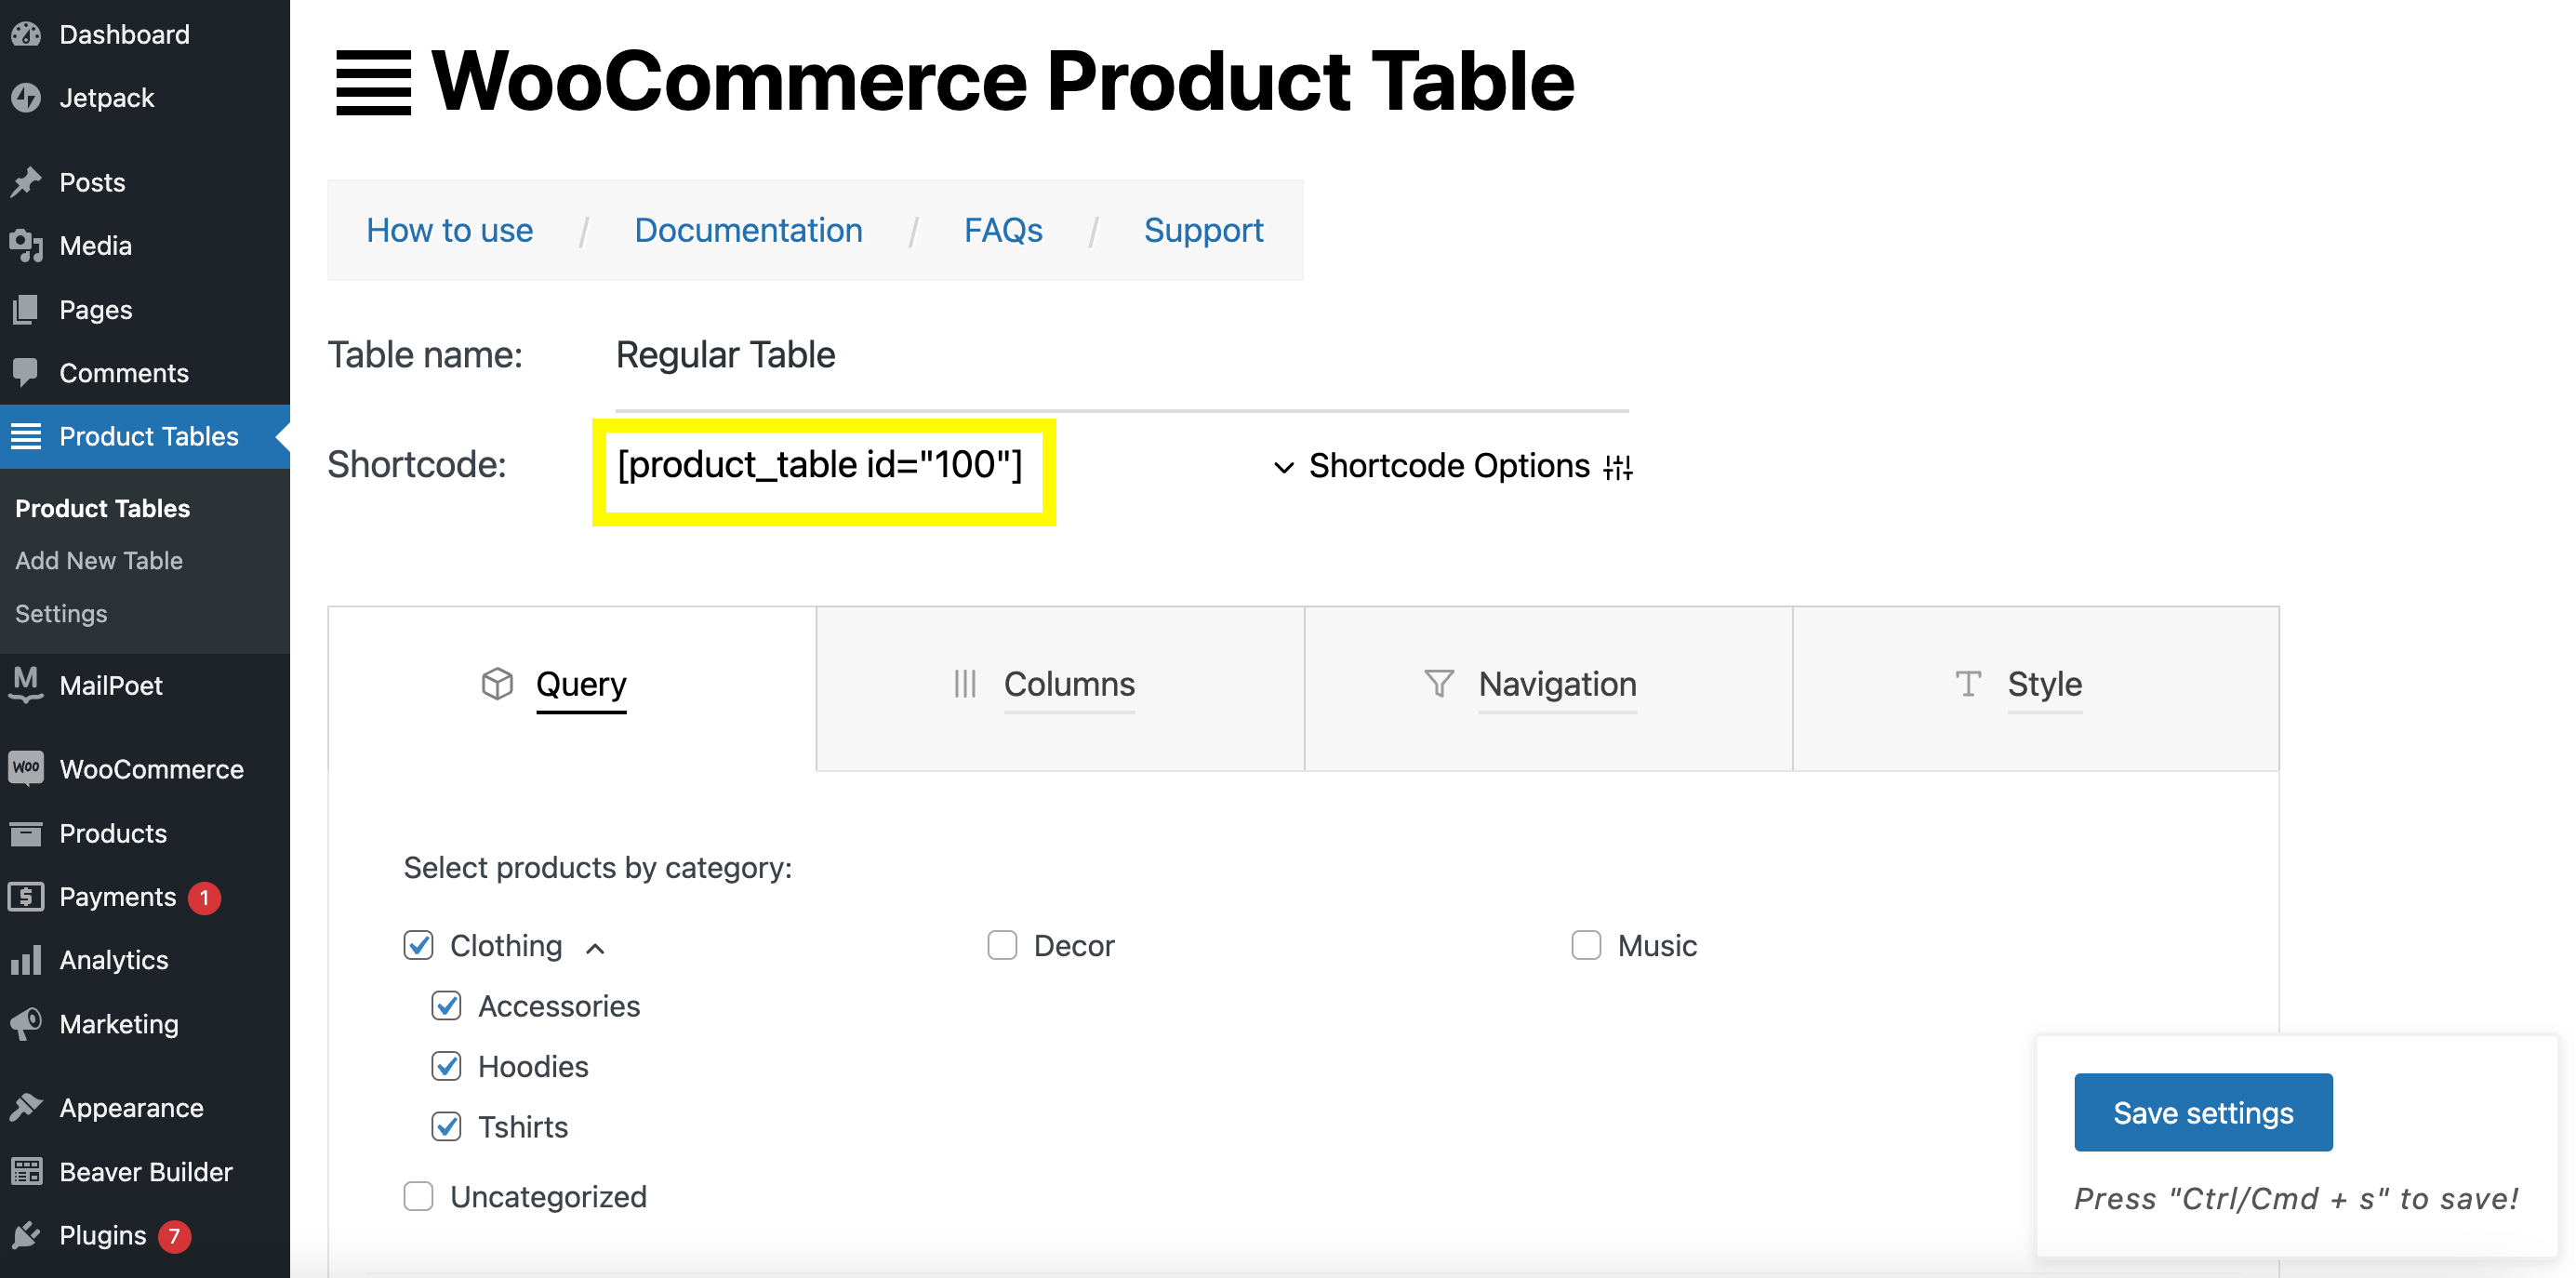
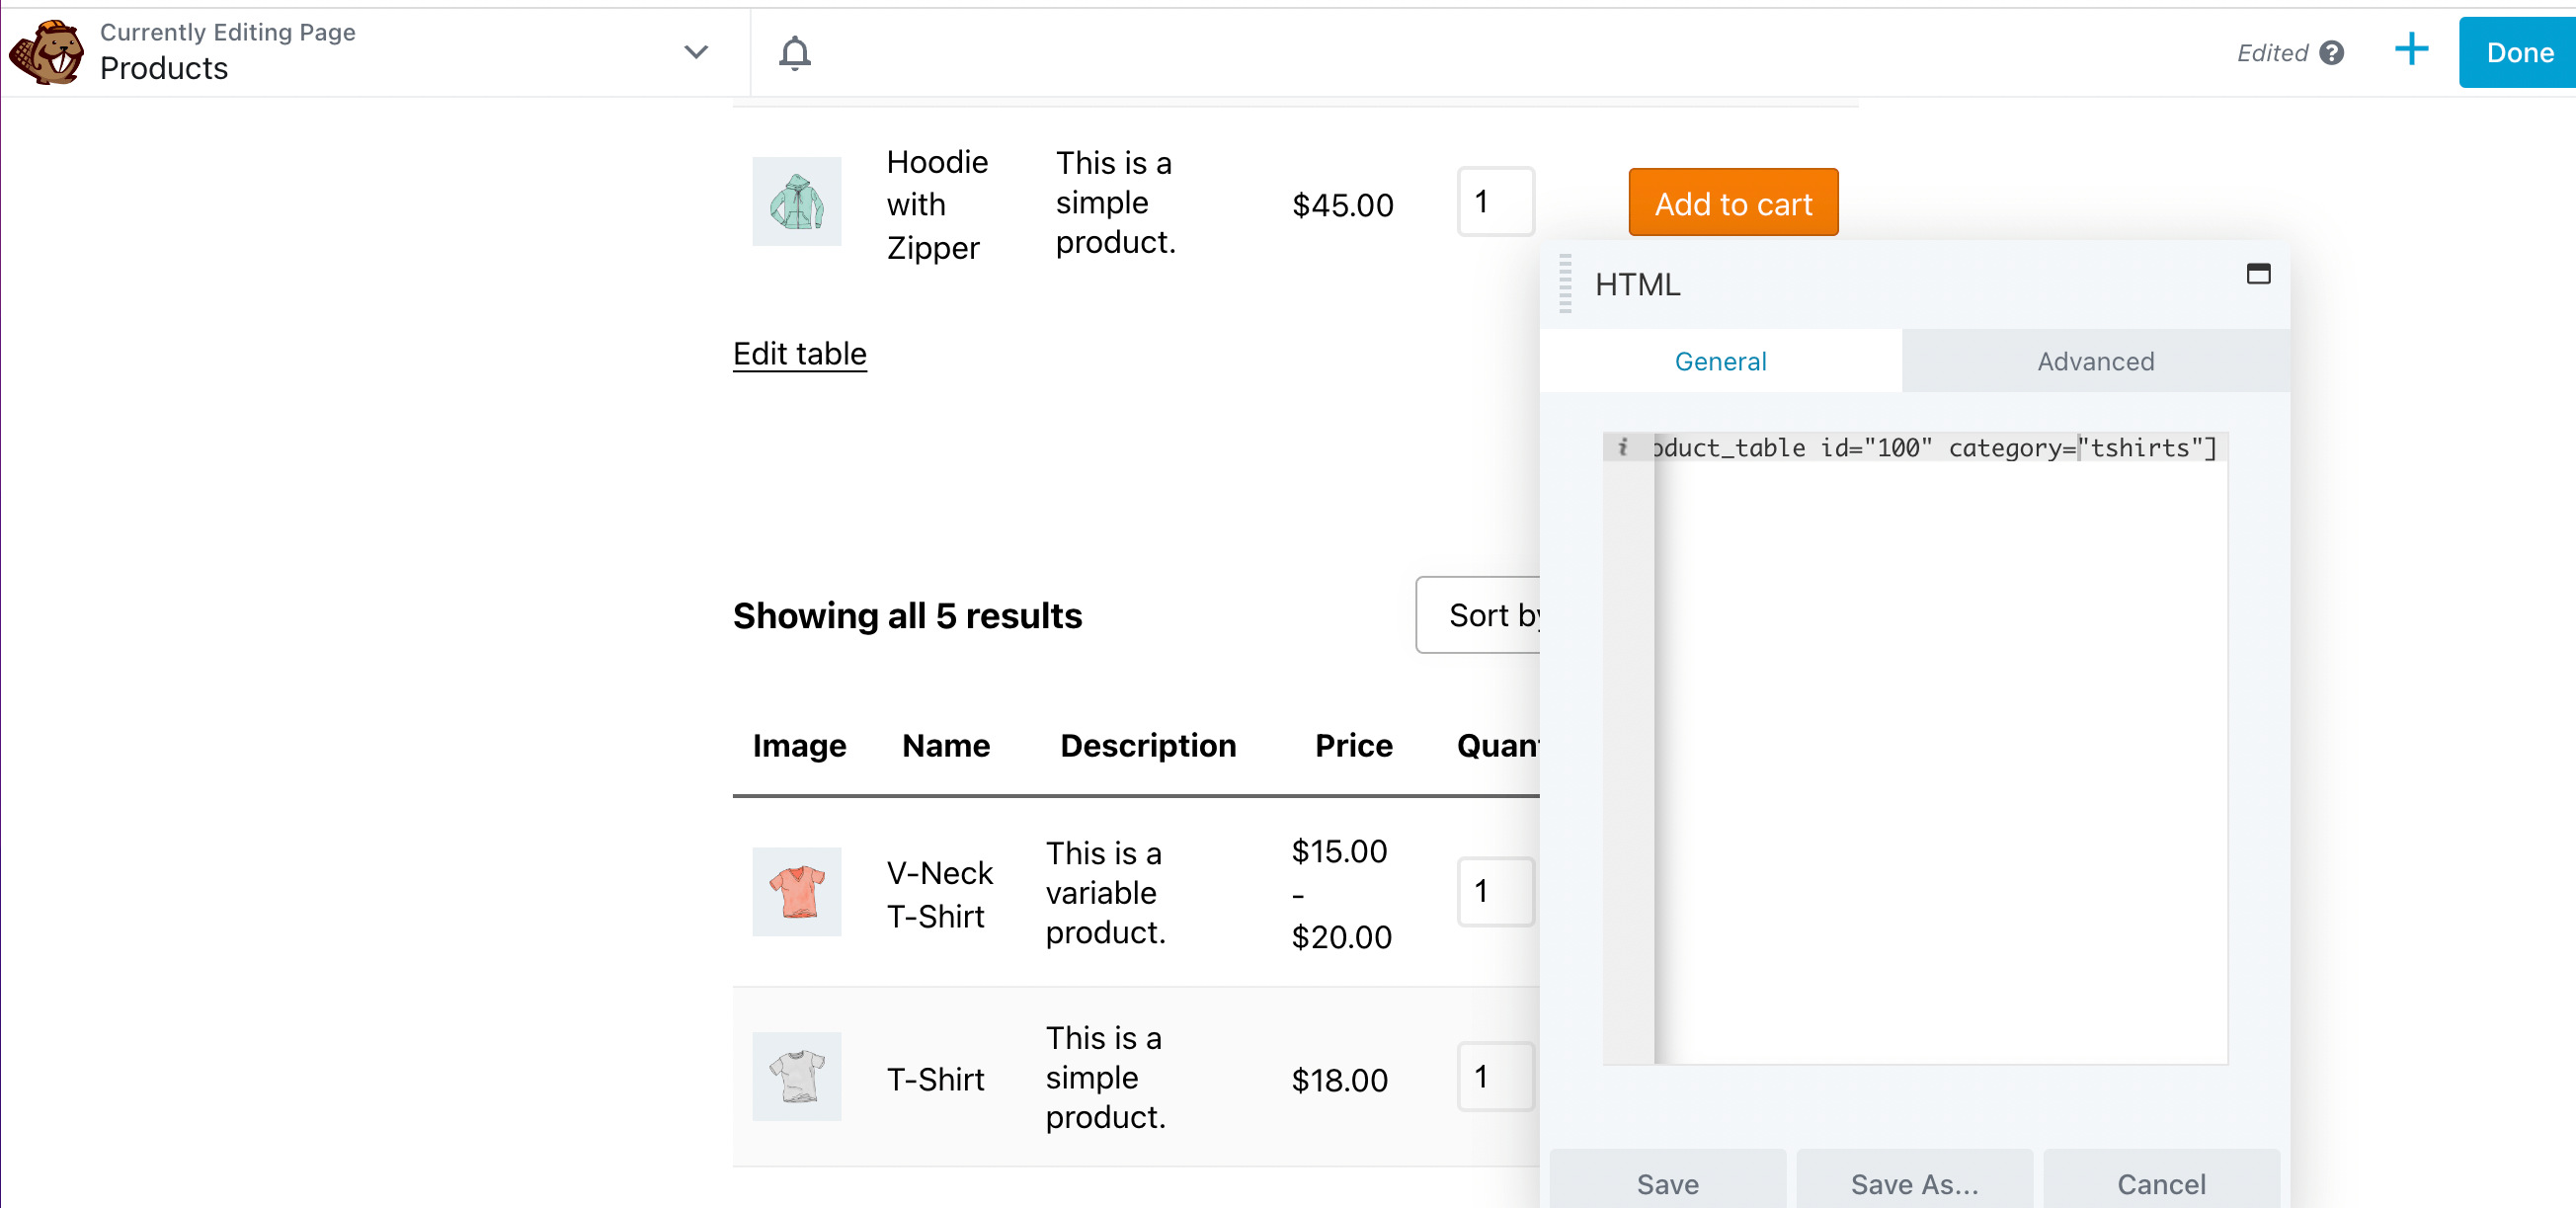
For our example, we’re going to select a Regular table. This will take you to the Product Table page. You will use the shortcode [product_table id=”100″] later:
Next, you can click on new page just below the shortcode field. On the next page, select Launch Beaver Builder to open up the editor:
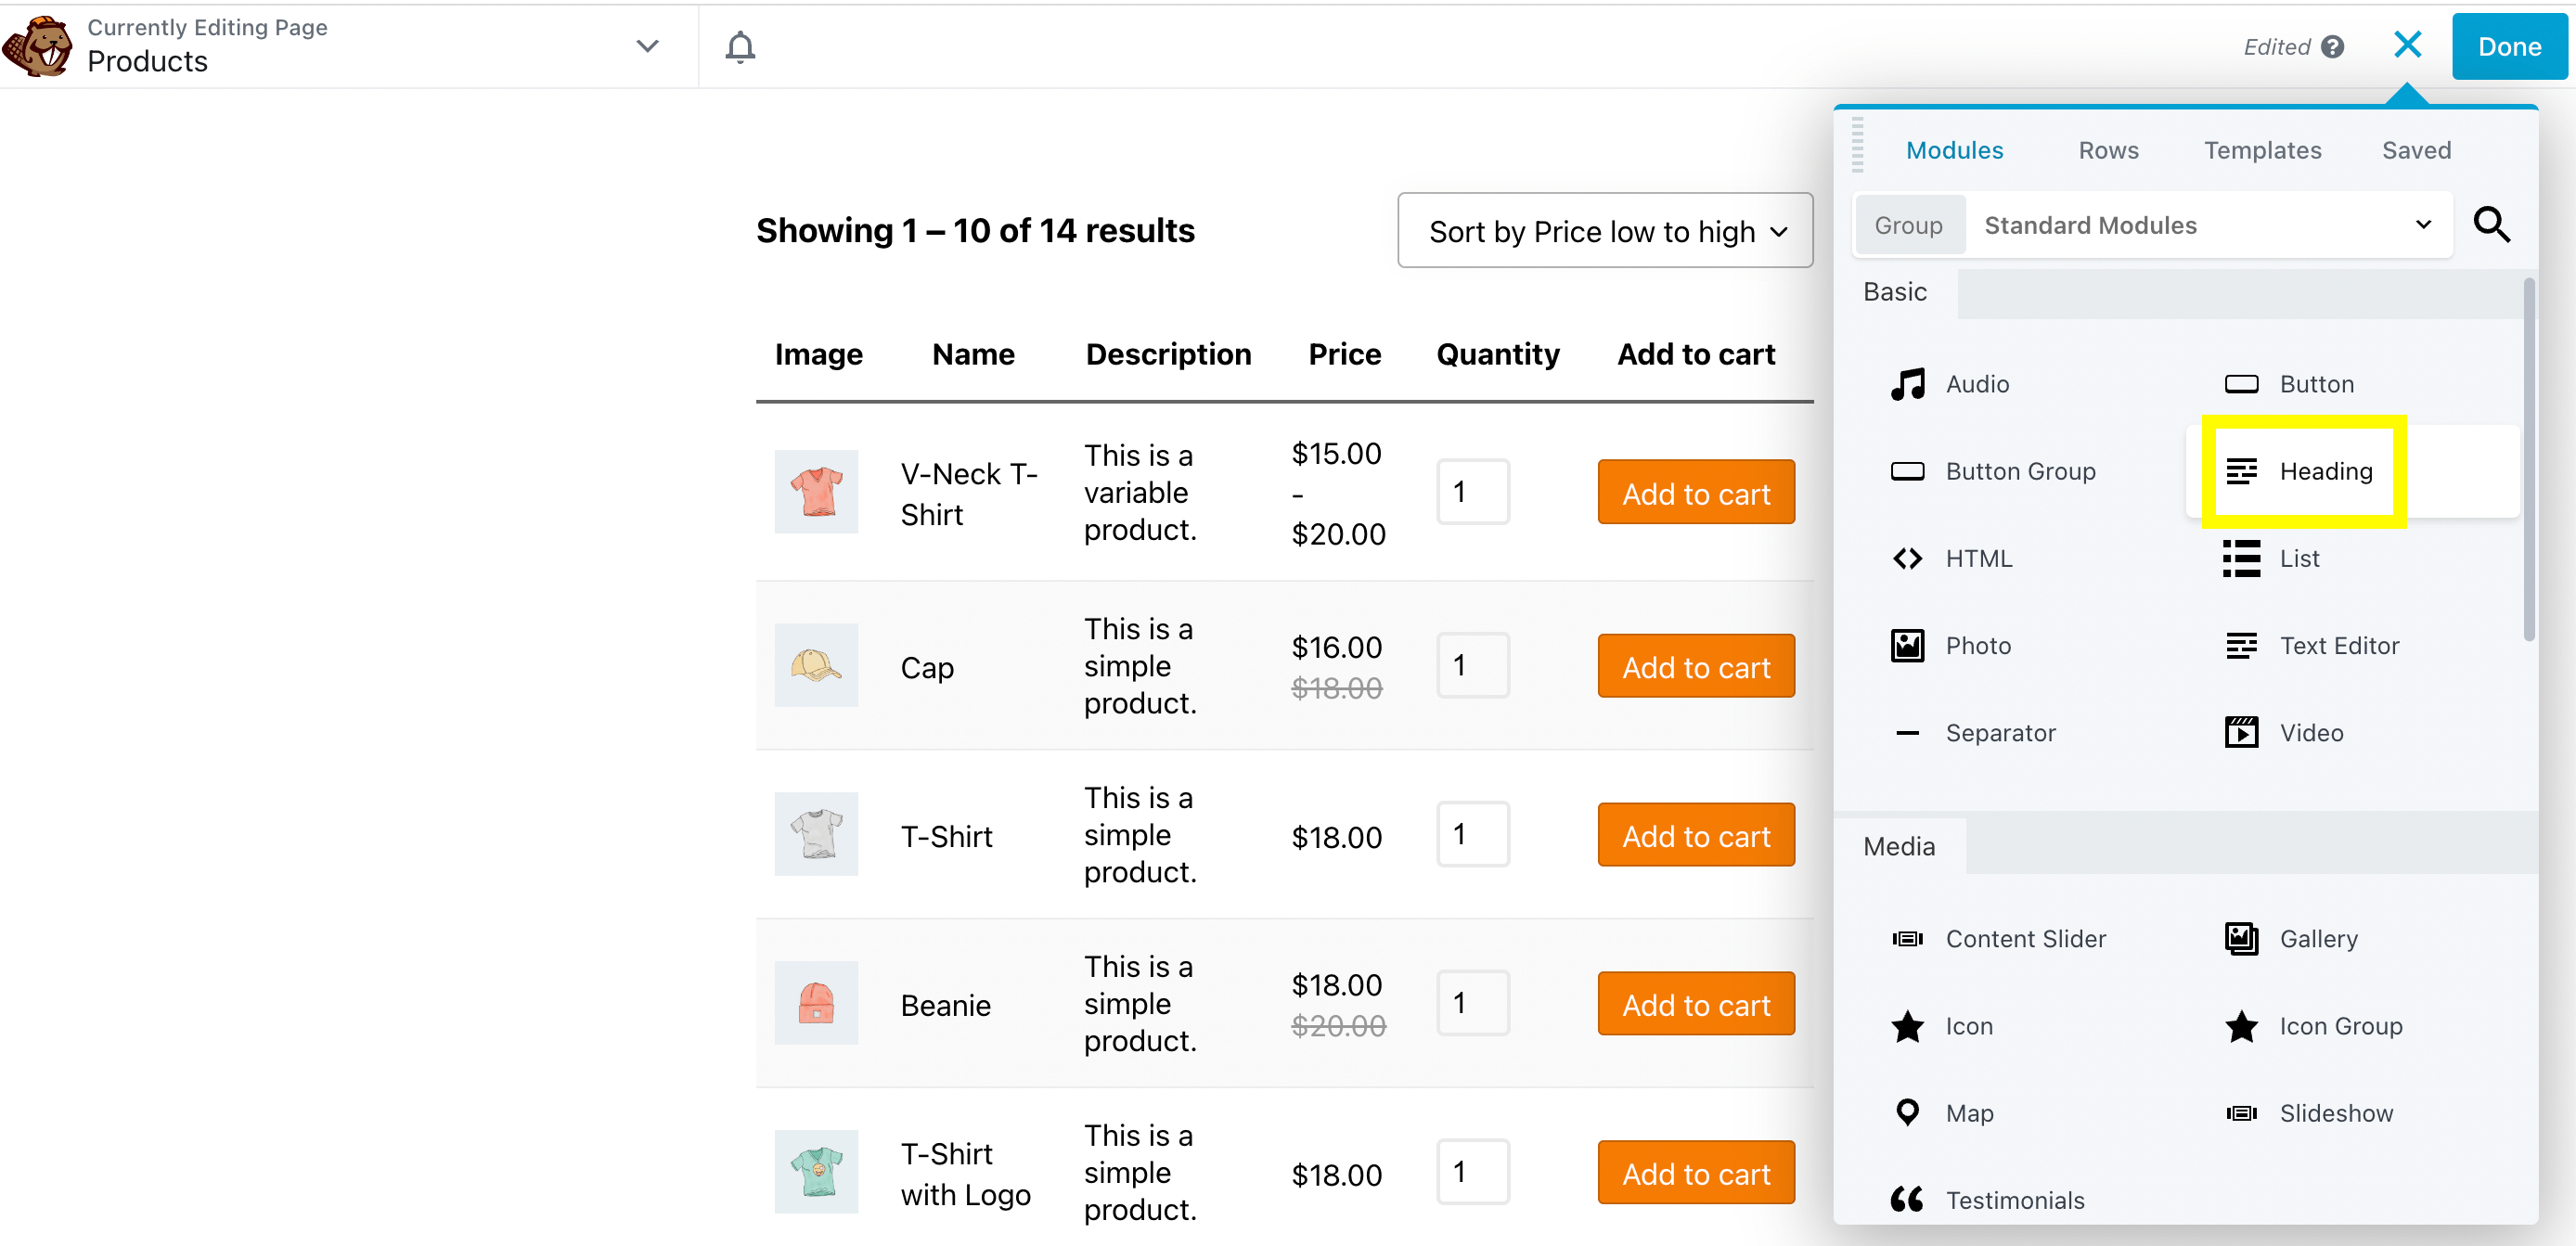
Now, click the blue plus sign on the top right to reveal the dropdown menu. Under Modules, choose the HTML module:
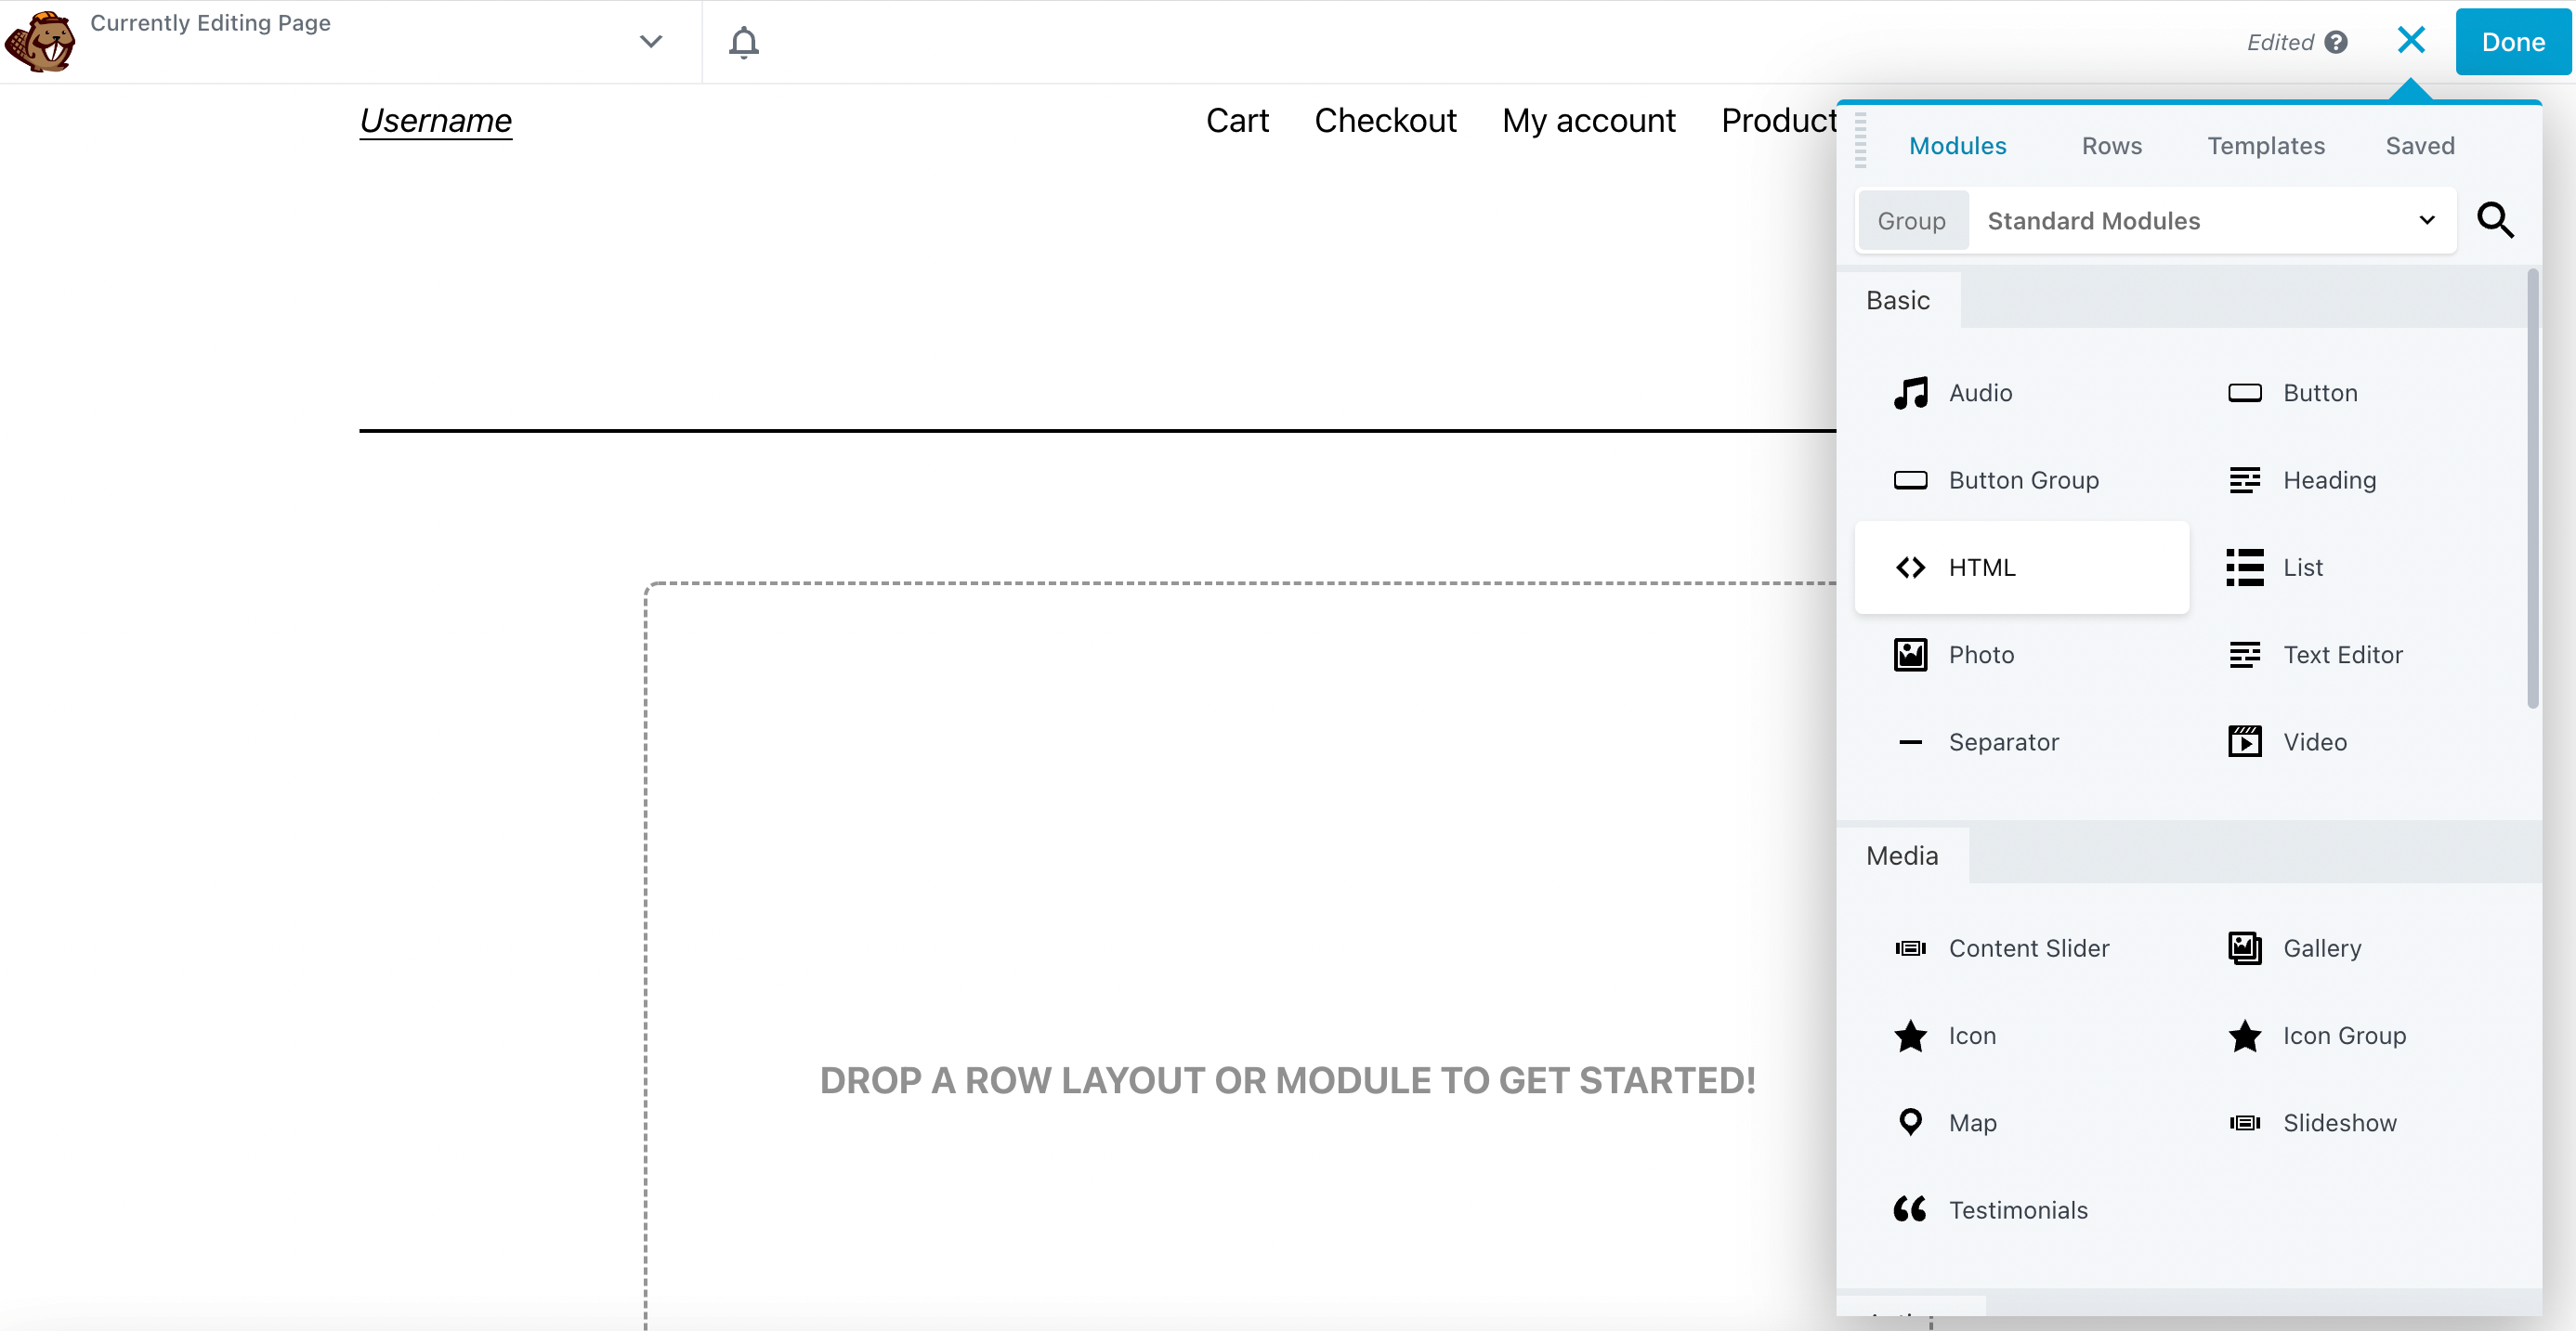
Drag it onto the page and you will see a blank field:
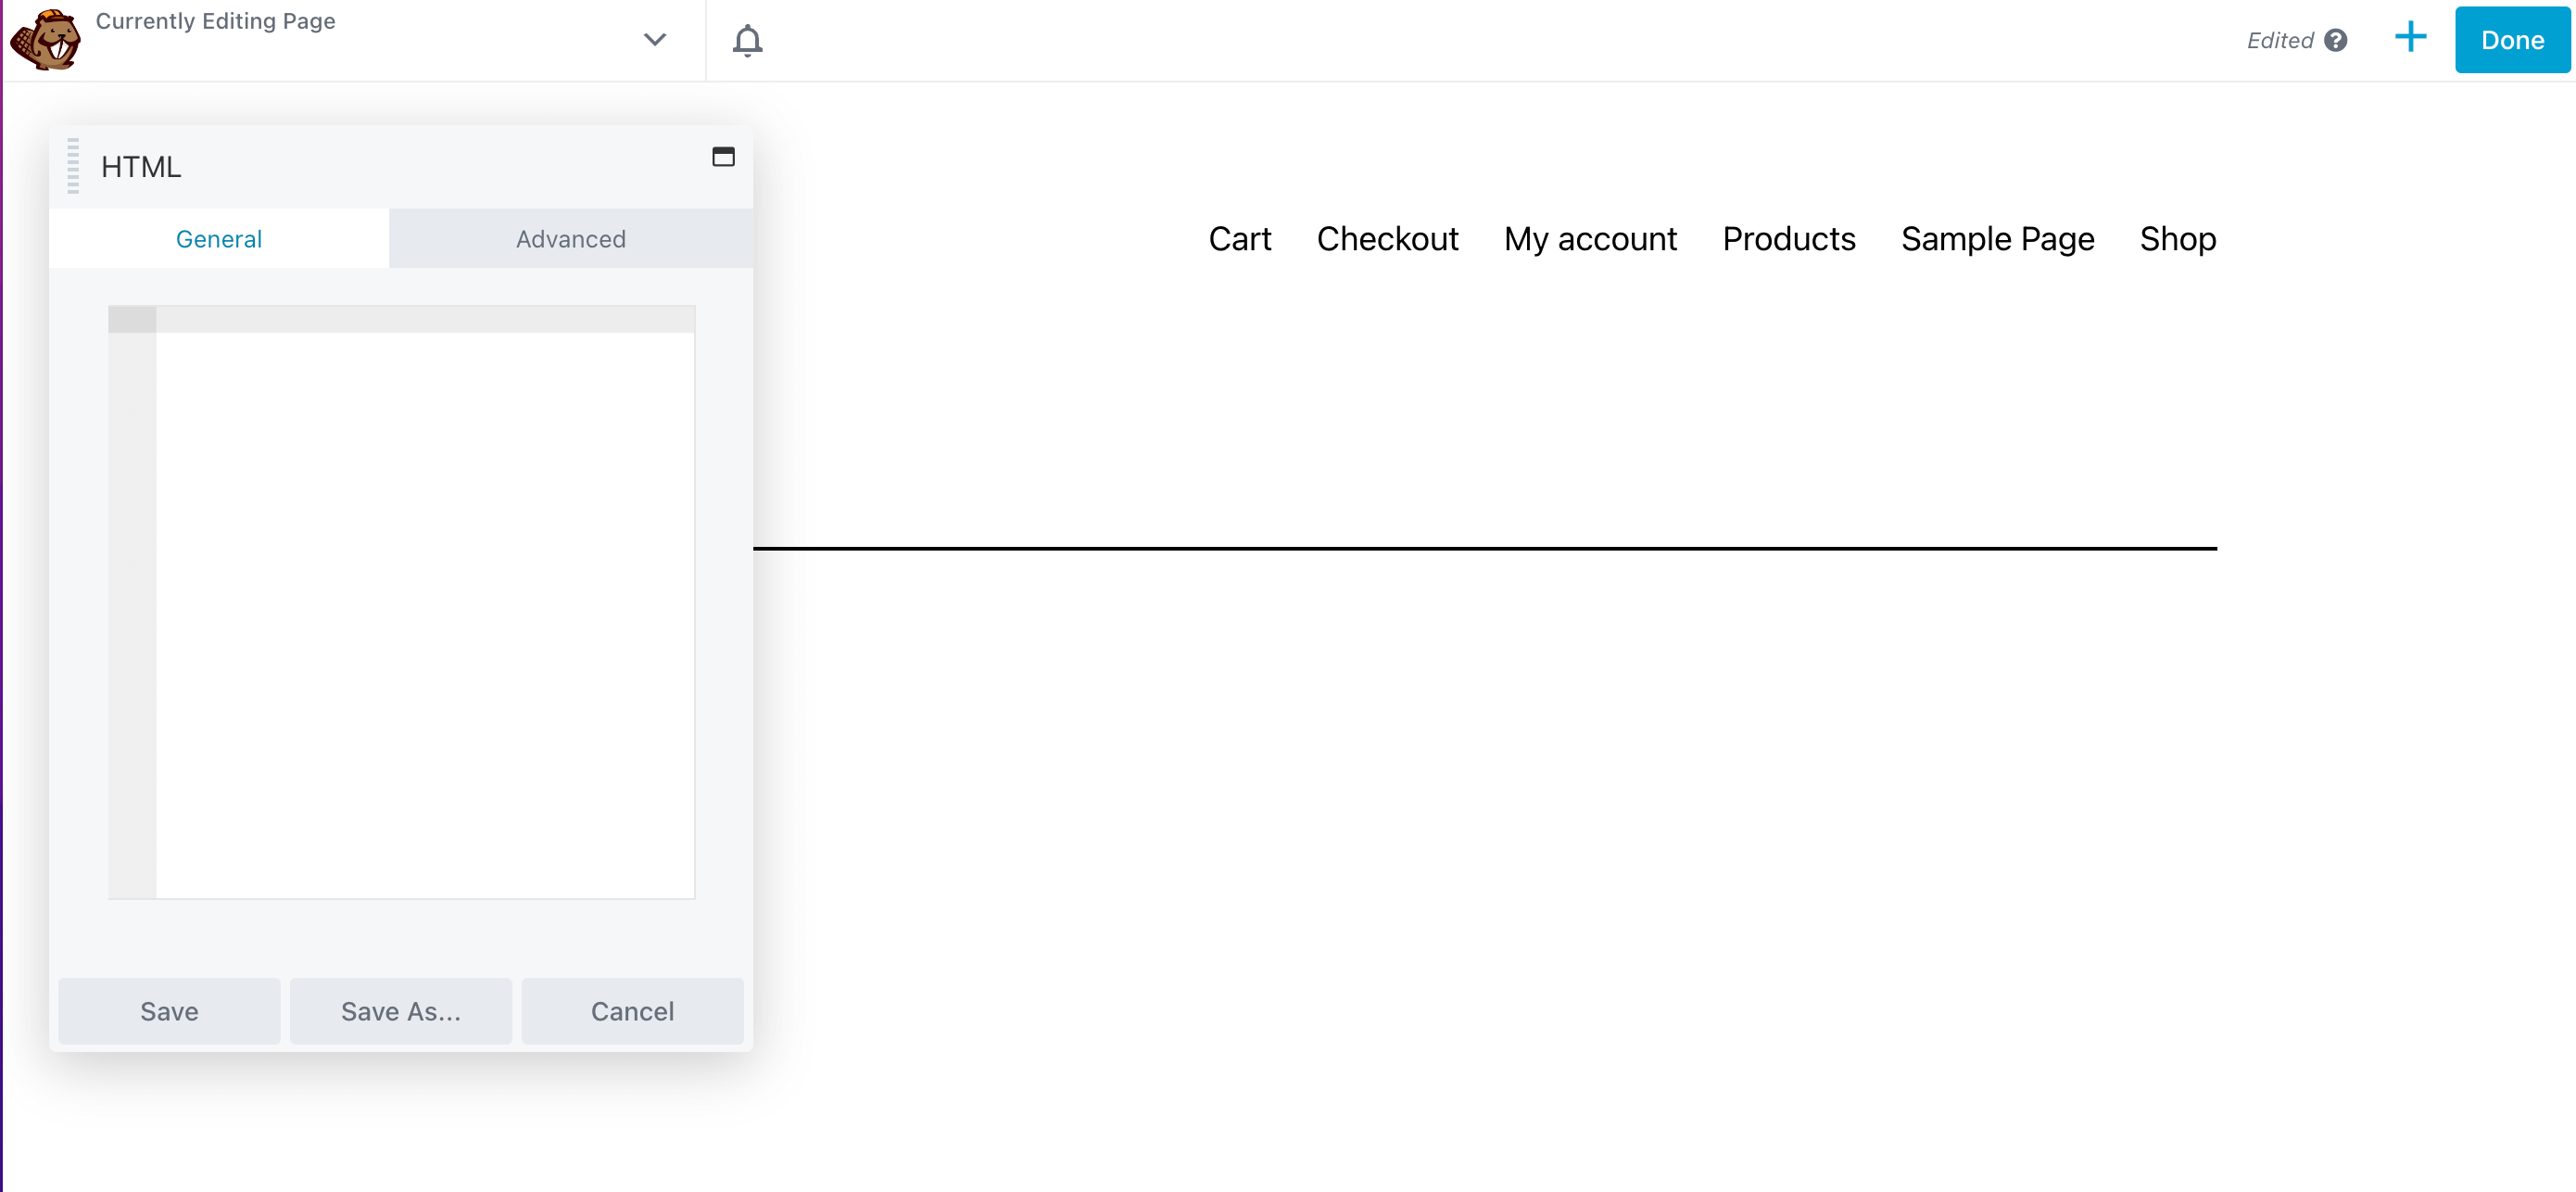
Now it’s time to add the shortcode. Go back to your dashboard and copy the shortcode product table id:
Paste it into your HTML module and click on Save. This will reveal your product table:
You can also add a heading to this page by clicking the Headings module and dragging it onto the page, above your order form:
Then type the name of your table:
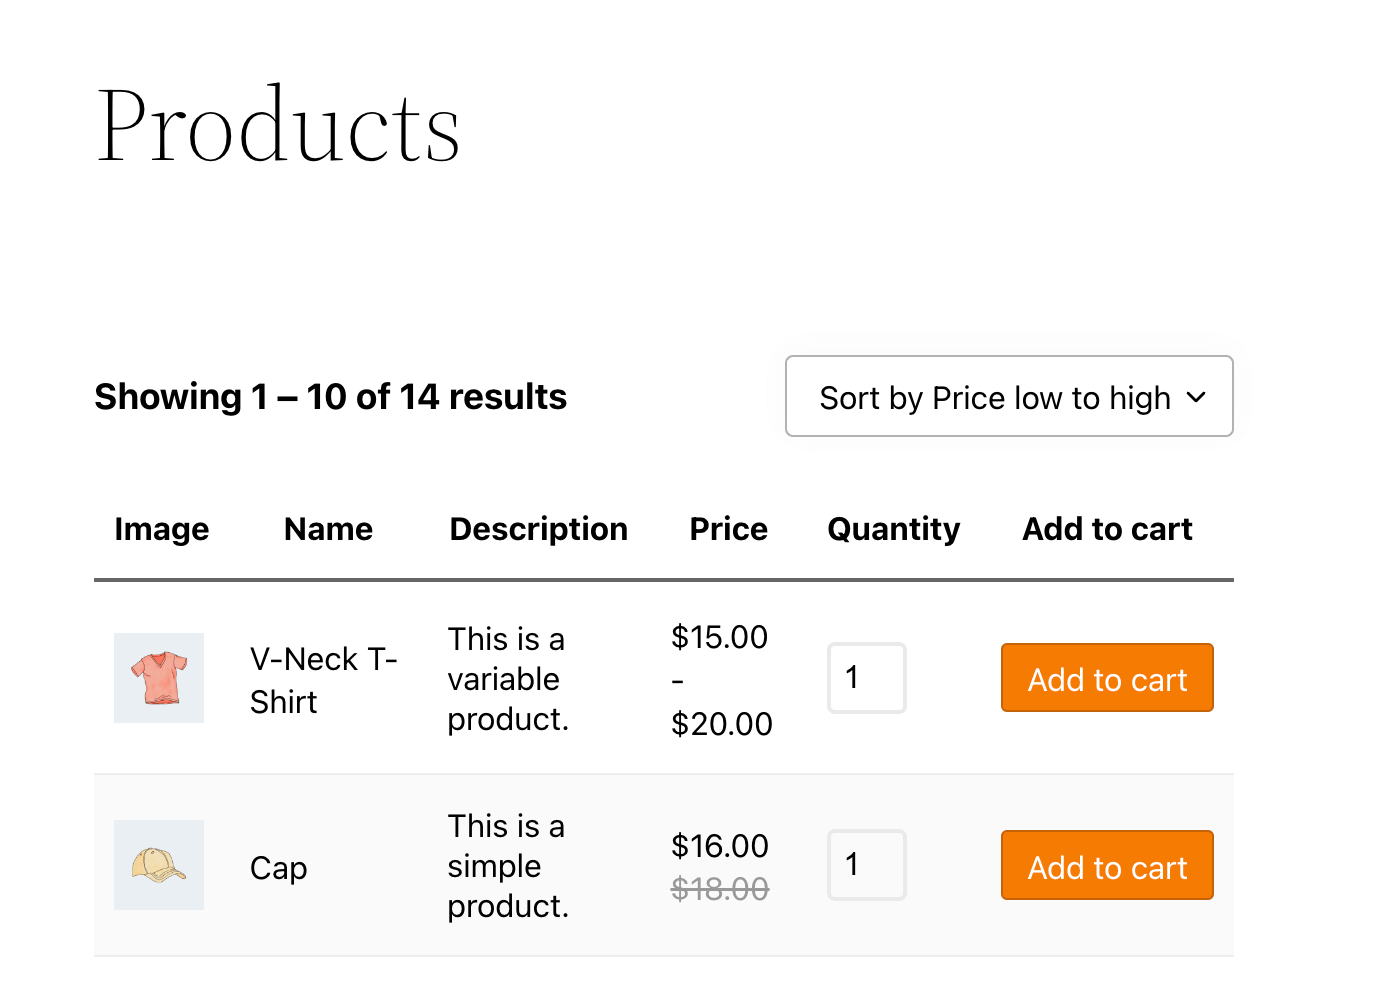
You can modify the name of your table depending on your products.
Step 3: Modify Products in Your Query Table
If you want to use an order form layout, chances are you have a lot of products to organize. That’s why our next step is modifying your query table. This will enable you to handpick which products are shown in your form.
To do this, you’ll need to go back to the Product Tables dashboard and click on the Query tab. Then, select a product category.
For our practice order form, we’ll use the Clothing category. You can further modify which products you want to display by subcategory:
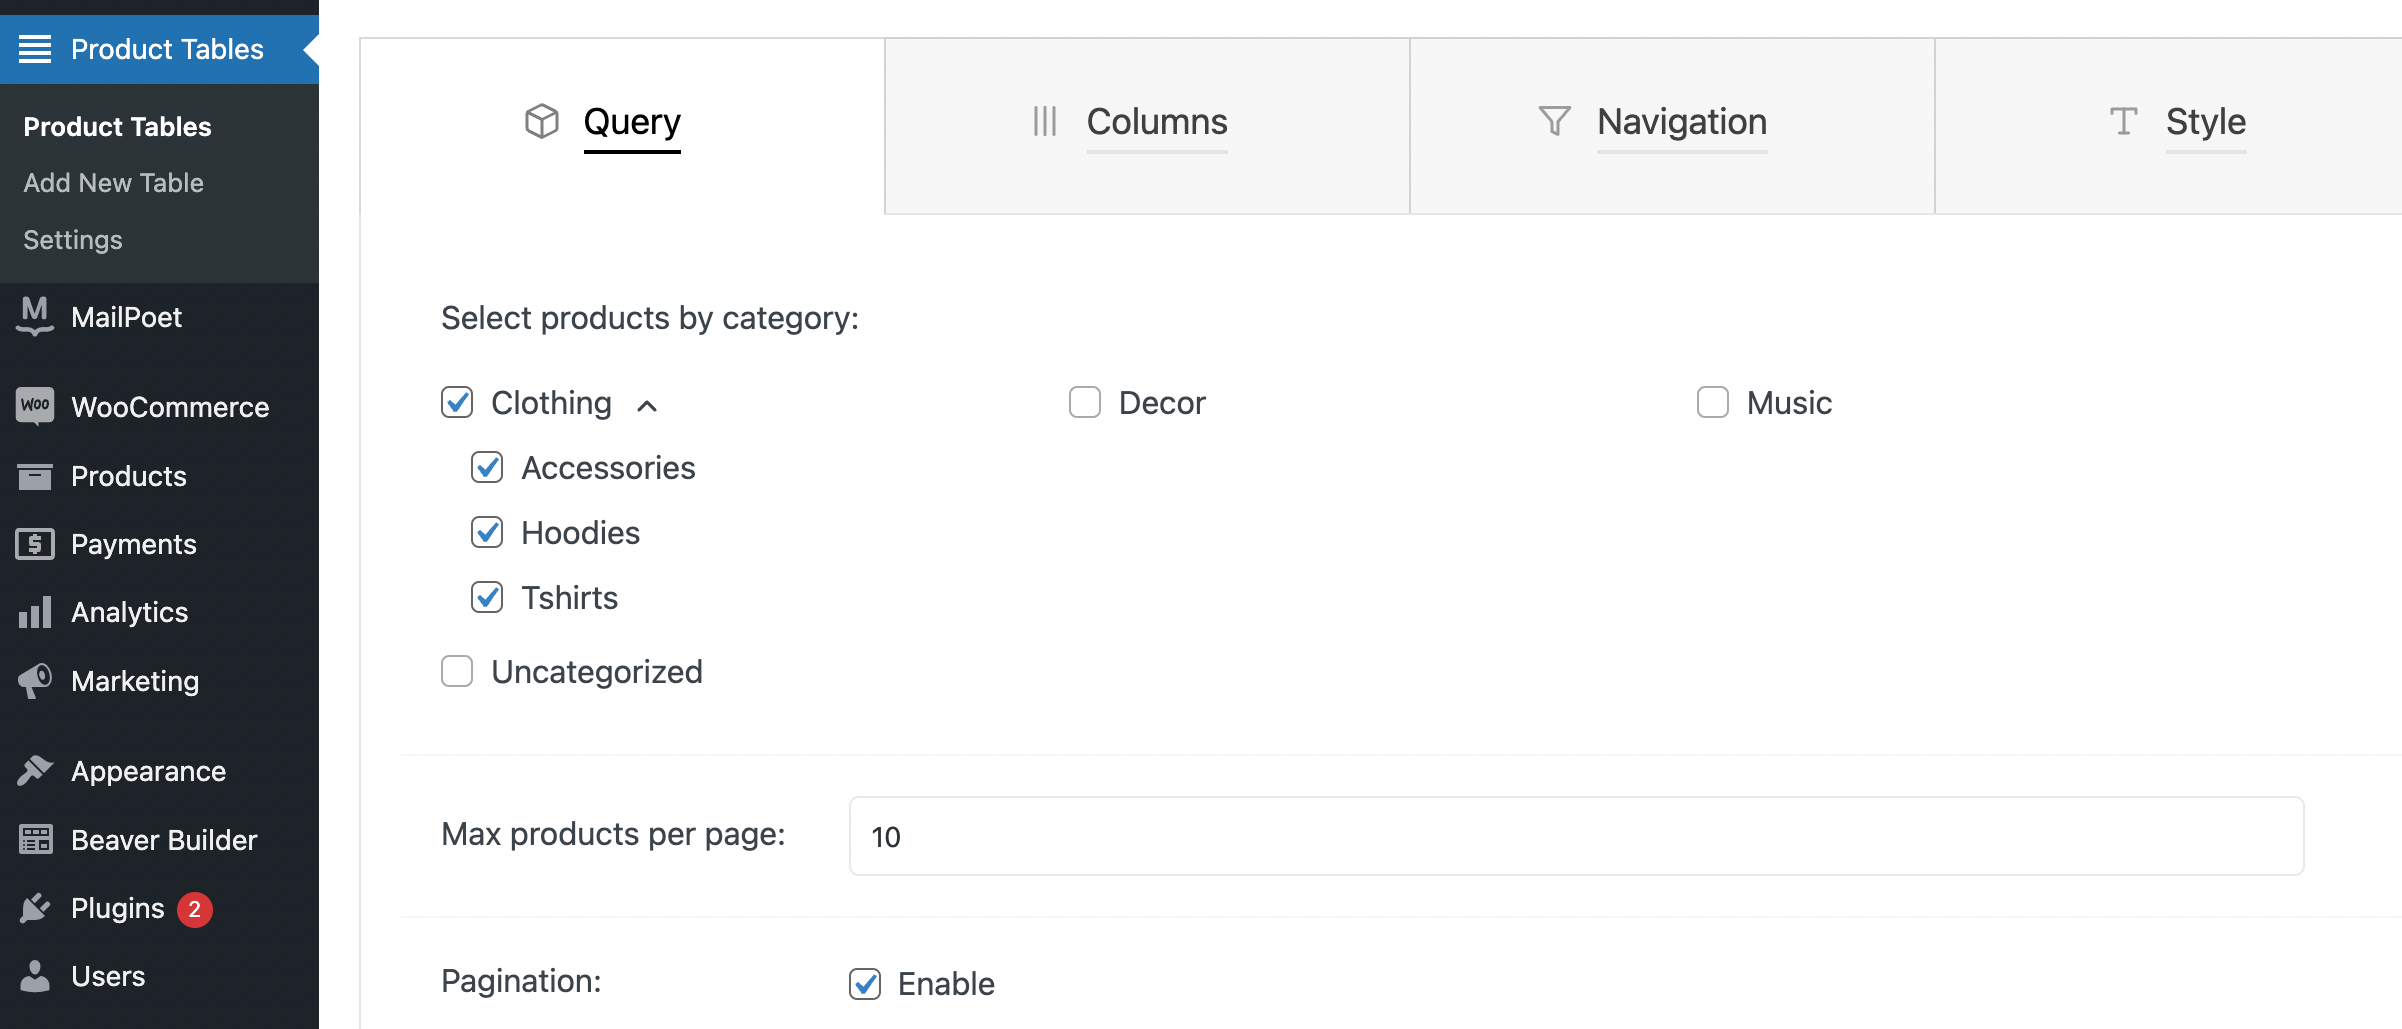
When you’re happy with your selections, click on Save Settings and refresh your preview page from before. Let’s try this with the Tshirts category:
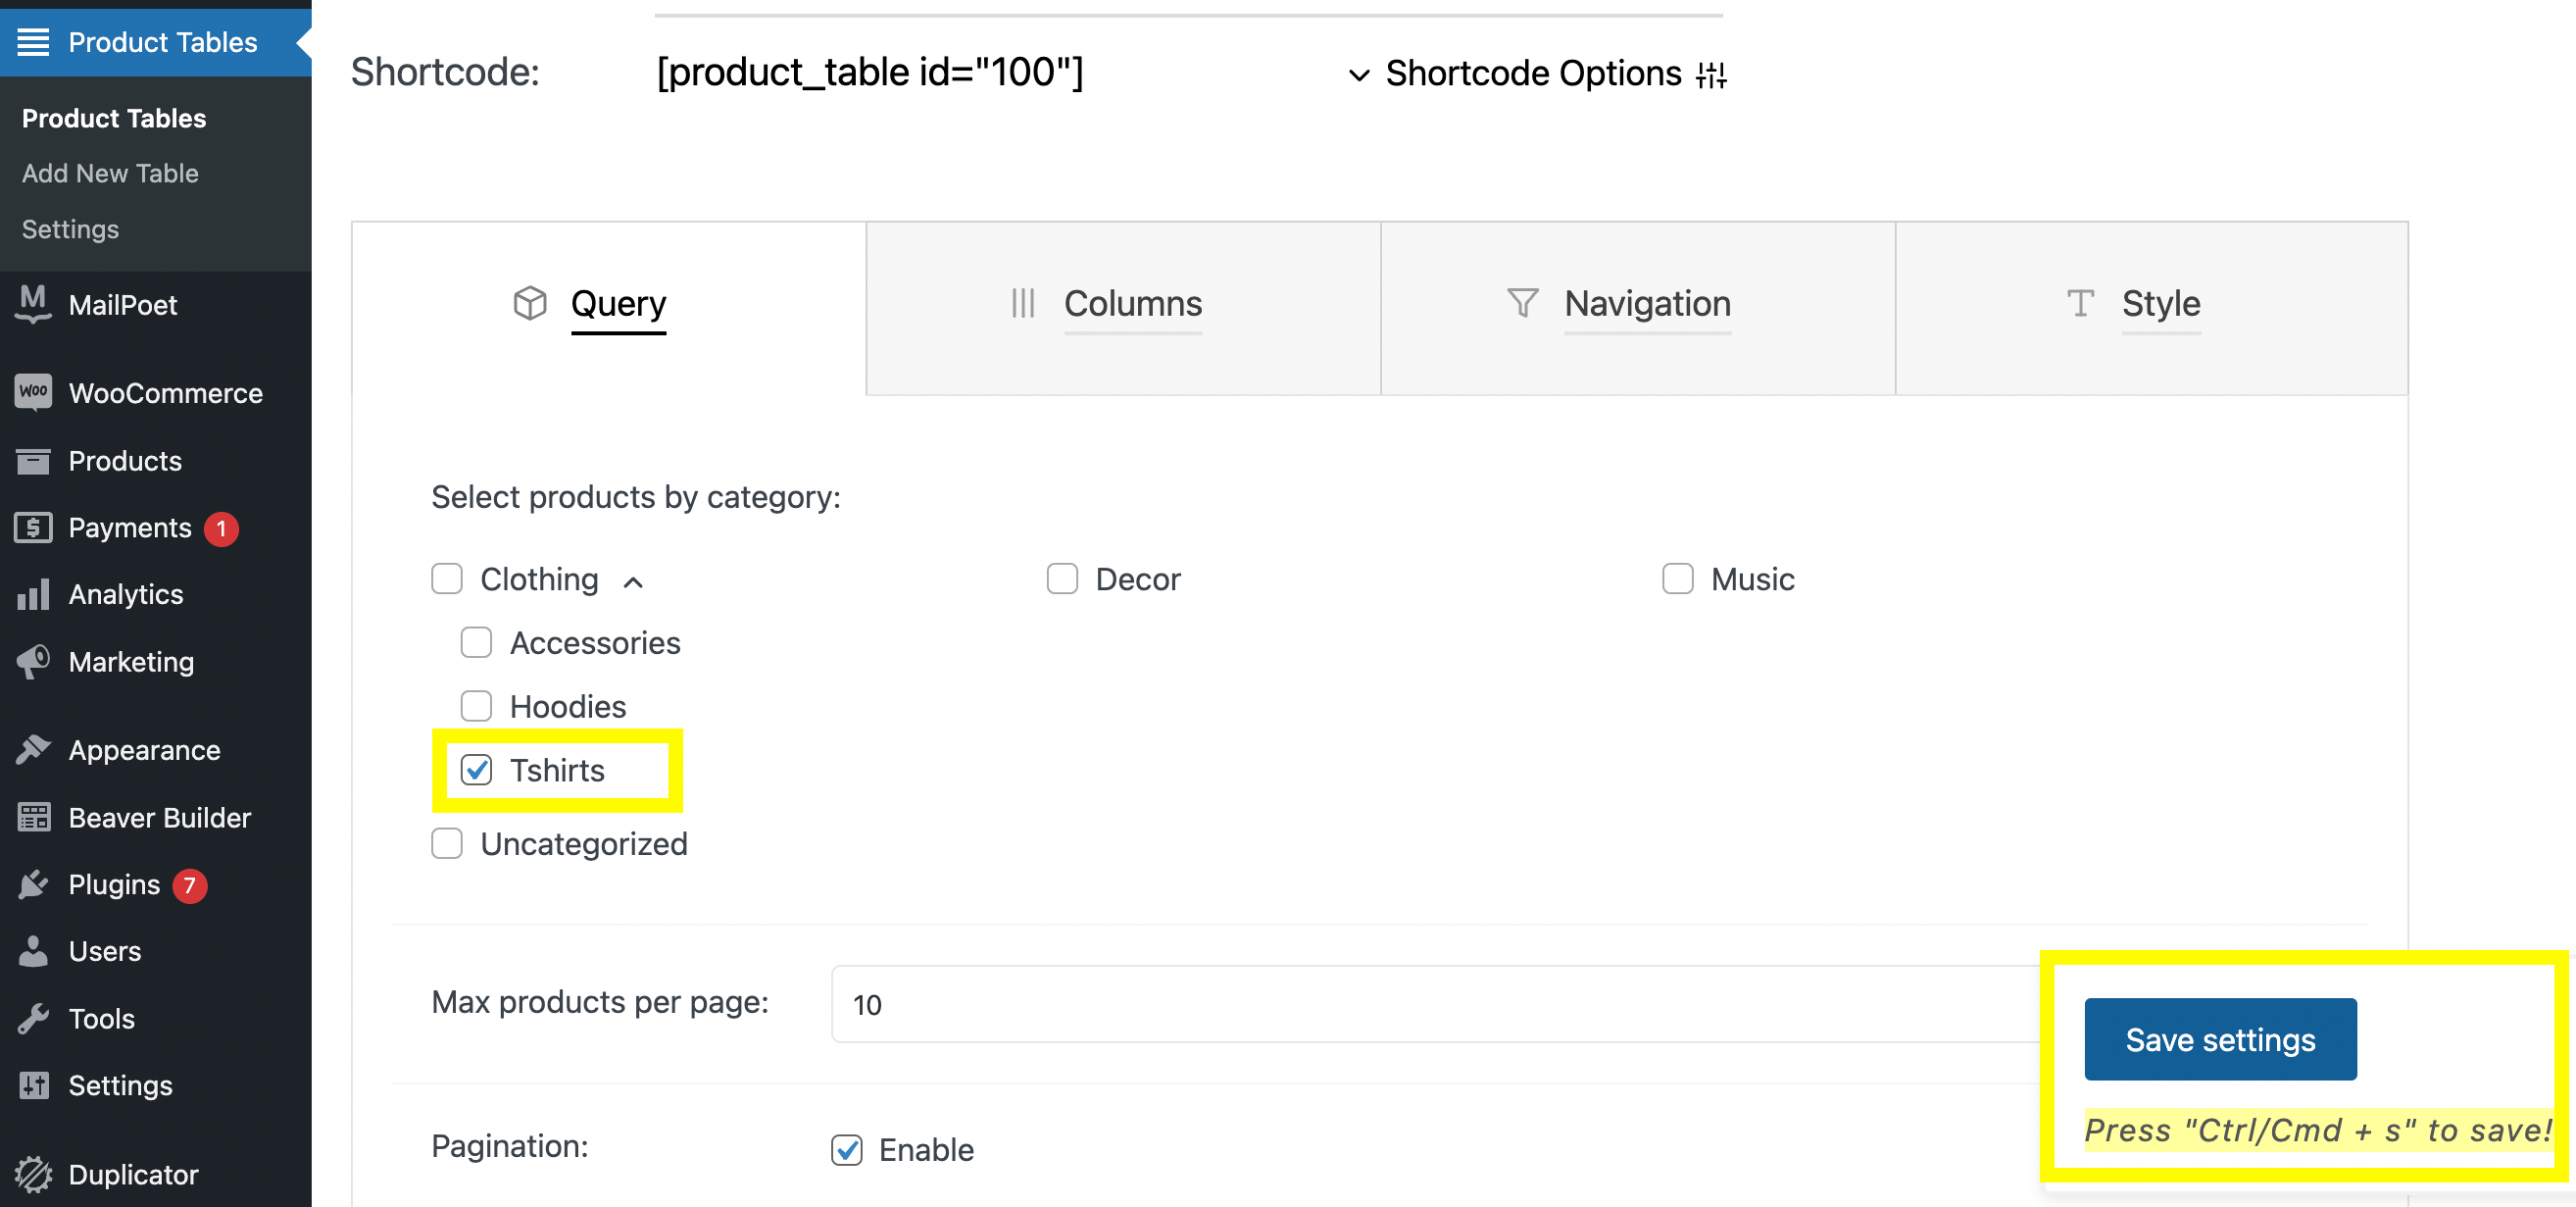
Select Tshirts, then click on Save Settings and refresh your preview page. You should see only the products you selected:

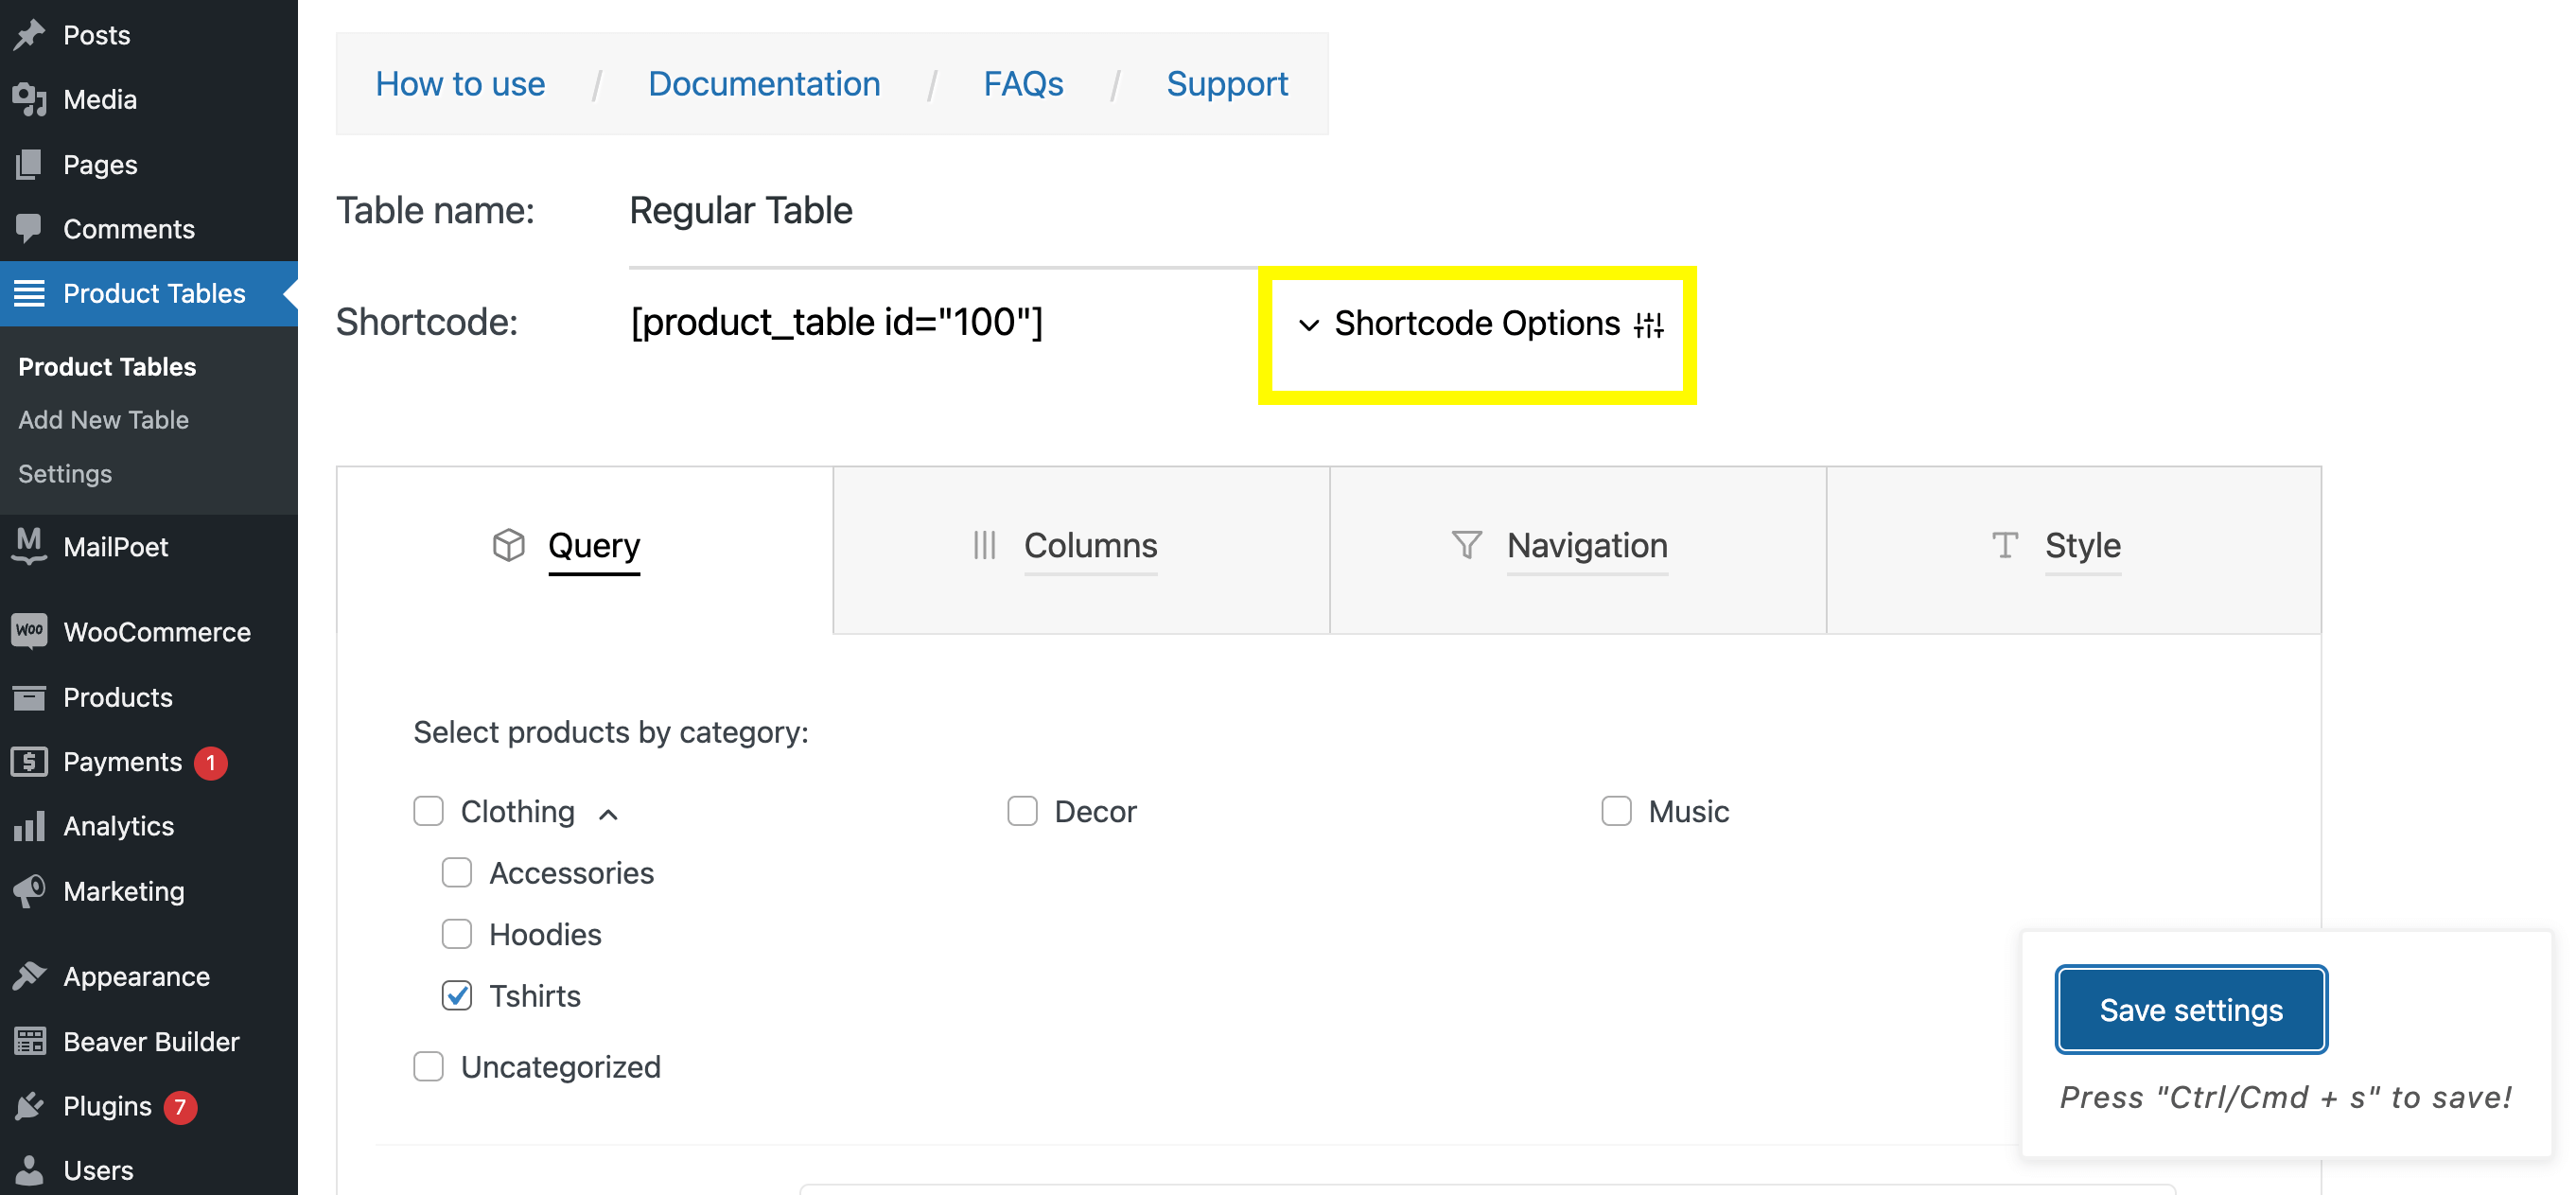
Keep in mind that there’s no need to create a new product table each time you want to show a certain category. The plugin provides you with various shortcode options.
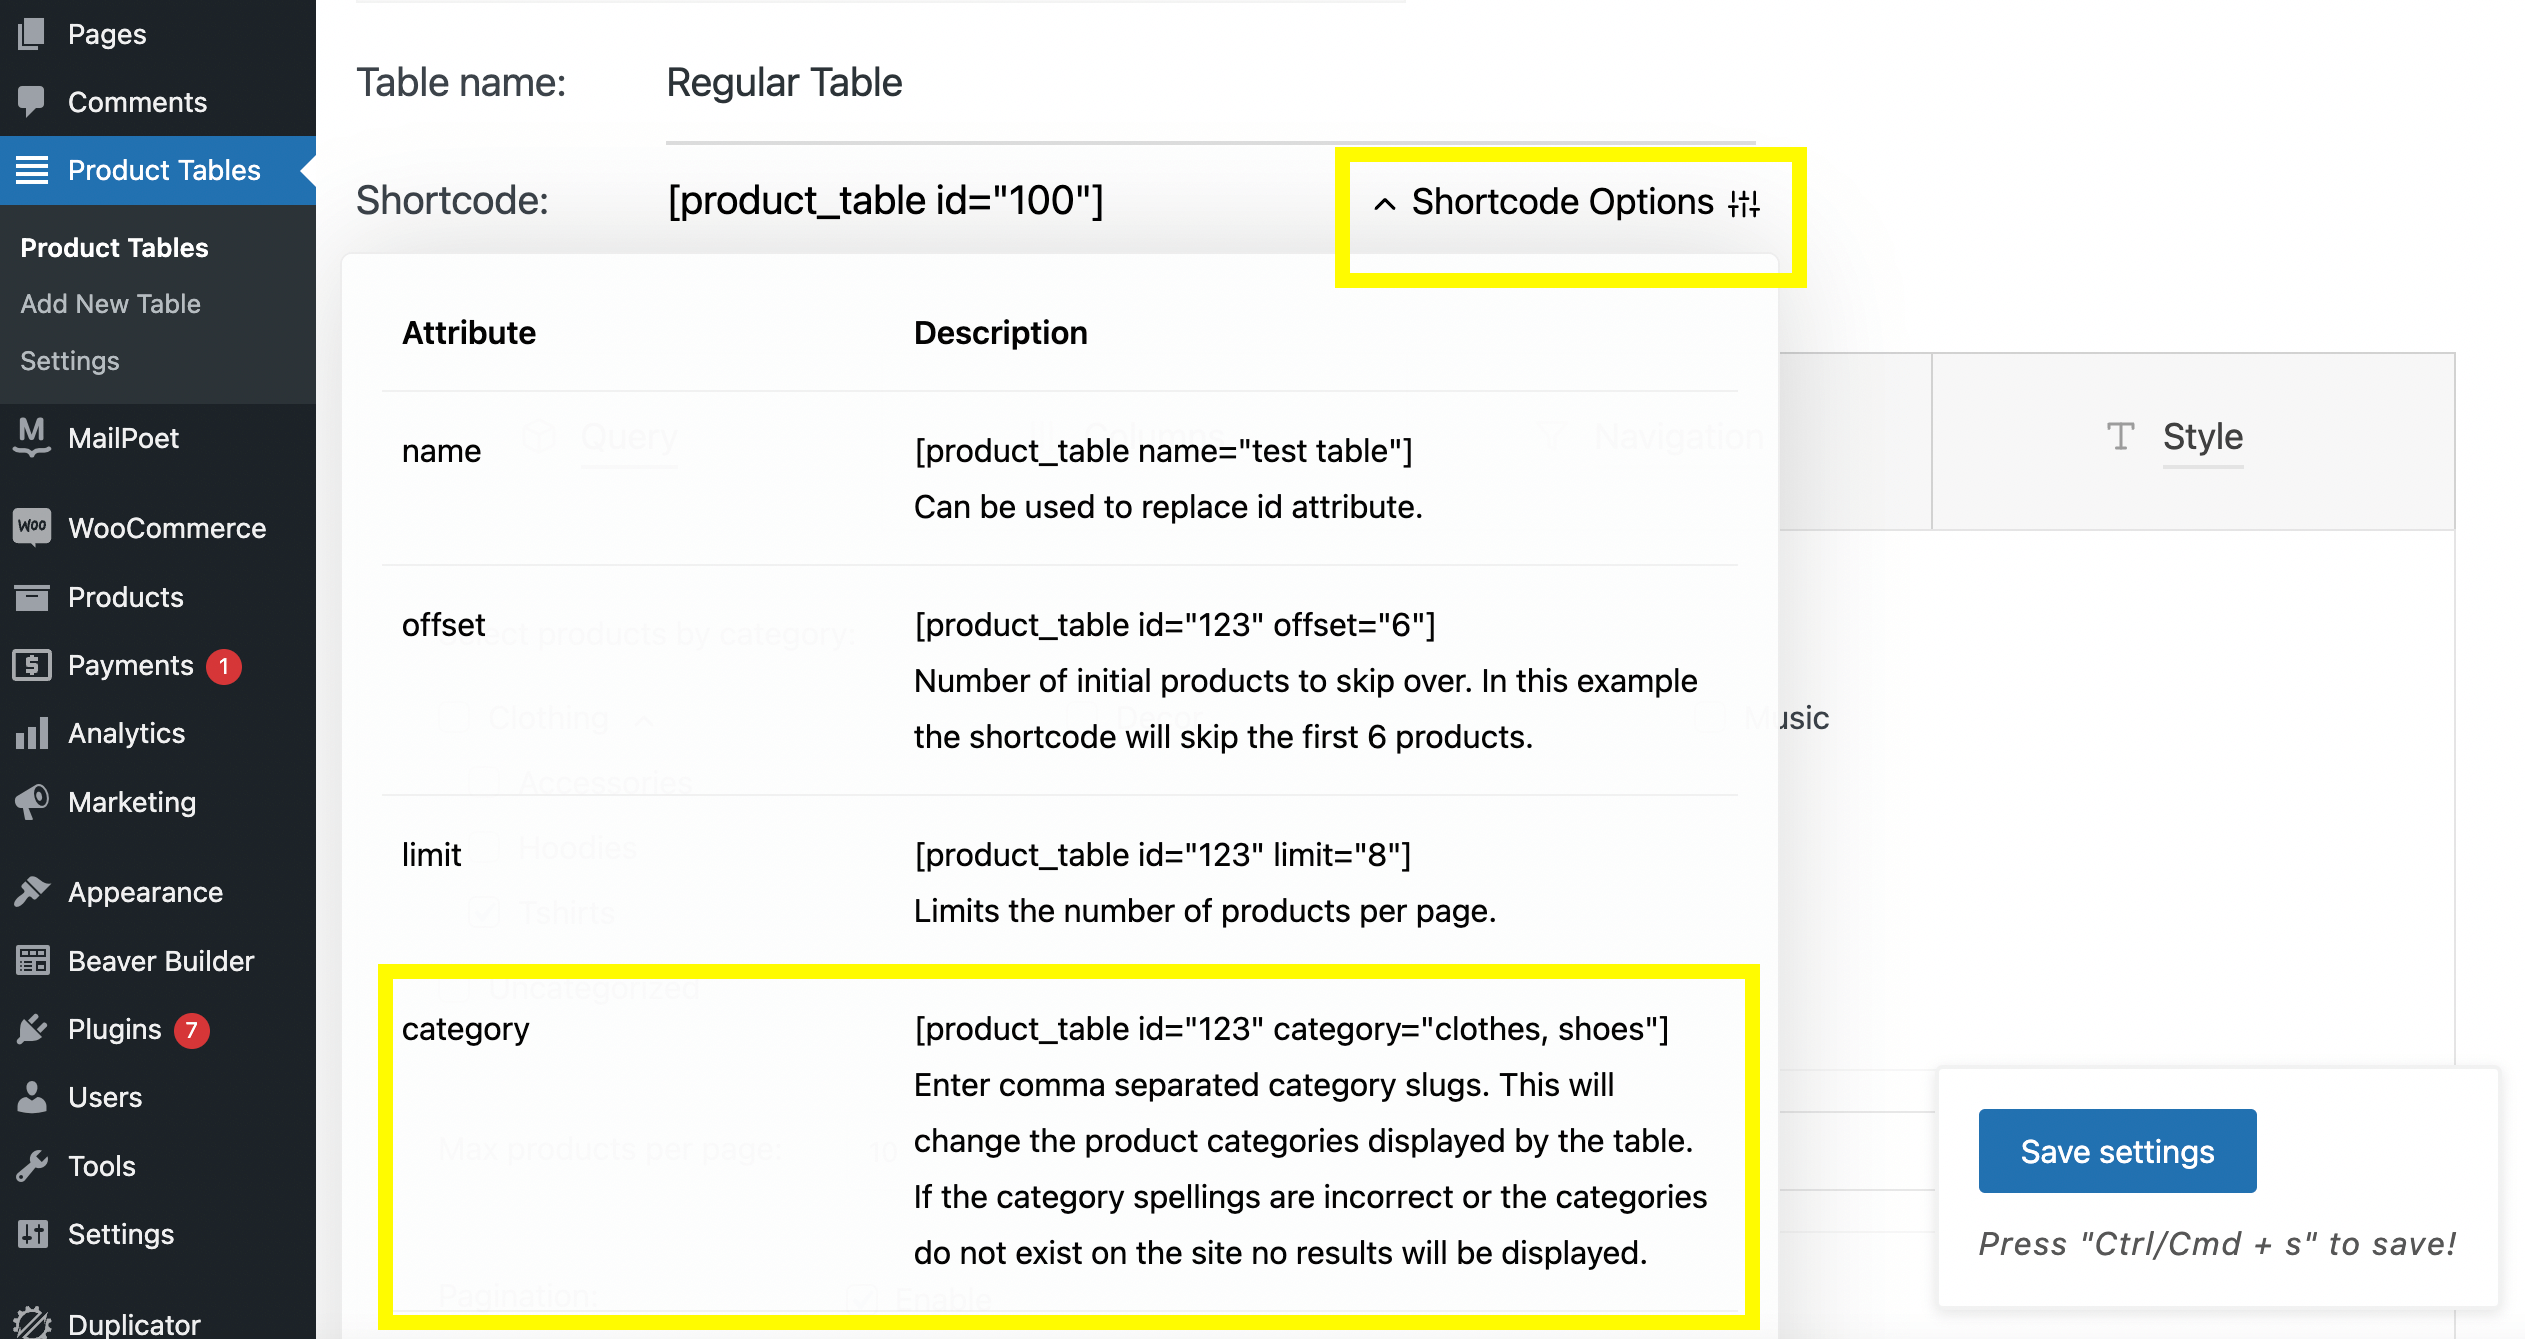
If you want to use another one, simply navigate to the Shortcode Options tab and change the option:
For example, if you want to show one category on your product table, copy the category shortcode:
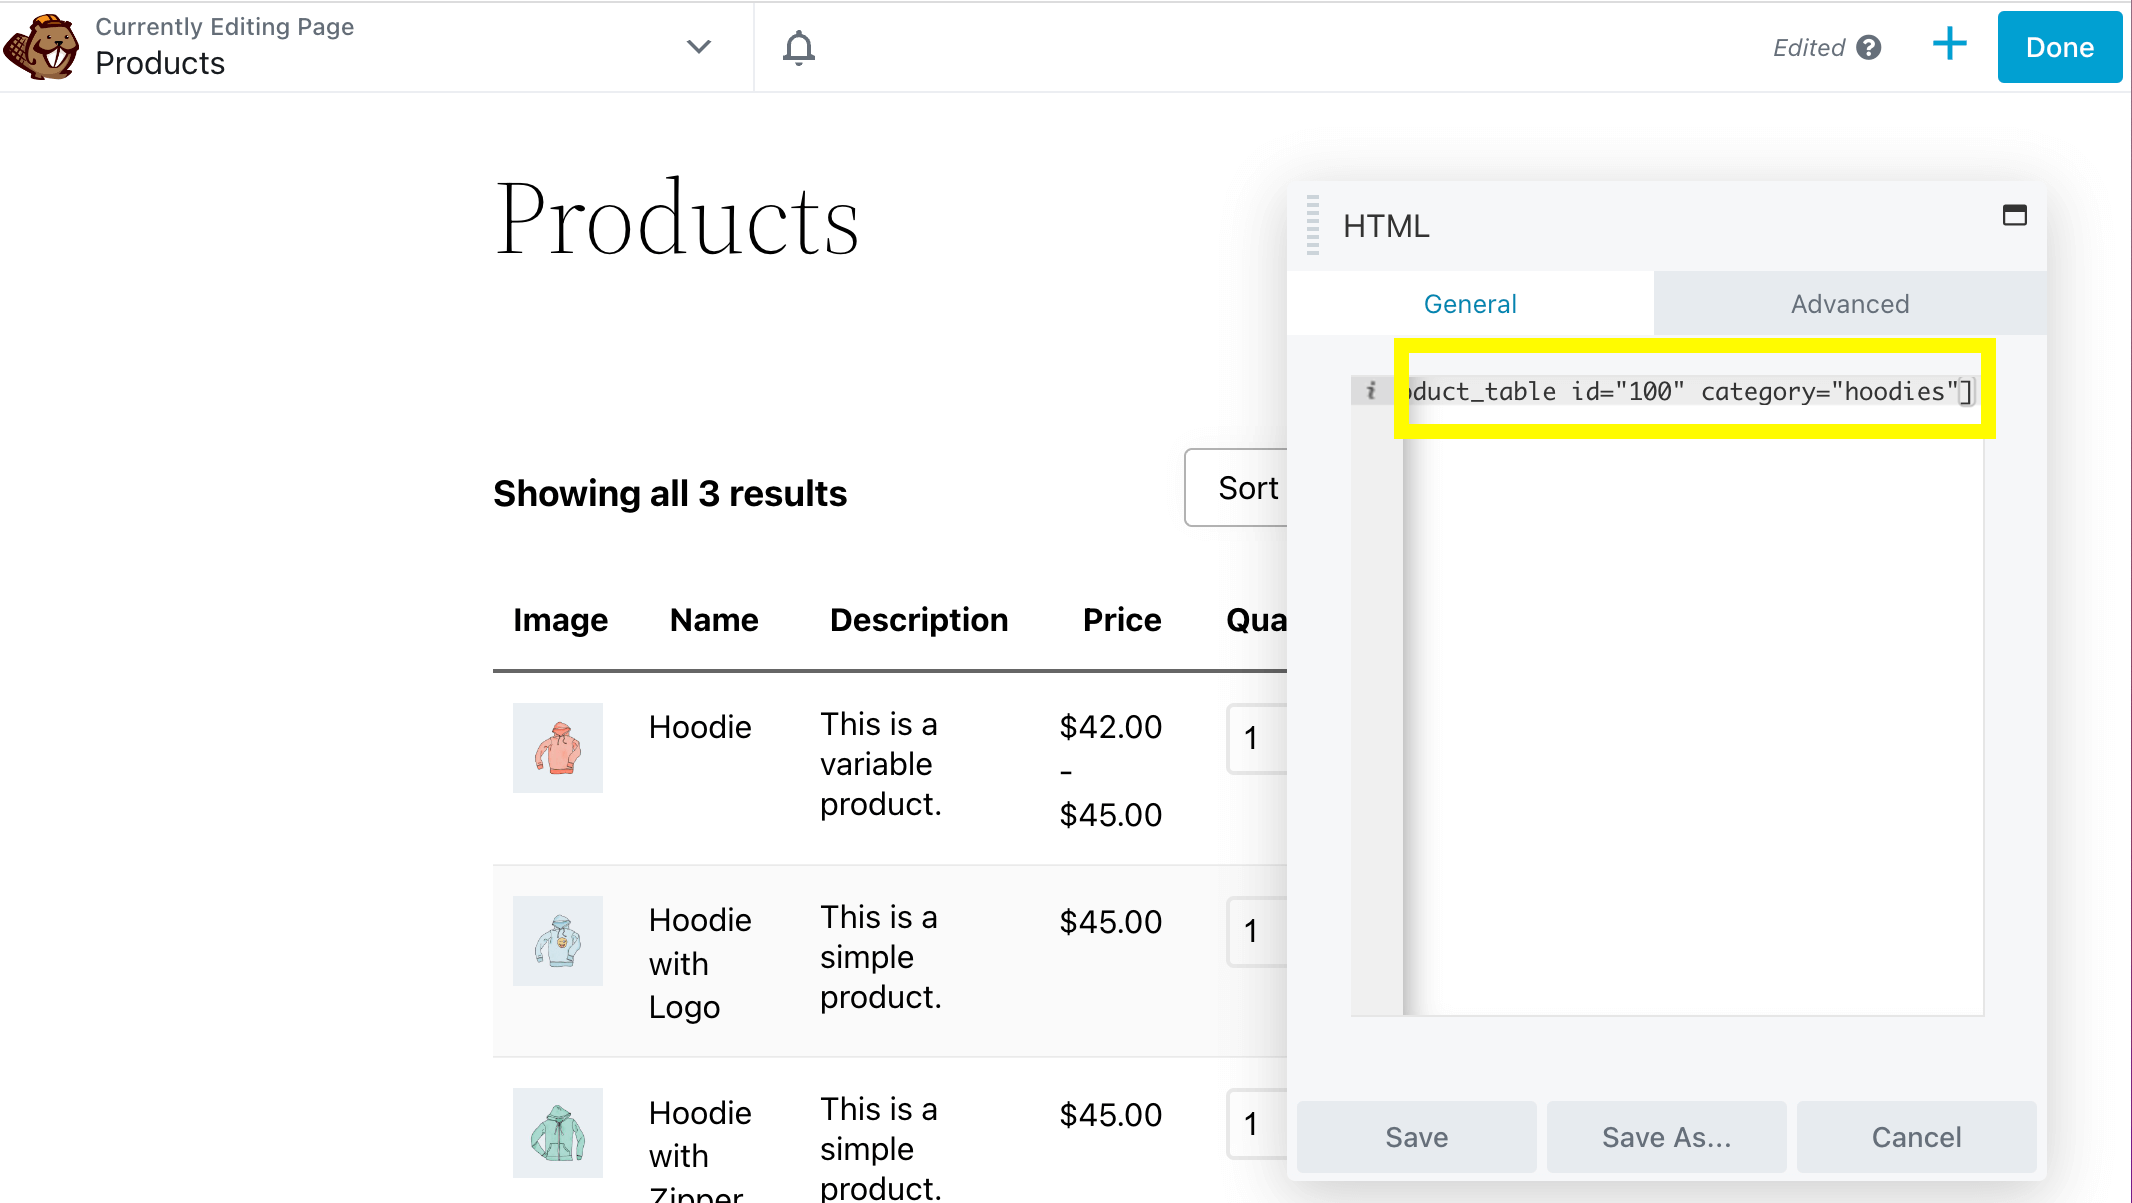
Paste it into the HTML module, then enter the category name(s) into the shortcode. Here we used “hoodies” as an example:
You can also add multiple tables on the same page by duplicating the shortcode block and typing in different categories:
Here, we’ve added a second order form for “tshirts”:
You can add as many tables as you want and add a heading for each one.
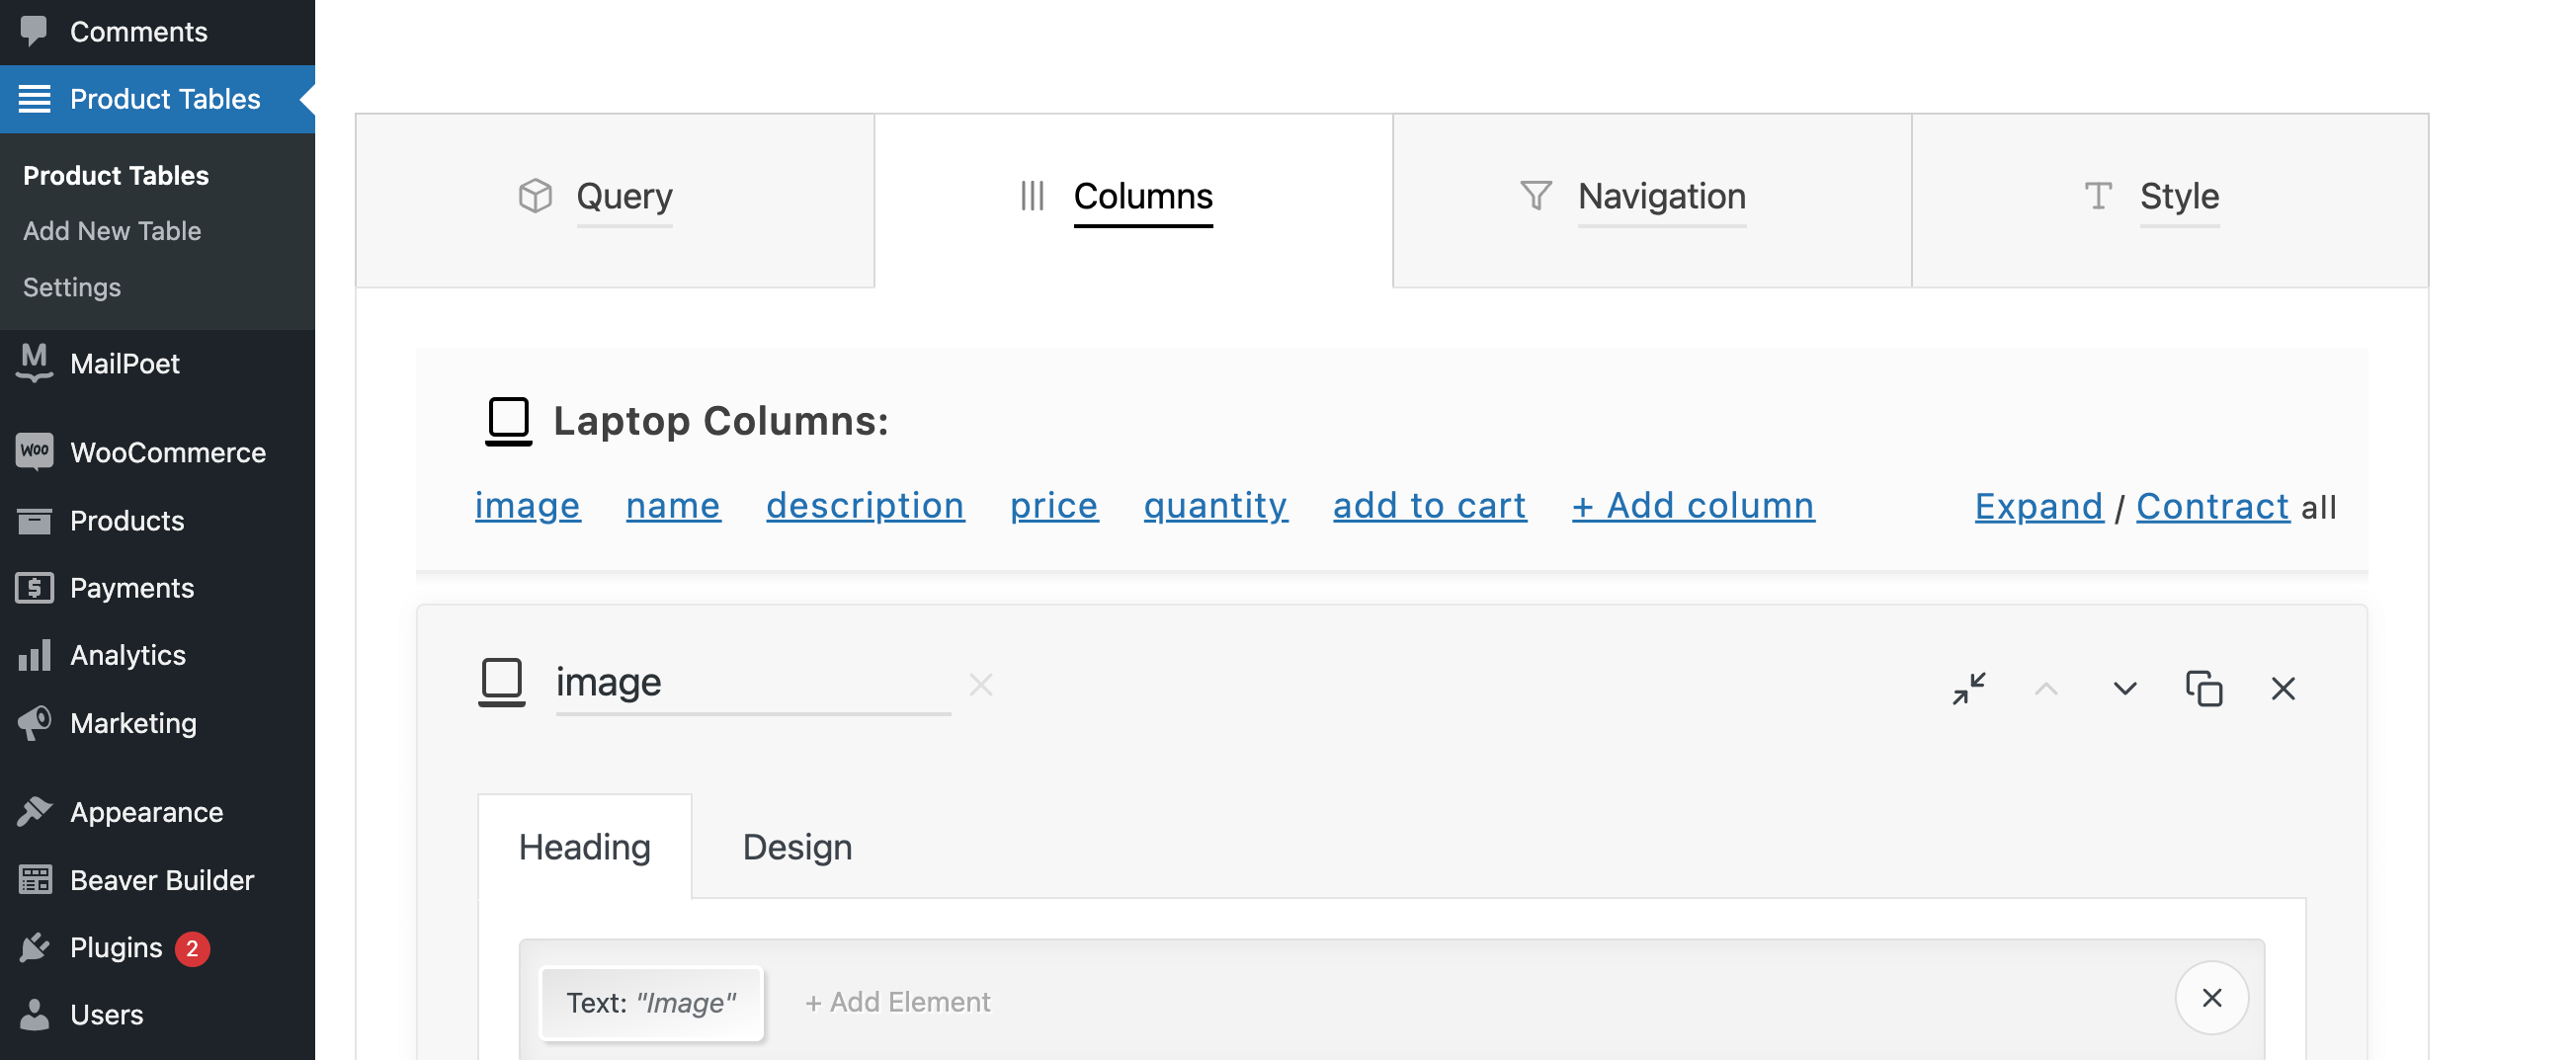
Step 4: Edit Your Product Table’s Columns and Rows
In addition to selecting specific products, you can also customize the columns and rows in your table. This is something to try on the backend and then preview on the front end. Let’s try this out by adding a stock-keeping unit (SKU) column.
To get started, delete the category shortcode in the HTML module. Then, open the Columns tab under Product Tables in your dashboard:
Next, scroll down to the + Add a Column and click on it:

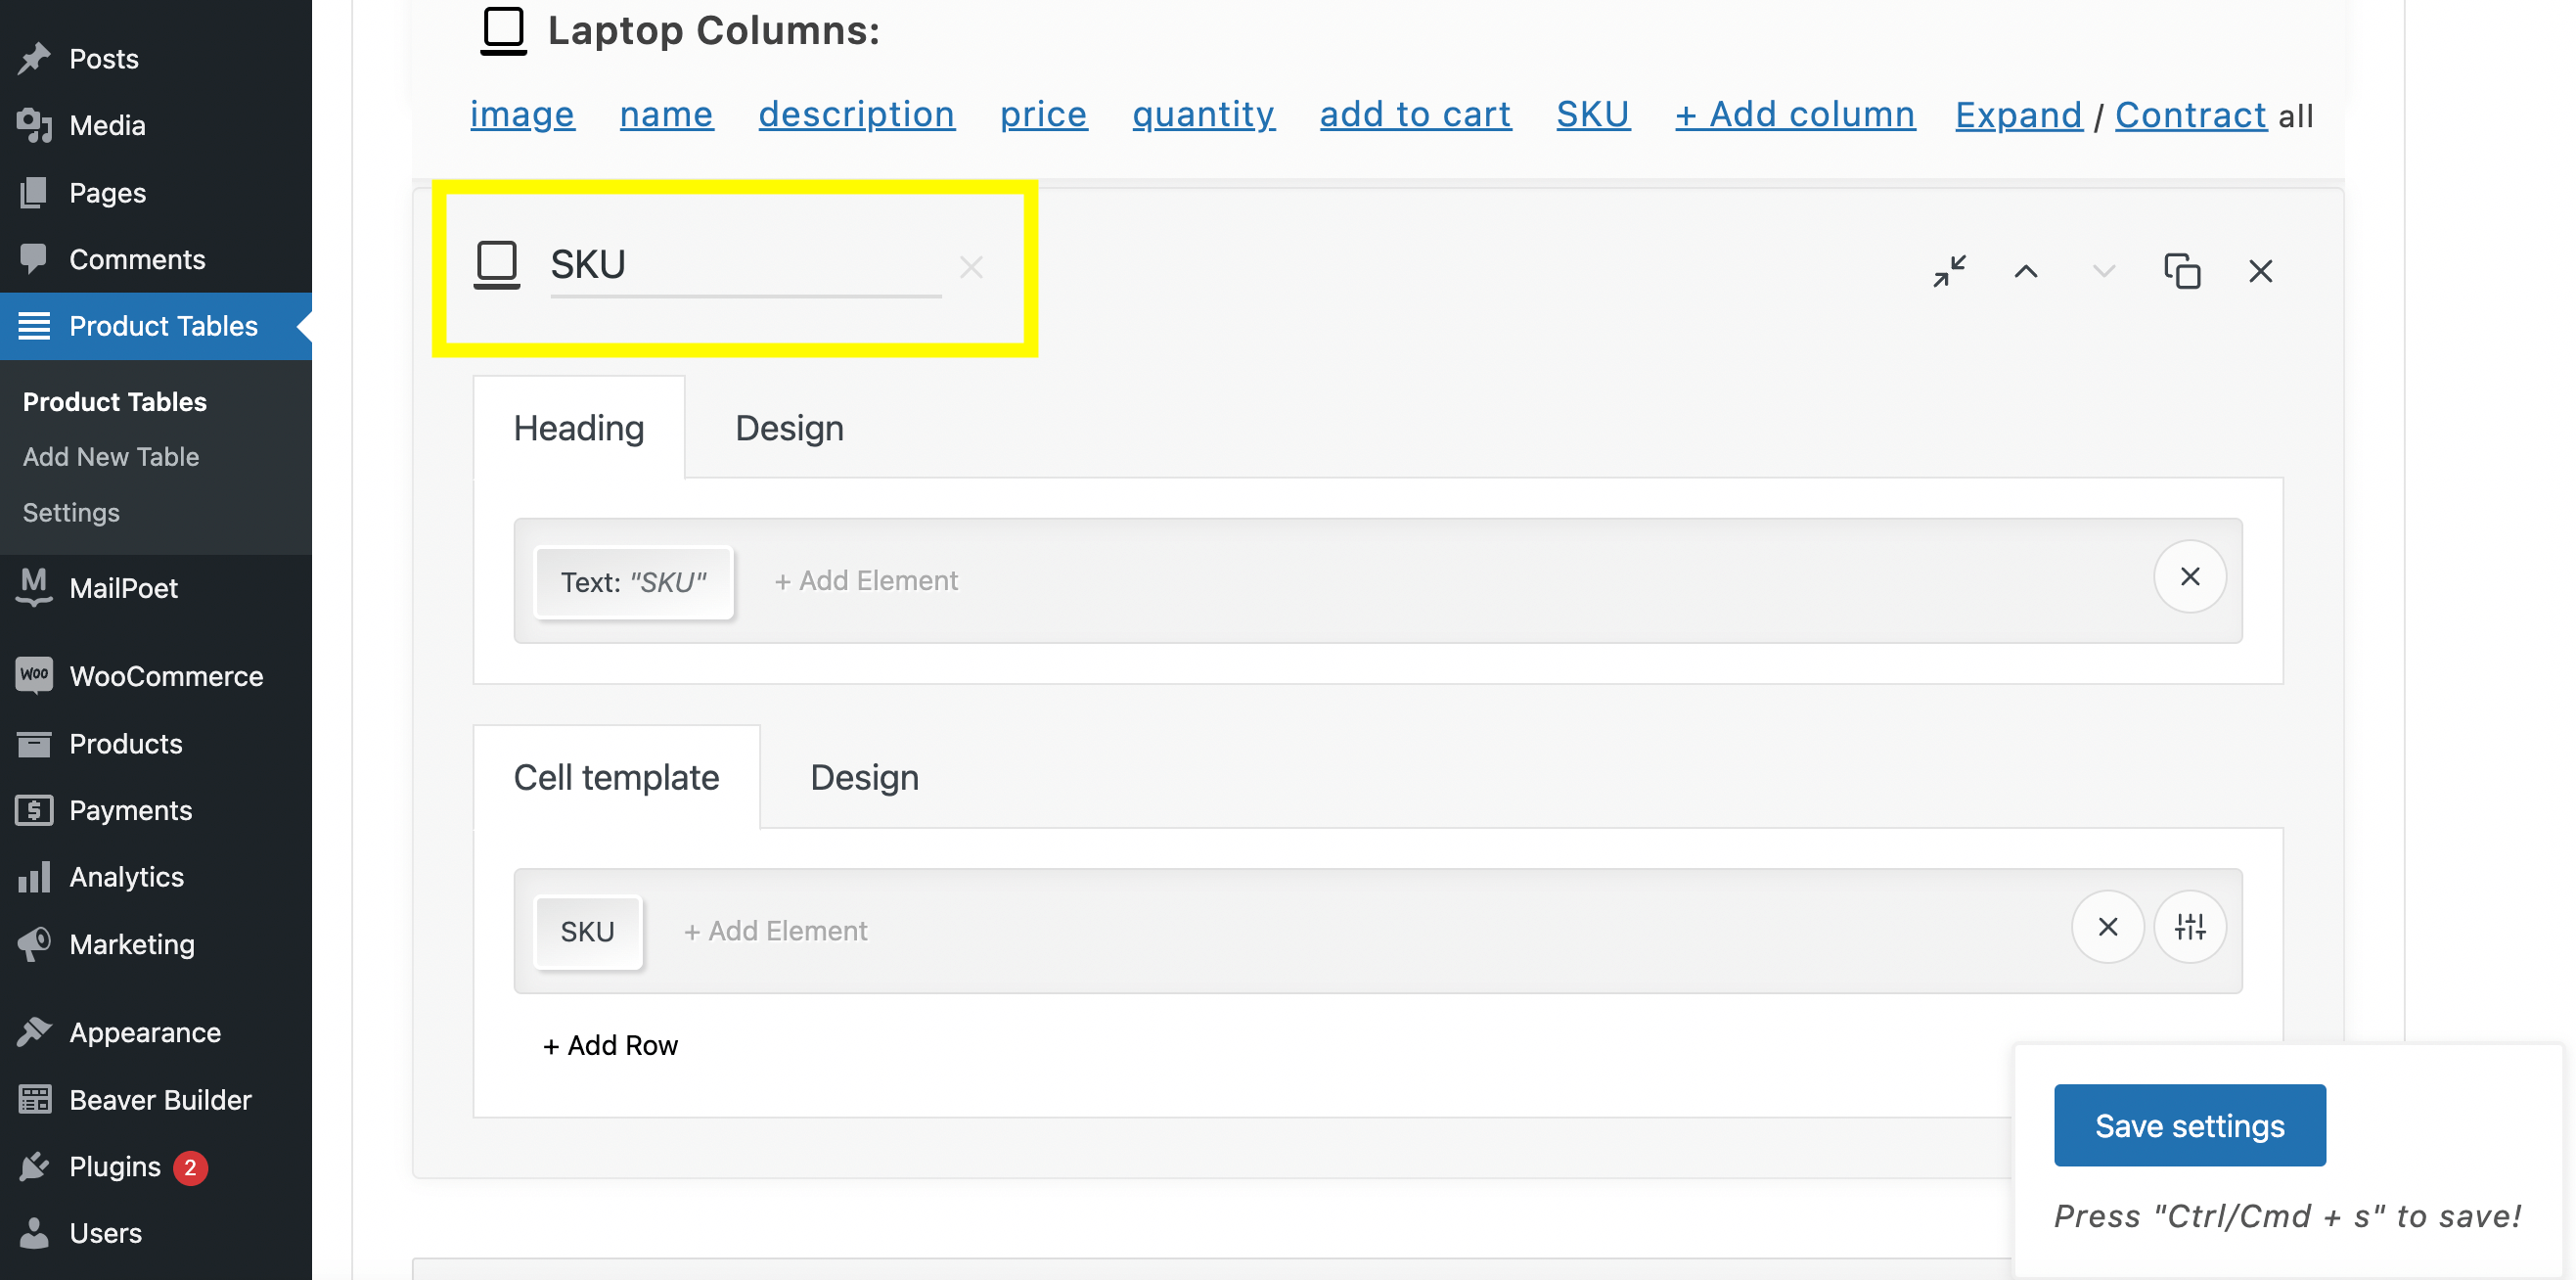
Then, select Add Element under the Cell Template tab. This will open up a window with a menu of elements to choose from. Here, click on SKU:
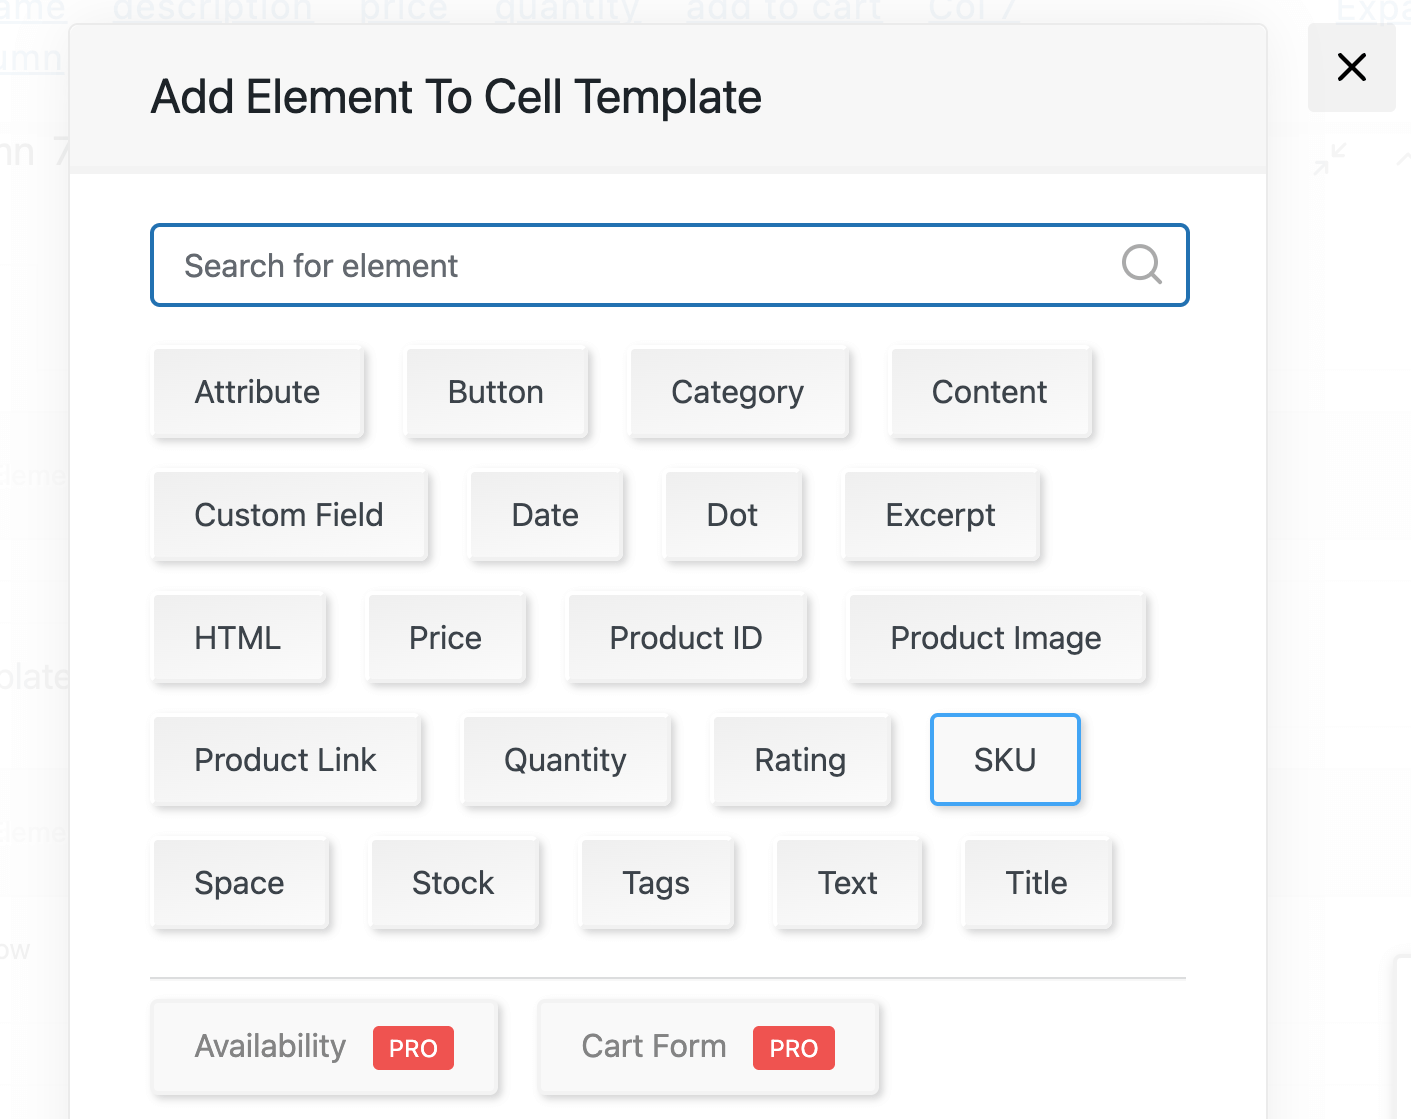
Next, click Add Element under the Heading tab. Select Text and type SKU:
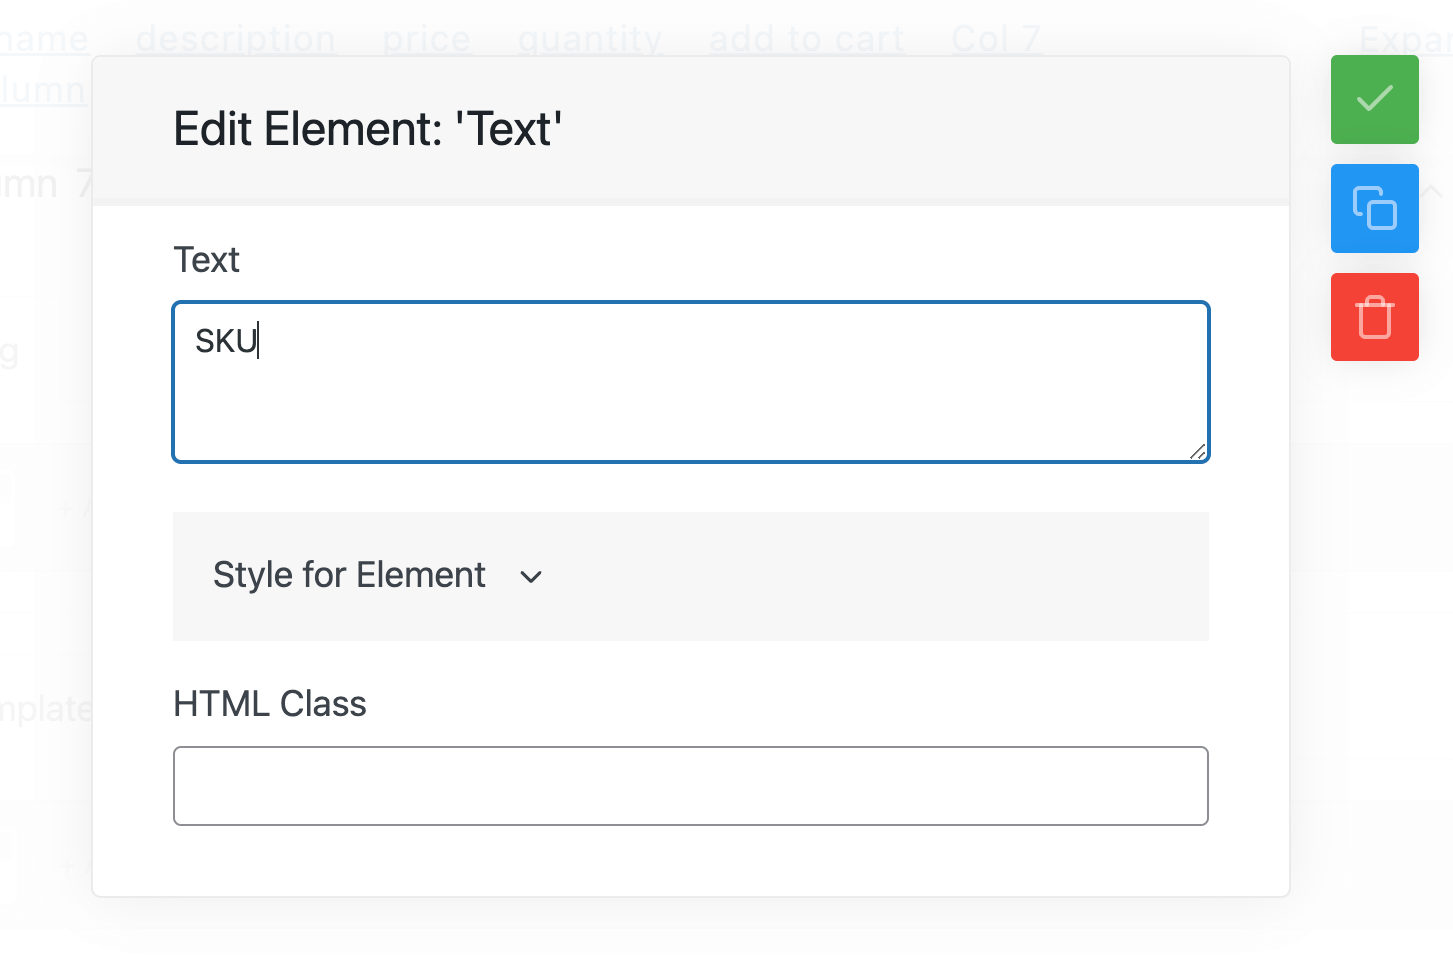
Afterward, click out of the tab and rename the column SKU:
To move this next to the name column in the top panel, simply click on the up arrow:
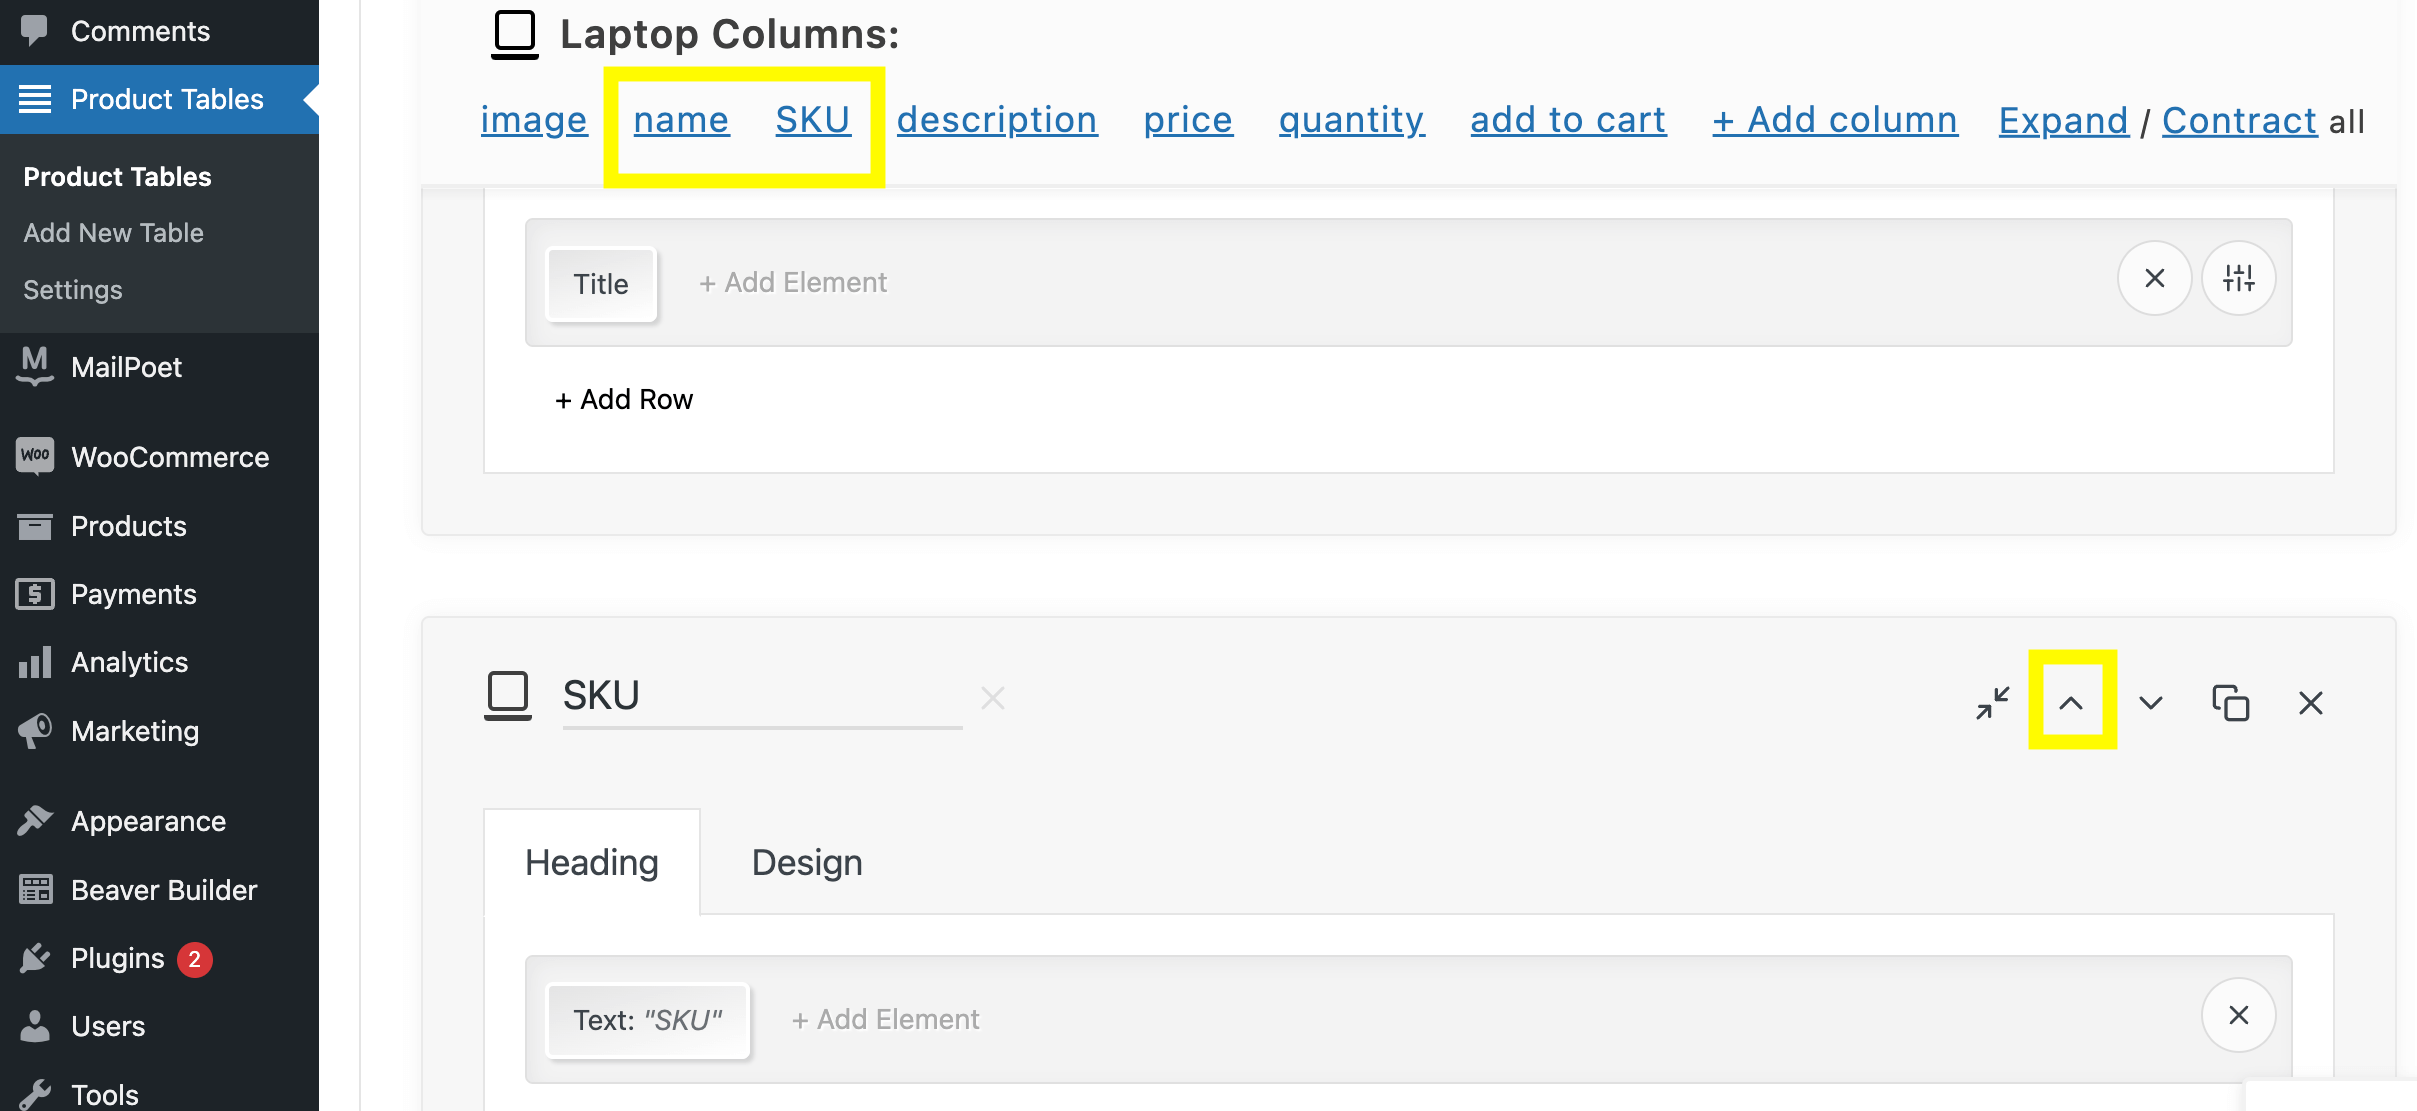
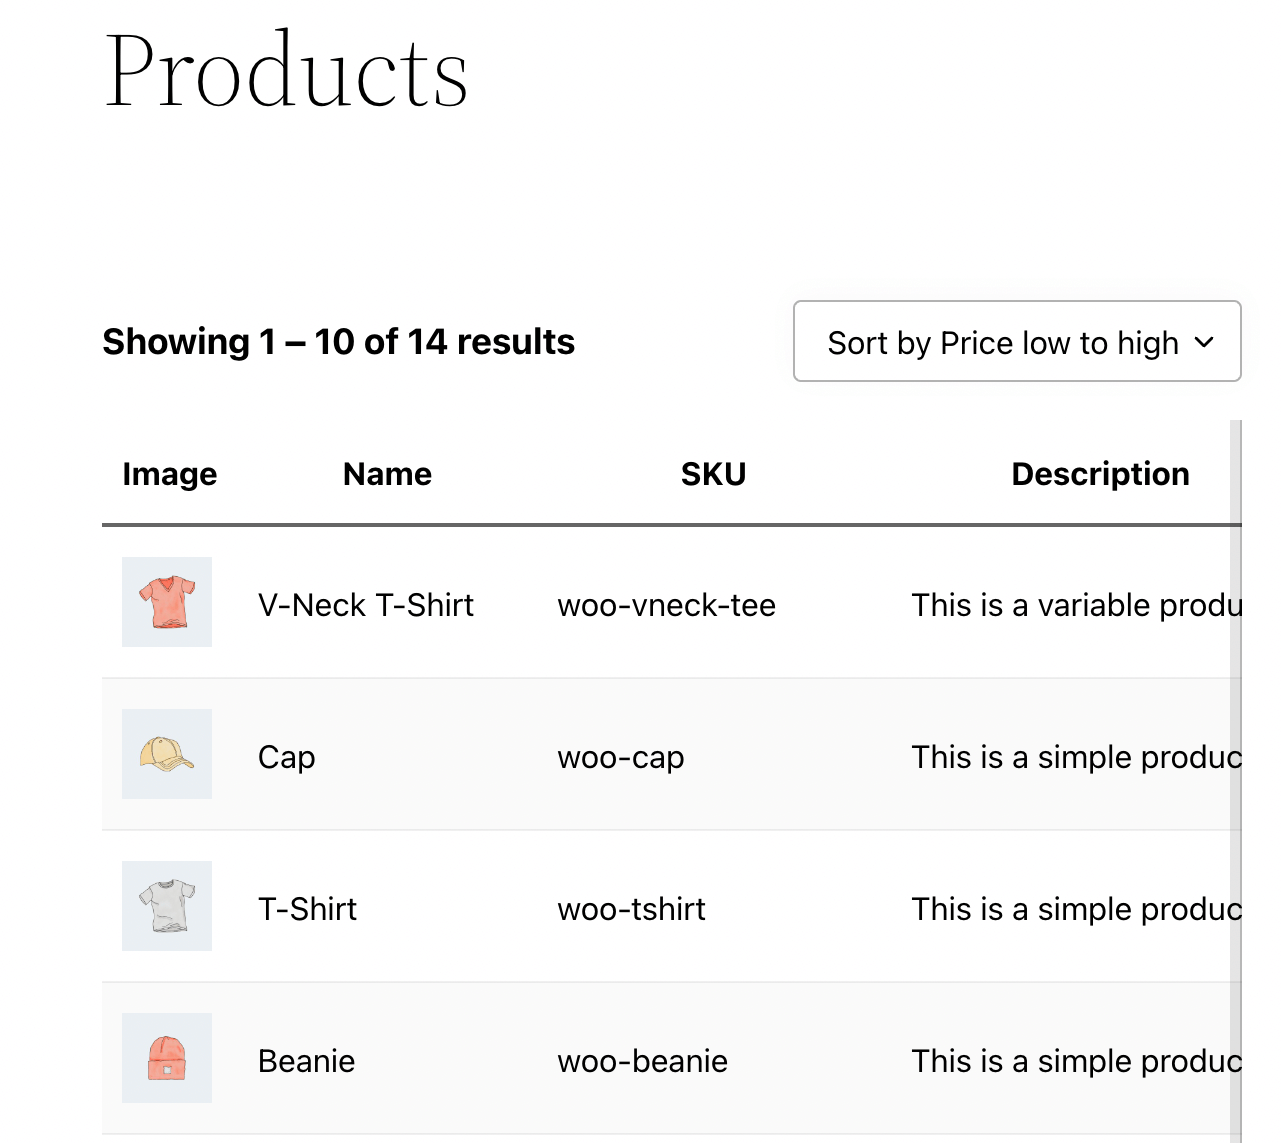
Now, you can click on Save settings and refresh your preview page. The new SKU column should now be next to the Name column:
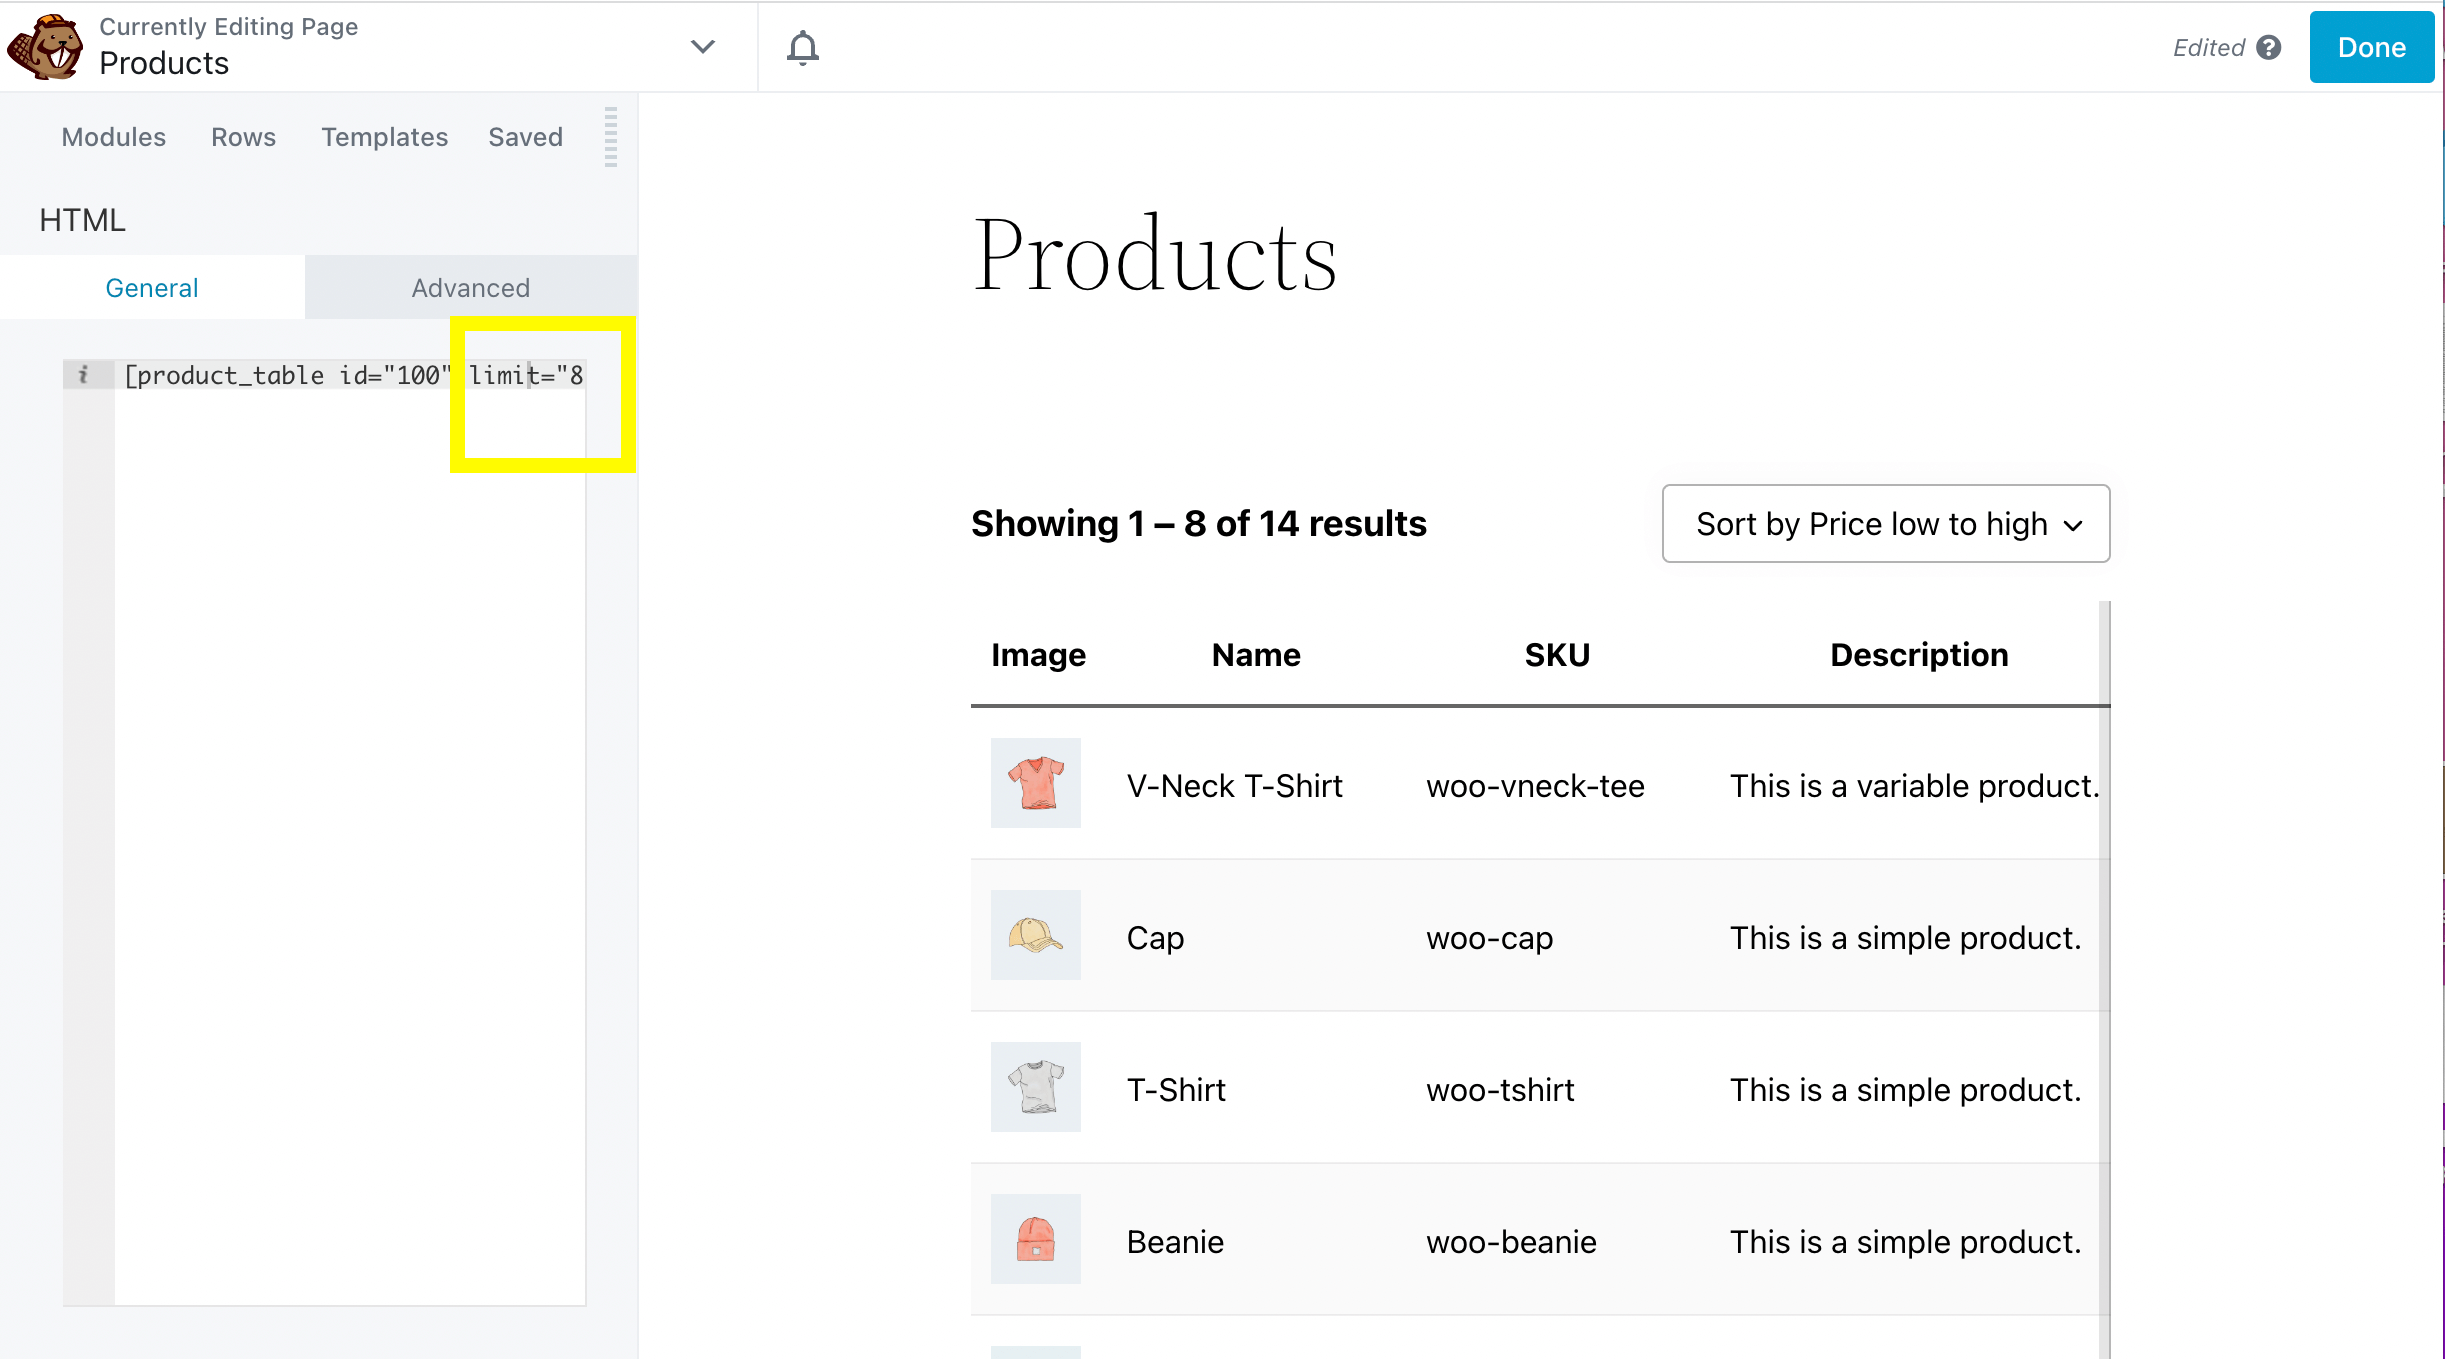
You can also change the number of products viewed per page using a shortcode. To do this, go back to the Shortcode Options tab. You’ll find the limit shortcode:
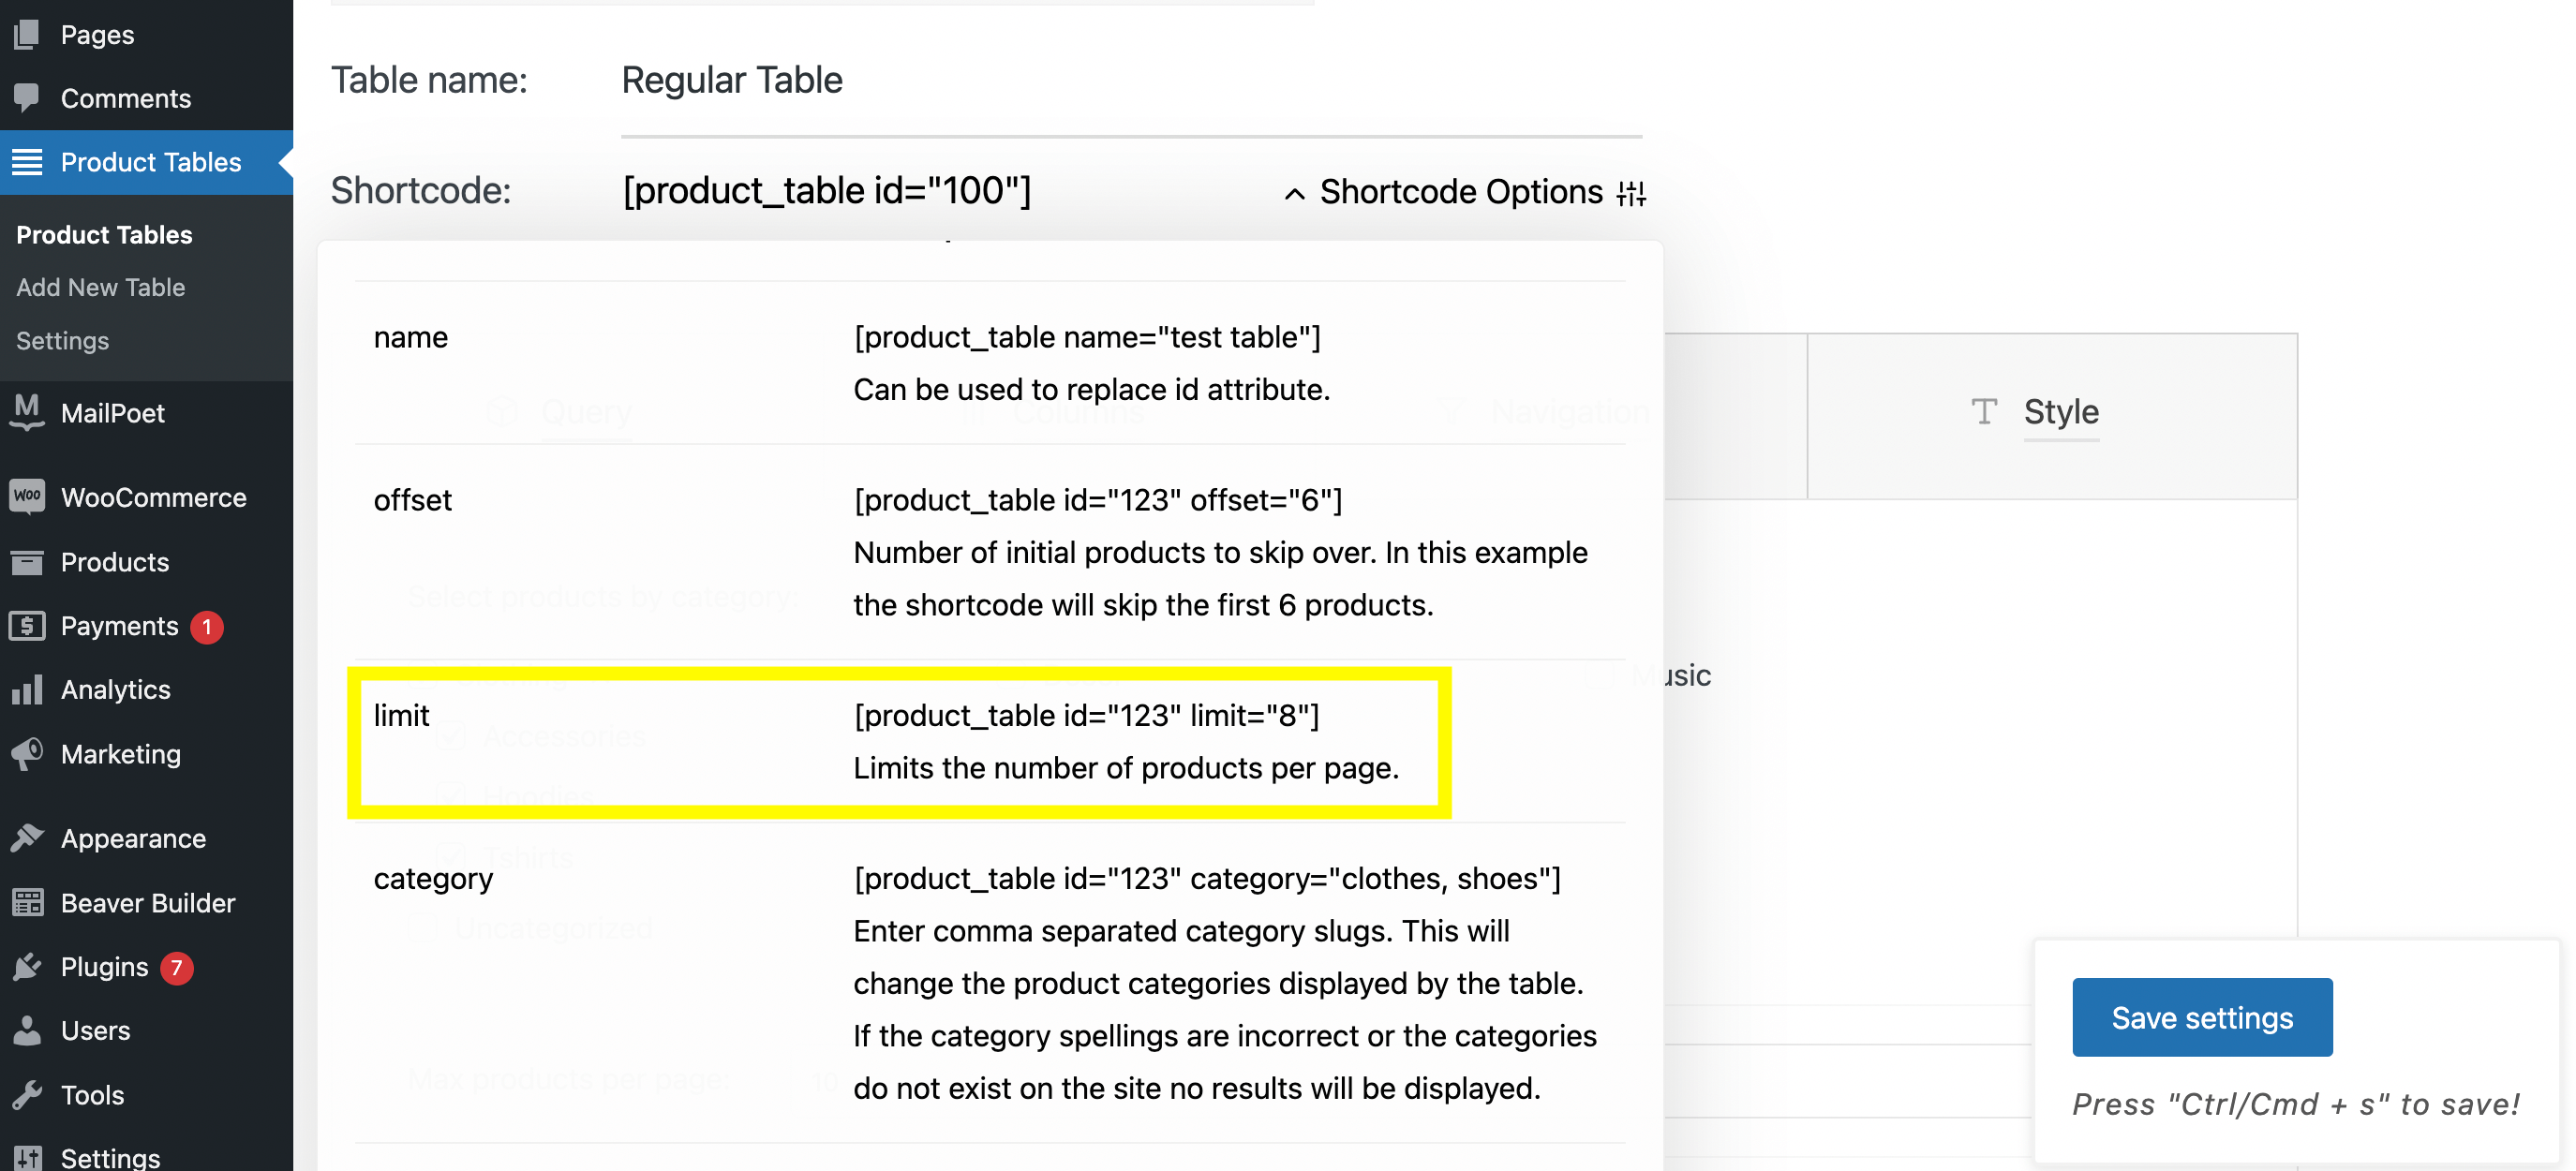
Copy this shortcode and paste it into the HTML module. Enter in the number of products you want displayed per page. We chose “8” for this example:
You are able to edit many other aspects of your table using the Shortcode Options tab, such as offsets, ids, and SKUs.
Step 5: Customize Order Form Details and Appearance
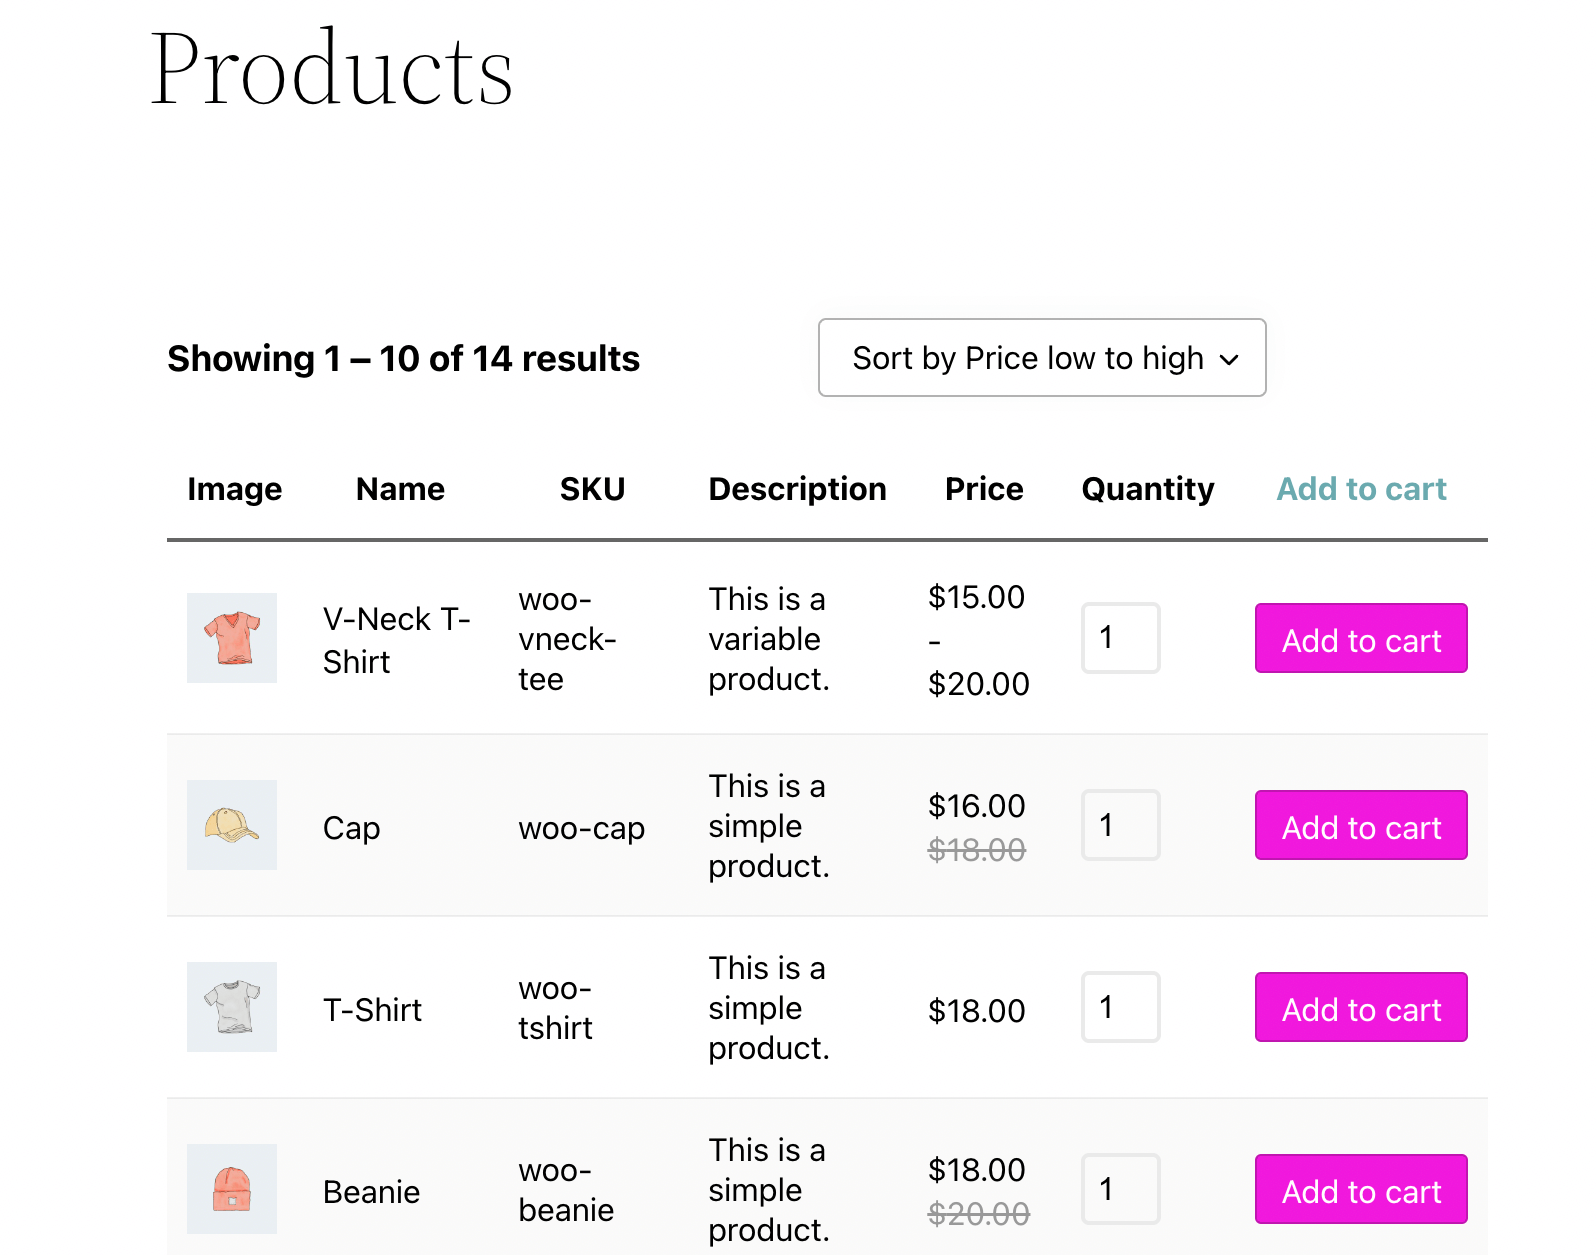
Beyond what we’ve already covered, you can edit many details of your order form, such as the add to cart button, image sizes, and more.
If you’d like to further personalize your order form, return to the Products Table tab. To edit the add to cart button go to Columns > add to cart:
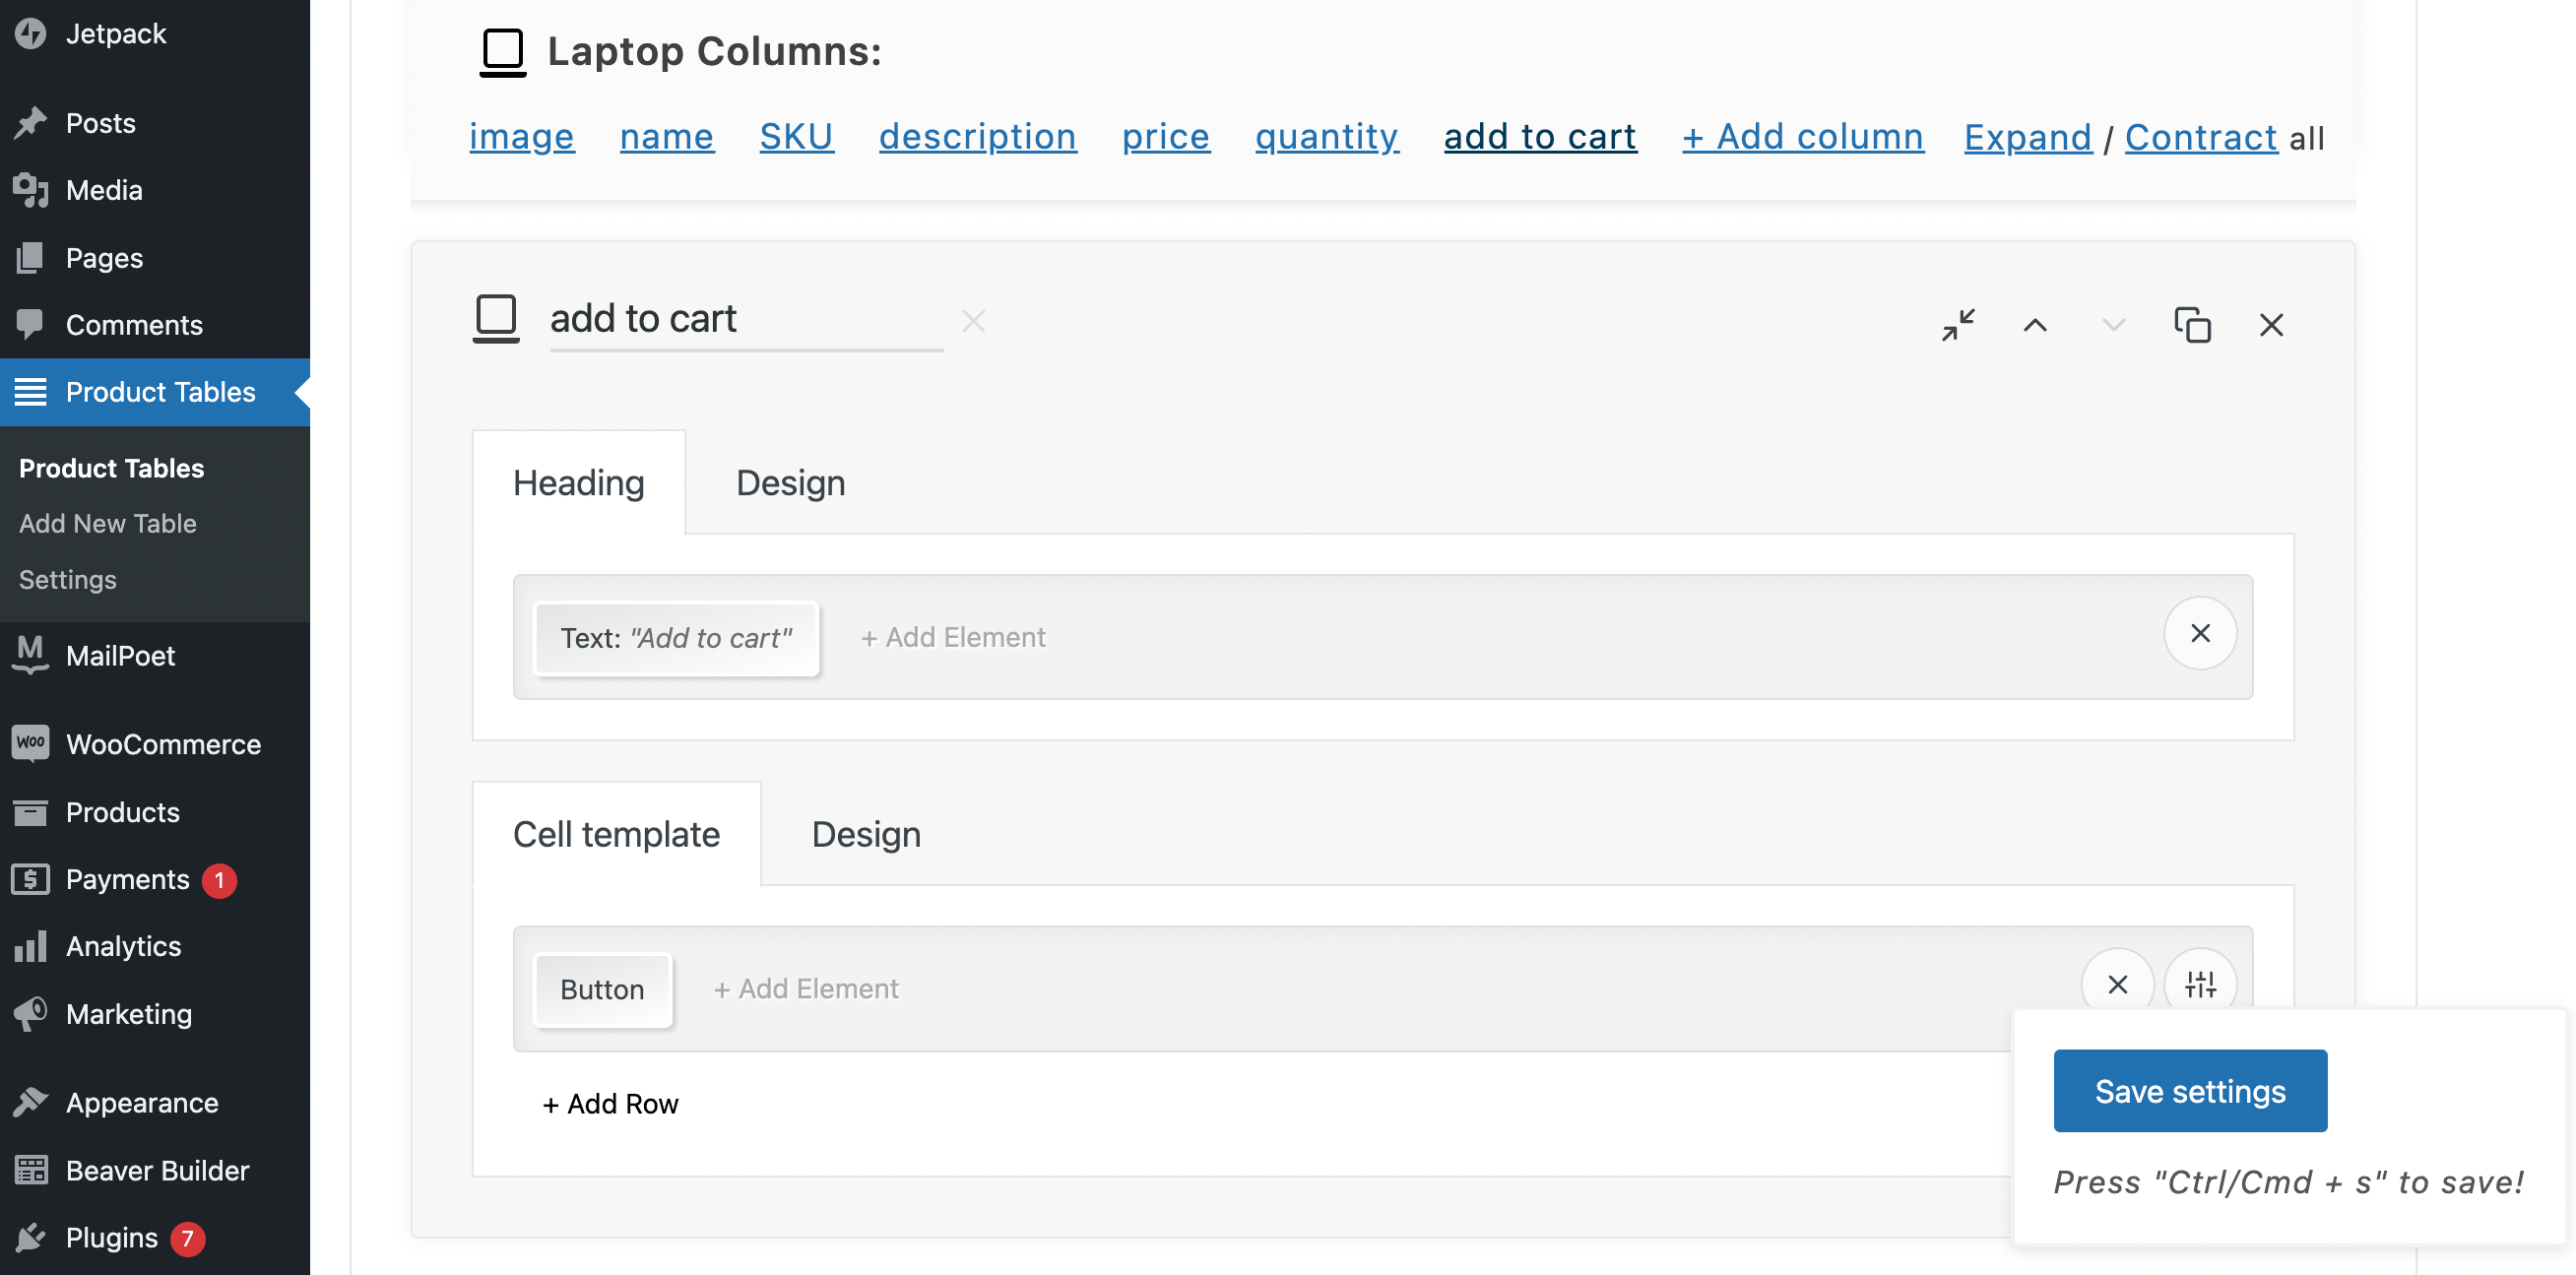
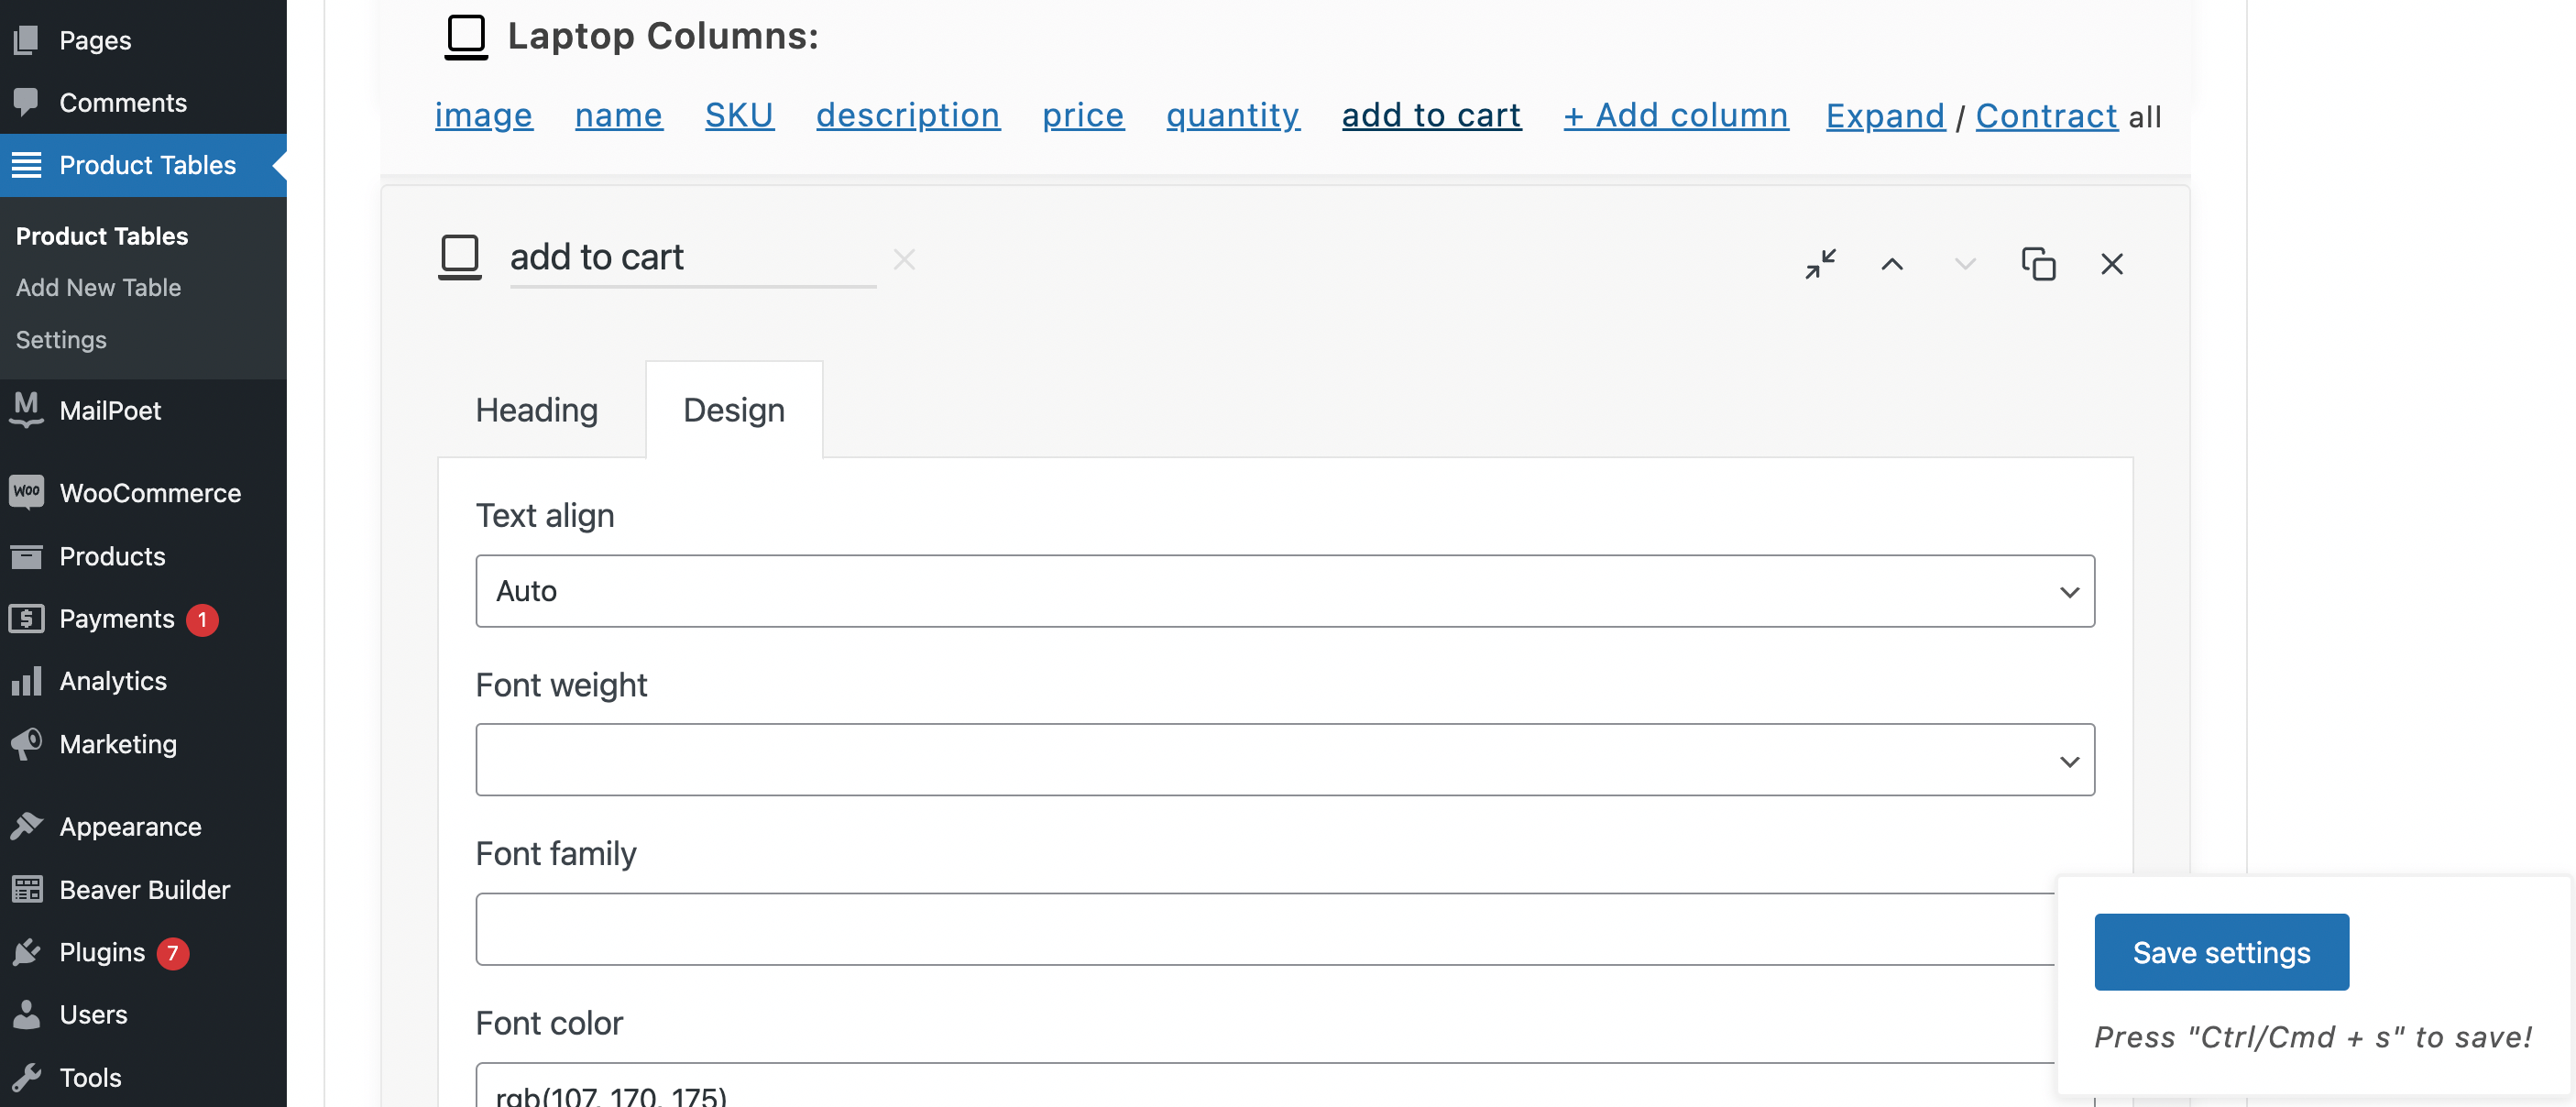
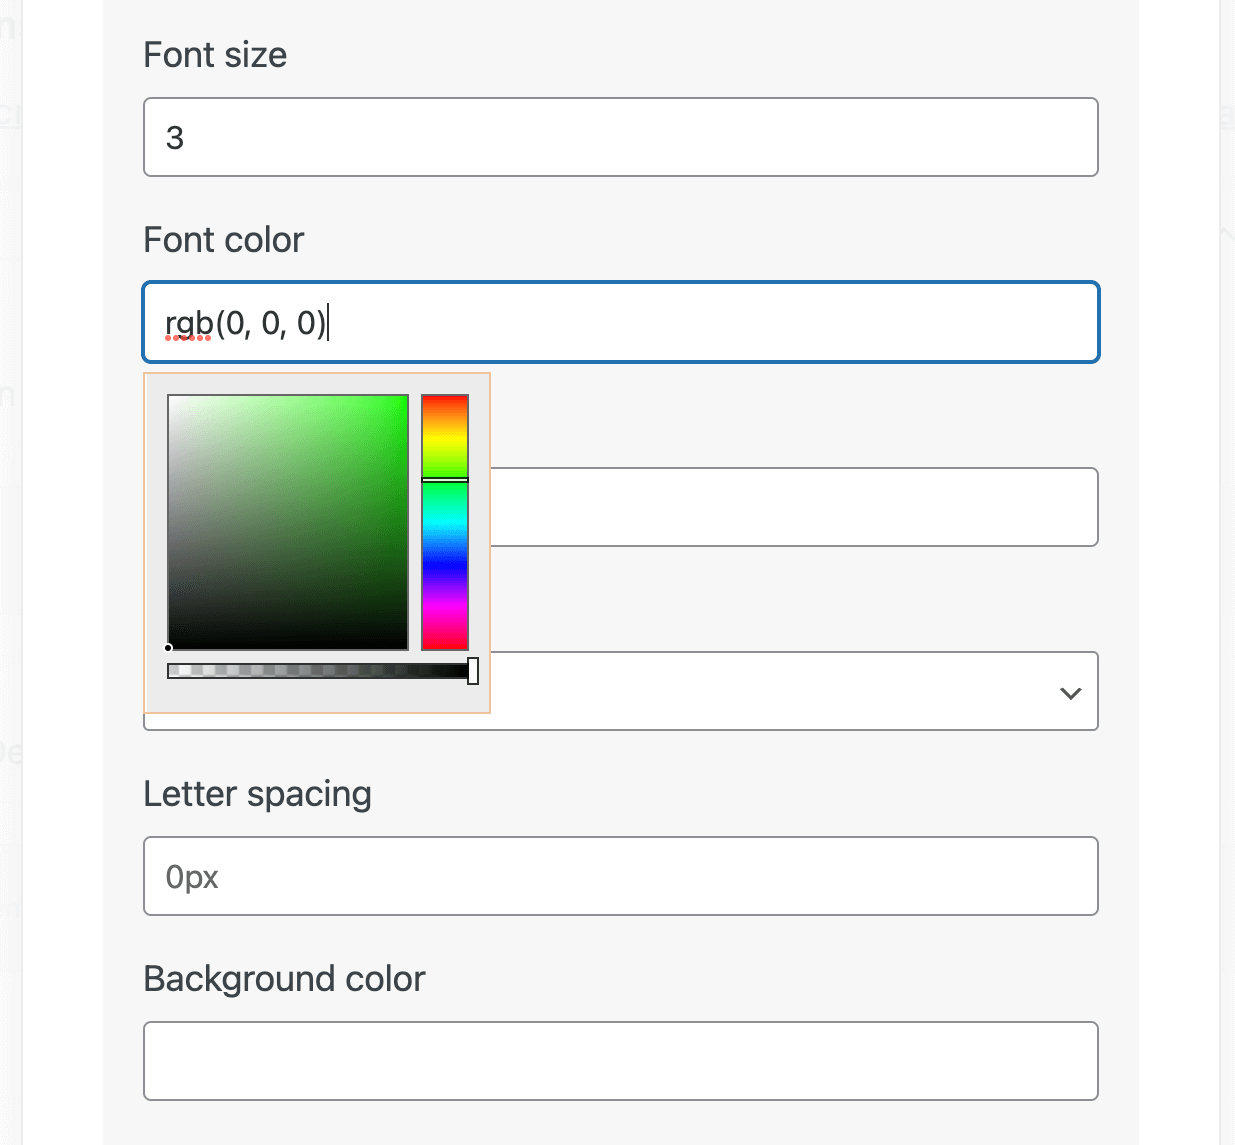
Then, click on Design. From here, you can edit the color, font weight and family, and background color:
You can also modify the add to cart button by selecting it in the top menu and clicking Button under Cell template:
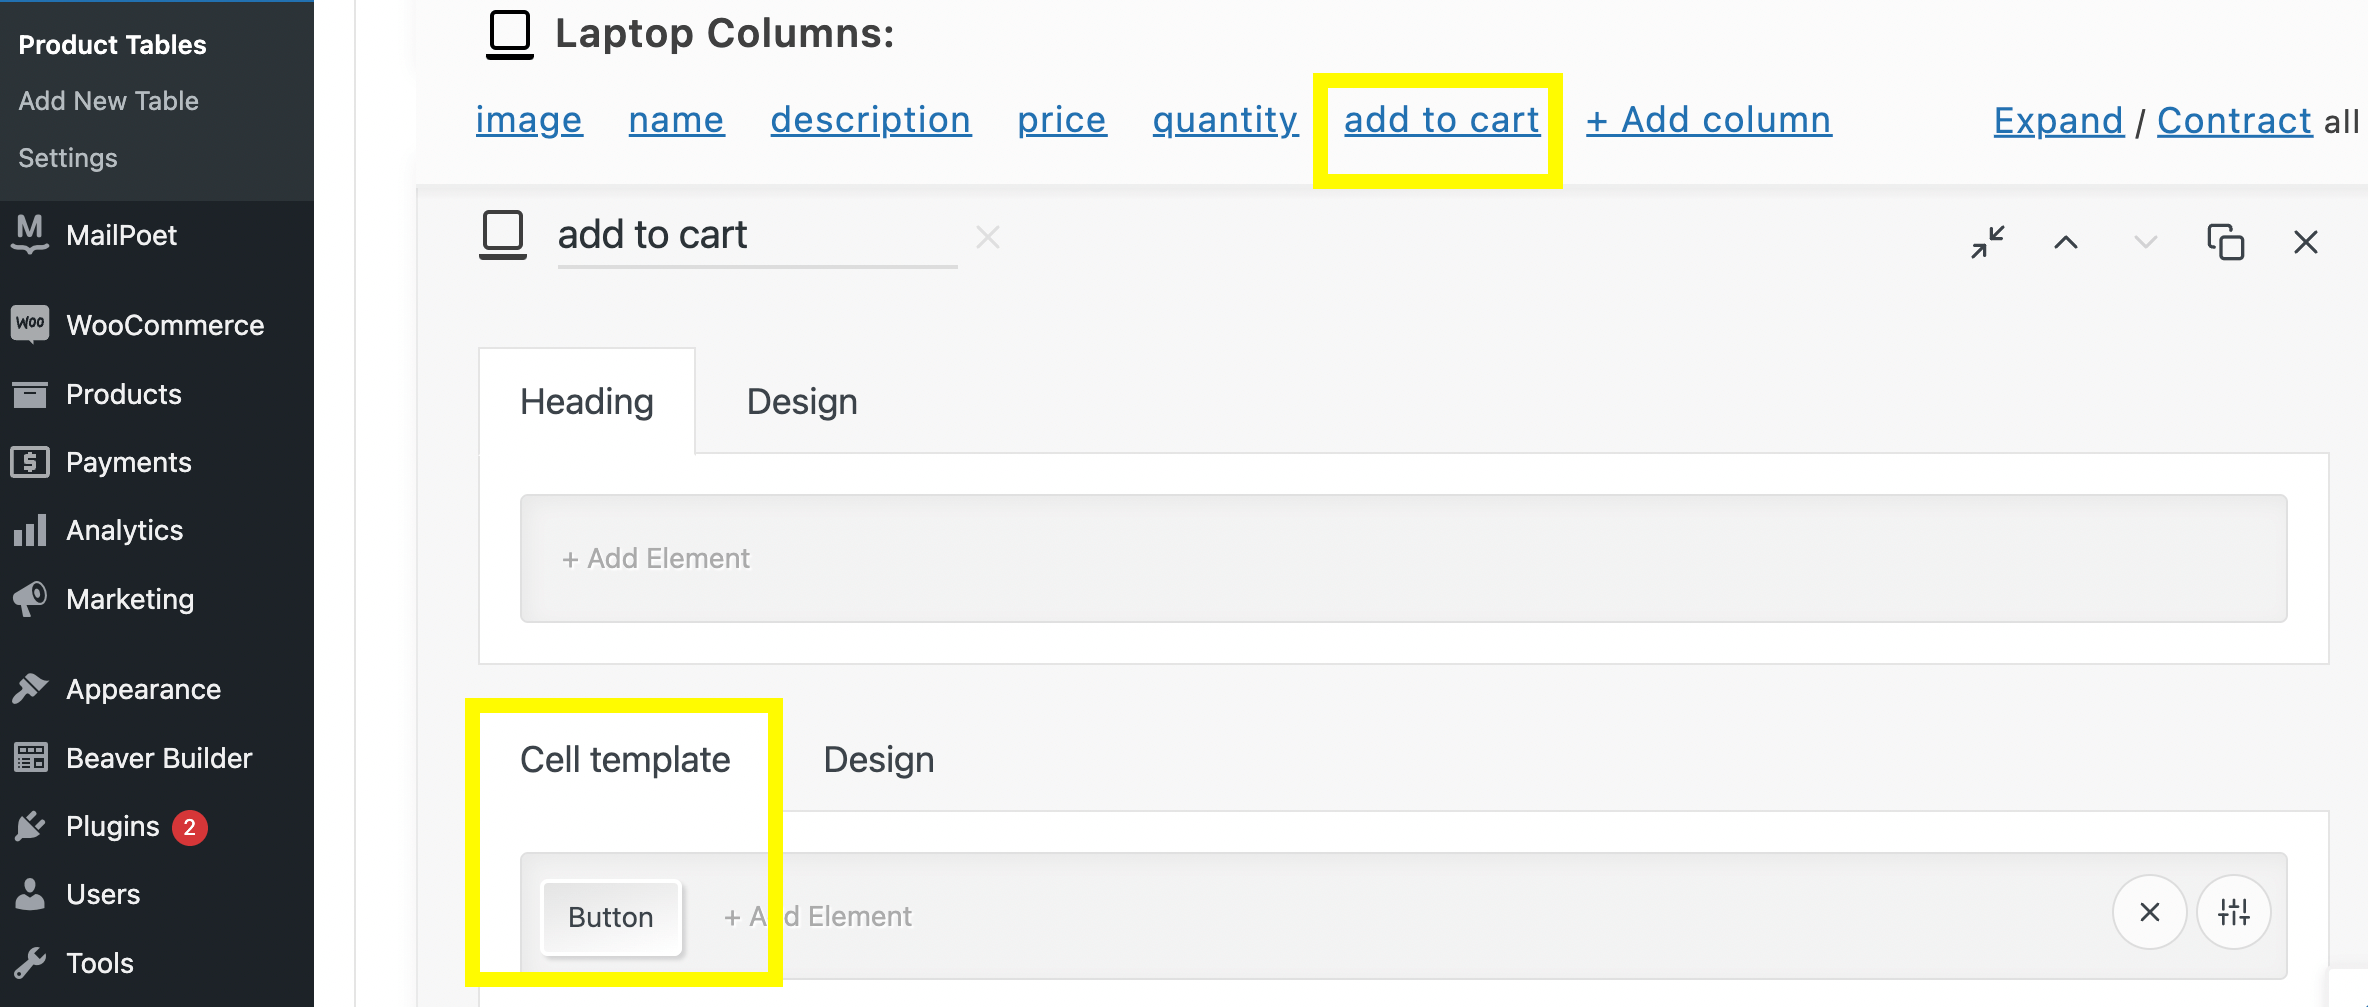
From here, you can create color, label, and “add to cart” actions, as well as the out-of-stock and Cart Badge selections. You can also customize the font style, color, weight, letter spacing, and border width:
Once you’ve made your changes, just click on Save settings and refresh your frontend preview tab:
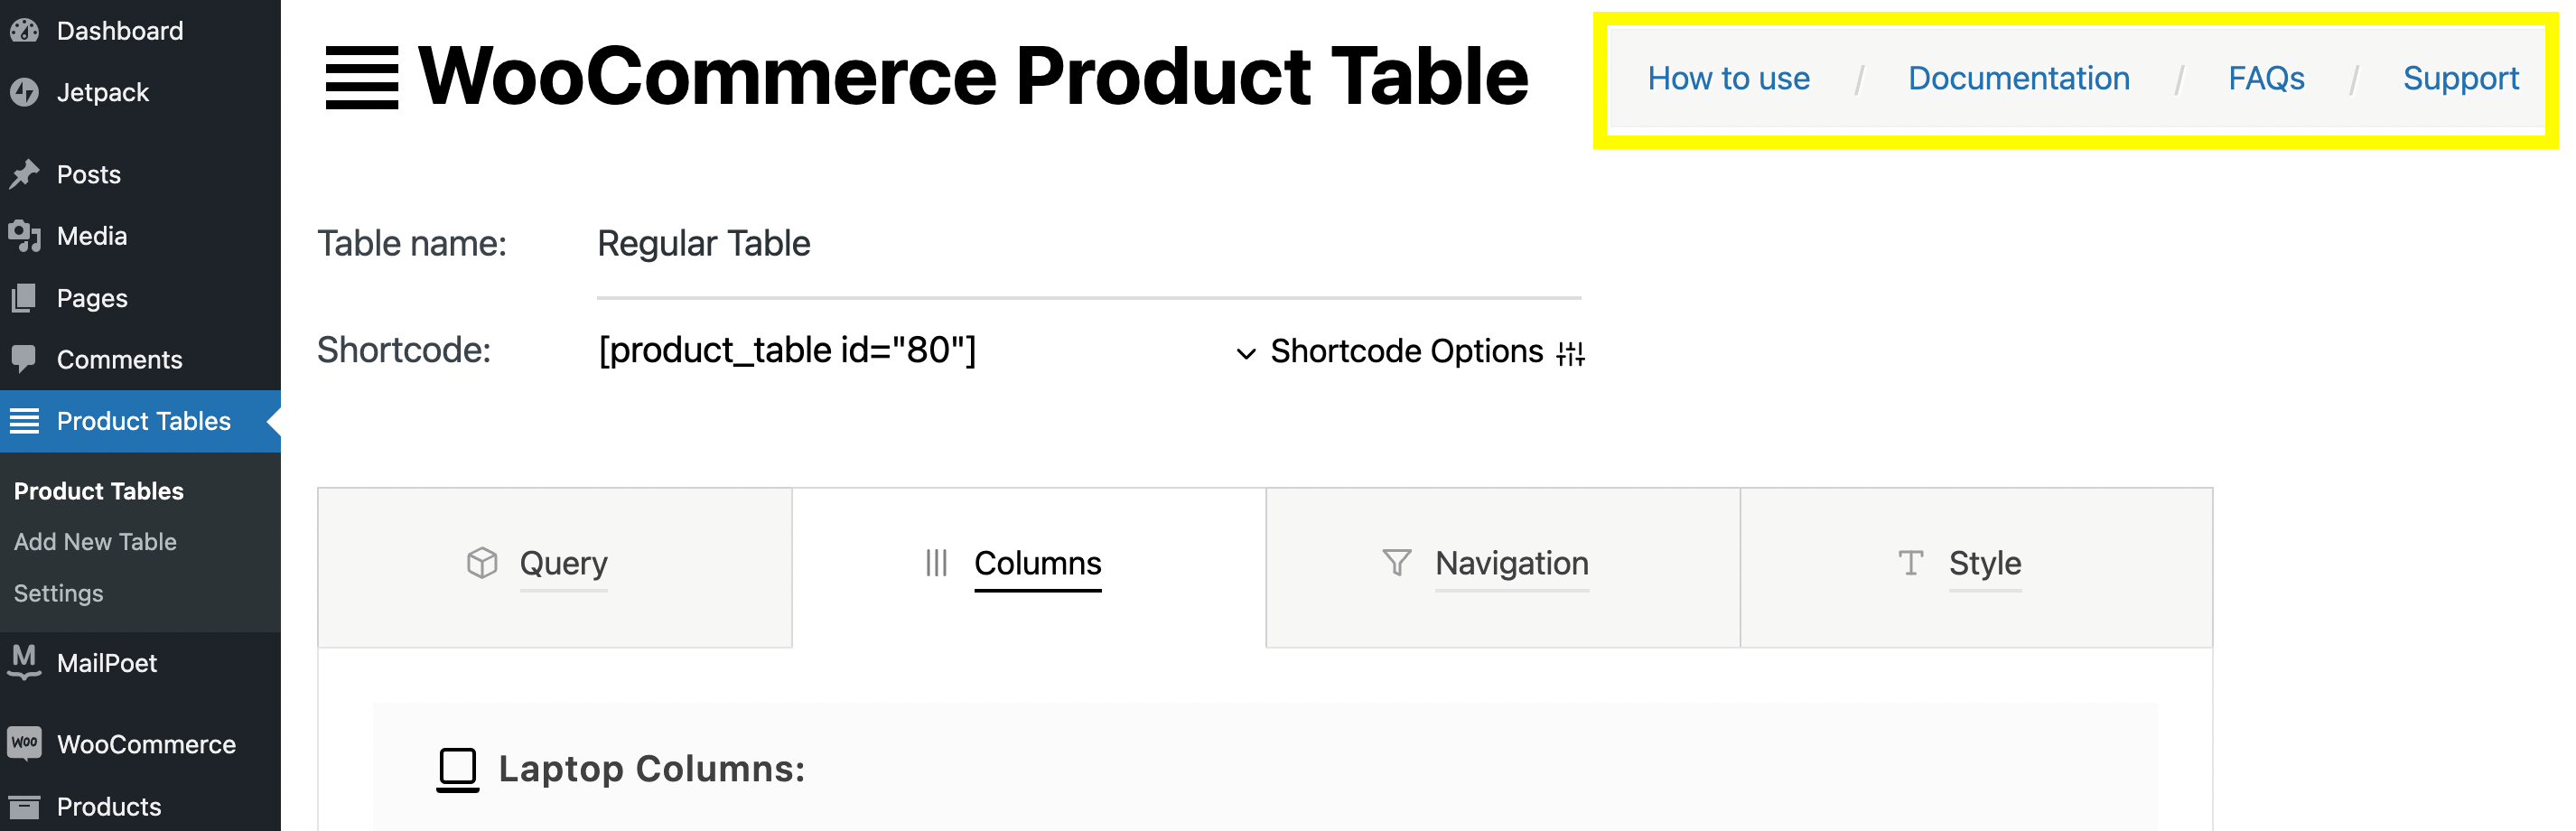
There are many other ways you can edit and customize your order form. If you want further guidance on how to take full advantage of the WooCommerce Product Table Lite plugin, you can check out the How to use, Documentation, FAQs, and Support pages at the top of the table:
There you have it! Now you should have a fully functional order form for your WooCommerce site.
Conclusion
Order forms can help streamline the shopping experience in your WooCommerce store. This display format may be especially beneficial if your customers need to buy in bulk. Ultimately, presenting your products in one place can lead to increased conversions for your e-commerce site.
To recap, here’s how to create a WooCommerce order form using the Beaver Builder page builder:
- Install and activate the WooCommerce Product Table Lite plugin.
- Create a table to display your products.
- Adjust the products in your query table using shortcodes.
- Edit your table by modifying columns and rows.
- Customize the details of your order form, such as buttons, image sizes, and font colors.
Do you have any questions about how to create an order form for your WooCommerce store? Let us know in the comments section below!
Our Newsletter
Our newsletter is personally written and sent out about once a month. It's not the least bit annoying or spammy.
We promise.
Try Beaver Builder Today

Related articles

How to Create a Mobile-First WooCommerce Store Using Beaver Builder
In today’s digital age, mobile shopping dominates online behavior. Recent studies show that over 70% of ecommerce traffic comes from…

How to Speed Up Your WooCommerce Store Built with Beaver Builder
Imagine a customer landing on your store, ready to buy, only to hit the back button because the page takes…
North Commerce Module for Beaver Builder
With all the excitement surrounding Beaver Builder 2.8 and our new Box Module, you might have missed the announcement of…
Join the community
We're here for you
There's a thriving community of builders and we'd love for you to join us. Come by and show off a project, network, or ask a question.
Since 2014
Build Your Website in Minutes, Not Months
Join Over 1 Million+ Websites Powered By Beaver Builder.