North Commerce Module for Beaver Builder
With all the excitement surrounding Beaver Builder 2.8 and our new Box Module, you might have missed the announcement of the North Commerce Module. This addition opens new doors for displaying North Commerce elements within your Beaver Builder layouts, offering a seamless experience for both you and your customers.
The North Commerce module is a Beaver Builder module that allows you to display North Commerce elements on your website. The module becomes available in the Beaver Builder UI when you have the North Commerce plugin installed.
In this article, you will learn how to use the North Commerce module to enhance your WordPress site and create a smooth shopping experience for your customers.
What is North Commerce?
Before diving into the details of the North Commerce Module, it’s essential to understand what North Commerce is and how it can help your e-commerce strategy:
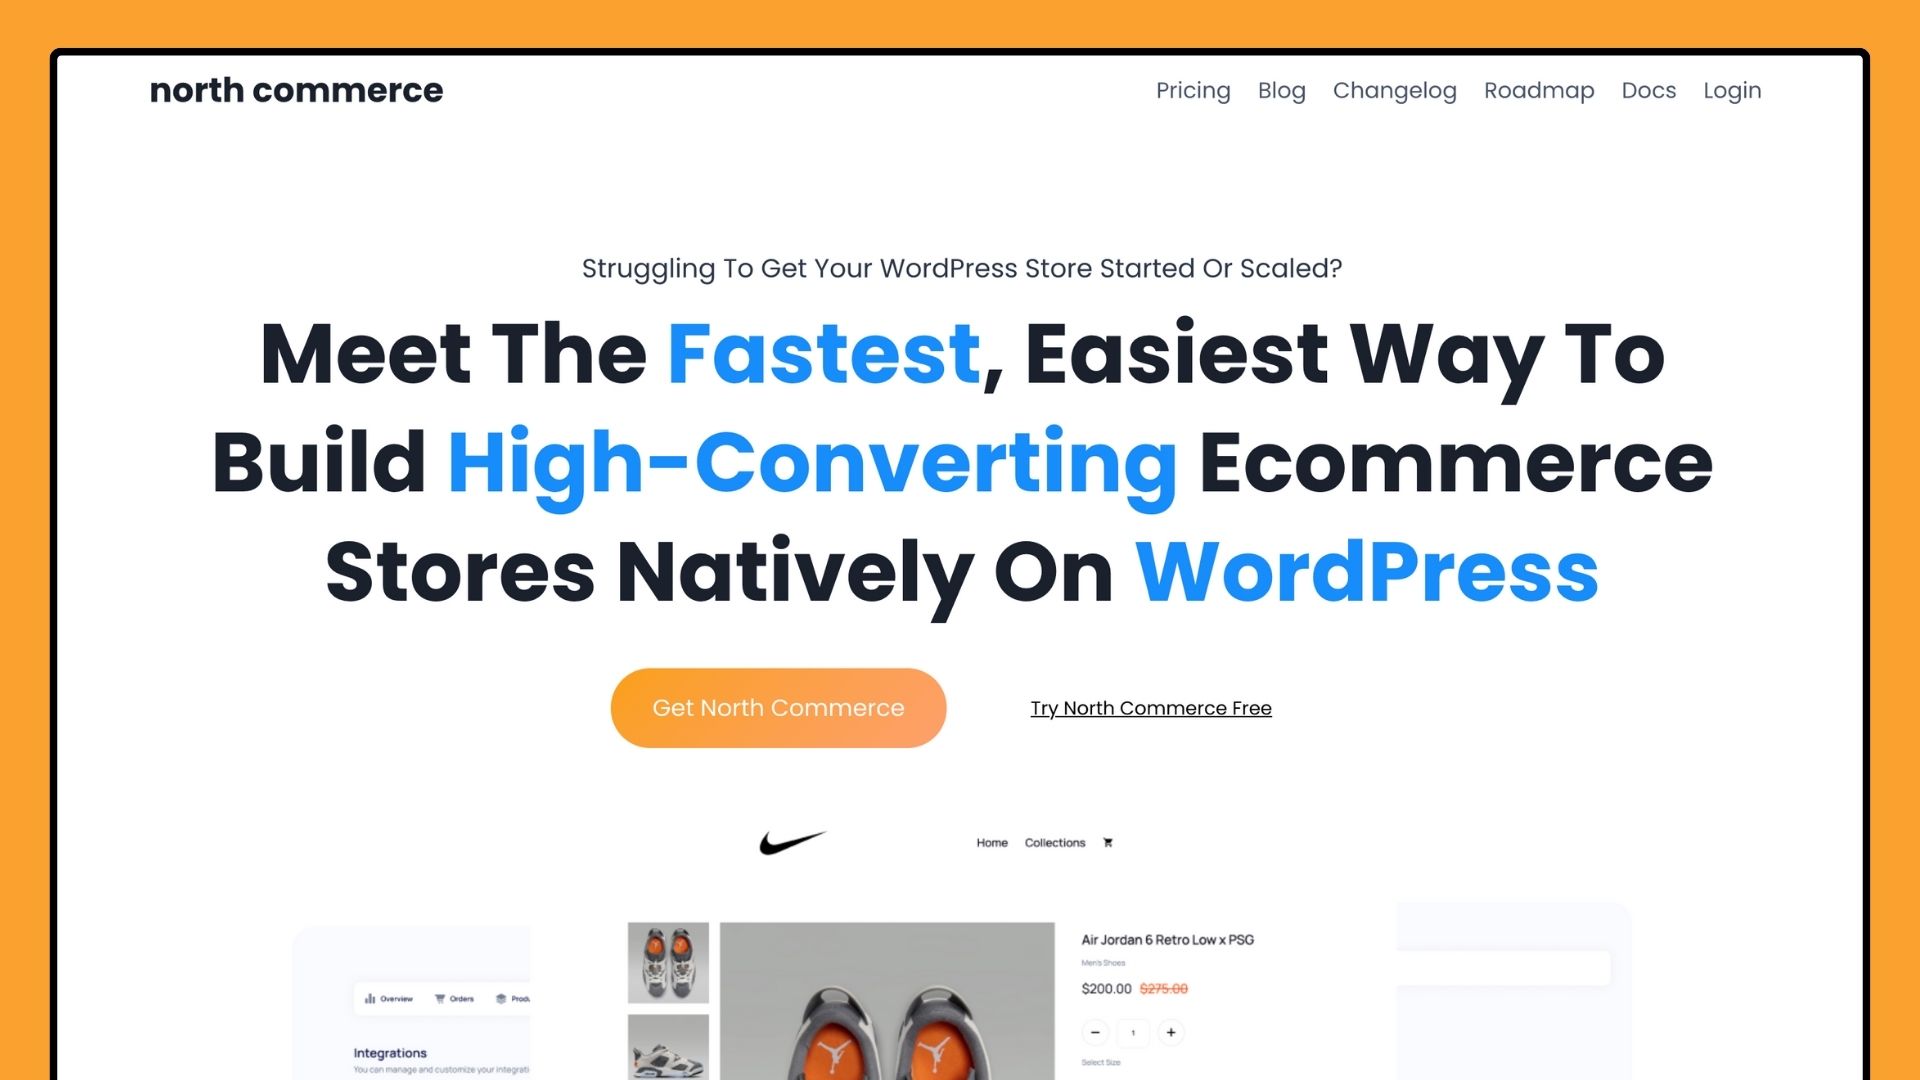
North Commerce is a new, all-in-one e-commerce plugin for WordPress, designed to help users create high-performing online stores and sales funnels.
It provides a range of features to build, manage, and optimize online shops, focusing on speed, ease of use, and customization.
Key Features of North Commerce:
- Custom Checkout Forms: Enhance the checkout process with customizable forms that include options for pre or post-order upsells, boosting your sales potential.
- All-in-One Solution: North Commerce provides essential e-commerce features such as subscription products, payment plans, advanced coupons, and review collection without the need for additional plugins.
- Optimized for Speed: The plugin is engineered for speed, ensuring fast load times and a smooth user experience, which is crucial for retaining customers and improving conversion rates.
North Commerce aims to provide a seamless and powerful e-commerce experience within WordPress. It simplifies building, managing, and optimizing online stores.
Introducing Beaver Builder’s North Commerce Module
The addition of the North Commerce Module allows you to display North Commerce elements directly within your Beaver Builder layouts, offering a more intuitive way to build e-commerce pages:
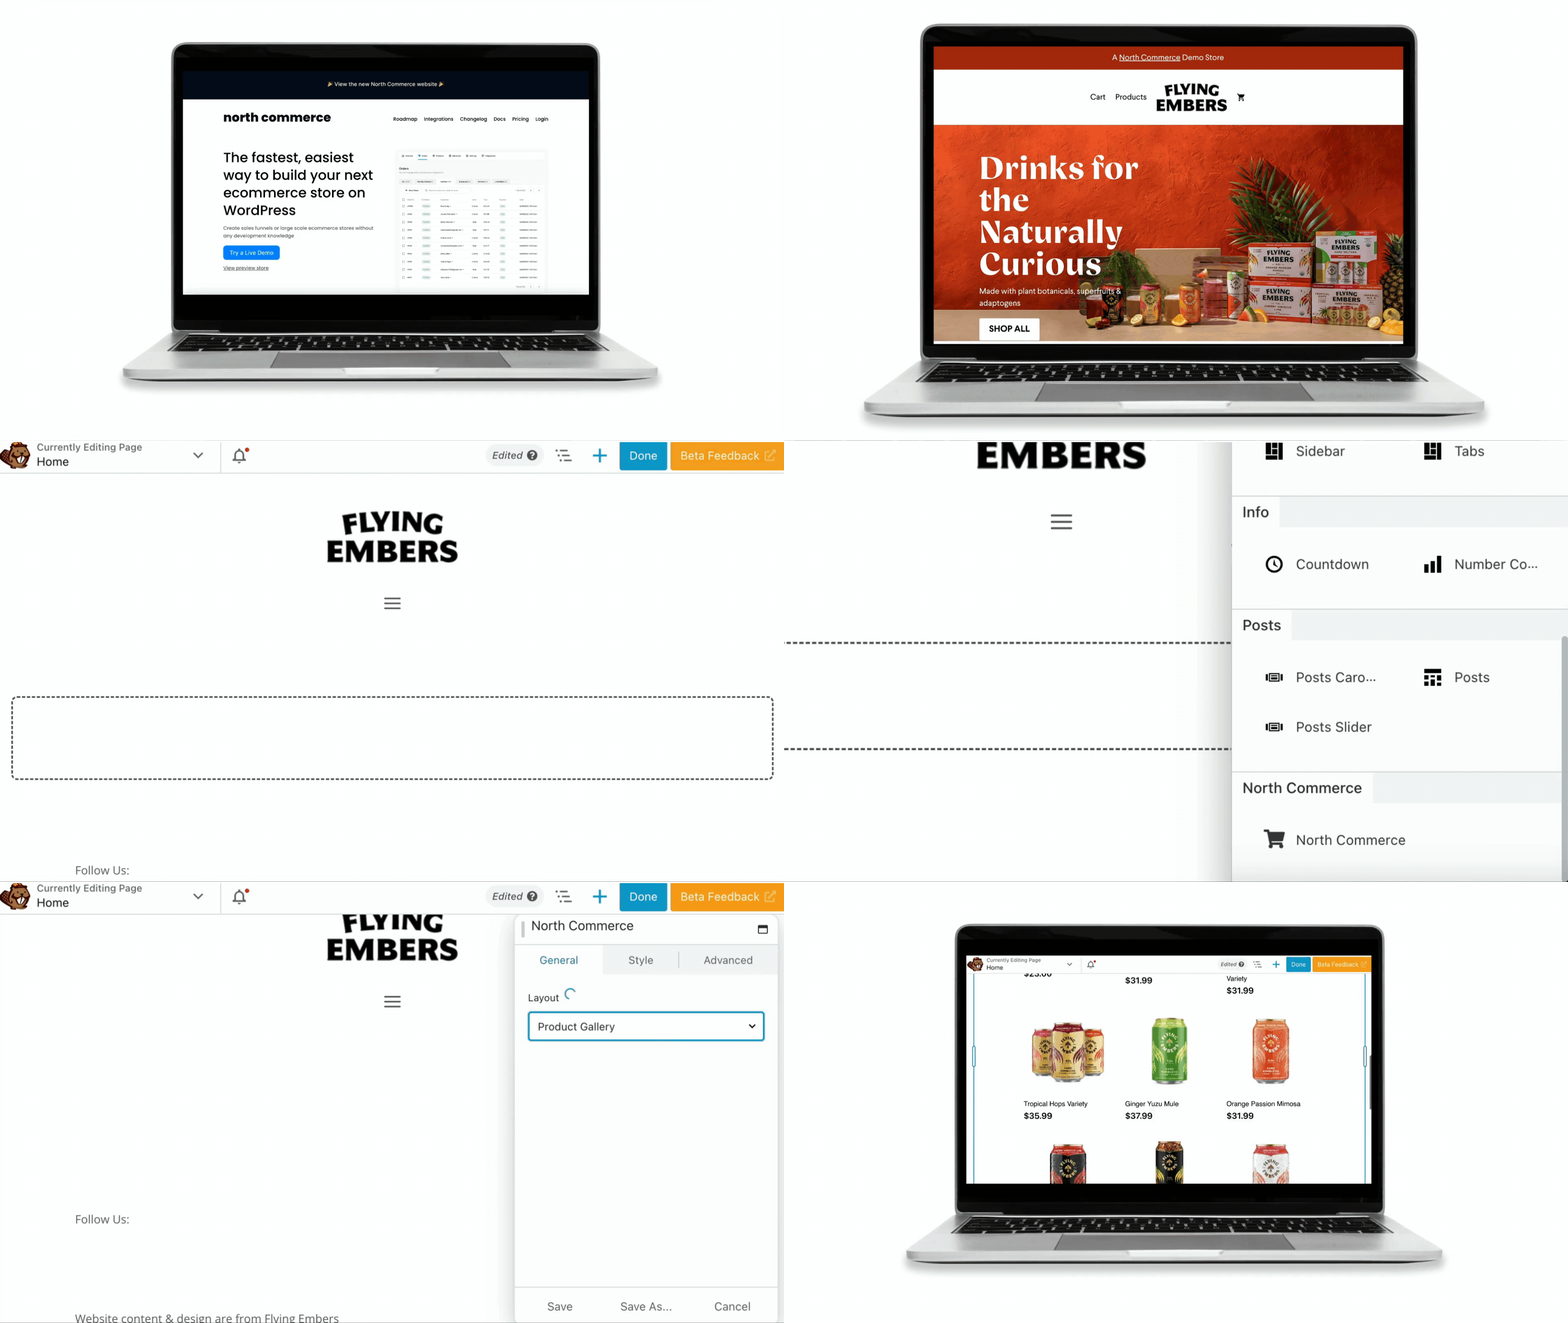
With this module, you no longer need to rely on shortcodes to display products. Simply drag and drop the North Commerce Module into your page and customize it with the familiar Beaver Builder interface.
Benefits of the North Commerce Module:
- Seamless Integration: The module works within with your existing Beaver Builder layouts, making it easy to add e-commerce functionality to your site without learning new tools.
- Enhanced Control: Gain more control over the appearance and functionality of your e-commerce pages, allowing for a more personalized shopping experience.
- Improved Workflow: Speed up your design process with pre-built layouts and customizable settings that eliminate the need for complex coding.
How to Use the Beaver Builder North Commerce Module
Creating a seamless e-commerce experience is crucial for the success of your online store. The North Commerce Module for Beaver Builder simplifies the process of building stunning, fully functional e-commerce websites.
Step 1: Install Required Plugins
Before getting started, make sure you have the following plugins installed and activated on your WordPress site:
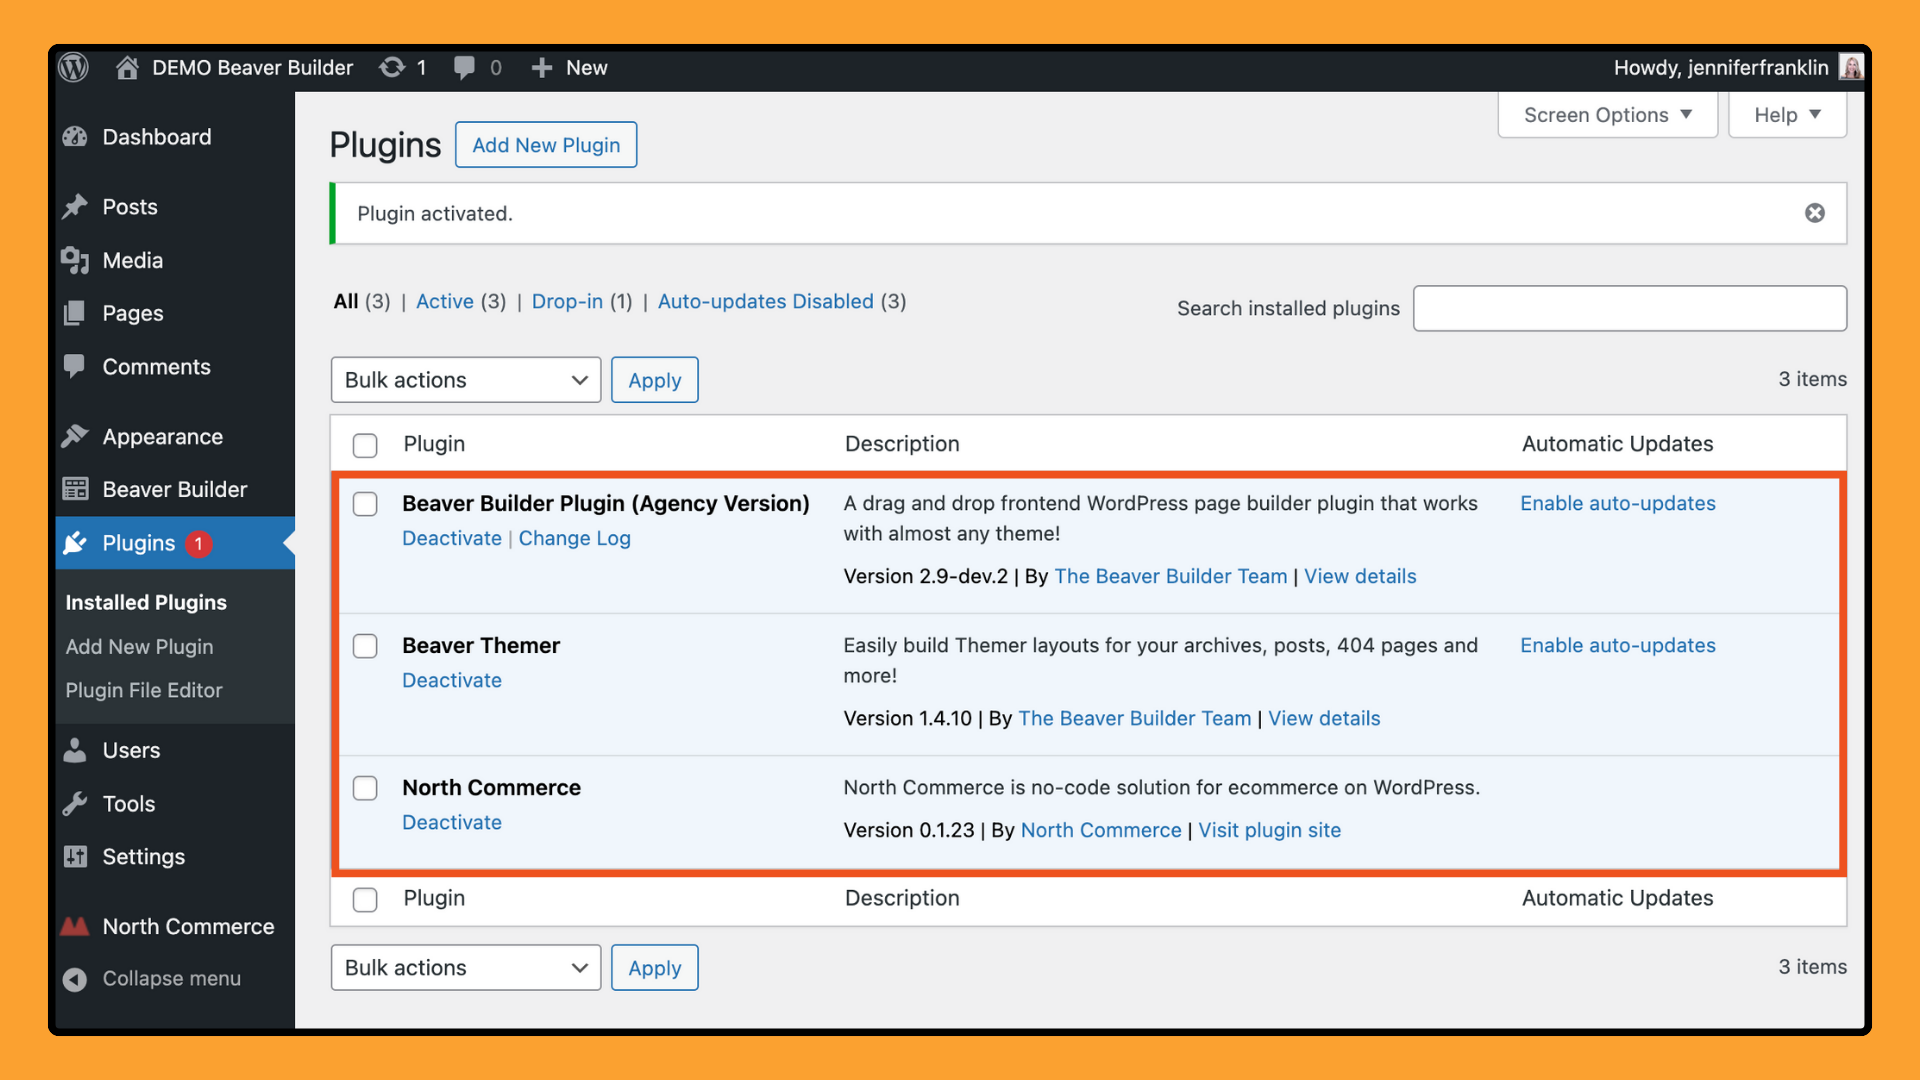
- Beaver Builder Page Builder: A flexible drag-and-drop page builder for WordPress that allows users to create custom layouts and designs without coding.
- North Commerce Plugin: An all-in-one WordPress e-commerce plugin designed to help users create high-performing online stores with a focus on speed and ease of use.
- Beaver Themer (optional): An theme builder for Beaver Builder that allows users to create custom headers, footers, product pages, and dynamic content layouts for their entire WordPress site.
Once these plugins are in place, you’re ready to begin crafting your e-commerce site.
Step 2: Add the North Commerce Module to Your Page
Navigate to the page where you want to add your e-commerce features and click to open the Beaver Builder editor. Then, click on the “+” icon in the top right corner to access the modules panel.
In the search bar, type “North Commerce” to quickly locate the module. Once you find it, simply drag and drop the North Commerce module to your desired location on the page:
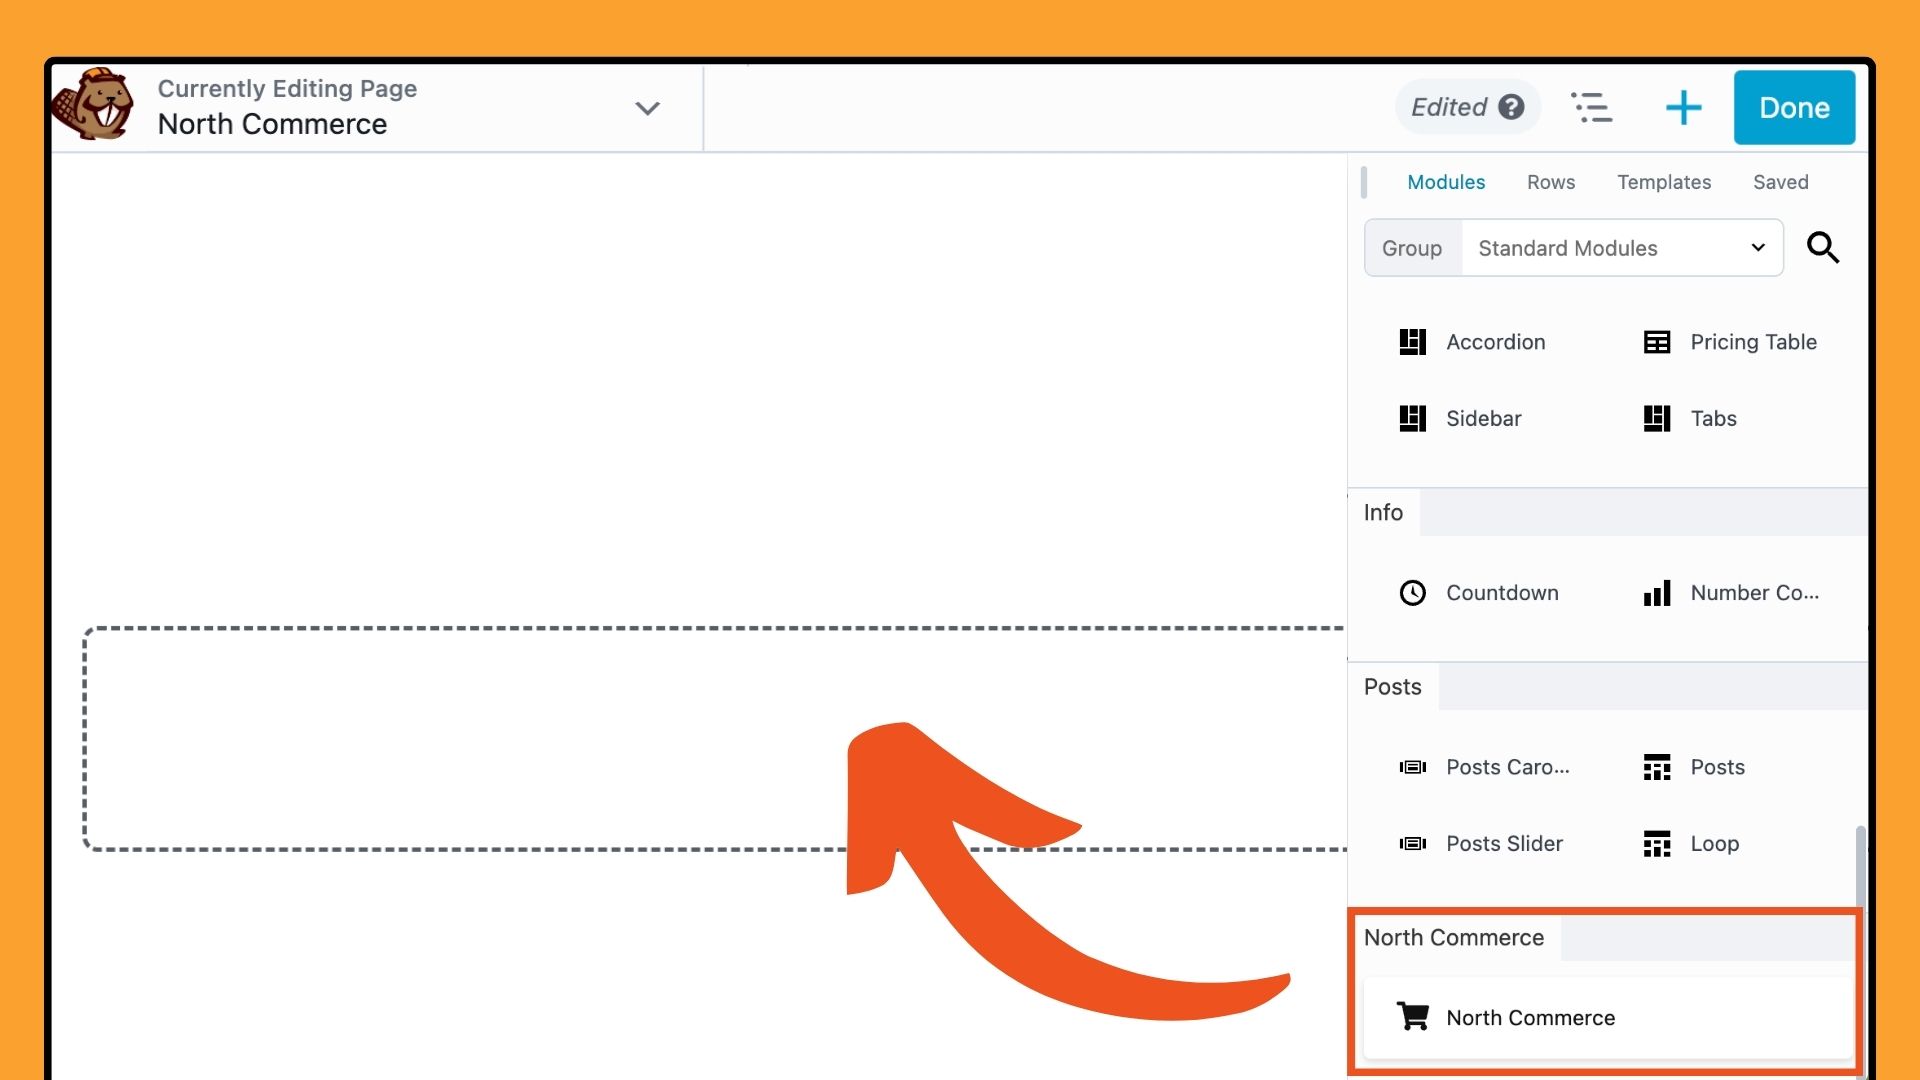
Adding the North Commerce module to your page is the first step in customizing your e-commerce experience. This gives you the flexibility to incorporate product displays, shopping cart elements, or checkout forms directly into your page’s design. This seamless integration ensures that your e-commerce features blend smoothly with the rest of your content, providing a cohesive and user-friendly experience for your visitors.
Step 3: Configure the North Commerce Module
The North Commerce Module offers a range of settings to help you customize the e-commerce elements on your site to match your brand and optimize the user experience.
Under the General tab, you can select from several layout options, each tailored to deliver a specific type of content or user interaction:
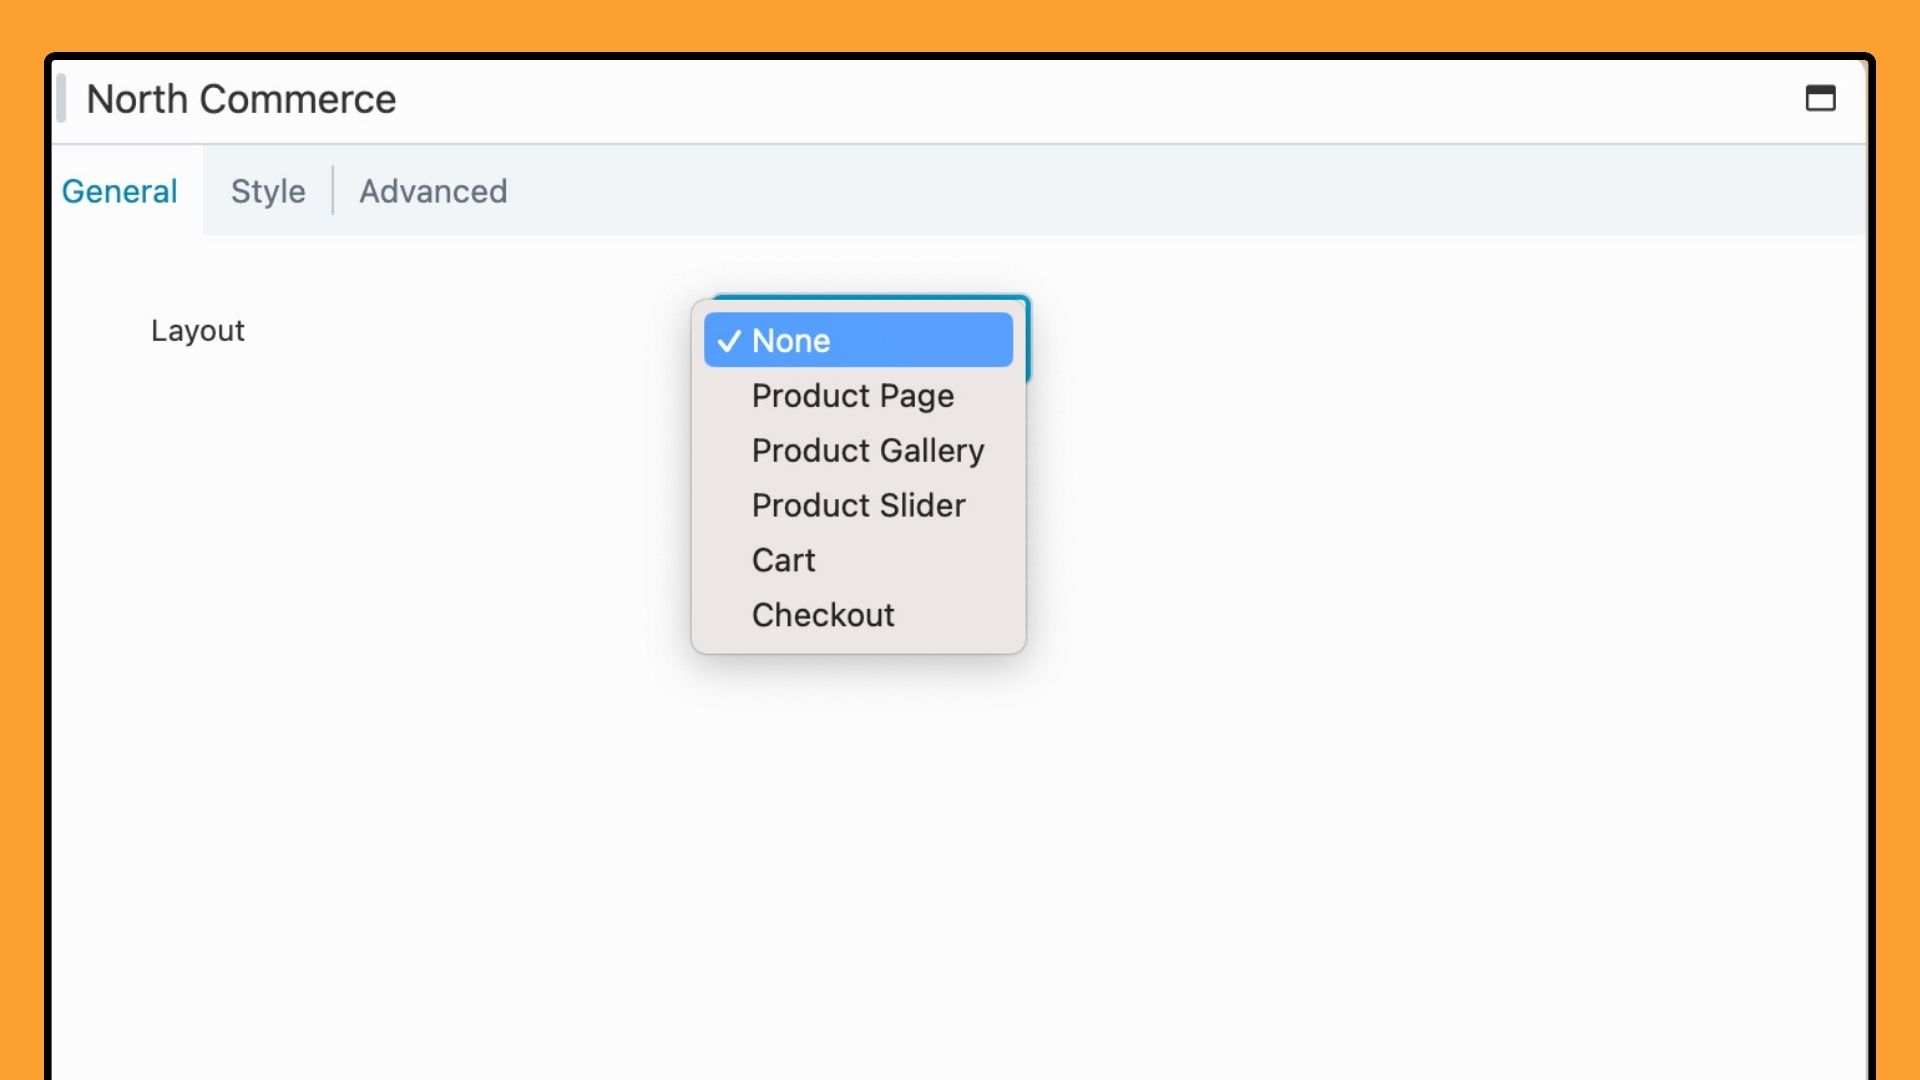
Each layout option caters to different aspects of your e-commerce store, helping you create a cohesive and user-friendly experience. Choose the layout that best fits your needs, whether to highlight products, streamline checkout, or enhance your site’s design.
Next, we’ll explore each layout option and provide guidance on configuring them for your store.
Product Page
The Product Page layout allows you to display a single product, just as you see on the default product page. This layout is perfect for highlighting a specific product anywhere on your site, such as on landing pages, blog posts, or custom sales pages.
Select Product Page from the Layout dropdown, then enter the Product Slug to showcase a specific item:
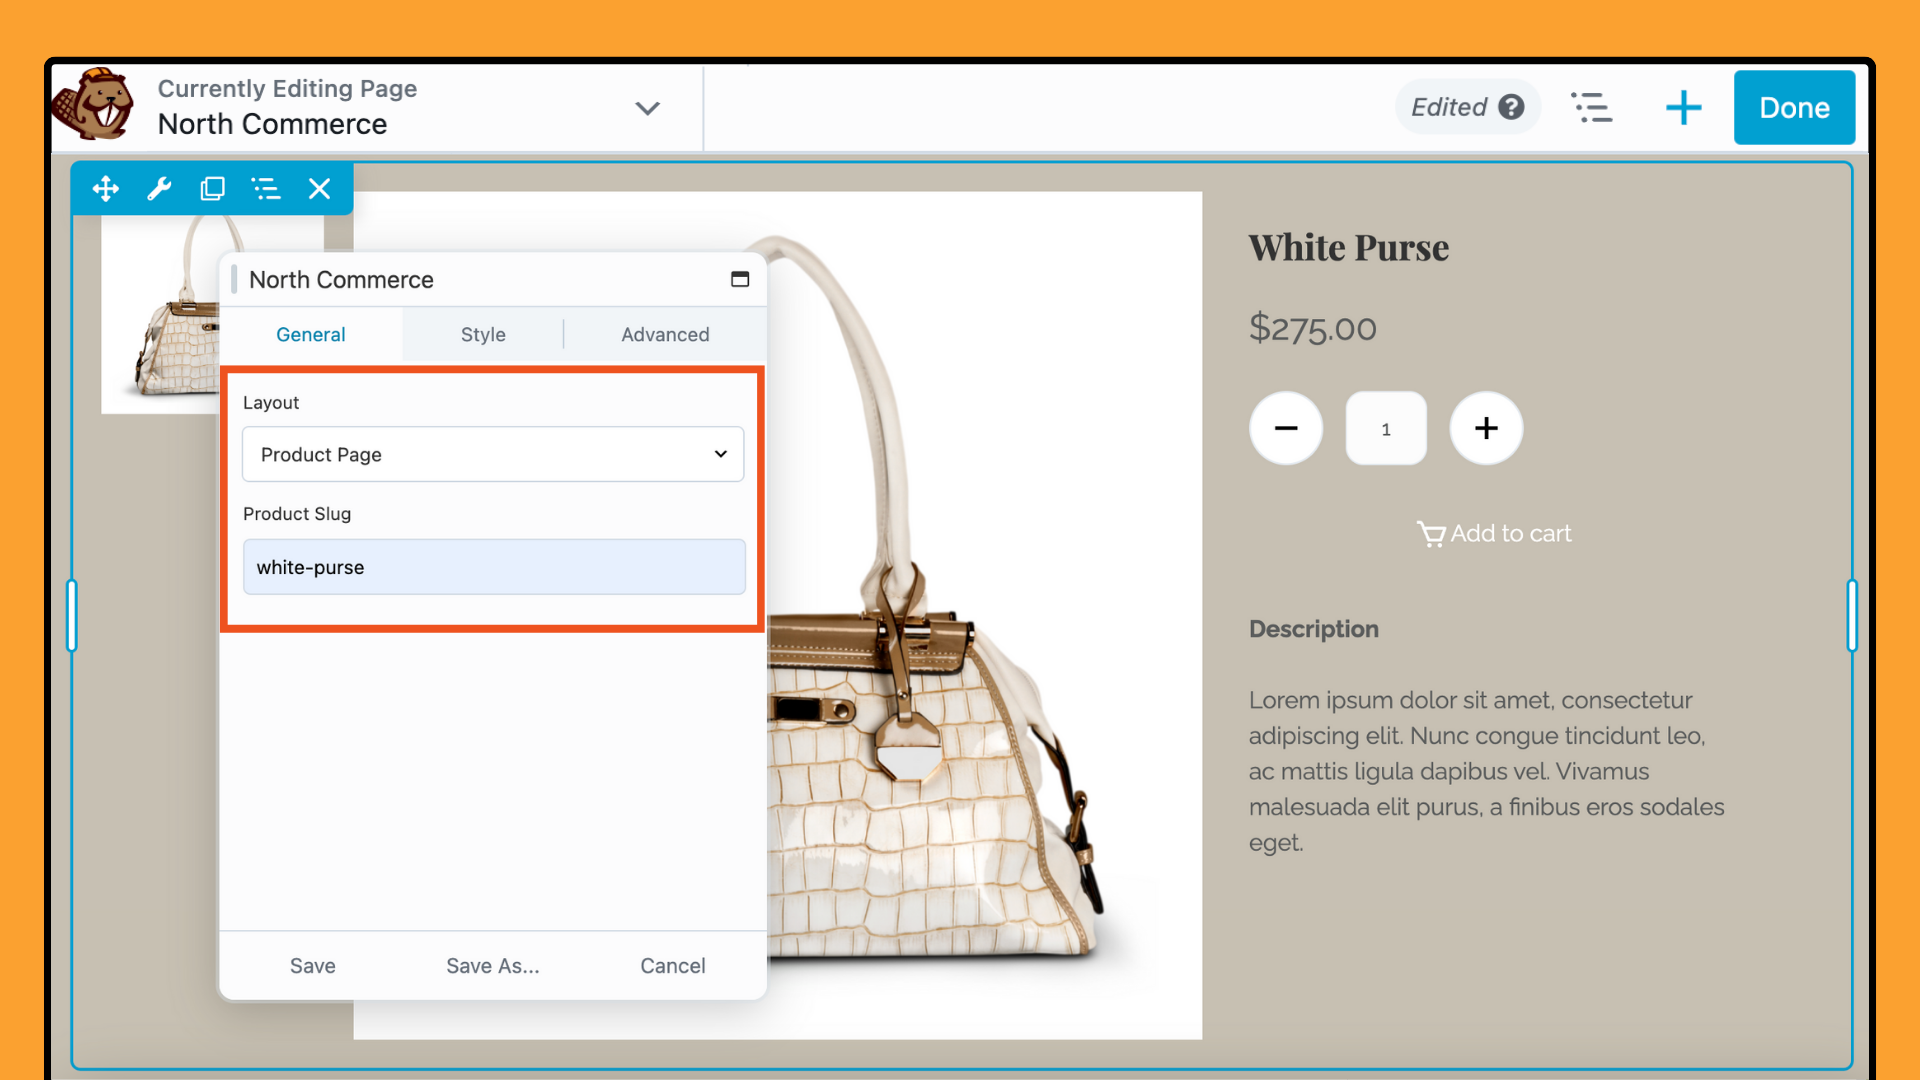
The product slug is a unique identifier for each product and ensures that the correct product information is displayed.
The Product Page layout gives visitors a detailed view of a product, including images, description, price, and options. It’s perfect for promoting featured products, running marketing campaigns, or creating custom showcases that blend with your site’s design.
Furthermore, by placing a product’s full details in strategic locations, you can effectively drive interest and boost conversions.
Product Gallery
To showcase multiple products on a single page, use the Product Gallery option in the North Commerce module. This feature is perfect for creating visually appealing category pages or product overviews.
Select Product Gallery from the Layout field:
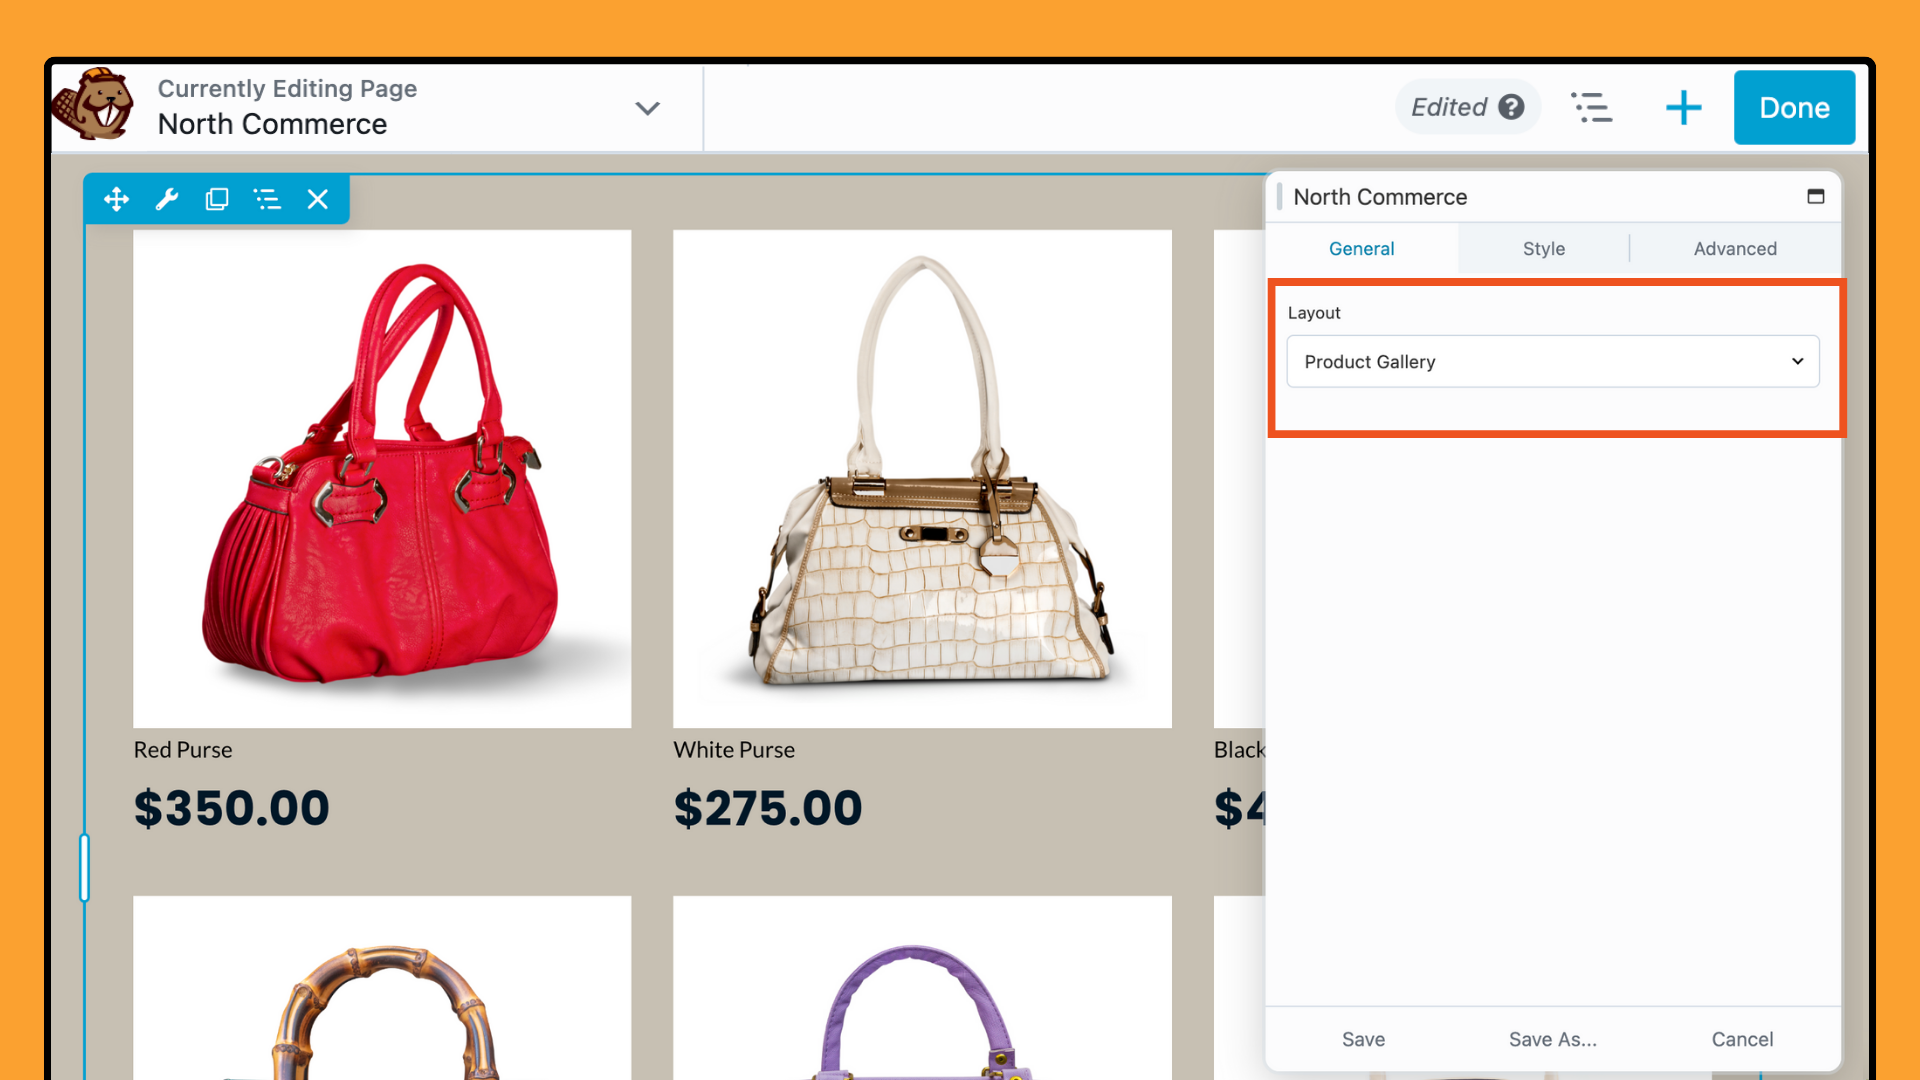
The Product Gallery layout displays your products in a clean, organized grid, typically with three columns. Each product is highlighted with its featured image, title, and price, providing visitors with a clear and attractive presentation of your offerings.
The Product Gallery layout engages customers by displaying multiple products at once. This makes it easier for them to find what they’re looking for.
Product Slider
The Product Slider option enables you to showcase a selection of your North Commerce products in a dynamic, interactive slider. This feature is ideal for making your products more visible and engaging to your site visitors.
To create a product slider, select Product Slider from the Layout field dropdown menu:
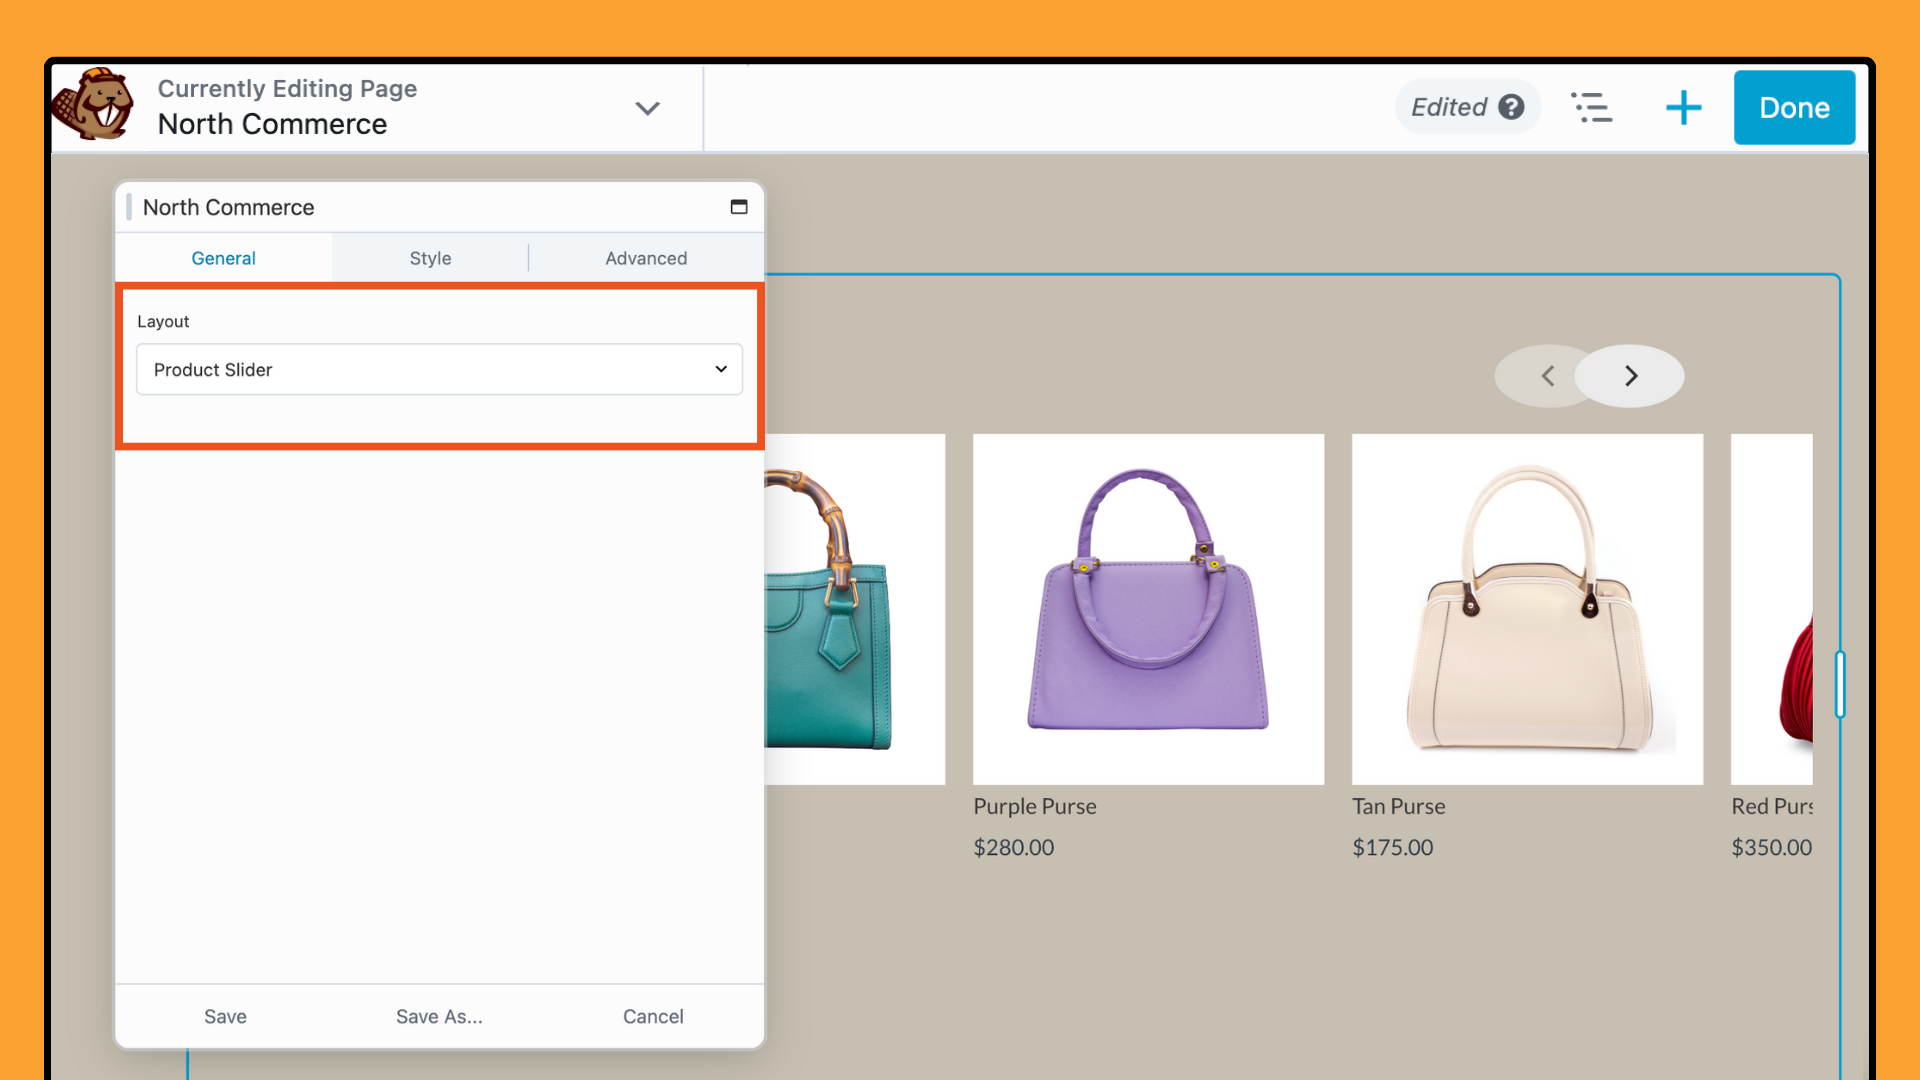
Using a product slider on key pages, such as your homepage or landing pages, can effectively draw attention to your products and encourage users to explore your offerings, ultimately driving higher engagement and sales.
Checkout
The North Commerce module allows you to embed the checkout process directly within any page or post. This option gives you flexibility in how and where you guide customers through your sales process. By displaying the North Commerce checkout form on custom pages, you can streamline the purchasing process and reduce friction for your customers.
To use this feature, simply select Checkout in the Layout field:
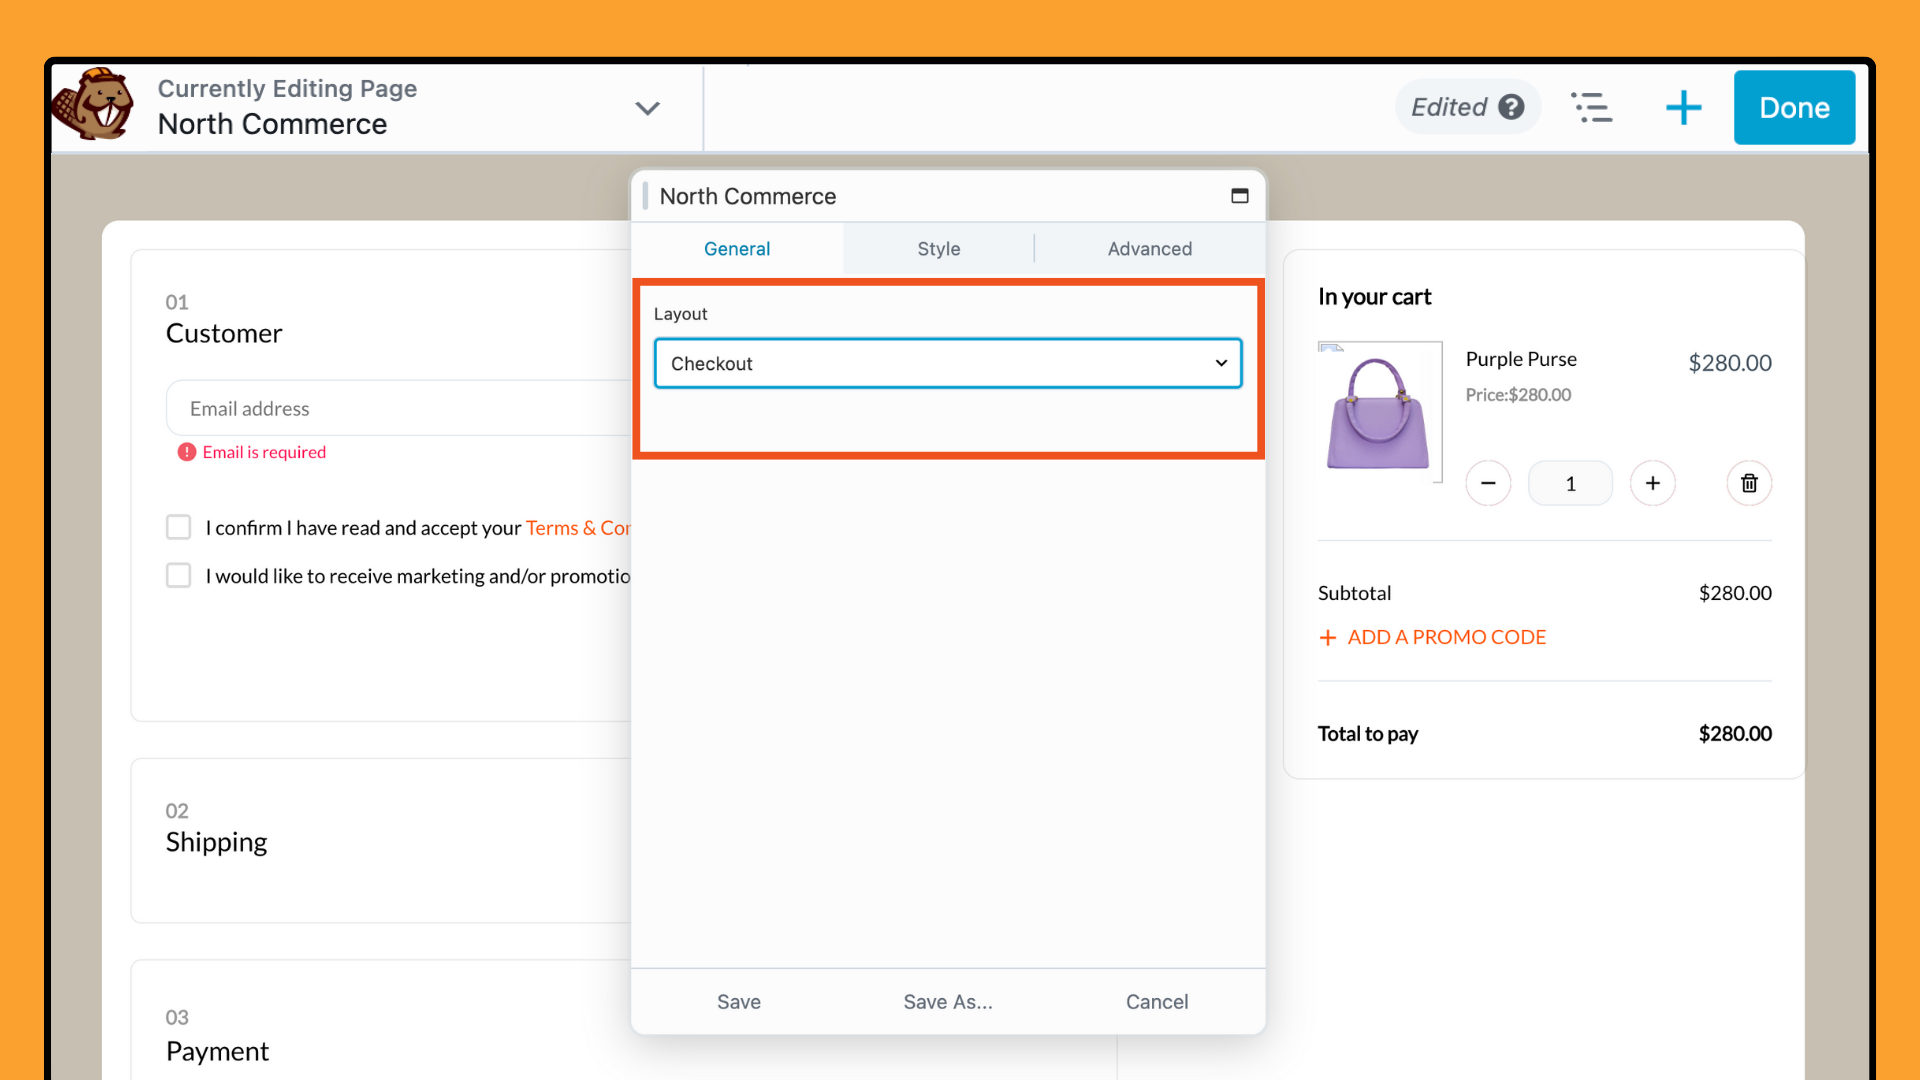
This will automatically display the checkout form, making it easier for customers to complete their purchase without having to navigate away from the current page.
Integrating the checkout form into strategic locations, such as landing pages or sales funnels, can significantly enhance the user experience and improve conversion rates.
Cart
Lastly, the North Commerce module allows you to display the contents of the user’s cart. This feature is particularly useful when building sales pages and funnels, as it enables customers to easily review their selections before checking out.
To use this feature, select Cart in the Layout field. You’ll see a display similar to the example screenshot below:
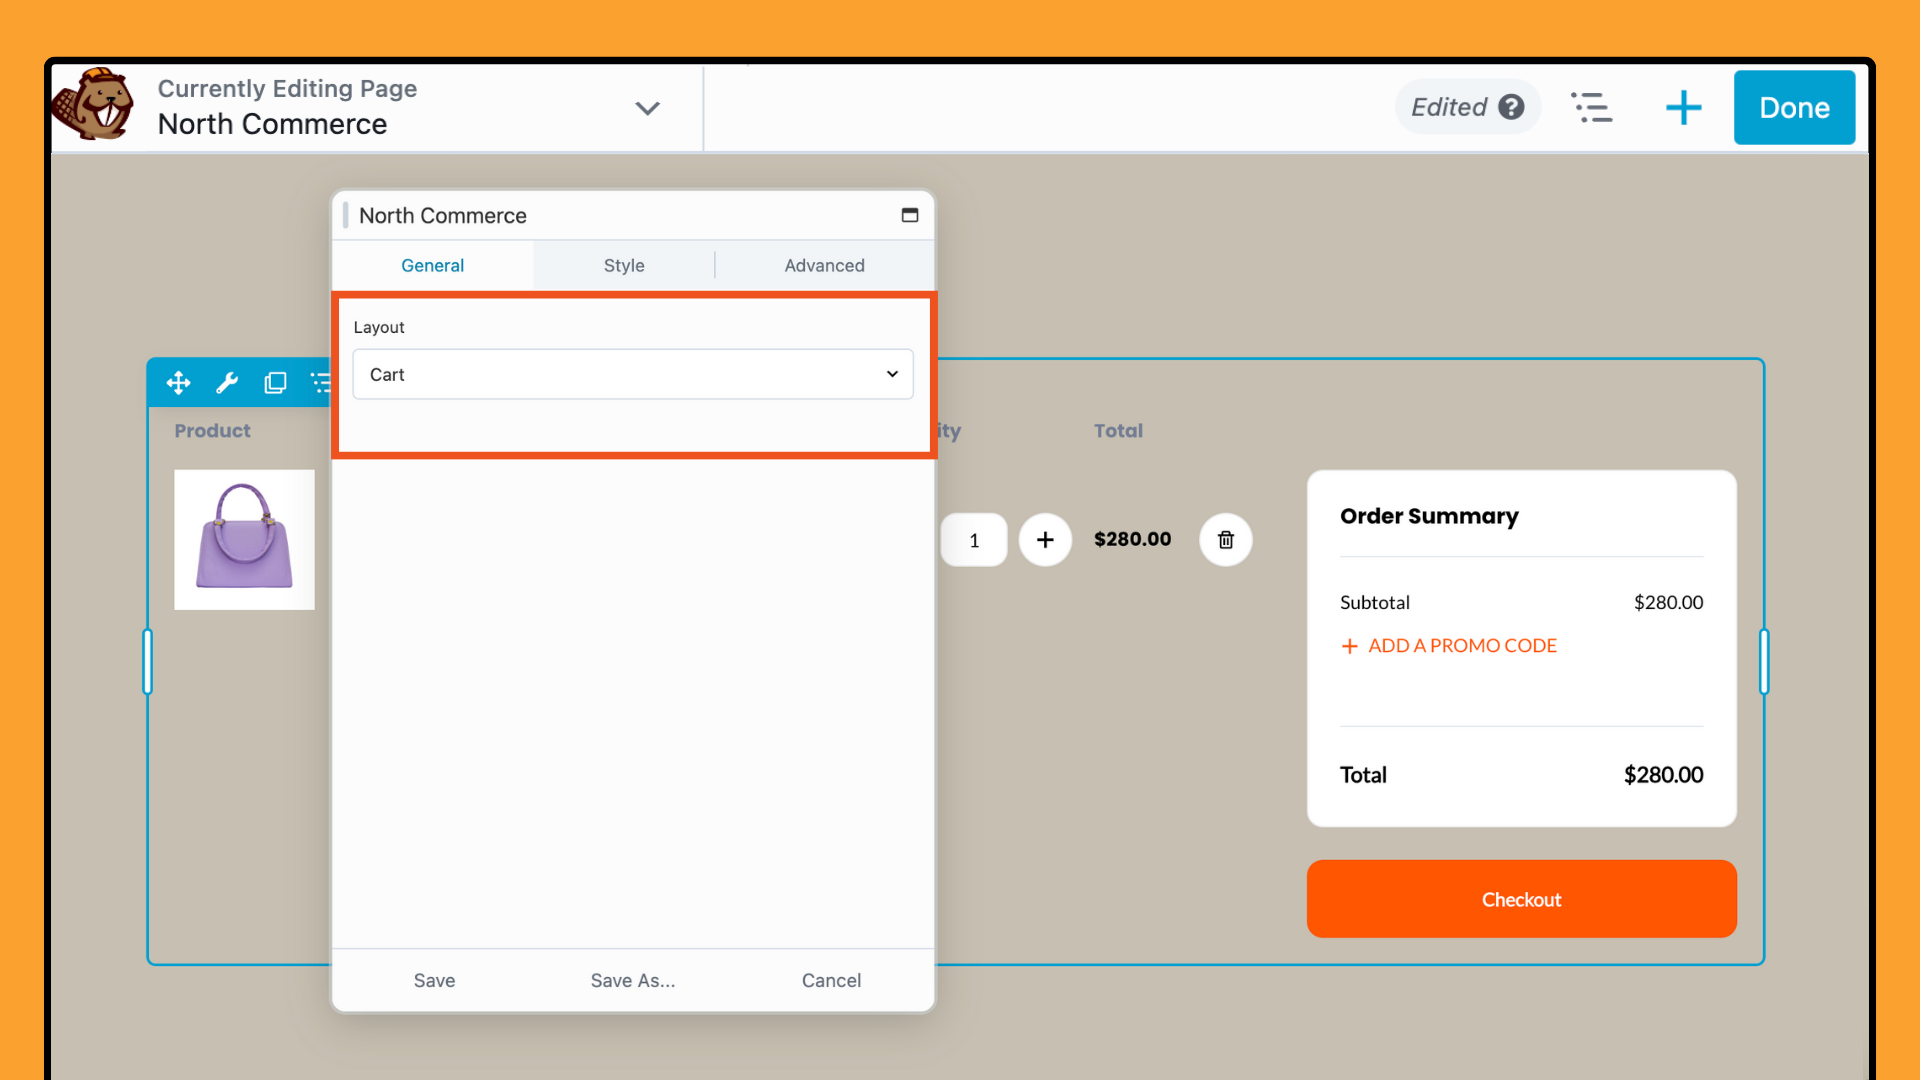
Keep reading to learn how to customize the default North Commerce Cart and Checkout pages to better fit your needs.
Step 4: Customize Your Layout
After selecting your layout, you can further personalize the appearance of your e-commerce elements.
In the settings popup, click on the Style tab:
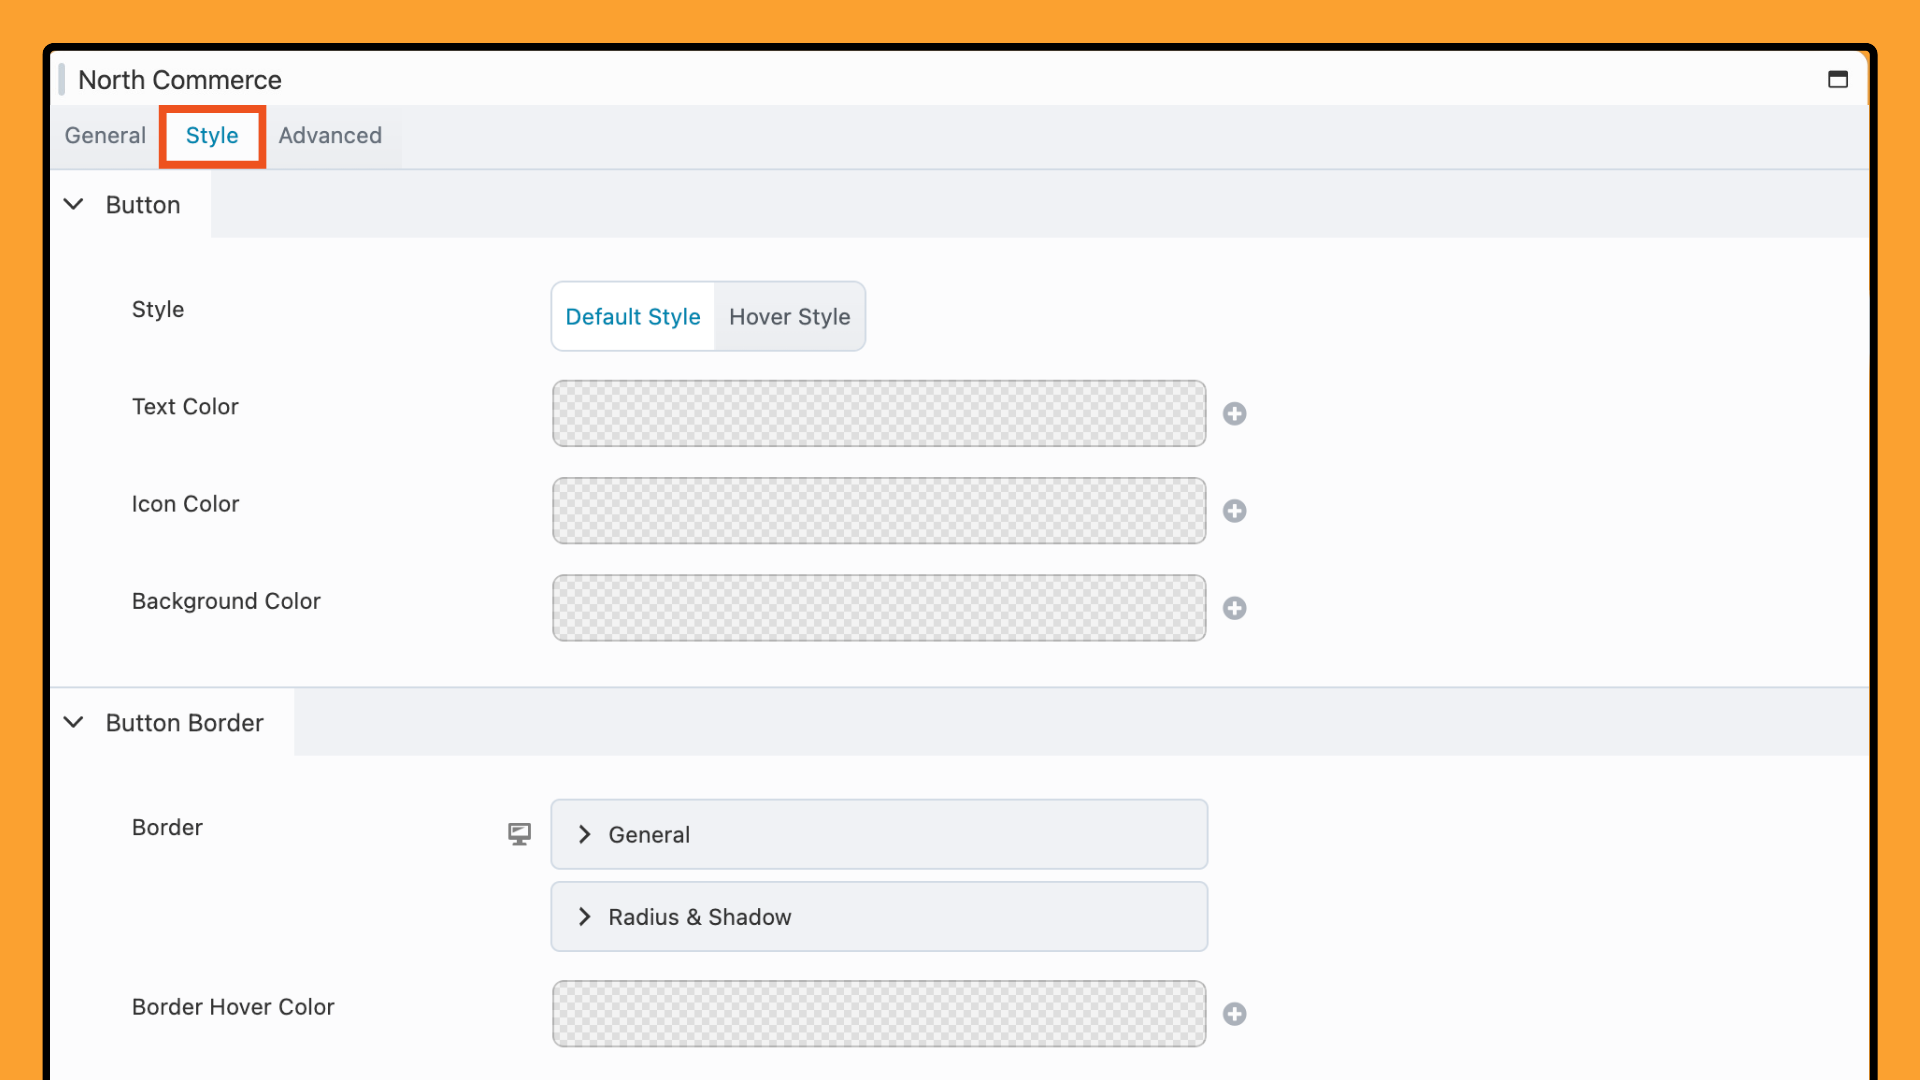
These options allow you to create buttons that match your brand and enhance the overall design of your e-commerce site:
Button Style
- Default Style: Set the appearance of the button in its normal state.
- Hover Style: Customize the button’s appearance when hovered over.
Color Options
- Text Color: Choose the color for the button text.
- Icon Color: Set the color for the button icon.
- Background Color: Select the background color of the button.
Button Border
- Border Styling: Customize the button’s border.
- Hover Border: Style the button border for the hover state.
Next, navigate to the Advanced tab:
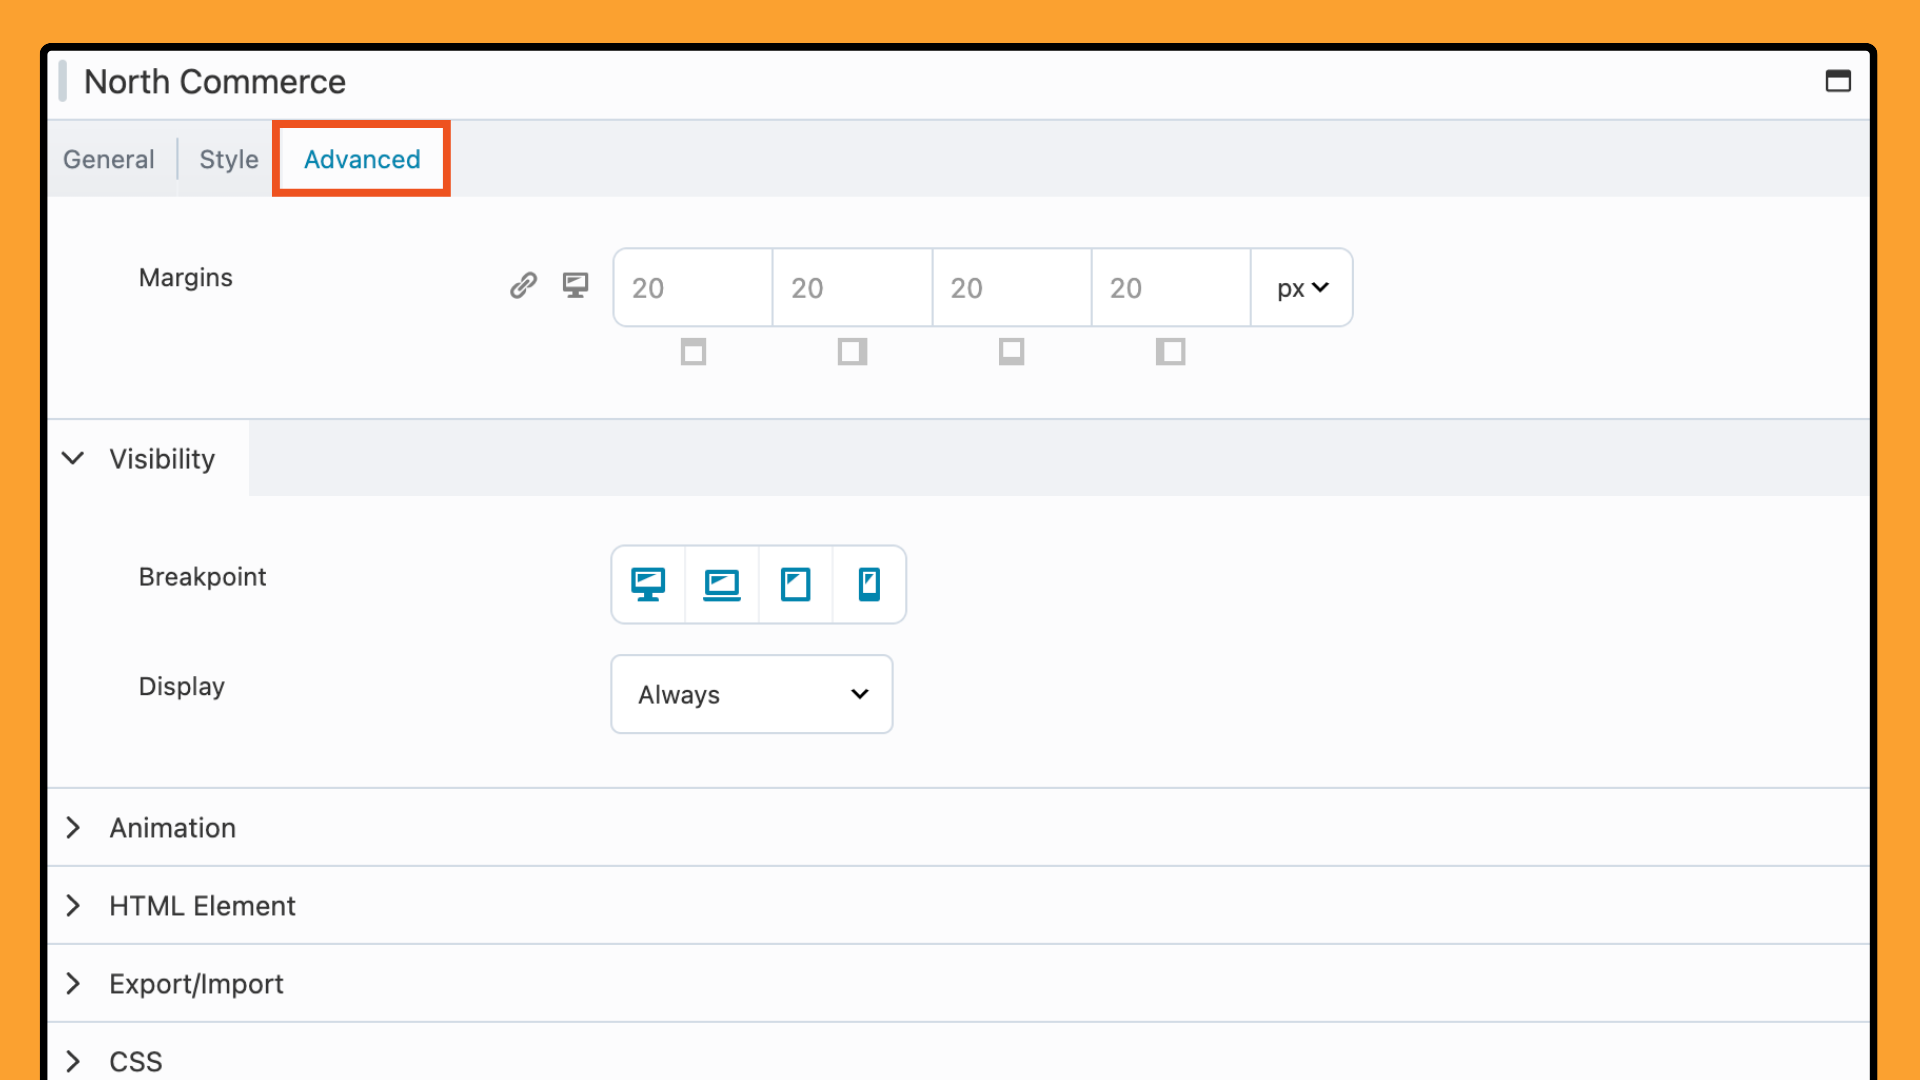
Adjust margins for spacing, set visibility rules by device type, and apply animations for dynamic user experiences. You can also add custom code with advanced CSS and Javascript settings. These options give you full control over your content’s display and allow precise tailoring to your design needs.
Conclusion
The North Commerce Module for Beaver Builder allows you to create an engaging and functional online store. Combining North Commerce with Beaver Builder helps you build a visually appealing site that enhances the user experience.
Related articles
Case Study: How One Freelancer Built a Web Design Business with Beaver Builder
Wondering about Beaver Builder for freelancers? Cami MacNamara operates WebCami Site Design, a successful solo web design business in West…
Beaver Builder Keyboard Shortcuts (Double Your Design Speed)
Want to build pages faster in Beaver Builder? You don’t need extra plugins, just your keyboard. These 10 essential Beaver…
Beaver Builder Outline Panel: The Key to Faster Page Building
If you’ve ever found yourself endlessly scrolling to find that one specific element buried deep in your web page design,…
Join the community
We're here for you
There's a thriving community of builders and we'd love for you to join us. Come by and show off a project, network, or ask a question.
Since 2014
Build Your Website in Minutes, Not Months
Join Over 1 Million+ Websites Powered By Beaver Builder.
 Beaver Builder

