When (And How) to Use Advanced Grid Layouts in WordPress
Effectively displaying your blog posts can mean the difference between a visitor staying on your site or clicking away. Advanced grid layouts give you more flexibility than traditional grids, whether you want a more artful approach, a better design, or simply the ability to display more posts on the page.
In this article, we will explain what advanced grids are, why they are often better than basic grids, and how your website can benefit from using them. Let’s begin!
Table of Contents:
An Introduction to Advanced Grid Layouts
When you think of a grid, you probably picture a symmetrical assortment of boxes, as in a chessboard or spreadsheet. However, while a standard grid is familiar and can be useful for keeping track of game pieces or accounting figures, it isn’t always optimal for web design.
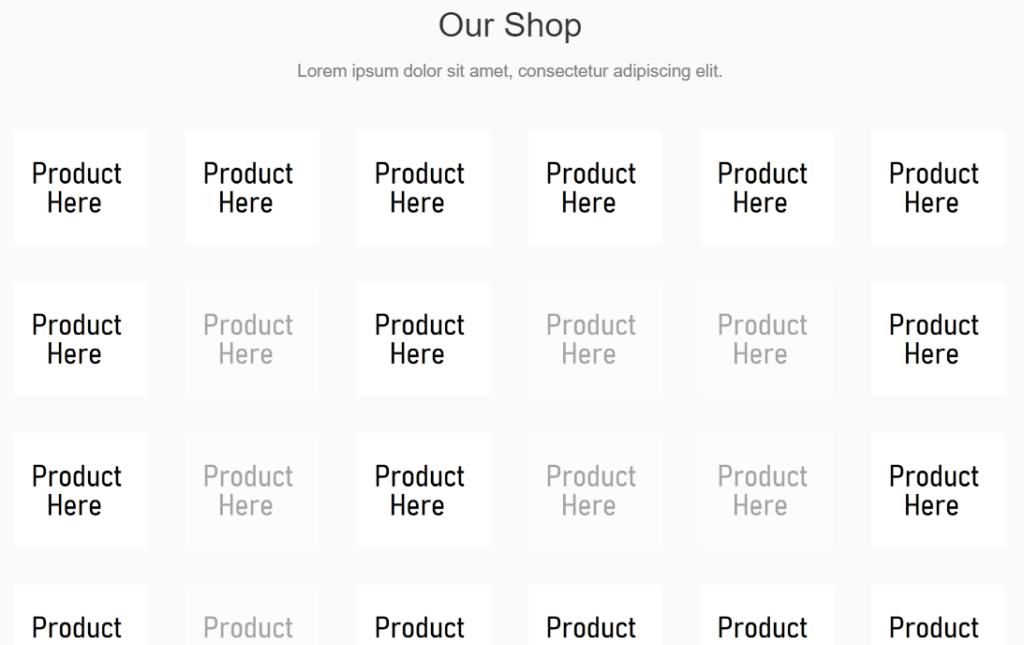
Advanced grids offer more customization and flexibility, so you can arrange your layout exactly how you want. For example, say you have an odd number of products you want to display on a page. In a traditional grid, the result is usually dead space:
While we are all pretty used to this on product pages and in search results, advanced grids offer a better way. Let’s say there are five blog posts you want to display on a landing page. With a standard grid, your options would either be a 5×1 row or a 2×3 grid with an empty space.
Rather than having to choose the better of two subpar options, an advanced grid could allow you create something like this:
Breaking away from the constraints of traditional grid layouts can enhance the design and functionality of your site in a number of ways. Better laid-out blogs will be more appealing to visitors, and more effective product page placement can even improve sales.
Best of all, this isn’t difficult to do. While you can create advanced grids using manual coding, you can also find tools to make the process extremely simple.
For example, our own Beaver Builder adds a lot of new functionality to the WordPress editor and theme customizer. This includes more intuitive row and column options, which allow you to create more adaptable advanced grids for any situation. We’ll show you how to use these options shortly.
The Advantages of Advanced Grids
Before we delve into creating advanced grids, let’s talk a little more about their benefits and use cases. While advanced grids are handy for breaking out of the normal constraints of traditional grids, the advantages don’t stop there.
Beaver Builder allows you to customize grid settings down to the spacing and margins, so you can make optimal use of your digital real estate. This could mean fitting more products on a single page, or padding featured images for a more artful look.
Advanced grids can also improve your website’s organization, allowing you to arrange your content logically and without any wasted space. What once might have been done with a boring drop-down menu and links can now be accomplished in a clear and attention-grabbing way.
If your website has a strong focus on visuals, such as a clothing boutique or art gallery, advanced grids can also offer a lot more options for displaying your images. You can even add animations to your gallery grids or carousel functionality with advanced settings.
How Your Site Can Benefit from an Advanced Grid Layout (3 Use Cases)
While most sites can benefit from advanced grid layouts in one way or another, there are a few common website types where they can have dramatic impact. Let’s look at three of the best use cases for this feature.
1. Blogs with Multiple Categories
Large blogs with many posts can suffer from that overwhelming amount of content. Without an efficient way to display and categorize everything, much of the content can end up buried and neglected.
An advanced grid layout not only allows you to display more posts per page and in better arrangements. It can also enable you to group and categorize posts creatively.
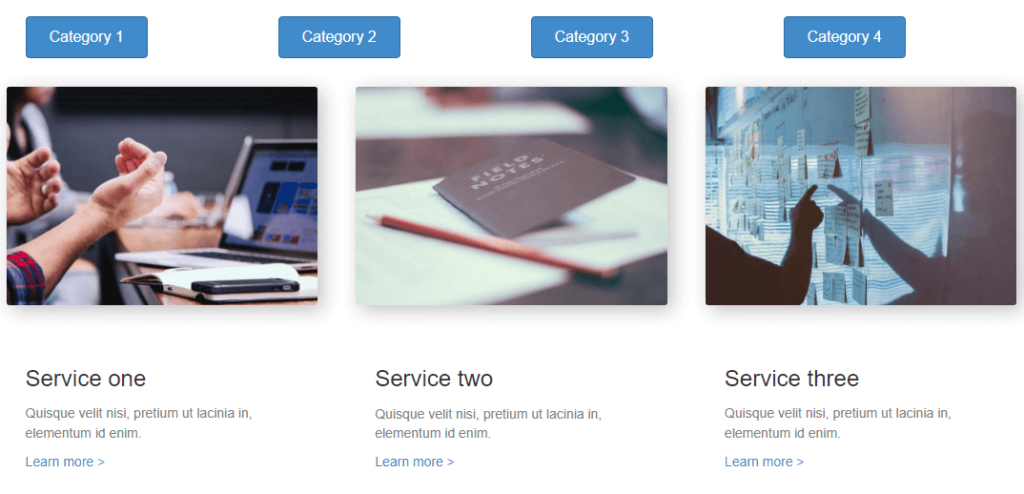
This could mean an assortment of categories laid out in a grid that will take you to different landing pages, or simply posts grouped together with tabs for easier browsing:
However you do it, advanced grid layouts make it much easier to organize your content logically and efficiently.
2. Online Stores
One of the most common uses for grids is online stores. Landing pages are often broken up into rows of categories and products for customers to peruse.
While a lot of thought tends to go into the individual product pages, what about the browsing pages where many different products are presented? A regular grid gets the job done, but advanced grids offer new opportunities to create an engaging shopping experience.
For example, you may offer products or services on your site that vary in scope or popularity. The traditional method is for each entry to fill an identical space in the grid with the same information. With an advanced grid, you can customize the size and shape of different entries to highlight best-sellers or otherwise differentiate your products.
Plus, this doesn’t just stop at regular products. Advanced grid layouts are common for sales pages and special offers. With Beaver Builder you can create different layouts for weekly deals, special offers, and holiday sales:
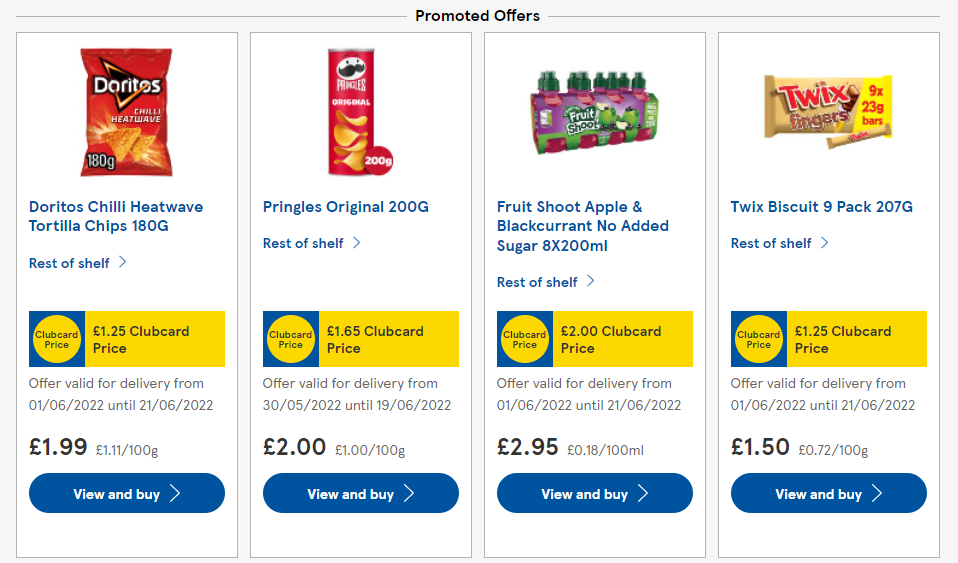
When offering a variety of items in an online store, advanced grids provide much more flexibility in how you display those products. Plus, there are many other areas of an eCommerce site that can benefit from advanced grid layouts, such as menus and landing pages.
3. Galleries
Online galleries come in all shapes, sizes, and mediums. When you think about galleries, art or photography may come to mind first, but this feature is used in a wide array of contexts.
For instance, there are wine galleries, fashion galleries, even web design galleries! What they all share in common is showcasing multiple pieces of content, usually with a visual component. What better way is there to display images online than with an advanced grid layout?
Just like a gallery wall that mixes different pieces together to form an intriguing whole, advanced grids allow for this kind of creativity when designing your website:
Whether you are an artist, a photographer, a dealer in fine goods, or a web designer, having the flexibility to showcase your work in a unique and interesting way can bolster the effect of the work itself. Advanced grid layouts, such as the kind you can design with Beaver Builder, enable you to set your website design work apart from the millions of other WordPress sites.
How to Build an Advanced Grid Layout for Your WordPress Site (In 3 Steps)
Building an advanced grid layout is easier than you might expect, thanks to Beaver Builder’s intuitive features. If you’re already familiar with the WordPress Block Editor, Beaver Builder is a more powerful alternative that gives you new options and can be applied to more areas of your site with the addition of Beaver Themer.
To create your first advanced grid layout, just follow these three steps.
Step 1: Install and Activate the Beaver Builder Plugin
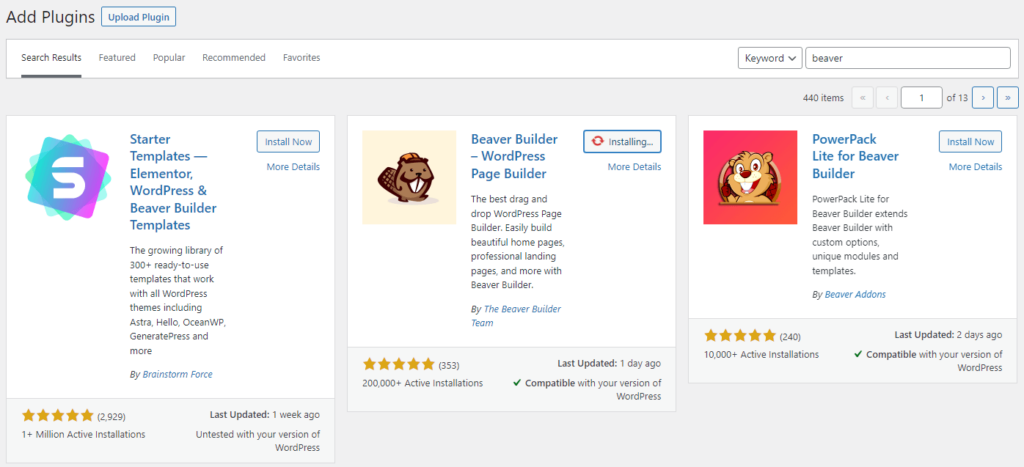
When you’re ready to get started, simply search for Beaver Builder in the Plugins section of your WordPress dashboard, then install and activate it:
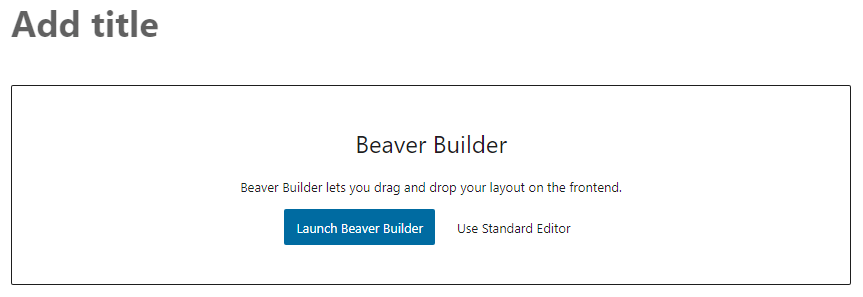
When creating a new page or post, choose Launch Beaver Builder to open up the editor:
It’s probably a good idea to take the tour for a quick lesson on everything you can do with Beaver Builder. In a nutshell, you can expect a more intuitive page editor where you can easily add and modify modules using a drag-and-drop interface.
Step 2: Build Your Advanced Grid
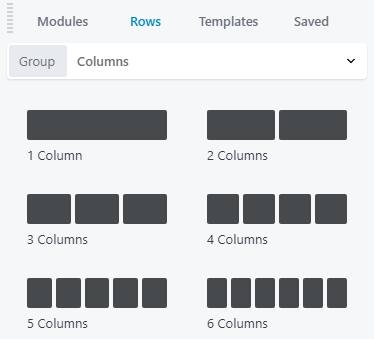
Next, add a new element to the page using the plus symbol in the top-right corner of the screen. Click on the Rows tab to see an assortment of column layouts you can choose from:
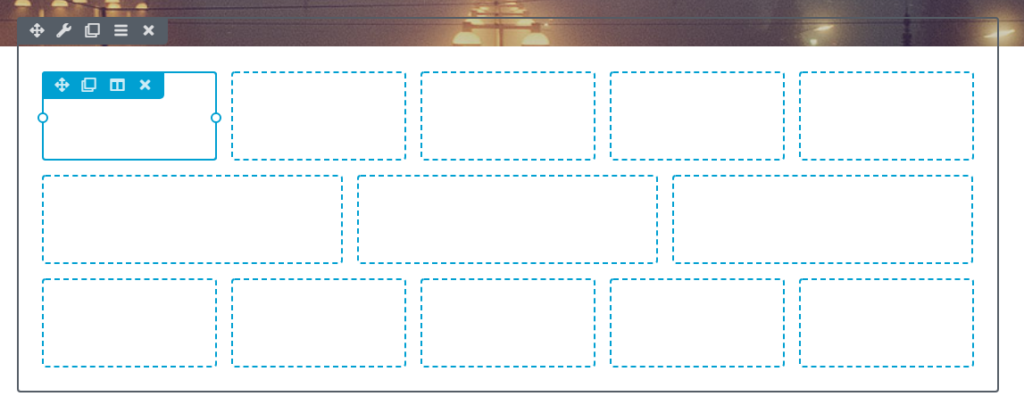
From there, simply drag and drop the desired rows onto your page to create a grid. You can use multiple rows of matching columns, or mix it up for a more creative look.
Each section in the grid is a slot where you can place new modules. These might be products from your store, images for your gallery, or other elements.
3. Populate the Slots
Now that you have your grid in place, it’s time to fill it up. Once again, go to the plus symbol to add new modules to the page. This time select the Modules tab to access your various choices.
Then, simply drag and drop new modules into the slots in your grid to populate them. These might be images, text, buttons, or even more advanced options like testimonials or a post carousel.
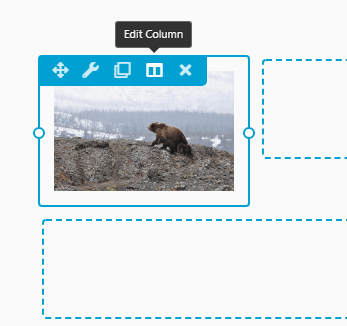
You can then modify each section as you would a normal WordPress block. There are additional options available if you hover over the element and click on the Edit Column icon:
We won’t cover all of the customization options here, but one strategy would be to insert images into the grid slots and link them to the appropriate product pages. You could do the same for your sales ad or art gallery:
Once you are finished, click on the Done button in the top-right corner of the screen. From there you can either publish or save the page as a draft, which you can then preview.
That’s all there is to it! With Beaver Builder you unlock a lot more customization in a very user-friendly package. You will quickly find that creating an advanced grid layout can be the best solution for many aspects of your site’s design.
Conclusion
While the default grid layouts used by many WordPress sites get the job done, they aren’t ideal for every situation. Advanced grid layouts offer more freedom to design a page how you want, so it’s optimized for your particular audience and goals.
To create an advanced grid layout with Beaver Builder, simply follow these steps:
- Install and activate the Beaver Builder plugin.
- Add row/column modules to a page or post to form your grid.
- Populate the grid with other elements, such as images and other media.
Beaver Builder’s premium plans add multi-site usage, white labeling, and the Beaver Builder Theme, which is designed specifically for use with our plugin. We also offer other products, including Beaver Themer and Assistant Pro, to make the web designing process even easier.
Do you have any questions about advanced grid layouts? Let us know in the comments section below!
Related articles
Case Study: How One Freelancer Built a Web Design Business with Beaver Builder
Wondering about Beaver Builder for freelancers? Cami MacNamara operates WebCami Site Design, a successful solo web design business in West…
Beaver Builder Keyboard Shortcuts (Double Your Design Speed)
Want to build pages faster in Beaver Builder? You don’t need extra plugins, just your keyboard. These 10 essential Beaver…
Beaver Builder Outline Panel: The Key to Faster Page Building
If you’ve ever found yourself endlessly scrolling to find that one specific element buried deep in your web page design,…
Join the community
We're here for you
There's a thriving community of builders and we'd love for you to join us. Come by and show off a project, network, or ask a question.
Since 2014
Build Your Website in Minutes, Not Months
Join Over 1 Million+ Websites Powered By Beaver Builder.
 Beaver Builder
