
Pricing tables are useful website elements that help visitors quickly and easily compare the main differences between payment options. However, creating a WordPress pricing table for your own site requires you to either code one by hand or use a dedicated plugin.
The good news is that Beaver Builder makes it easy to add a pricing table in WordPress using either a pre-designed template, pre-built pricing table row, or pricing table module.
In this post, we’ll discuss why you may want to consider adding a pricing table to your site. Then, we’ll show you how to do this in WordPress with Beaver Builder. Let’s get started!
Table of Contents:
Why You Should Consider Adding a Pricing Table to Your Website
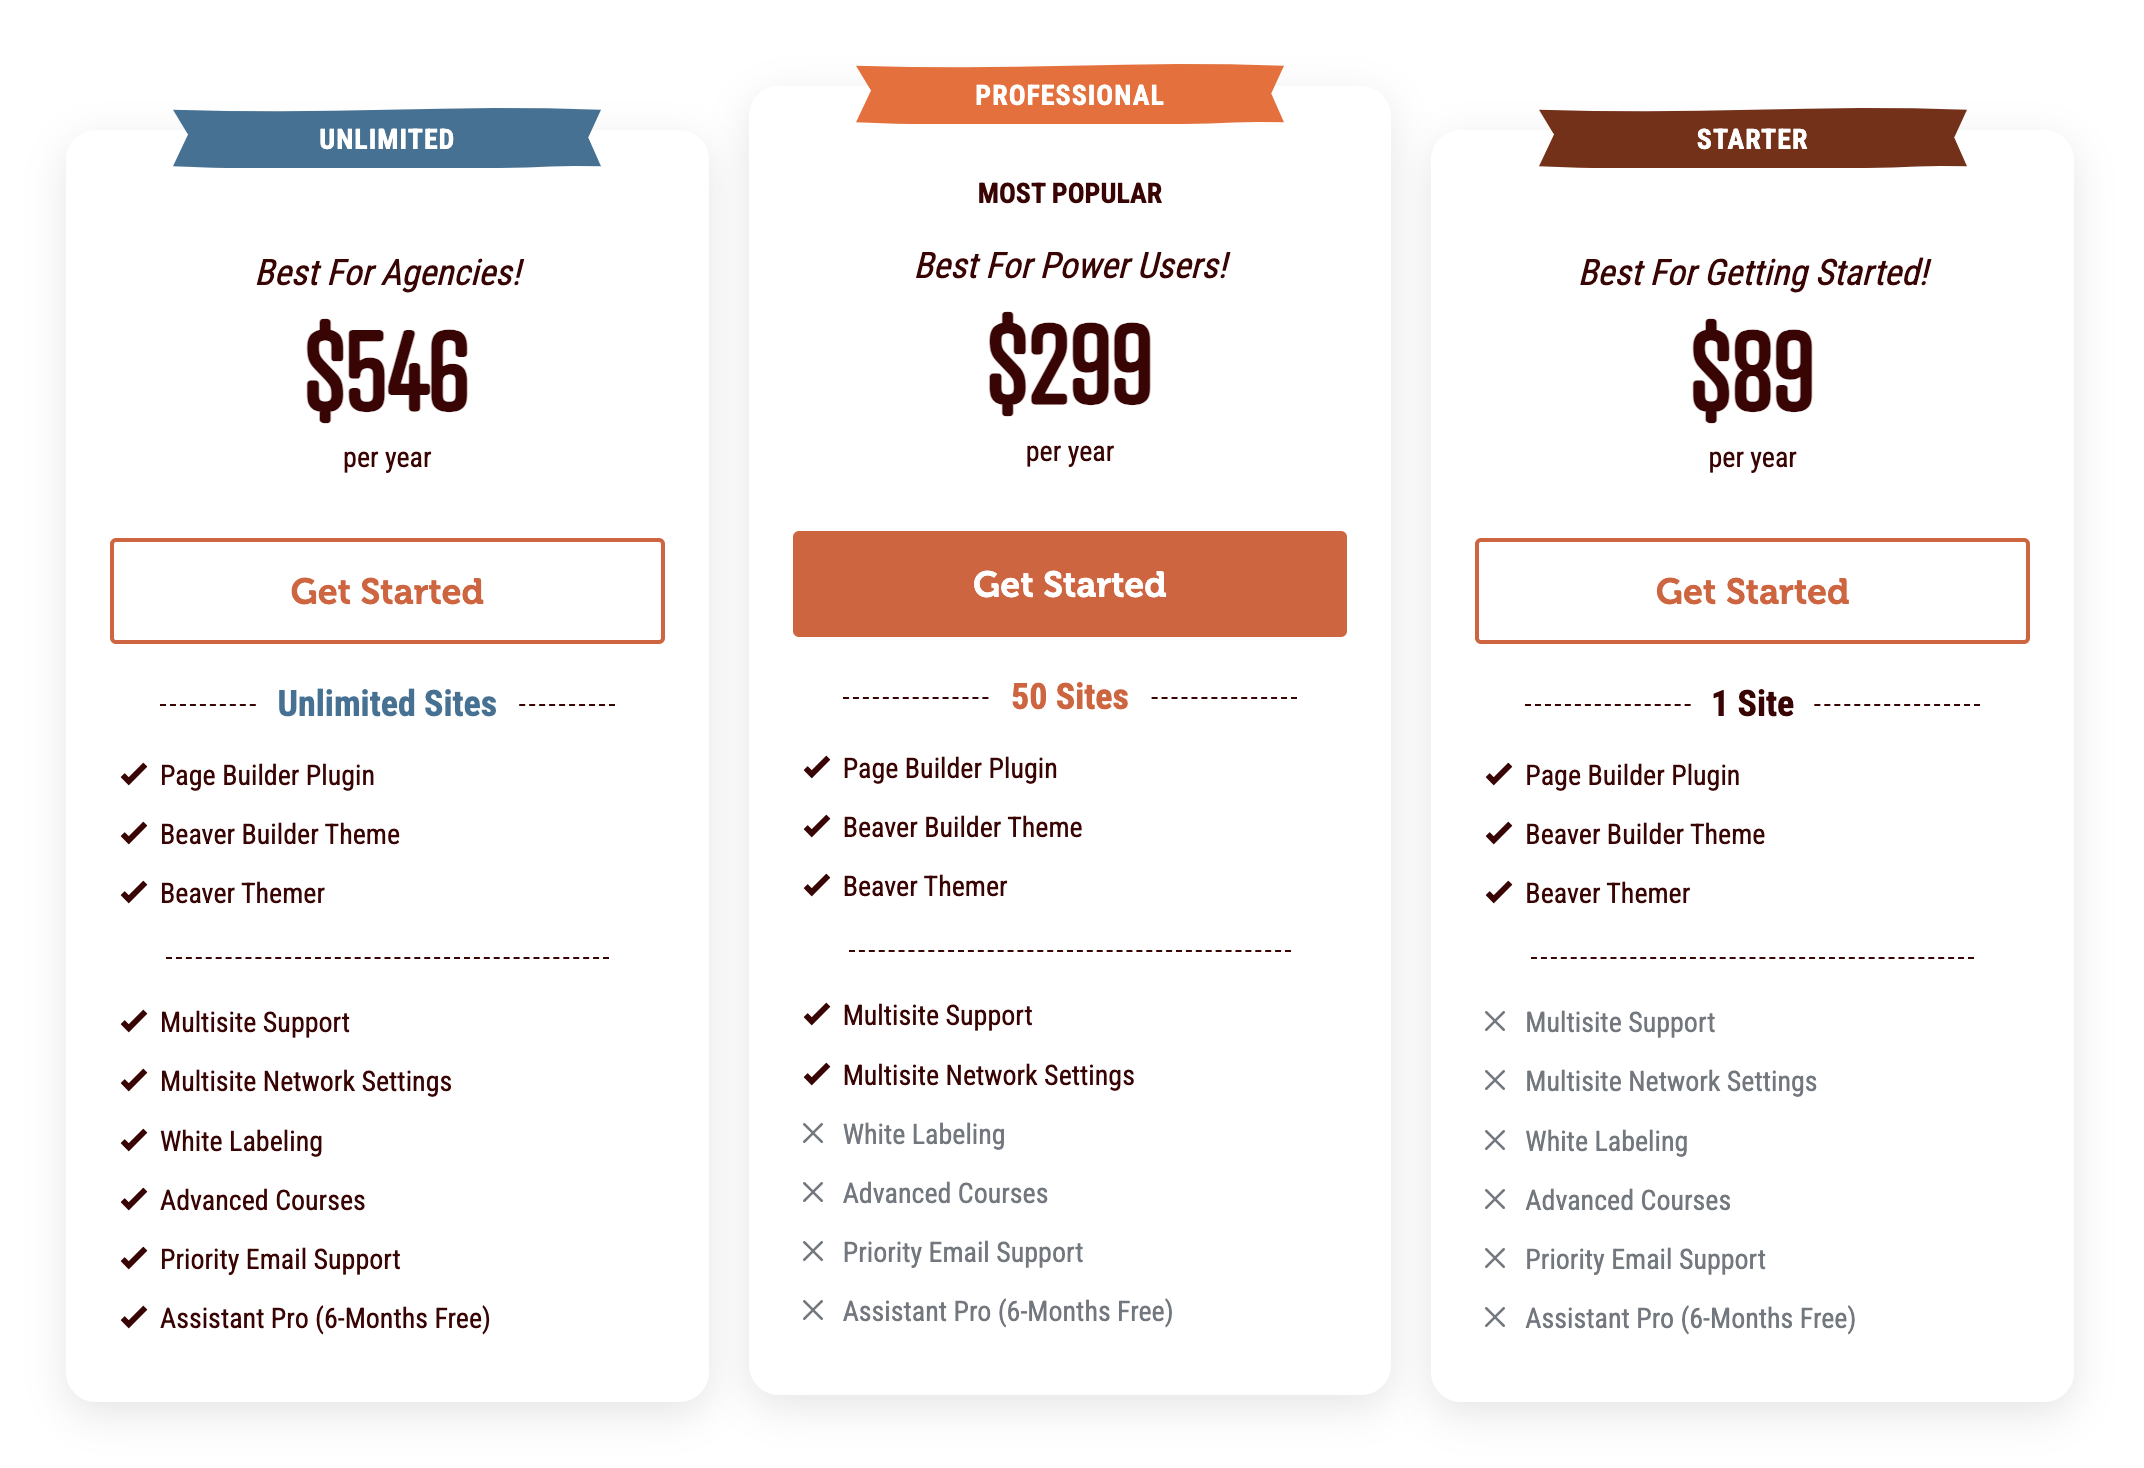
When you’re designing an e-commerce website, it’s important to think about features that will drive conversions. By creating a pricing table, you can allow new customers to easily compare the prices and features of your services before buying them.
For example, our Beaver Builder website includes a pricing table with various payment tiers and packages. Thanks to this table, you can clearly see what’s included in each subscription, as well as how much it costs. Once you choose a plan, you can click on the Get Started button to buy it:
A pricing table can be effective for any website with subscription tiers, like membership sites or monthly software services.
If you need to showcase a large amount of information and features, pricing tables can organize them in an easy-to-understand way. This can encourage users to buy the plan that suits their needs.
To decide whether a pricing table would be effective, consider whether you have more than one version of a product or service. If so, a pricing table would likely be helpful to provide customers with an overview of the various options and the differences between them. When you can remove any pricing confusion, you can increase conversions on your site.
How to Add a Pricing Table in WordPress (3 Methods)
Now that you’re aware of the benefits pricing tables can offer, it’s time to create one for your website. For this tutorial, we’ll be using our Beaver Builder page builder plugin. This gives you access to pre-designed templates, pre-built rows, and pricing table module!
1. Add a Beaver Builder Pricing Page Template
You can either build your pricing table from scratch using a Pricing Table module (we show you how in the last method, Customize a Pricing Table Module) or you can simply add a pre-designed page template.
With Beaver Builder, you can automatically implement this layout on a new page with just one click. Then, you can easily customize it with your specific products or services.
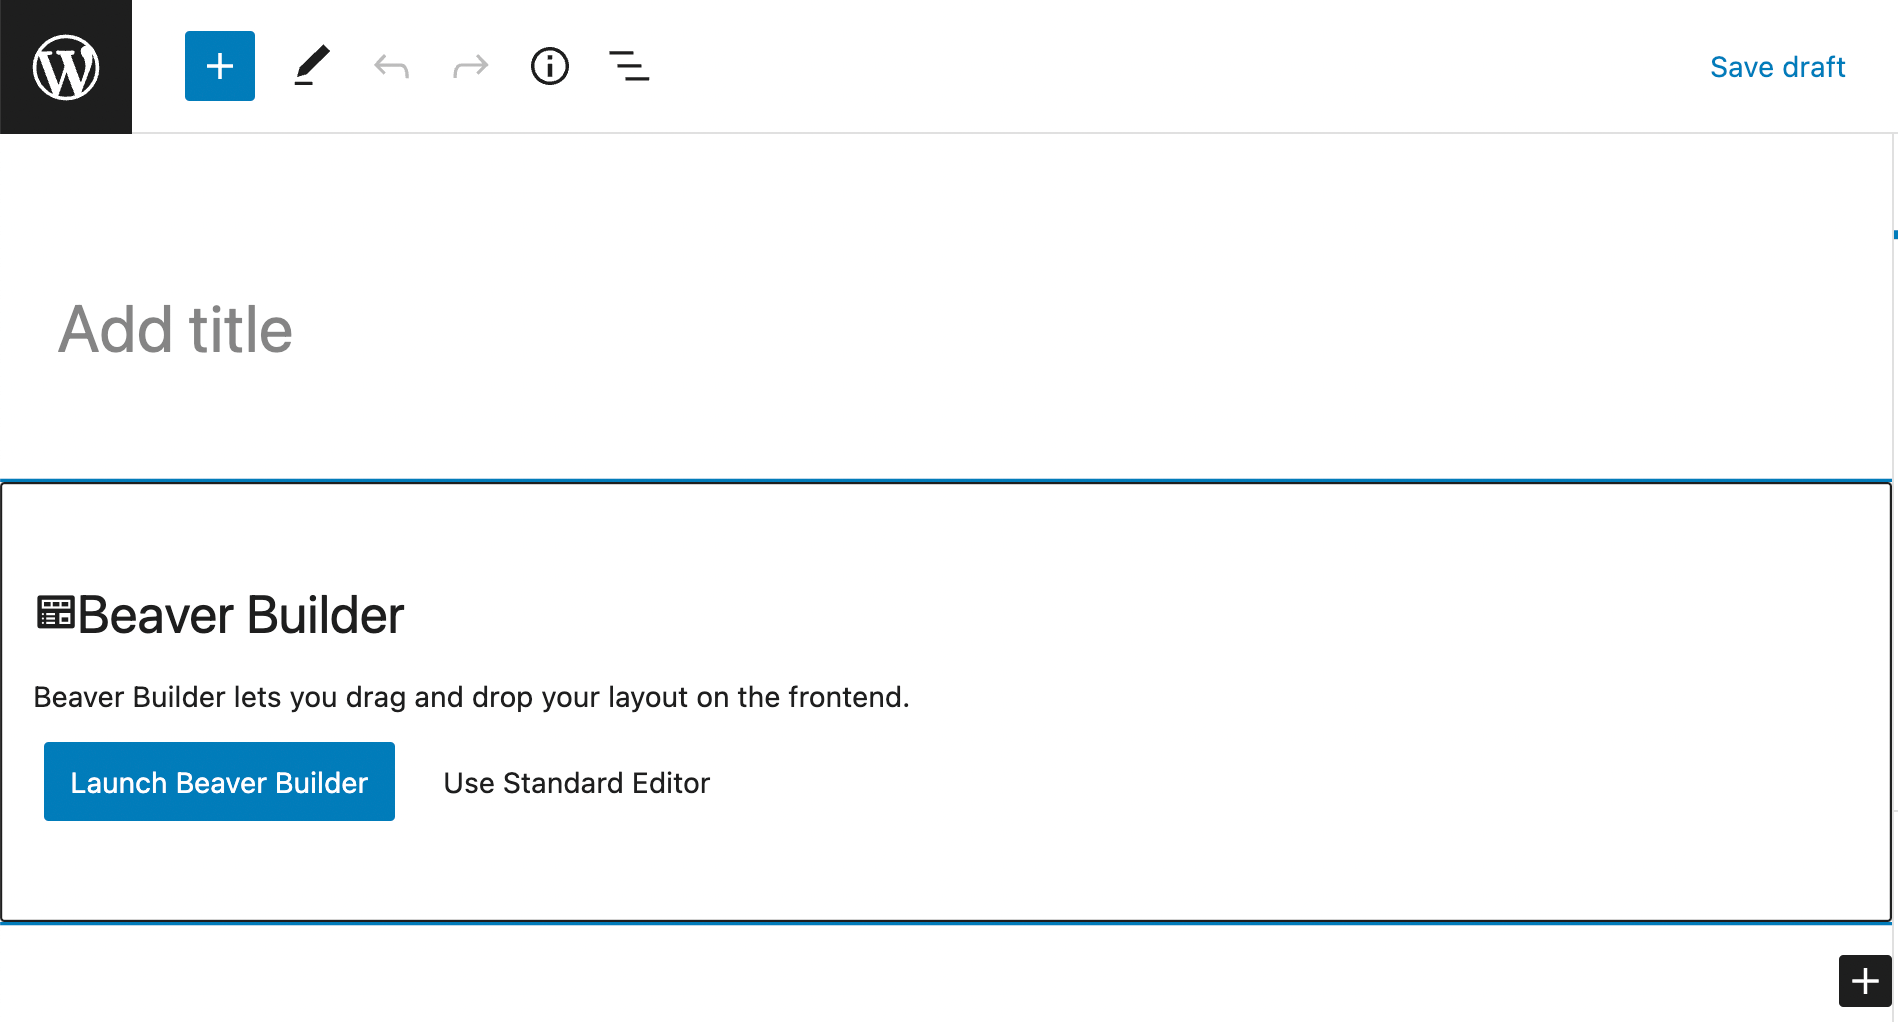
To get started, open WordPress and add a new page. Give your page a name and click on Launch Beaver Builder:
Once the Beaver Builder editor opens, click the Templates tab in the pop-up menu. Then, choose Content Pages from the Group drop-down:
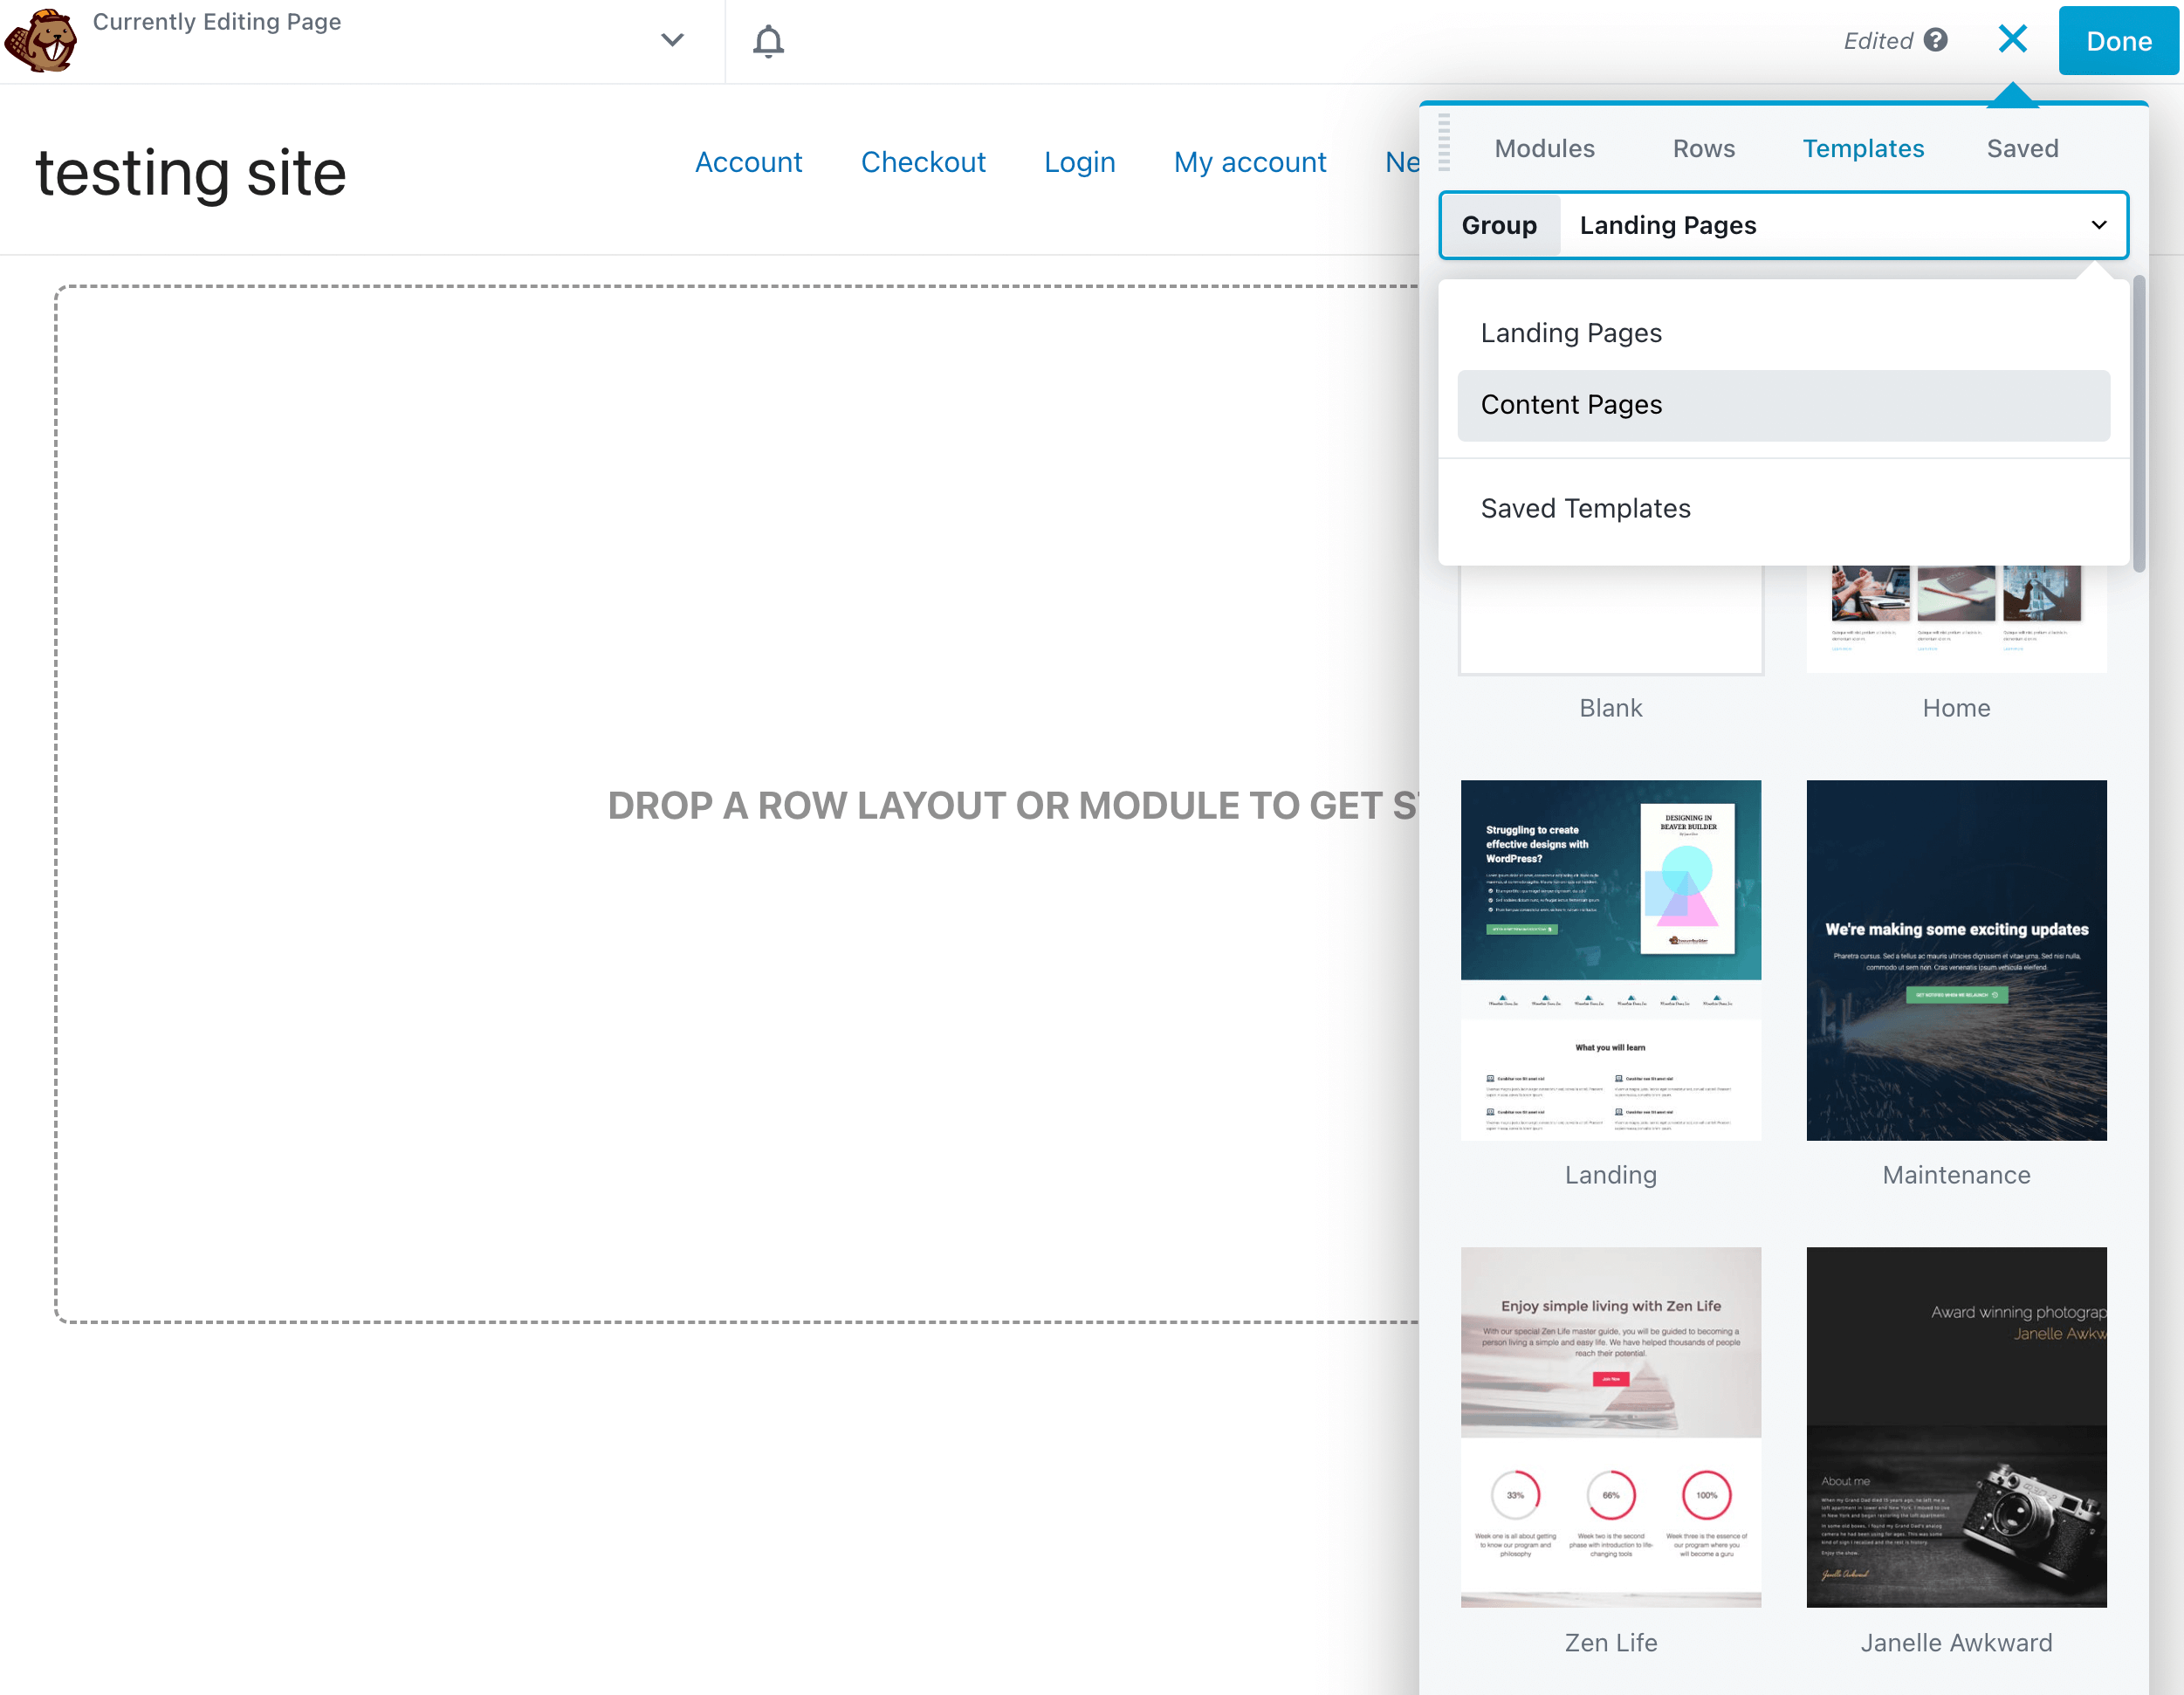
To find specific Pricing page templates, scroll to the bottom of the section. Here, you’ll see two different designs you can choose from:
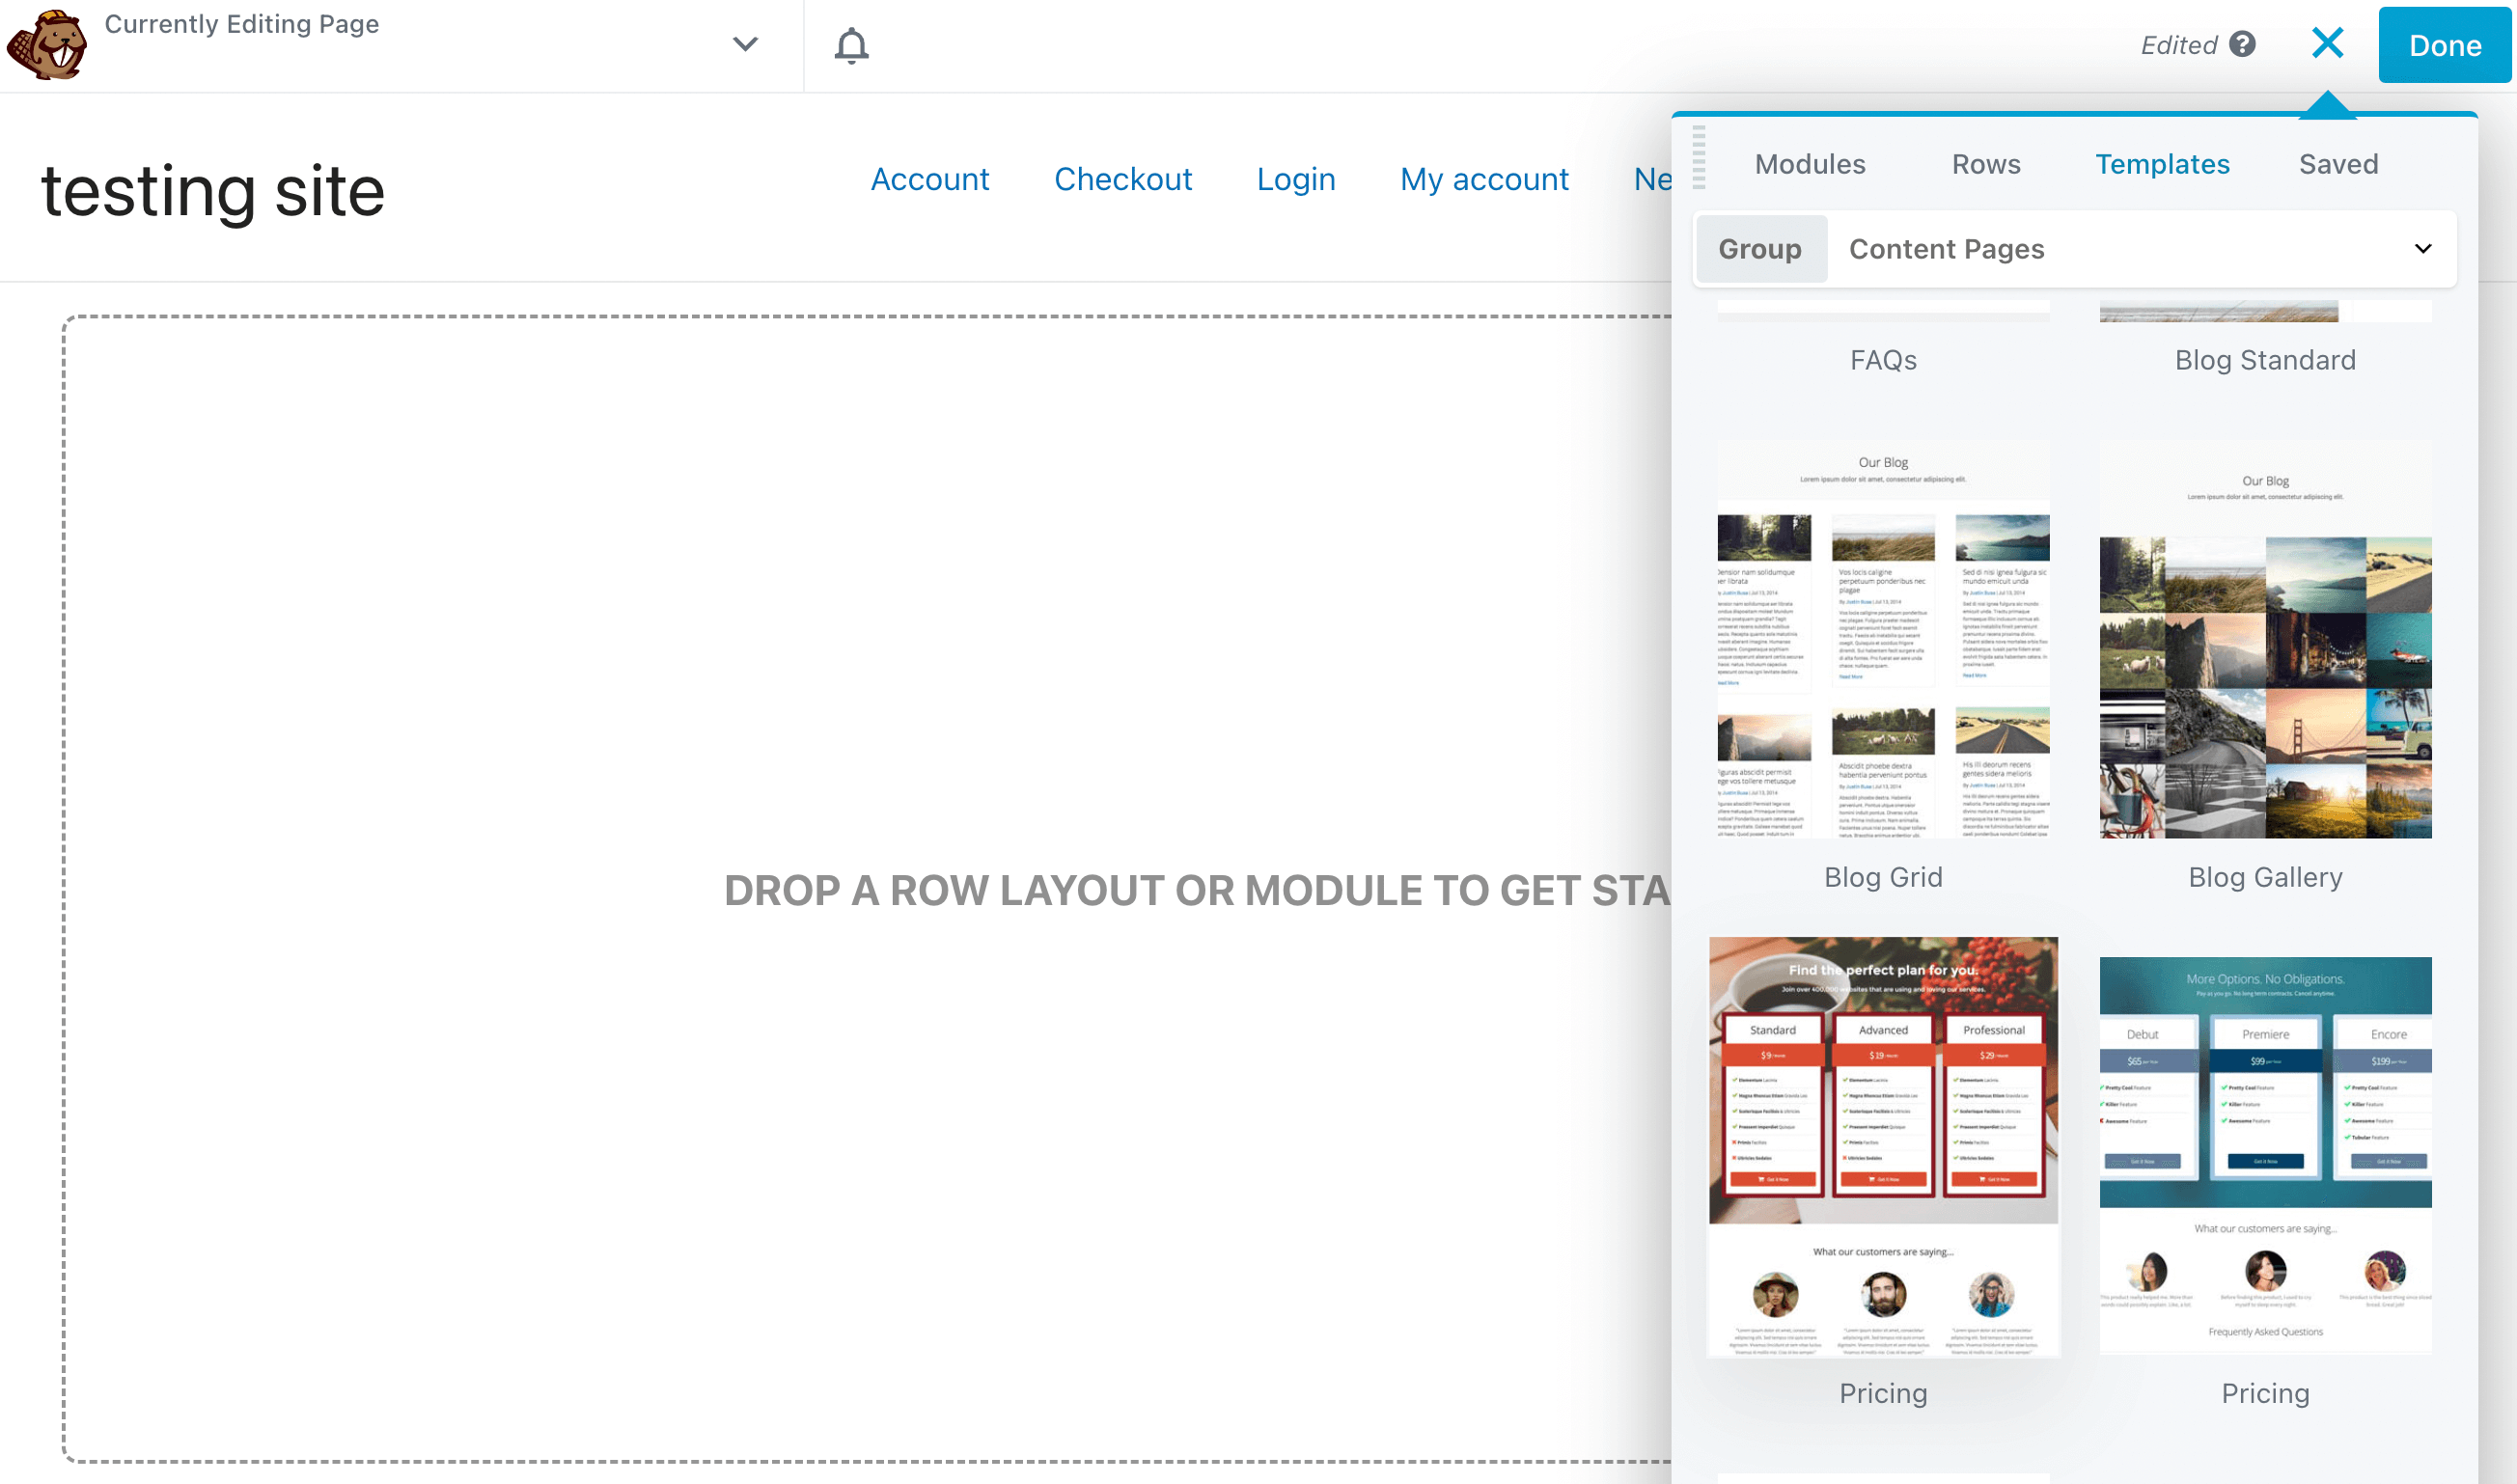
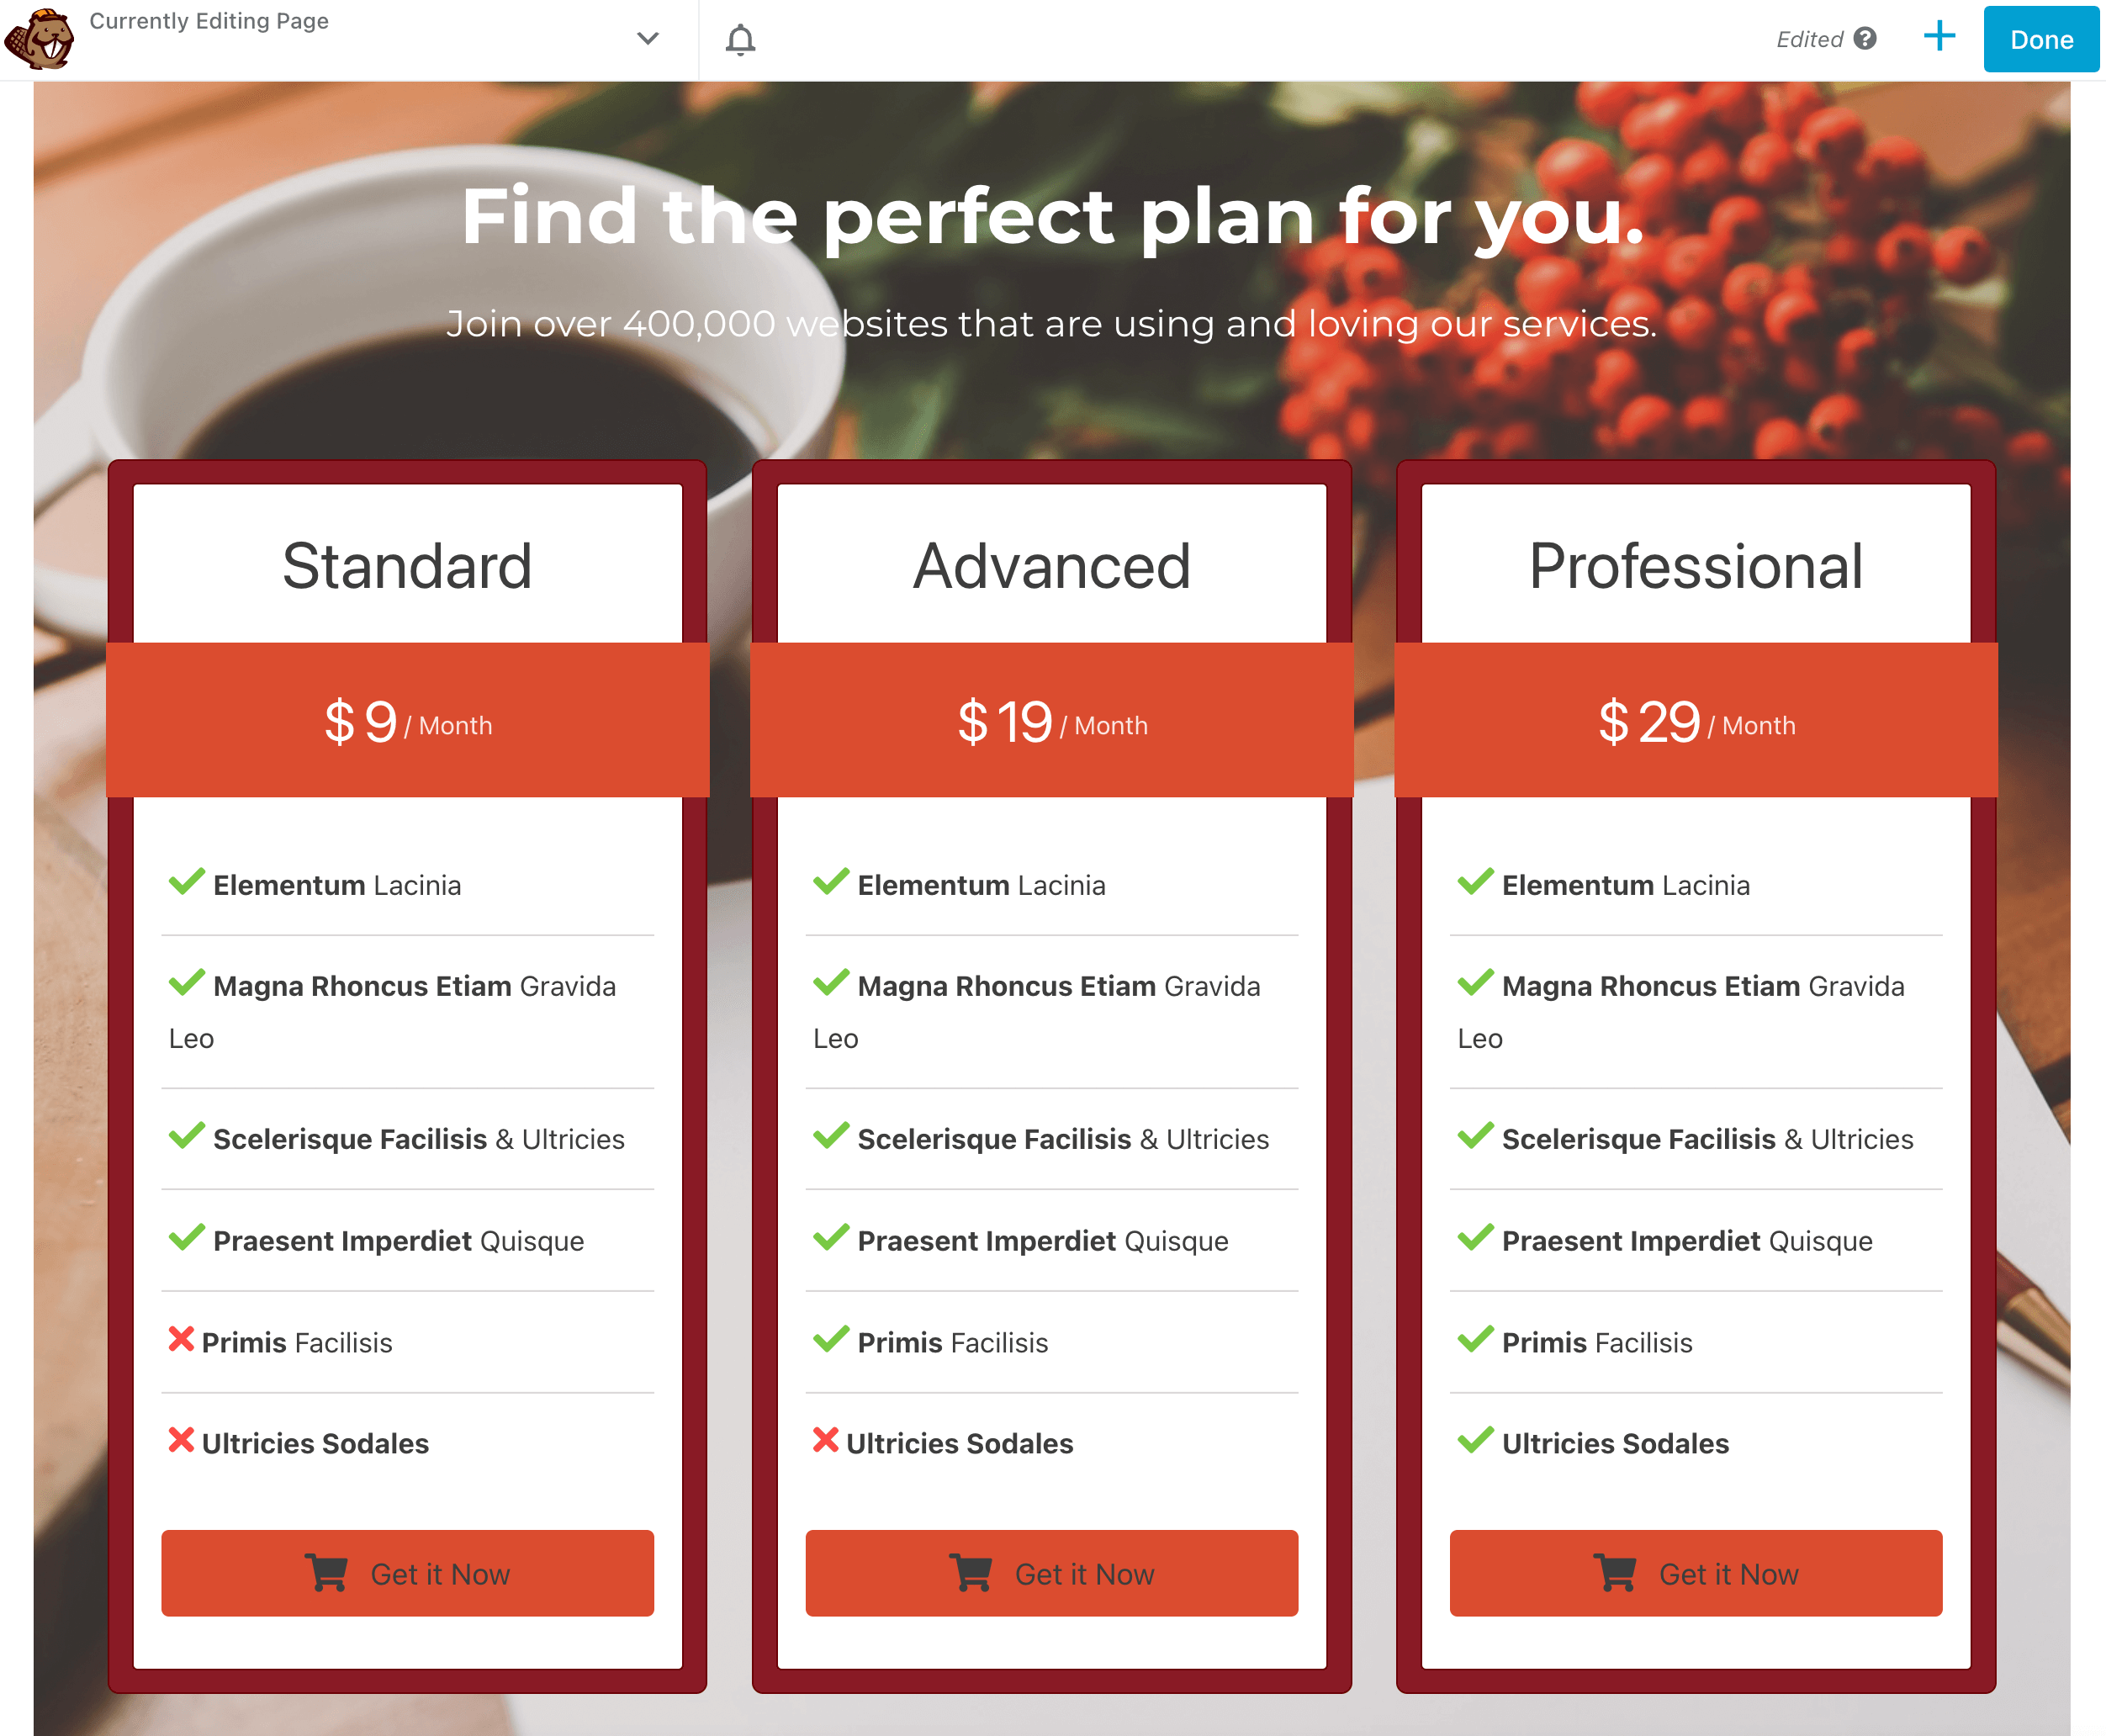
When you find a design you like, click on it. This will automatically apply the template to the page. With either of the Pricing templates, you’ll notice a pricing module, along with customer testimonials and frequently asked questions:
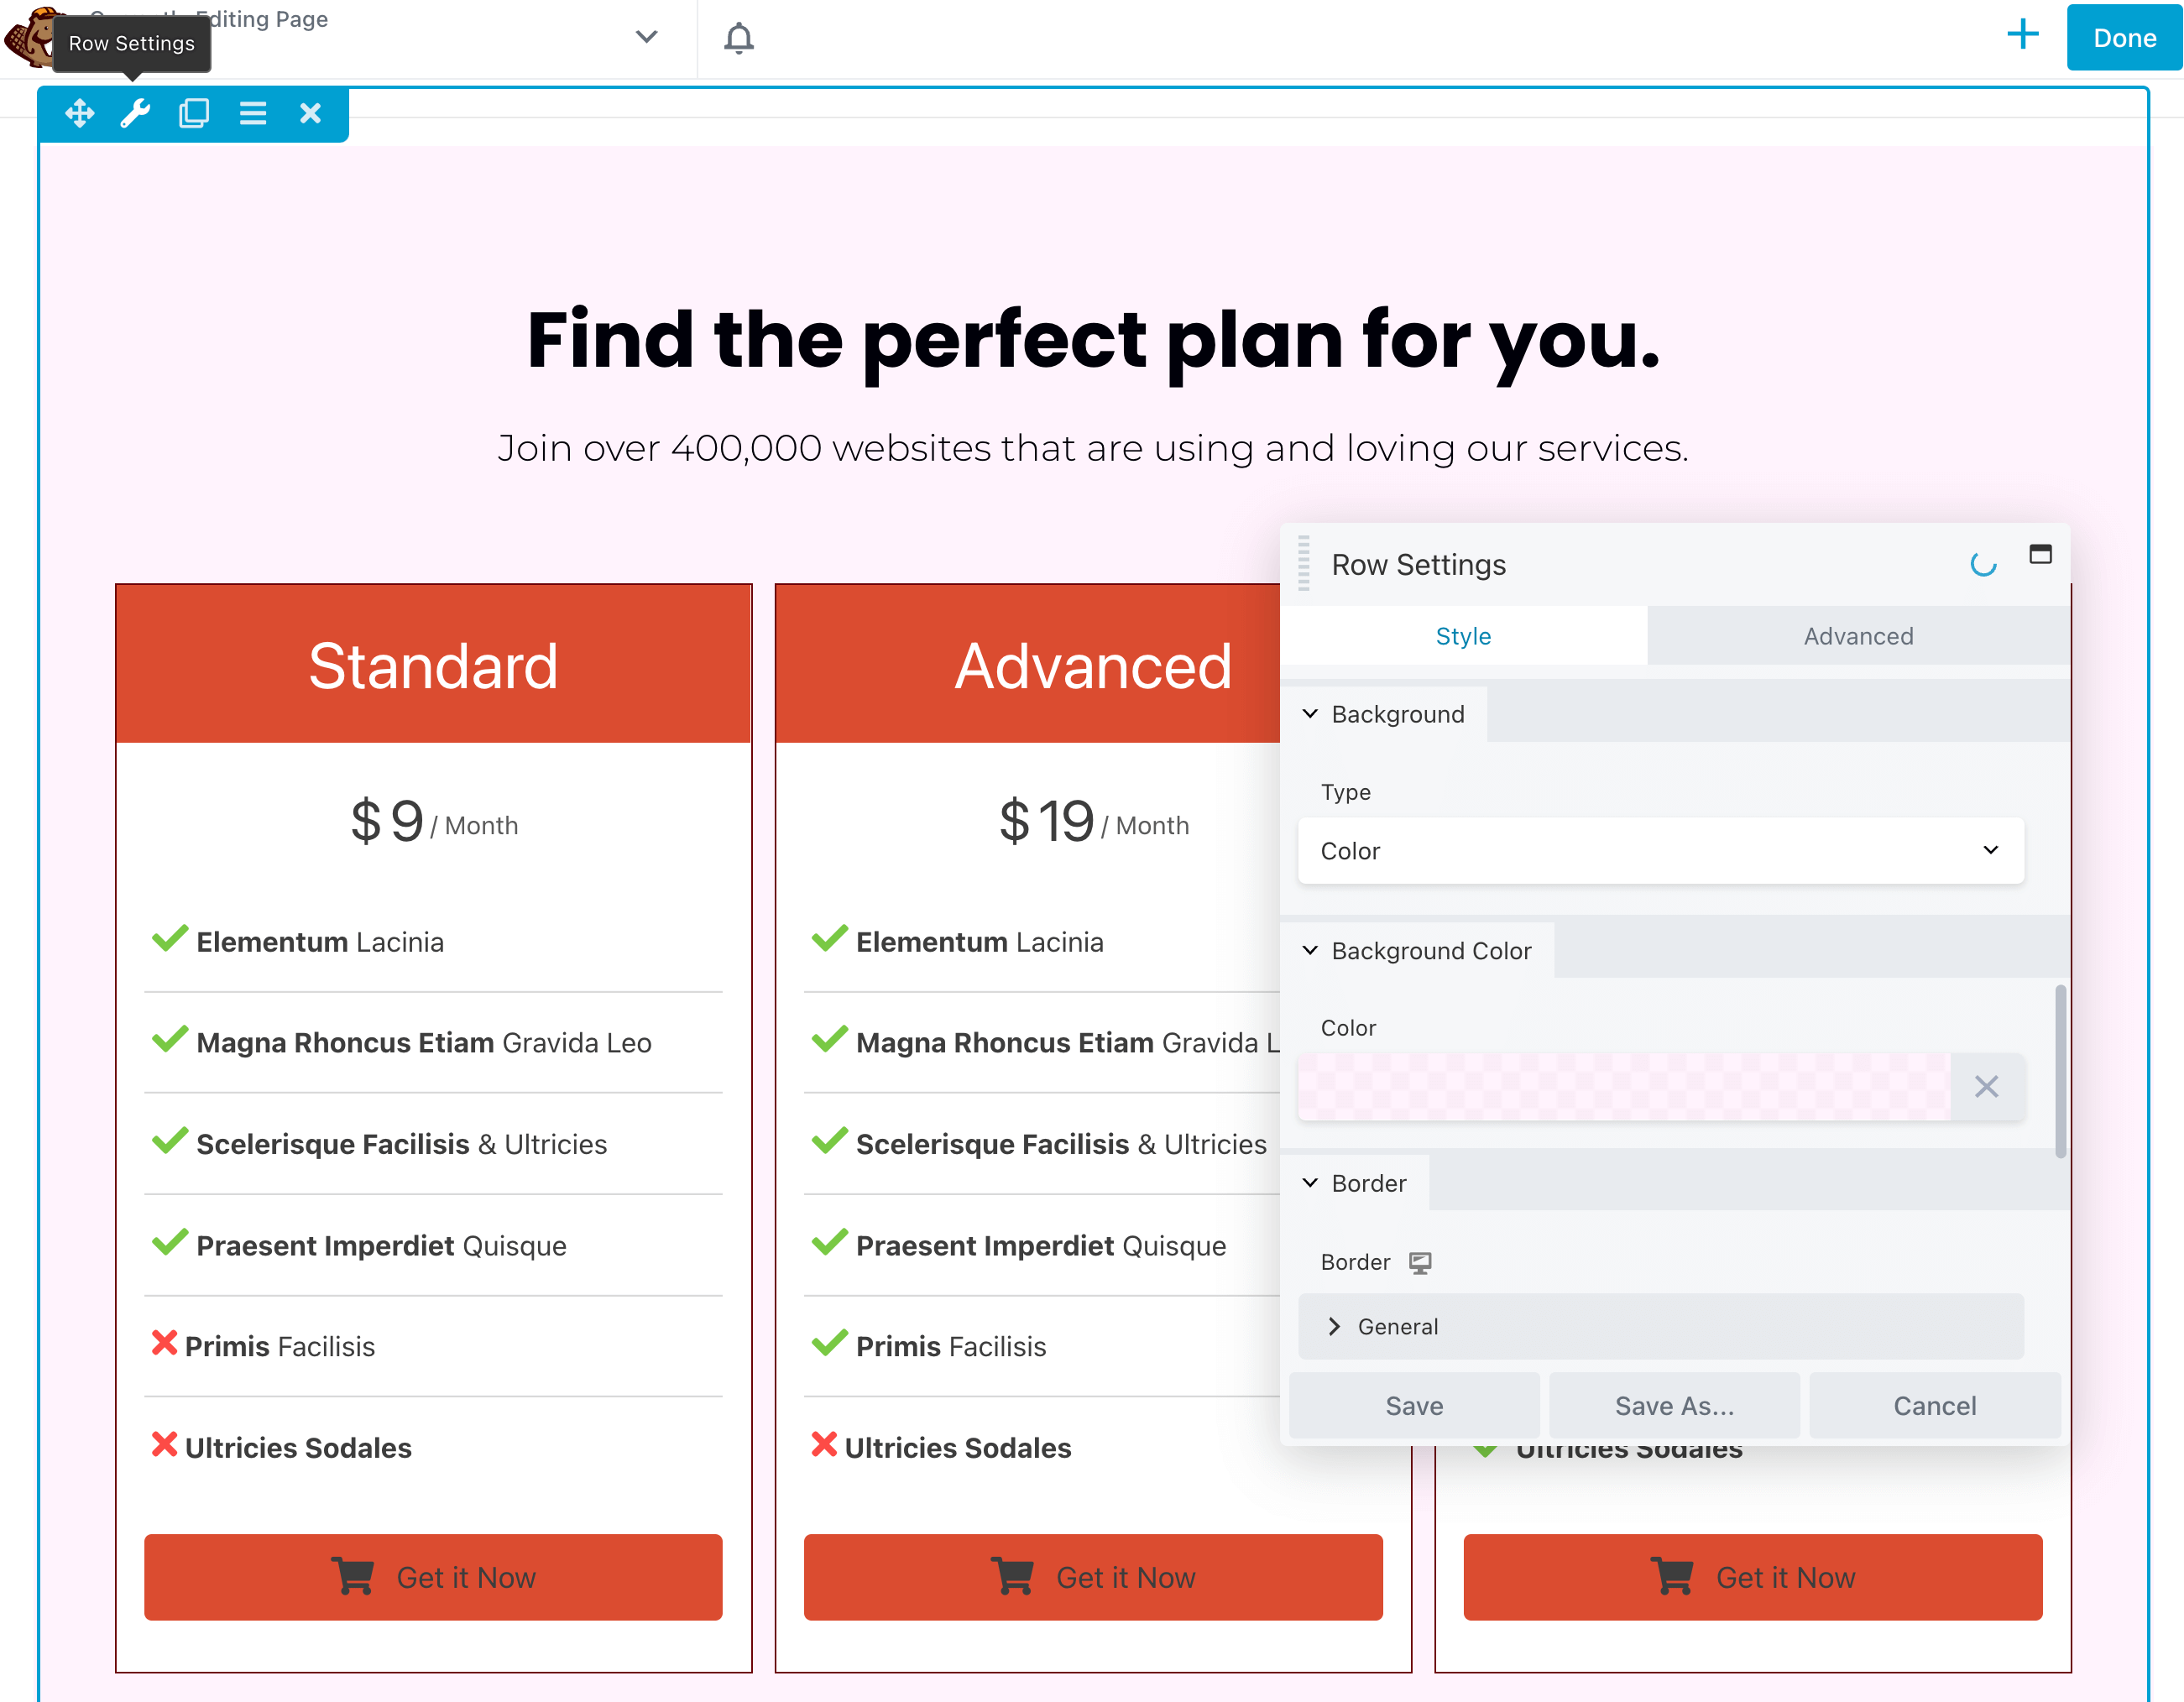
Although it will include a default color palette and background image, you can easily customize these options. To do this, first, click on the Row Settings. Then, you can set a custom background as a color, video, or slideshow:
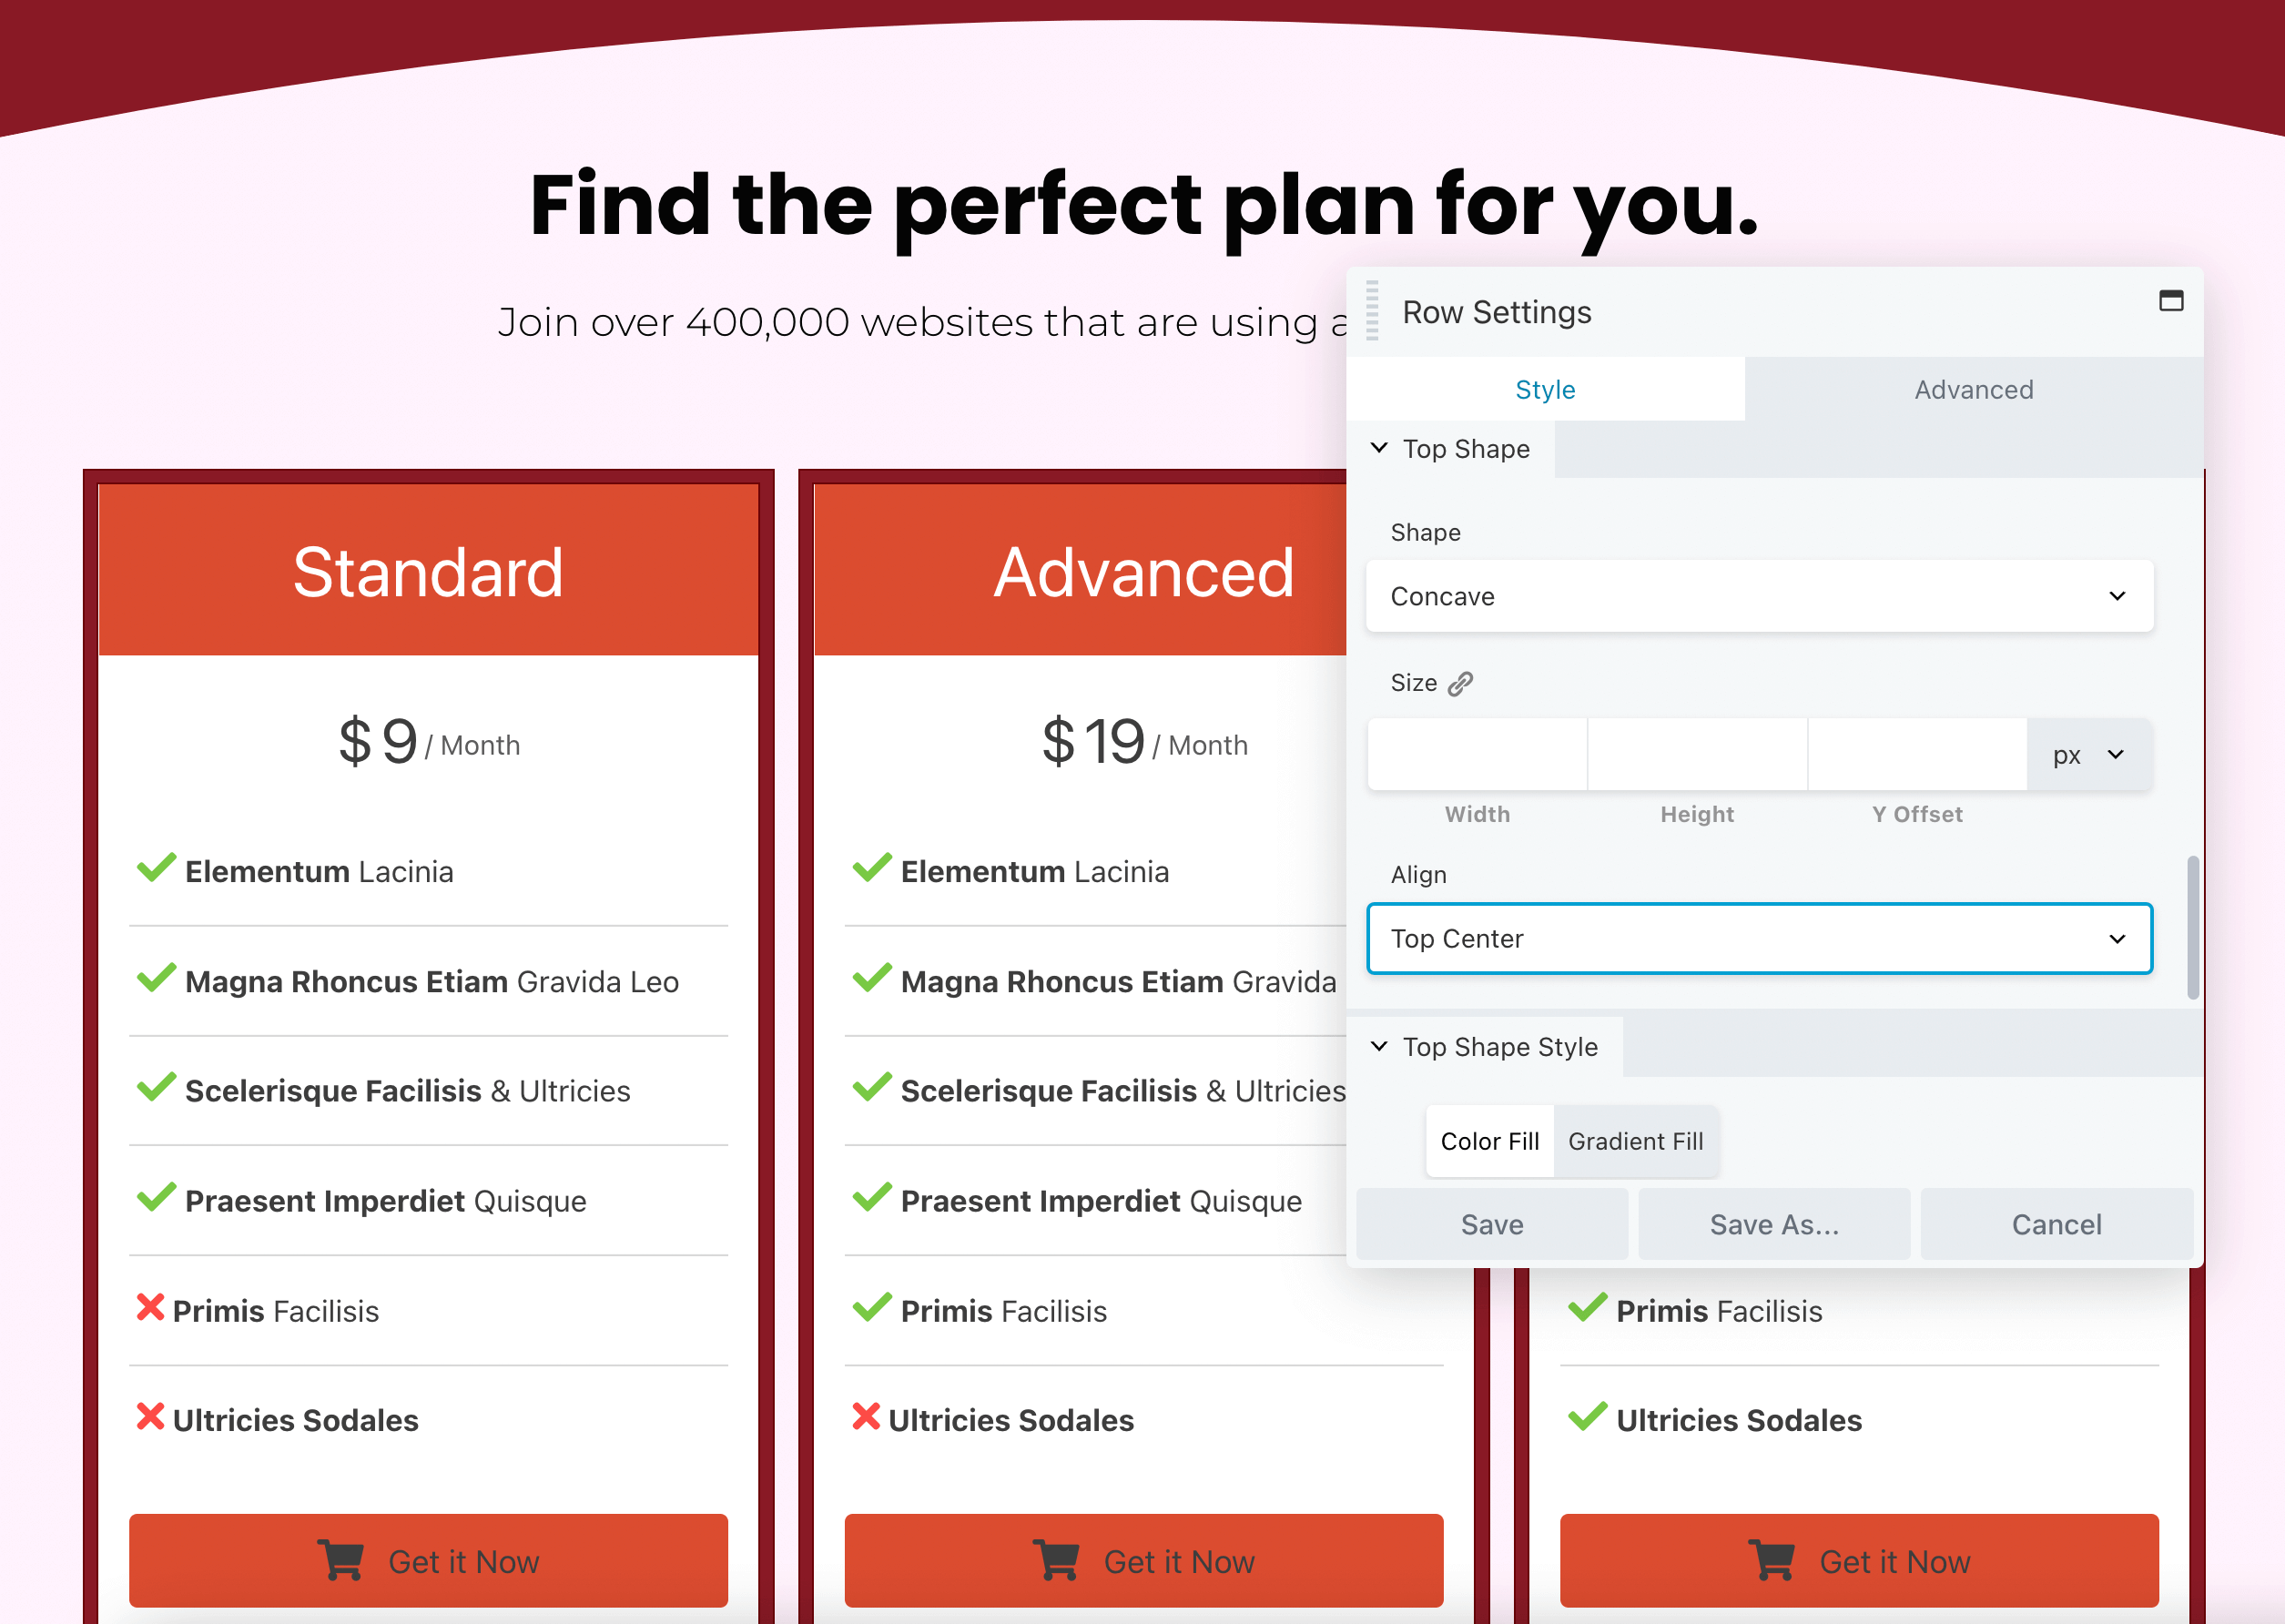
You’re also able to add a top shape or bottom shape to the design. This can bring an engaging visual element to the pricing table:
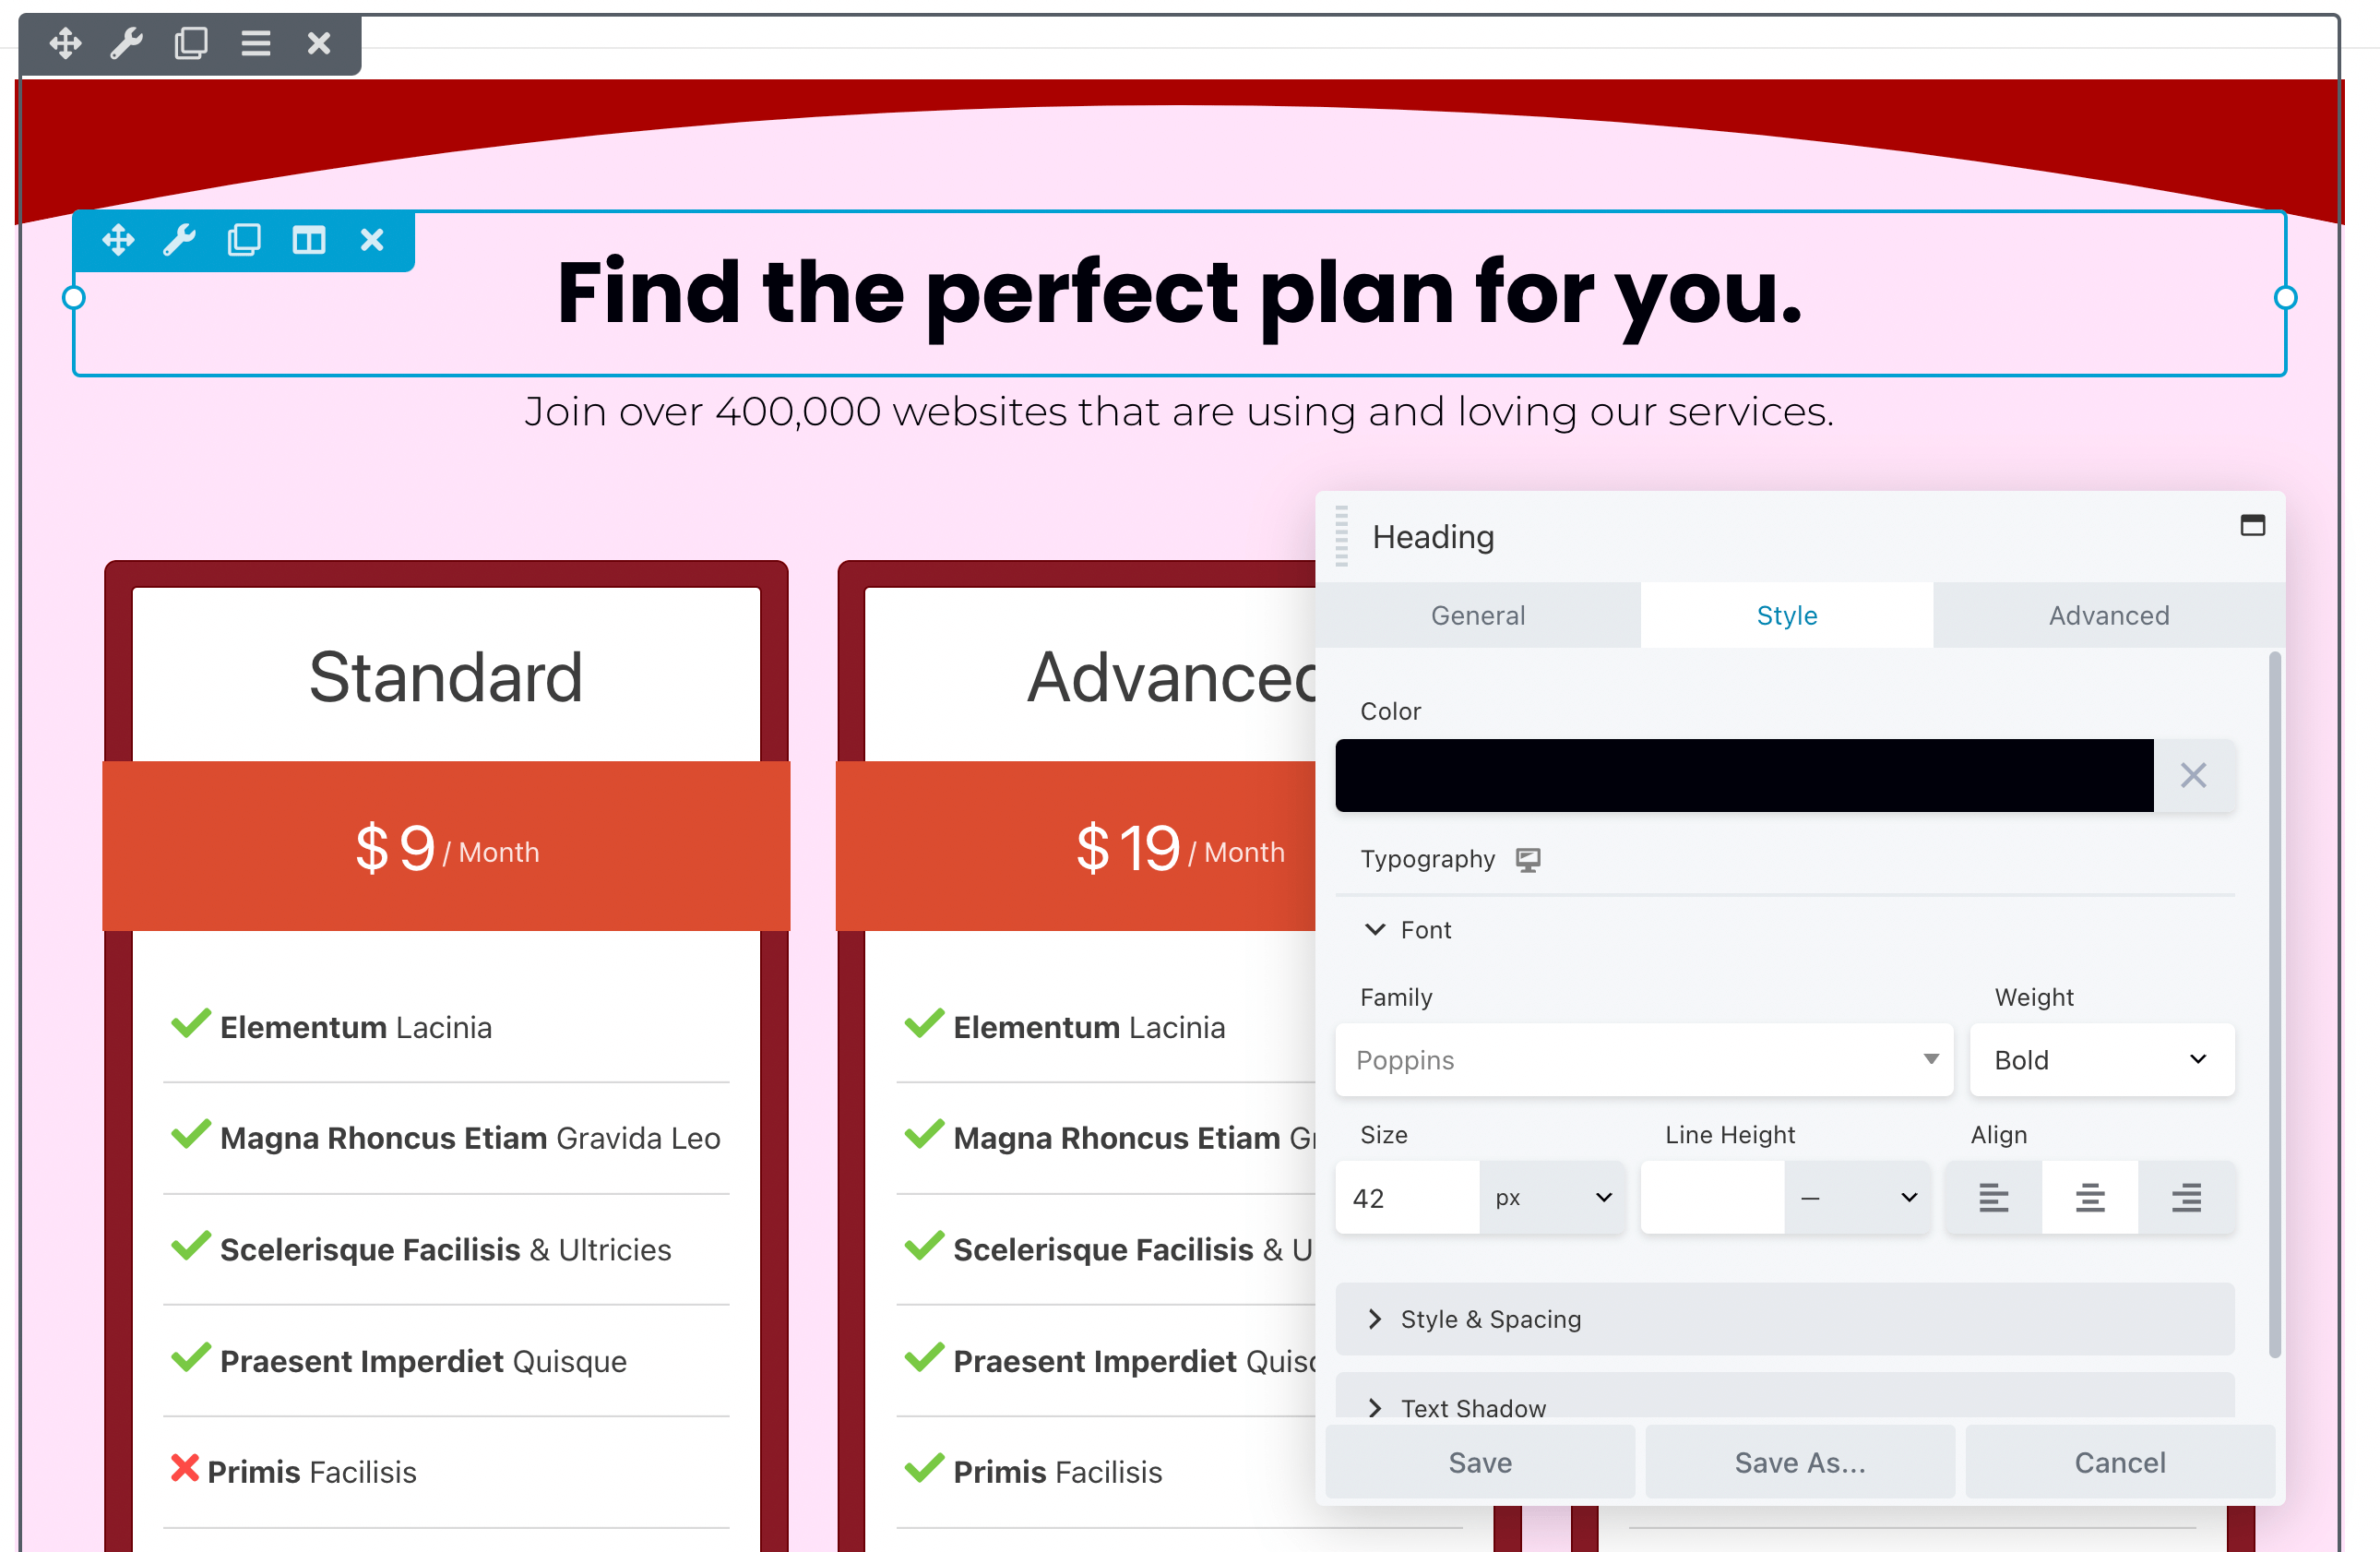
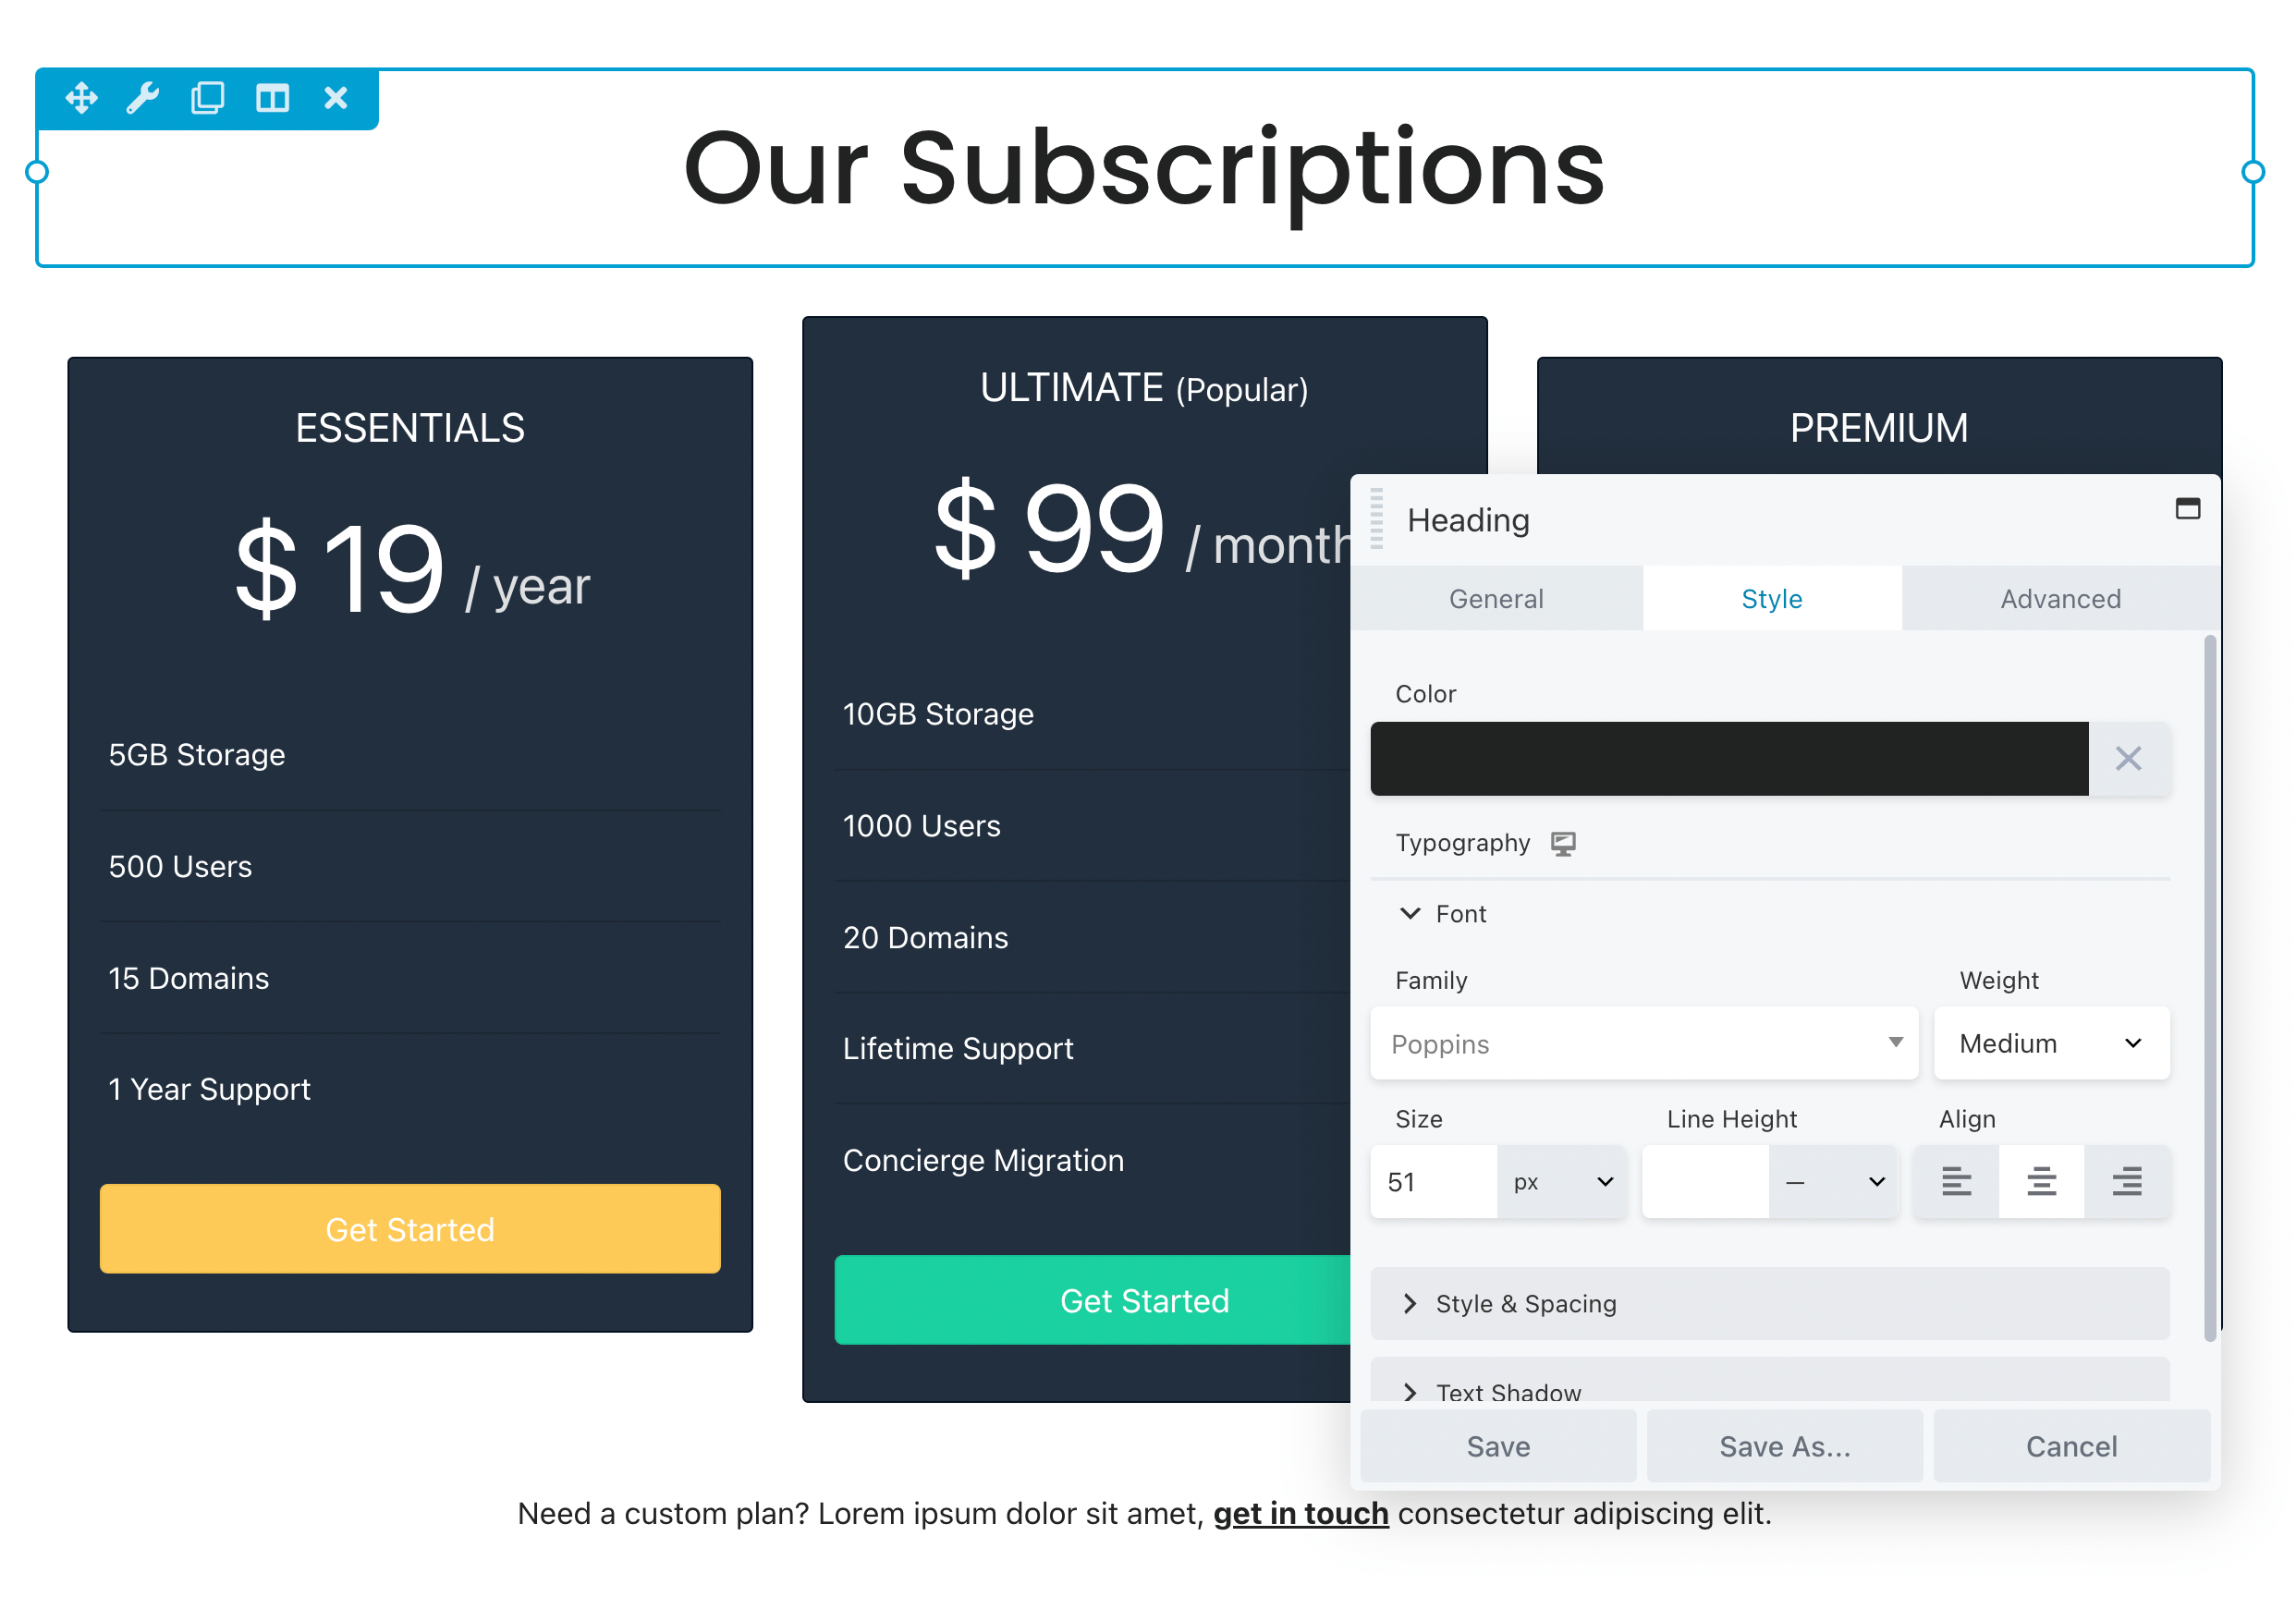
Next, you can edit the text, font, and color of the main headings. You might want to include a brief call-to-action, like Find the perfect plan for you, to encourage users to look at the table:
Now, it’s time to start customizing the pricing table. After you select it, you can choose to emphasize either the title or prices of each product. You can also edit the border style, size, and spacing as needed:
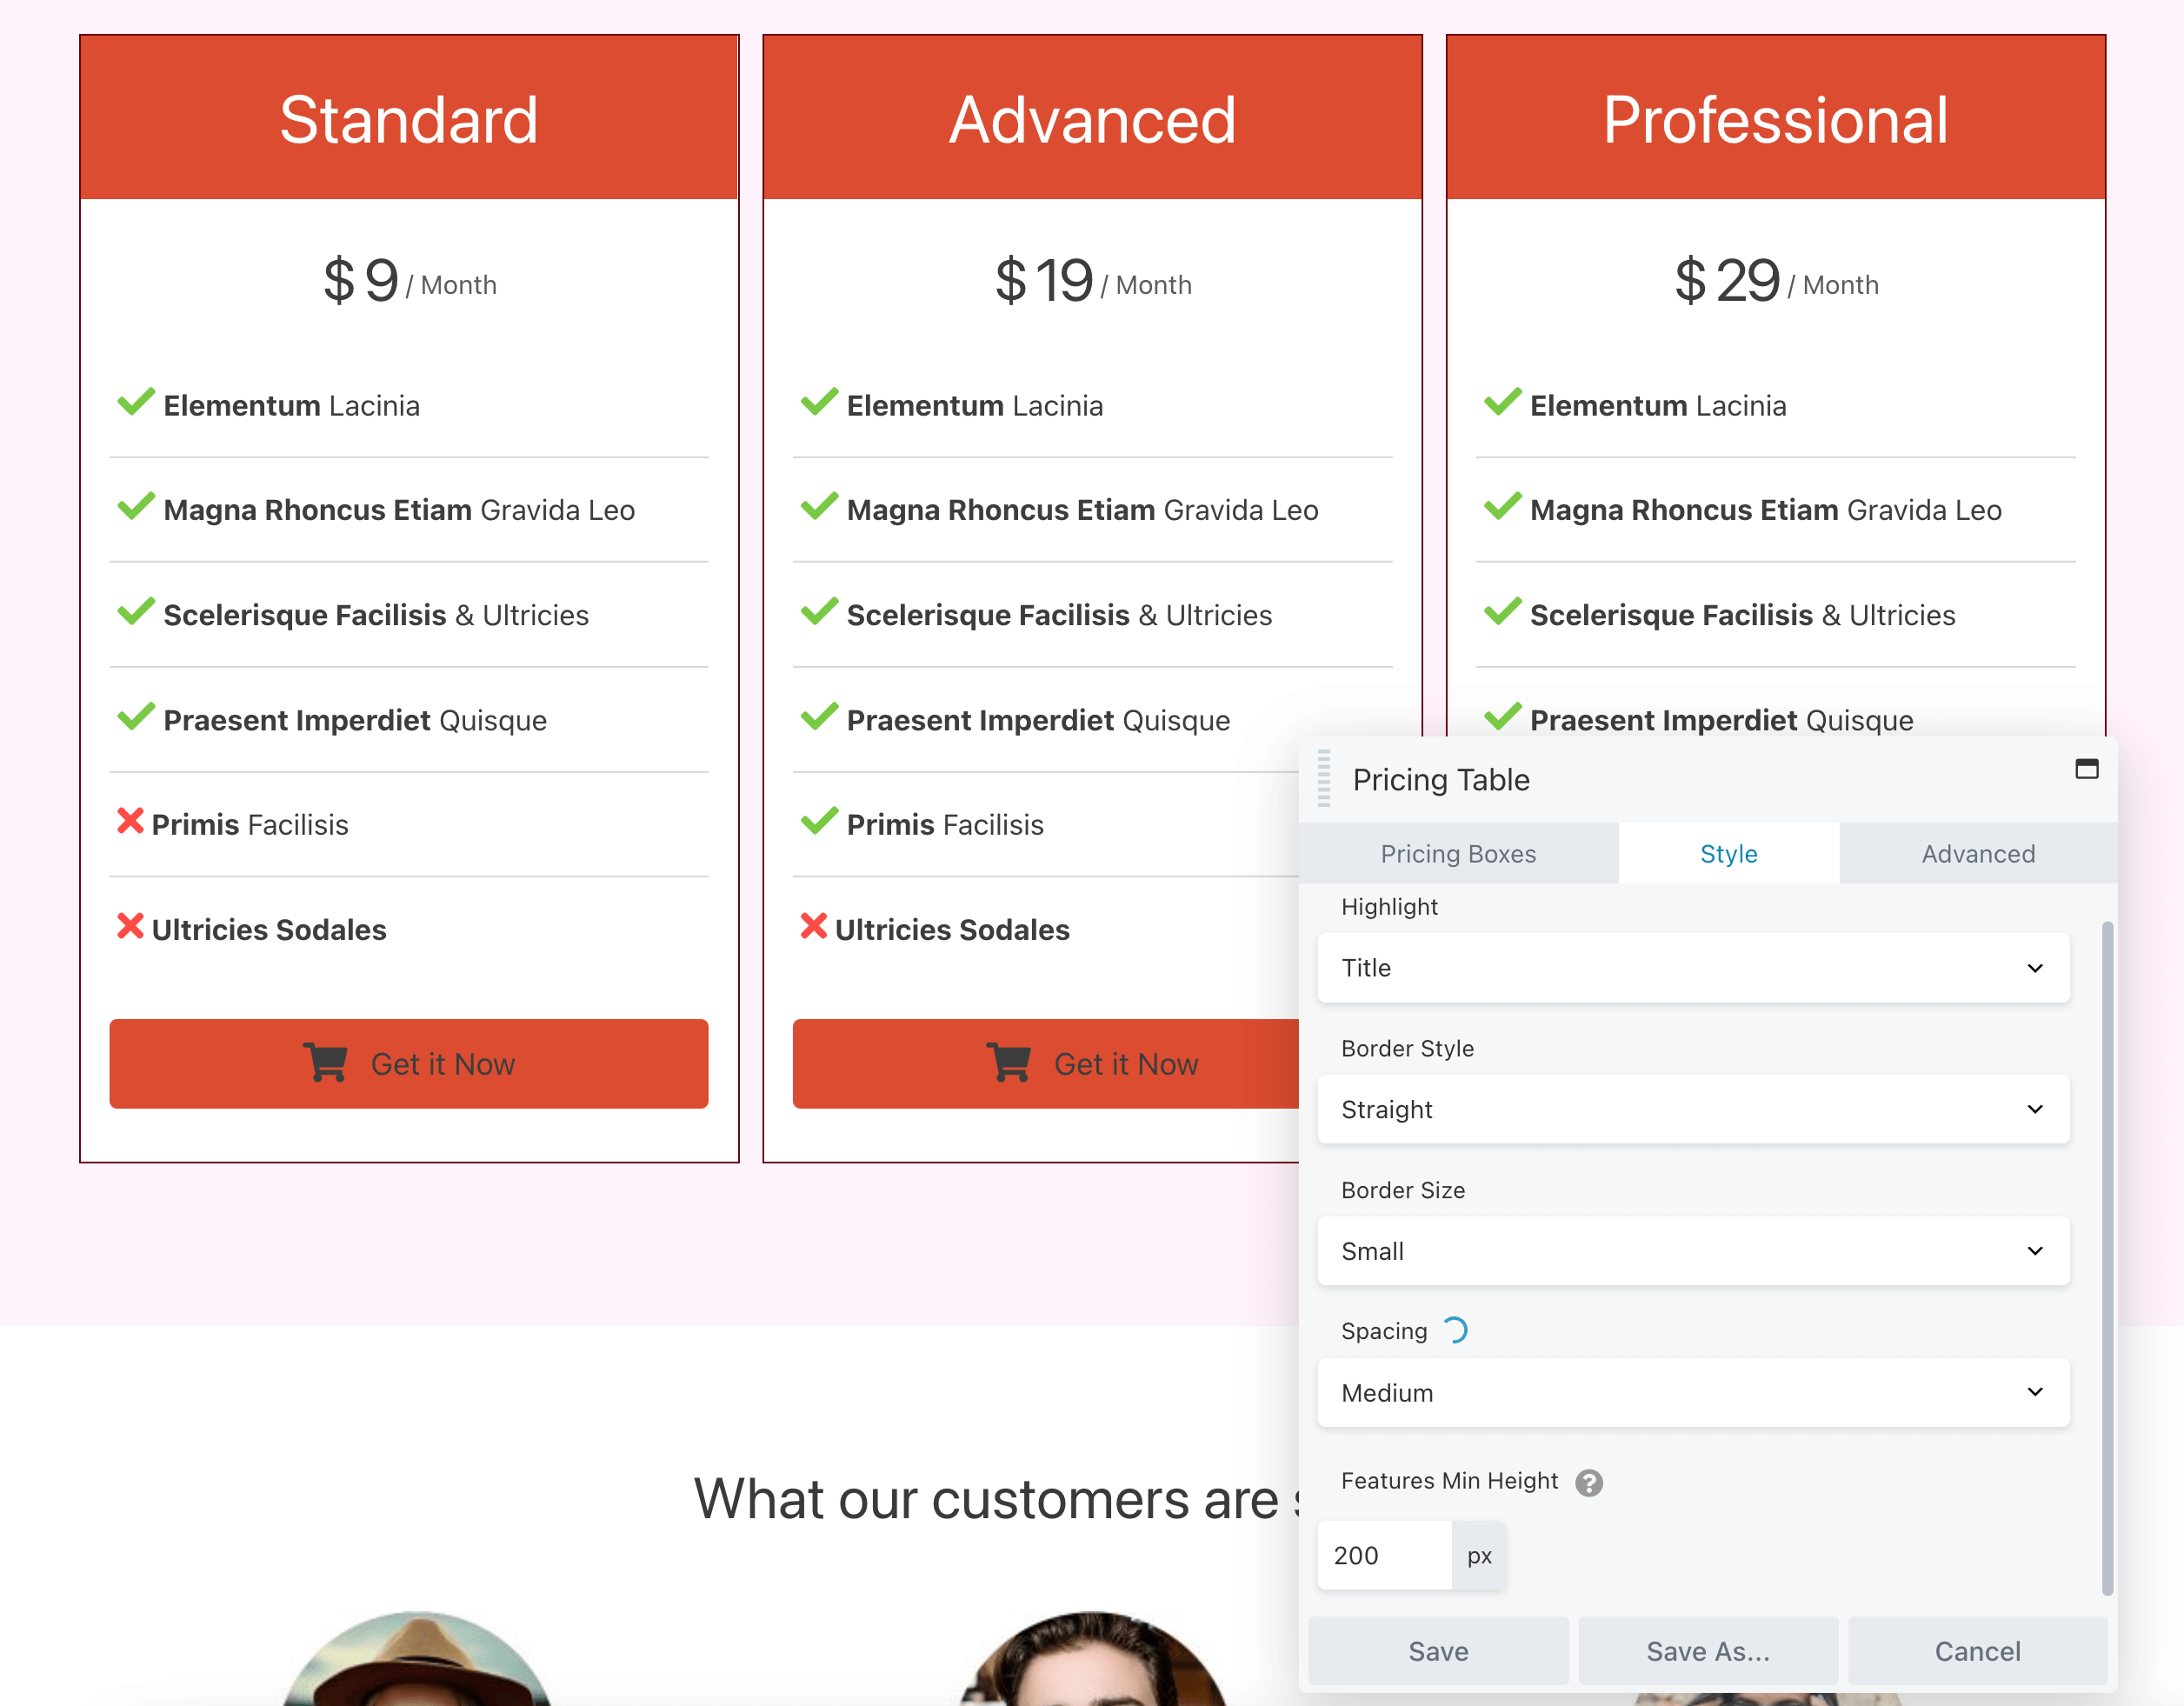
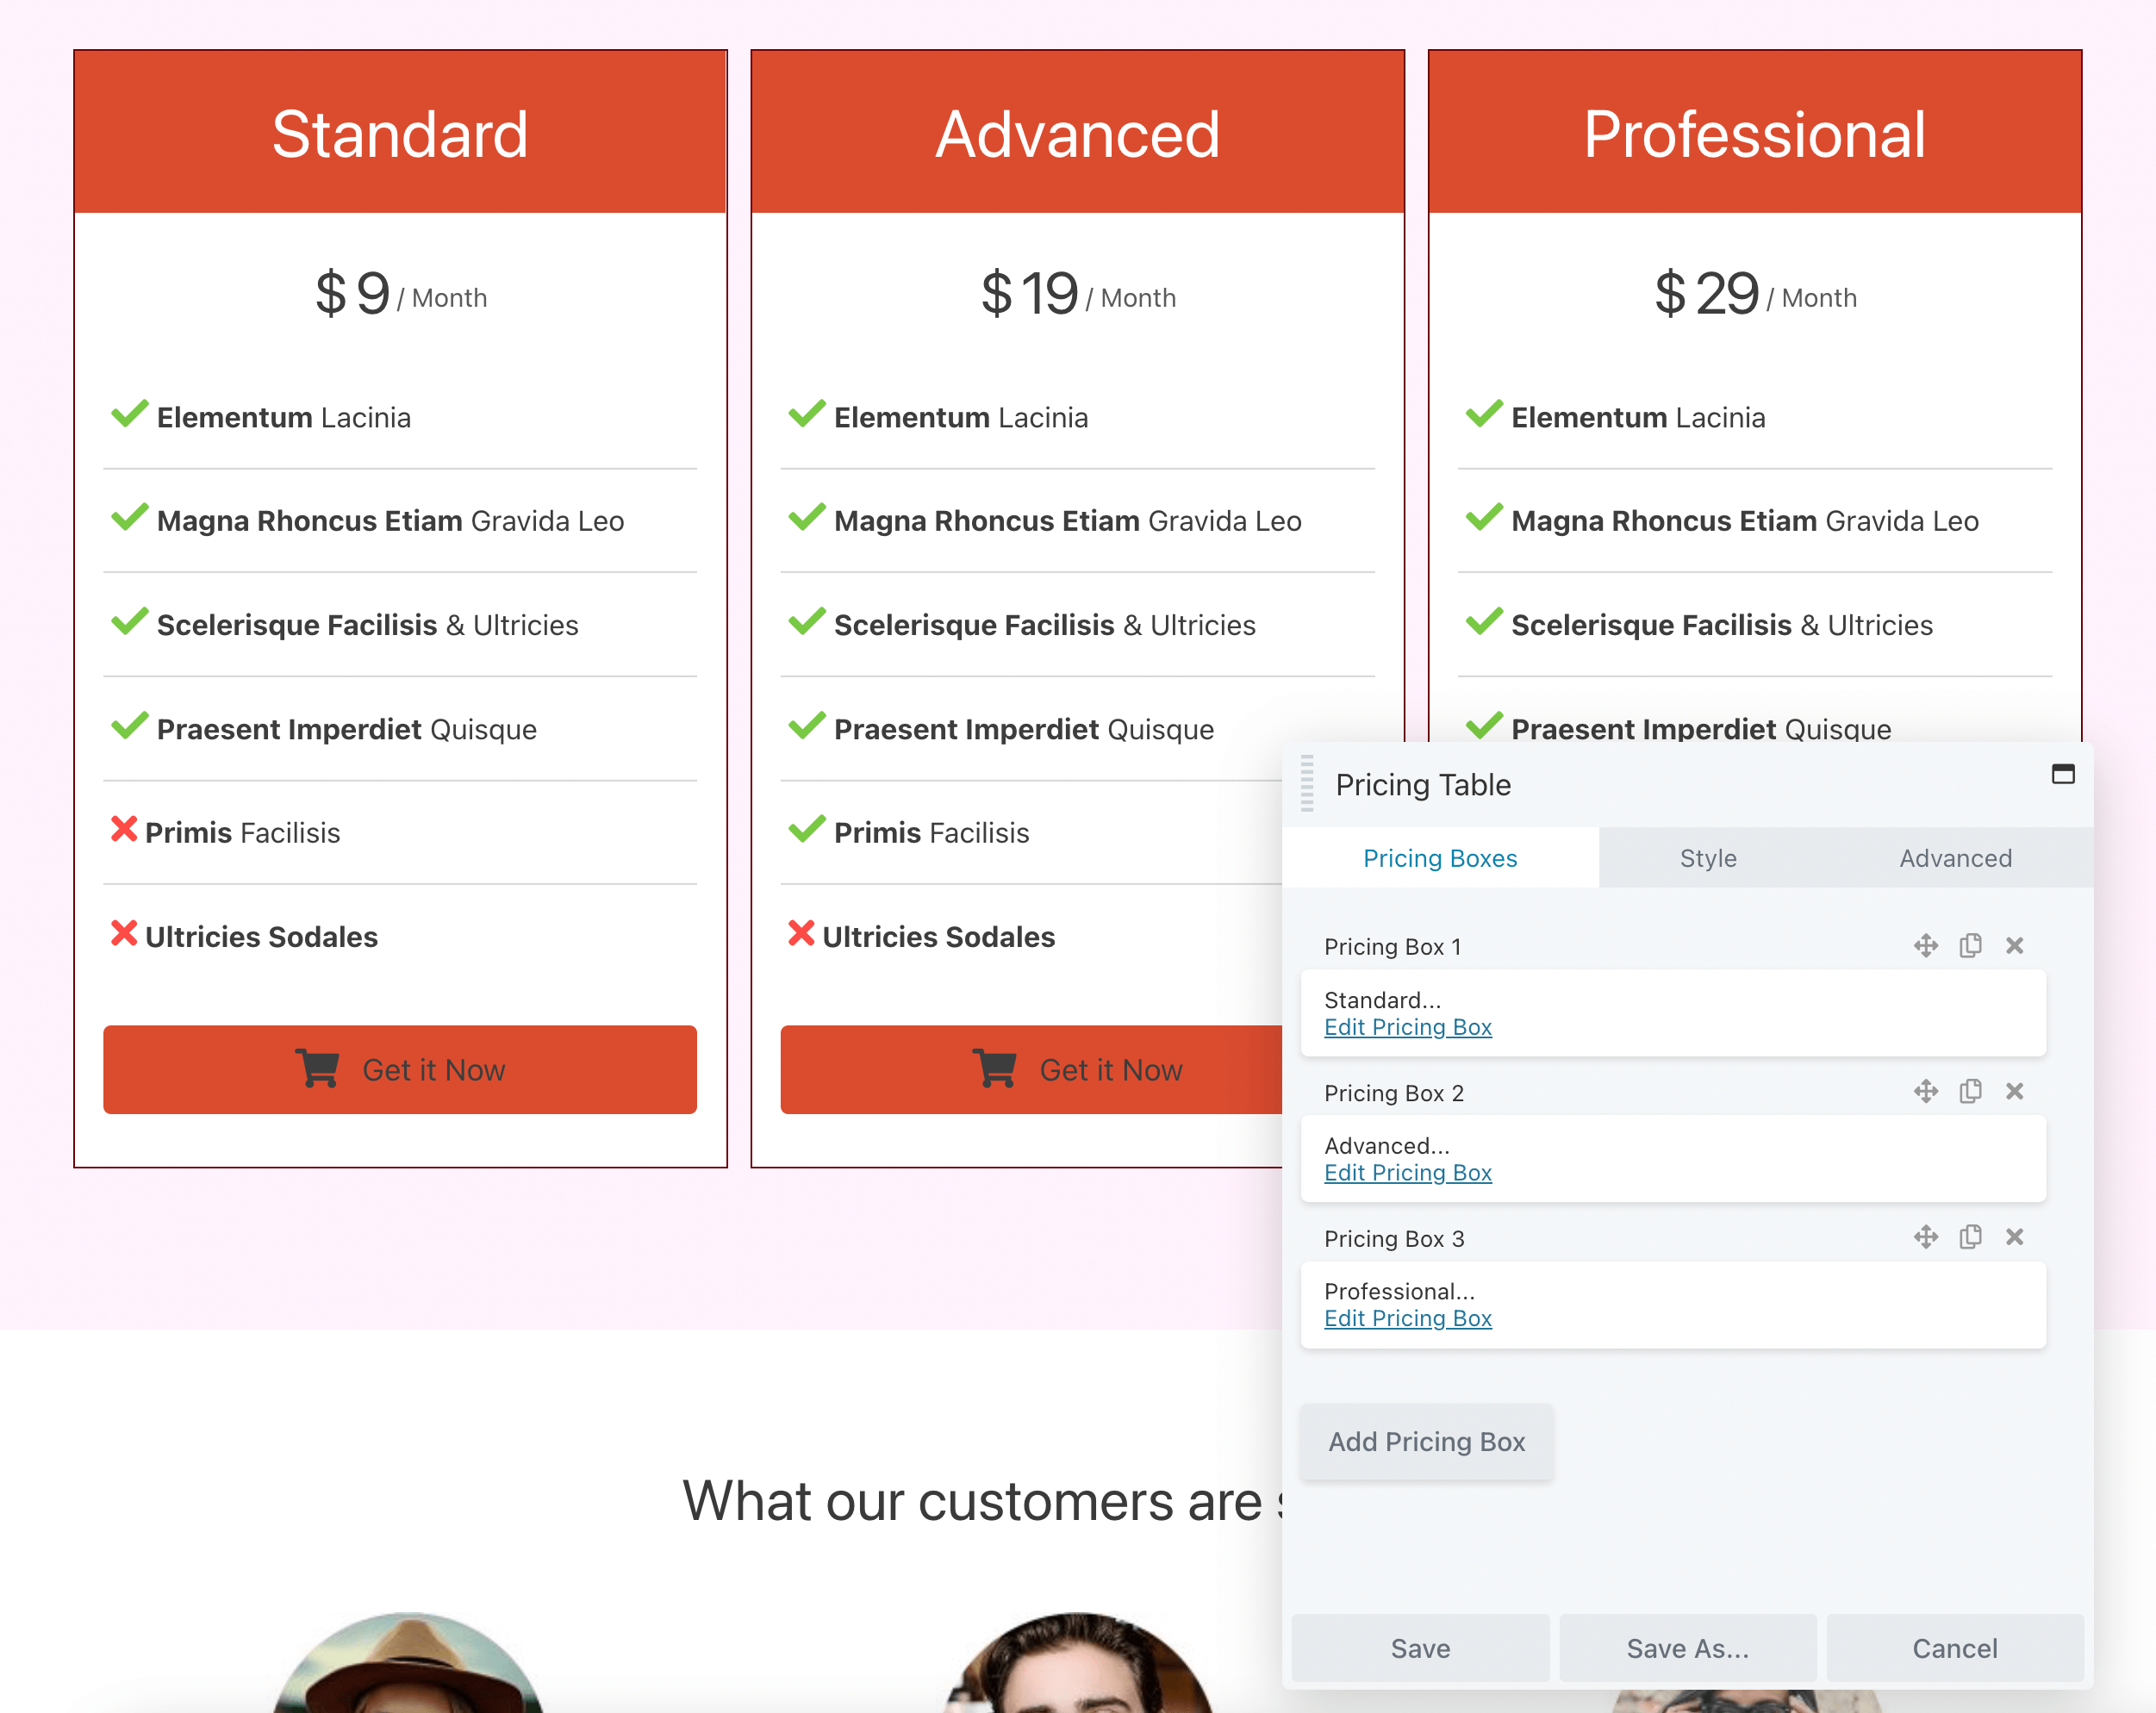
To edit the pricing options, click on the Pricing Boxes tab. Here, you can modify each box, reorder them, or add new ones:
As you can see, the advantage of using a Beaver Builder template is that it allows you to fully design your Pricing page in just a few steps.
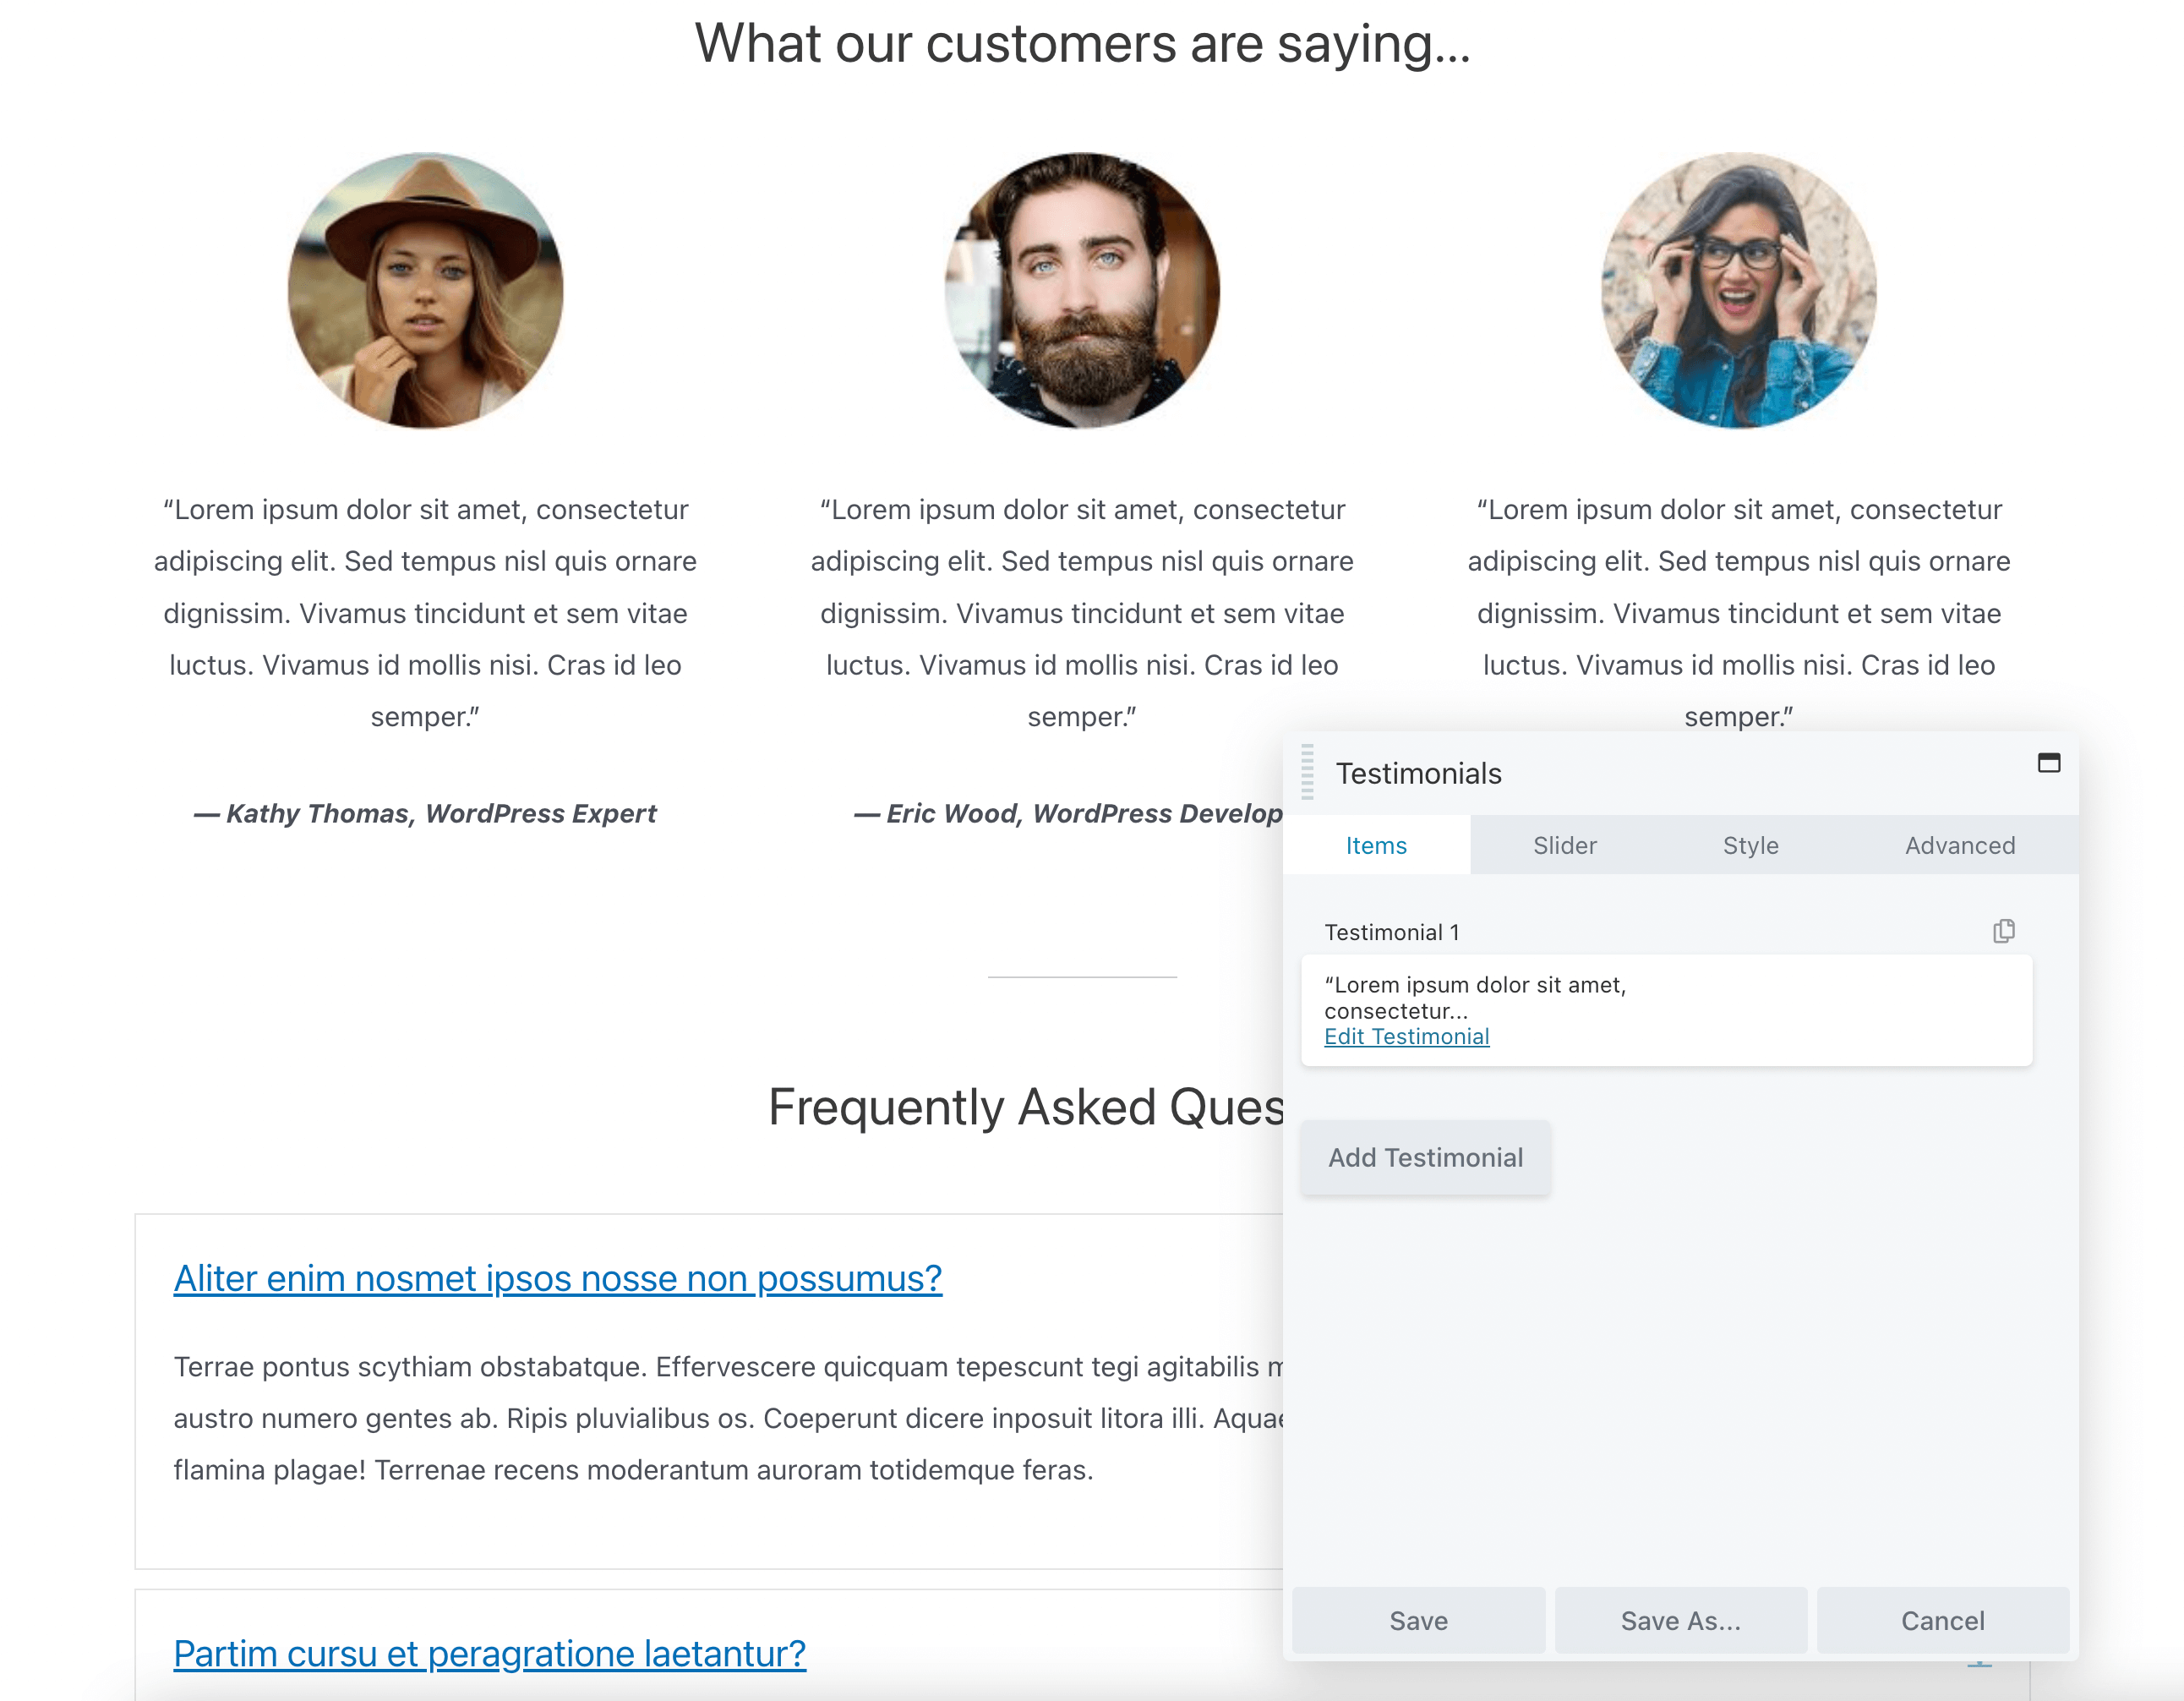
As noted above, the page template we are working with also includes a customer testimonial and FAQ module. You can choose to delete these or, after you’ve saved your pricing table, you can scroll down the page and customze these sections to include more information about your products or services:
When you’re happy with how your Pricing page looks, be sure to save your changes and publish it!
2. Choose a Pre-Built Pricing Table Row
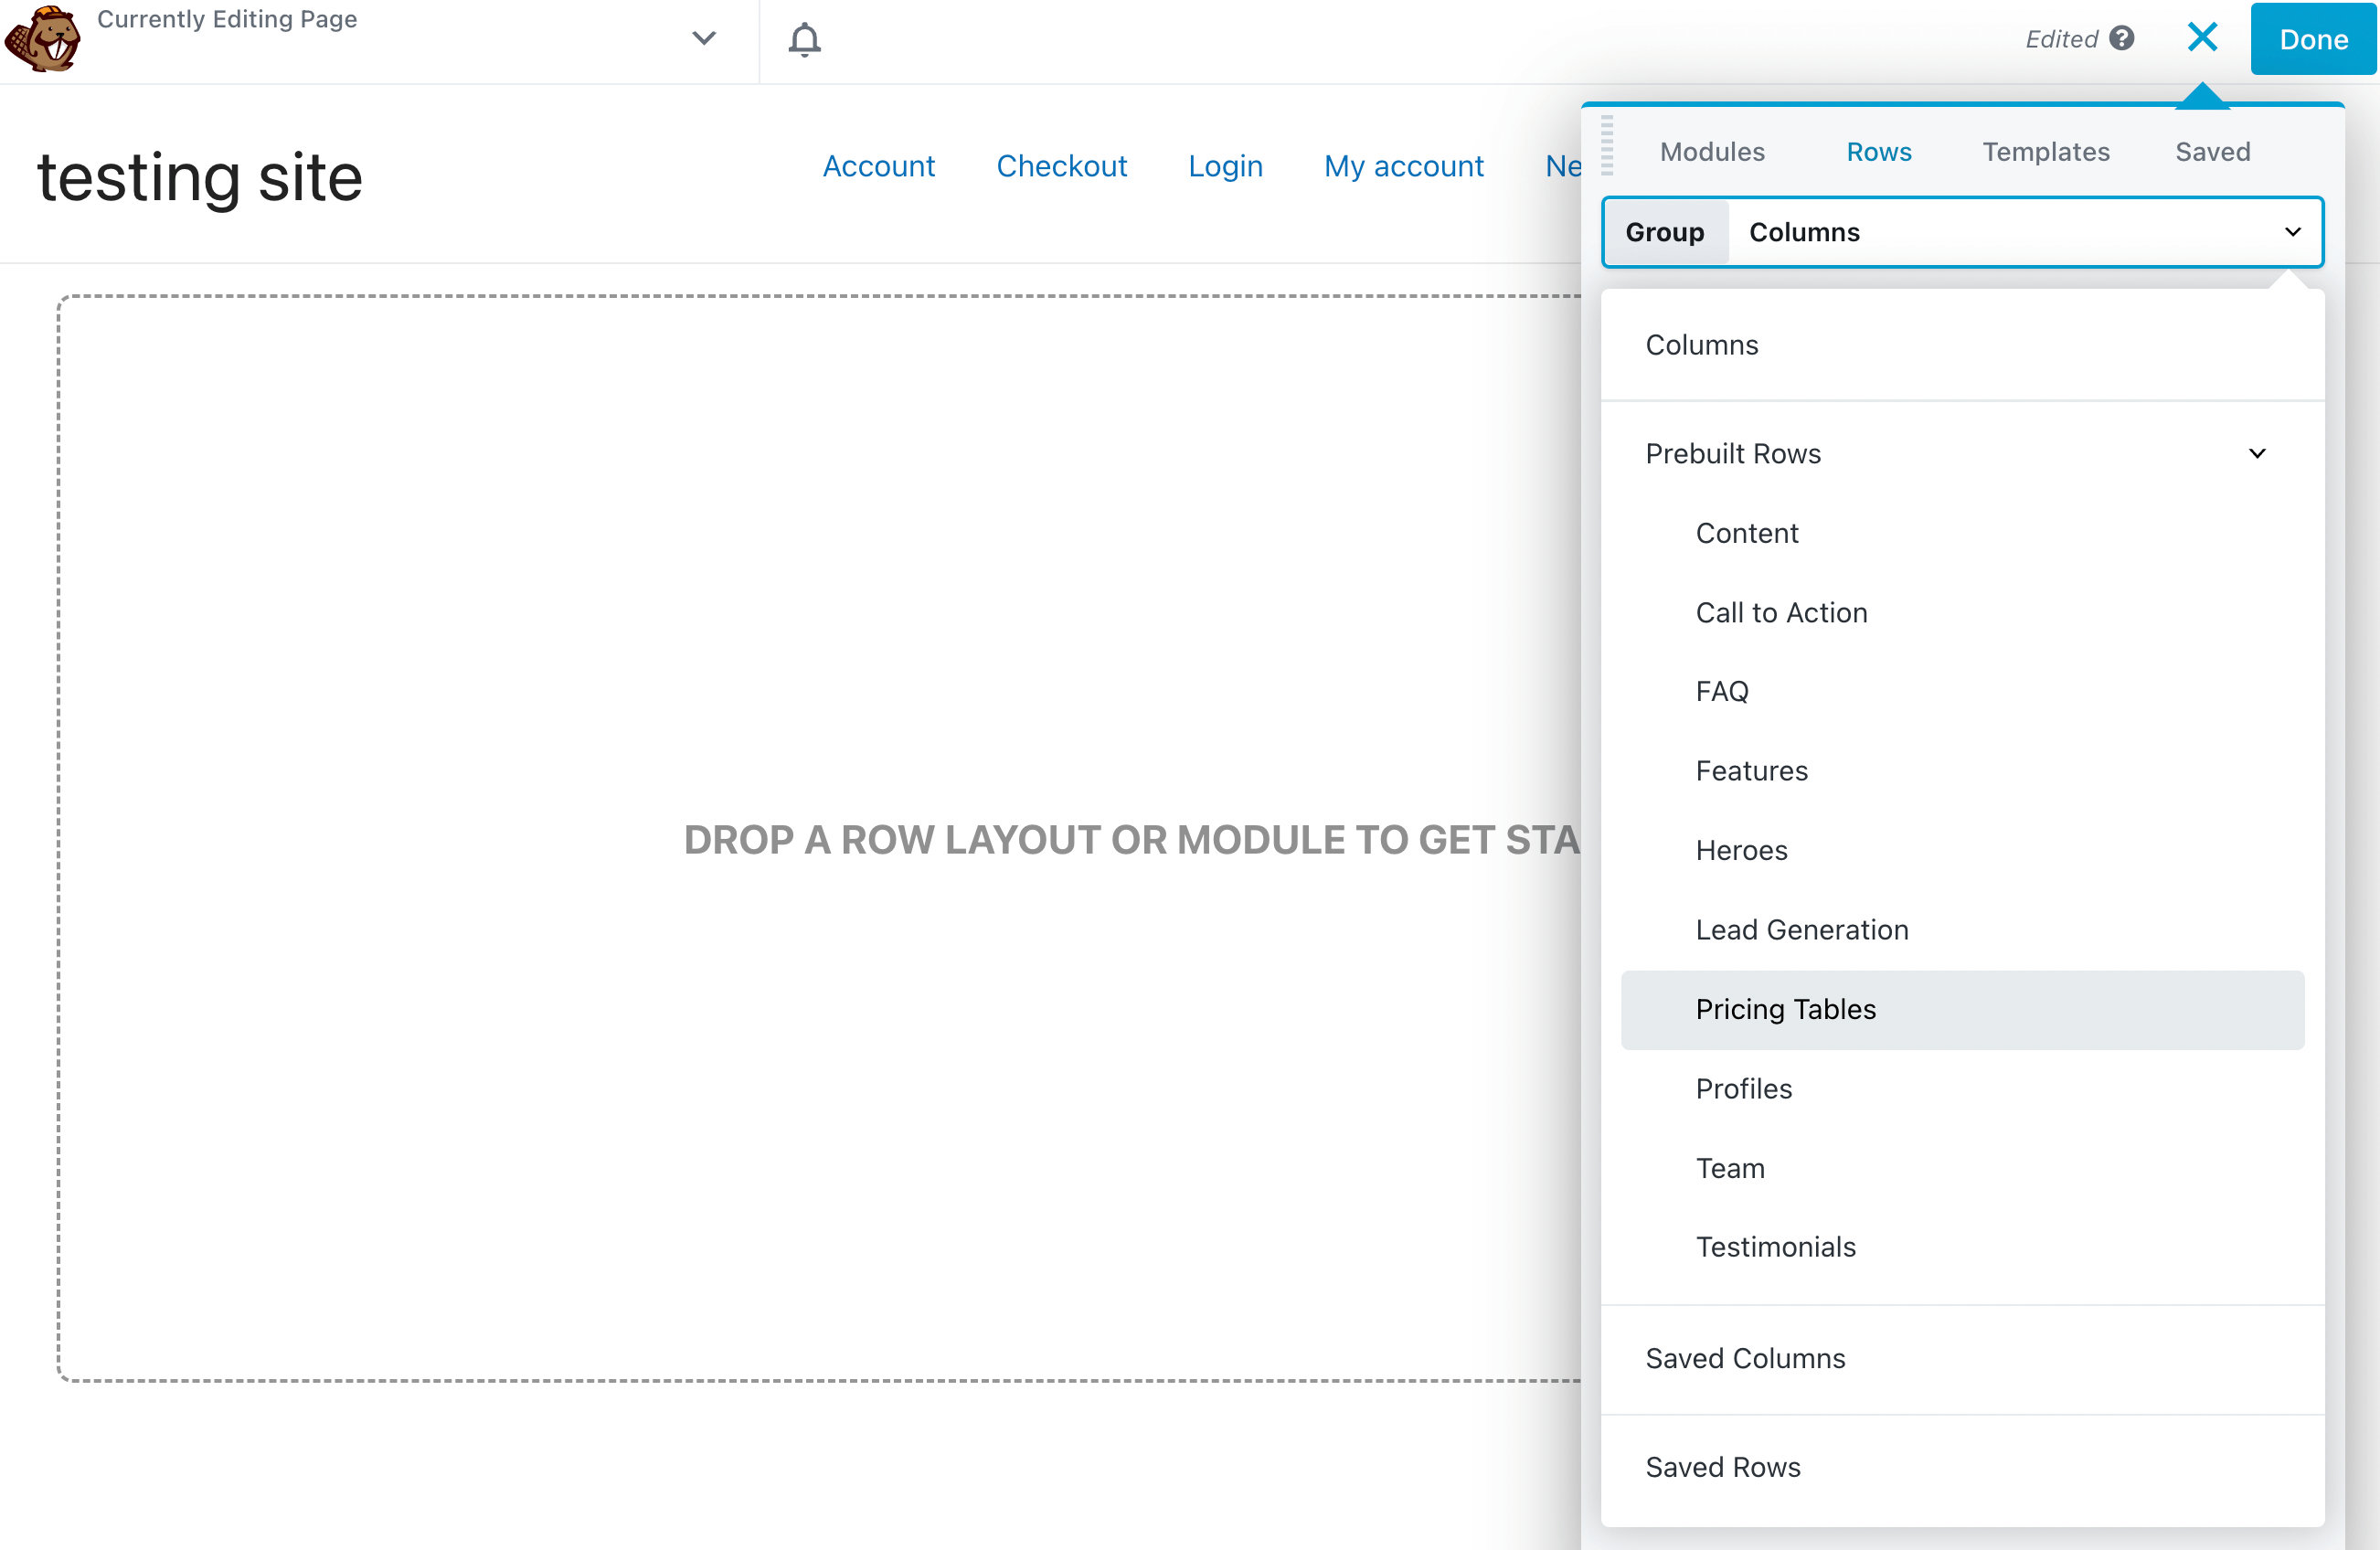
Alternatively, you may want some more variety in your pre-designed pricing table options. In this case, you can browse Beaver Builder’s pre-built rows. To get started, simply go to Rows > Prebuilt Rows > Pricing Tables:
Then, you can choose from eight different pricing table designs. Once you find one you like, drag and drop it onto the page:

Similar to using a template, you’ll need to edit the heading to include information about your products. You can customize the font type, weight, size, spacing, and more:
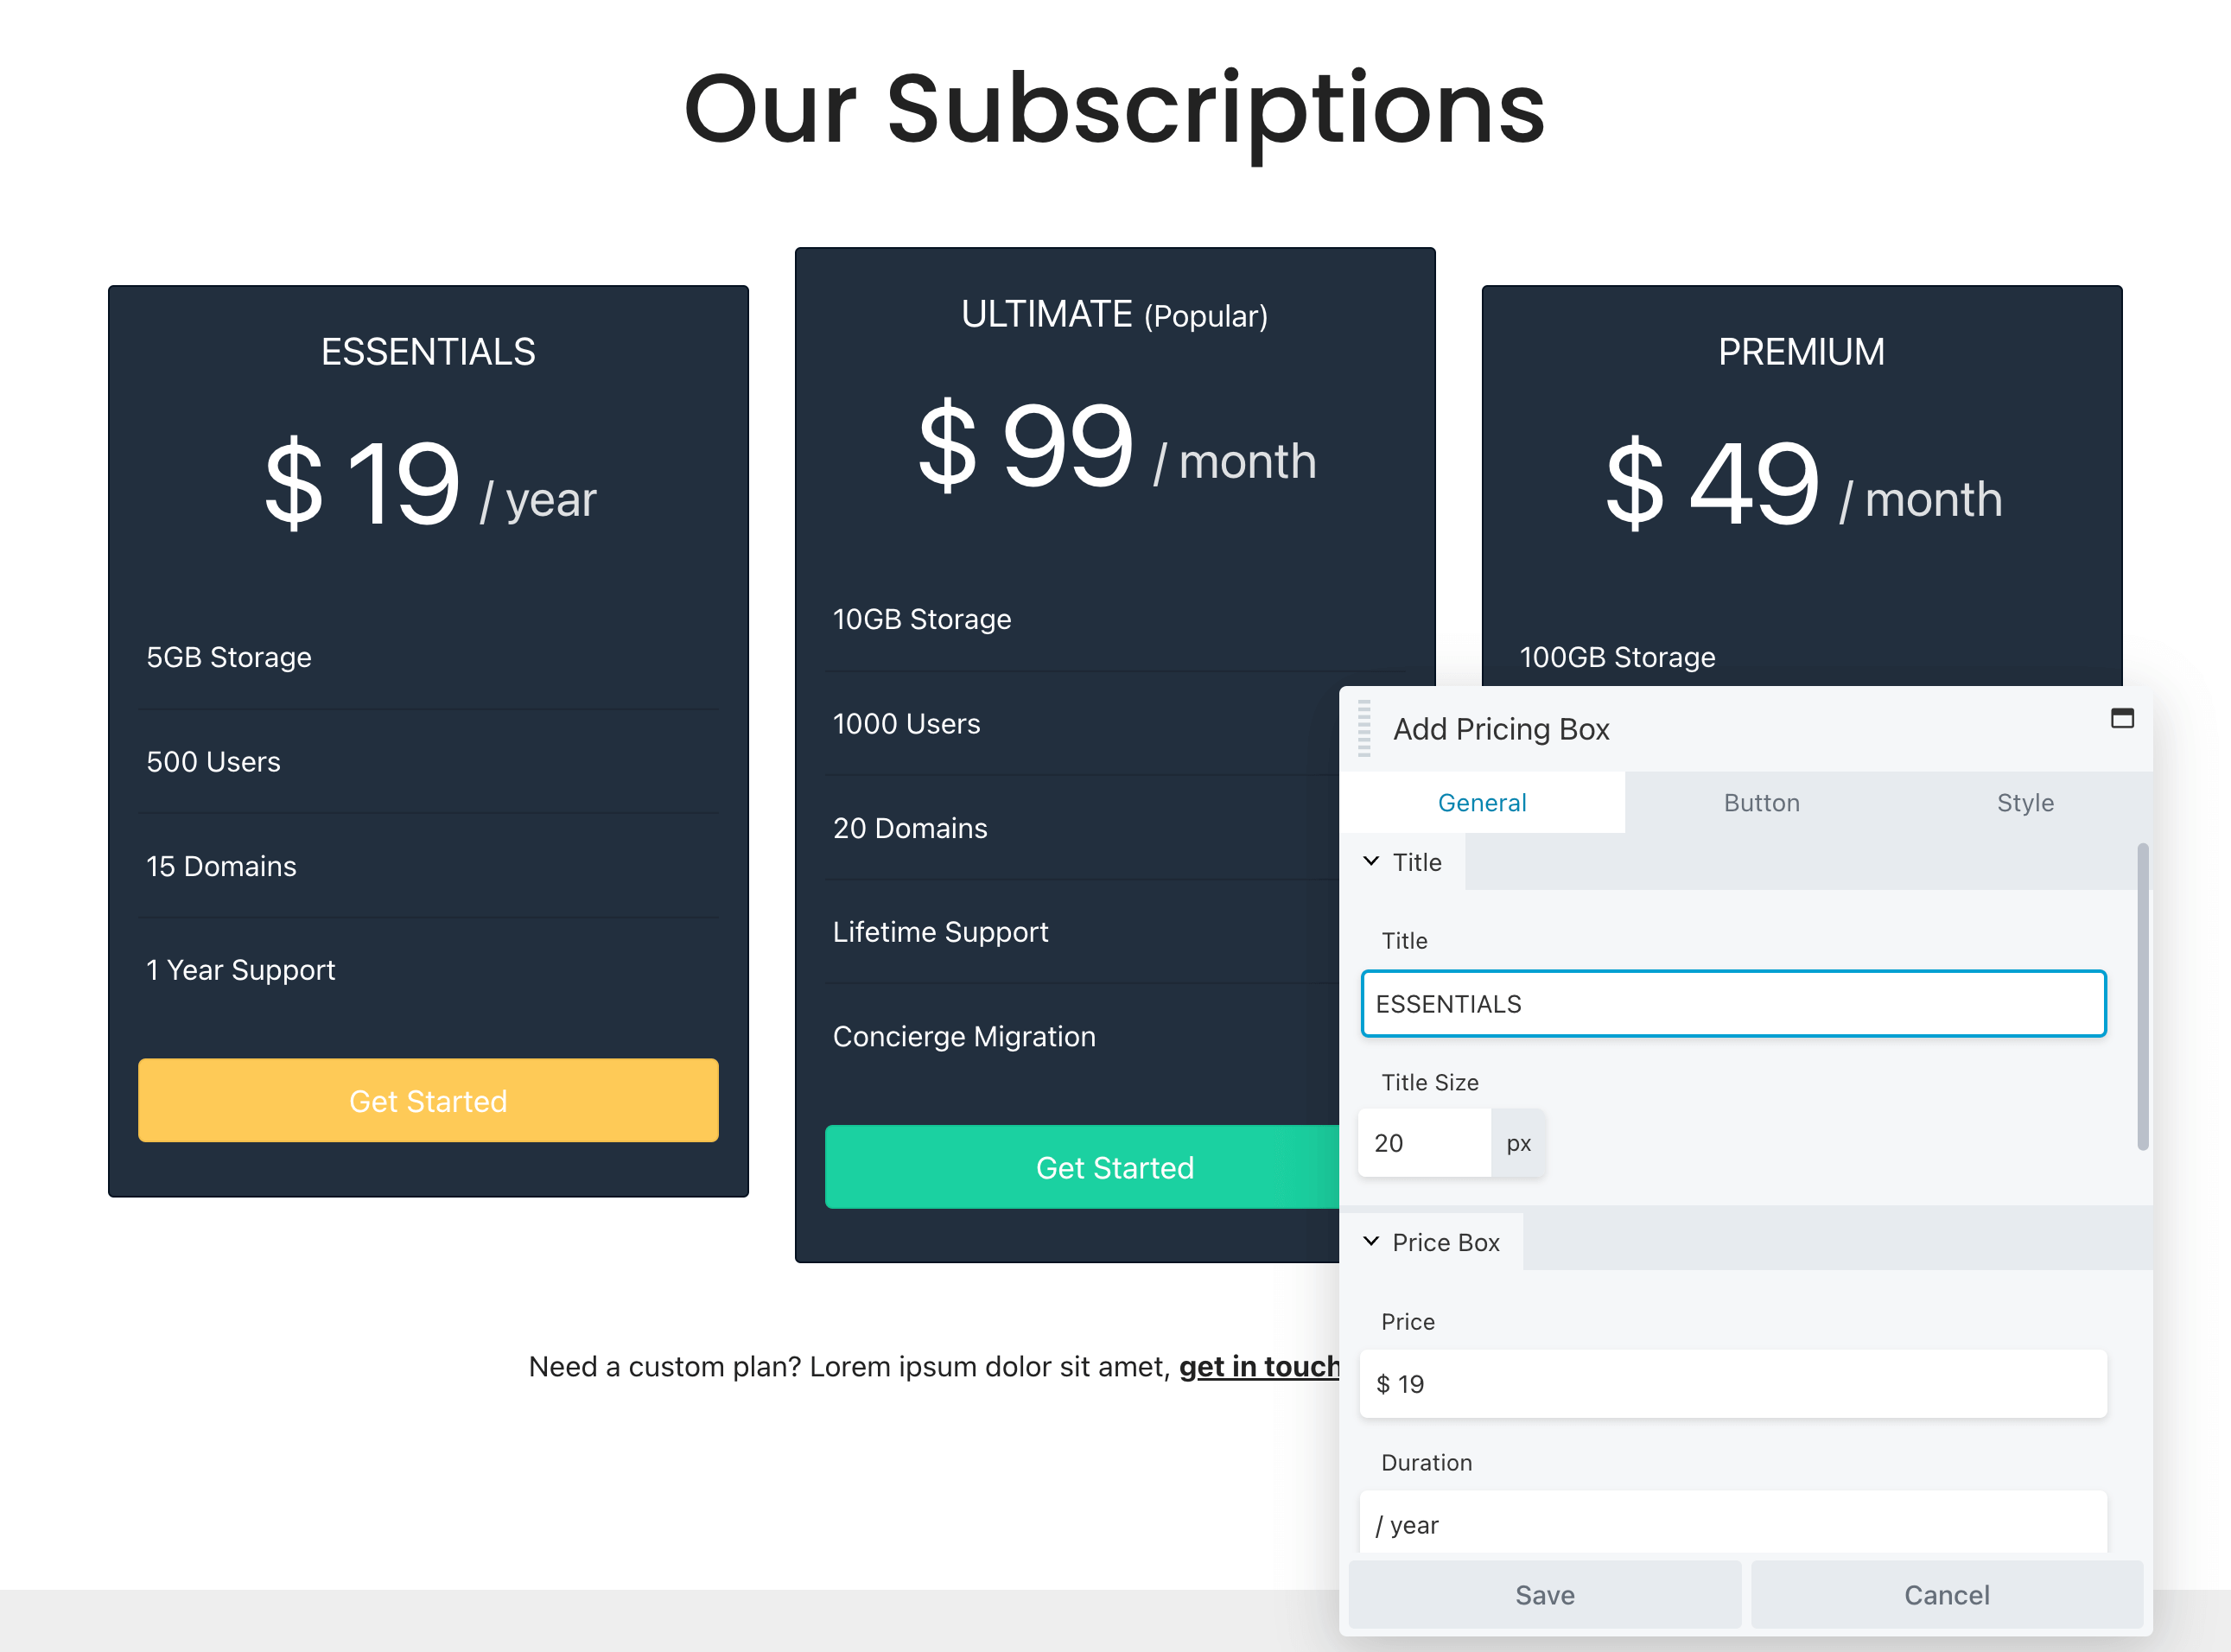
Now, you can start editing the pricing boxes. For each one, you’re able to add a custom title and price. You can also choose a monthly or yearly payment duration:
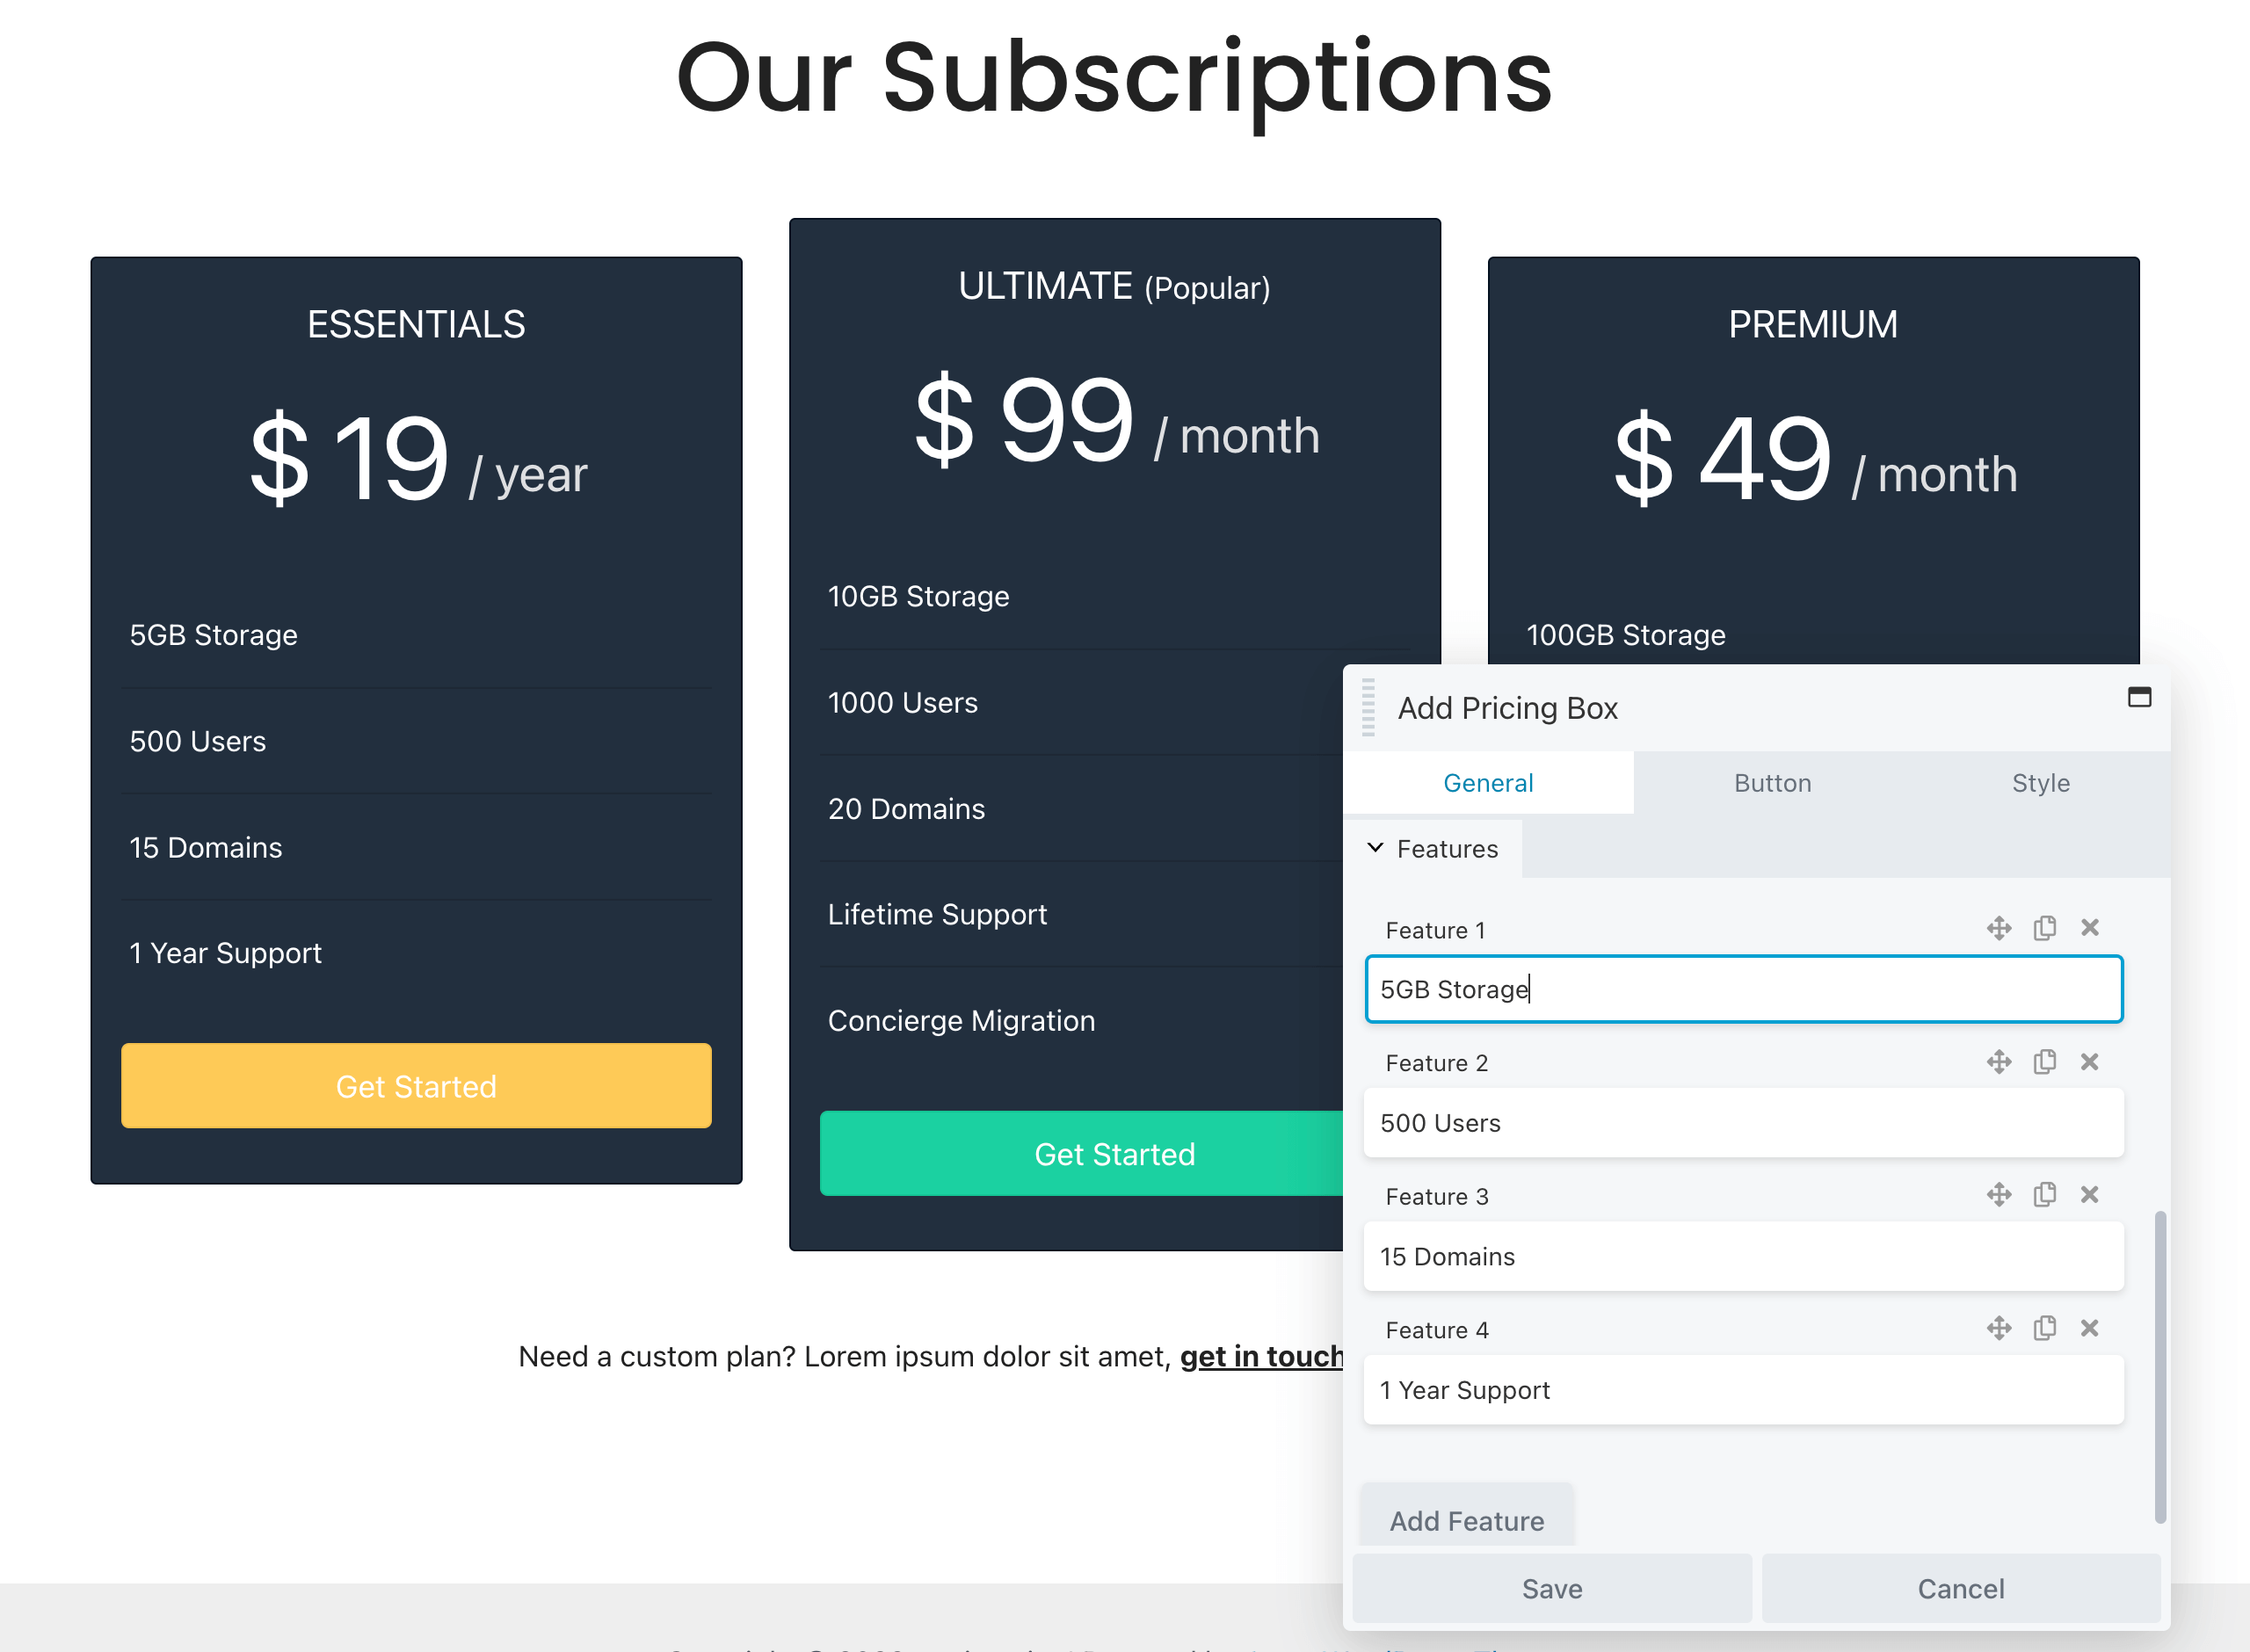
Next, scroll down to the Features section. Here, you’re able to edit the current options and add new ones as needed. To ensure that customers understand your pricing table, it’s a good idea to only include the main features that will differentiate each tier:
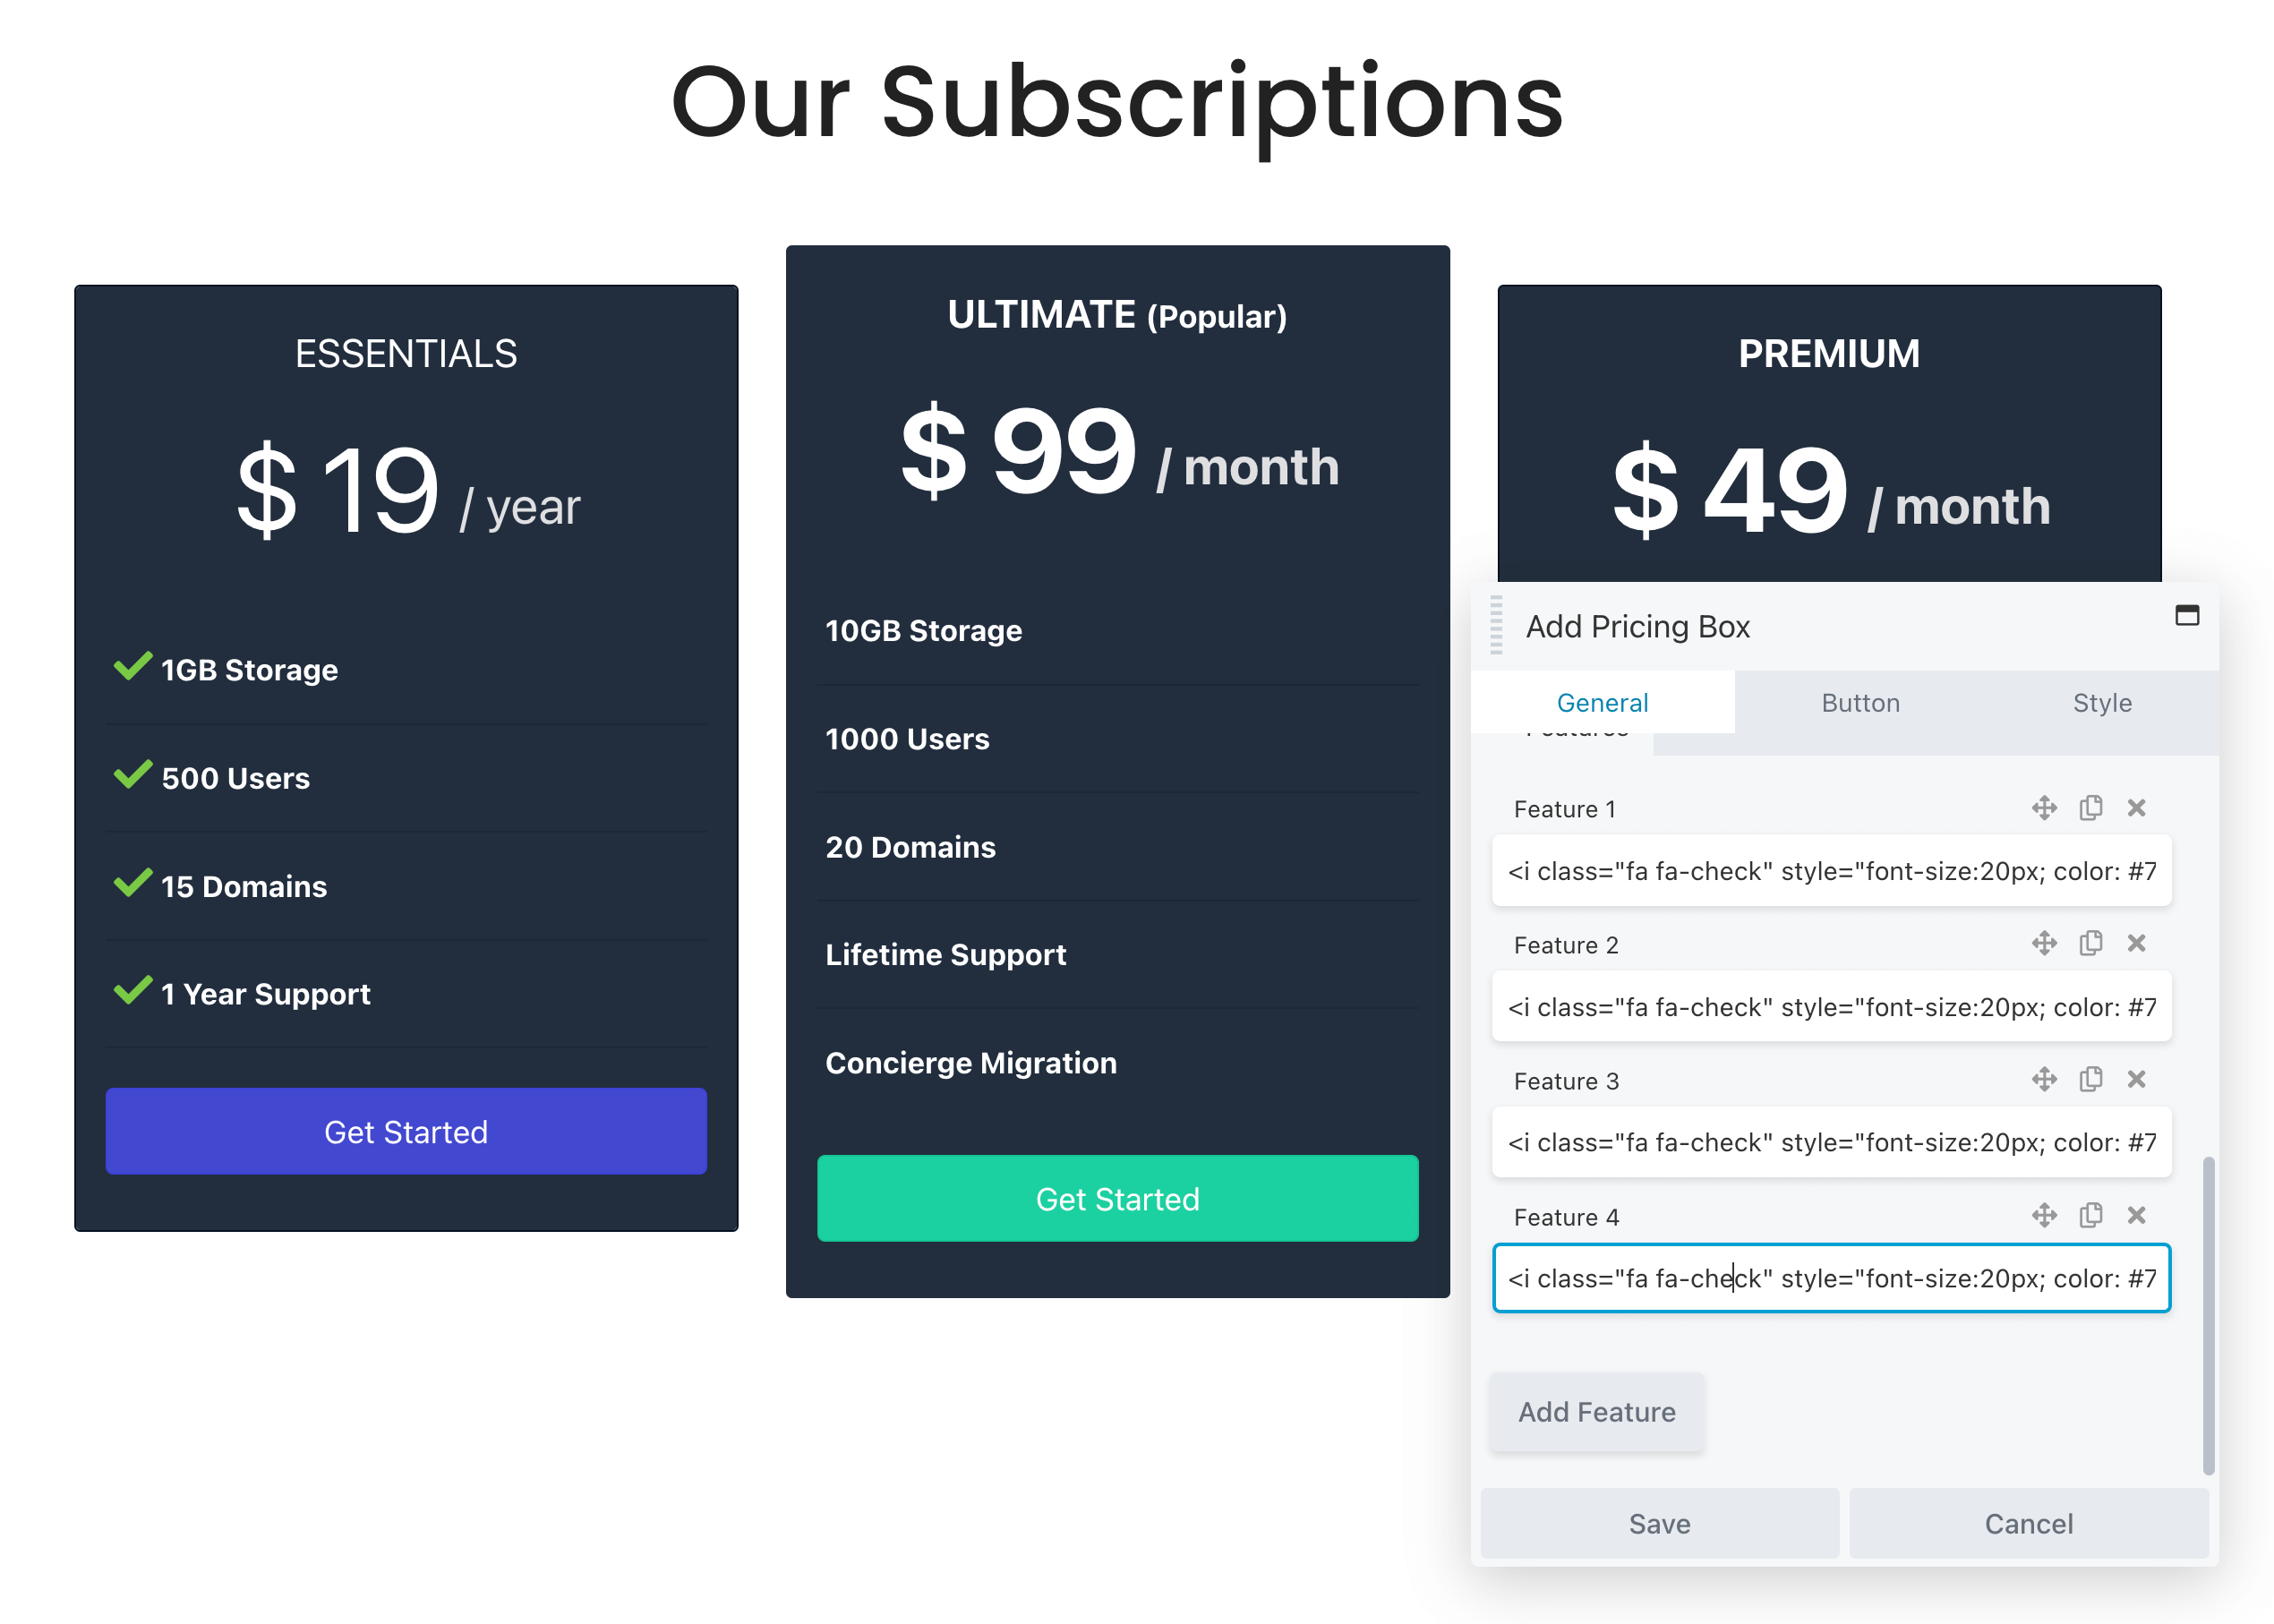
Additionally, keep in mind that you can add HTML markup to any text box. For example, if you want to include green checkmarks next to each feature, you can paste this bit of code instead of text:
<i class="fa fa-check" style="font-size:20px; color: #7AC943;"></i> <strong> 1 Year Support Here’s how that HTML code would look on the front-end:
In the Button tab, you can add a new call-to-action. Additionally, if you want to allow users to purchase that plan, just paste a link to the checkout page:
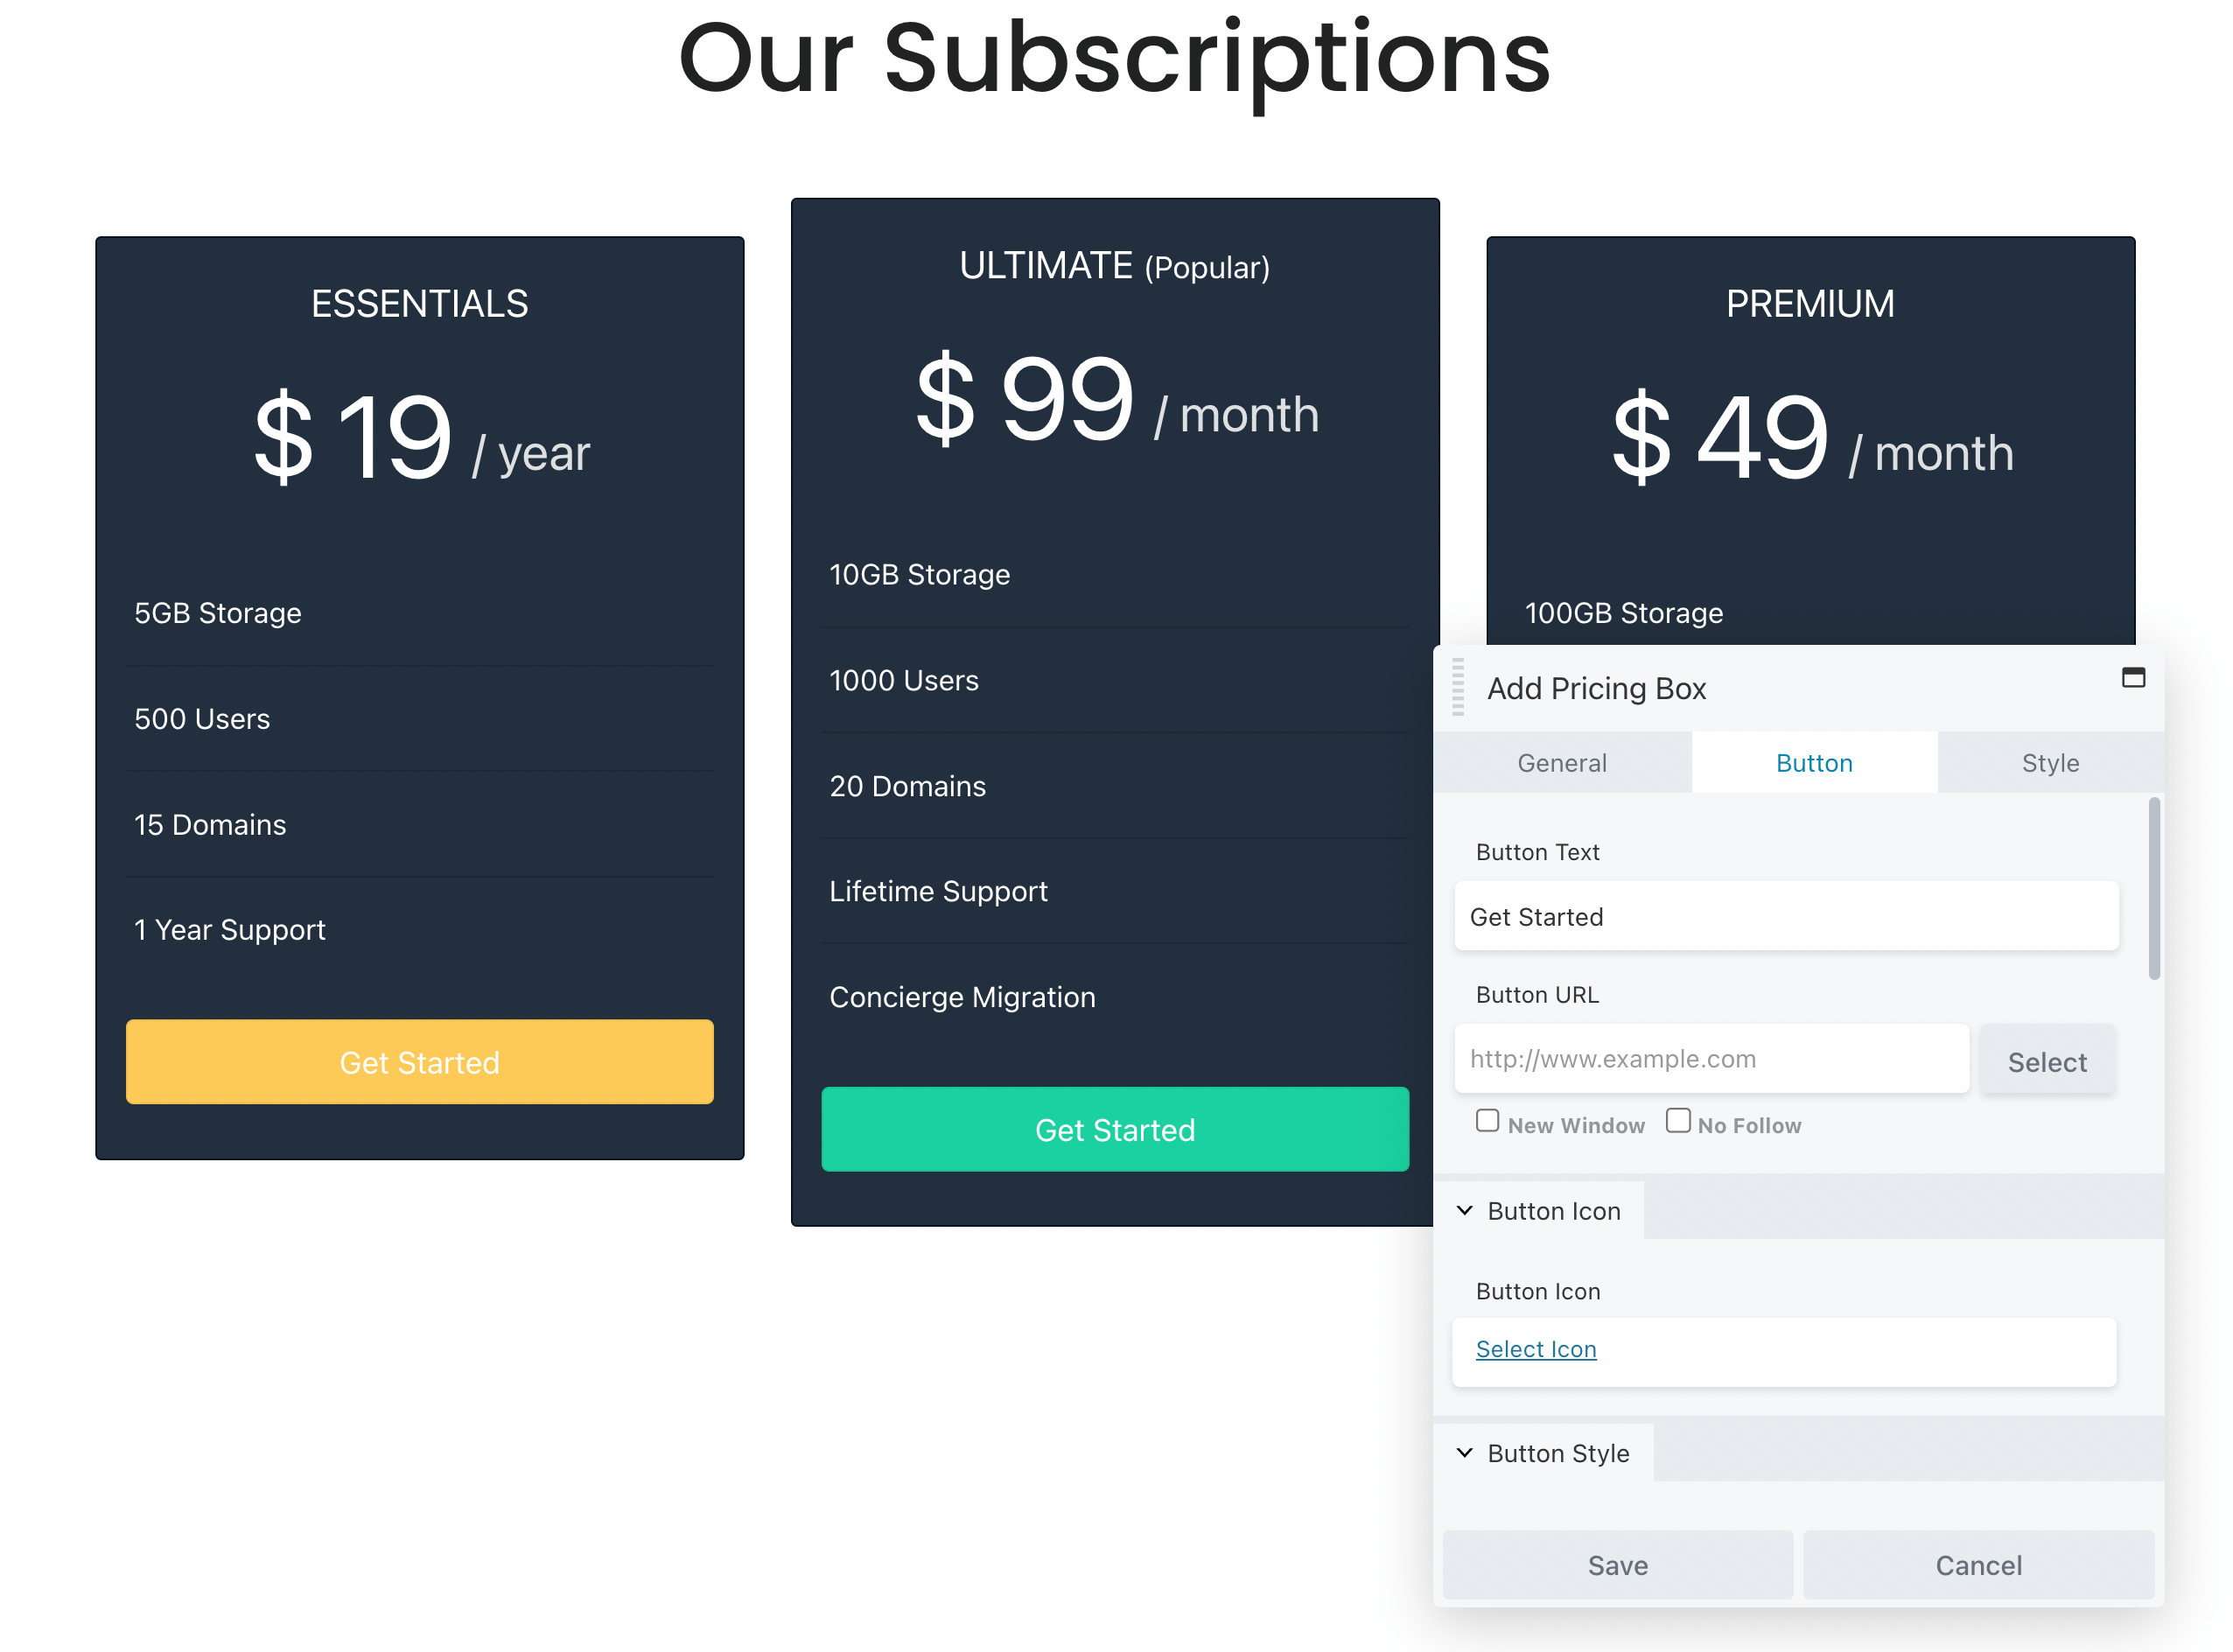
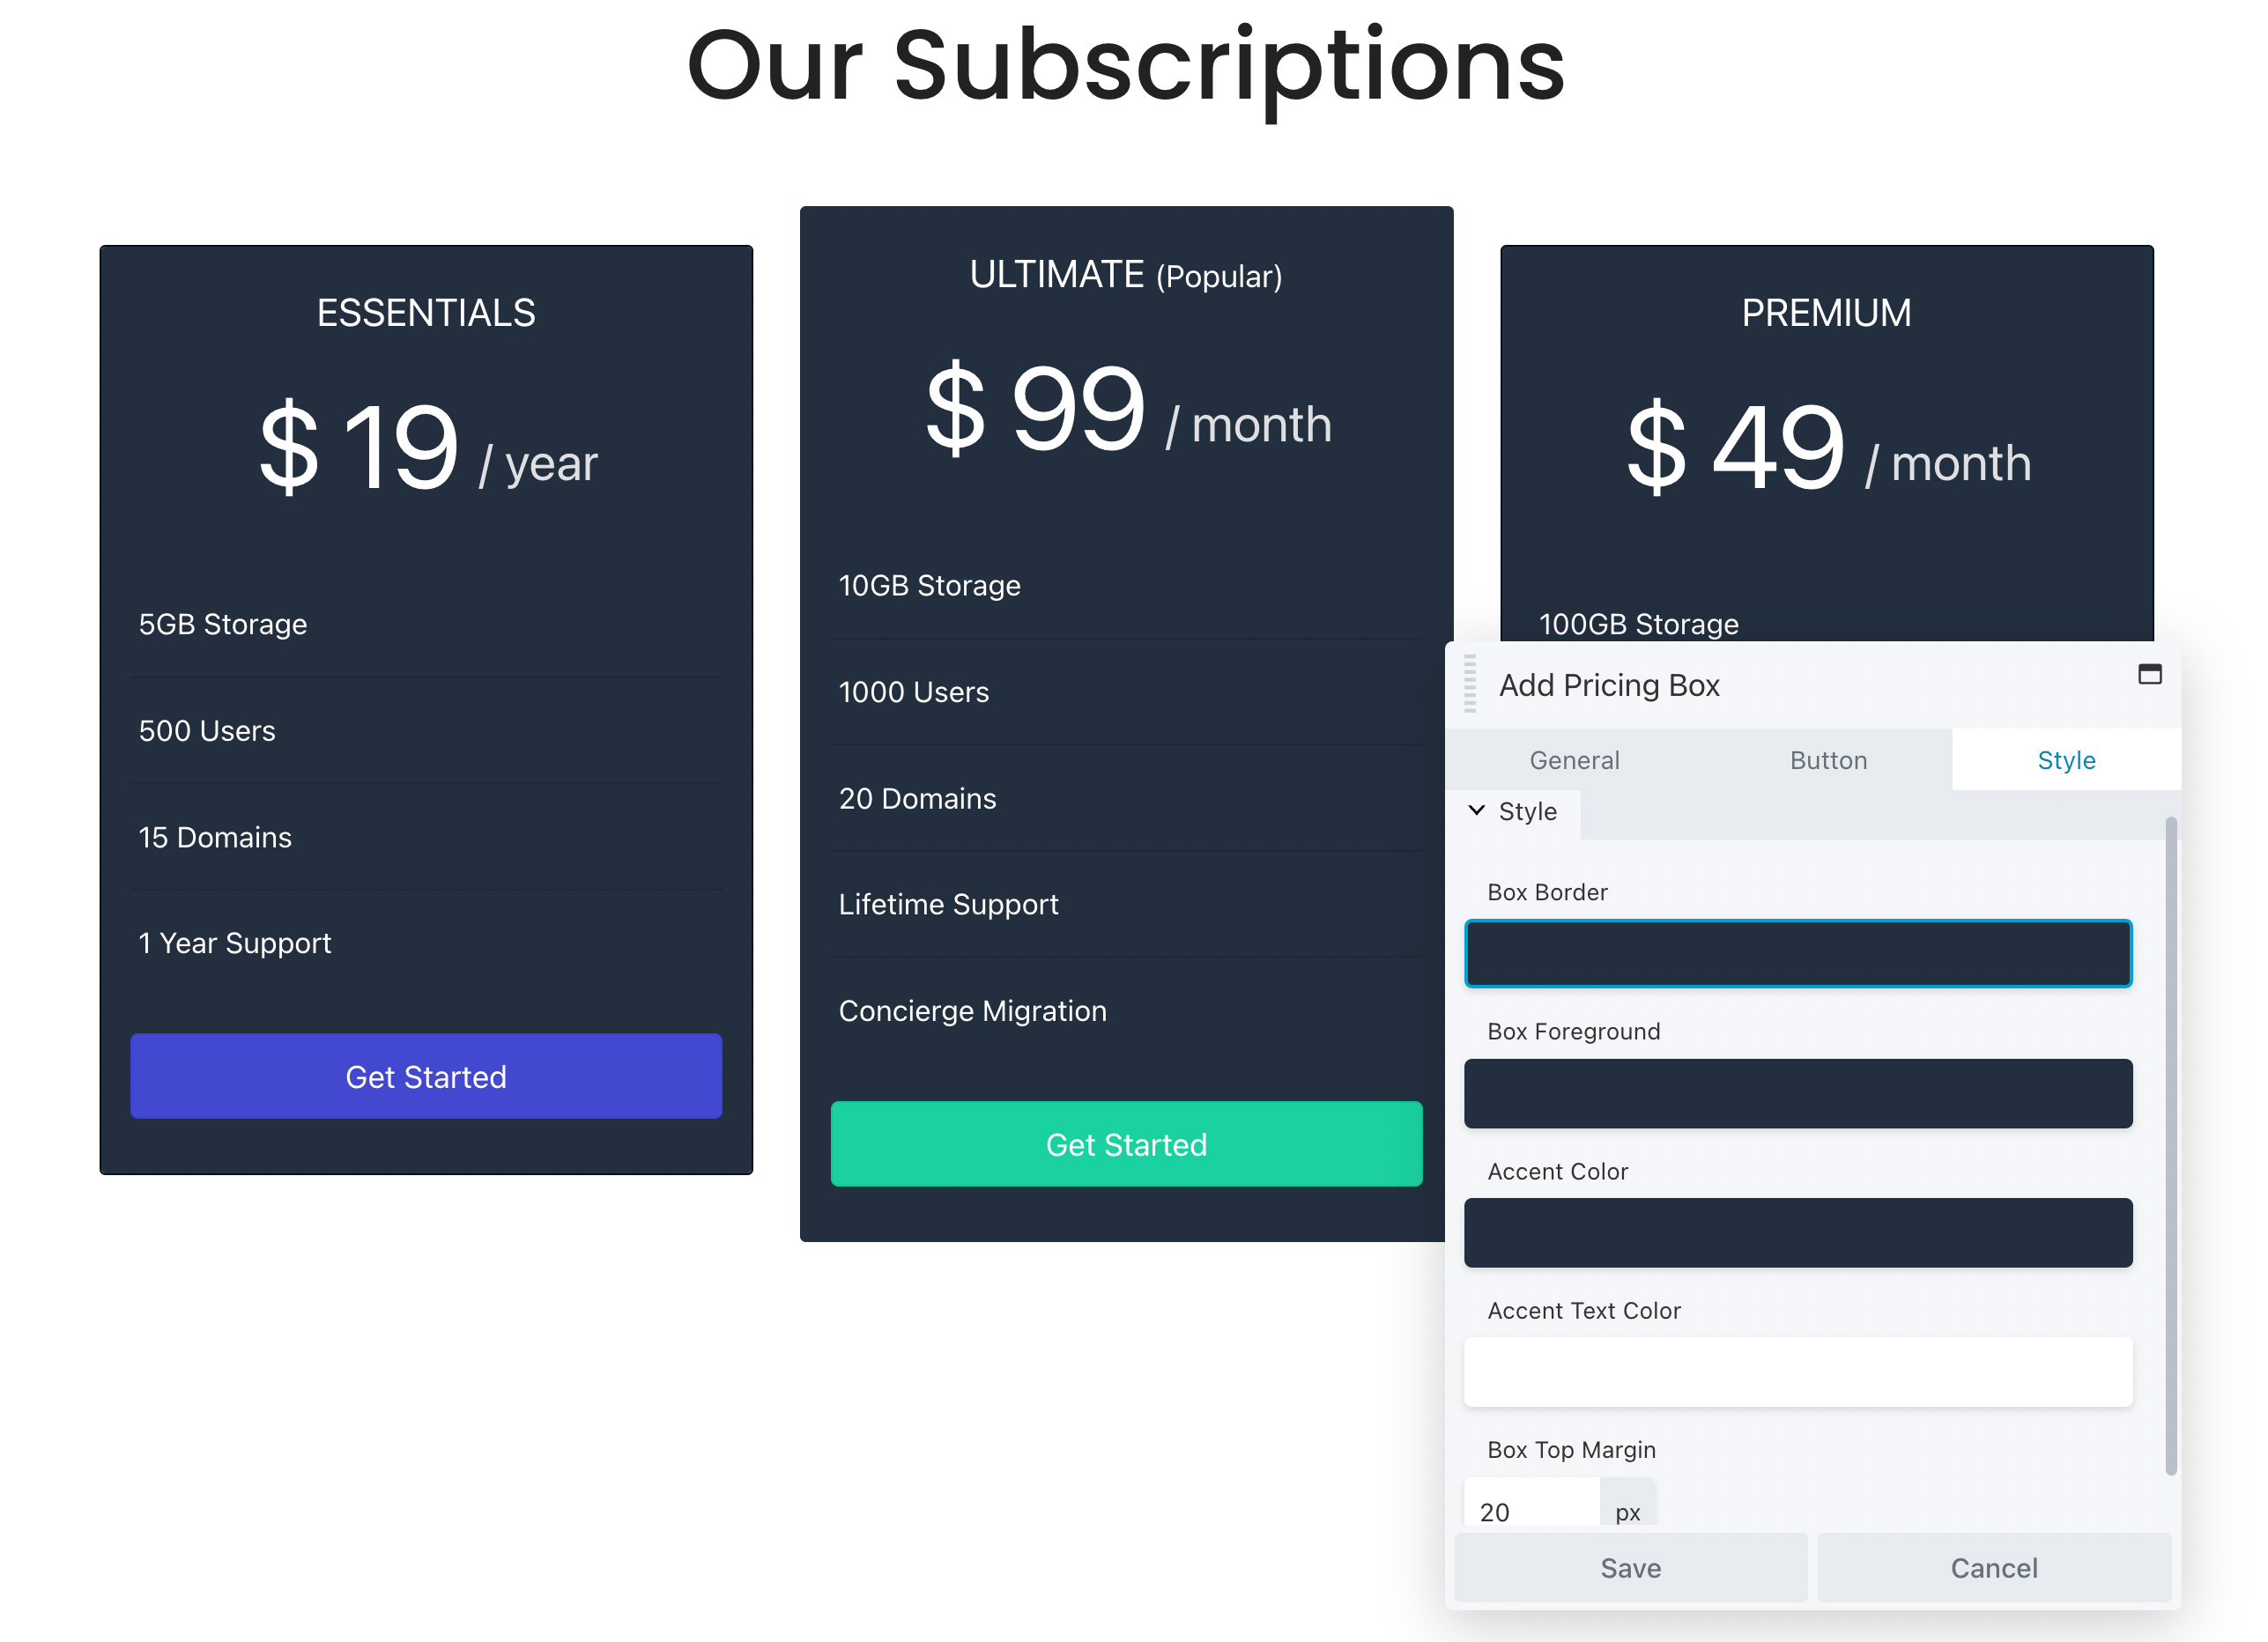
Based on the pre-built row you chose, there will be a default color scheme, but you can adjust this to fit your brand. Under Style, edit the box’s border and foreground color. You can also add an accent color for the boxes and text:
After you finish customizing the row, save your changes.
3. Customize a Pricing Table Module
As another option, you may want to build a custom pricing table from scratch. This can give you full control over each box’s design and functionality. This is also a good choice if you want to add a pricing table to a pre-existing page (without including the customer testimonial or FAQ sections we saw in the template).
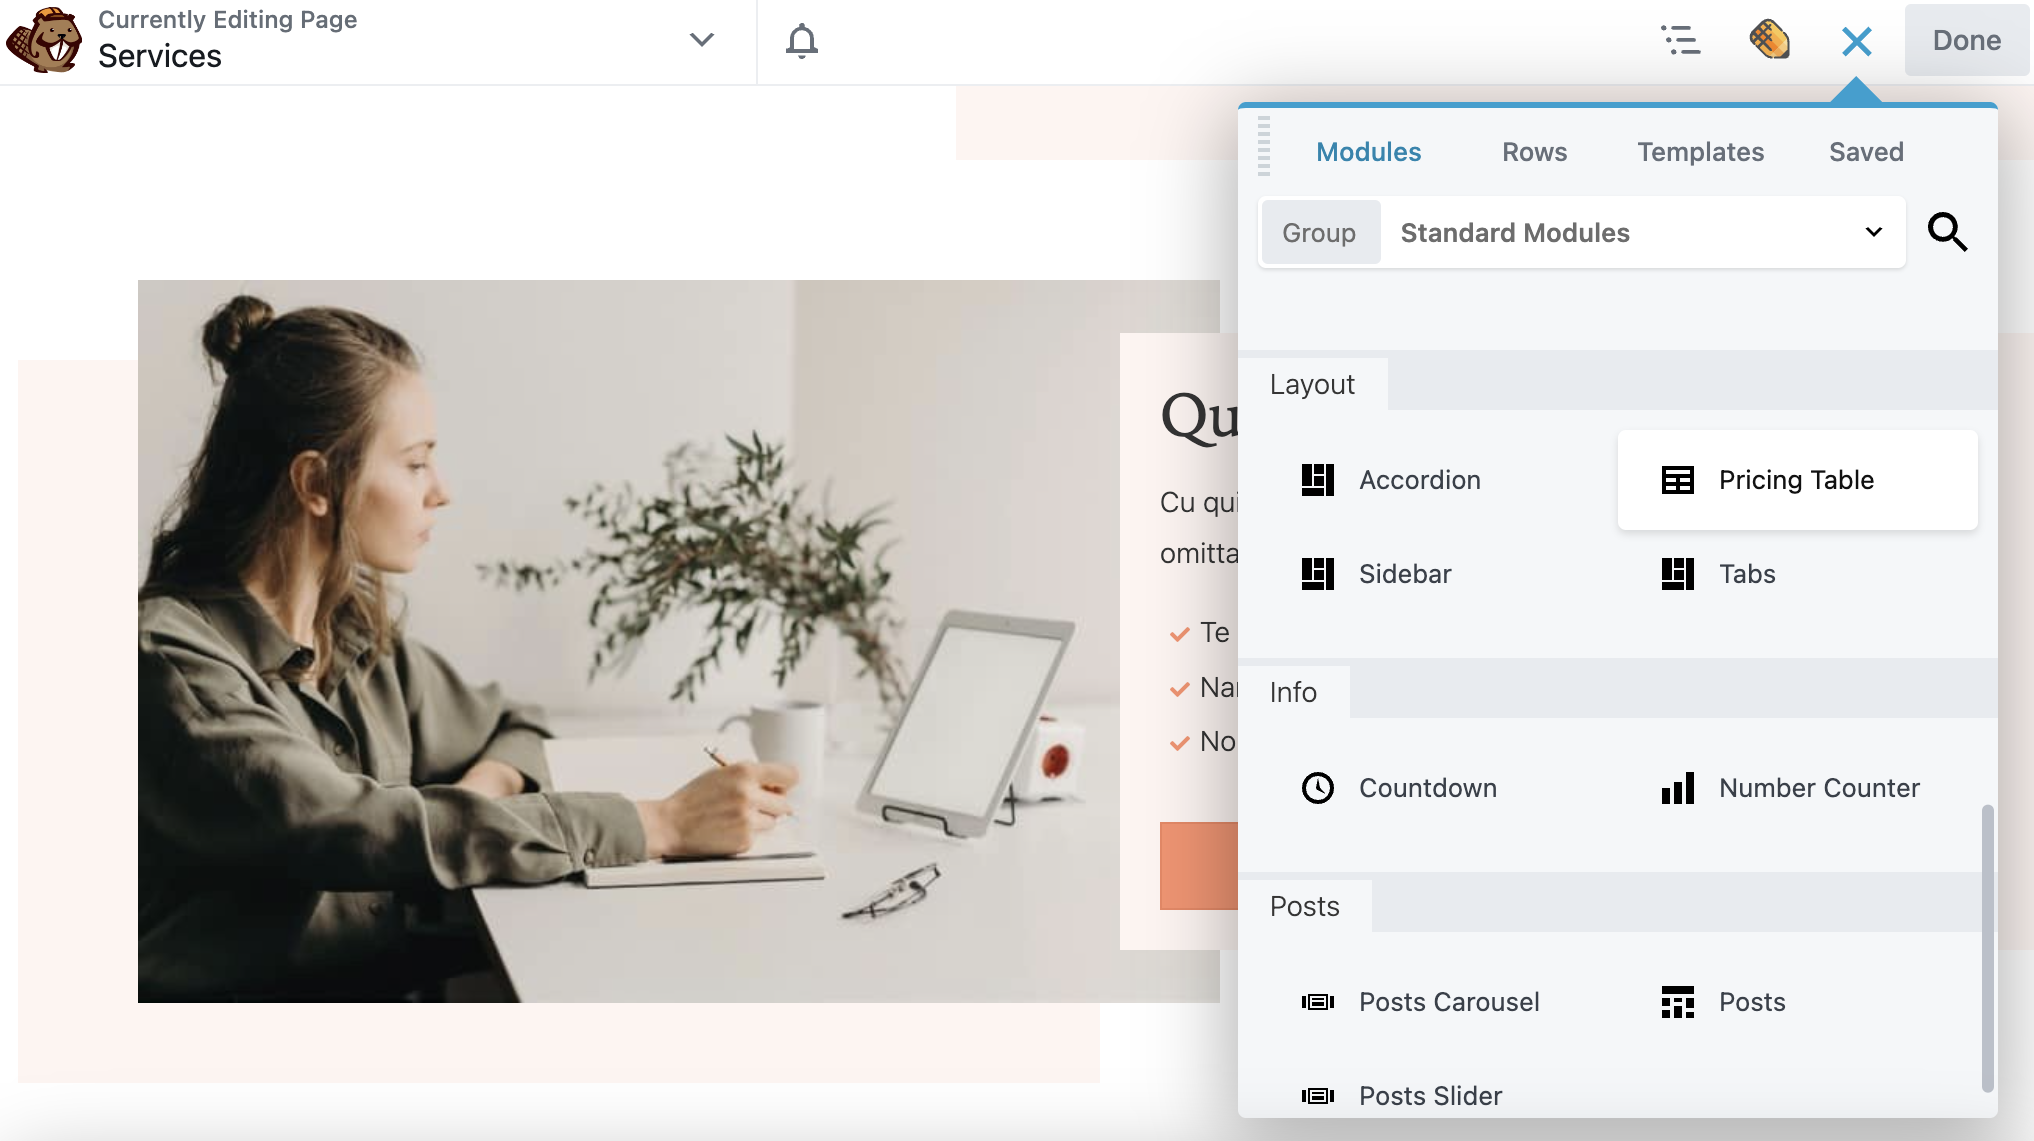
With Beaver Builder, you can add a Pricing Table module to any post or page and then customize it from the ground up. First, open the Modules tab and find the Pricing Table option. Then, you can drag and drop it anywhere:
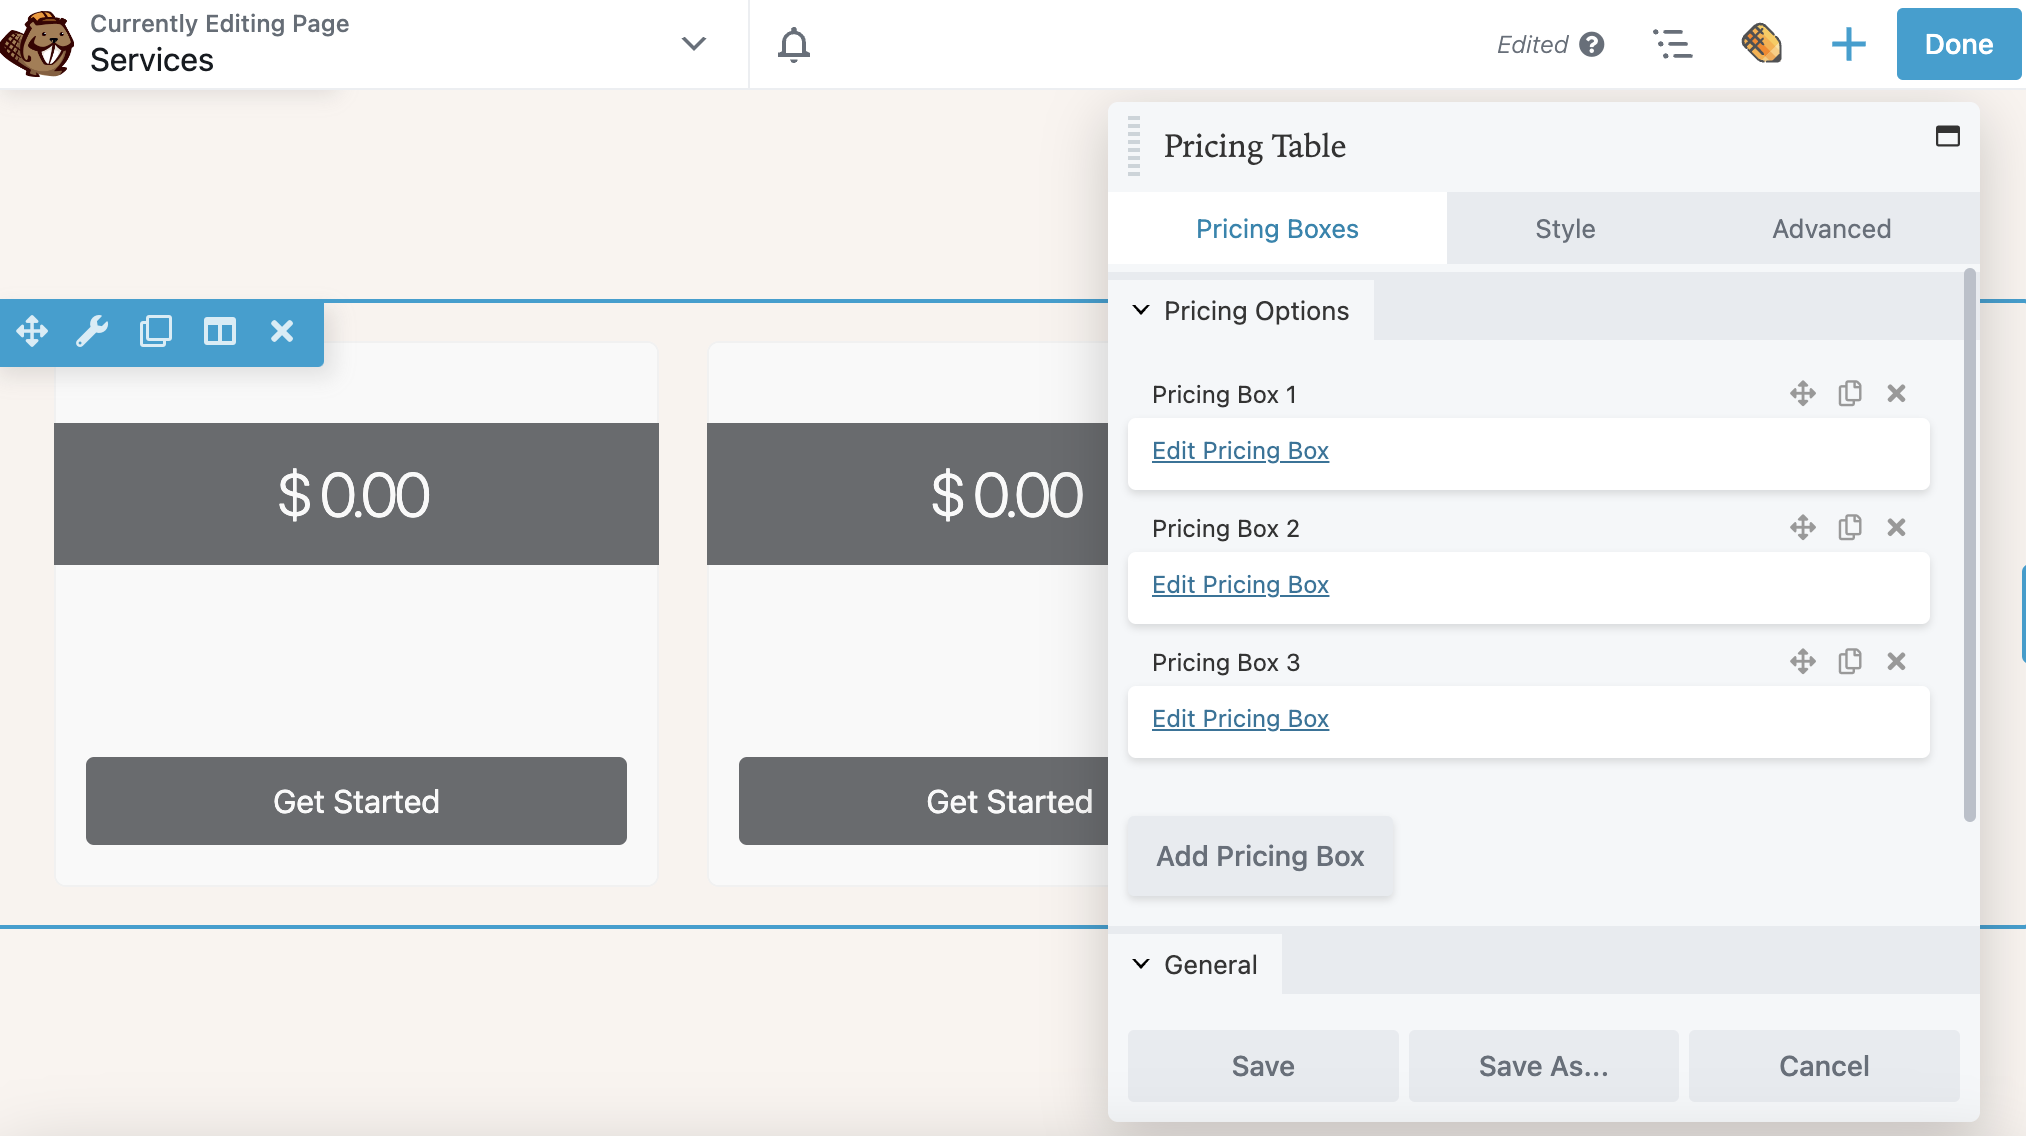
Unlike with a template or pre-built row, you’ll have to add pricing boxes yourself. You can simply click on Add Pricing Box as many times as you need:
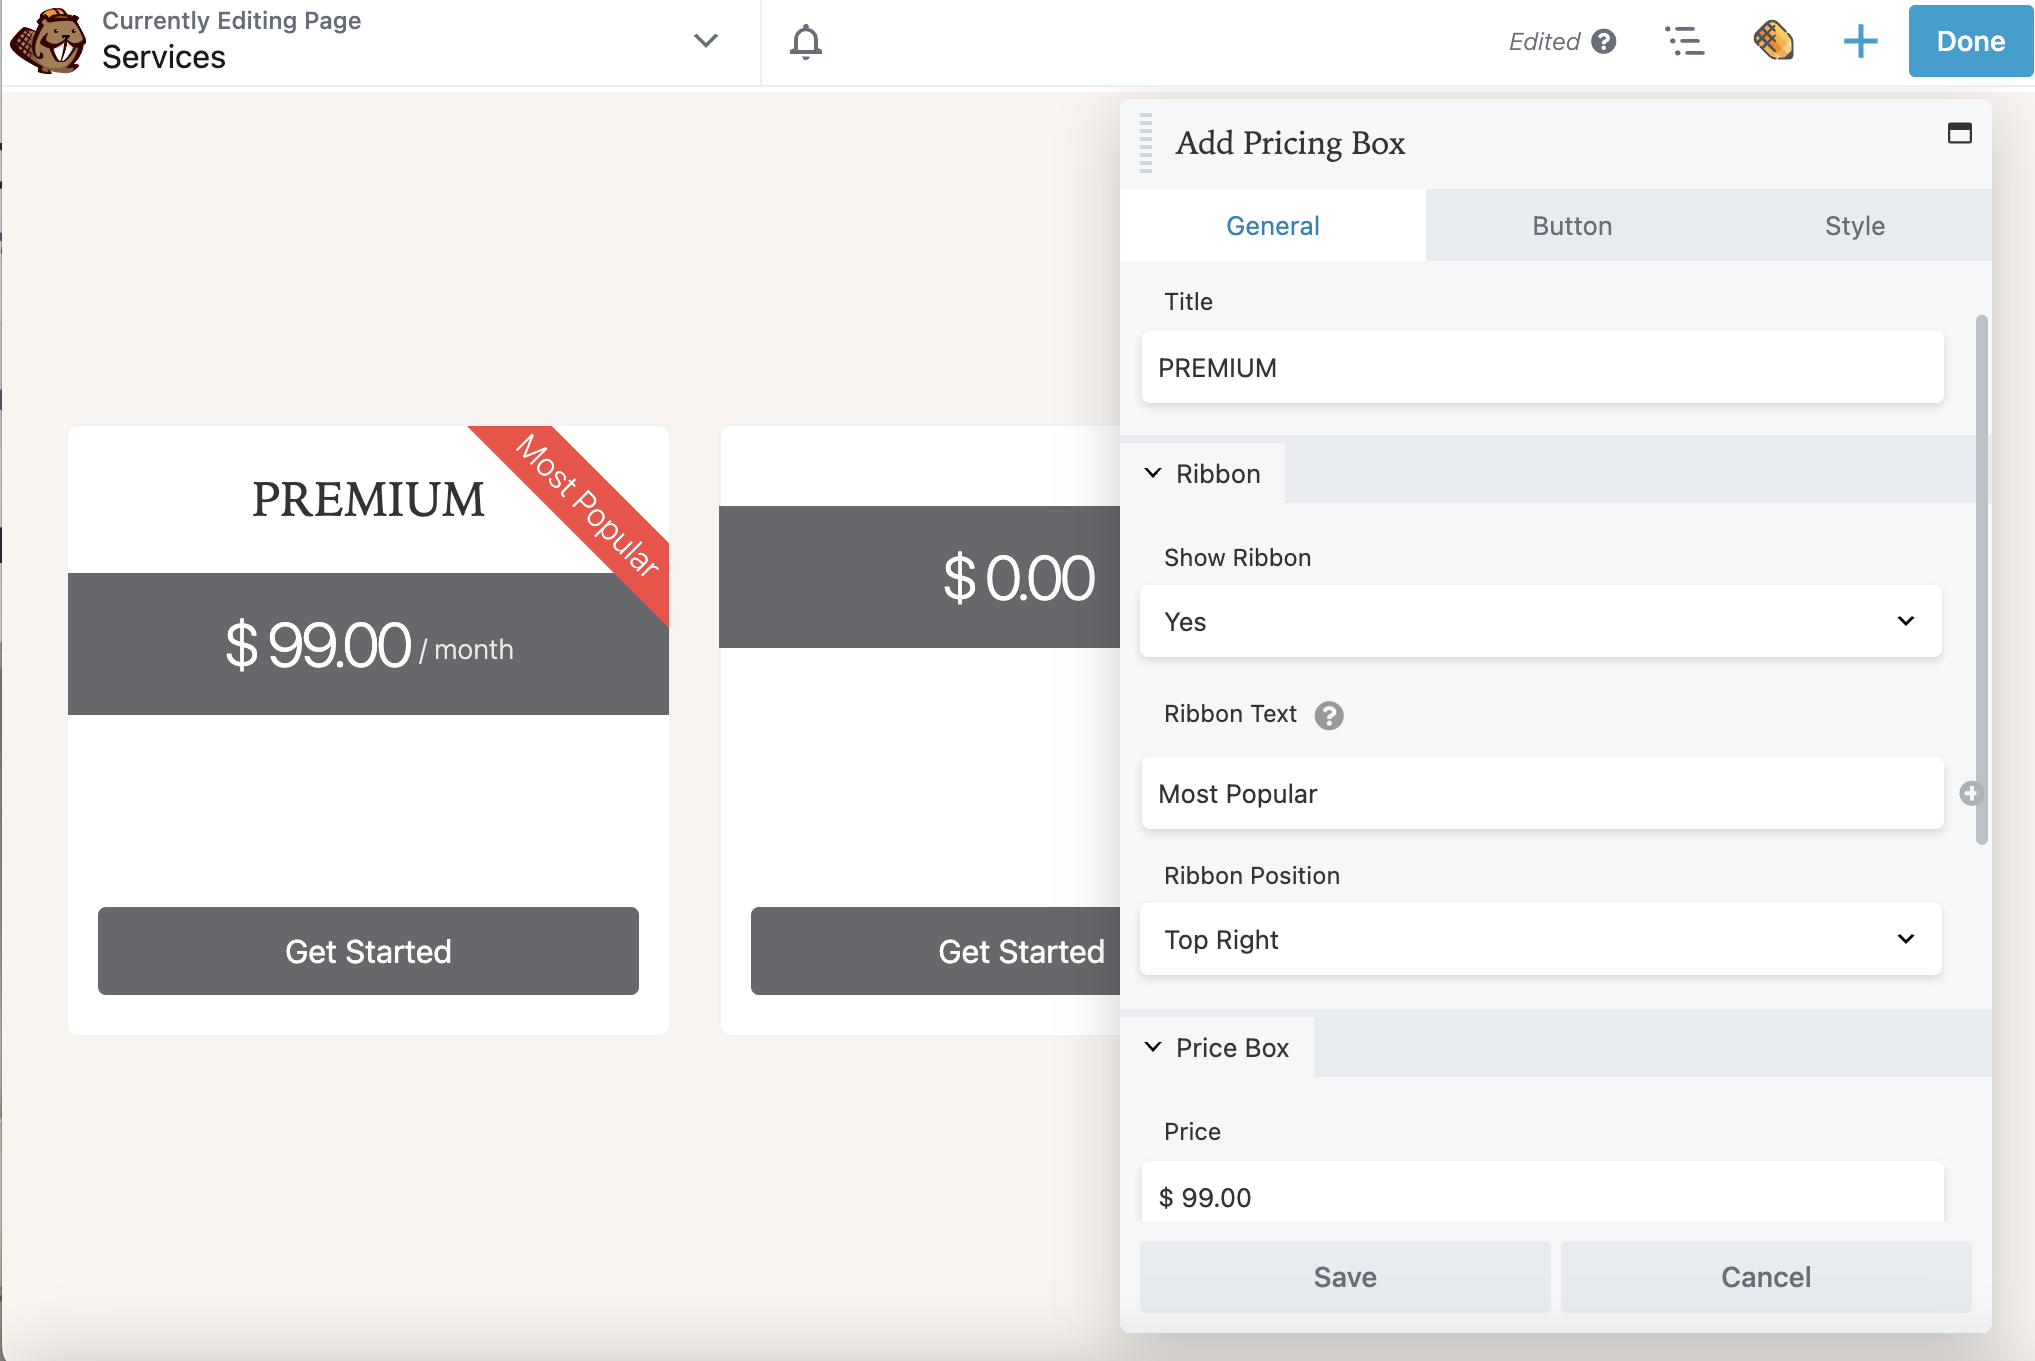
Next, select Edit Pricing Box. In the General settings, give the box a title and add a price and payment duration. You can also choose whether you wish to show a Ribbon. In this example, the ribbon is displayed on the top right of the most popular pricing option:
Instead of having fixed prices, you can even display a discount. This may motivate customers to purchase items more quickly. To do this, you can add this HTML markup to the Price value:
<s>$99</s> <span style="color:red;";>$79</span>Now, you can scroll down to the Features section. Here, add specific details for each pricing tier. Click the drill down arrow to show more options including a Feature Icon, Feature Icon Color, and Tooltip:
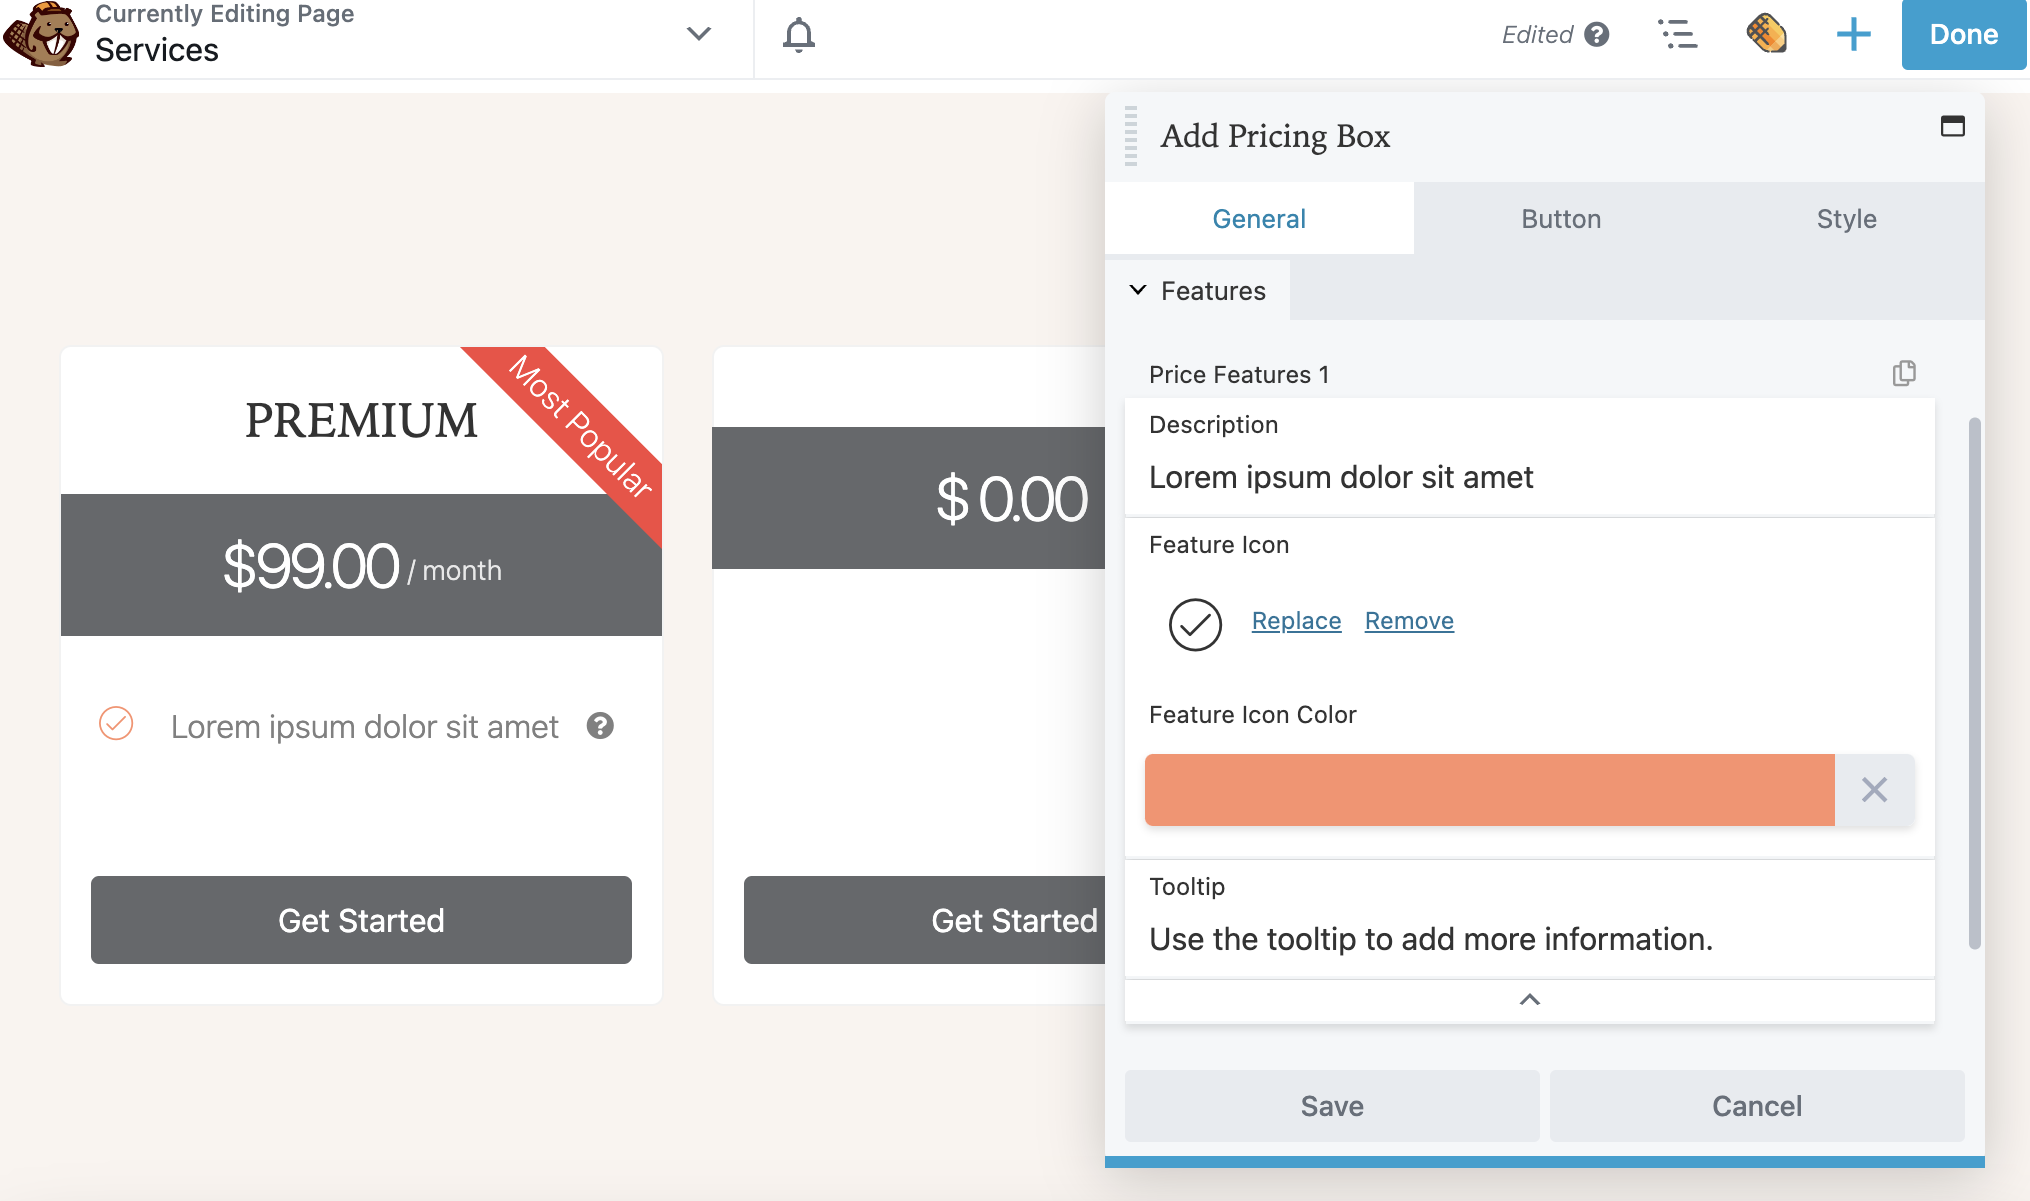
Note that you can click the Copy icon in the upper right corner to duplicate the Price Features 1 so that you don’t have to recreate the settings for each new feature.
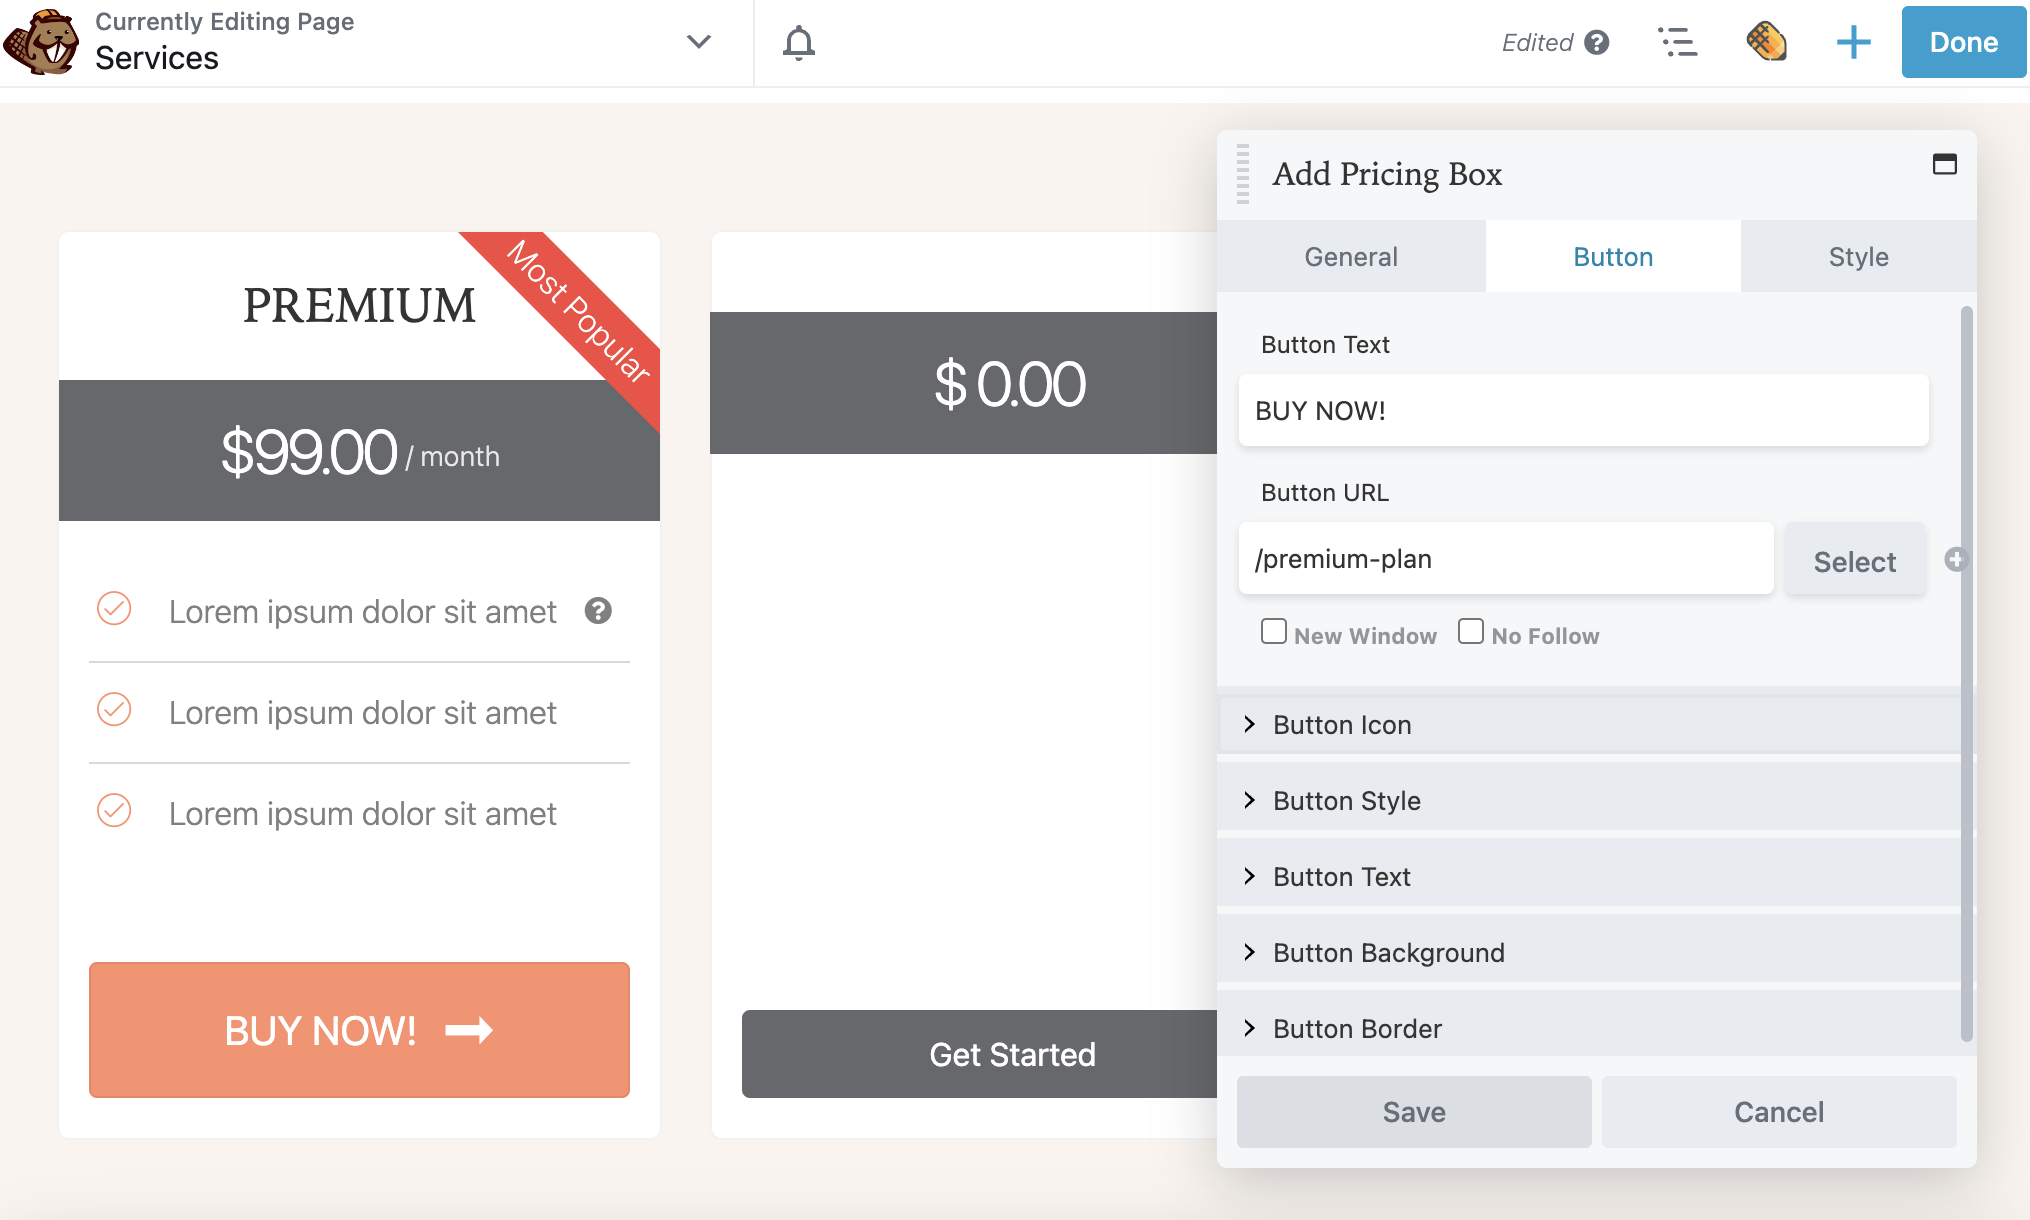
Once you have finished adding the features for this pricing box, you are ready to move on to the Button tab. Here you can add a custom call-to-action with a link to your product. You might also consider including a button icon and customizing further with your brand colors:
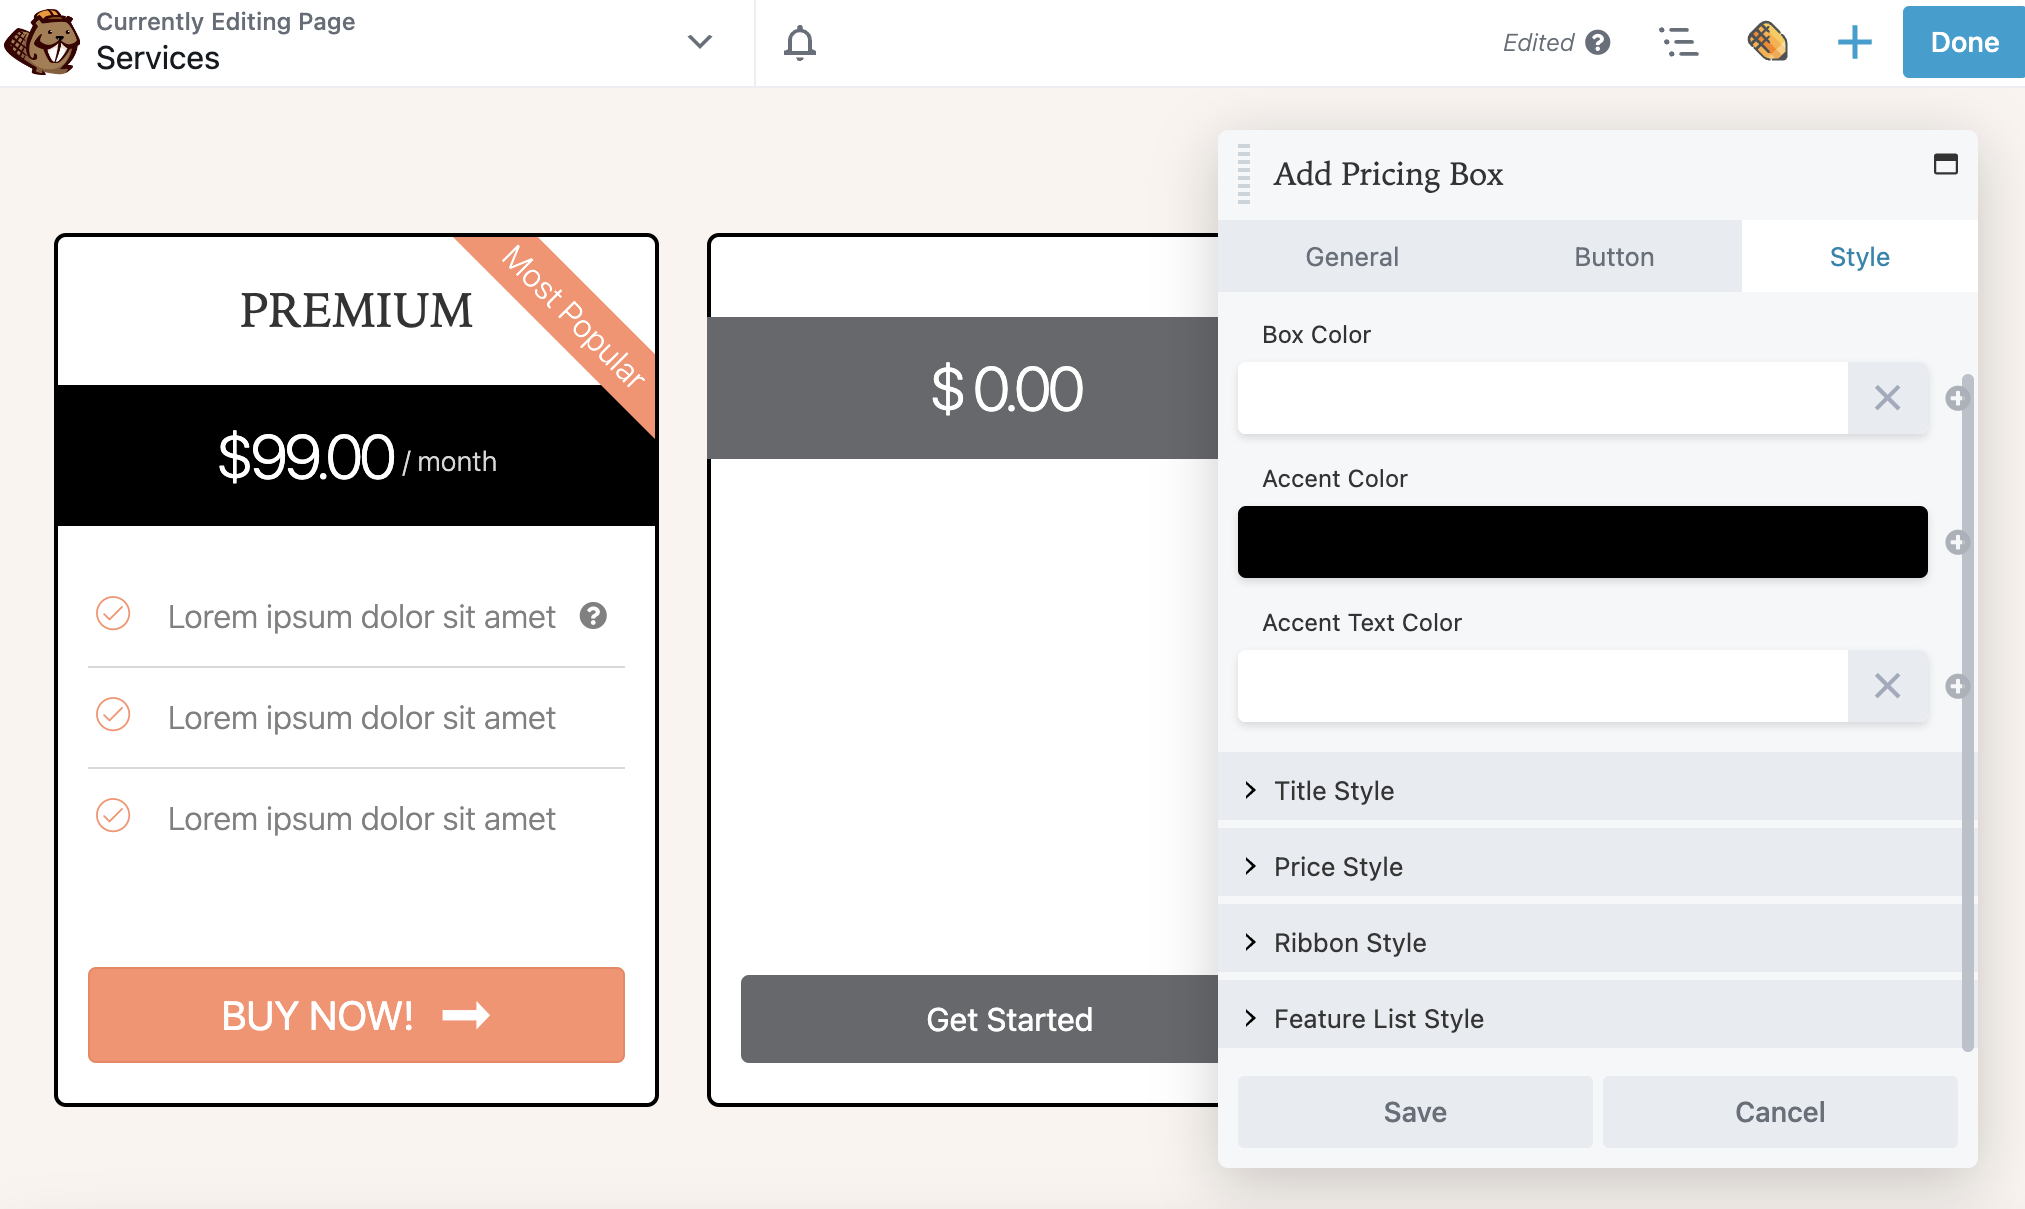
Lastly, click on the Style tab. This enables you to set a color scheme for each box:
Repeat this process for each box in your pricing table. Then, you can continue to edit the settings for the entire table.
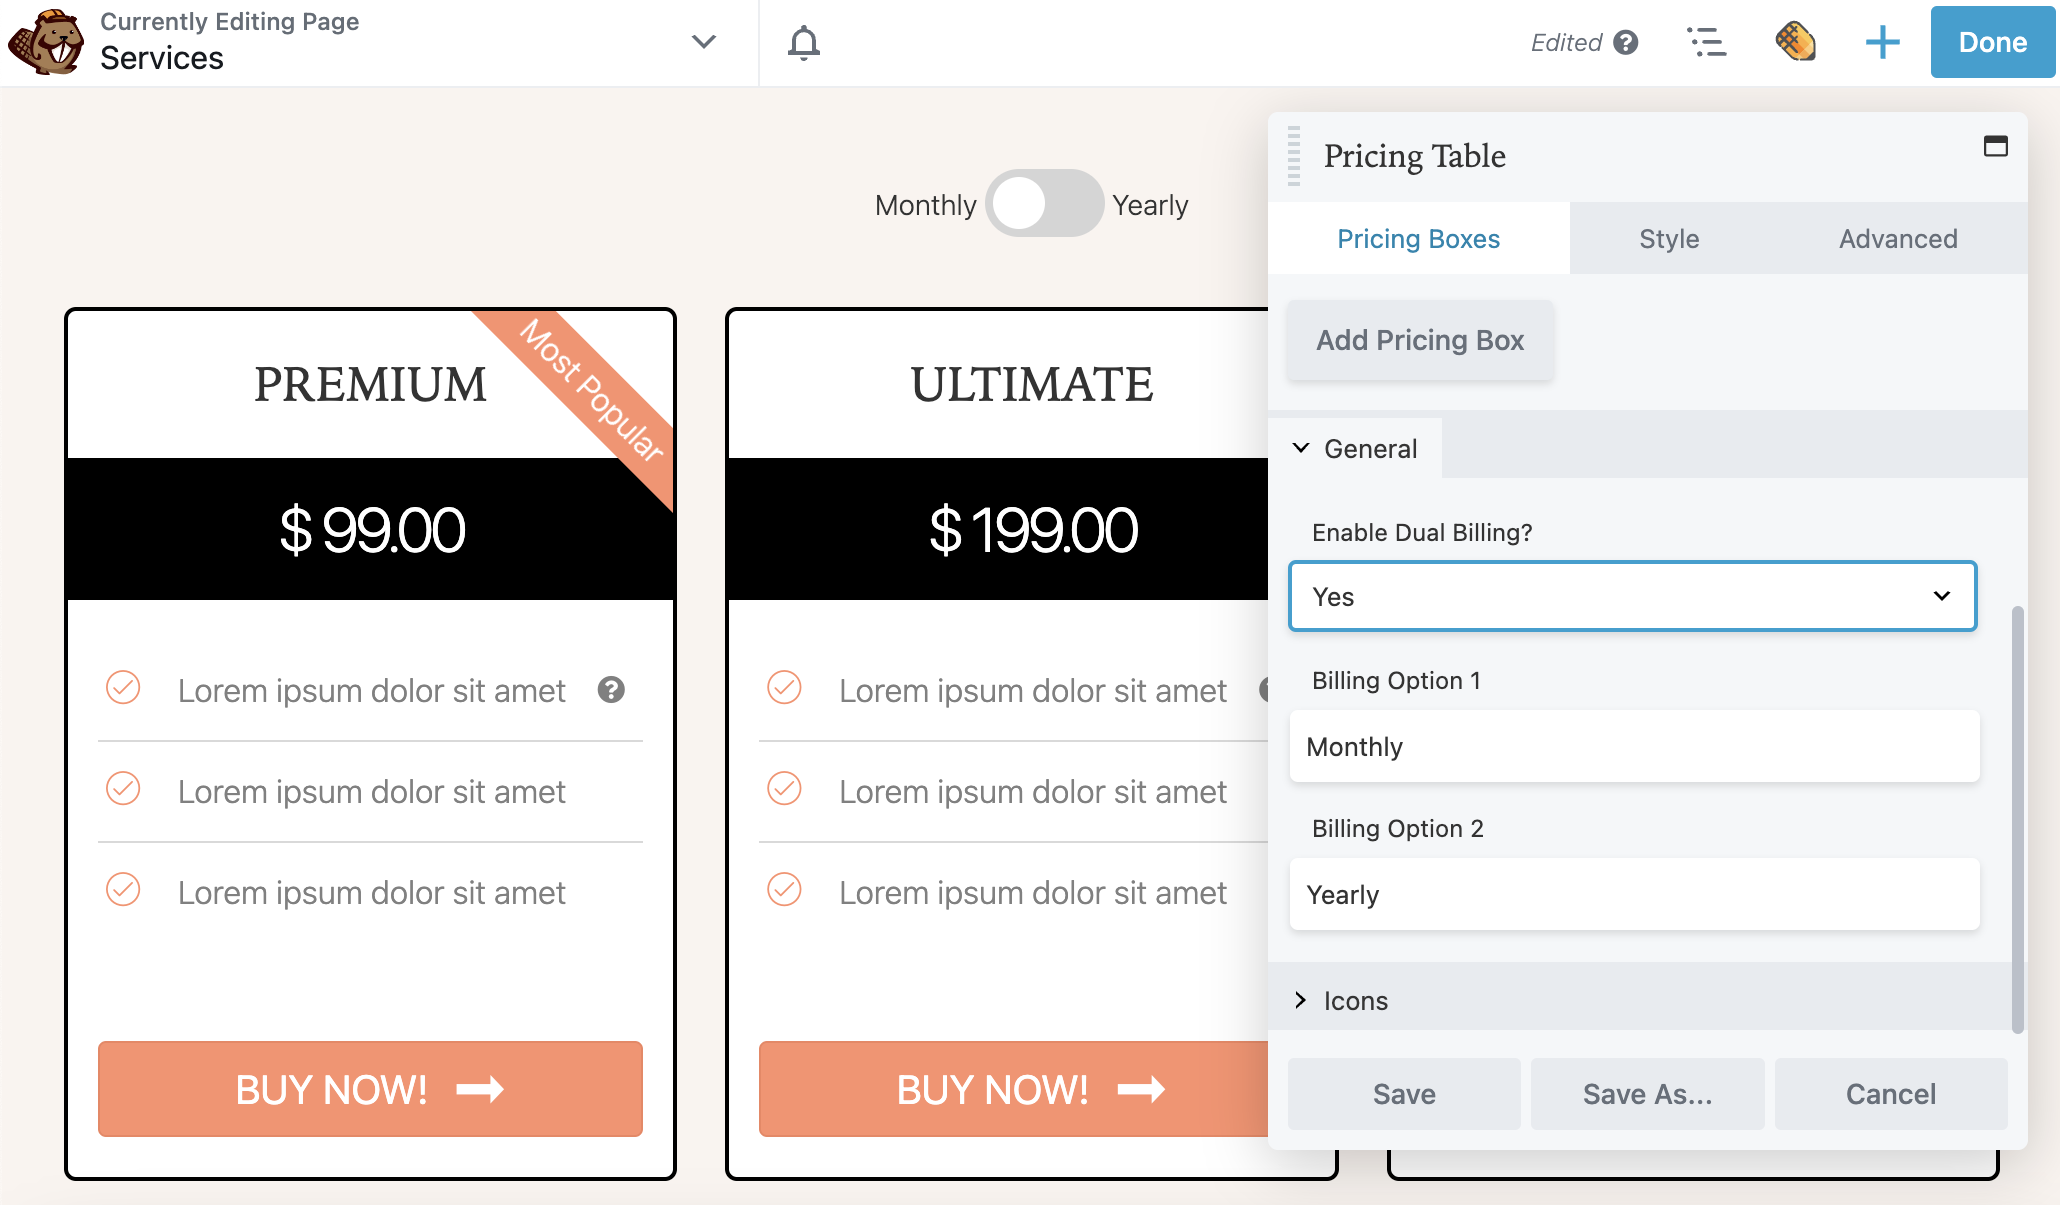
From the Pricing Boxes tab, scroll down to the General section and select Yes to enable dual billing. This adds a switch to toggle between two billing options such as Monthly and Yearly:
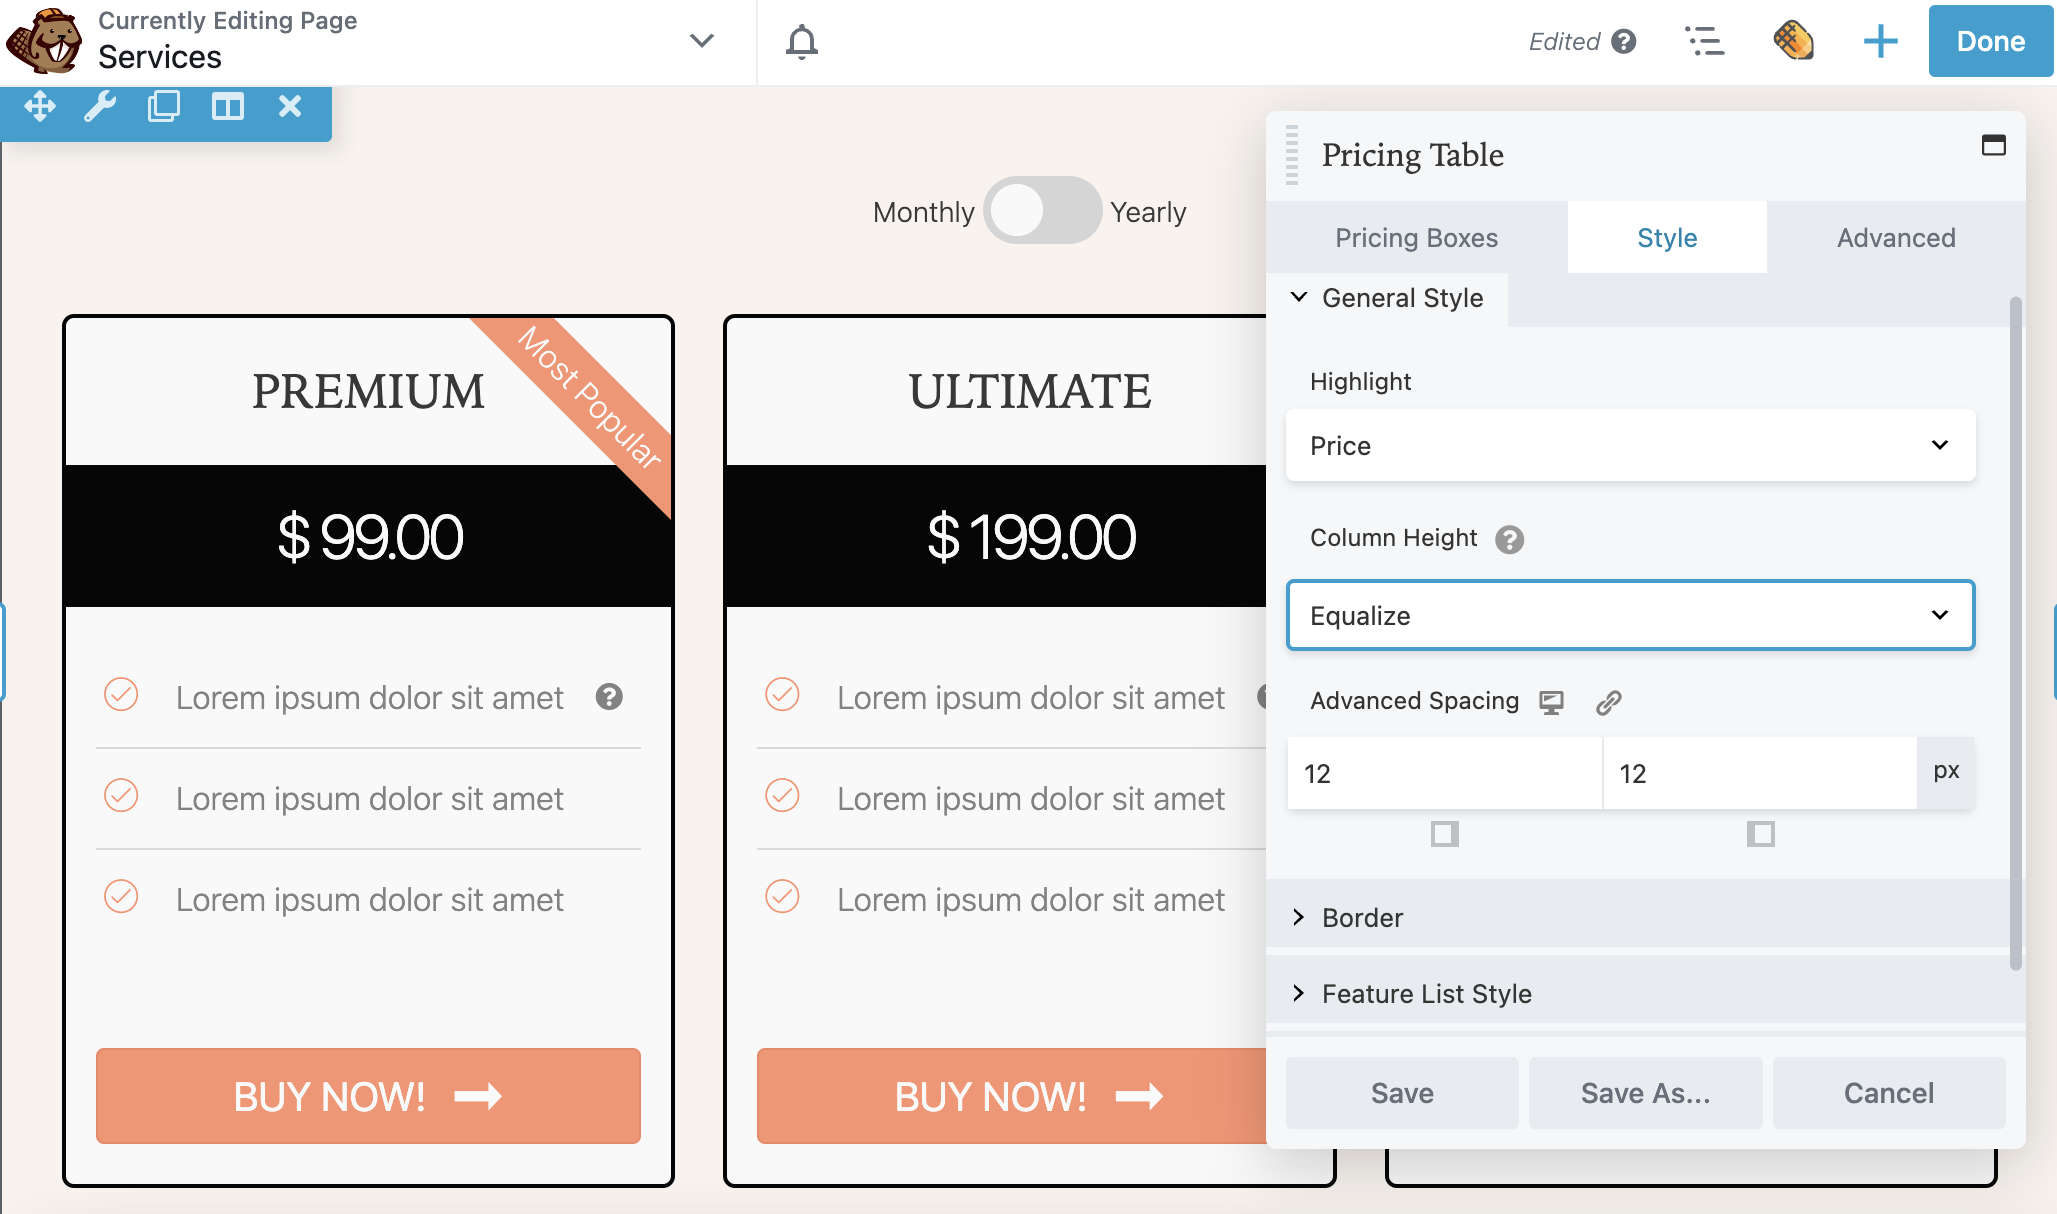
Next, click on the Style tab. Here, you’re able to adjust the overall style of the Pricing Table module. For example, if you have an uneven number of features in each box, you can set the Column Height to Equalize. This will normalize the boxes to have the same height as the largest column:
Like any other Beaver Builder module, there will be Advanced settings too. You can use these to set custom margins, animations, HTML elements, and visibility if needed.
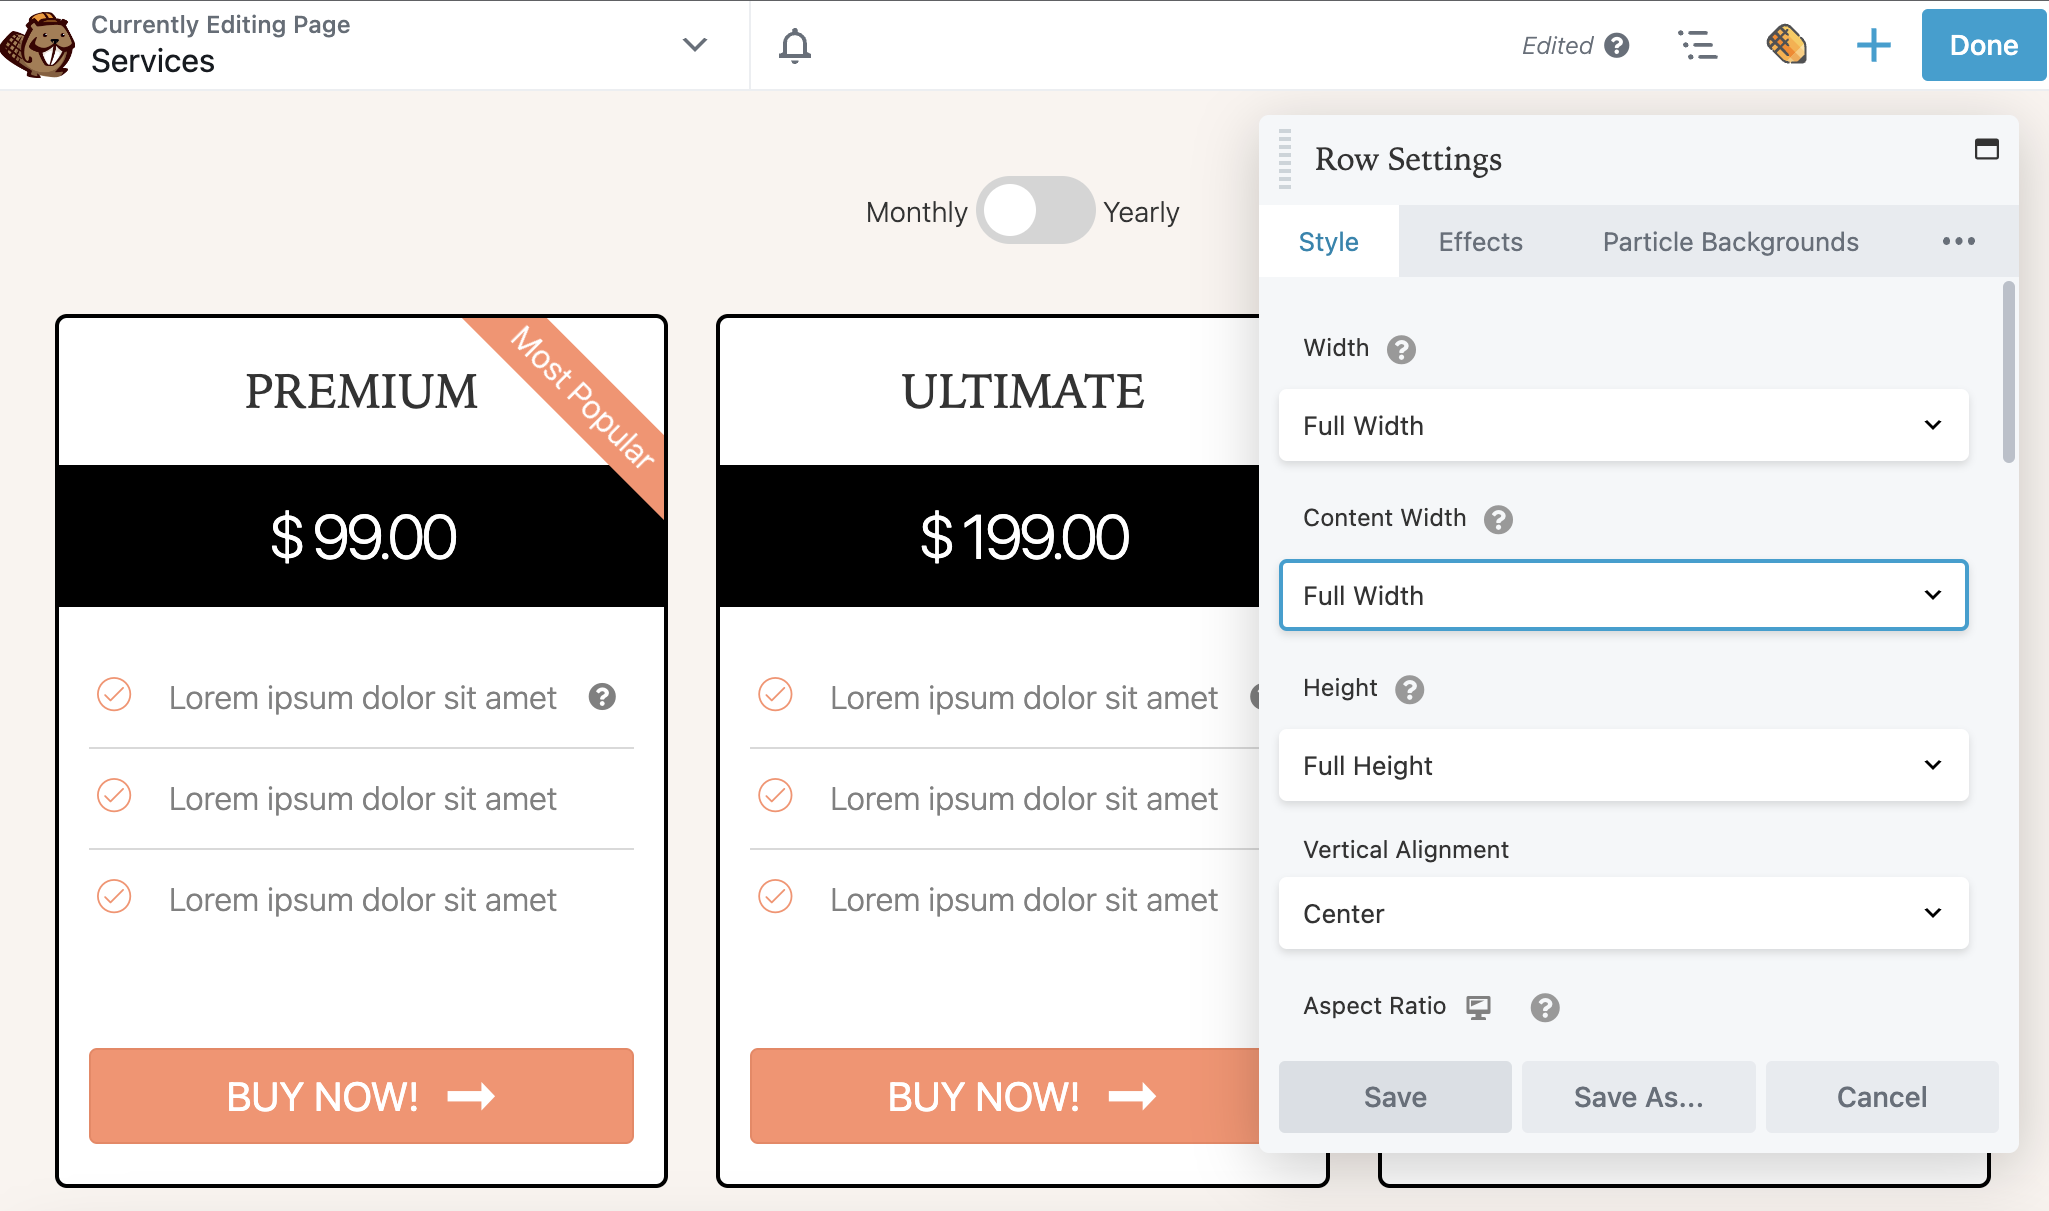
Click Save to save the changes to your Pricing Table module. Now, you can click on the Row Settings. Here, you can adjust the width and height of the entire pricing table module. You can also change the text and link color:
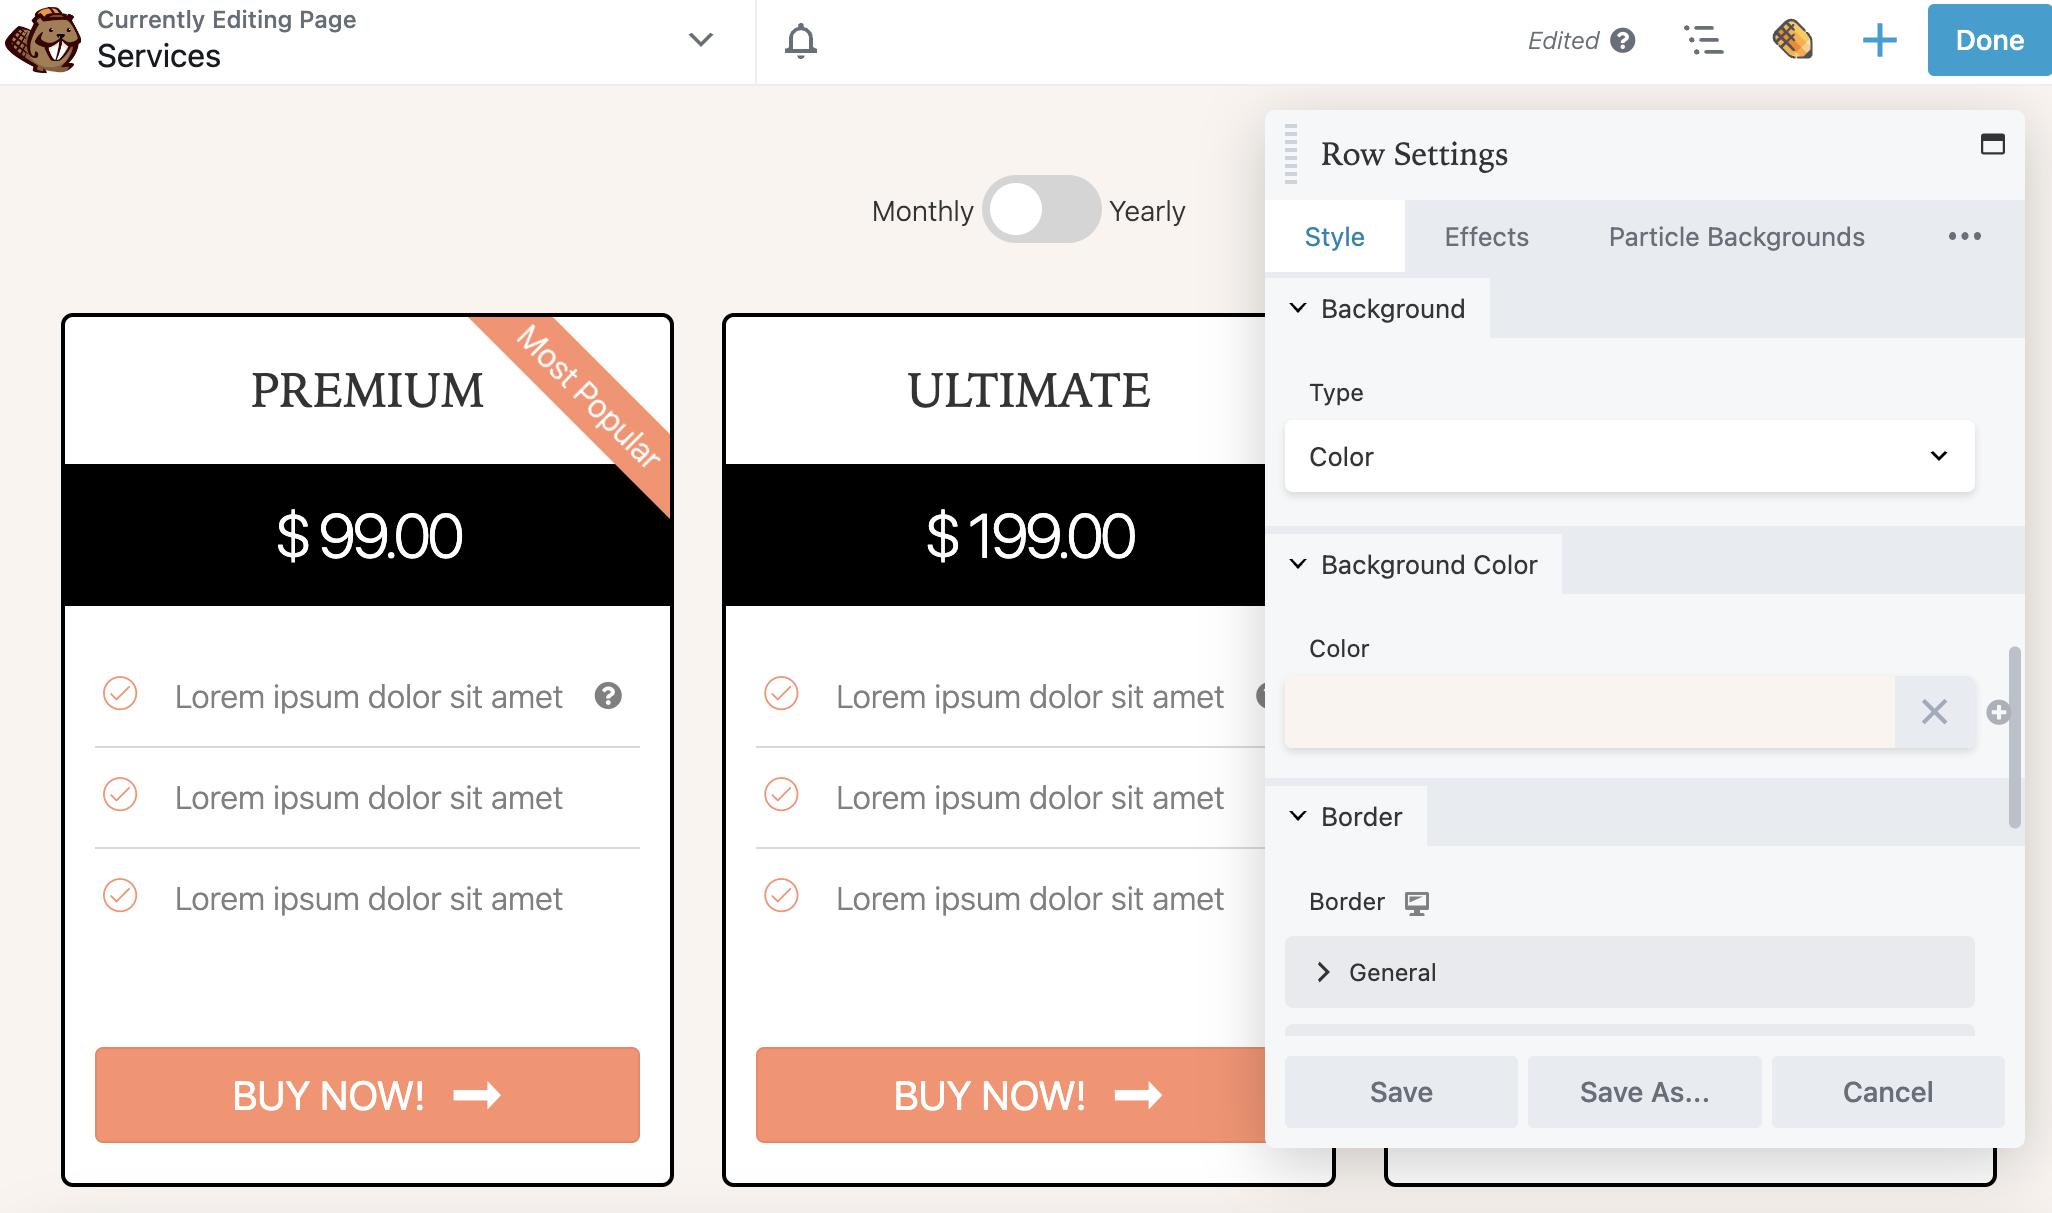
Then, you can customize the background with a solid color, gradient, photo, video, embedded code, slideshow, or parallax. You can also add an overlay color or shapes to the background. In this example, we will keep it simple so that the pricing table takes center stage:
After this, you’ll have a well-designed pricing table for your website!
Conclusion
If you don’t properly showcase prices on a website, it can be challenging to turn online visitors into conversions. With a pricing table, you’re able to display your products’ main features and price differences. This can motivate potential customers to compare each option and feel confident that they’re purchasing the right one for their needs.
To review, here are the three ways you can add a pricing table in WordPress with Beaver Builder:
- Add a pre-designed pricing page template.
- Choose a pre-built pricing table row.
- Customize a Pricing Table module.
Related Questions
What Information Should I Include in a Pricing Table?
As a general rule, pricing tables should highlight the main services or products that you provide. Inside each box, customers should be able to see pricing, main features, and a call-to-action button. You can also include any of your website’s current discounts.
How Else Can I Increase Conversions on My Website?
A pricing table can be an effective way to motivate visitors to buy your products. However, you should also make sure your pages are loading quickly and mobile-friendly. If you’re optimizing a client’s website, consider performing A/B split testing to target high-converting features.
Our Newsletter
Our newsletter is personally written and sent out about once a month. It's not the least bit annoying or spammy.
We promise.
Try Beaver Builder Today

Related articles

Beaver Builder Maintenance Mode: How to Set It Up
Beaver Builder Maintenance Mode helps you keep your website looking professional while you work behind the scenes. Whether you’re redesigning…
Beaver Builder 2.11: Popup Module, Maintenance Mode, and Settings Snapshots
Beaver Builder 2.11, also known as Kariba, is now available and delivers some exciting updates: a new Popup Module for…

Beaver Builder AI: Build WordPress Layouts with AI (Now in Alpha)
Hey everyone! Big news. After a long time of building behind the scenes, Beaver Builder AI is here. The alpha…
Join the community
We're here for you
There's a thriving community of builders and we'd love for you to join us. Come by and show off a project, network, or ask a question.
Since 2014
Build Your Website in Minutes, Not Months
Join Over 1 Million+ Websites Powered By Beaver Builder.