
WordPress is an excellent foundation for many types of websites thanks to its stripped-down design. However, this means that in order to set up a niche site, you’ll need some additional tools. Fortunately, you have access to user-friendly and powerful options such as MemberPress – a premium plugin for building all types of membership websites.
In this post, we’ll introduce you to MemberPress. Then we’ll show you how you can use it alongside our Beaver Builder page builder to start creating your membership website.
The Uses and Benefits of Membership-Based Websites
In many cases, you’ll want visitors to be able to access all of your website’s content easily. However, locking some or all of your site away for members’ eyes only can be a smart move.
That’s what a membership website is in a nutshell – a site that requires users to log in before they can access key parts of it. Some require payment in exchange for membership. Others simply ask that visitors create an account or sign up for an email list:

You can provide some content for free or make membership a condition of accessing your entire site. This flexibility makes membership sites applicable to a wide range of use cases, such as:
- Blogs and forums with members-only content
- Online courses and e-learning platforms
- Sites that offer subscription-based services
- Ecommerce stores that require membership for certain (or all) purchases
- Web-based job boards
- Websites for clubs, associations, and fan communities
Requiring membership to access parts or all of your site does somewhat restrict its user base. However, it also comes with two key benefits. First, it promotes higher-quality engagement with your site through a sense of belonging and exclusivity. Second, you can use membership fees to bring in a consistent income.
Of course, it takes a little more work to set up a membership site than a simple blog or online business portfolio. The good news is that you can streamline the task with the right tools.
Introducing the MemberPress Plugin
As with any popular functionality, there are multiple plugins available for adding membership features to WordPress. However, we’re going to focus on one of the most accessible and user-friendly options – MemberPress:
Unlike other tools that add functionality in a piecemeal fashion, MemberPress is designed as an all-in-one solution for building a WordPress membership site. With that in mind, it offers a variety of features that include:
- Functionality for setting up and configuring products or services and multiple payment gateways
- Customizable pricing pages for displaying your membership products or tiers
- Options for setting up automated subscriptions
- Additional eCommerce functionality, including coupon creation
- Fine-grained control over what content is visible or restricted to specific types of visitors
- Easy integration with popular forum-building plugins (such as bbPress)
- Reports to let you know how your membership site and individual products or services are performing
MemberPress is a premium-only plugin, which means there’s no free version. Paid plans start at $149 per year, which will get you access to nearly all of the plugin’s features for use on a single site.
That means this plugin may not be the best choice for those on tight budgets or who are looking to build free members-only community sites. On the other hand, if you’re planning to make an income from user subscriptions, MemberPress can be a smart initial investment that will save you a lot of time and hassle.
Using MemberPress and Beaver Builder to Create Your Membership Site
There’s one more advantage to using MemberPress – it works seamlessly alongside our own Beaver Builder plugin. If you’re a fan of our page builder, you can leverage its features to design a unique membership website that’s perfectly suited to your specific needs.
Beaver Builder will help you set up both the members-only and public sections of your website, customizing the look and layout of your pages and posts. With the Beaver Themer add-on plugin, you can also build custom layouts for headers, footers, navigation, archive and single post page, 404 pages, banners, and more. MemberPress then provides the functionality you need to get your membership site working as it should.
In fact, this combination is so popular that MemberPress is now offering a dedicated content protection add-on specifically for Beaver Builder. This enables you to control access to your site’s content right in Beaver Builder by:
- Allowing or restricting access to content within rows
- Setting up customized membership rules
- Creating custom messages to display to users with restricted access
- Adjusting permissions for viewing content within the Beaver Builder settings
Using these features, you can lock portions of your posts or pages behind a membership wall and display a Call to Action (CTA) encouraging new visitors to sign up. These capabilities give you a finer degree of control over your content than what you get with other membership plugins that can only restrict access to full posts or pages.
This integration is available to anyone who has at least a Basic MemberPress plan. When you’re looking to build a membership website, either for your own business or for a client, Beaver Builder and MemberPress will work together to make the experience quick and simple.
How to Build a Membership Site Using Beaver Builder and MemberPress (In 4 Steps)
We’re assuming you already have Beaver Builder set up on your soon-to-be membership site. If not, first install and activate it and familiarize yourself with the basics if you’re new to the plugin.
We’re also using the Beaver Builder Theme in our examples below. This isn’t necessary – you can set up a membership site using MemberPress, Beaver Builder, and any theme you like. However, the Beaver Builder theme enables you to take maximum advantage of Beaver Builder’s customization options.
With that out of the way, let’s get to work!
Step 1: Install and Configure MemberPress
As we mentioned earlier, MemberPress is a premium-only plugin. That means you’ll need to start out by purchasing a license. The Basic plan should be sufficient for most users, but you can check out the developer’s website for details on the differences between each plan.
Next, install and activate MemberPress on your website. This gives you access to a brand-new MemberPress section of the dashboard, with a whole list of sub-sections and features:
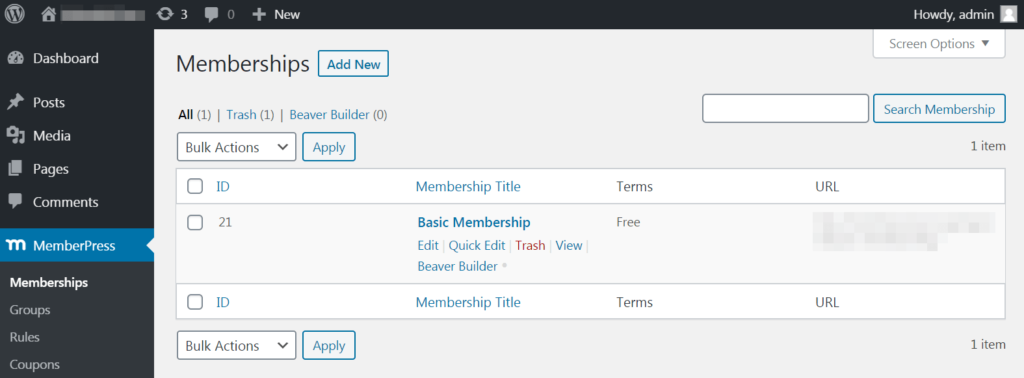
From here, you can add and manage individual members, view reports, create coupons, and more. It’s a good idea to start with the Options section:
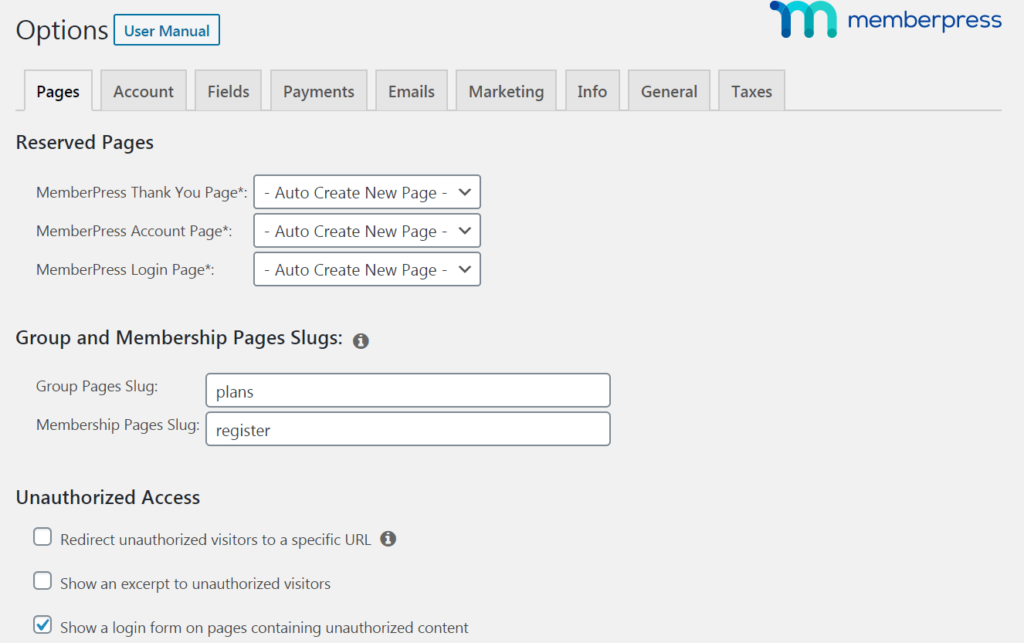
On this screen, you can configure some of MemberPress’ key settings. You can also create important pages – such as “thank you” and login pages – or choose existing ones to use for those purposes. The settings here also let you customize permissions, add payment methods, and more.
We’d suggest taking some time with these settings to make sure you have MemberPress up and running just the way you want. Most of the choices and options are fairly self-explanatory, but if you need help there’s a comprehensive knowledge base full of explanations and tutorials.
Step 2: Set Up Your Memberships
After configuring MemberPress, the next thing is to set up some memberships. These are the plans you’ll offer to visitors, which they can purchase in order to access your site’s content (or whatever else you have locked behind your membership wall).
Head over to Memberships > Add New in your dashboard, where you’ll see a familiar-looking screen:
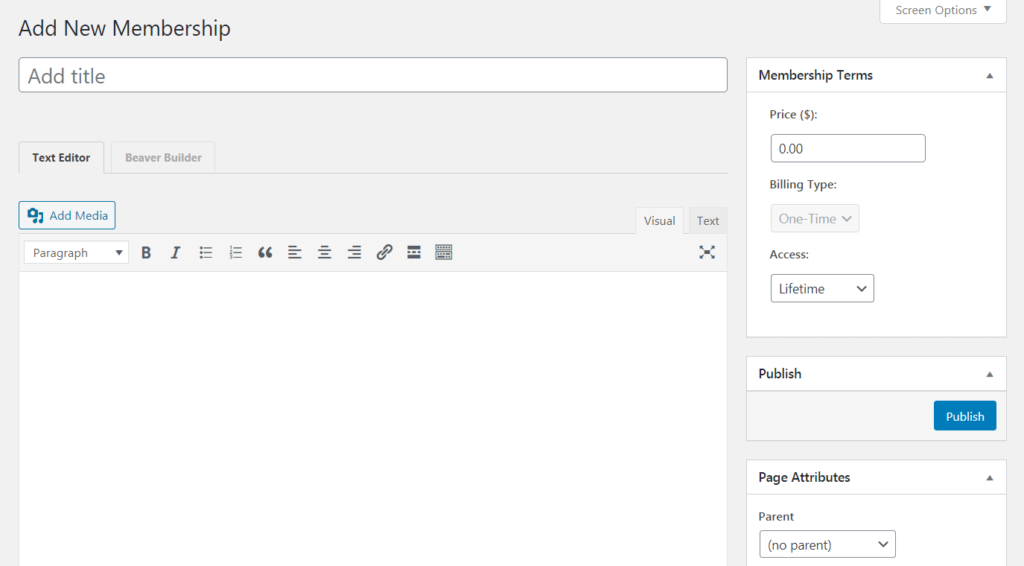
It’s set up in the style of the Classic WordPress Editor. The first two fields enable you to create a title for your membership and add a description. In the right-hand menu, you can set a price for the plan, decide whether it’s a one-time or recurring fee, and customize the billing interval or access length.
Below the editor, you’ll find a selection of additional options:
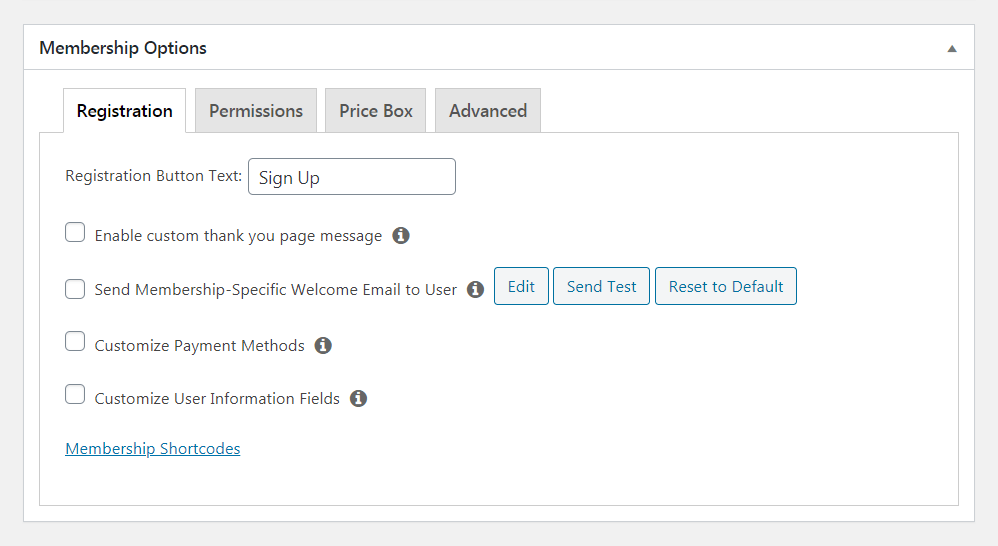
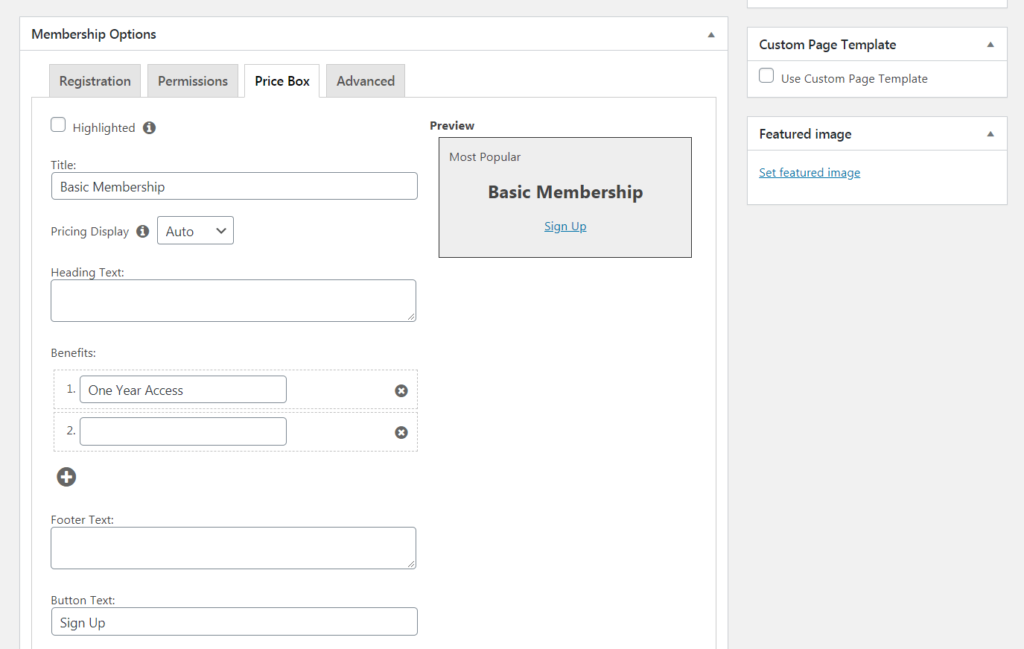
Here you can determine what will happen after a user makes a purchase, decide who is allowed to buy memberships, and so on. Most importantly, you can customize what the membership will look like on your pricing page in the Price Box tab:
You can choose to create only a single membership plan or offer a variety of options with multiple levels of access – that’s completely up to you.
Step 3: Create Your Pricing Page
After you have one or more memberships set up, you can create your pricing page. You’ll do this under MemberPress > Groups > Add New:
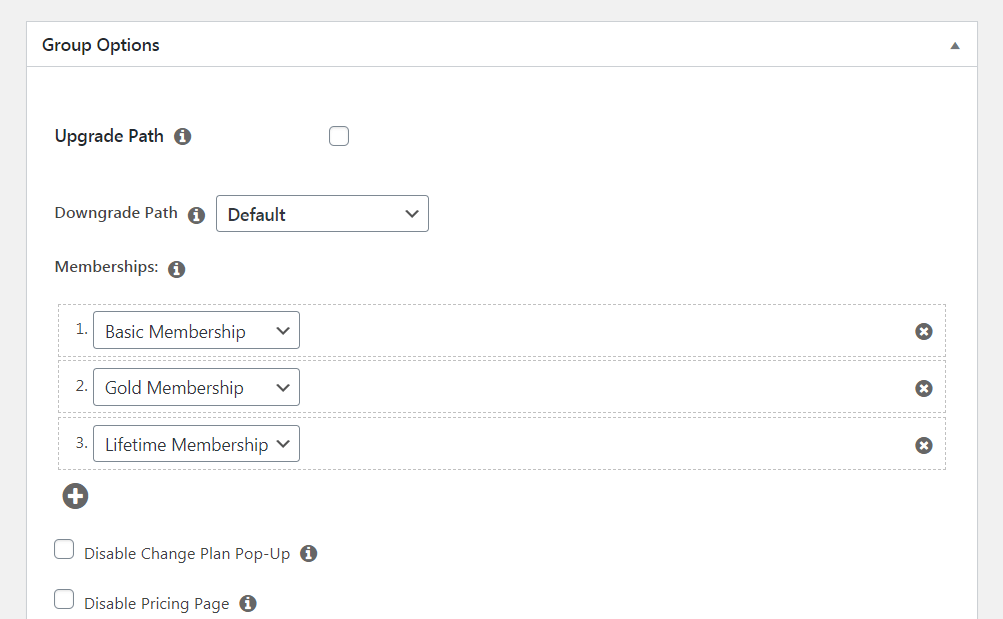
Scroll down to the custom options and choose which memberships to display and how they’re related. This makes it easy for visitors to see everything you have to offer at a glance:
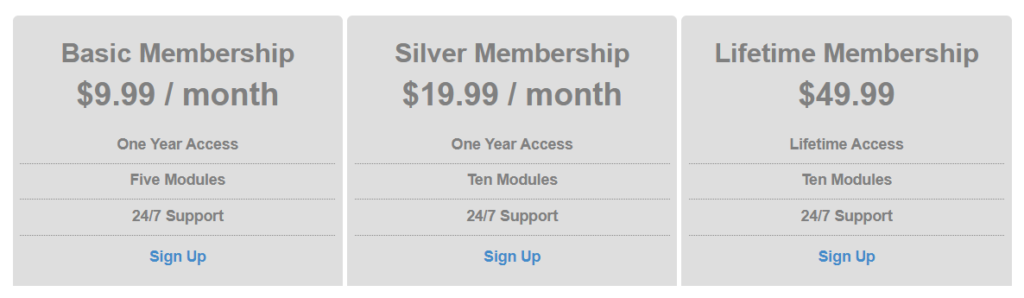
If you’re not happy with how any of the individual memberships appear, you can go back and make changes to them in the Memberships section. Your changes are reflected on your pricing page.
Step 4: Build Your Members-Only Content
At this point, there are many directions you can take your membership site. However, we want to focus on one way you can encourage visitors to sign up for memberships. This is also where Beaver Builder comes into the picture.
Suppose you want to set up restricted members-only content on a specific page. All visitors can see some of the content, but only members will be able to view all of it. Nonmembers will instead see a prompt encouraging them to sign up, with the visible content serving as a teaser.
First, create a new blog post use Beaver Builder’s Heading and Text Editor modules to add some content:
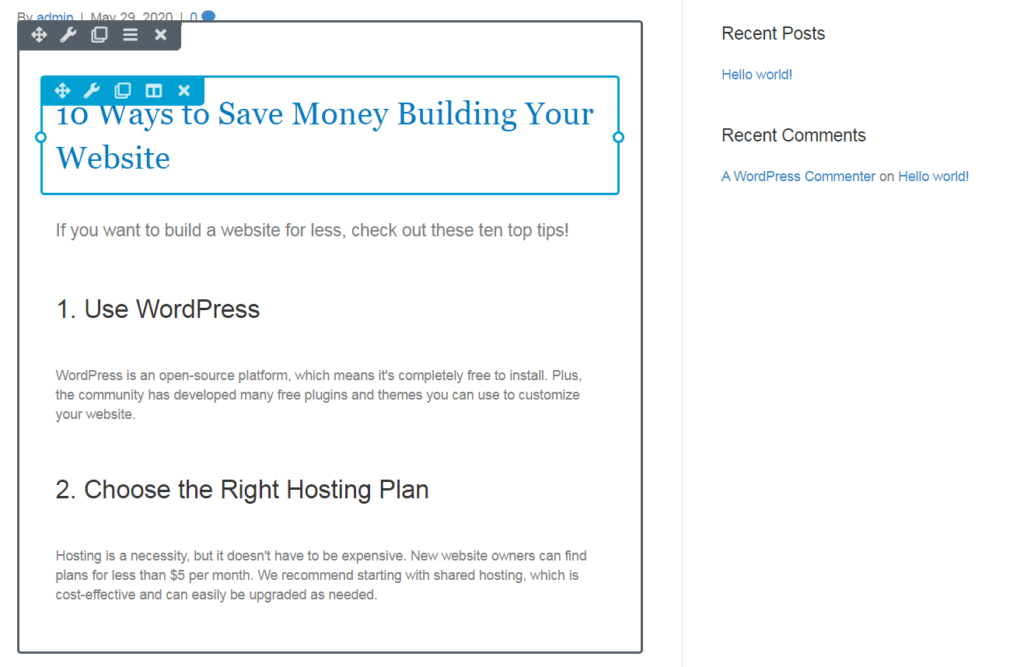
We want everyone who visits the page to see the header, lead-in text, and the first tip to give them an idea of what the page is about. We’ll even show them the header for the second tip to make them want to read further. However, we’ll restrict the rest of the content to members only.
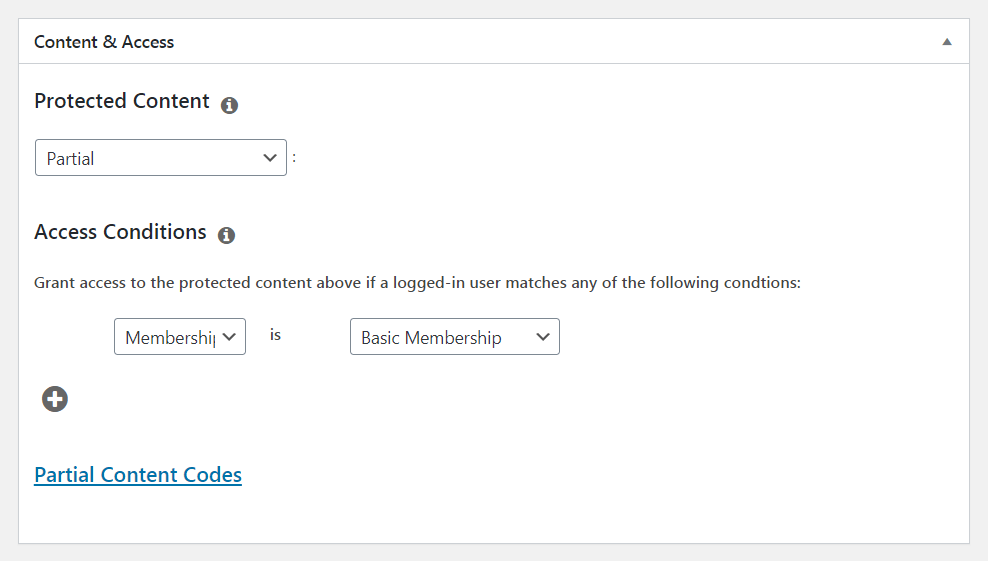
To do this, save the post and navigate to MemberPress > Rules > Add New. Here, you can set up custom rules for what content is visible to which visitors. Select the Partial rule, then choose the Basic Membership plan:
Then save the rule, return to the post, and open the settings for each module containing the text you want to restrict. The settings panel has a MemberPress tab with a dropdown labeled MemberPress Rule:
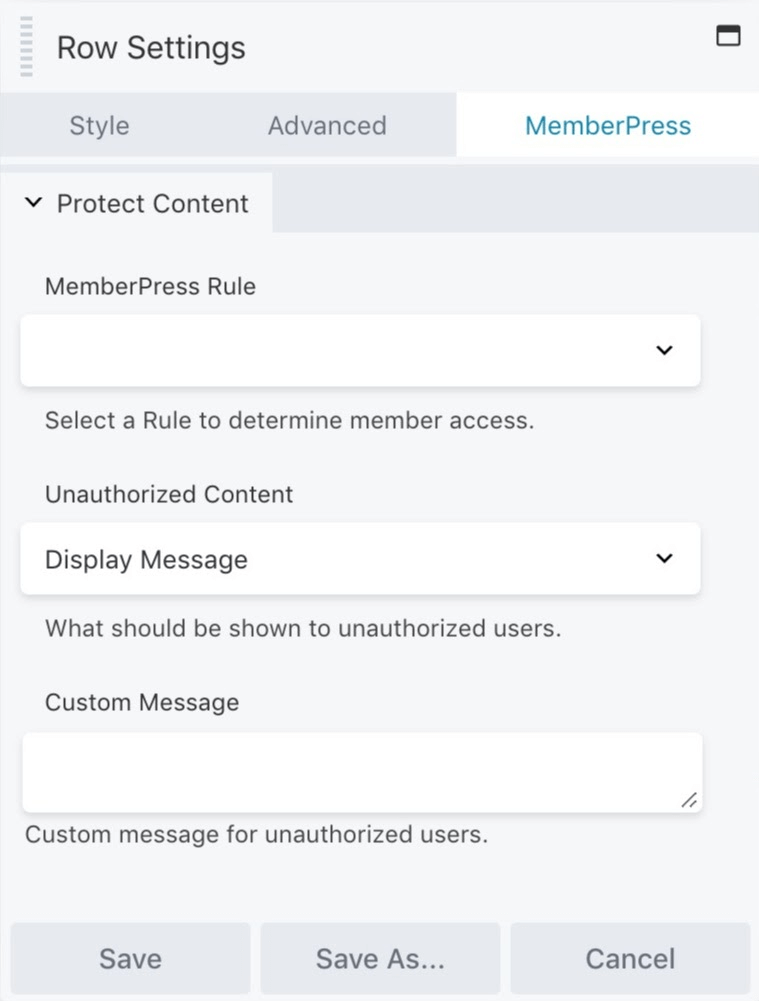
Just choose the rule that you created. You can also create a custom message to display to nonmembers, letting them know that the content is restricted and encouraging them to sign up.
Here is a video by the MemberPress team that demonstrates how to use the Beaver Builder content protection add-on.
With that, you’ve successfully created a blog post that displays a teaser for nonmembers and provides signed-in members with automatic access to the full content. You can see how this technique can be applied in all kinds of ways to customize how content on your site appears to each type of visitor.
Conclusion
When it comes to building a website, having the right solutions at hand is crucial. If you’re creating a membership site, you can’t go wrong with the combination of WordPress, Beaver Builder, and MemberPress. This provides you with the flexibility and customization options you want, and the membership-specific features you need.
You can get the ball rolling and start building your custom membership site by:
- Installing and configuring MemberPress.
- Setting up your memberships.
- Creating your pricing page.
- Building your members-only content.
Do you have any questions about how to customize your membership site using Beaver Builder? Let us know in the comments section below!
6 Comments
Our Newsletter
Our newsletter is personally written and sent out about once a month. It's not the least bit annoying or spammy.
We promise.
Try Beaver Builder Today

Related articles

How Beaver Builder Products Work Together to Build Flexible WordPress Websites
Building a WordPress website often means stitching together a theme from one developer, a page builder from another, and a…
Growing a Facebook Group to 14,000 Members: Community Management Tips with David McCan
David McCan grew the Dynamic WordPress Facebook group to over 14,000 members. We sat down to talk about his moderation...

Why Agencies Are Switching to Beaver Builder: Performance Testing Results
By Chris Smith – HYPEsites.com For WordPress agencies, page builder choice directly impacts the metrics that matter most: project margins,…
Join the community
We're here for you
There's a thriving community of builders and we'd love for you to join us. Come by and show off a project, network, or ask a question.
Since 2014
Ready to build?
The WordPress page builder agencies and freelancers have trusted since 2014.
Thanks for this, good article.
I’m just in the process of finishing a membership site with memberpress (and of course BB) for a client. I have to say it’s a very well featured product with very comprehensive documentation.
That’s awesome Hugues! MemberPress has done a great job integrating with Beaver Builder. Makes building membership websites easier =)
Awesome article! We have a client working toward starting a membership site for real estate. We already know we’ll use BB, and we’ve been contemplating which membership plugin to use.
We look forward to hearing and seeing the membership site you create Allan =)
Great article. Is there anywhere I can find an example website that is using Memberpress for a membership website? Or a demo of a membership site using Memberpress?
Hi Suzanne you could try asking members in our private Facebook Group. I’m sure there are some folks in the community that would be happy to share their sites =)