
Wondering how to help visitors navigate your website with ease? Some sites use excessive dropdown menus, which isn’t ideal for the user experience. Fortunately, you can create a mega menu instead. This makes all your pages instantly accessible in one place. It also offers a neat and stylish way to display your web pages.
In this post, we’re going to take a closer look at what a mega menu is and explore some of the key benefits of using one. Then, we’ll help you decide whether a mega menu is a good choice for your website, before we share two ways to create one using Beaver Builder. Let’s get started!
Table of Contents
- An Overview of Mega Menus
- When to Use a Mega Menu for Your Website
- How to Create a Mega Menu Using Beaver Builder (2 Ways)
- 1. With the Beaver Builder Theme
- 2. With the Beaver Builder Mega Menu Addon
- Conclusion
An Overview of Mega Menus
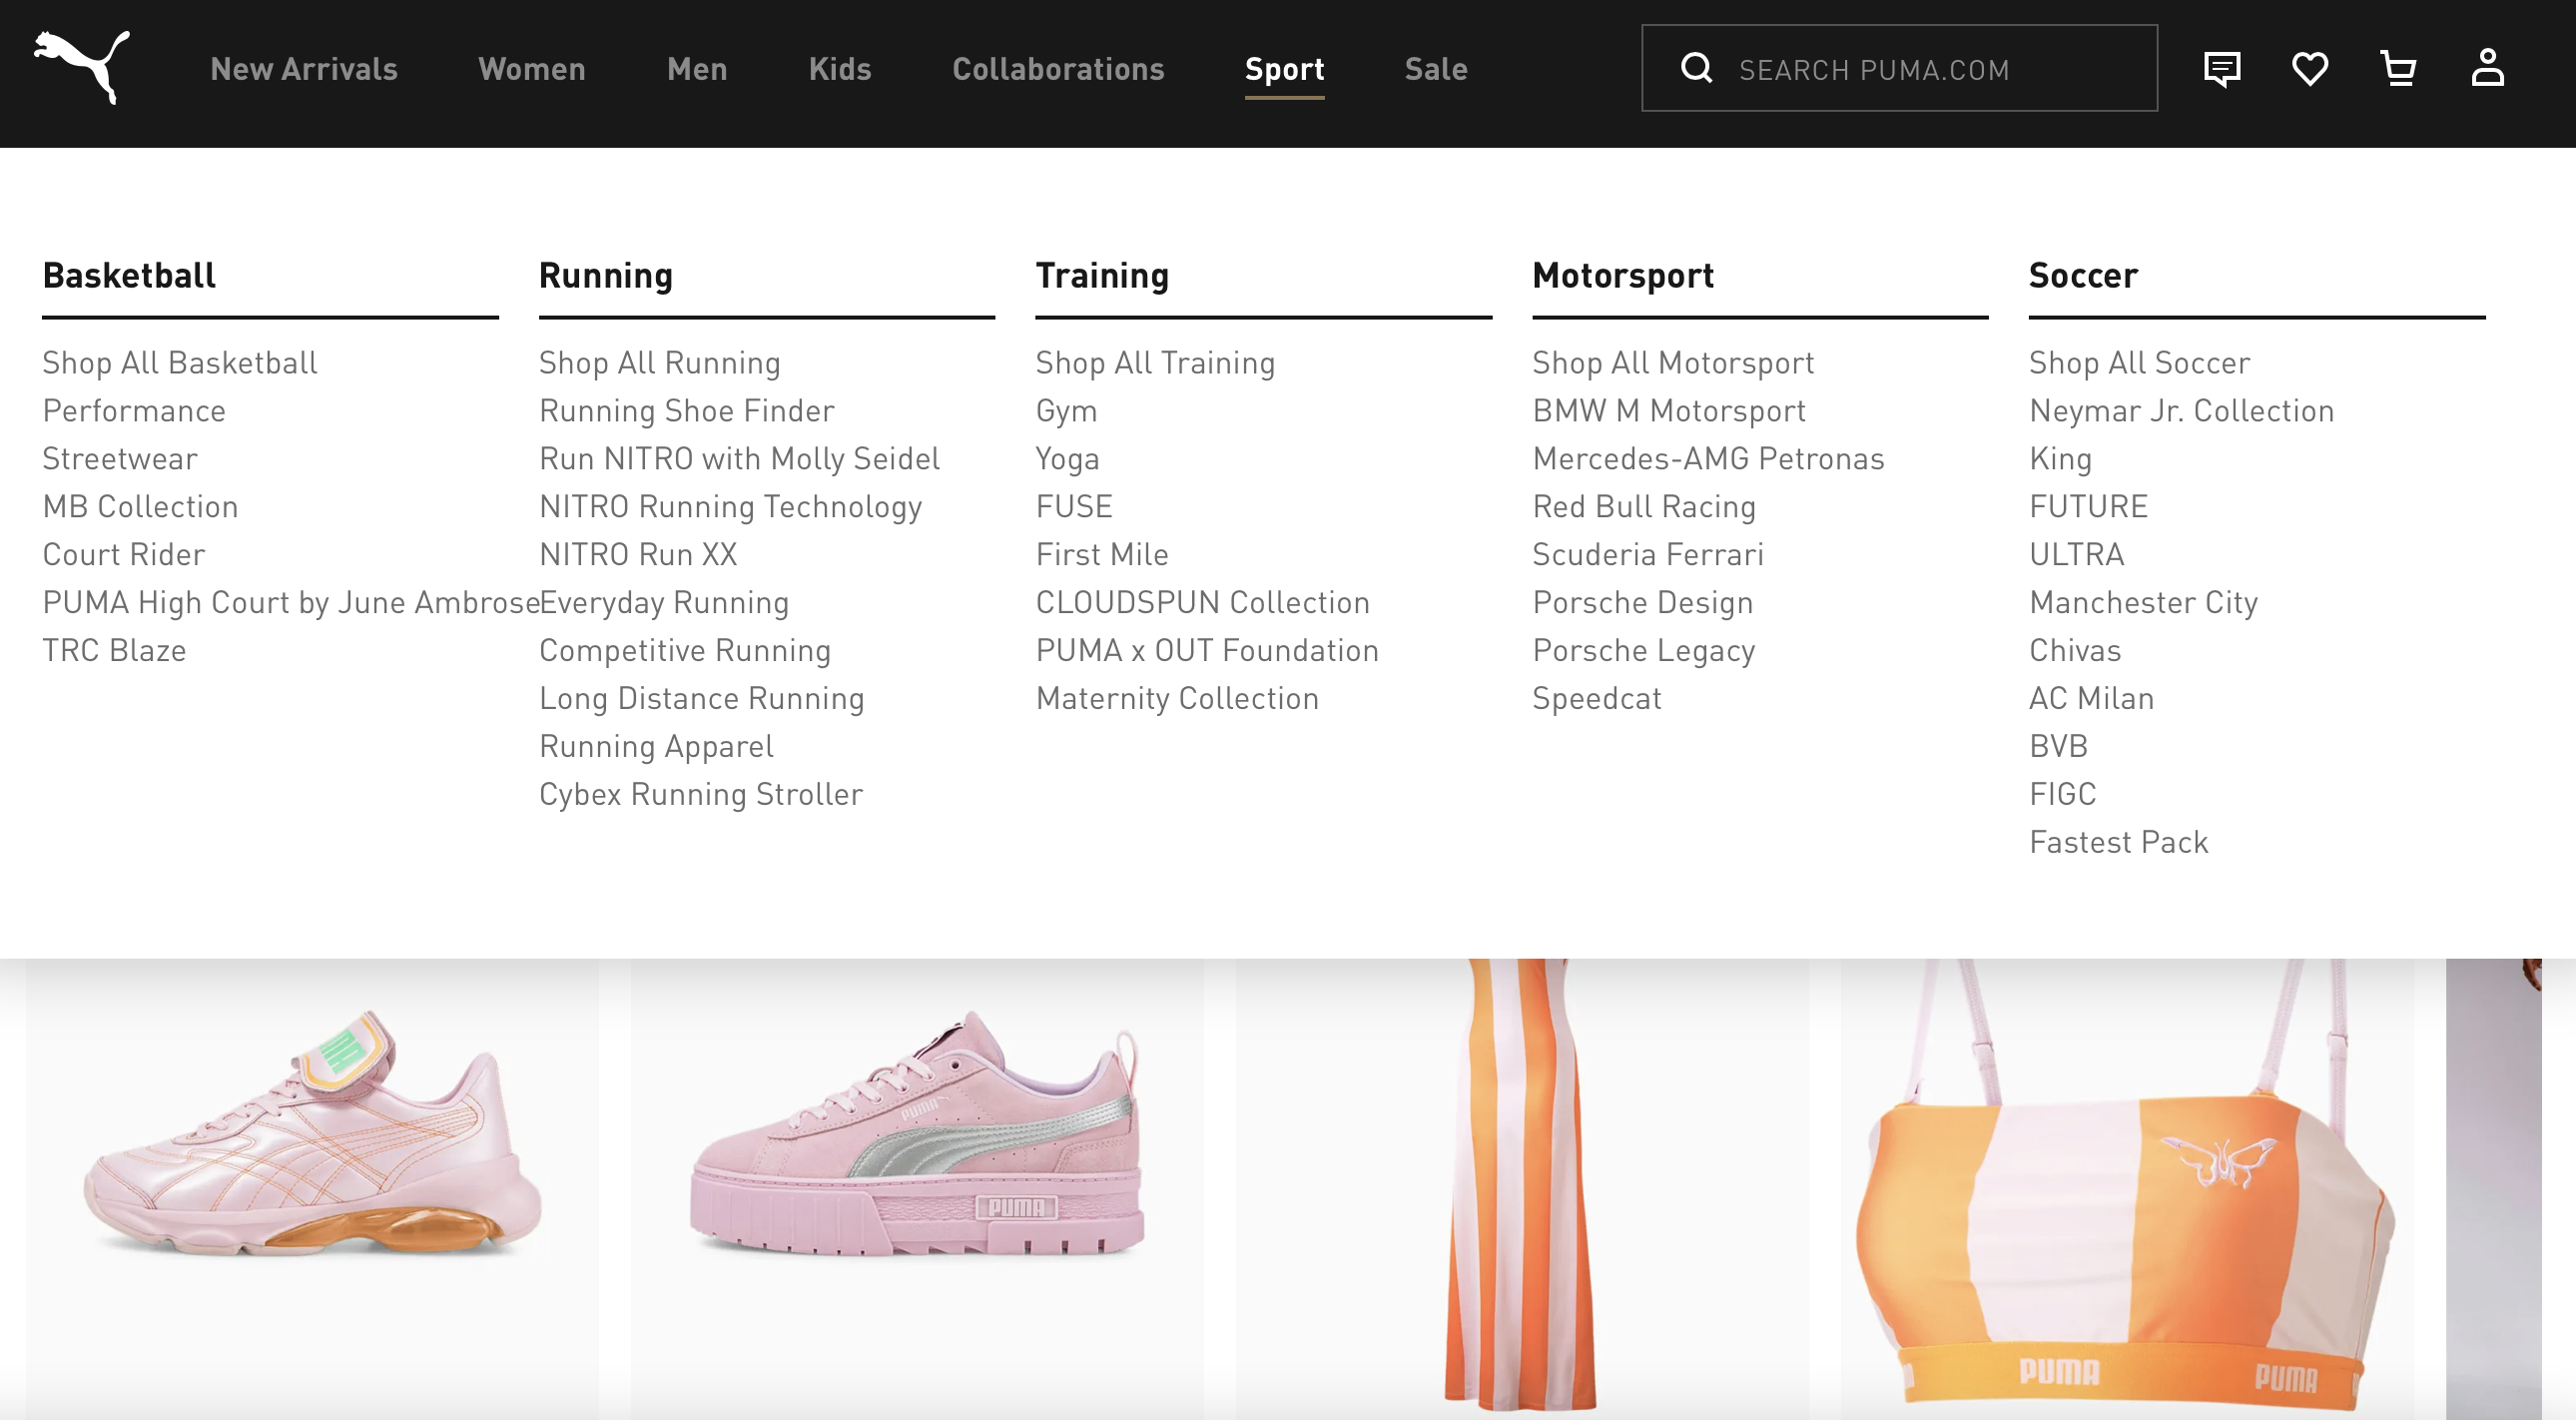
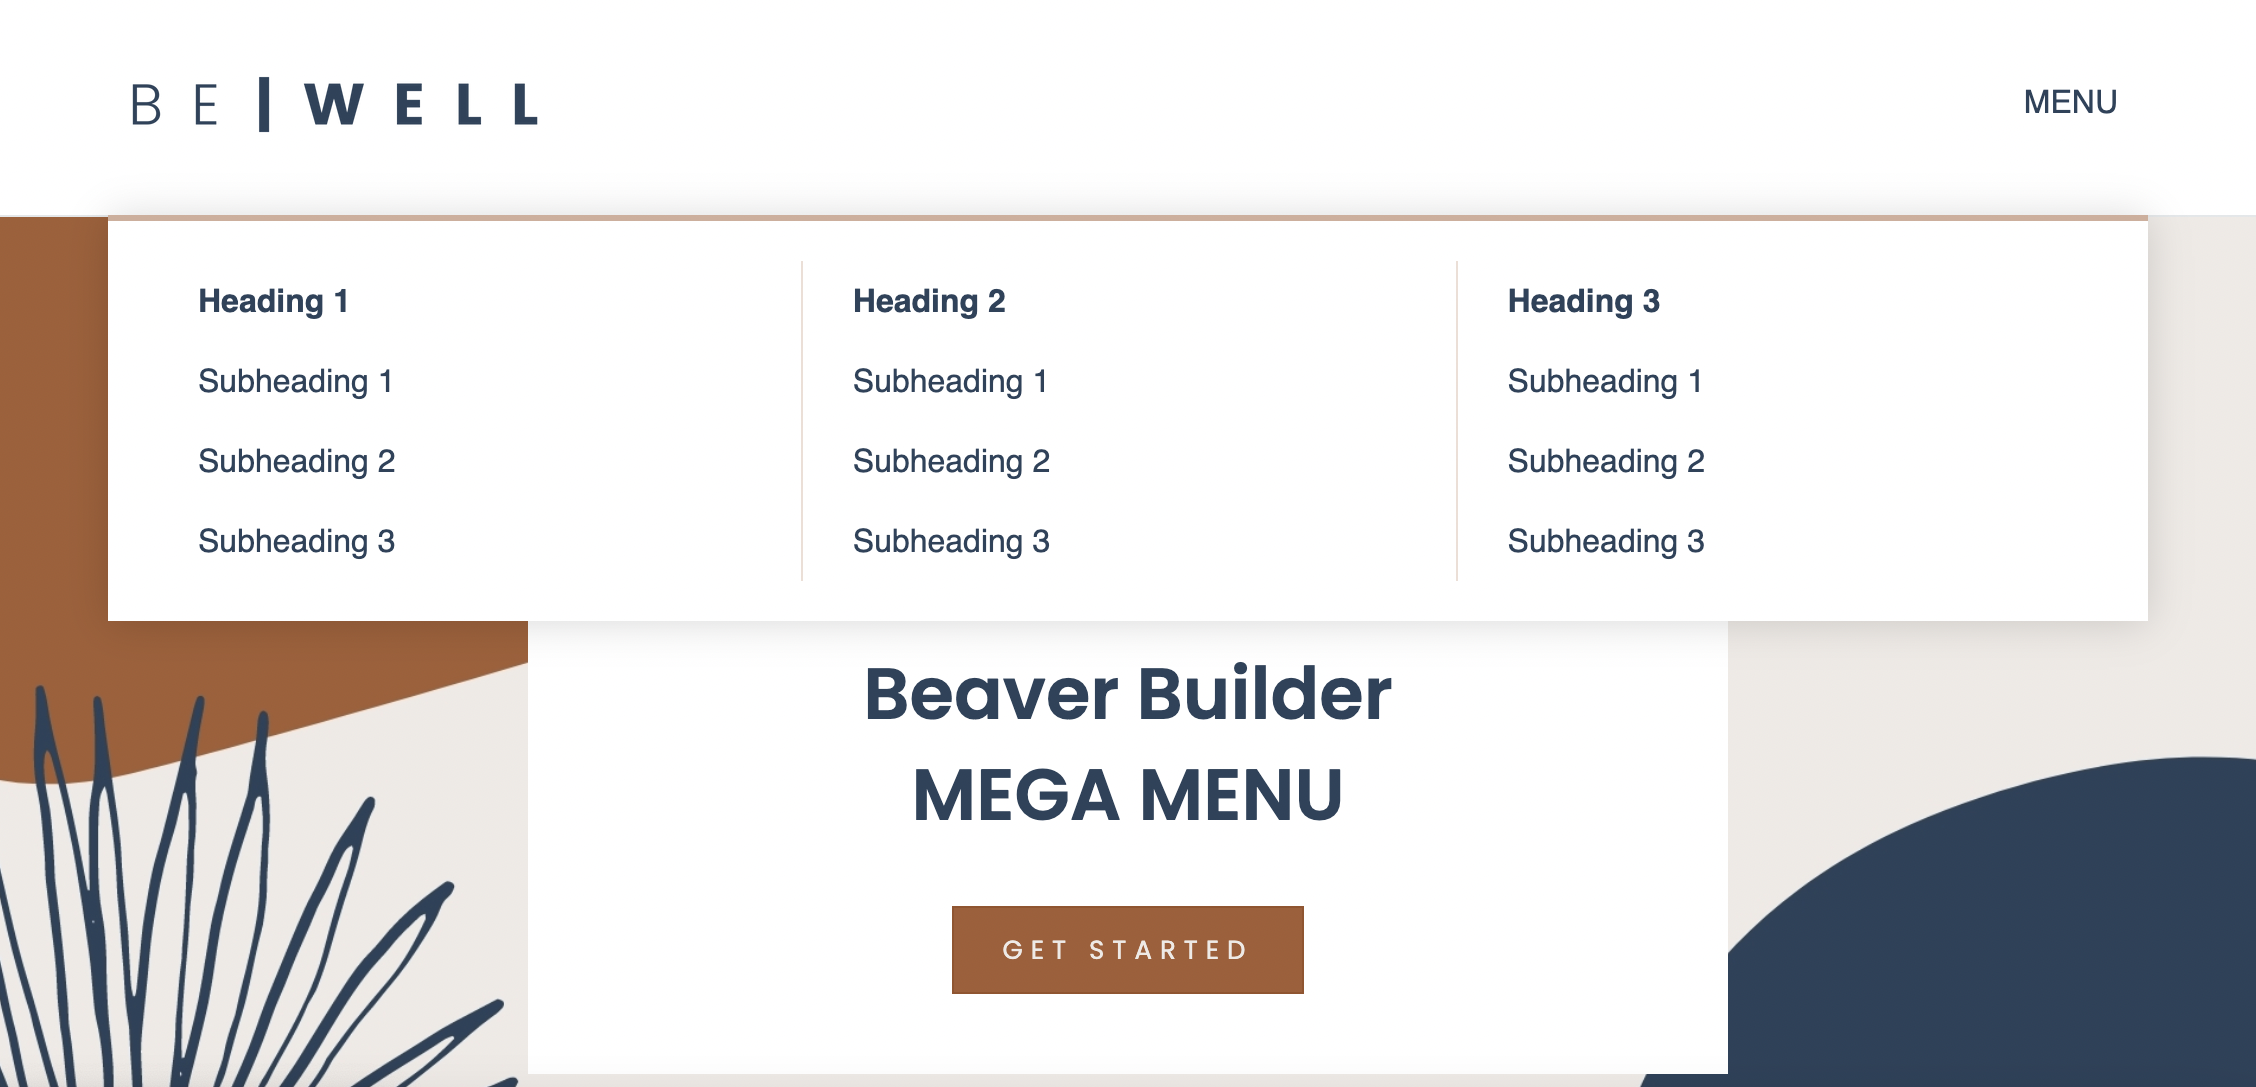
A mega menu is a big, expandable menu that makes links to multiple pages on your site visible in one place. Quite often, they’re used in large e-commerce stores or websites with lots of categories and subcategories.
Using a mega menu, visitors can quickly and easily view and select any of your pages:
There are many benefits of opting for a mega menu as opposed to a bunch of different dropdown menus. They can be both practical and eye-catching.
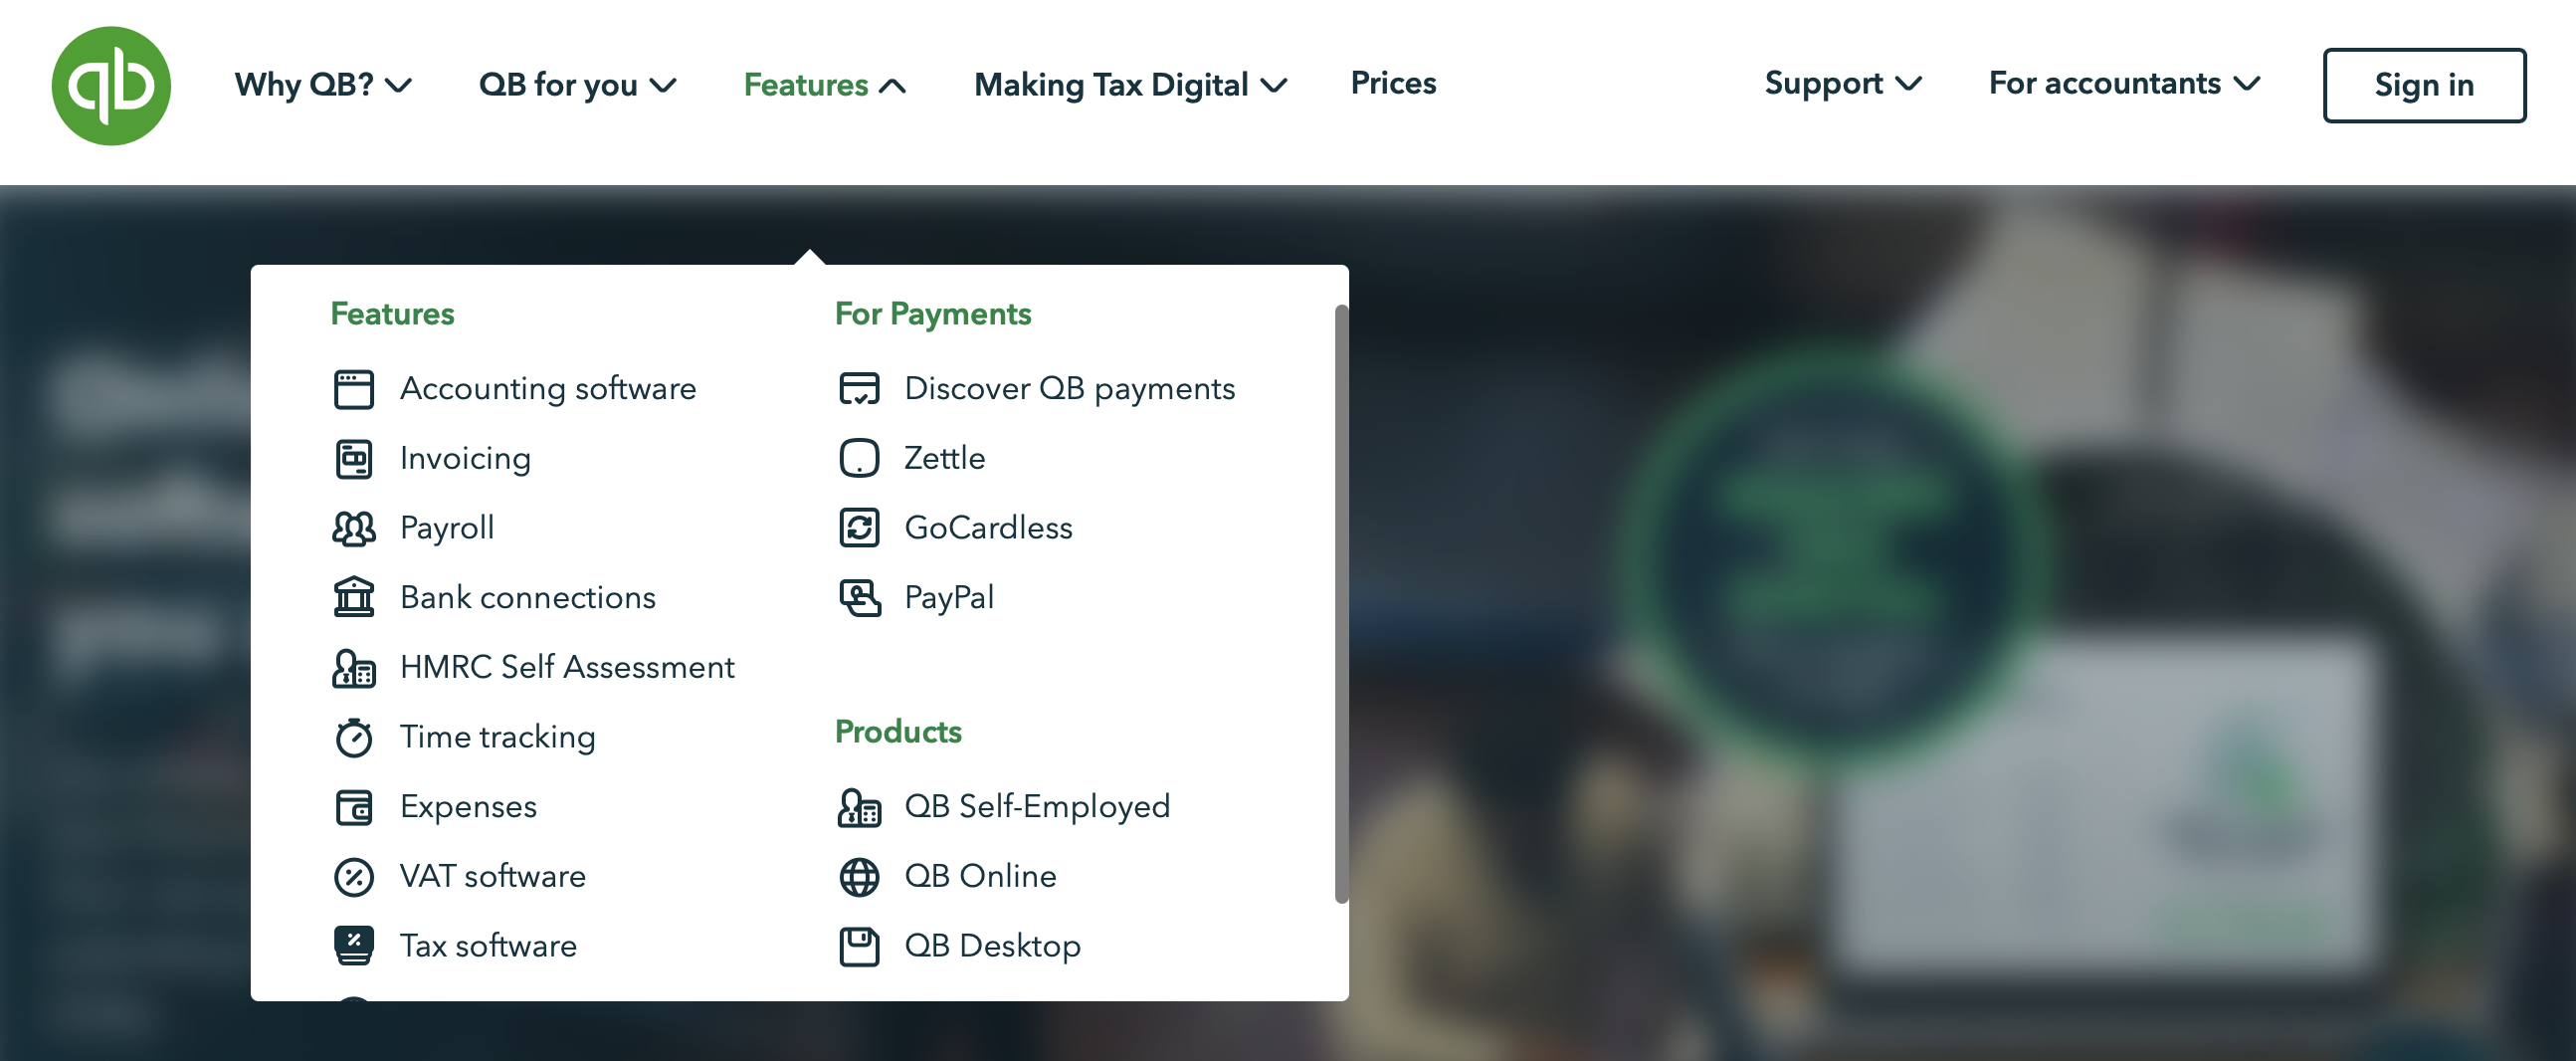
Sleek mega menus have the potential to enhance the appearance of your website due to their modern, stylish layout. You can even utilize engaging images or icons to help prevent your menu from becoming too text-heavy:

Most importantly, mega menus are comprehensive, ensuring that more of your pages are included in your site’s navigation. To achieve this effect with a dropdown menu, your site could easily become cluttered and stacked with lots of categories.
Essentially, mega menus offer more space than traditional menus, enabling you to keep your website organized and easy to explore. This way, visitors can quickly find what they’re looking for.
When to Use a Mega Menu for Your Website
It’s a good idea to include a mega menu on your website if it would make navigation easier and more intuitive for visitors. You may also consider a mega menu if you’re looking for ways to keep customers on the site longer. That’s because, with mega menus, shoppers are more likely to discover related items or categories.
As we discussed earlier, mega menus are largely used in e-commerce stores. However, this isn’t the only type of website that can benefit from them.
In fact, any site with lots of content to display may want to take advantage of the space and organization that they provide. For example, news websites, magazines, content publishers, and large blogs might find them useful:

Since mega menus can enhance the design of your site, you can make the most of the opportunity to add more than just links to additional content.
For example, you might give yourself a better chance of improving sales by encouraging users to visit other product pages. This incentive is much stronger for customers when they’re provided with a straightforward and engaging experience:
Lastly, it’s important to consider the size of your website when determining whether a mega menu is right for you. Mega menus are so effective for e-commerce sites because they tend to have lots of products and categories.
They help direct users to where they want to be without requiring them to search through tons of listings. However, if your site is small, you likely don’t need to include many links and categories in your menus. In this case, a mega menu may not be necessary.
How to Create a Mega Menu Using Beaver Builder (2 Ways)
The Beaver Builder plugin gives you greater control over your website’s design. For instance, when using our theme framework, you can easily transform standard dropdown menus into mega menus. Plus, when combined with the Beaver Themer plugin, you can use it to create a variety of layouts for headers, footers, and 404 pages.
If you’ve decided that a mega menu will add value to your website, here are two ways you can create one using Beaver Builder.
1. Beaver Builder Theme Mega Menu
The first way to create a mega menu is with the Beaver Builder Theme. It allows you to turn standard drop-down menus into mega menus.
You might like to watch this video tutorial that explains how:
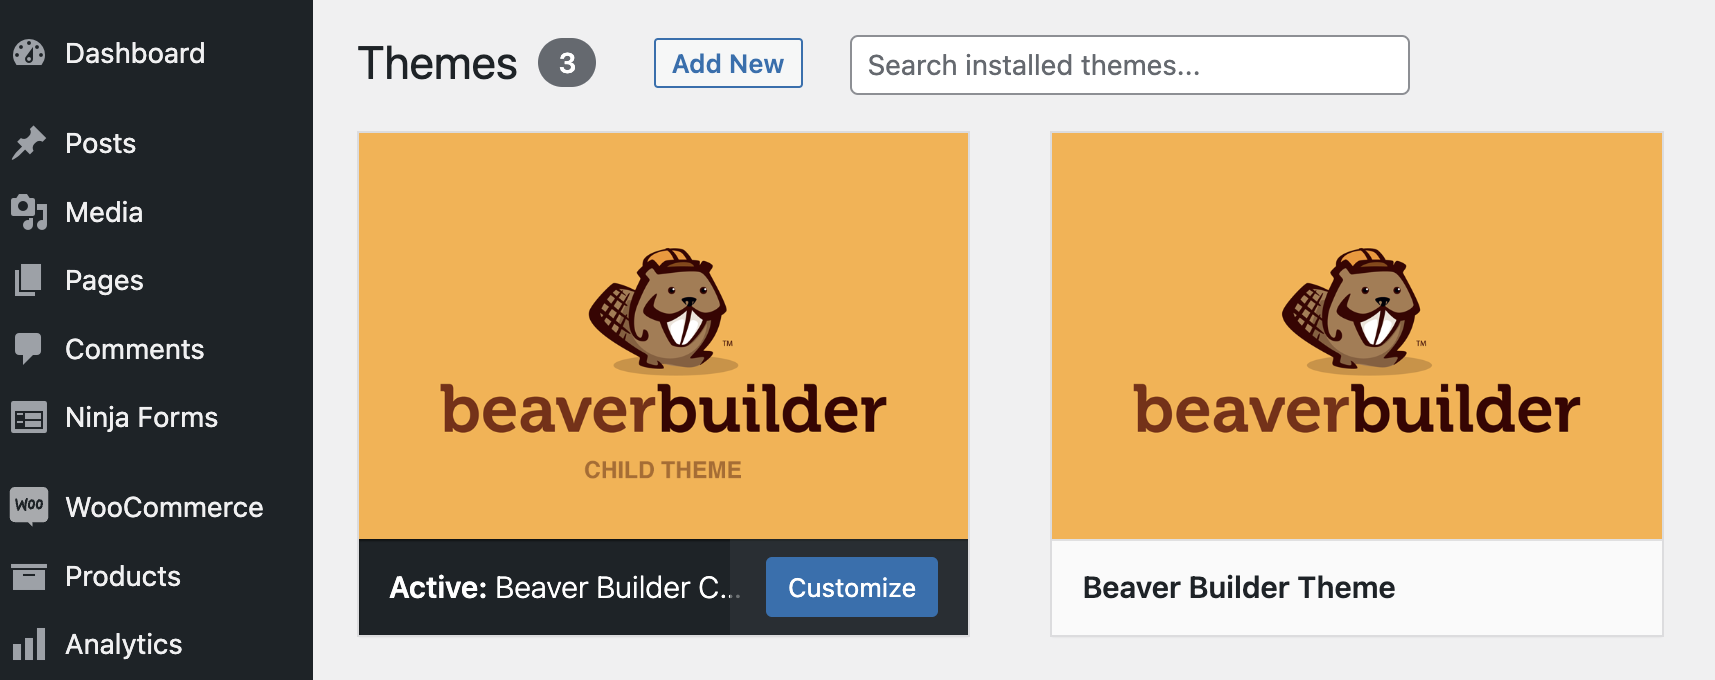
To get started, download and install the Beaver Builder Theme:
Note: If you are switching themes on an existing site, it is always a good idea to backup your site before you begin.
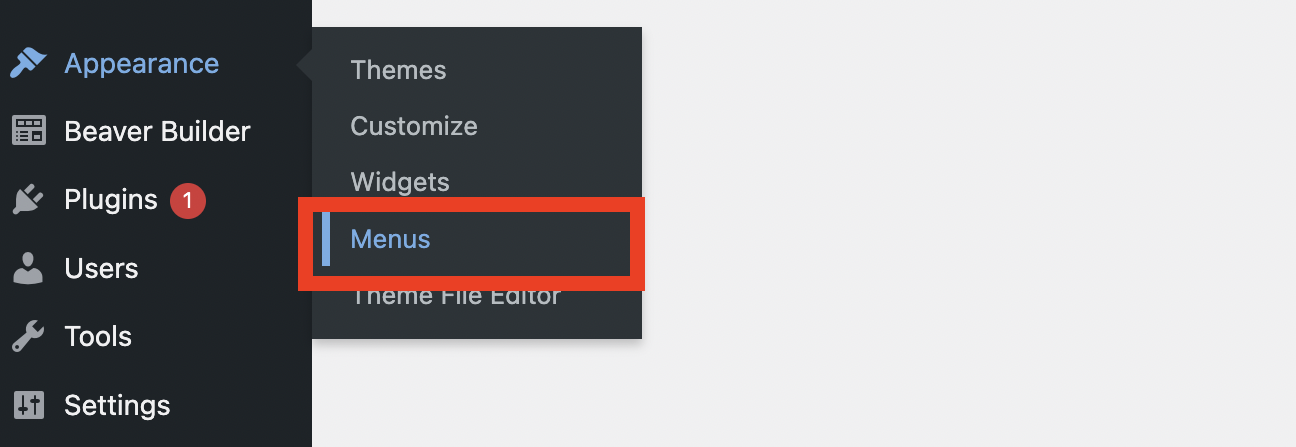
Next, go to Appearance > Menus in your WordPress dashboard:
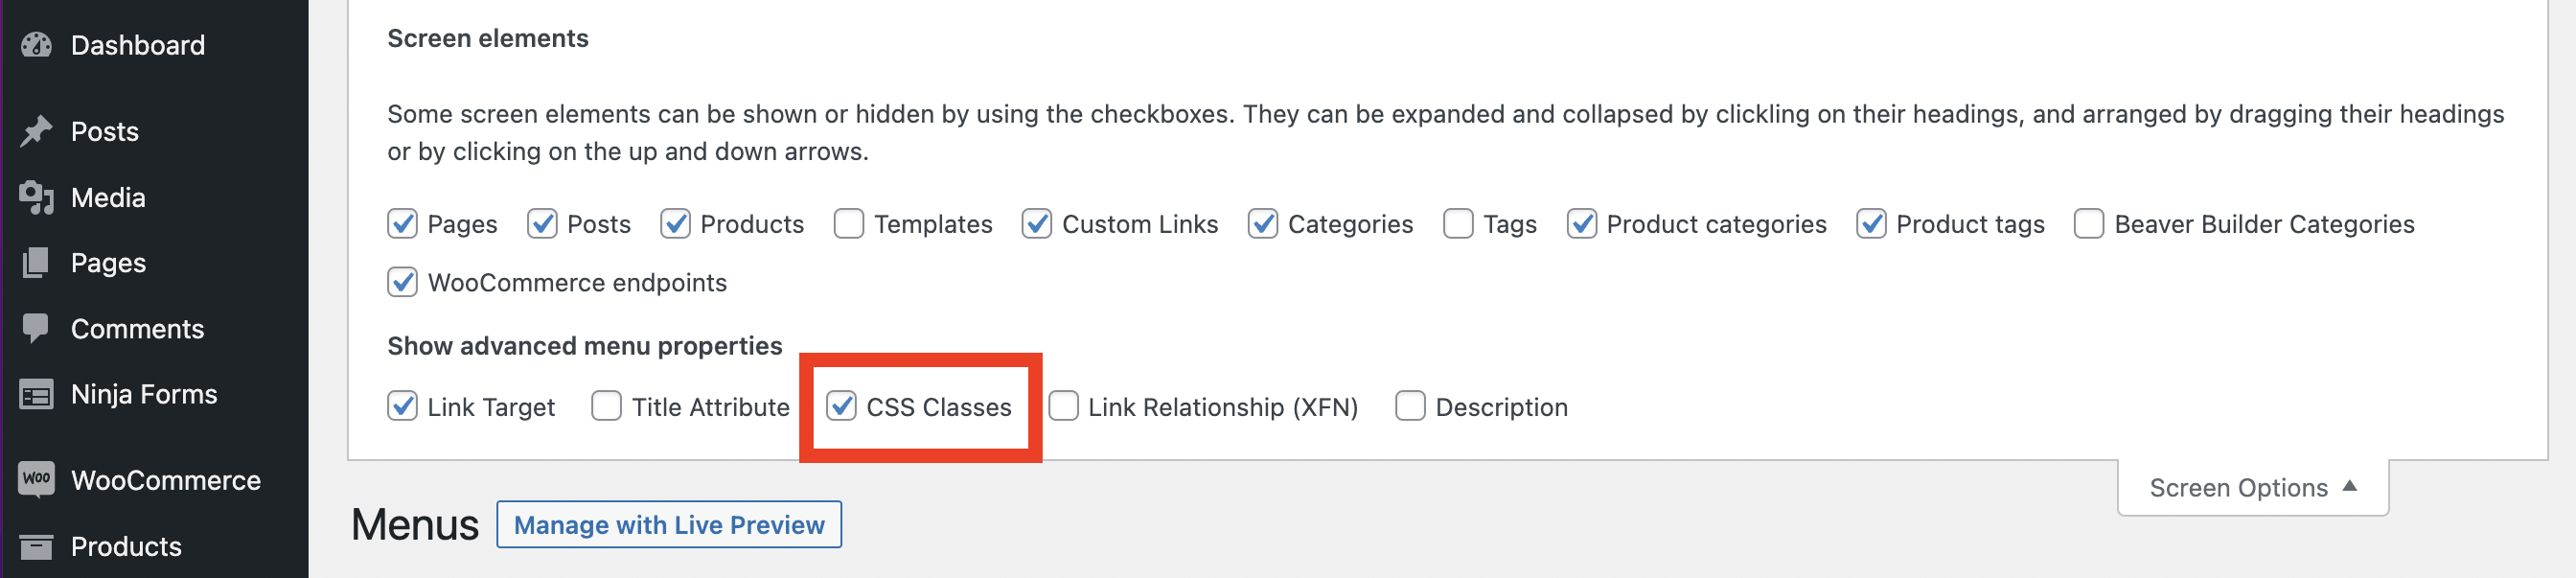
In the upper right-hand corner, click on Screen Options and make sure the CSS Classes box is ticked:
Next, scroll down to your menu items and either choose an existing menu or create a new one:
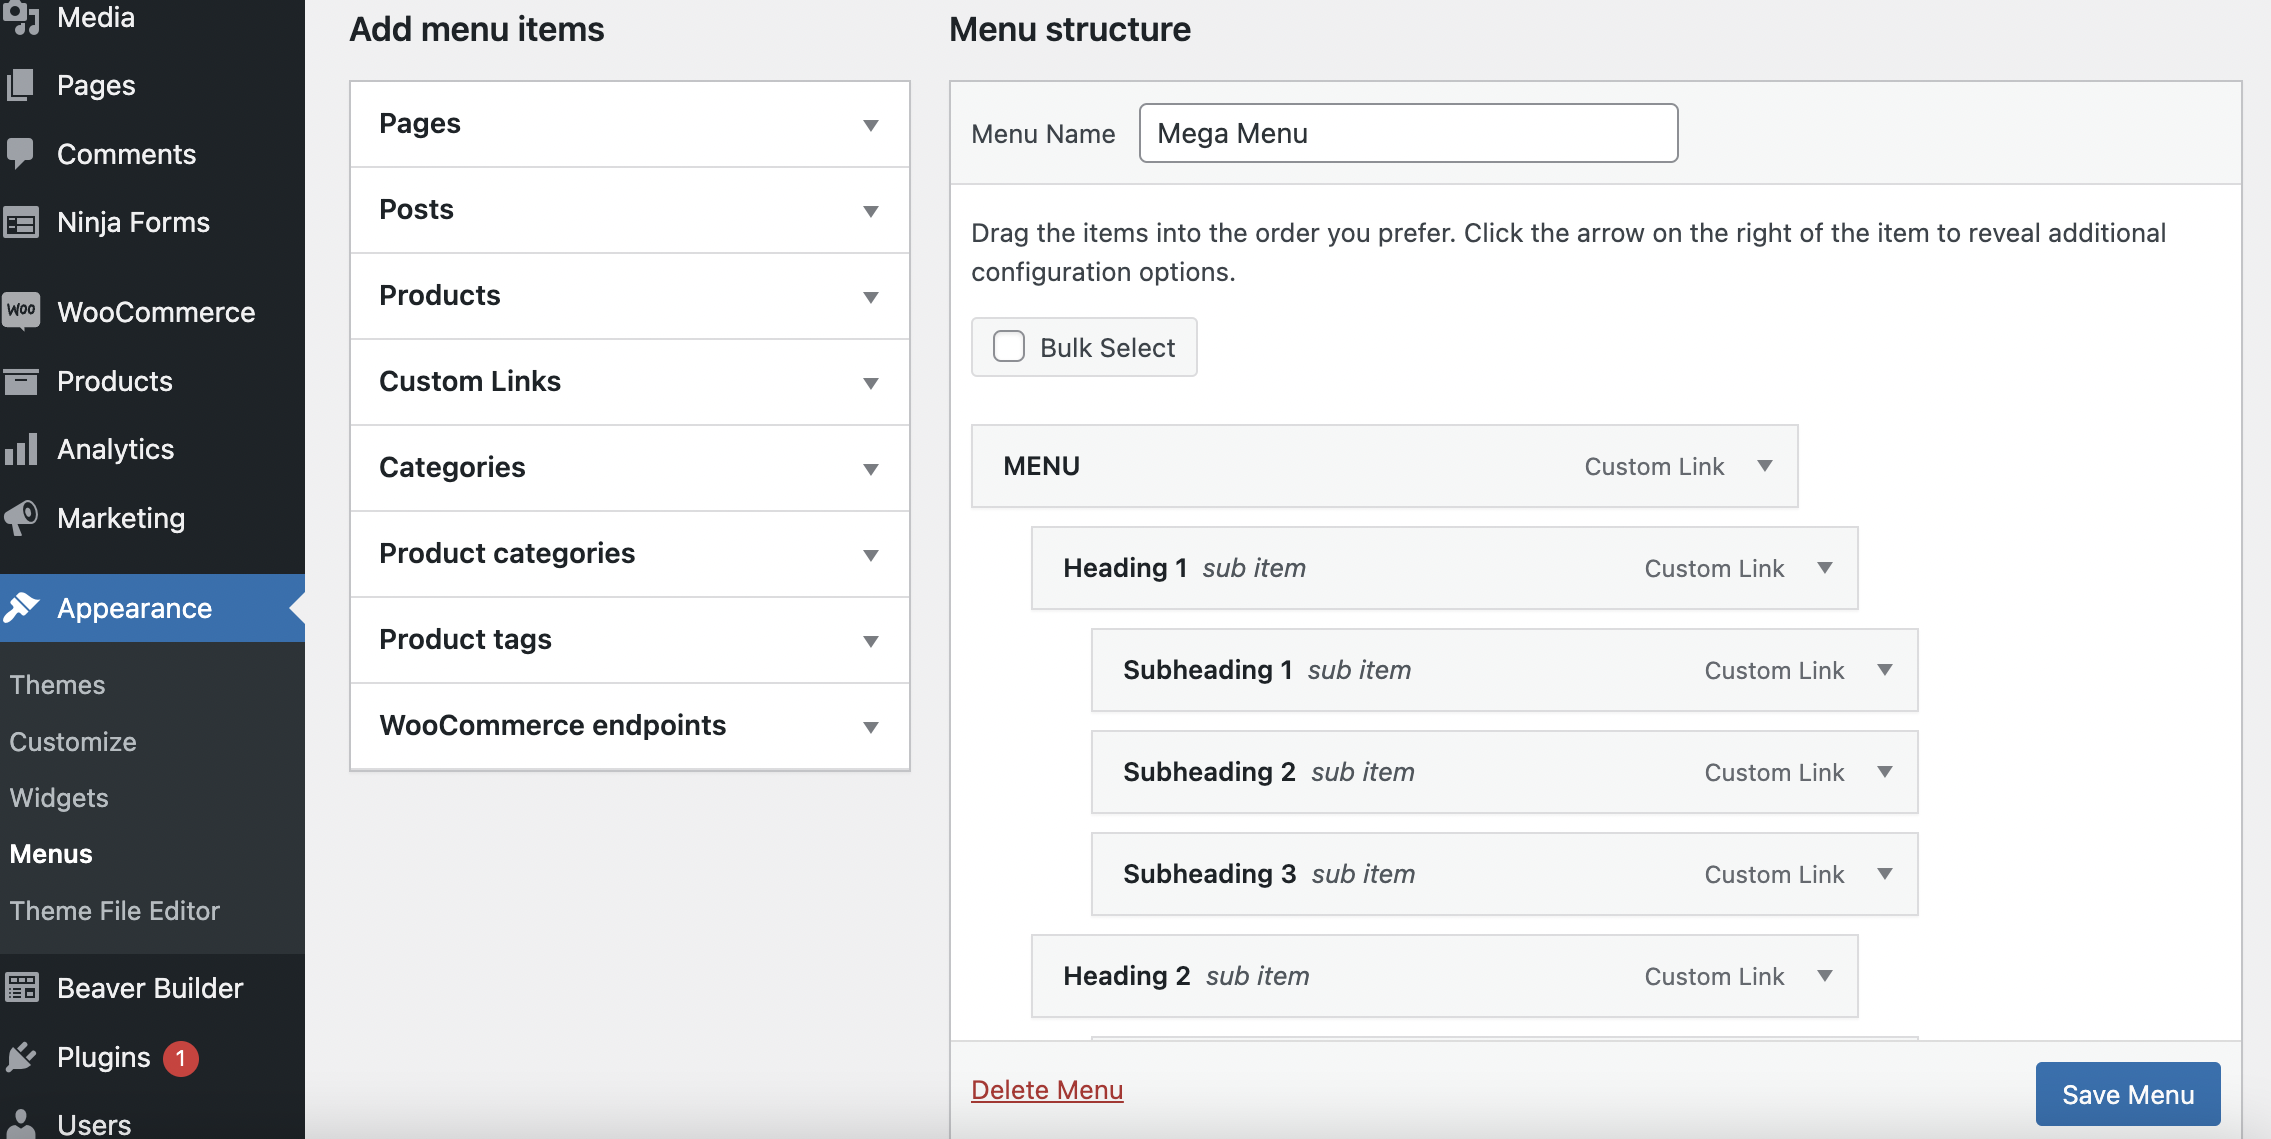
Now, you can reorder your menu by simply dragging and dropping items into different positions. However, you will want to make sure your main category is the top-level menu item.
Next, click on the down arrow to expand a menu item. In the CSS Classes field, enter “mega-menu”:
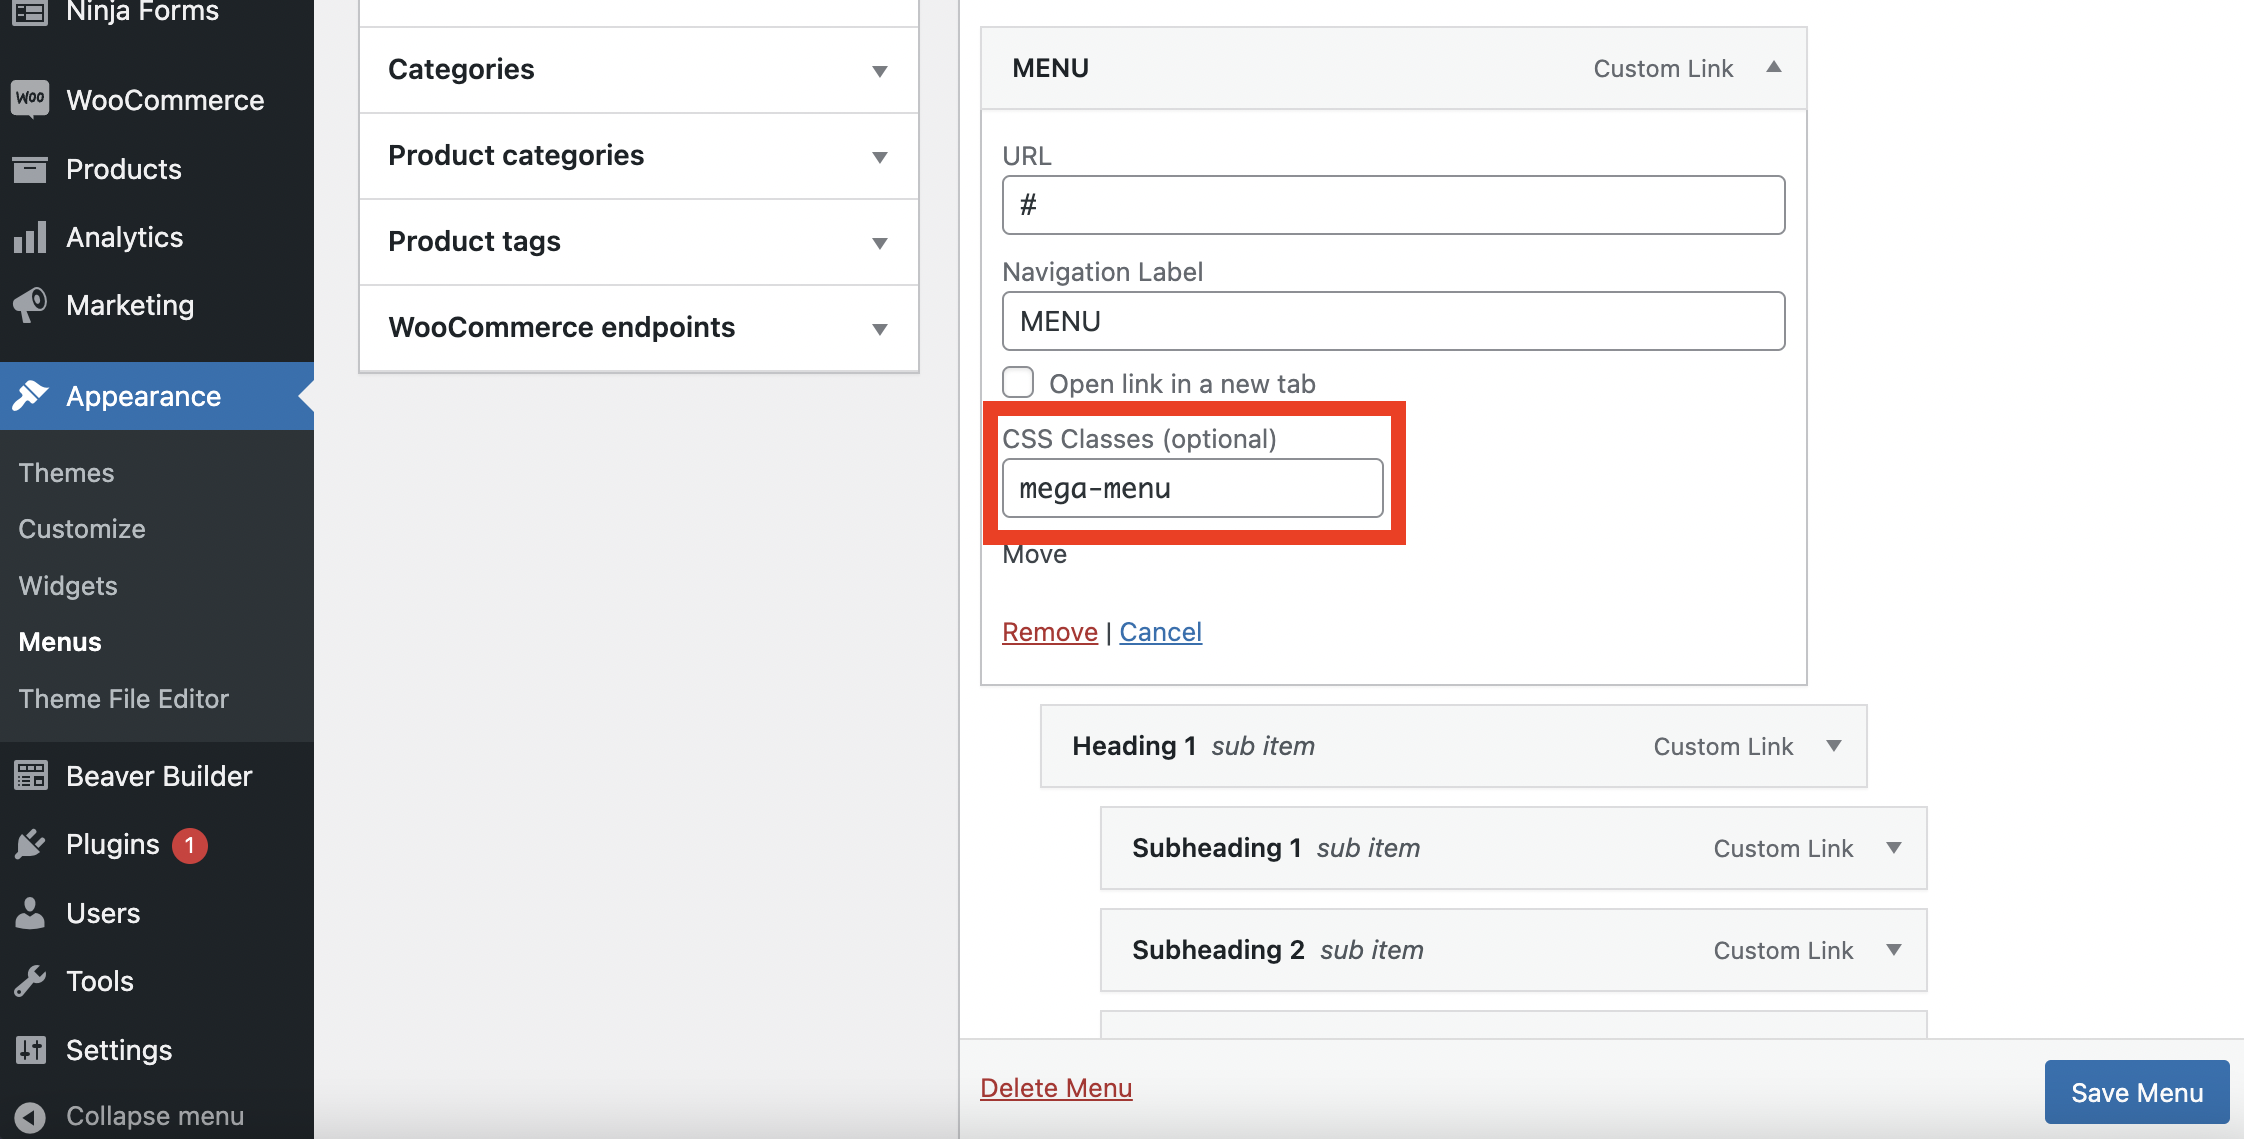
Repeat this process for each of your menu items that you wish to turn into a mega menu. In this example, we are going to have just one, which we labeled “MENU“.
If you scroll further down your screen, you can select where you want to position the menu on your site. Displaying it in your header is probably your best bet.
You can also enable a setting that automatically adds new top-level pages to your menu. When you’re finished making your selections, click on Save Menu.
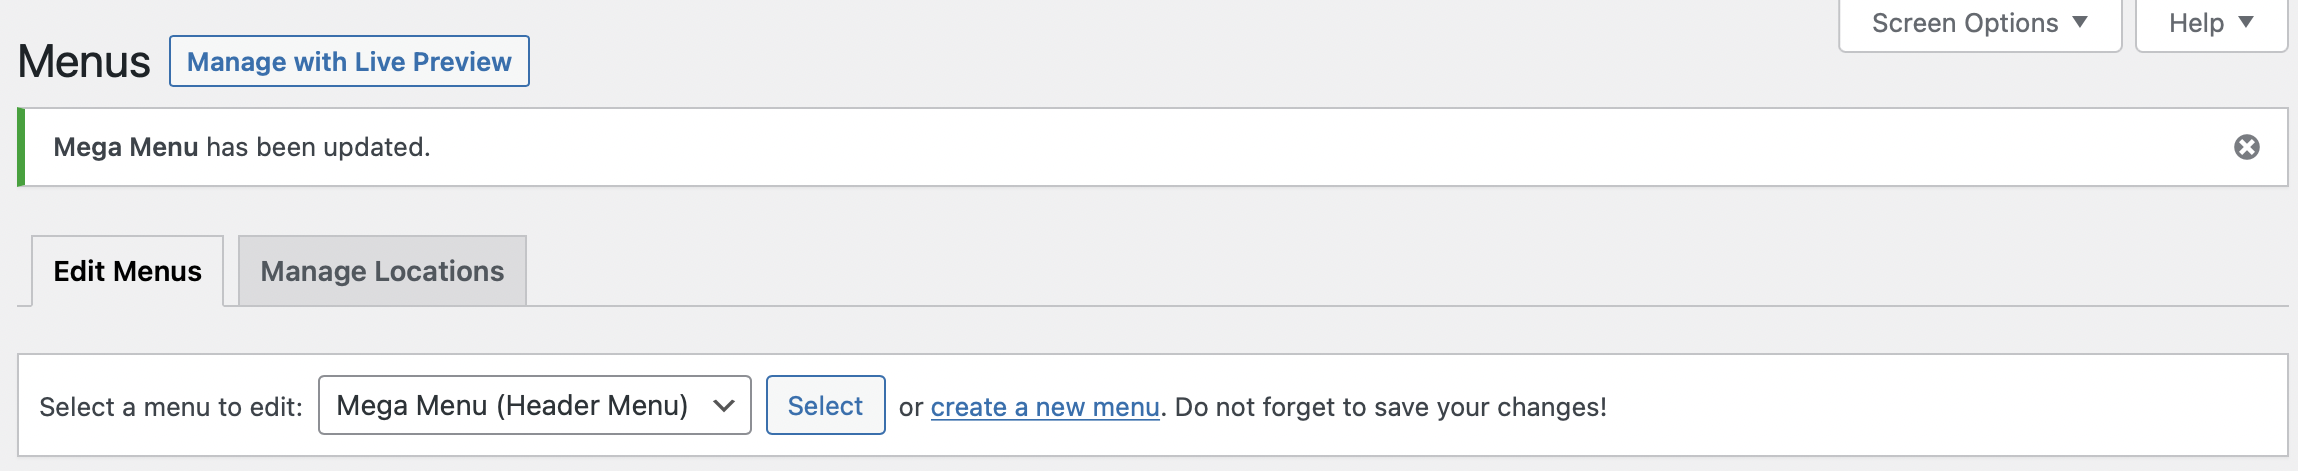
Finally, you can view and edit your mega menu by clicking Manage with Live Preview:
On the following screen, you can see how your mega menu looks on the front end of your site. Now you can continue to reorder your menu until you’re happy with it.
Then, click on Publish at the top of the page to save your changes. Note that you may need to refresh the page to see your changes:
2. With the Beaver Builder Mega Menu Addon
Alternatively, you can purchase the Beaver Builder Mega Menu Addon to create a more complex and customized menu. You’ll also need to have the Beaver Builder page builder plugin and the Beaver Themer plugin installed on your WordPress site for this method.
Any premium Beaver Builder plan grants you access to the entire suite of products, including the Beaver Builder Page Builder, Beaver Builder Theme, and Beaver Themer. If you want to give the products a try before you buy, check out our demo site.
You may find this video tutorial helpful, as it provides a step-by-step guide on how to create a mega menu using this method:
Create A Saved Row For Each Mega Menu Item
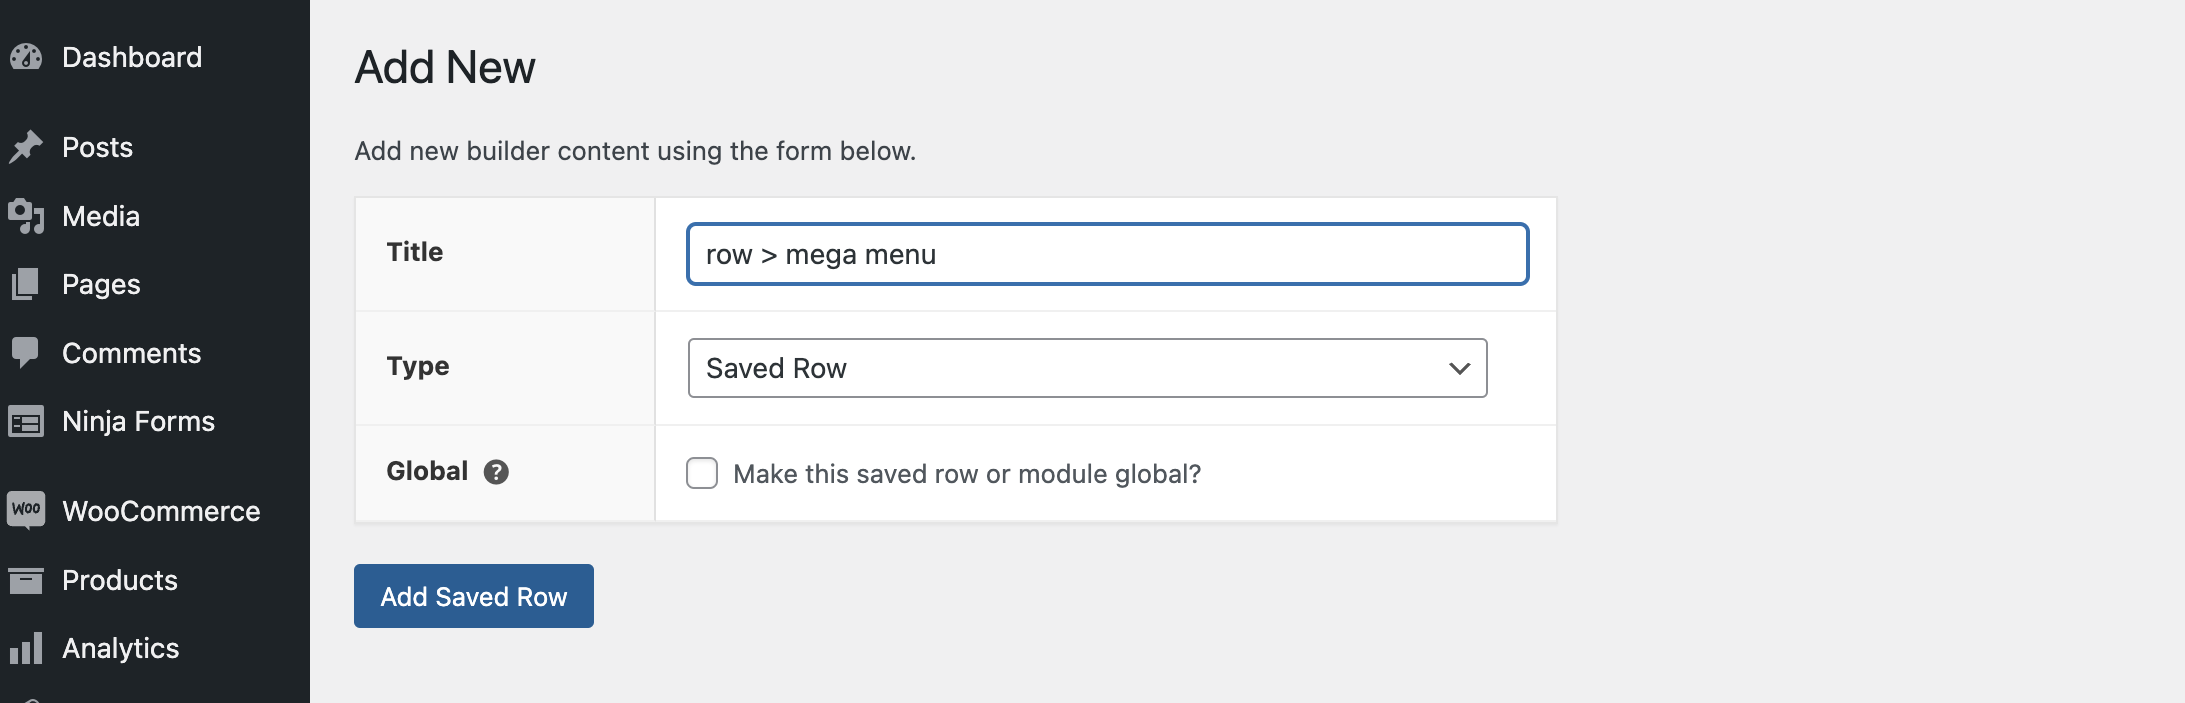
First, you’ll need to create a Saved Row for each mega menu item. To do this, head to Beaver Builder > Saved Rows:

Then, click Add New. Here, give your row a title and use the dropdown to select Saved Row as your type. Next, click on Add Saved Row:
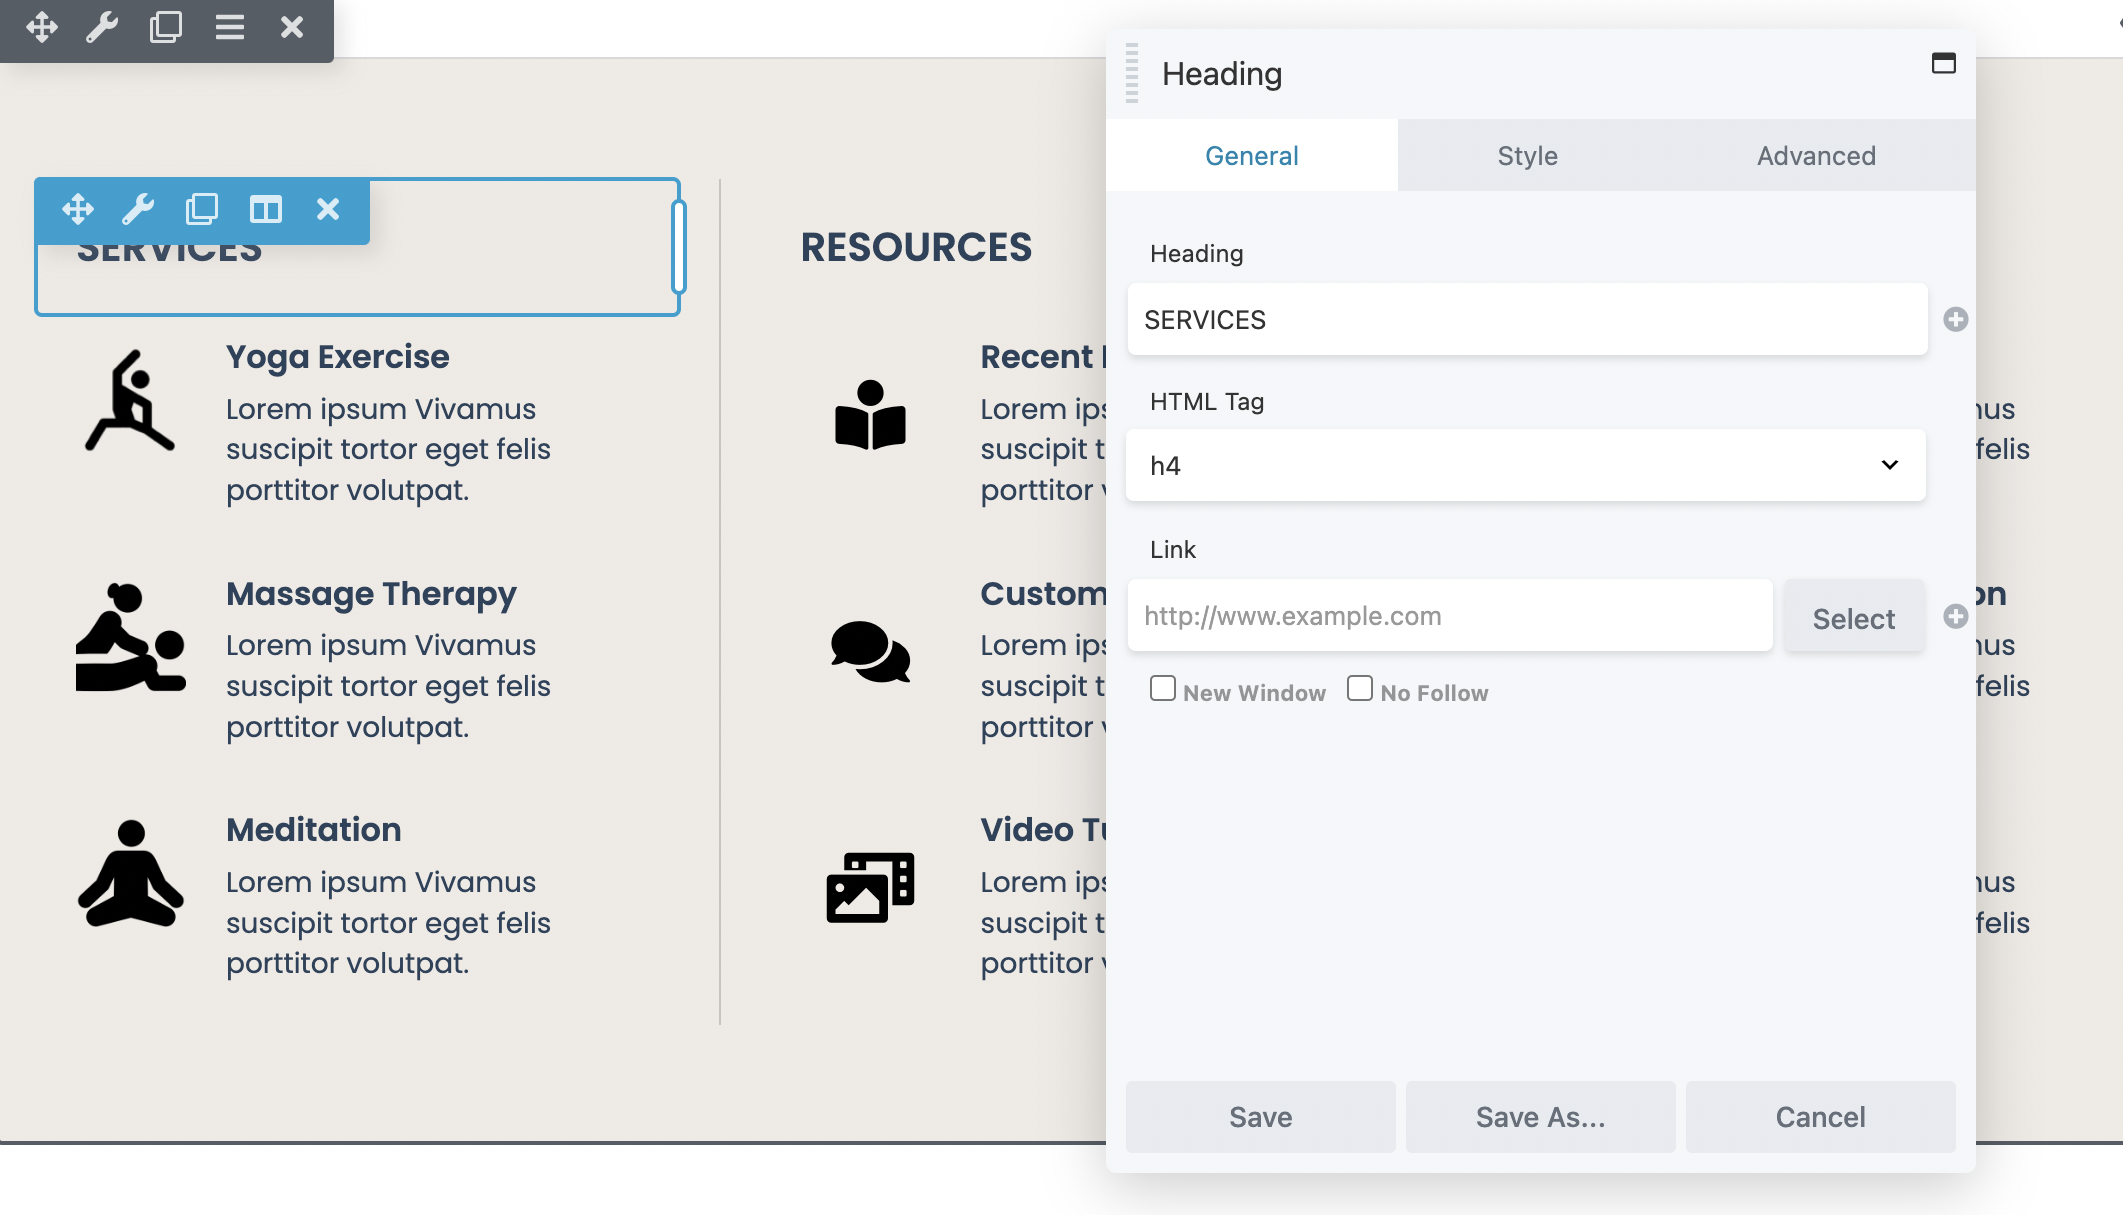
In the next window, click Launch Beaver Builder to open up the editor. Now, within the page builder, you can edit and customize your row with ease. For example, you can apply colors and backgrounds. Plus, you can make your rows full width or fixed width, and add any modules you like:
Create A Mobile Menu
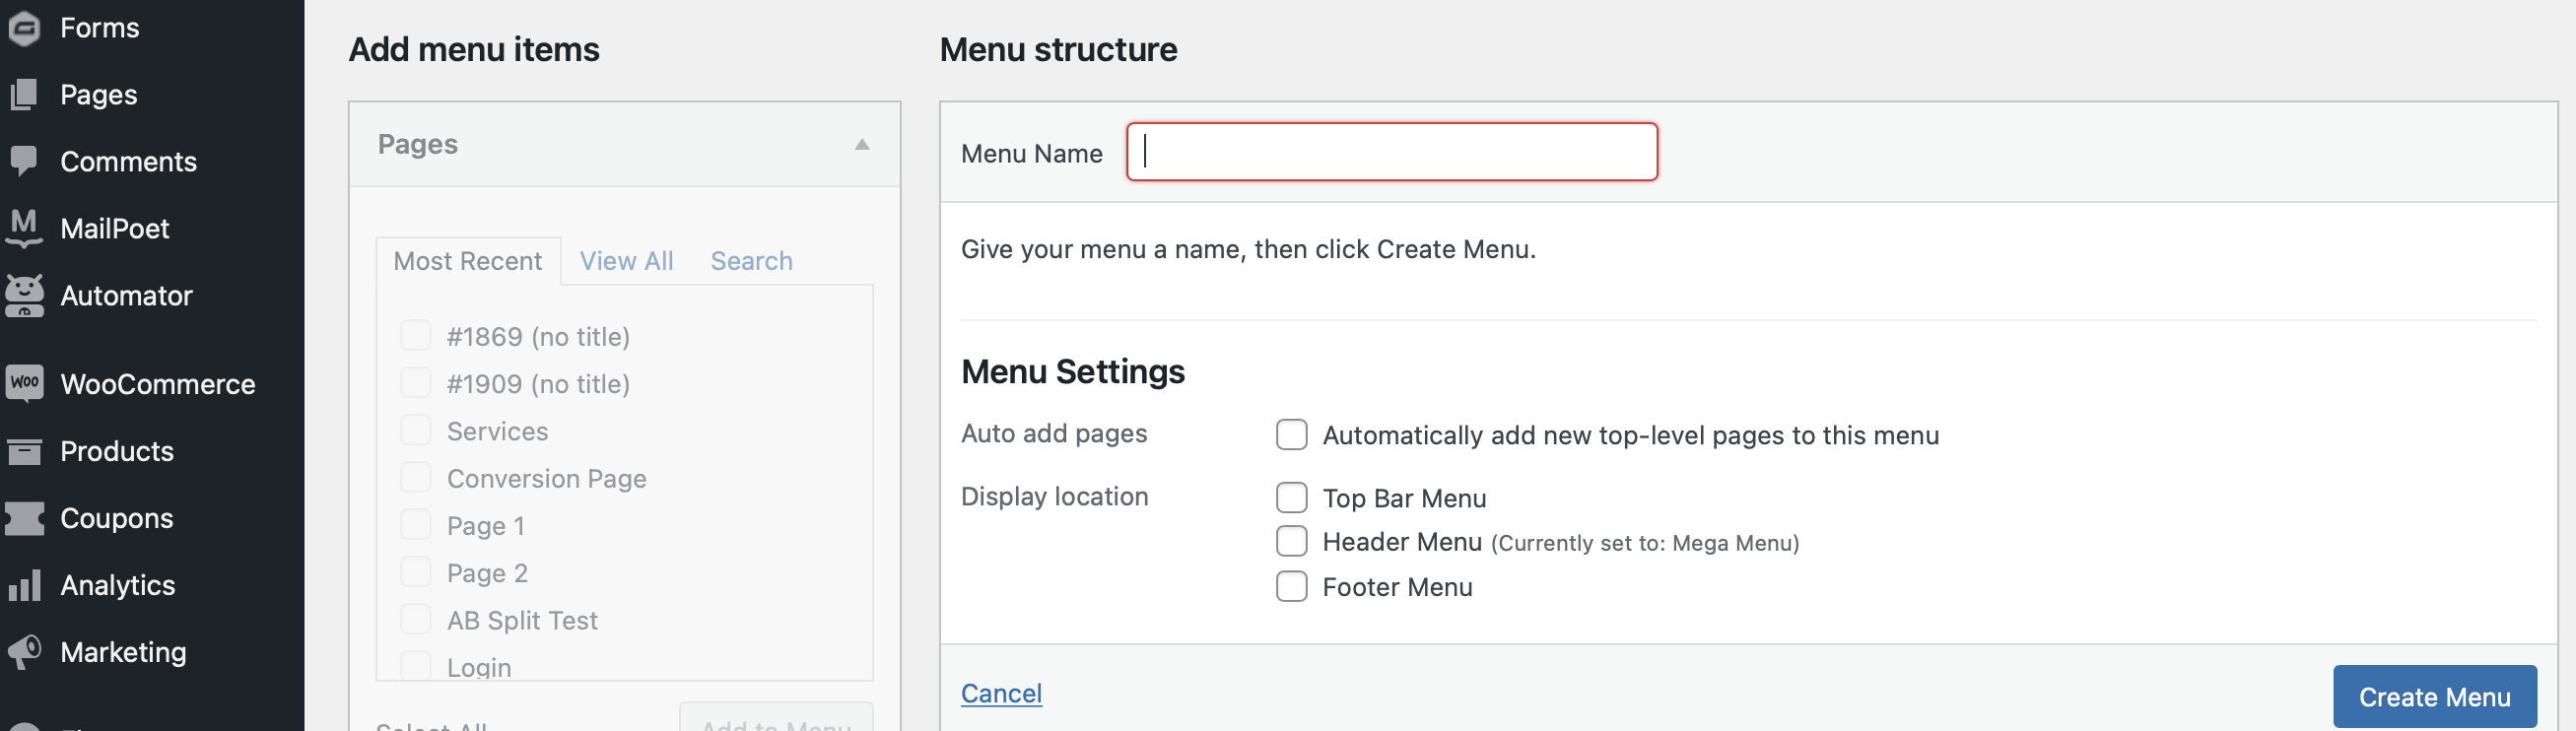
Once you have created a saved row for each of the mega menu links, it’s time to create a separate navigation menu to serve as your mobile menu. This should include every page you want to contain in your mobile navigation. Navigate to Appearance > Menus > create a new menu:

Give your menu a name and then click Create Menu:
Next, you will need to add your menu items (pages) as you did in the first method, by ticking the checkboxes beside the items you want to include. Then, select Add to Menu:
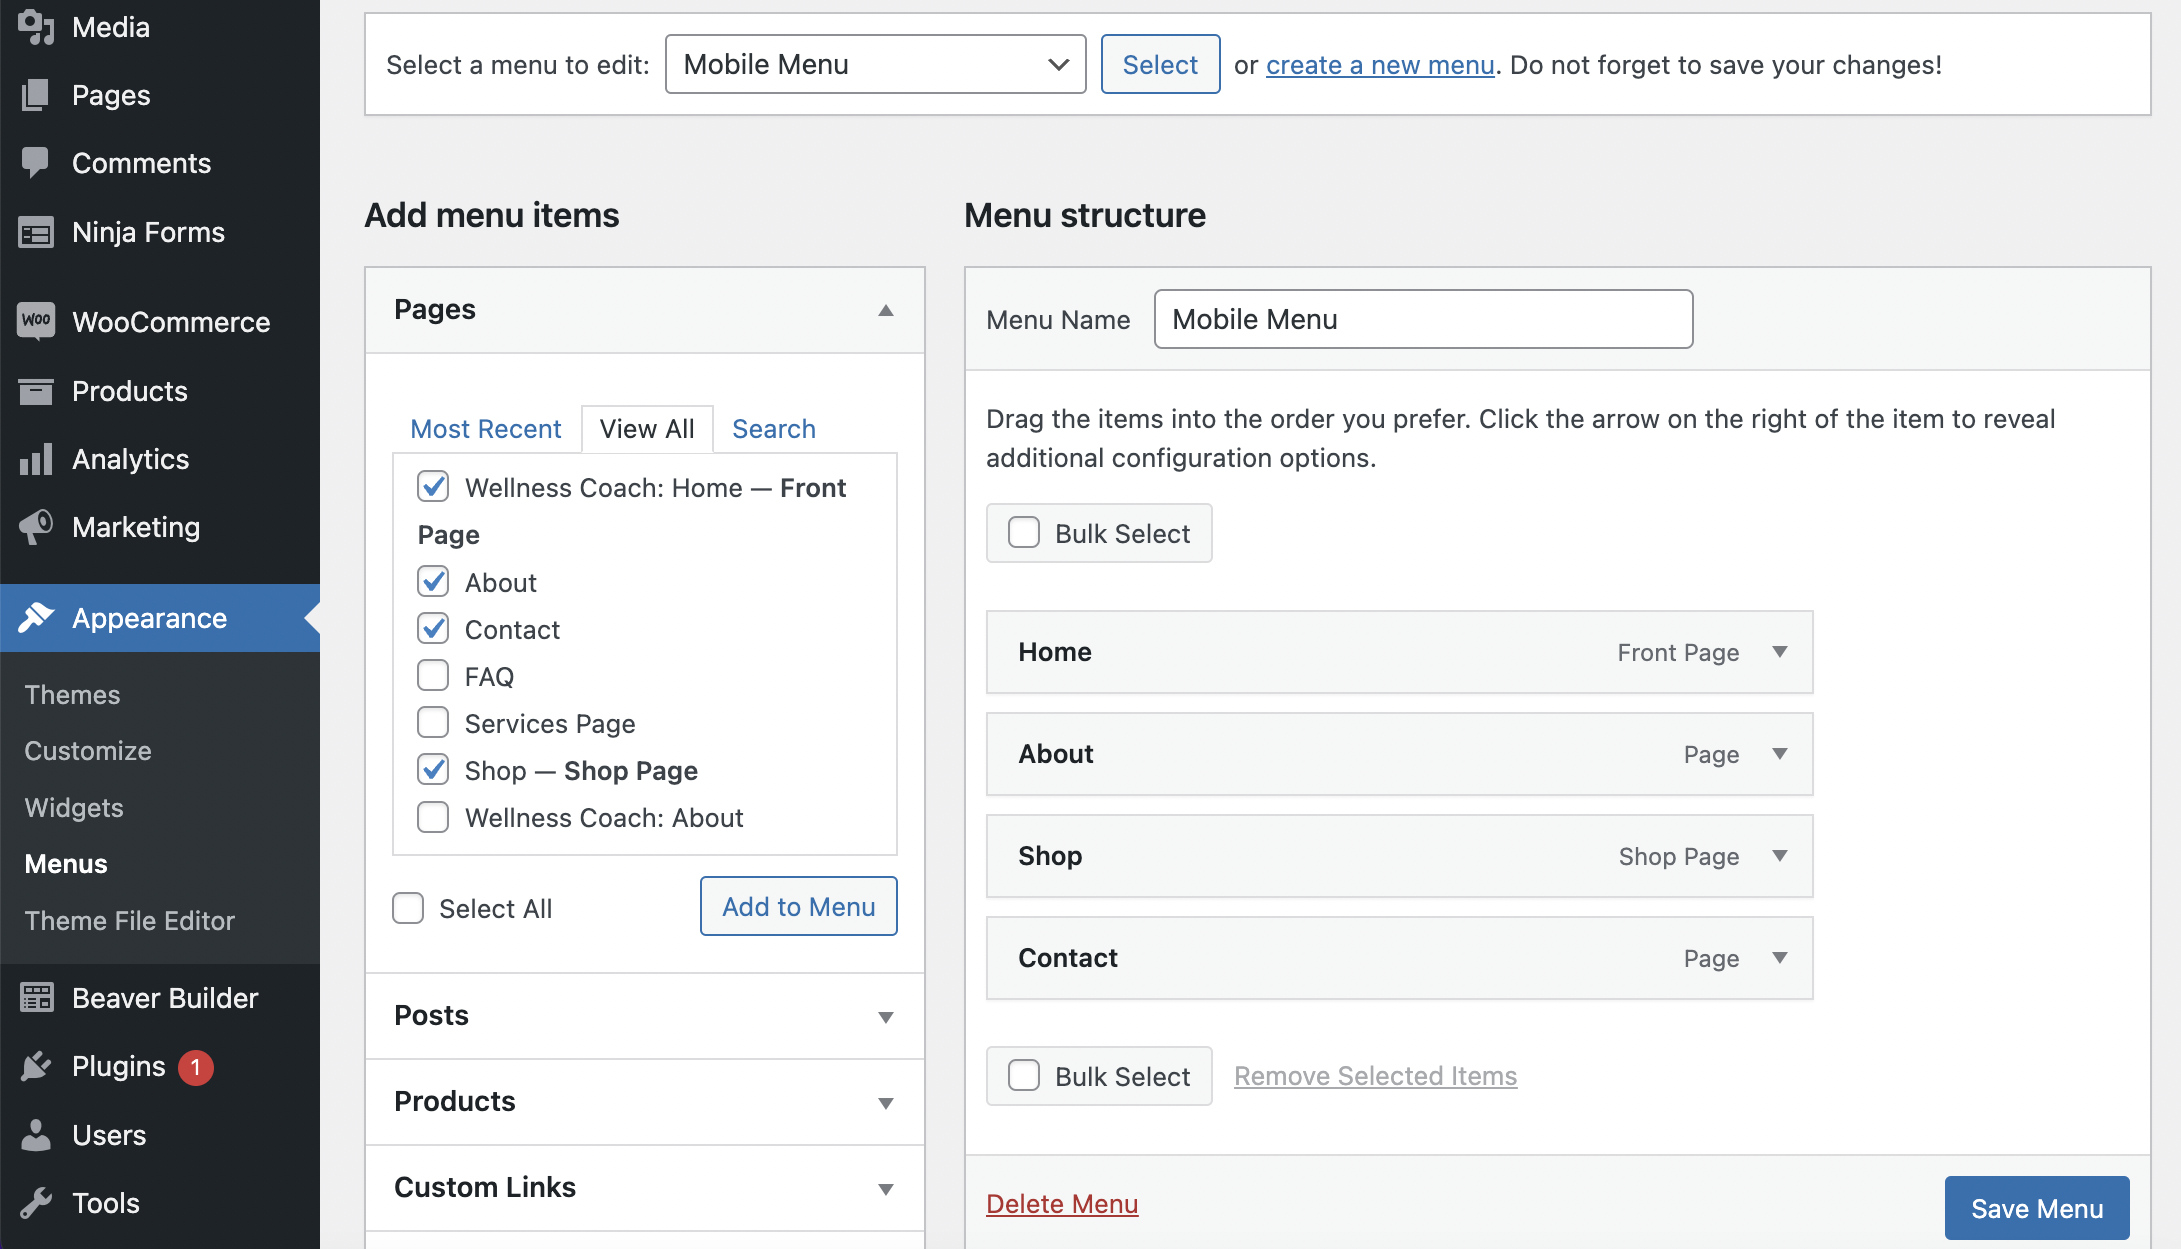
Once you have added all of your mobile menu items, click Save Menu.
Create A Separate Menu For Each Dropdown Menu Item
You might also want to include traditional dropdown menus within your mega menu. Perhaps, you have an About Us section which only consists of two or three subcategories. In this case, it might make more sense to use a dropdown as opposed to a mega menu.
You’ll need to create a separate menu for each of your dropdown menu items within your Menus screen. In this example, we named ours “Dropdown > About Us” and added Our Story, Our Team and Work With Us pages to the dropdown:
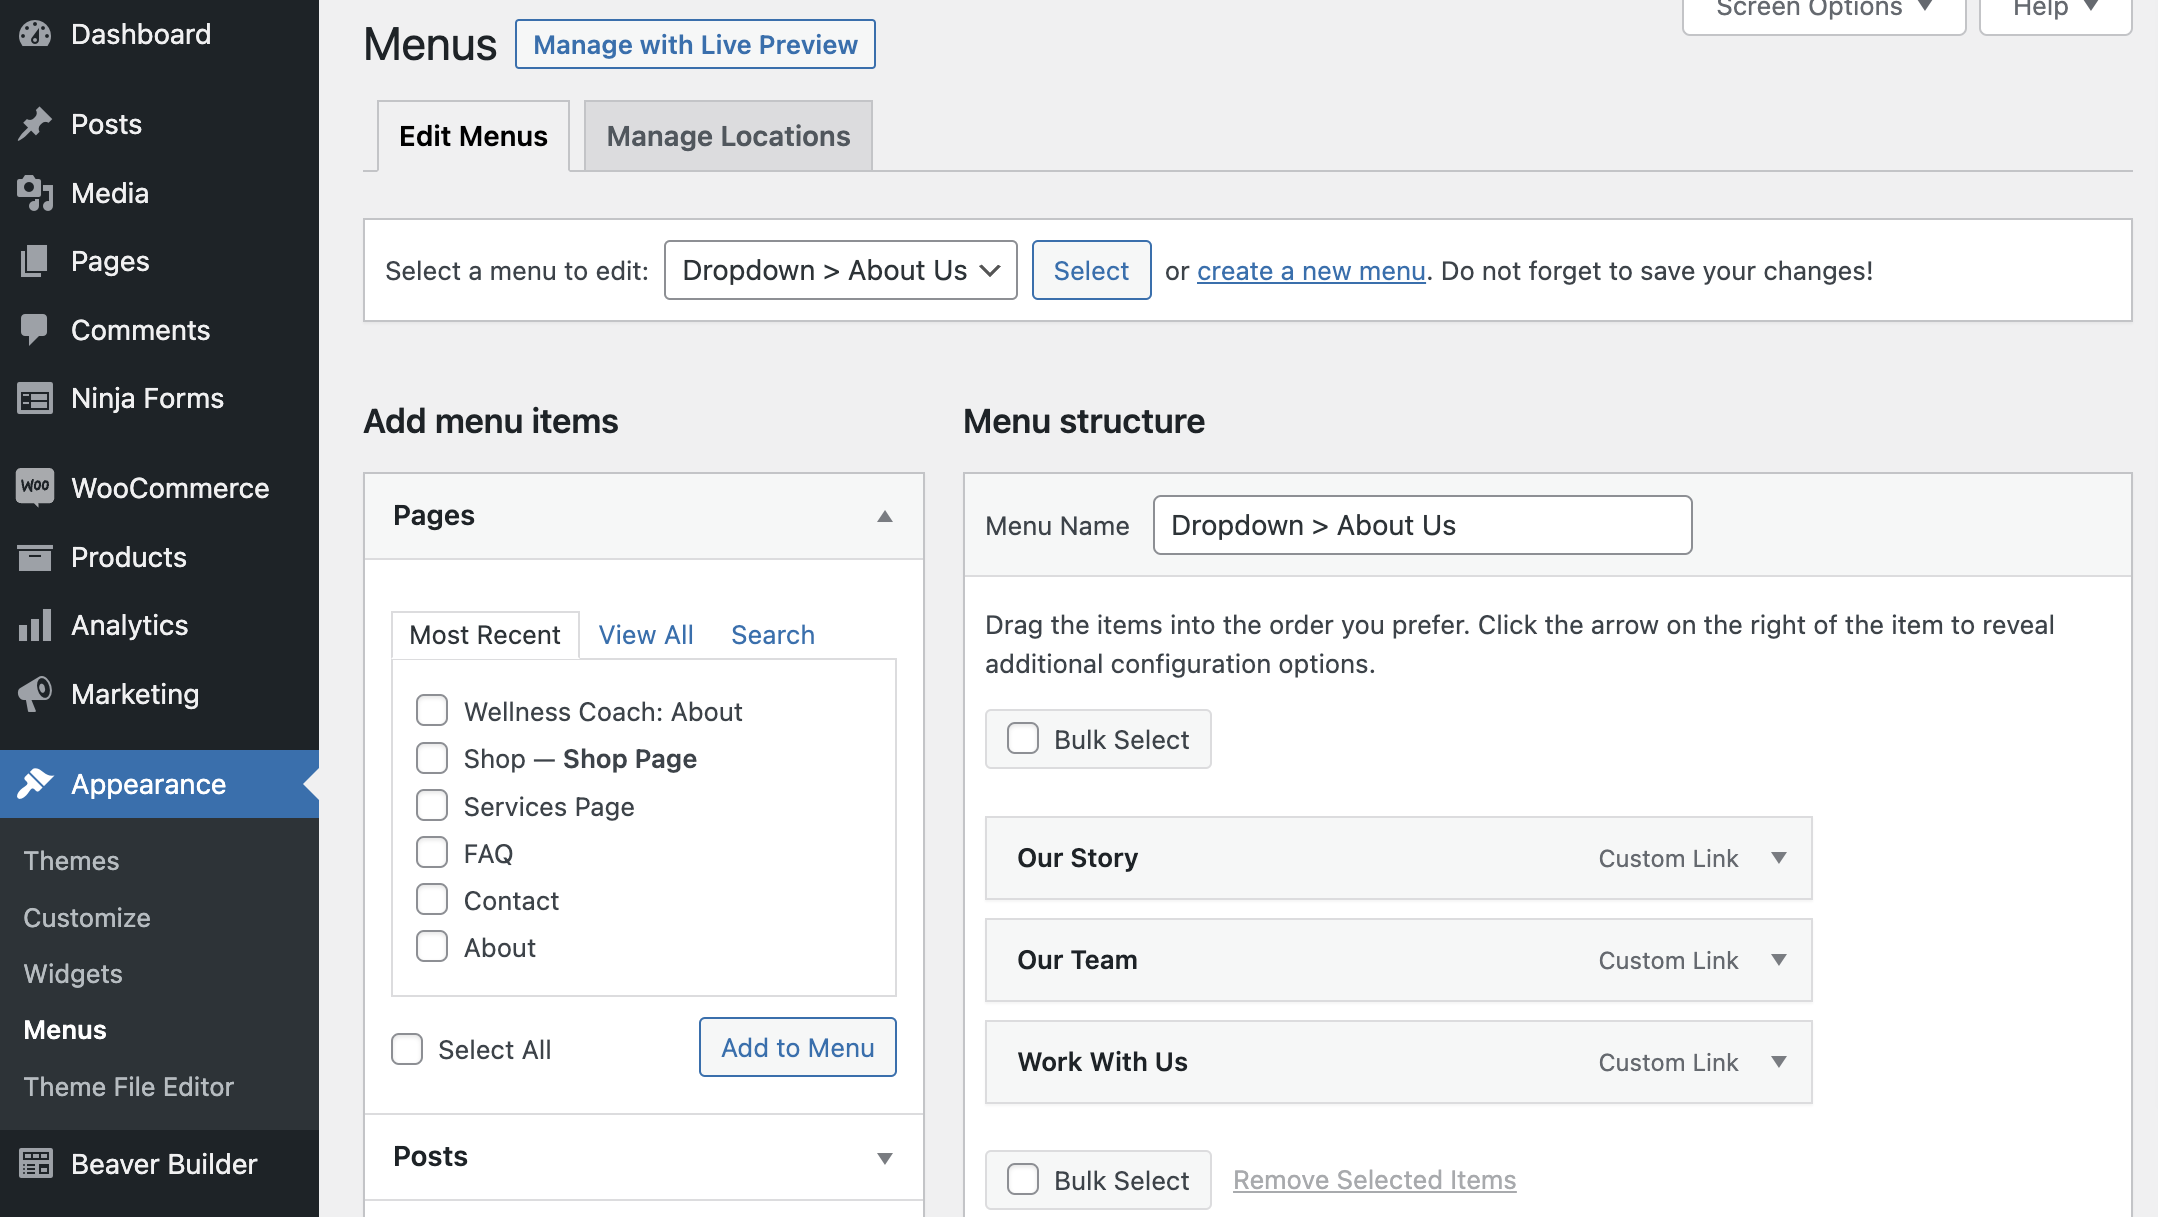
Click Save Menu when you’re done.
Add The Mega Menu To Beaver Themer
Next, you can add the mega menu to your Beaver Themer layout as a header.
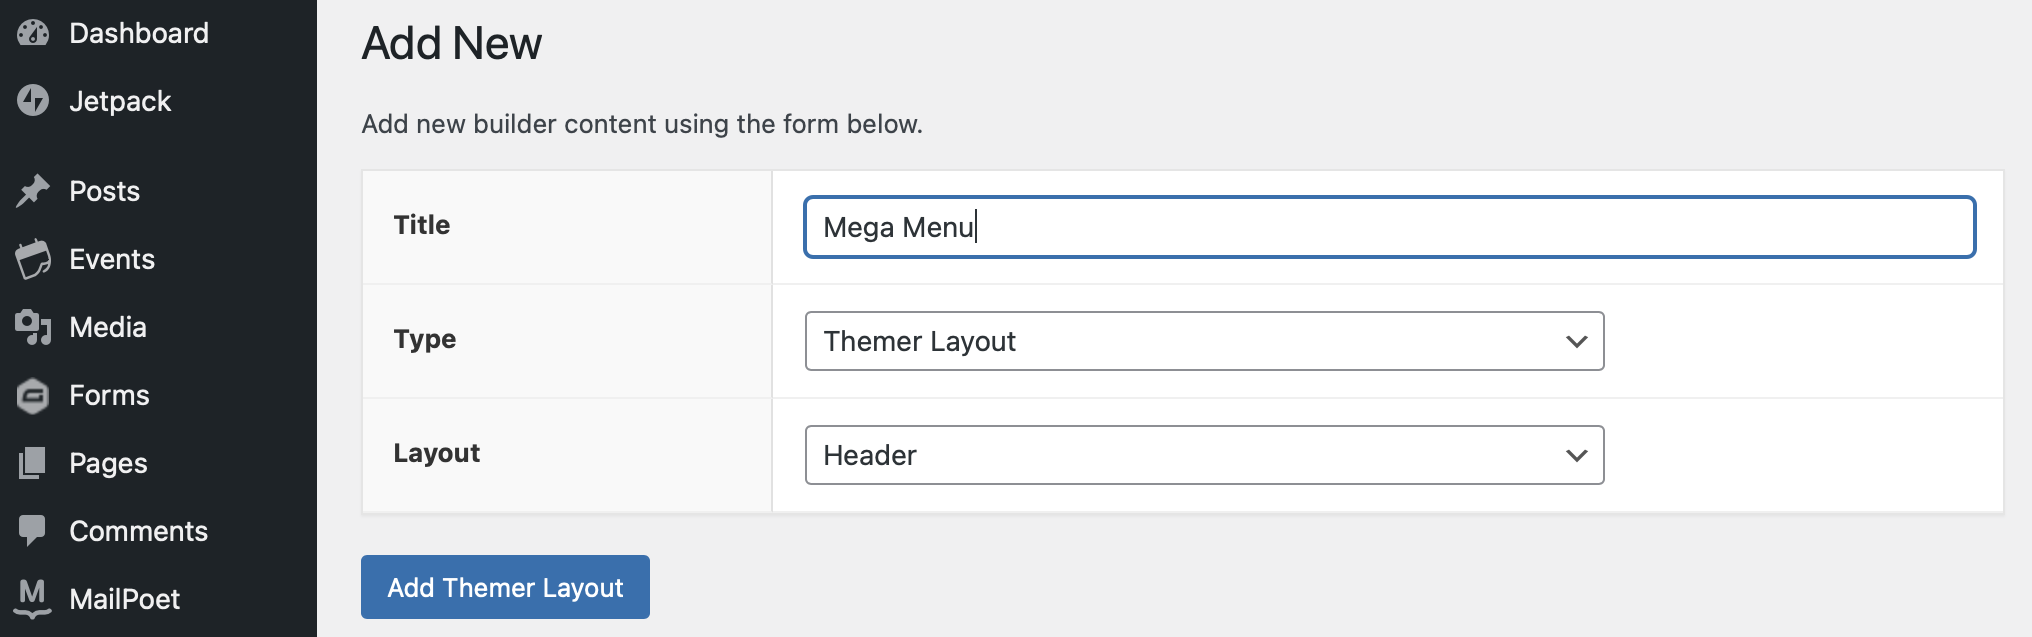
To do this, navigate to Beaver Builder > Themer Layouts > Add New. Give your layout a title, select Themer Layout for your type, and choose Header as your layout. Then, click on Add Themer Layout:
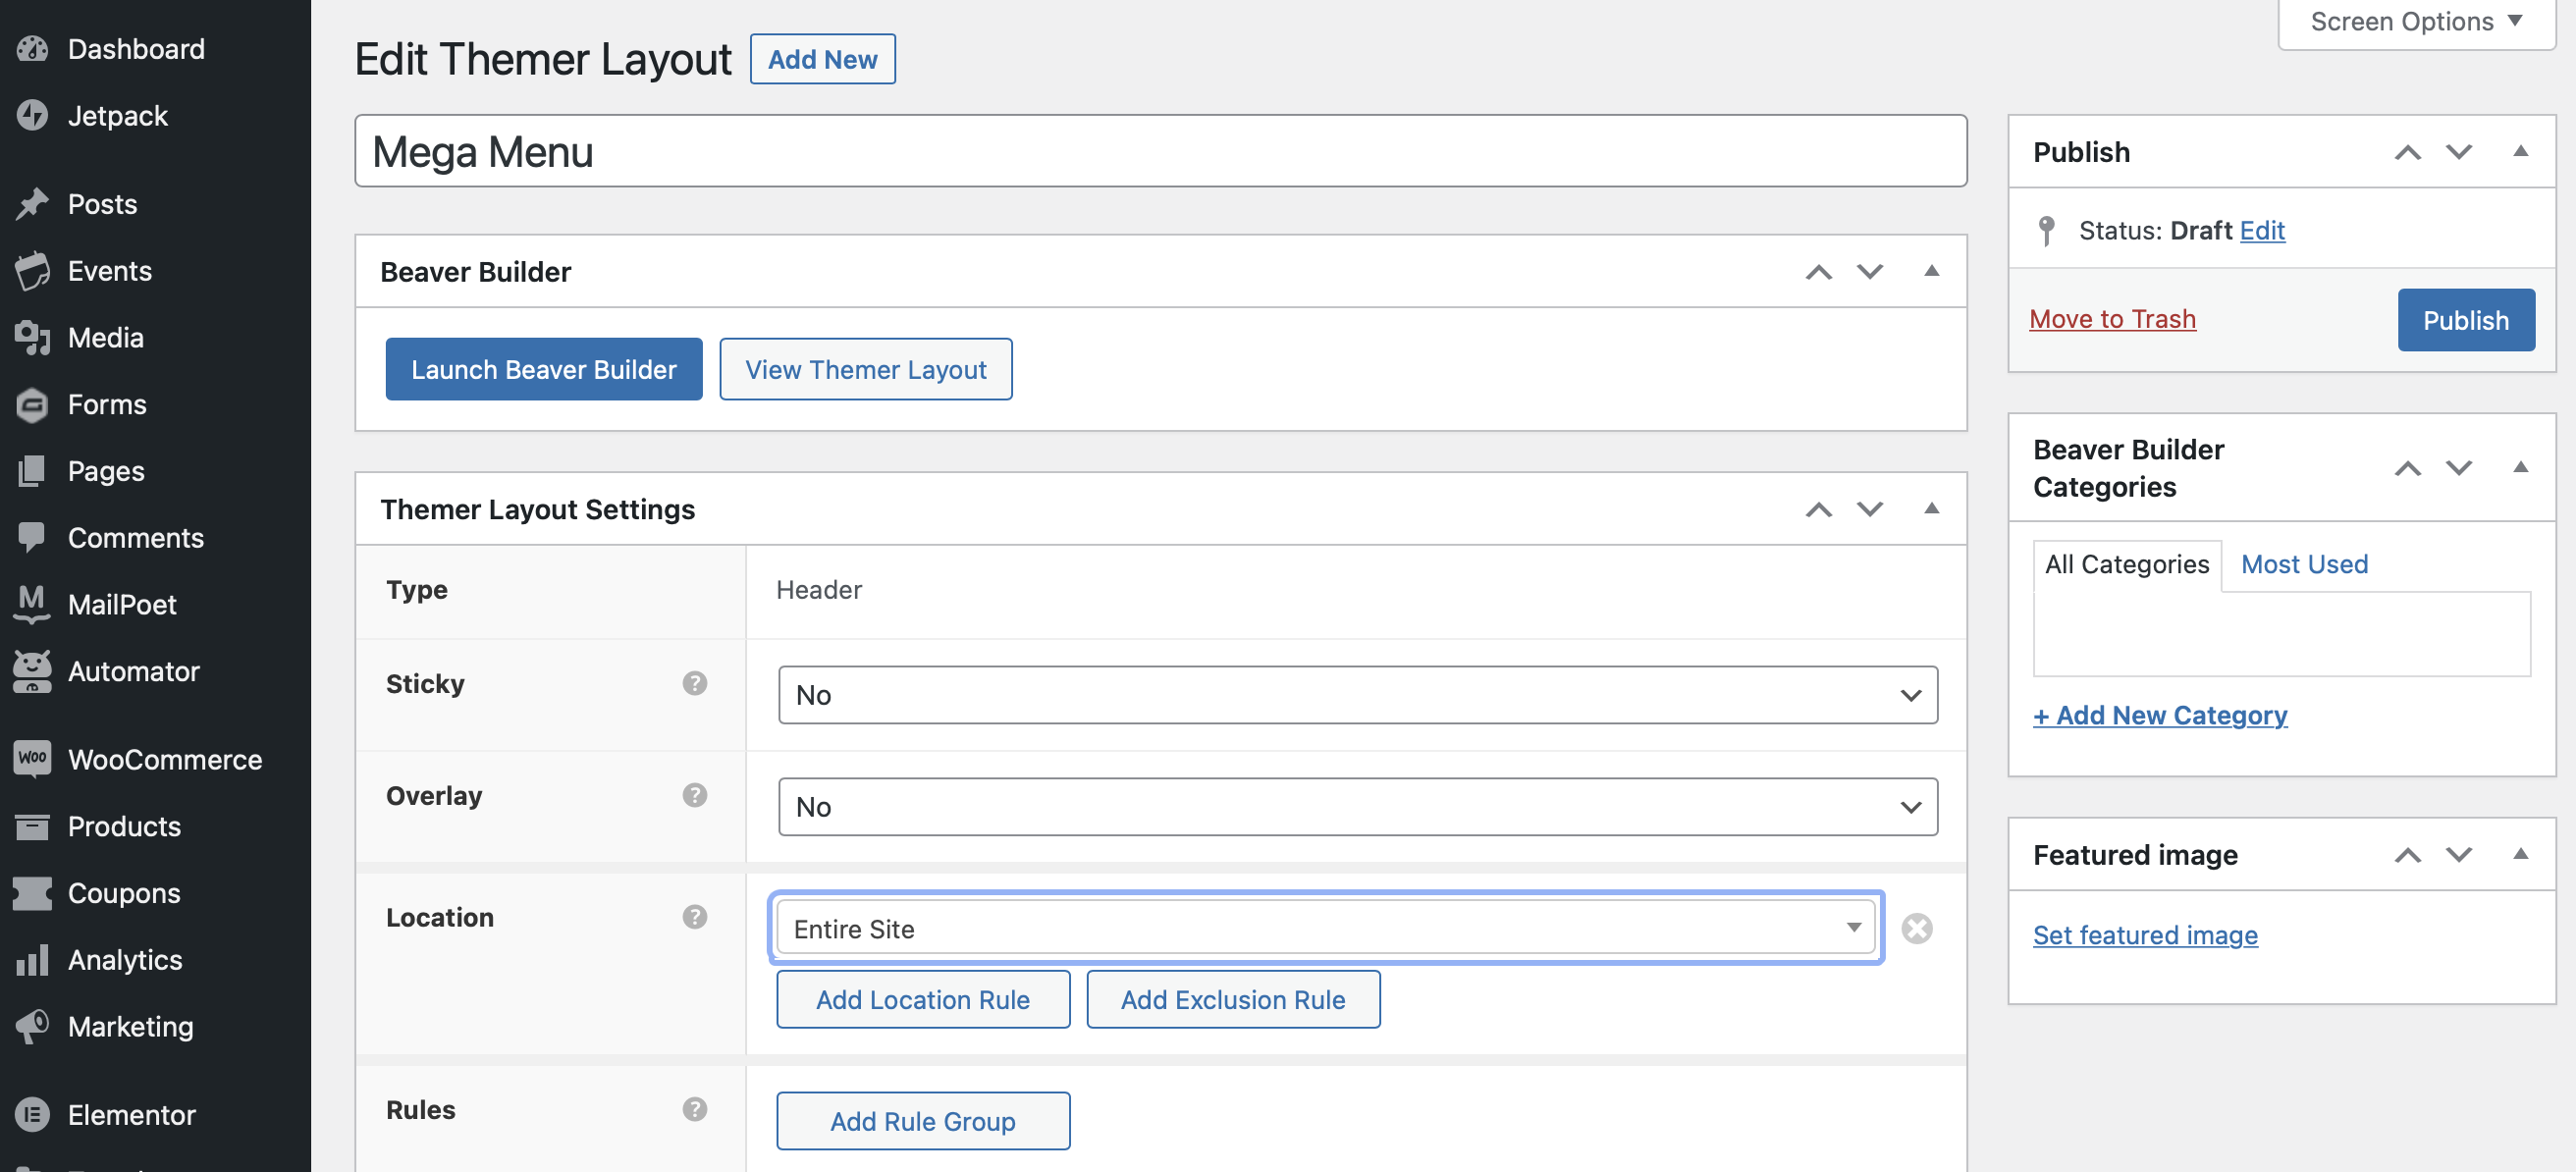
You can adjust the settings to suit your needs. For example, you can change the location of your layout. We used the dropdown to select Entire Site so that the menu is accessible from all web pages.
Then, click on Launch Beaver Builder to open the editor:
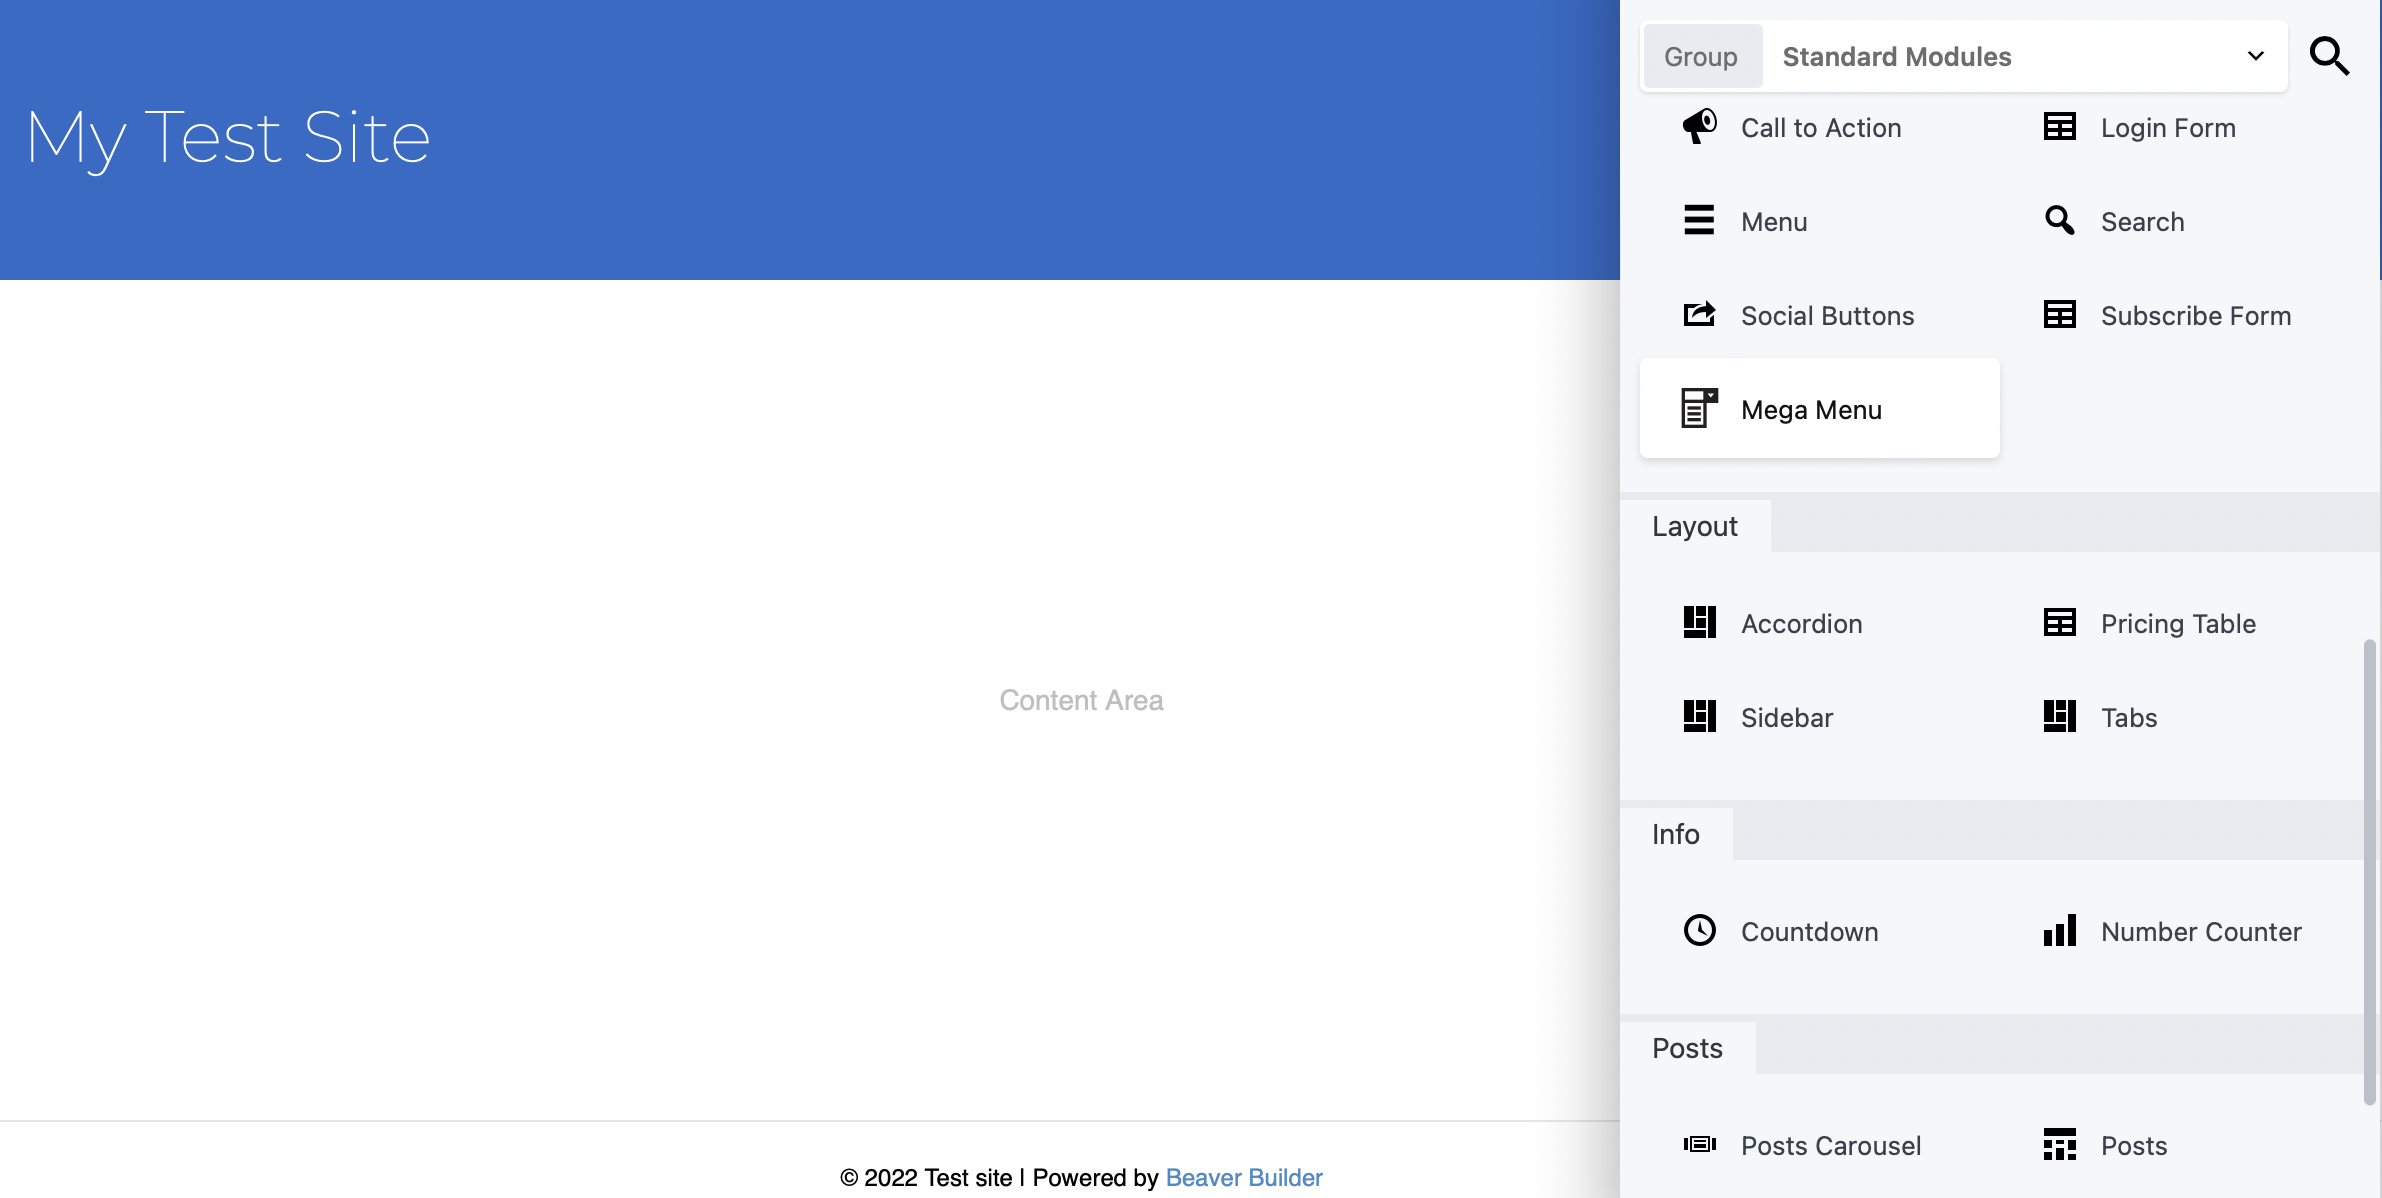
Access your modules as usual by tapping the plus symbol (+). If you installed the mega menu plugin successfully, you will now see a Mega Menu module, which you can drag into your header layout:
Add List Items To Mega Menu
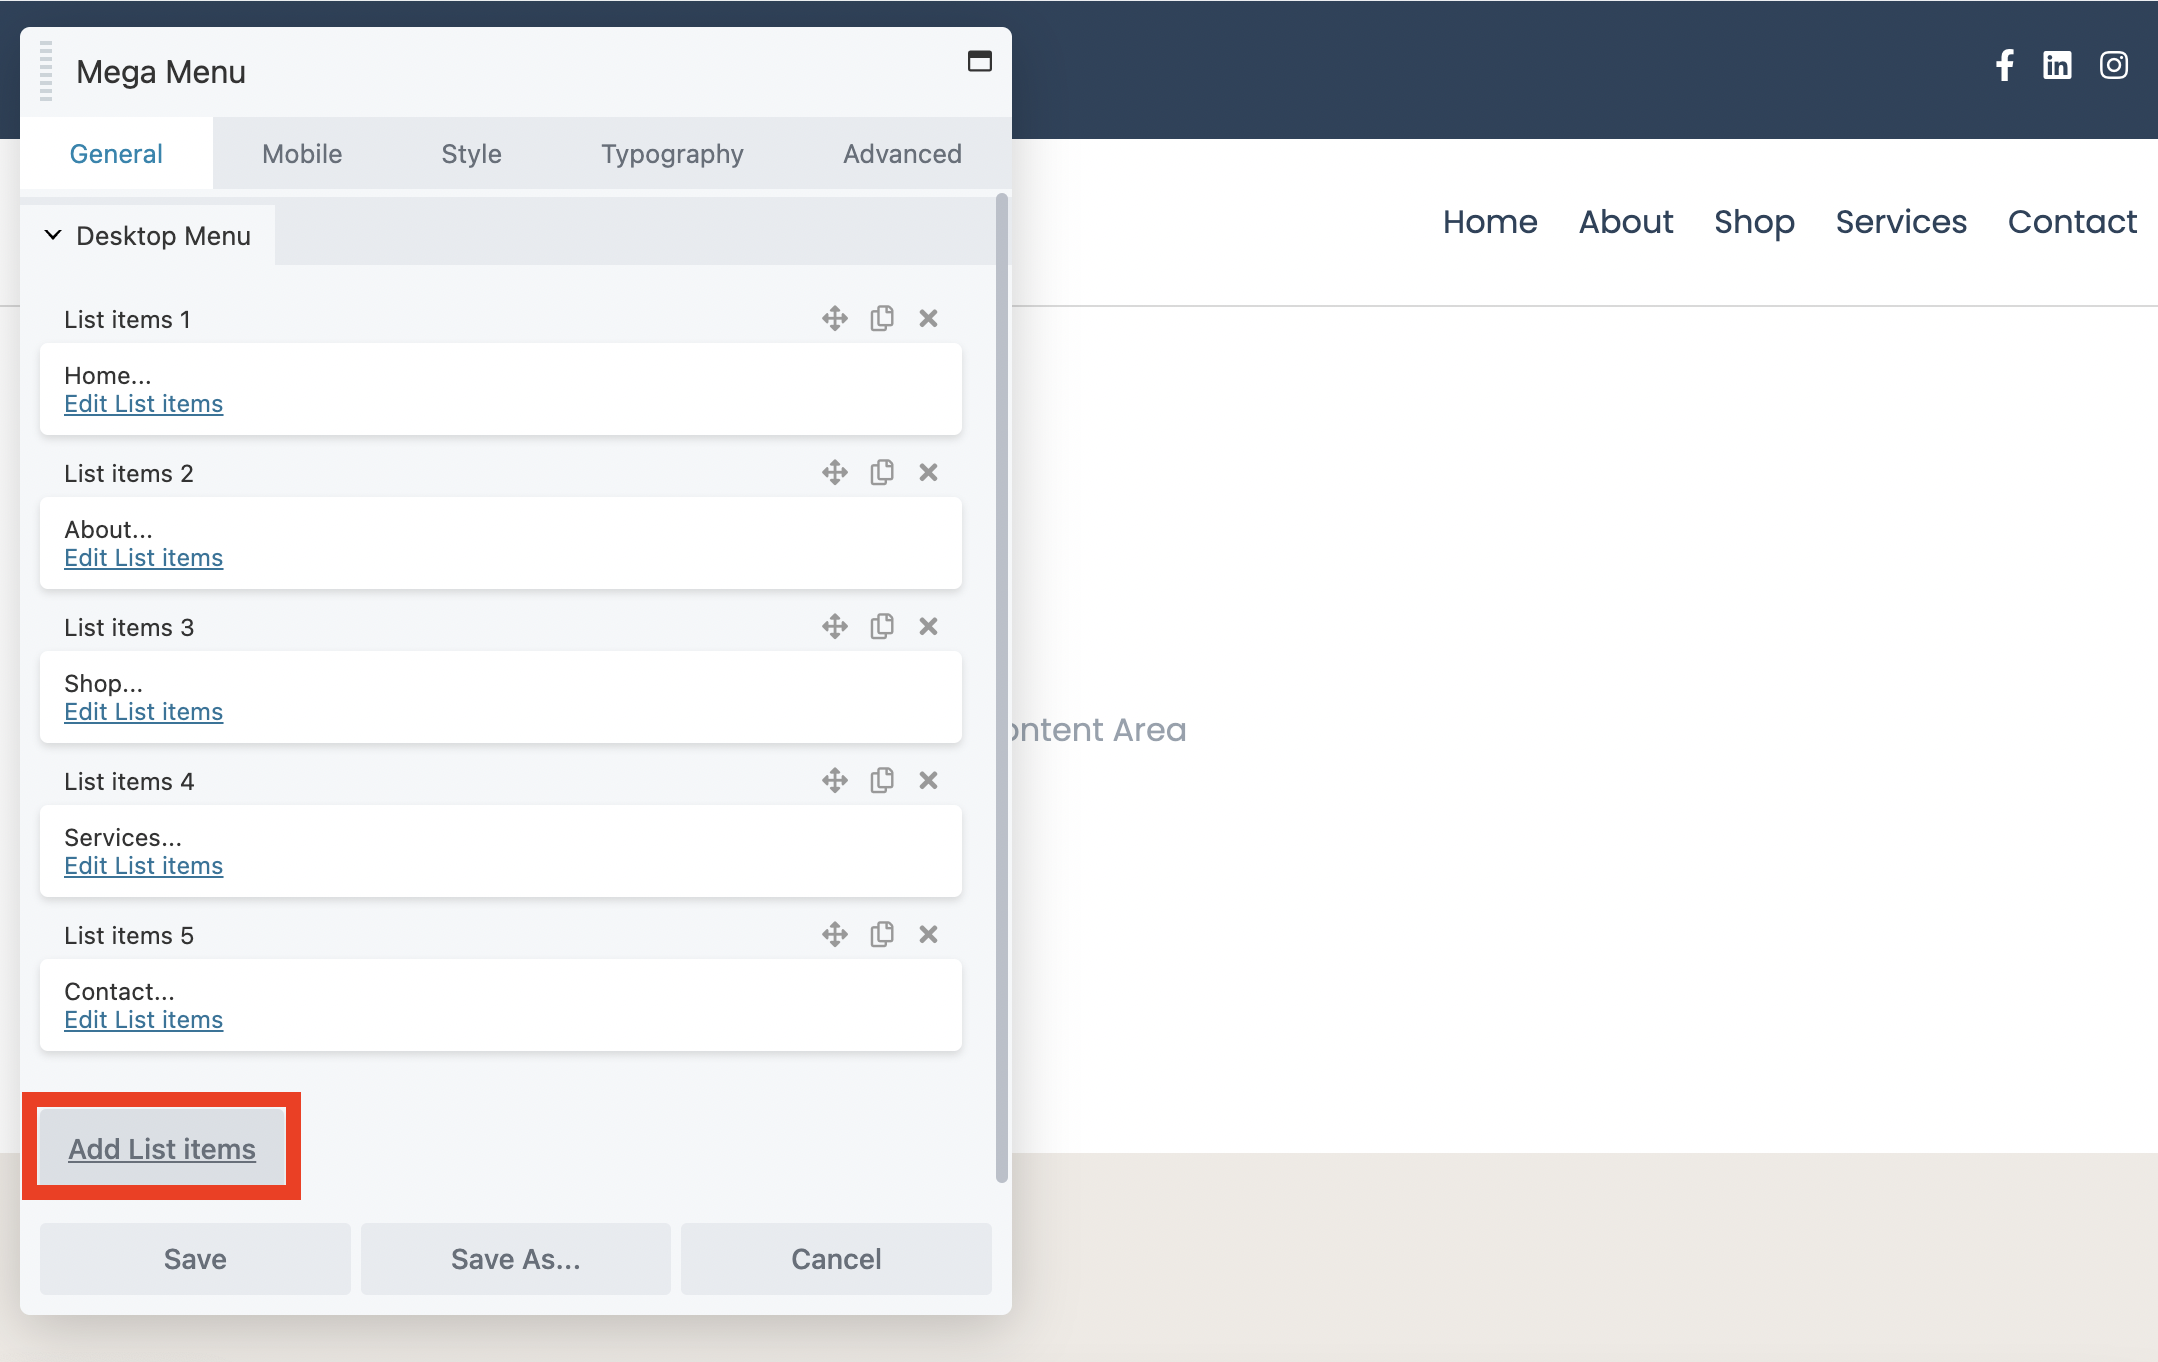
In the General tab, you can add menu items by hitting Add List items:
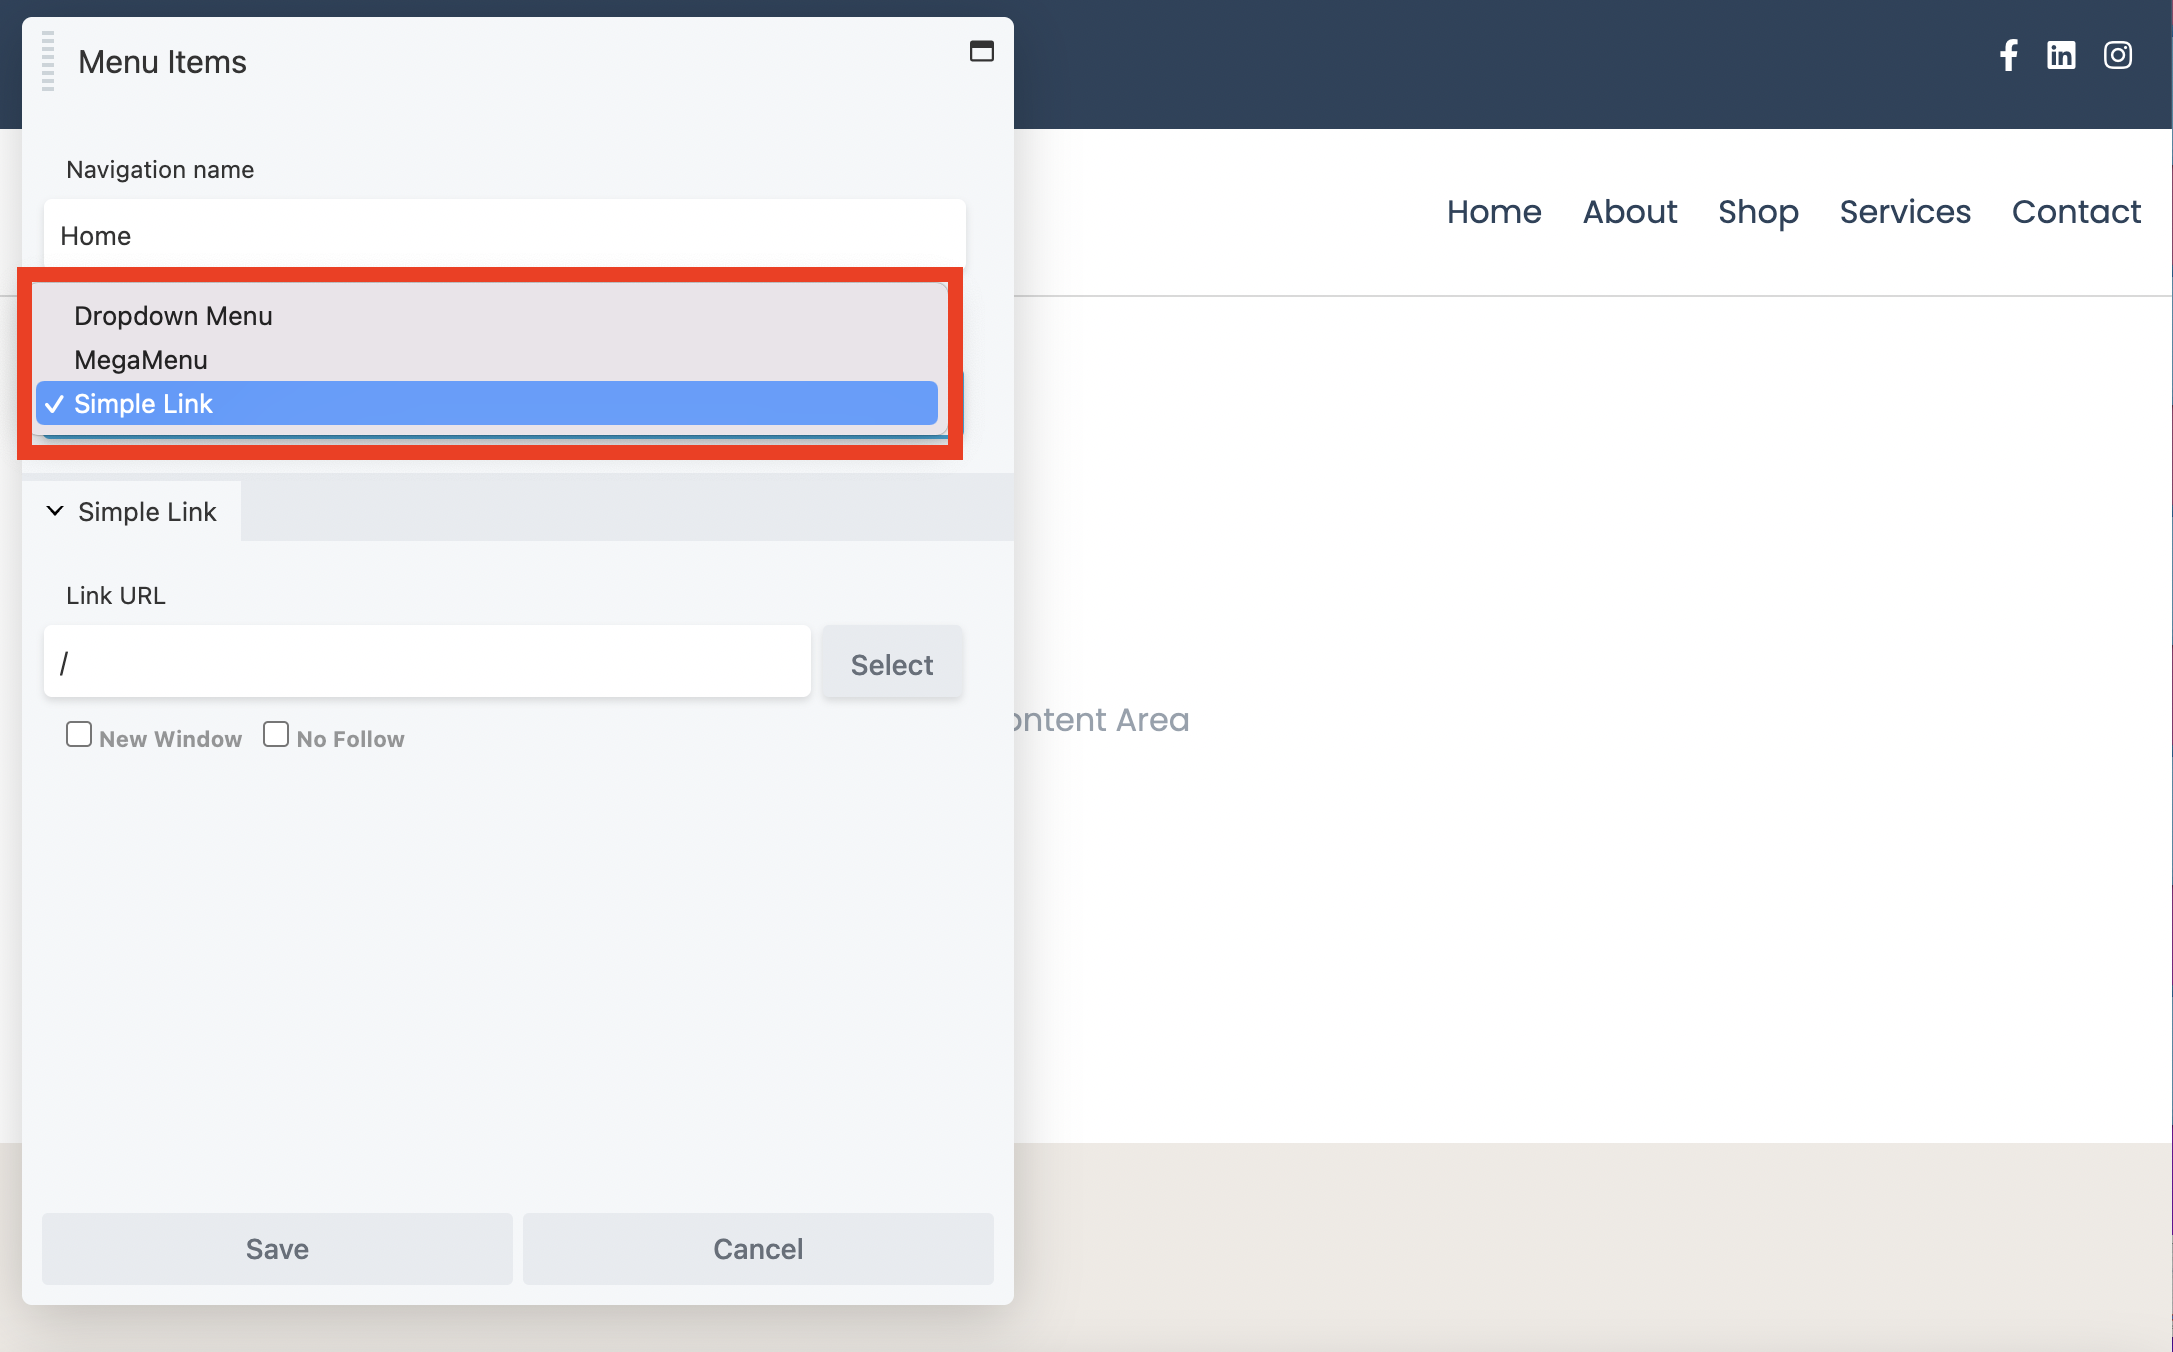
Then, select Edit List items to give each item a Navigation name and Navigation type. For example, you can choose to add your item as a mega menu, a dropdown menu, or as a simple link:
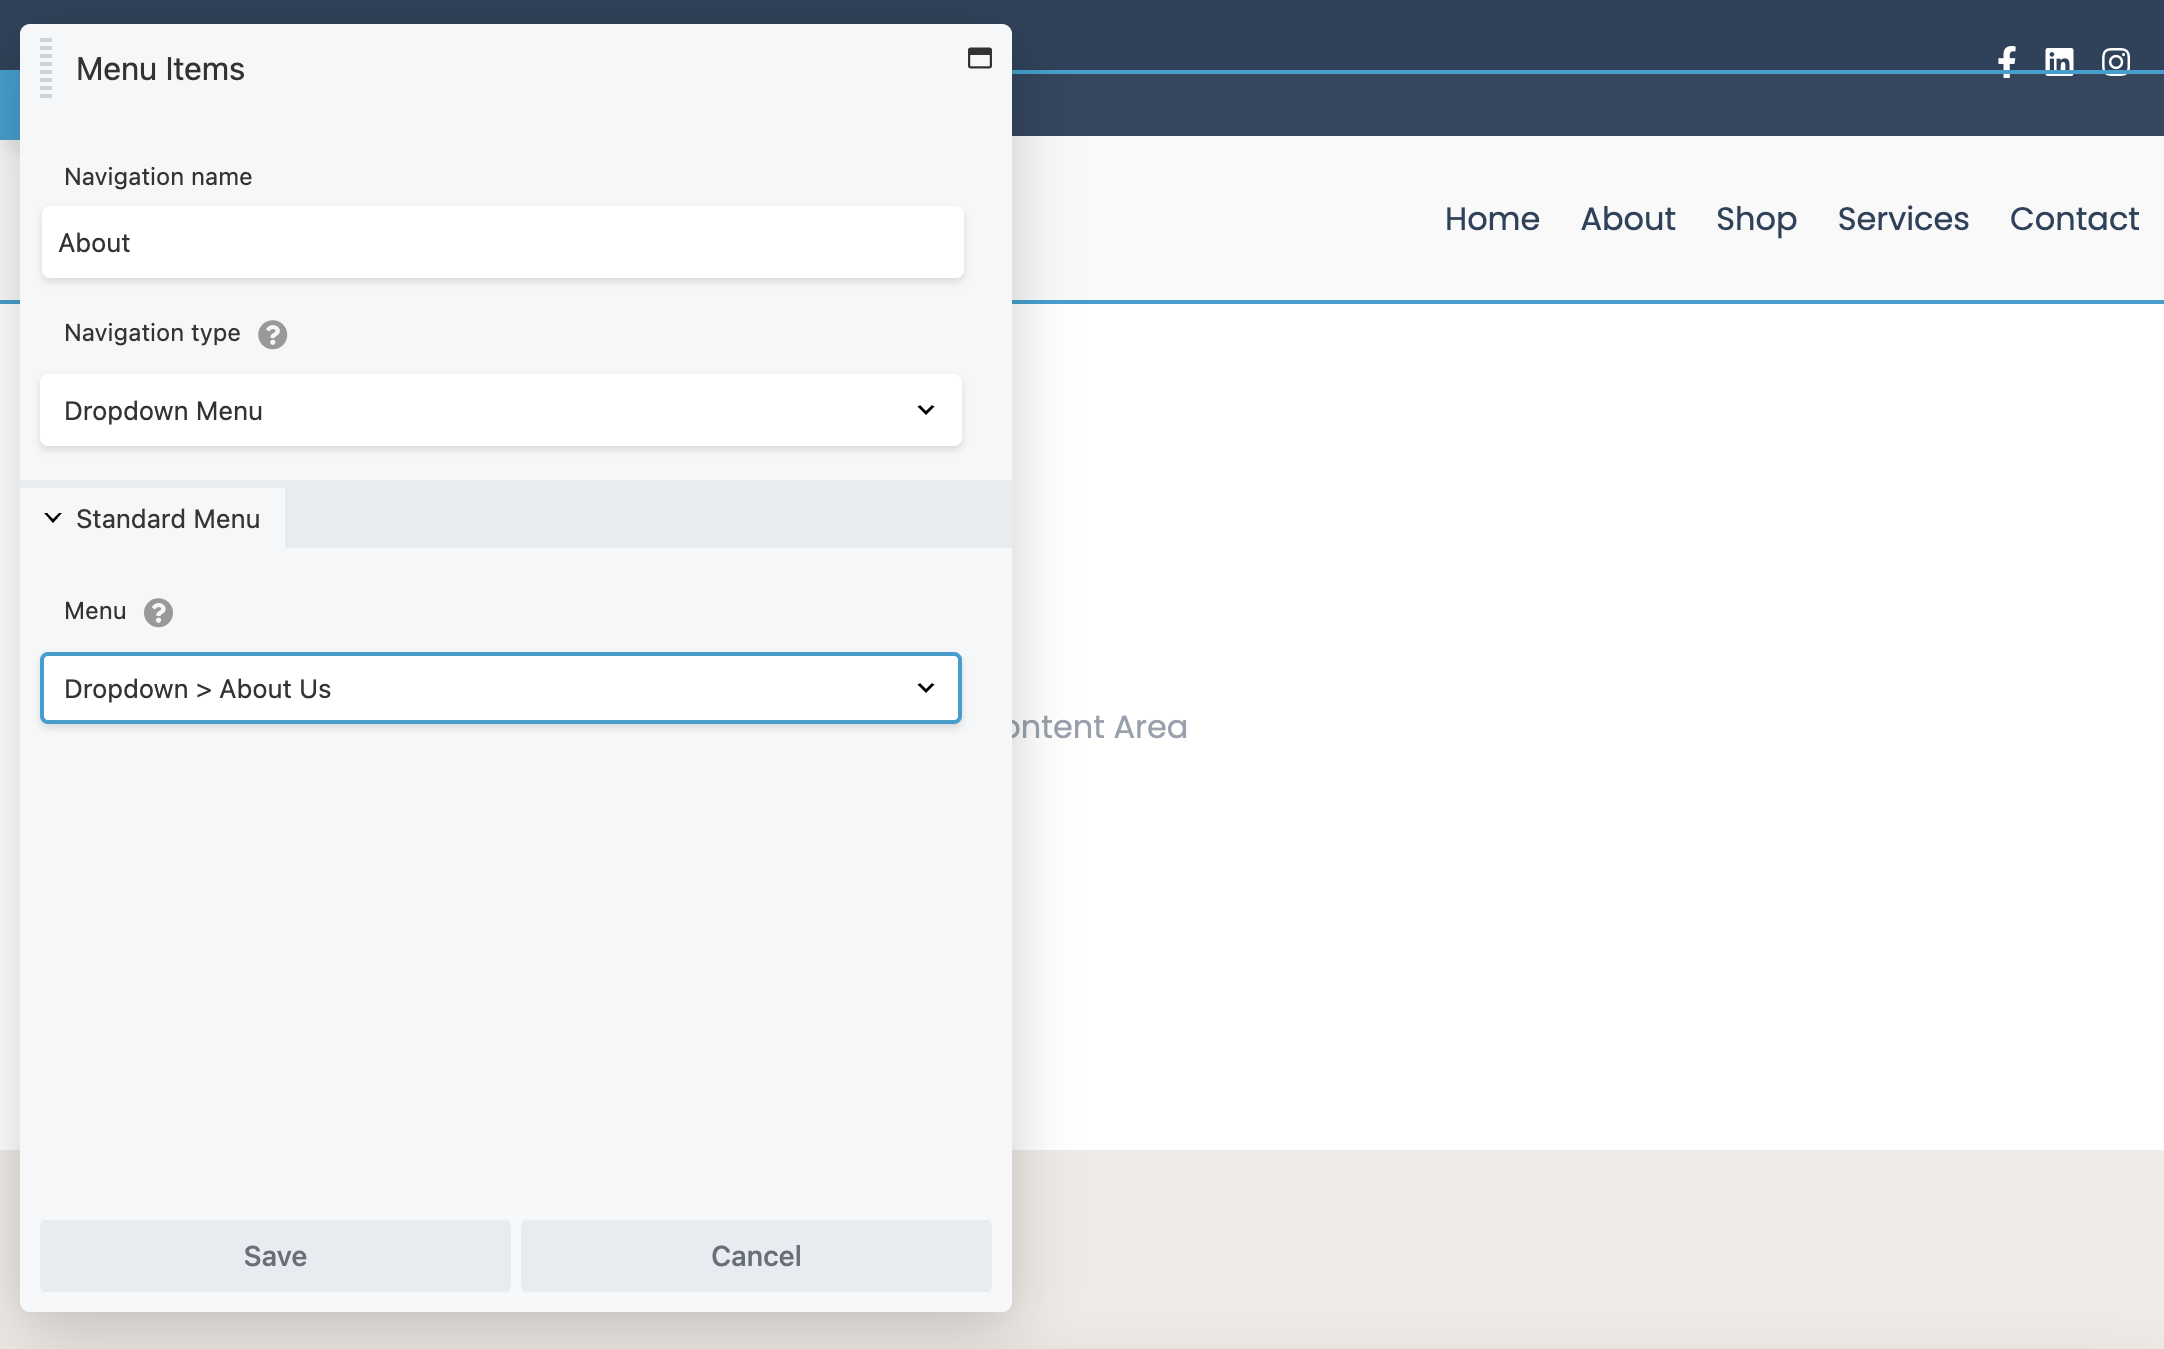
If you want to select the About Us dropdown menu you created earlier, select Dropdown Menu as your navigation type. Then, under Standard Menu, find the navigation menu you created earlier (Dropdown > About Us):
Otherwise, choose Mega Menu as your navigation type, and select the Saved Row that you created at the start of this tutorial:
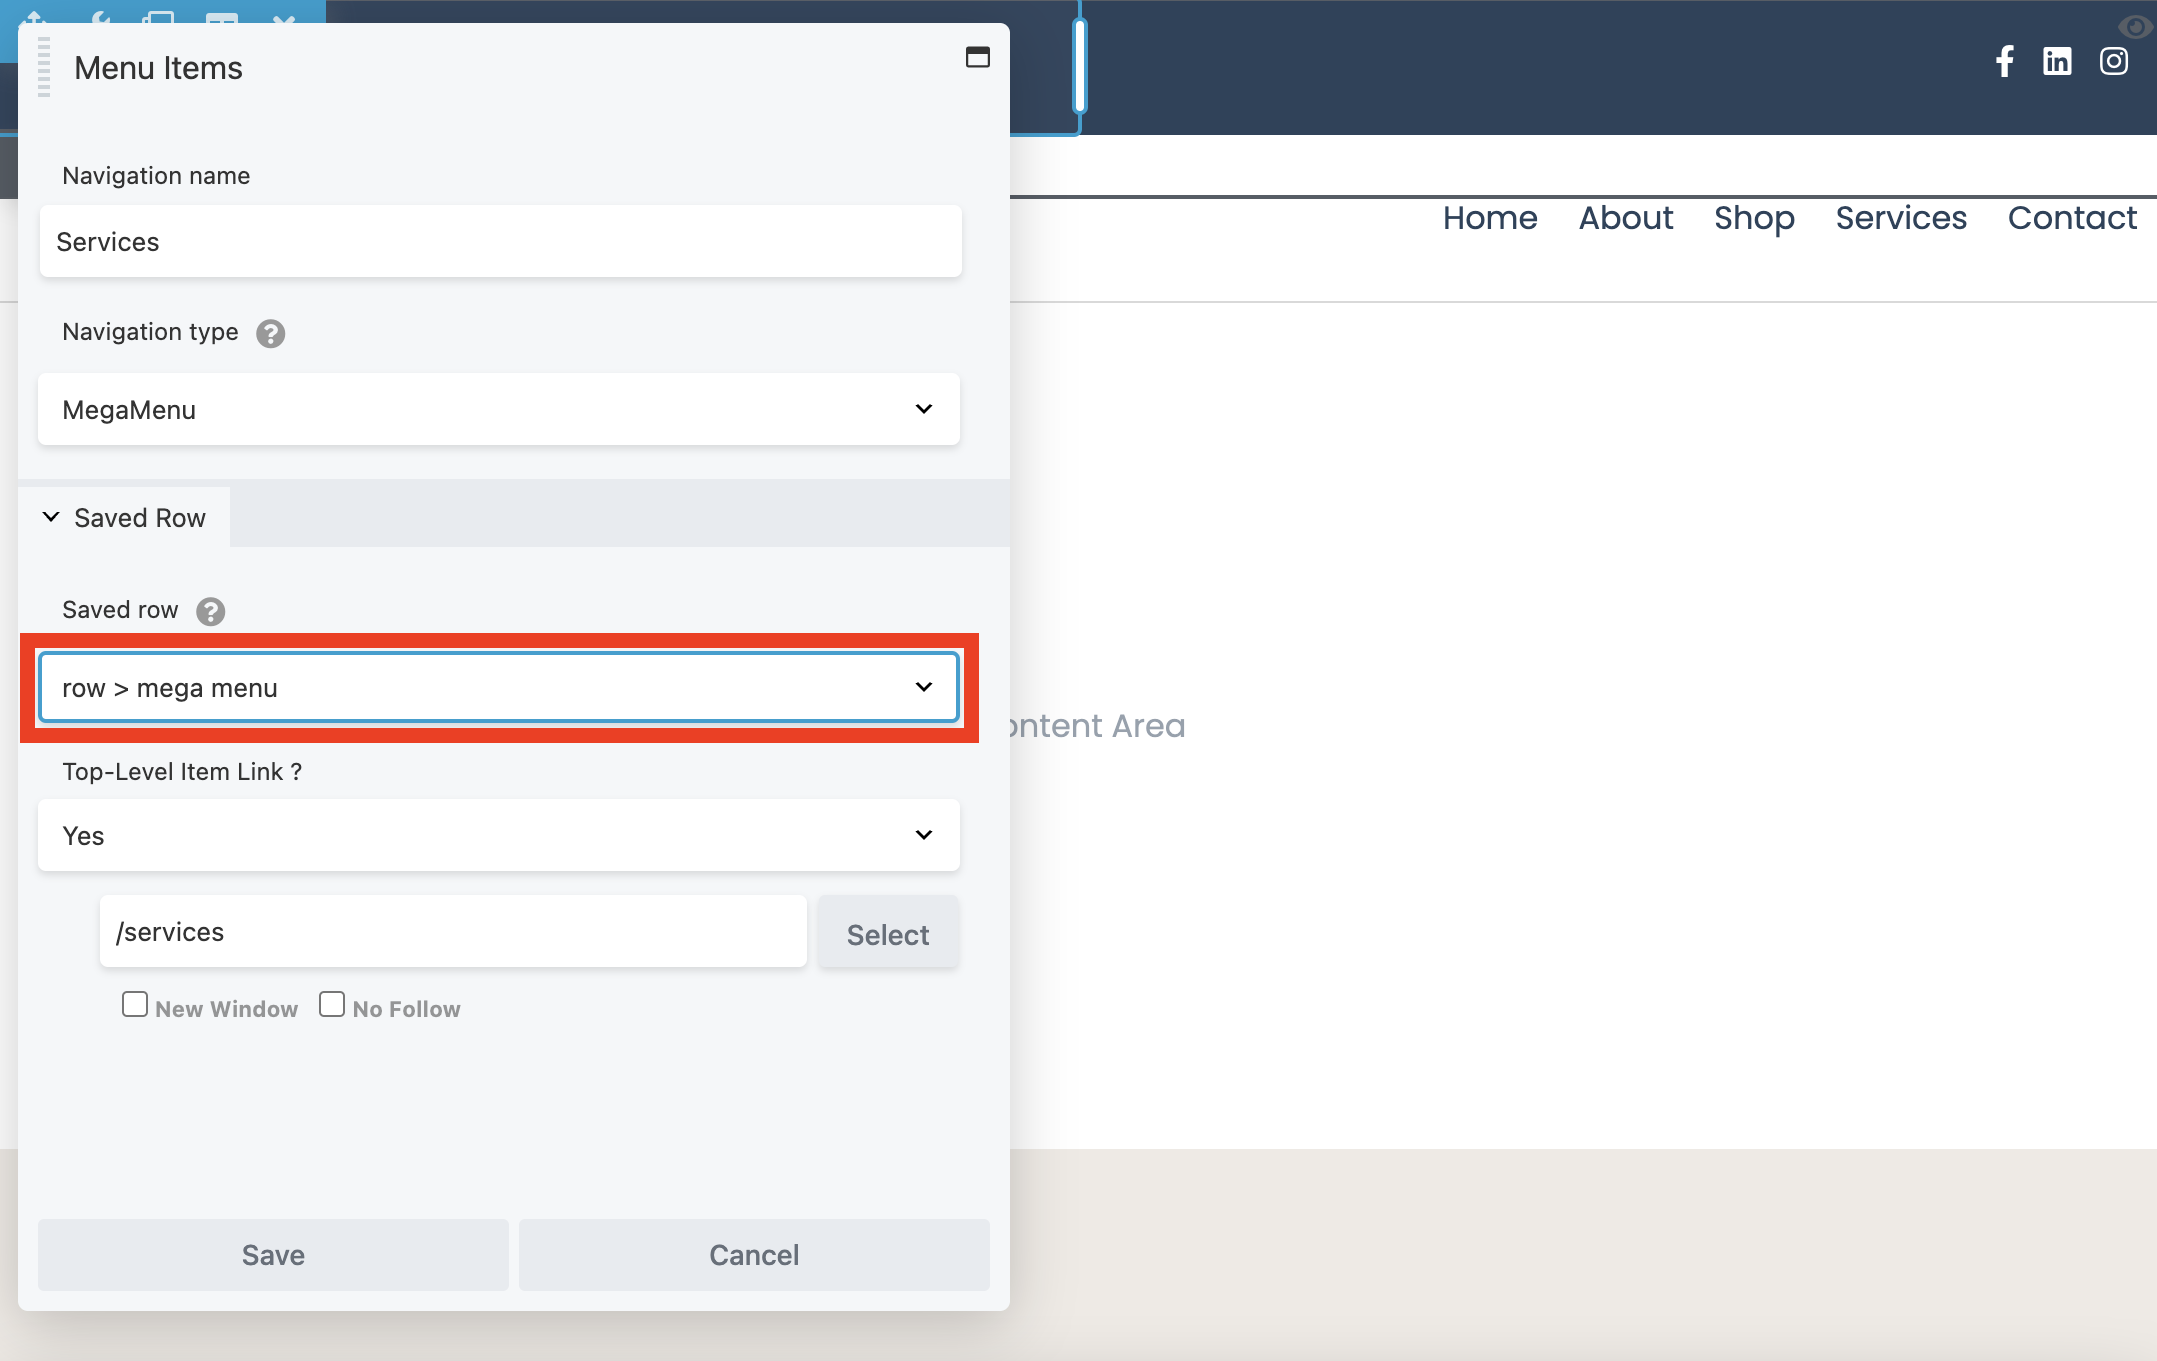
You can also use the dropdown to choose whether you want your menu item to be a top-level item, and simply enter the URL for that page. Then, click on Save.
Choose A Mobile Menu
At this stage, your mega menu will be too large and clunky to view on small devices. Therefore, you’ll now want to head to the Mobile tab to select the mobile menu that you created earlier:

This enables visitors on smaller devices to view a convenient, off-canvas slide-in menu. Here, you can adjust the width of your mobile menu, choose which way to slide in from, and define a close button.
Style The Mega Menu
Under the Style tab, you can configure the style settings for your top-level menu, dropdown menu, and mobile menu. For example, you can apply custom colors, alter the padding, and set the alignment for each menu item.
Once you’re happy with the way your menu looks, click on Done followed by Publish to see it in action. Note that it is important to refresh your page after editing so that you can view your changes.
Then, simply hover over your mega menu to see it in action:
Conclusion
Although dropdown menus are widely used, they don’t necessarily provide the best user experience for your site visitors. With a mega menu, you can make more pages visible and accessible, enabling users to quickly find what they’re looking for. Plus, they can help make your site look more professional.
To recap, here are two ways you can create a mega menu using Beaver Builder:
- With the Beaver Builder Theme, you can manually create a menu in WordPress.
- With the Beaver Builder Mega Menu and Beaver Themer plugins, you can easily build complex, custom mega menus.
Related Questions
Do I need Beaver Themer to use the Mega Menu Addon?
As a general rule, the Beaver Builder Mega Menu Addon is designed to work with Beaver Themer. However, if your existing theme lets you insert a shortcode (or a widget) in the location where you want the mega menu to appear, then it might work there too.
Are Beaver Builder Mega Menus optimized for mobile?
The Beaver Builder Mega Menu plugin has a responsive menu for mobile devices with a customizable off-canvas effect. If you want to control whether the mega menu appears on small or medium devices (like tablets) you can go to Beaver Builder’s Global Settings and change the breakpoints.
Our Newsletter
Our newsletter is personally written and sent out about once a month. It's not the least bit annoying or spammy.
We promise.
Try Beaver Builder Today

Related articles

Beaver Builder Maintenance Mode: How to Set It Up
Beaver Builder Maintenance Mode helps you keep your website looking professional while you work behind the scenes. Whether you’re redesigning…

Beaver Builder 2.11: Popup Module, Maintenance Mode, and Settings Snapshots
Beaver Builder 2.11, also known as Kariba, is now available and delivers some exciting updates: a new Popup Module for…

Beaver Builder AI: Build WordPress Layouts with AI (Now in Alpha)
Hey everyone! Big news. After a long time of building behind the scenes, Beaver Builder AI is here. The alpha…
Join the community
We're here for you
There's a thriving community of builders and we'd love for you to join us. Come by and show off a project, network, or ask a question.
Since 2014
Build Your Website in Minutes, Not Months
Join Over 1 Million+ Websites Powered By Beaver Builder.