
There are many reasons why people encounter your 404 page, including errors such as typos and misspelled URLs. The frustration of not finding the page you’re looking for can be diffused by a custom error page – and maybe even turned into a positive experience. By creating a more engaging 404 page, you can ensure that a simple error doesn’t undermine everything that’s great about your website.
In this post, we’ll discuss why you might want to replace WordPress’s stock page with your own design. We’ll then cover five must-have elements that can make your 404 page a more pleasant place to be. Let’s get started!
What Is a 404 Page (And Why You Might Want to Create a Custom One)
A 404 page indicates that you’ve reached the requested domain, but the URL path provided no information. Essentially, this is the internet’s way of letting you know that the path you’re trying to follow leads to nowhere.
If you don’t add a custom page to your website, then the server will display a stock 404 page instead. Its design and content will vary depending on your WordPress theme:
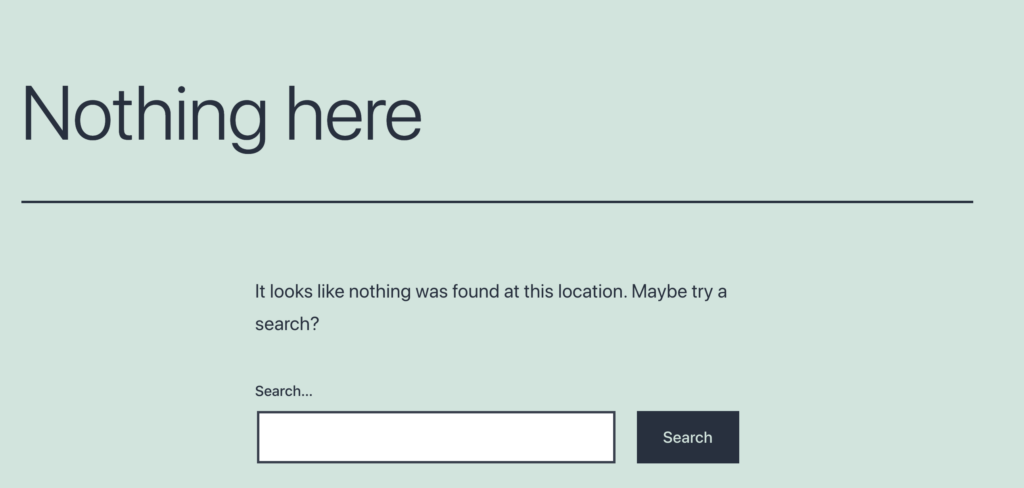
While most themes do a good job of providing a professionally-designed 404 page, this is still a stock design. If you rely on this one-size-fits-all approach, then you may be missing out on some valuable opportunities.
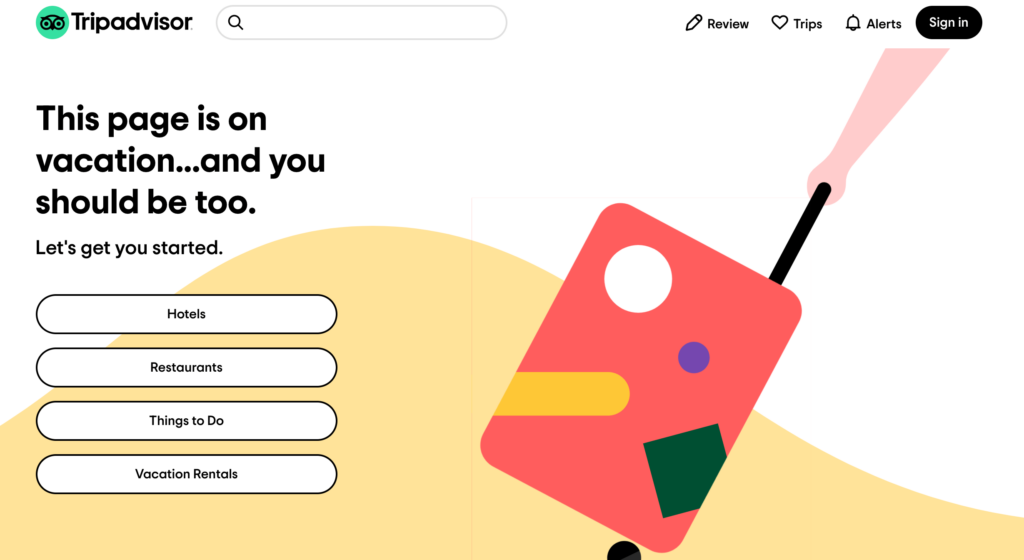
It may be an error message, but a 404 page is still a chance to strengthen your branding and make an impression on your audience. If you type “best 404 pages” into your favorite search engine, you’ll find plenty of creative and attention-grabbing examples:
Even if you create an engaging and innovative 404 page, encountering this error message is never ideal. Whenever a visitor lands on this page, there’s always a chance they may give up on your site completely.
The best custom 404 pages aim to re-engage visitors. For example, you might showcase your site’s most interesting and popular content in the form of a recommended or related posts section. This can spark some interest in a visitor who was on the verge of navigating away from your site.
You might even use your 404 error message as a conversion tool. For example, if you run an ecommerce store, you can add some product recommendations to this page. With the right design, your 404 page can start contributing positively to your site.
How to Create a Custom 404 Error Page in WordPress
In an ideal world, visitors never encounter your 404 error message. However, the reality is that something as simple as a misspelled URL can send visitors straight to a dead end.
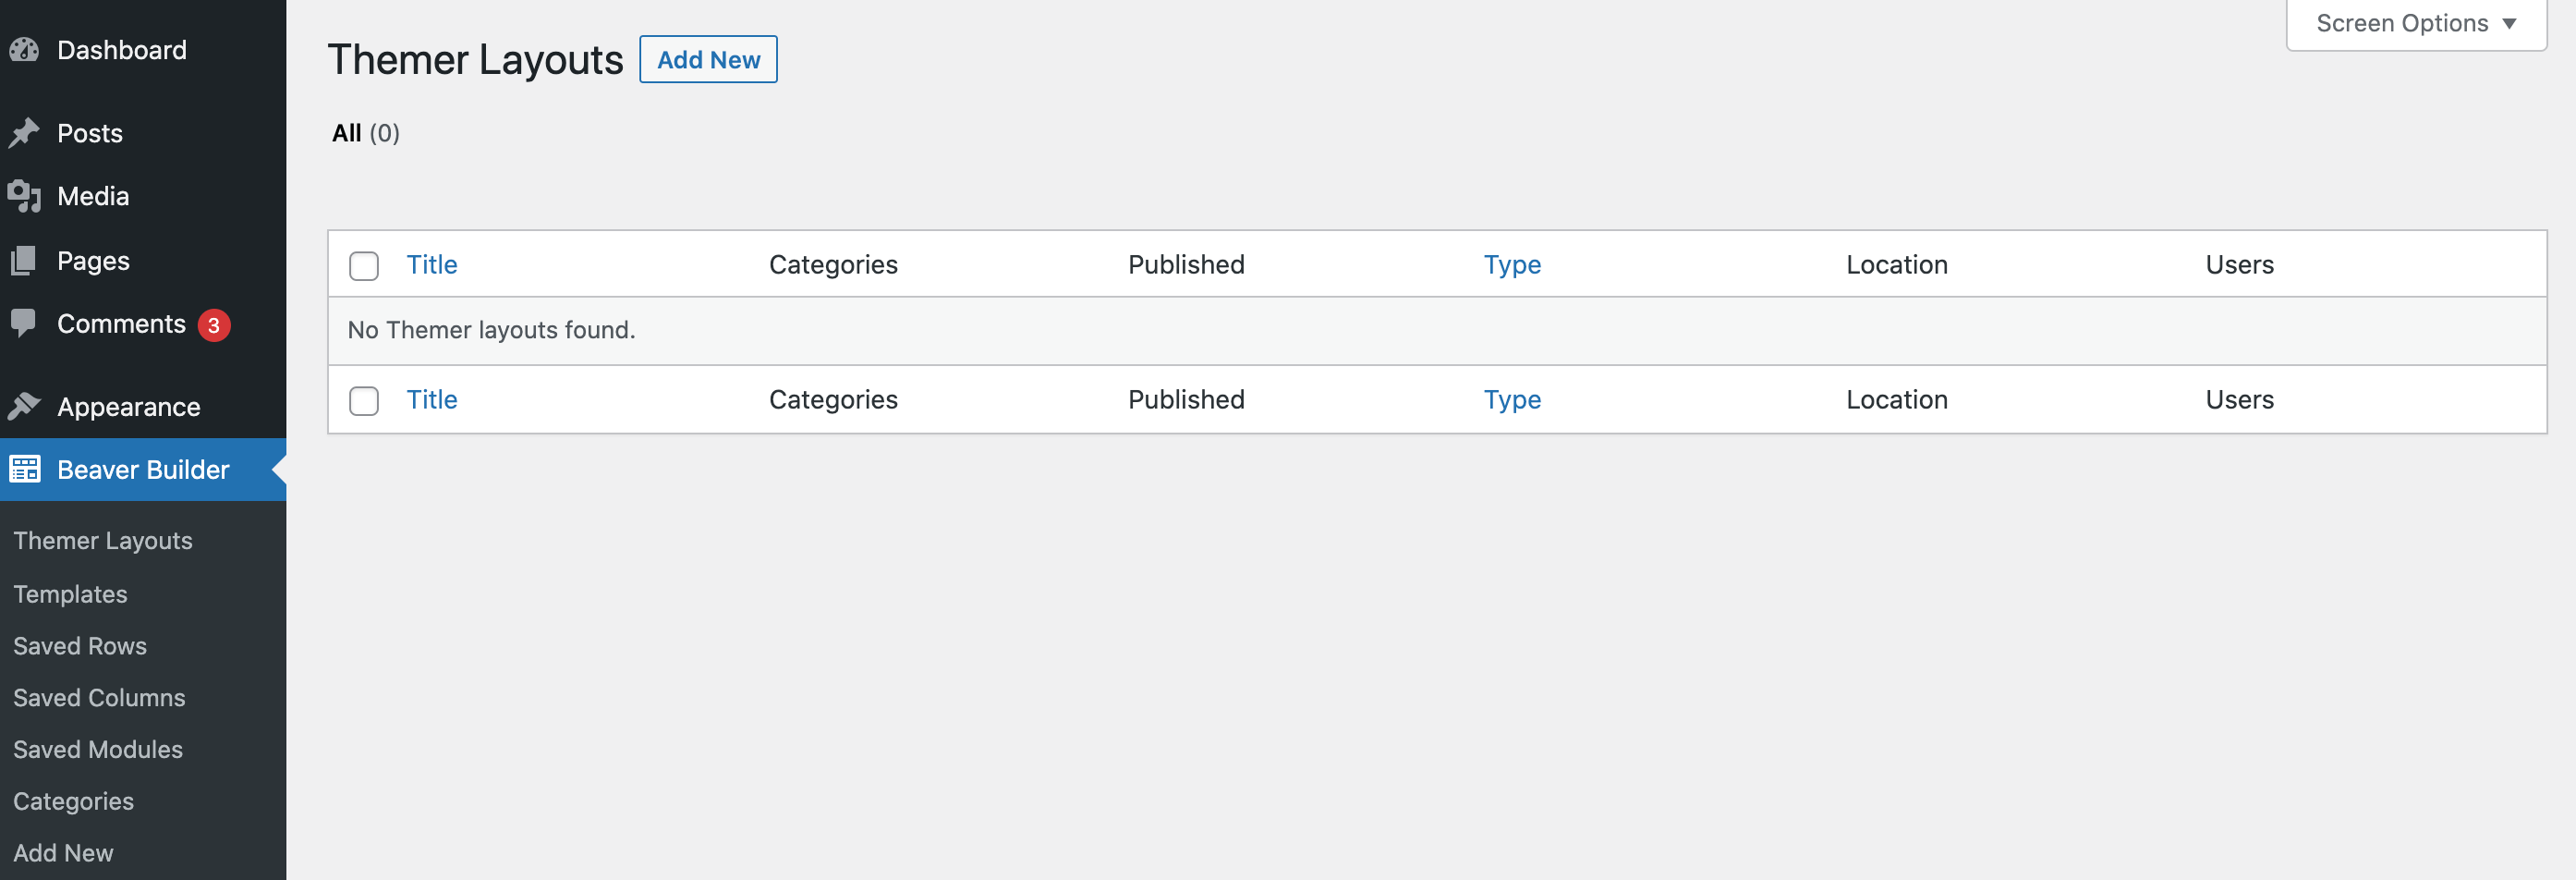
With this in mind, let’s see how you can turn this error into something positive by creating a custom 404 page. The 404 page is normally controlled by your theme and you can’t edit it directly. However, the premium Beaver Builder plugin combined with the Beaver Themer plugin lets you create a custom 404 page using a standard page layout tool.
With these plugins installed, navigate to Beaver Builder > Themer Layouts and click Add New:
On the next screen, give your layout a descriptive title. For Type, select Themer Layout:
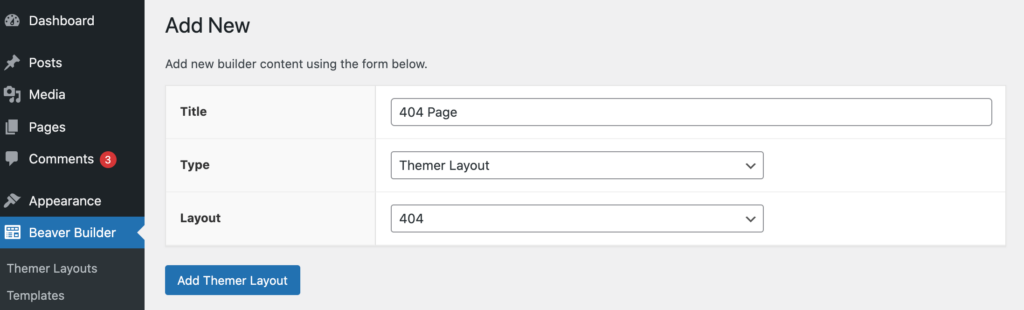
For Layout, select 404. Next, click Add Themer Layout, then click Launch Beaver Builder. You’re now ready to start building your 404 page. The initial Themer layout has a template applied that looks like this:
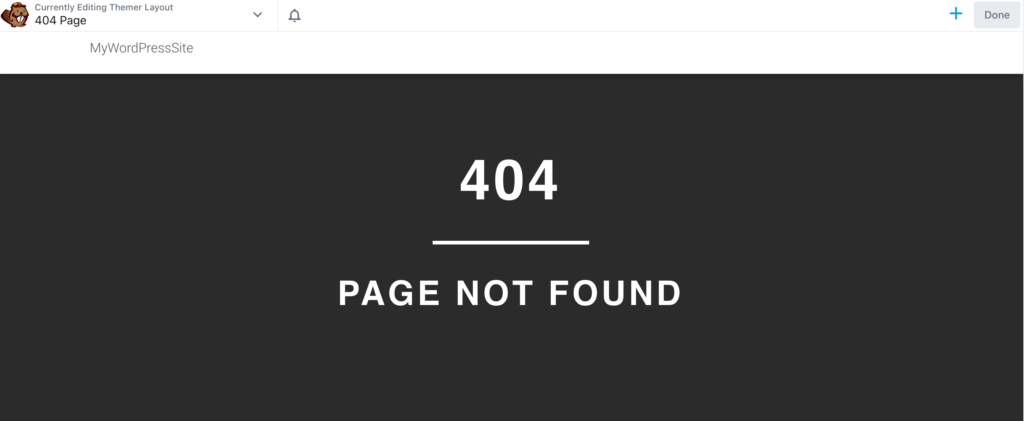
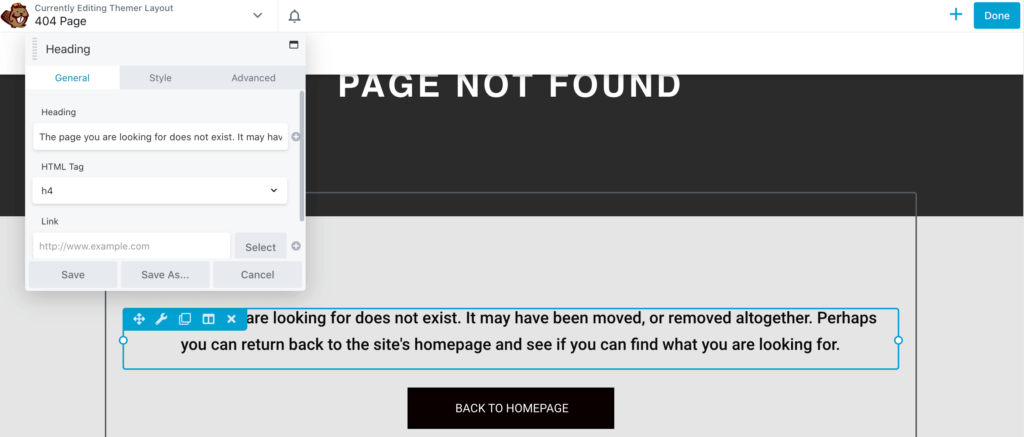
You can change any aspect of this initial layout to produce your own messaging. To edit any piece of text, click it to open the module’s settings, where you can create your own message:
If you include the template’s Back to homepage button, be sure to add your own link by clicking the button in the editor to open its settings. In the settings panel, scroll to the Link field:
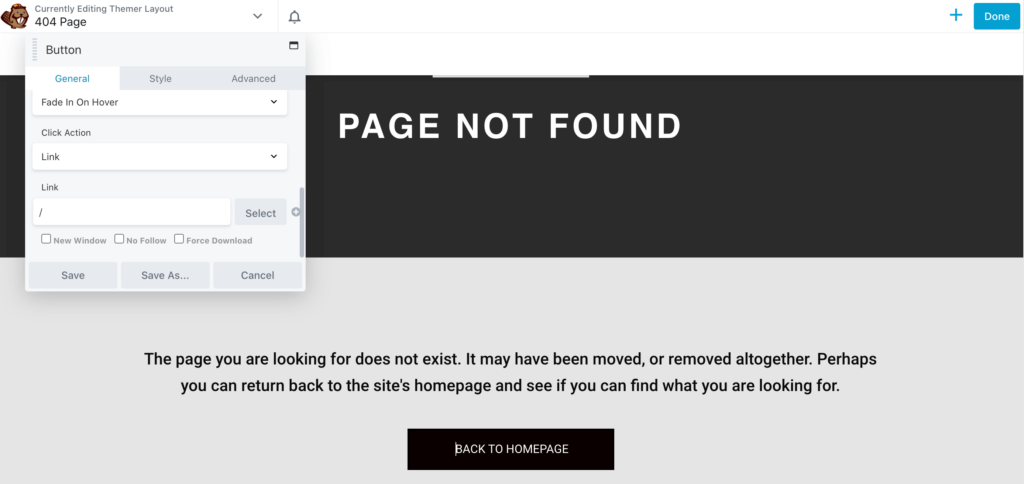
You can now add your homepage or any other URL and specify whether this link should open in a new tab. You can also change the row and module colors by opening the settings and clicking the Style tab.
There are many additional ways to customize this default page, but this is all you need to create a functioning design. To make this page live, click Done > Publish. You can test your new page on the front end by deliberately entering a URL that doesn’t exist.
How to Create a More Engaging 404 Page (5 Essential Beaver Builder Modules)
At this point, you have a basic custom 404 page. But Beaver Builder has a lot more modules that can help take your design to the next level. Let’s take a look at five of our favorites.
Tip: To add a module to your layout in the Beaver Builder editor, click the + icon in the upper right corner to open the Content panel and make sure the Module tab is selected. Drag any module into your layout and drop it in the target location. Now you’re ready to create a truly eye-catching 404 page.
1. Navigation Menu
Many 404 designs feature a return to homepage link. This is a great start, but not everyone wants to visit your site’s central hub.
By including a prominent navigation menu, you can give visitors the flexibility to jump directly to different parts of your website. If you’re lucky, this might even include the content they were originally trying to access. In this way, a menu can mean the difference between visitors continuing to engage with your content, or navigating away from your website.
To get started, drag a Menu module from the Content panel into your Themer layout. This automatically opens the Menu module settings:
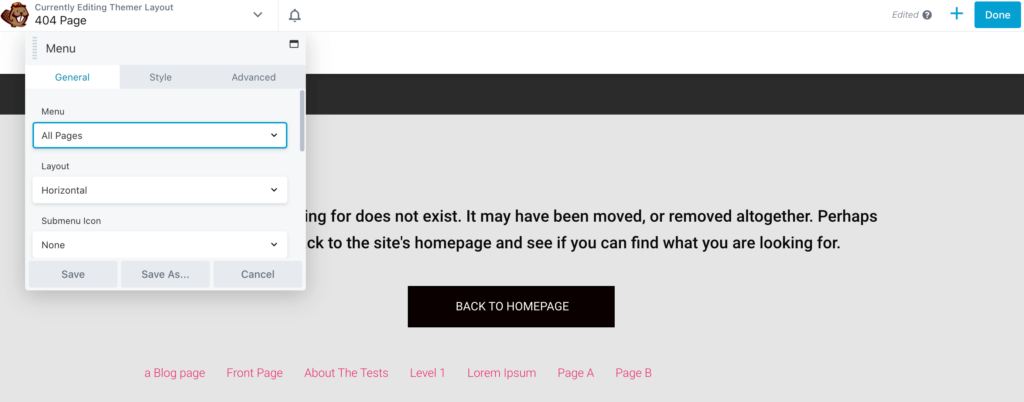
Click the Menu setting dropdown and choose the WordPress navigation menu that you want to display as part of your 404 page. (If you haven’t set one up yet, you can do that from your WordPress admin panel at Appearance > Menus.) You can also choose from various styles, such as horizontal, vertical, or accordion.
2. Recommended Posts
You can highlight your site’s new and interesting content by adding a Recent Posts section to your site. Choose a Posts, Posts Carousel, or Posts Slider module and add it to your 404 page:
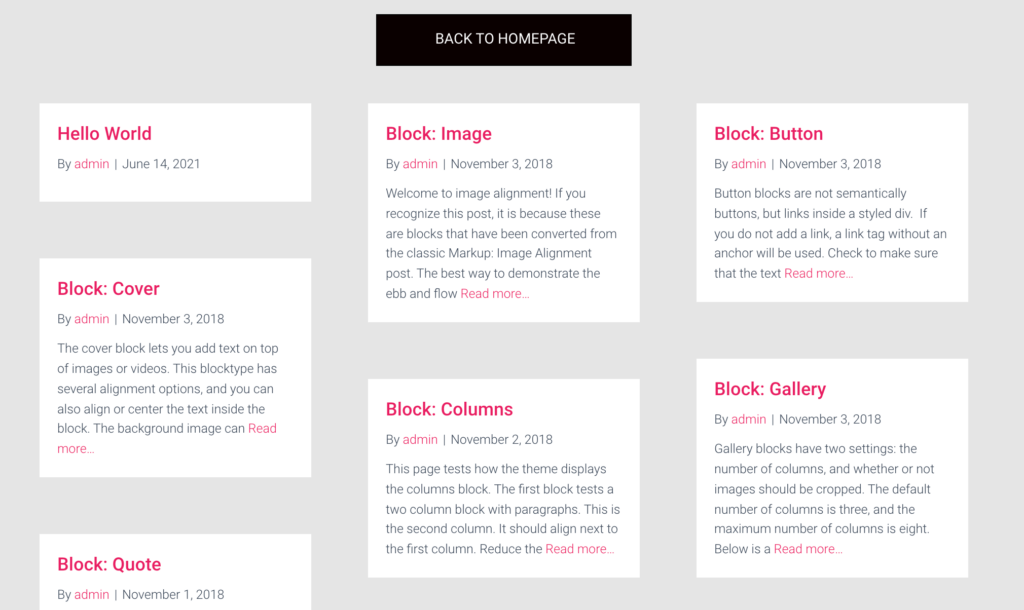
Depending on the module’s settings, you can display the featured image or a snippet of the post’s content. This can be a great way to catch visitors’ attention and lure them into your website.
The Posts module displays a selection of articles in a column, masonry, or list layout. This module is the most versatile in terms of what you display and how much you can tweak the settings.
The Posts Carousel module enables you to showcase a few items in a horizontal row, with or without animation. This module displays each post’s featured image, overlaid by information such as the page title:
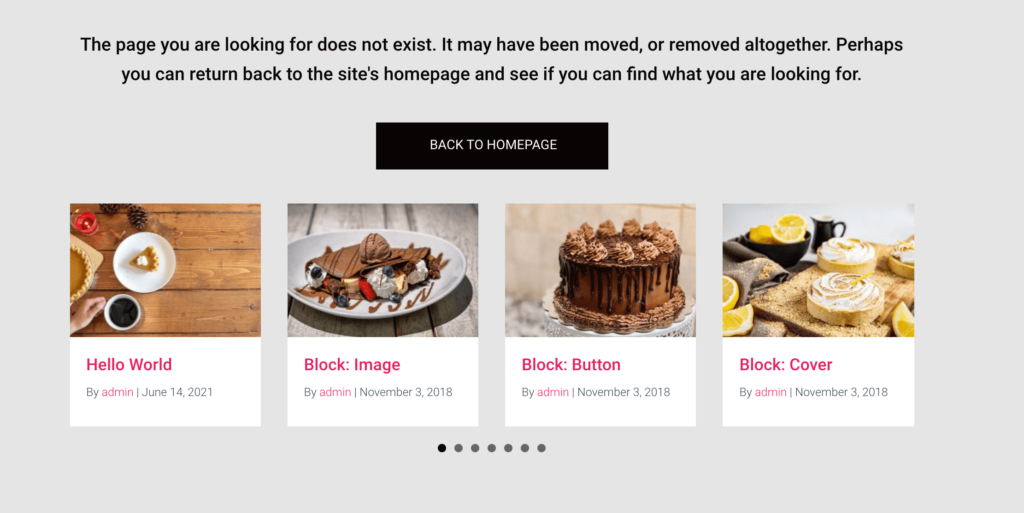
You can either set this row to scroll automatically or let visitors manually click through the available options. Using the Posts Carousel module, you can display a large number of posts in a limited space, and without overwhelming the visitor with a wall of text.
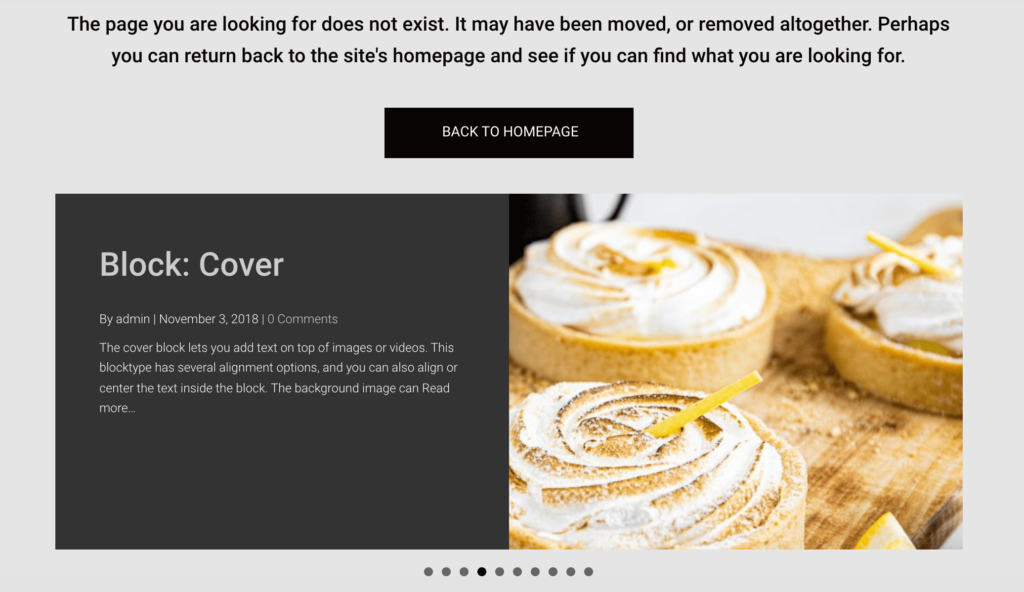
The Posts Slider module displays an image overlaid by text. Since it gives visuals prime position, Posts Slider is a great choice for items that have an attention-grabbing featured image:
3. Contact Form
Broken links can be disastrous for the visitor experience and can also impact your Search Engine Optimization (SEO). Search engine bots crawl all of your site’s links, including the broken ones. This wastes the crawl budget and may delay your site’s content appearing in relevant search engine results.
With so much at stake, you should know if there are broken links. Here, you may be able to recruit your visitors as testers, by giving them an easy way to report any 404 errors they encounter.
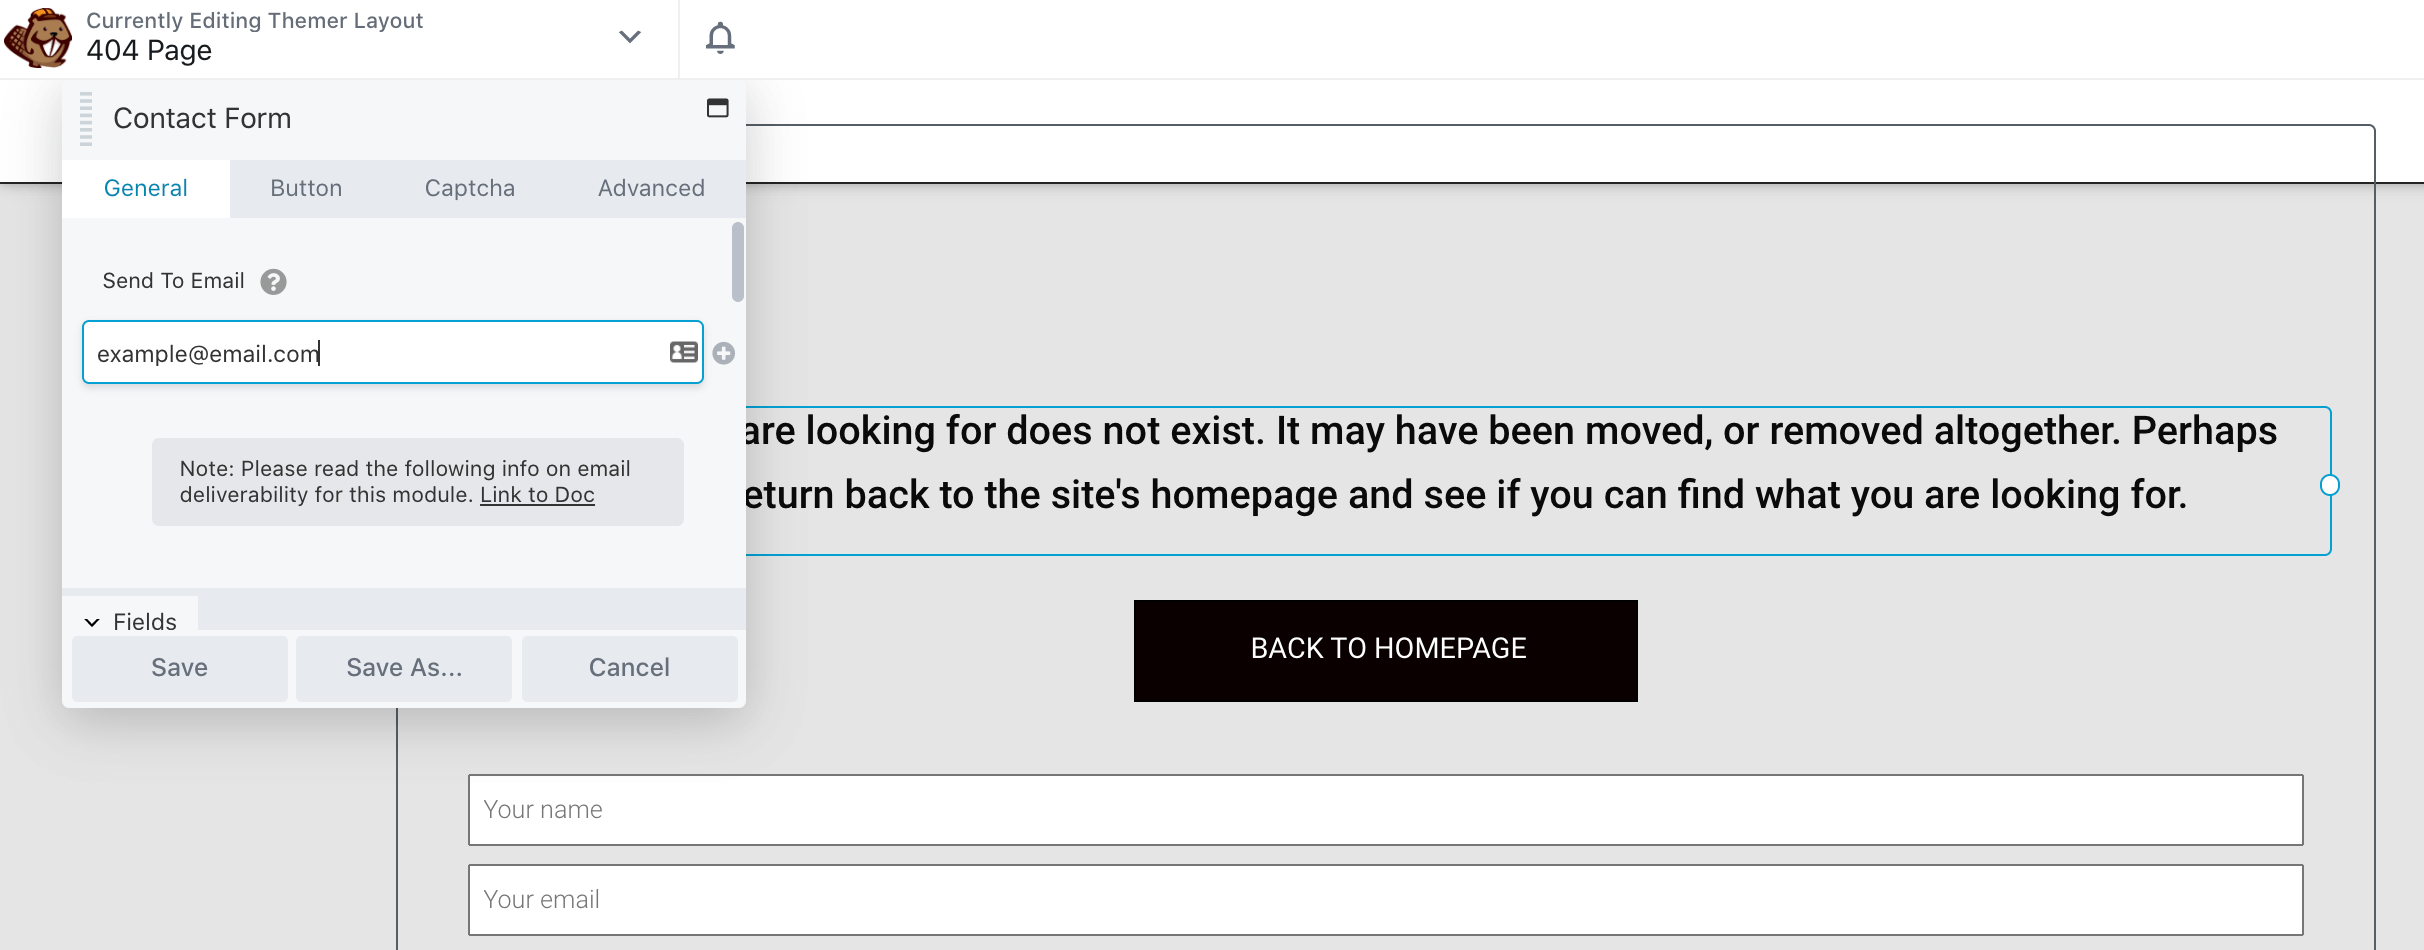
To encourage this helpful input, you might offer them an incentive for reporting 404 messages, such as a discount code for your WooCommerce store. You can enable visitors to report damaged links by adding a Contact Form module to your 404 page:
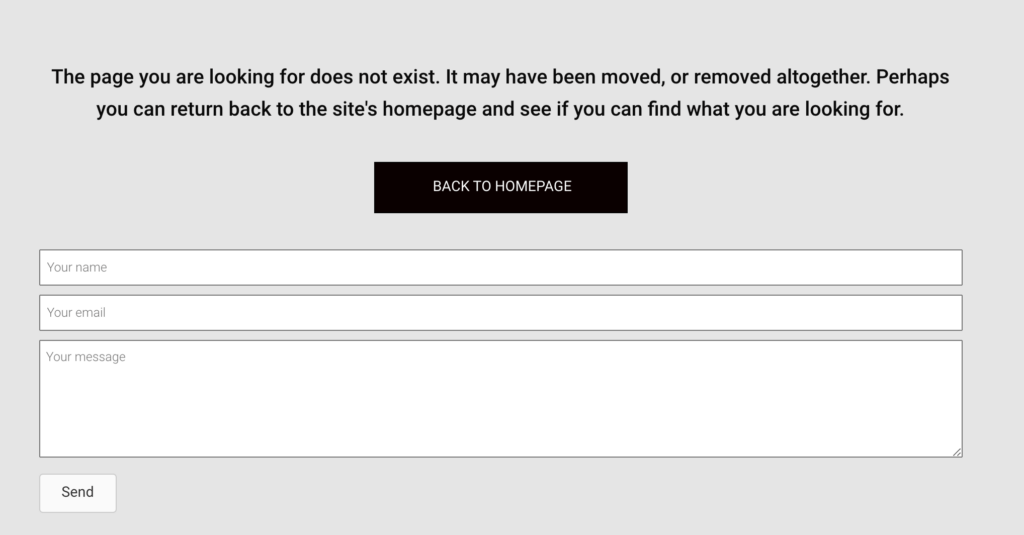
By default, this contact form will send its responses to your WordPress admin address. If you want to use an alternative account, you can enter this address into the Send To Email setting:
To make it clear that this form is intended for reporting broken links, you may want to consider adding some supporting text. You can add this using Beaver Builder’s Text Editor module. You can also edit the form’s button text to create a clear Call To Action (CTA):

To edit this label, click the Button tab in the Contact Form module’s settings panel. You can then enter your new CTA into the Button Text setting.
4. Search Bar
Navigation menus and posts sections are great for encouraging visitors to explore your website. However, some people may be searching for specific content and will appreciate easy access to a search bar.
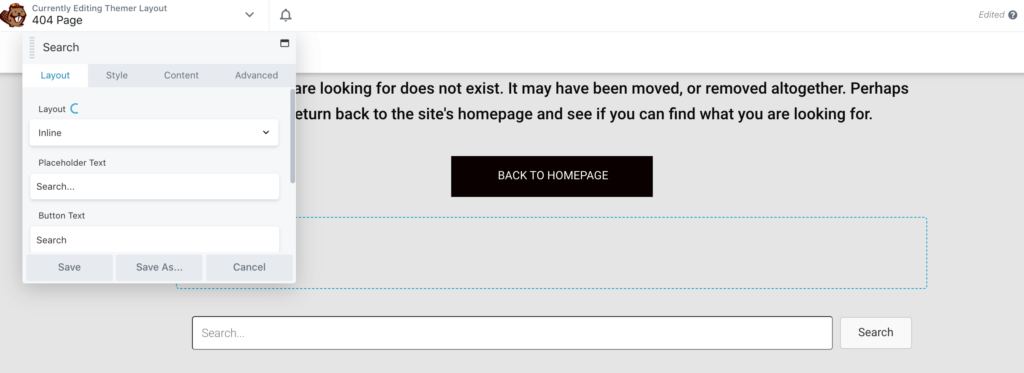
Beaver Builder comes with a Search module that you can drag and drop into your 404 page. After adding this module, adjust its settings to customize your search bar. For example, you can choose between various layouts, including button only and inline:
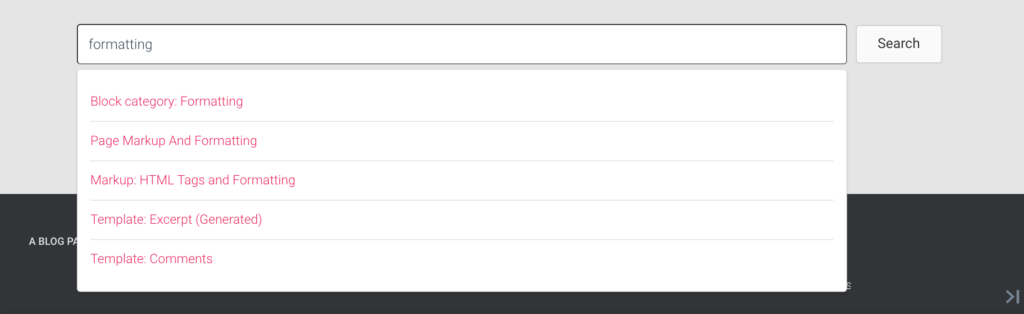
You should also consider how you want to display the search results. The Beaver Builder search bar can display these matches as part of your 404 page, in the form of a dropdown:
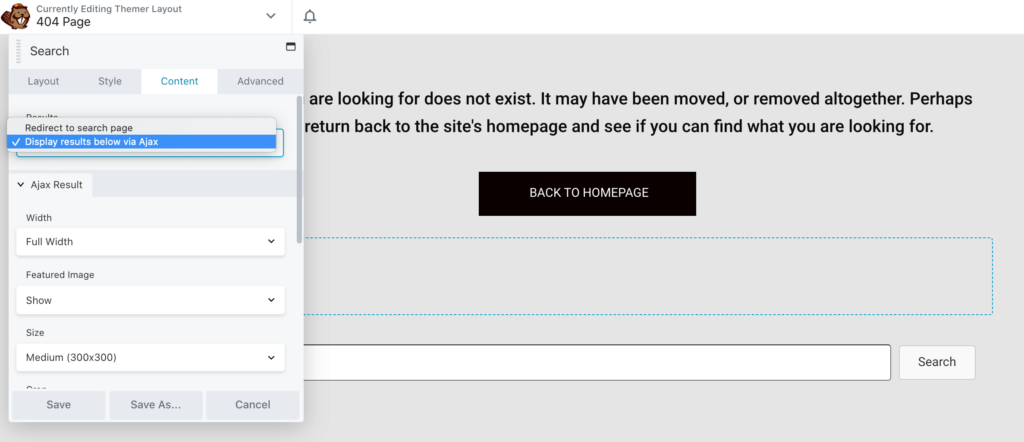
By displaying these results inside your 404 page, visitors can access the content they want, without having to navigate through a separate search results page. To create this effect, select the Content tab. Then, open the Results dropdown and choose Display results below via AJAX:
Alternatively, you might prefer to
5. Login Form
Memberships can be a great way to build a long-term relationship with your audience. It also forms a core component of certain websites, including ecommerce stores and training sites.
If you offer membership functionality, then you may want to enable users to log into their accounts directly from your 404 page. This can help re-engage your visitors. It can also provide a handy shortcut for users who were trying to access their account when they encountered the 404 error.
Beaver Builder ships with a Login Form module. This adds a basic login form to your 404 page:

By default, this form displays the Remember Login and Forgot Password links. If you’d prefer a more streamlined form, you can change these settings by selecting the General tab in the Login Form module’s settings:
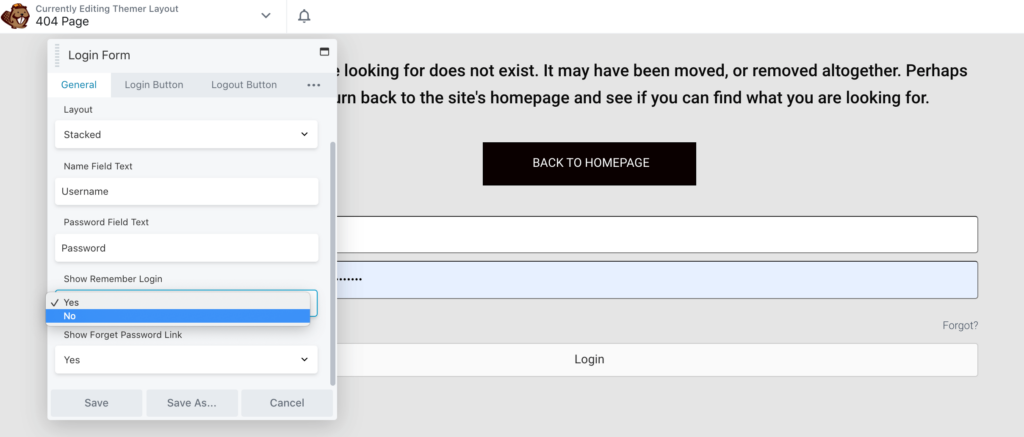
Set both the Show Remember Login and Show Forgot Password Link settings to No. This removes these links from your login form.
Conclusion
In an ideal world, visitors would never encounter your 404 page. However, even if you keep your site in tip-top condition, there’s always a chance that visitors misspell a URL or make a typo. This lands them squarely on your 404 page, through no fault of your own.
Let’s quickly recap five Beaver Builder modules that we like to include in 404 pages:
- Navigation menu, to help visitors access different areas of your site.
- Recommended posts, which can highlight your site’s most interesting articles.
- Contact form, so that visitors can report the 404 error.
- Search bar, which can be a time-saver for people who have a specific piece of content in mind.
- Login form, to provide easy access to the visitor’s account.
Do you have any questions about how to create a custom 404 error page in WordPress? Let us know in the comments section below!
2 Comments
Our Newsletter
Our newsletter is personally written and sent out about once a month. It's not the least bit annoying or spammy.
We promise.
Try Beaver Builder Today

Related articles
Beaver Builder Maintenance Mode: How to Set It Up
Beaver Builder Maintenance Mode helps you keep your website looking professional while you work behind the scenes. Whether you’re redesigning…
Beaver Builder 2.11: Popup Module, Maintenance Mode, and Settings Snapshots
Beaver Builder 2.11, also known as Kariba, is now available and delivers some exciting updates: a new Popup Module for…

Beaver Builder AI: Build WordPress Layouts with AI (Now in Alpha)
Hey everyone! Big news. After a long time of building behind the scenes, Beaver Builder AI is here. The alpha…
Join the community
We're here for you
There's a thriving community of builders and we'd love for you to join us. Come by and show off a project, network, or ask a question.
Since 2014
Build Your Website in Minutes, Not Months
Join Over 1 Million+ Websites Powered By Beaver Builder.
Nice information about 404 error. Thank you for sharing.
Does anyone know if the code works as well for multisite installations?
If so, does the 404 page bounce to the subdomain / subfolder / subsite or the main or root domain / folder / site?