
7 Beaver Builder Features Developers Should Know About
Page builders are designed to make creating websites easy for anyone, even WordPress beginners. However, Beaver Builder also has several features for developers to make life easier for you and your clients.
In this article, we’ll introduce you to some powerful features you may not know about that make Beaver Builder a fantastic tool for web developers.
Let’s dive in!
Why Beaver Builder Is a Powerful Tool for Developers
Although Beaver Builder is designed to make page building easy, it still includes loads of features for developers and other advanced users.
It’s the best of both worlds – a simple drag-and-drop interface for creating basic layouts, along with the ability to use custom code to implement more complex features.
Developers can use these advanced techniques to build a page or website, and then hand it off to clients to tweak and maintain using the What You See Is What You Get (WYSIWYG) editor.
By putting Beaver Builder into the hands of site owners, you can minimize the time you have to spend helping them with content creation.
It’s also possible to save custom templates and elements you create for use in your future projects. This helps speed up development significantly, so you can take on more clients and increase your revenue.
The flexibility to be as simple or as complex as you need makes Beaver Builder an extremely powerful tool for even the most seasoned web developers.
There are dozens of different ways to incorporate it into your workflow and improve your business.
Beaver Builder Features that Assist Developers
Whether you’re looking to increase your productivity or want to try implementing new elements in an upcoming project, Beaver Builder can help.
We can categorize these features as follows:
- Features to customize your layouts in Beaver Builder
- 1. Responsive design previews and settings
- 2. Shortcodes for layouts, rows, columns, and modules
- 3. Support for inserting JavaScript locally and globally.
- Features to customize the plugin for your clients’ use
- 4. Custom modules
- 5. Hooks for custom code
- 6. User access control
- Features in Beaver Themer that save development work
- 7. Custom “theme” layouts, dynamic content, conditional logic
Features to Customize Your Beaver Builder Layouts
1. Responsive Design Features
If you’ve written code for responsive design, you’re aware of the challenge of getting your page to look good on various devices.
Beaver Builder is built on the Bootstrap 3 and 4 framework, meaning it’s designed to be responsive out of the box – and you can tweak to your heart’s content.
The Beaver Builder editor has a Responsive Editing Mode, which means you can preview your layout at extra large, large, medium, and small device sizes and directly edit your layout at each device size.
There are plenty of ways you can customize your layouts to look good at every screen size.
- Responsive style settings: Many of the Beaver Builder row, column, and module settings, such as margins, padding, typography, and borders, can be set differently for each device size.
- Breakpoints: Breakpoints define the screen width for large, medium, and small devices, which plays a role in responsive behavior. You can change these breakpoint settings globally in the Beaver Builder plugin or theme.
- Stacking: Beaver Builder automatically stacks columns as screen size decreases, but you can reverse or control the default column stacking behavior.
- Spacing: Beaver Builder automatically reduces left and right margins and padding on small devices, but you can override or remove this auto spacing.
- Visibility: You can choose the per-device visibility (extra large, large, medium, or small) on which a row, column, or module is visible. For example, you can have one Photo module display on large and medium devices and a second Photo module with a mobile-friendly version of the image for display on mobile devices.
And remember – not only is it easier for you to create these layouts but also it’s easier for you and your clients to maintain and update them. That takes a lot of maintenance work off your plate, where you’re going back to review and revise your custom code.
2. Shortcode Support
Beaver Builder includes robust support for shortcodes, which enables you to execute functions in places you normally wouldn’t be able to.
A common use for them is displaying a Beaver Builder module in a standard sidebar widget.
You can create shortcodes for any Beaver Builder content that has a slug or ID, including posts, pages, eCommerce products, and saved rows, columns, modules, and layout templates.
Within a Beaver Builder layout, you can insert them into any module with a text field or a text editor. You can also use shortcodes on posts or pages created using the standard WordPress editor.
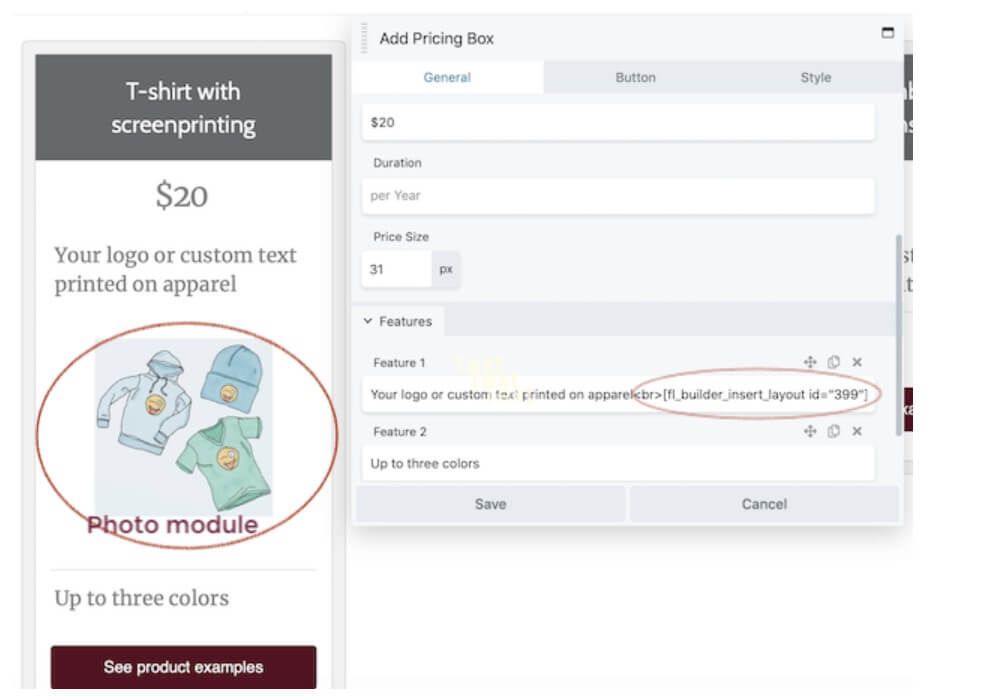
Shortcodes let you do some unique things, such as insert one module into another module. For example, you could insert a Gallery module into a Tabs module to display a gallery of images in one of your tabs.
Here’s an example of a Beaver Builder Photo module inserted into a Pricing module:
3. Custom JavaScript
Beaver Builder makes it extremely easy to insert custom JavaScript. Here are some common uses of JavaScript:
- Create custom loading screens
- Add animations to spice up a page or make a certain section stand out
- Draw attention to important elements such as a Call to Action (CTA) button
- Add code for Google Analytics
No matter what you want to do with JavaScript, Beaver Builder can help make it happen.
You can apply the JavaScript to the entire site, a single page, or a specific spot in the page’s layout. No matter where you want it, as long as you’ve got the code, our page builder makes it simple to apply it.
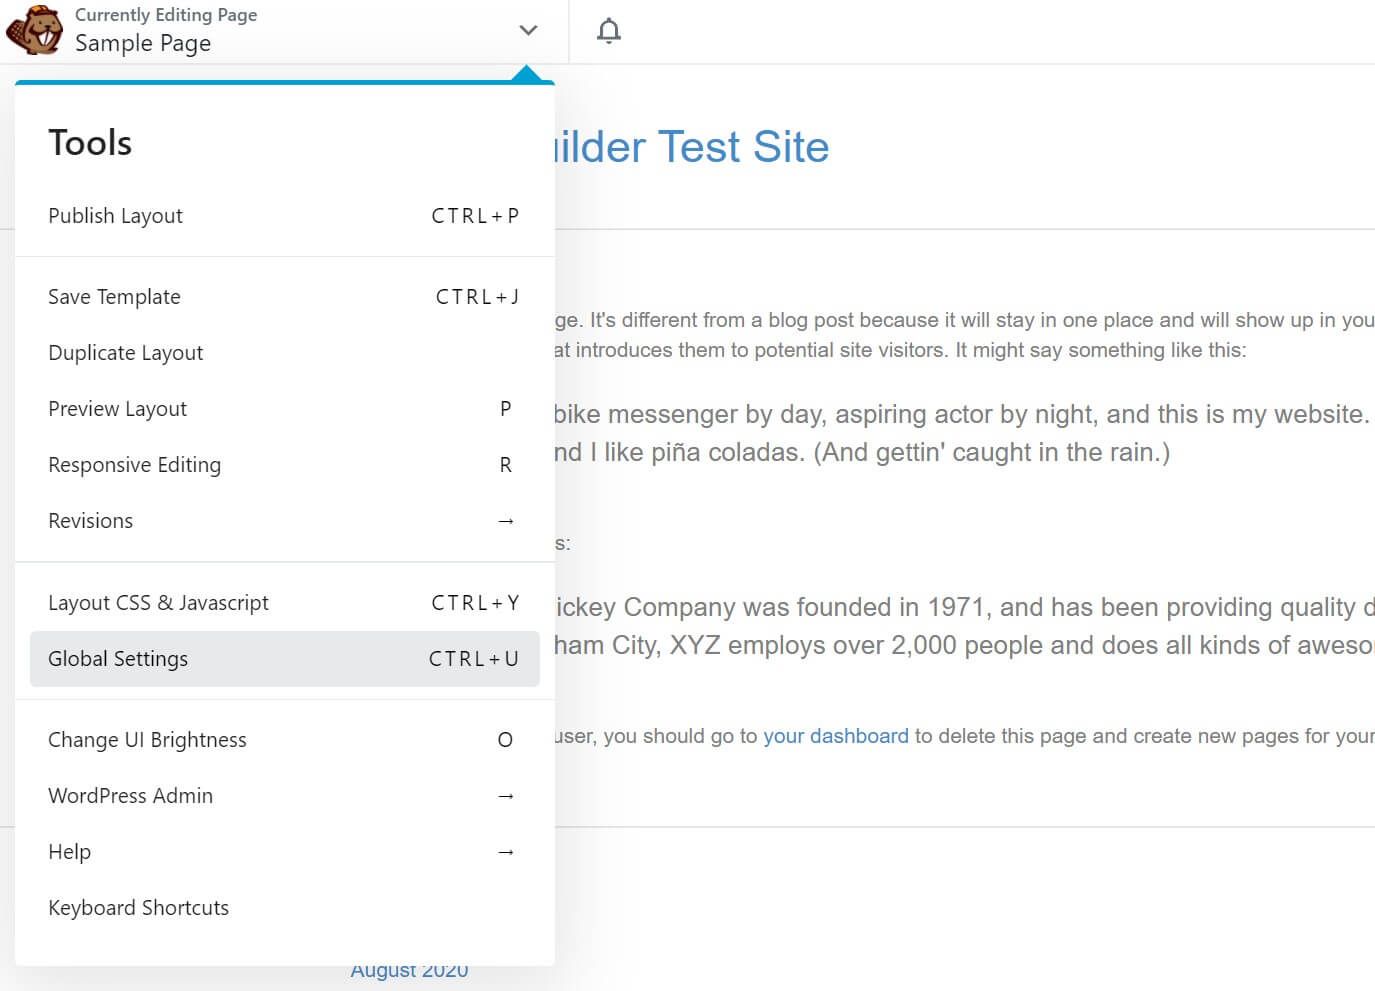
To apply custom JavaScript to your entire site, open the Beaver Builder editor and click the dropdown menu in the top left corner to expose the Tools menu. Then select Global Settings:
Click the JavaScript tab, enter your code, and click Save.
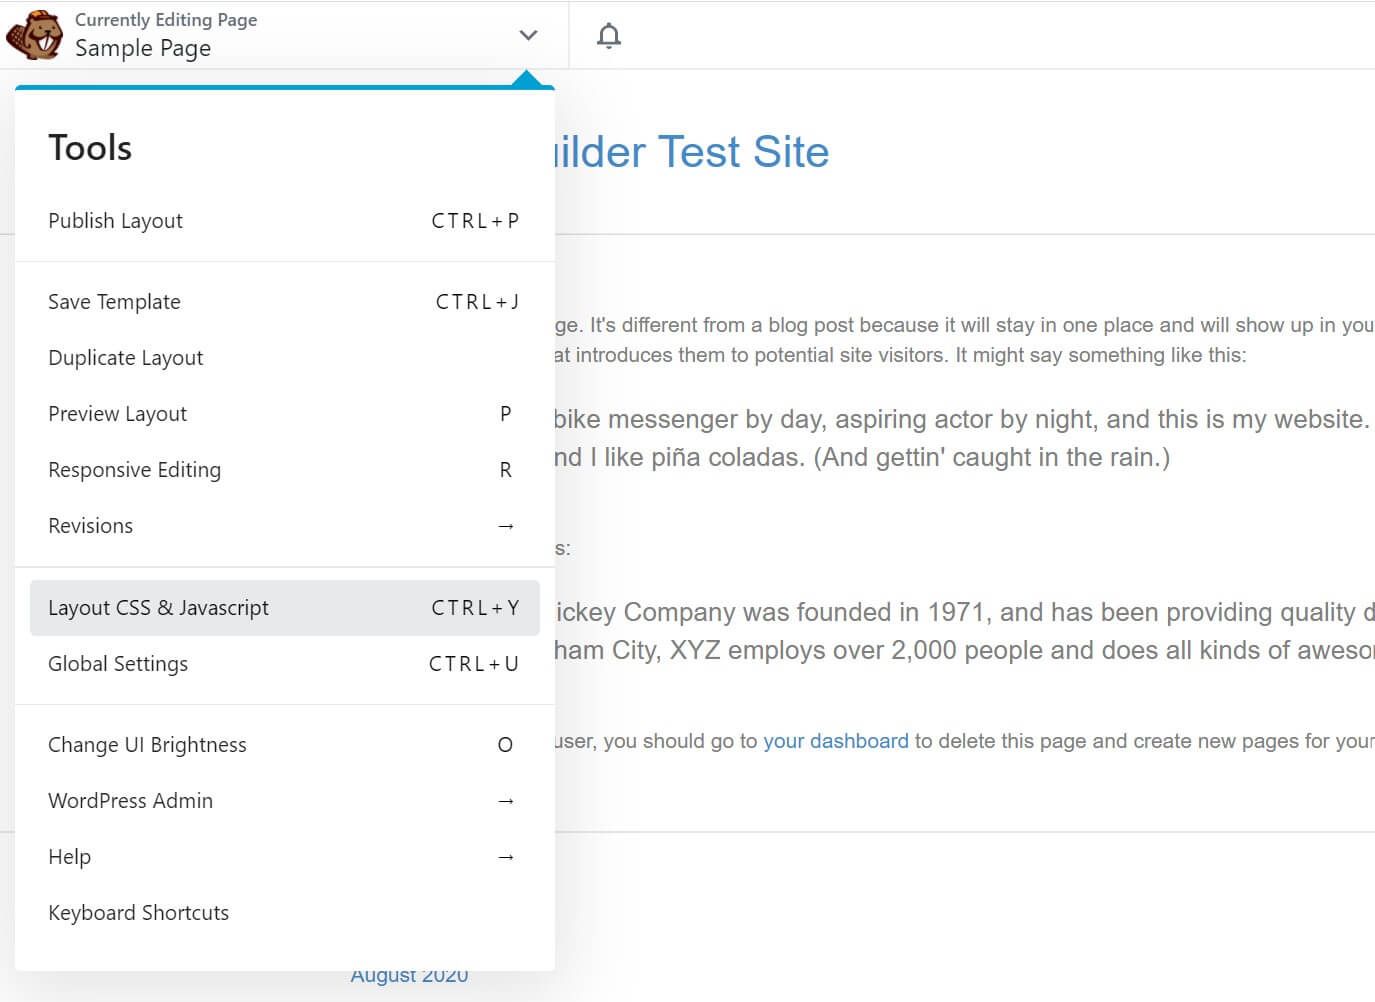
To add custom JavaScript to a single page, open the page in the Beaver Builder editor and open the same Tools menu. This time, select Layout CSS & JavaScript:
Click the JavaScript tab, enter your code, and click Save.
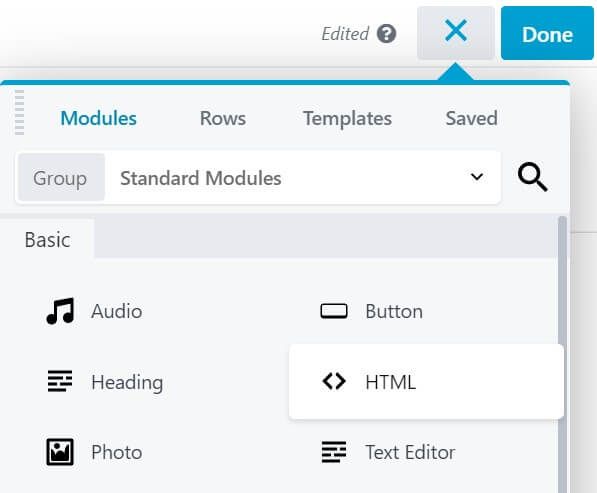
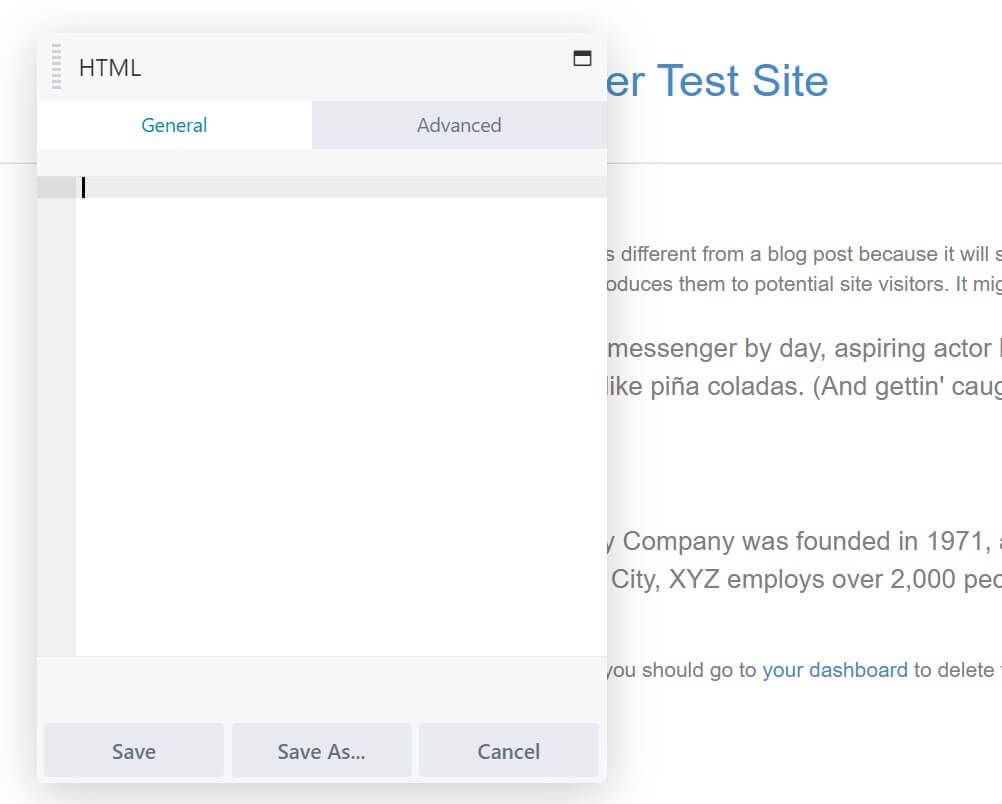
To apply custom JavaScript at a specific point on the page, you can use the Beaver Builder HTML module. From the Builder, click on the plus (+) button in the upper right-hand corner, then look for HTML:
Drag the module to wherever you want it on the page, then enter the code on the General tab and click Save to update it:
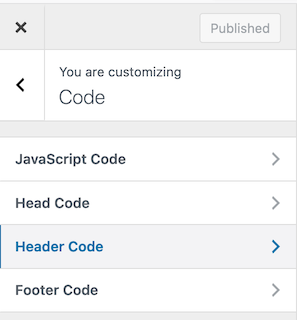
If you’re using the Beaver Builder Theme, the Customizer has a Code tab where you can enter JavaScript and other code in the <head> tag, immediately after the <body> tag, or immediately before the closing </body> tag:
Features to Customize the Plugin
4. Custom Modules
Beaver Builder lets developers create their own custom modules – complete with detailed settings panels – just like the stock modules provided with the plugin. This opens up nearly limitless possibilities for personalizing our page builder to suit both your needs and those of your clients.
To create a custom module in Beaver Builder, follow five simple steps:
- Create a new plugin. This prevents your modules from being overwritten during Beaver Builder updates.
- Add your module to the new plugin. It should be saved as a PHP file in the plugin’s directory.
- Define the settings for your module. These are the custom options you want to appear in the Beaver Builder editor.
- Add the front end HTML. This determines how the module renders the HTML for each instance of the module on the front end.
- Style your module. Use CSS and JavaScript to add styles.
For some amazing examples of what you can do with custom modules, check out the ones that come in the PowerPack for Beaver Builder from IdeaBox Creations.
Some examples include sliding menus, video galleries, a table of contents, and a countdown timer. If you need more inspiration, check out our list of recommended resources.
For complete instructions on the process of developing your own modules, read our custom module documentation.
5. Custom Actions and Filters
Beaver Builder includes robust support for custom hooks. While the plugin includes a large library of modules, you’re not limited to the default elements and layout options.
Here’s a list of common uses of Beaver Builder filters, with links to the entire list of plugin hooks.
This provides for a lot of flexibility in outputting content or performing custom functions. Some of the available hooks enable you to:
- Add new font families to your site
- Create new widget areas
- Edit the default content layouts
- Incorporate custom fields
The Beaver Builder Theme also includes hooks and filters if you’d like to use it in conjunction with the page builder to craft unique solutions for your clients.
Here are lists of the commonly used actions and filters, with links to the entire list of theme hooks.
6. User Access Controls
Have you ever worked painstakingly on a project for a client and handed it off to them, only to have them break something almost immediately?
Beaver Builder may be able to help you prevent such problems.
User access settings let you limit what other users can access and change. By making a few tweaks to the permissions, you won’t have to worry about anyone fiddling around behind the scenes and accidentally modifying key settings or deleting important content.
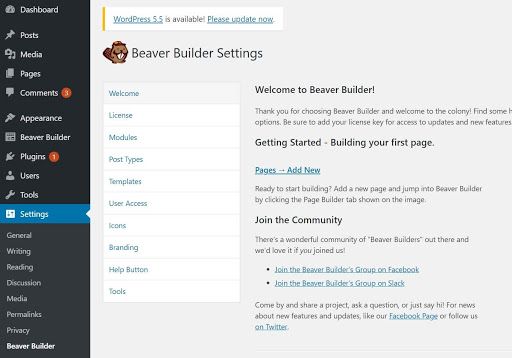
To edit user access settings, navigate to Settings > Beaver Builder > User Access in your WordPress Dashboard:
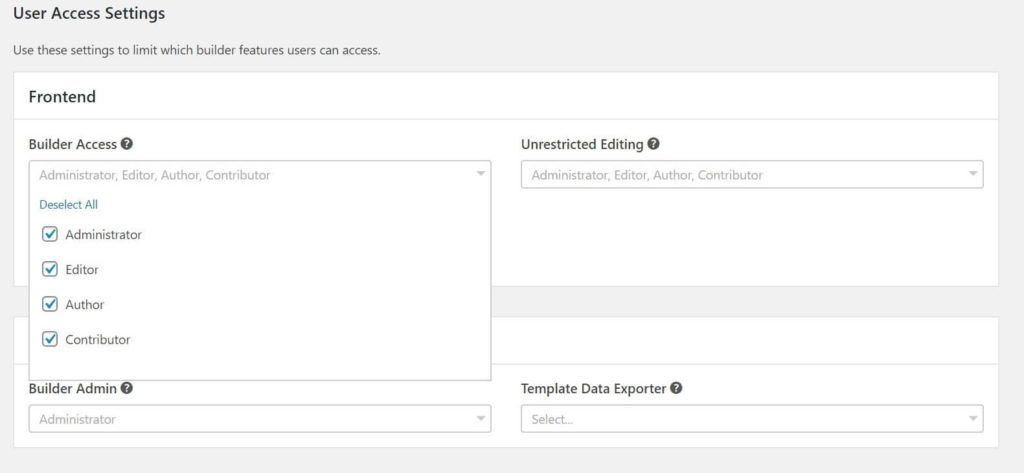
From here, you can specify which WordPress user roles can perform certain actions.
This includes who can access the Beaver Builder editor, who can make unrestricted edits, and who has access to the Beaver Builder menu with saved custom layout templates, rows, columns, and modules.
Each option can be checked or unchecked for each WordPress user role (administrator, editor, contributor, author):
For more information, check out the official user access documentation. If you want to fine-tune user access even further, look into the third-party User Access Extended plugin.
7. Developer Work Saver: Beaver Themer
Although WordPress requires a theme, developers often want a framework theme so they can create their own customizations outside the content area of pages and posts. Beaver Themer is a game-changer for customization, for a number of reasons.
Layout types
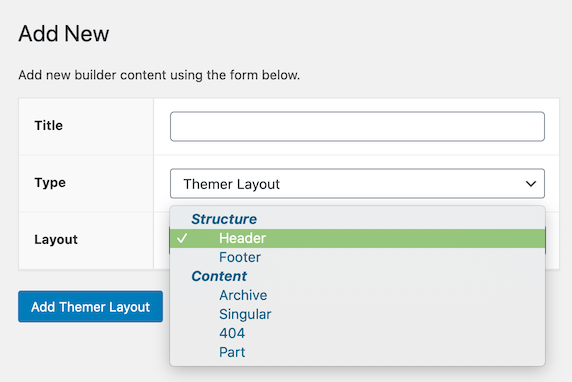
You can create Beaver Builder layouts for portions of the page normally controlled by the theme: headers, footers, archive pages, single posts, 404 pages, and search pages.
Because the layouts are created in Beaver Builder, you get all the advantages described in other sections, such as responsiveness and the ability for your clients to easily make changes to the layouts.
A really handy layout type is the Part. You can create one or more rows of content as a part and insert it into any location on the page offered by a WordPress location hook: page open or page close, before or after the header, before or after the content area, and so on.
Themer Part layouts are perfect for banners that you want to insert on a subset of pages on your site and remove them with one click when they’re no longer relevant.
Here’s an example of a Themer Part used as a banner before the header, which is also a Themer layout:
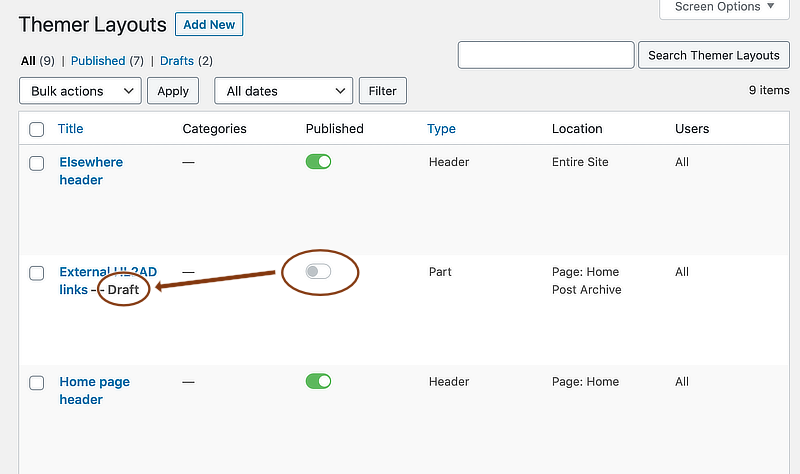
When the event is over, just unpublish the Part in the list of Themer layouts and it will return to Draft state.
As you can see in this screenshot, it’s a one-click toggle to unpublish the layout:
Dynamic content: queries and field connections
Beaver Themer has two mechanisms for dynamically changing the content in the layout depending on where the layout occurs: queries and field connections.
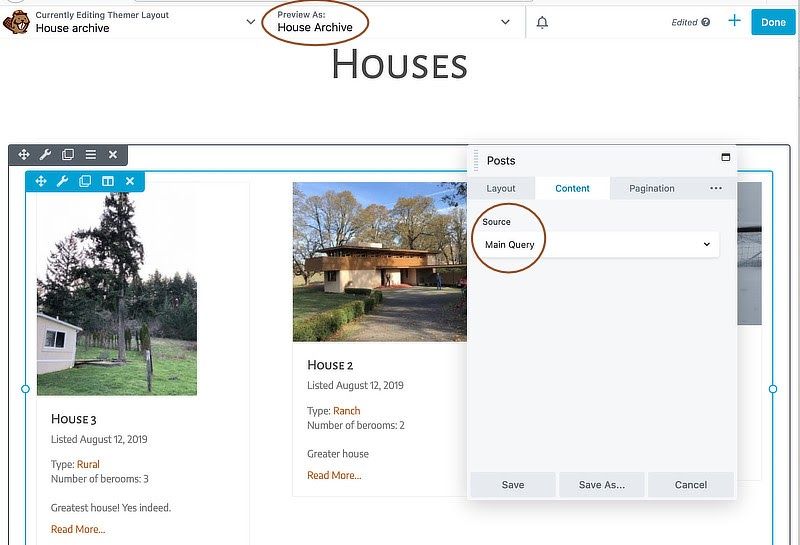
For archives, you can specify whether a Posts module uses a main query or custom query.
For the main query, WordPress uses the standard loop to generate the correct lists of posts depending on the archive location.
Here’s a screenshot example for a custom post type called Houses with a number of custom fields created with the Advanced Custom Fields plugin.
The Themer Archive layout location is set to the Houses archive page, and the main query shows the correct results.
On the other hand, a custom query lets you filter which posts are displayed in various ways. The results won’t change depending on where on your site you display it.
The other mechanism that inserts content based on its location is field connections, which are connections to fields in your site database.
For example, if you’re creating a Heading layout, you can specify a field connection to Site Title, which connects to the WordPress Site Title field in Settings > General.
If the value of that field ever changes, your site automatically updates the content wherever it’s used.
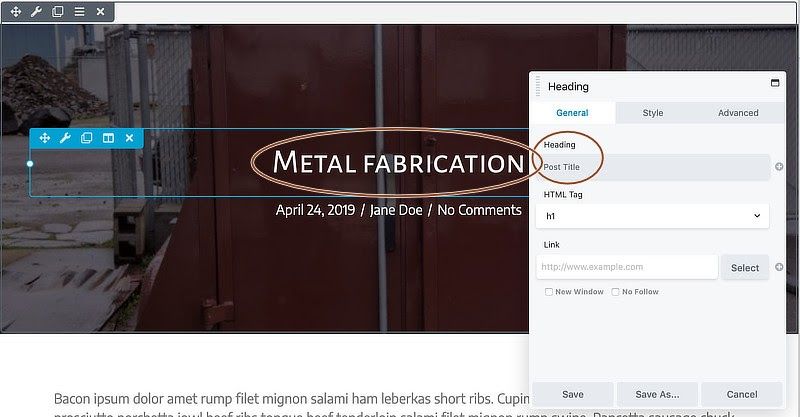
Another example: if you’re building a Singular Theme layout to display single posts, use the Post Title field connection, so the correct post title appears wherever that Themer layout applies.
Here’s an example of a Themer layout for posts with a Post Title field connection. Whichever page you preview in this layout, the page title changes to match the post.
Field connections work for any custom post type. You can use field connections as shortcodes or create conditional shortcodes, which offers the ability to check for certain values in the database before displaying content.
In the previous example of the custom post type, the Posts module has a custom layout that uses field connection shortcodes to grab the correct custom field values for each post.
As long as Beaver Themer is installed, all of these features can be used in regular Beaver Builder layouts as well as Themer layouts, so you also get more versatility with standard Beaver Builder layouts.
Conditional logic
Beaver Themer lets you apply conditional logic to give you extra control over where Themer layouts, rows, columns, or modules appear.
For example, you could display one Themer layout when a visitor has logged in and a different layout otherwise.
There are many conditions to choose from, and like field connections, you can use conditional logic in regular Beaver Builder layouts.
If you need additional help, we also have a collection of Beaver Themer video tutorials that you can reference.
Conclusion
Beaver Builder offers a variety of flexible, powerful tools to make building websites easier. It can significantly improve your efficiency as a developer and even keep clients from accidentally breaking their sites after you hand them off.
In this article, we covered seven of the best Beaver Builder features for web developers, including custom hooks and JavaScript, shortcodes, and even the ability to create your own modules.
No matter your experience level, you’ll be able to craft top-notch sites.
Do you have any questions about using Beaver Builder for development? Ask away in the comments section below!
6 Comments
Related articles
Visual Development with Beaver Builder: Building WordPress Sites That Scale
What’s the secret to building flexible, scalable WordPress sites that adapt to any project? Visual development is changing the way…
Case Study: How One Freelancer Built a Web Design Business with Beaver Builder
Wondering about Beaver Builder for freelancers? Cami MacNamara operates WebCami Site Design, a successful solo web design business in West…
Beaver Builder Keyboard Shortcuts (Double Your Design Speed)
Want to build pages faster in Beaver Builder? You don’t need extra plugins, just your keyboard. These 10 essential Beaver…
Join the community
We're here for you
There's a thriving community of builders and we'd love for you to join us. Come by and show off a project, network, or ask a question.
Since 2014
Build Your Website in Minutes, Not Months
Join Over 1 Million+ Websites Powered By Beaver Builder.
 Beaver Builder




Beaver Builder and Beaver Themer are great products. I can’t recommend them highly enough.
Beaver Builder and Beaver Themer are great products. I can’t recommend them highly enough.
I hope BB core supports CSS Grids and Flexbox in the near future. I didn’t see anything on the product roadmap.
PS – Tabbing from the comment field takes you to the footer and not the name field🤓
I always tell people to stay away from Squarespace, wix, weebly whatever for all of the reasons listed above. It doesn’t make sense to use something like that when BB allows for so much customization. I love it.
The biggest setback for me is it’s 2021 and we are limited to 3 breakpoints and no support for vh units. Our websites look like garbage on iMacs and 1900px displays.
For example, Webflow supports a 4th breakpoint. XLarge and support for vh and vw units. That’s what Beaver Builder needs to do to be viable.
Hi Stu, Thank you so much for feedback. Good news! An additional breakpoint is on the roadmap and should be available for testing in the very near future.