
How to Set Up Beaver Builder AI Chat: Install, Connect, and Start Building
 -
August 18, 2026
-
August 18, 2026
Wondering how to set up Beaver Builder AI? In a previous article, we introduced three ways to build with Beaver Builder AI: Beaver Builder AI Chat vs MCP Connection vs Design Kits.
Each one fits a different workflow. In this article, you’ll set up the built-in chat. By the end, you’ll have the plugin installed, your API key connected, and everything you need to generate your first layout.
Want to try Beaver Builder AI? Jump into our new AI demo and start building right away. No installation required. Try Beaver Builder AI →
What You Need Before You Start
- Beaver Builder AI plugin
- An API key from an AI provider
- Beaver Builder page builder plugin
Step 1: Install the Beaver Builder AI Plugin
Beaver Builder AI is a separate plugin from the Beaver Builder page builder plugin. You will need to install it alongside Beaver Builder v2.11+ to build and edit layouts with Beaver Builder’s visual editor, or you can use Beaver Builder AI on its own with the WordPress Block Editor.
Current Beaver Builder customers with a Plus, Professional, or Unlimited plan, including Legacy Plans, can download the Beaver Builder AI plugin from your My Account page.
New to Beaver Builder or ready to upgrade? Get Beaver Builder AI →
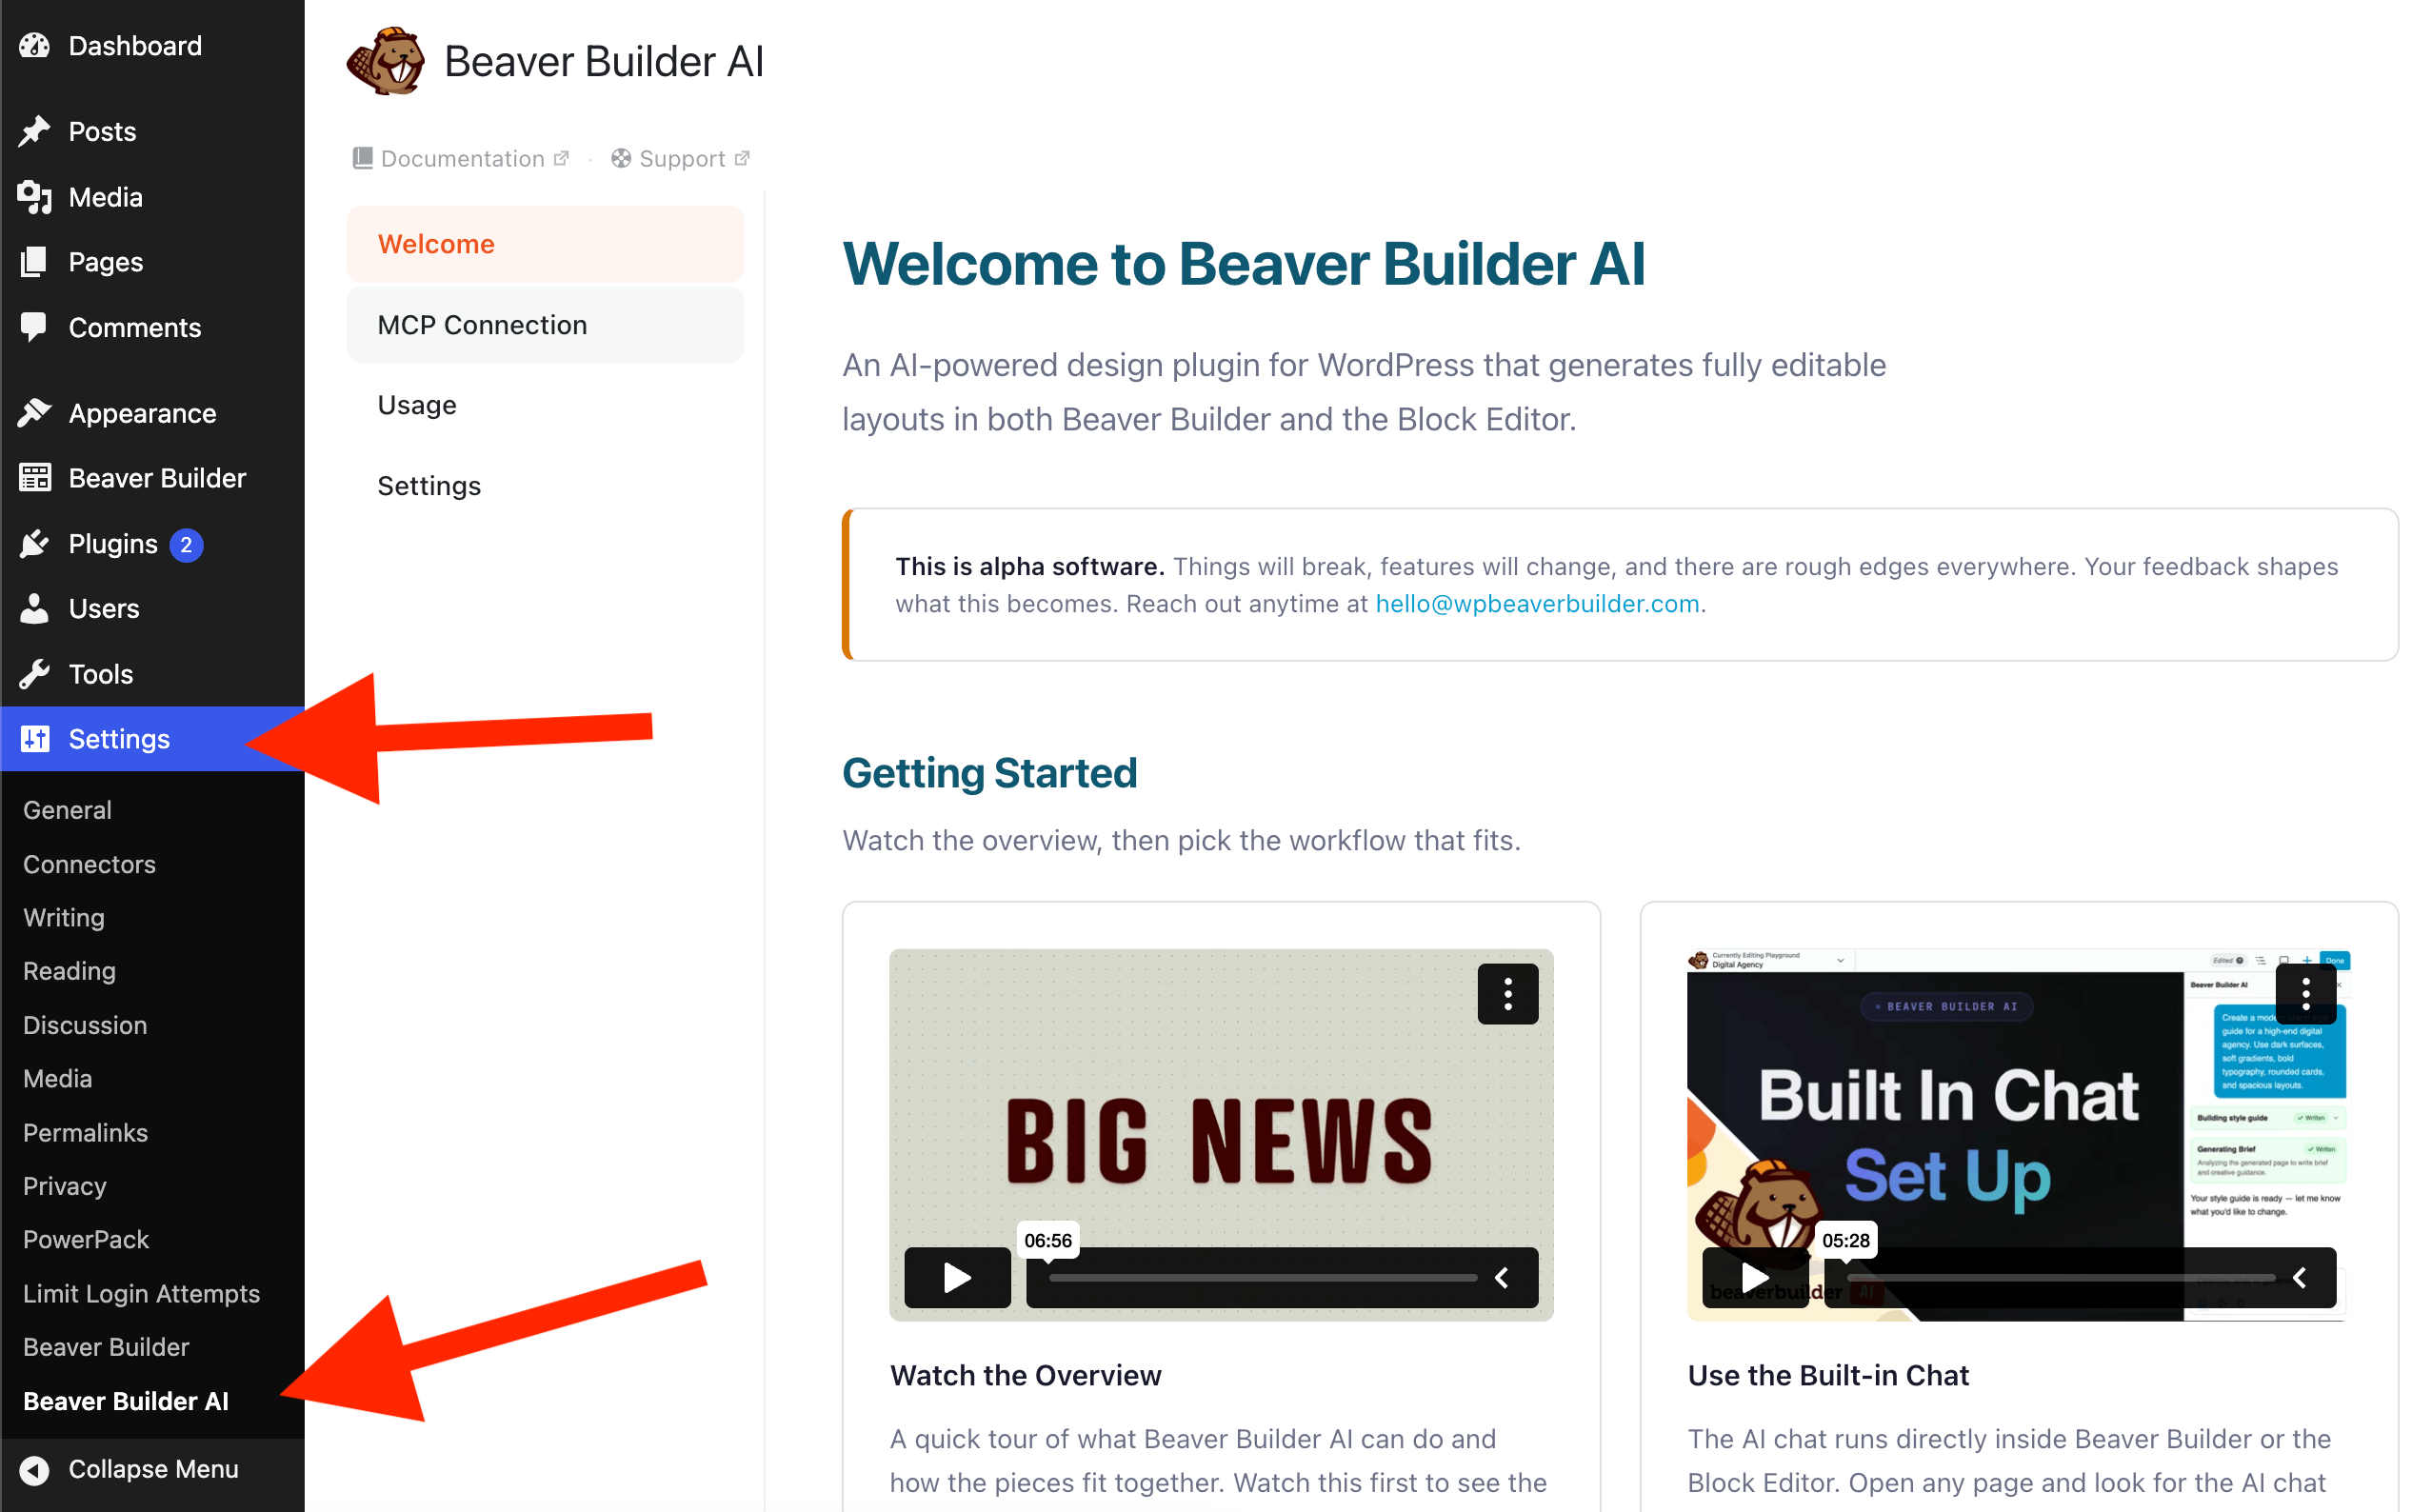
After activation, you’ll see a new Beaver Builder AI menu item in the WordPress admin sidebar under the Settings tab. From there, you’ll complete the rest of the setup process:
Step 2: Connect Your AI Provider
Beaver Builder AI uses your own AI provider to generate page layouts. You connect your Anthropic (Claude), OpenAI (ChatGPT), or OpenRouter key and pay the provider directly for usage.
You can configure one or more AI providers and switch between them per conversation. Once a conversation starts, its provider is locked until the chat is deleted.
Get your API key
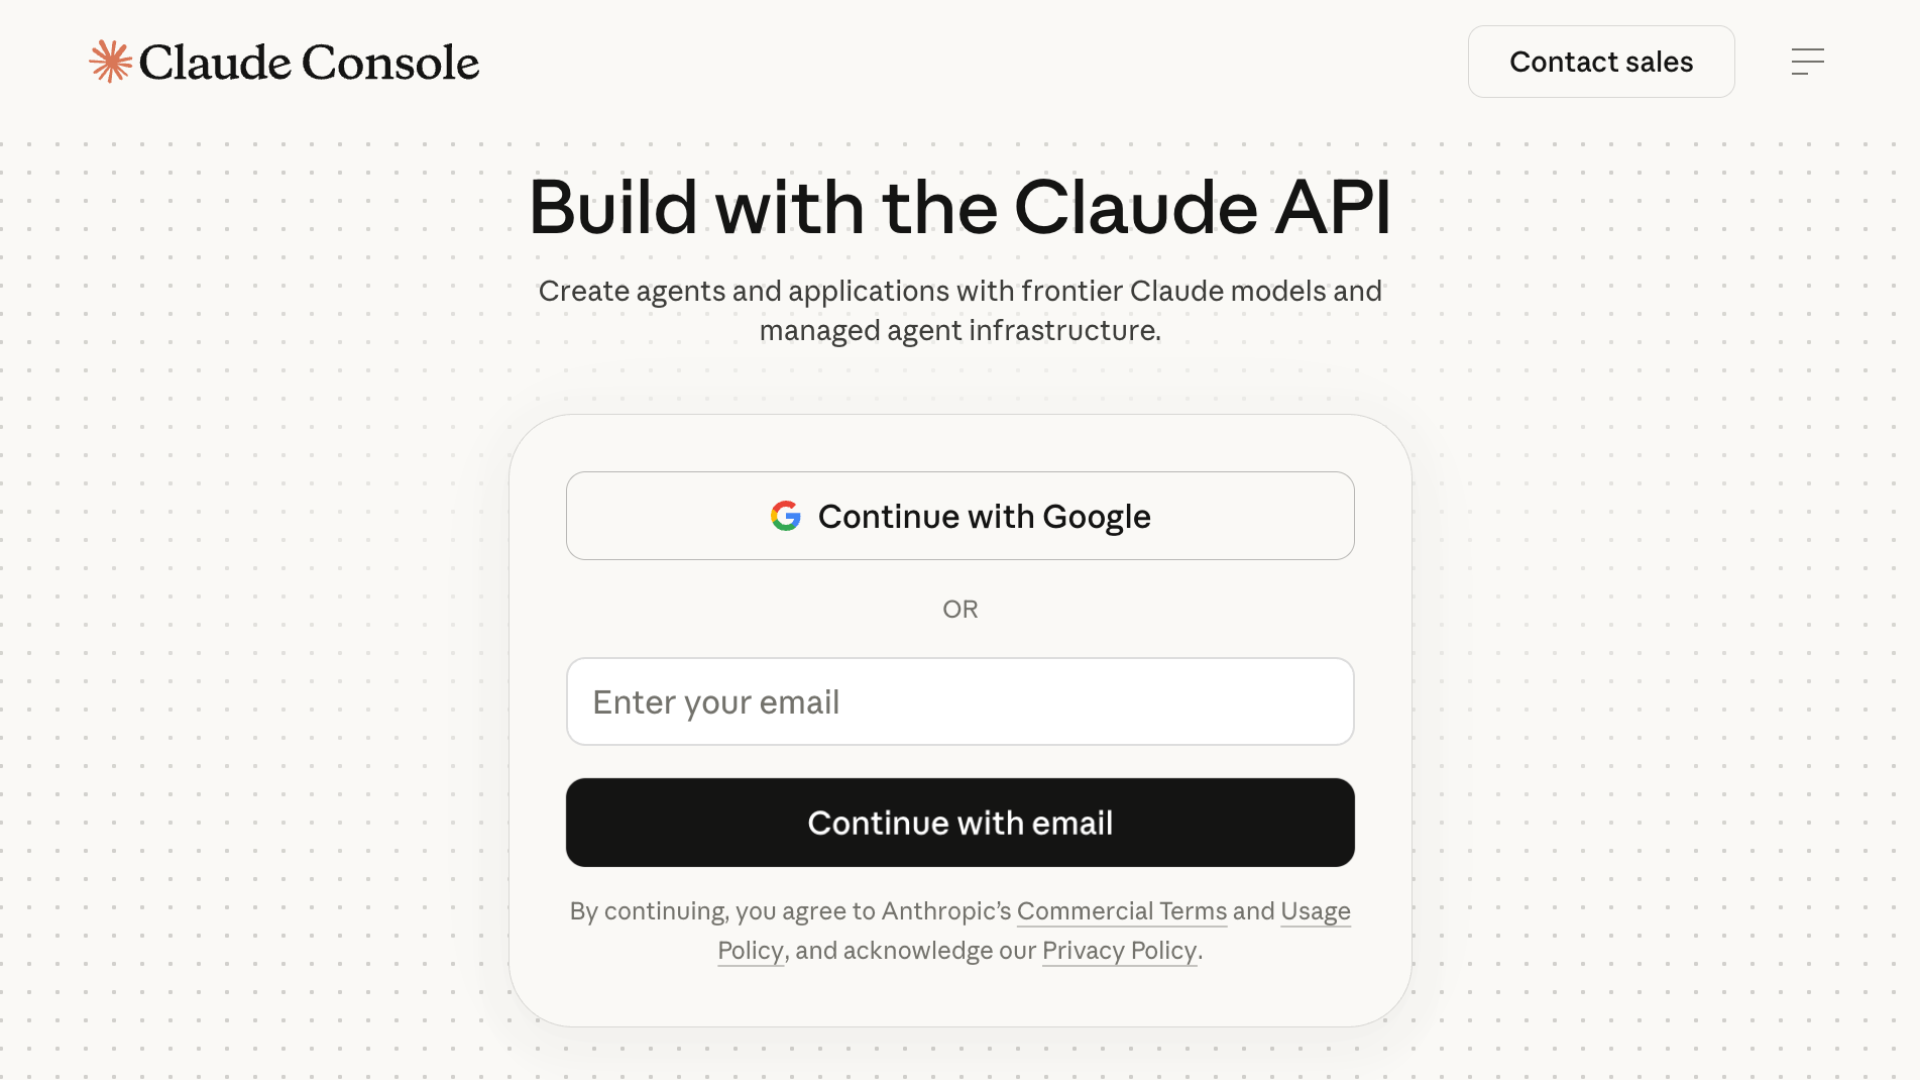
In this guide, we’ll walk through the setup using an Anthropic API key. Go to console.anthropic.com and sign in or create a free account:
Navigate to API Keys in the left sidebar:
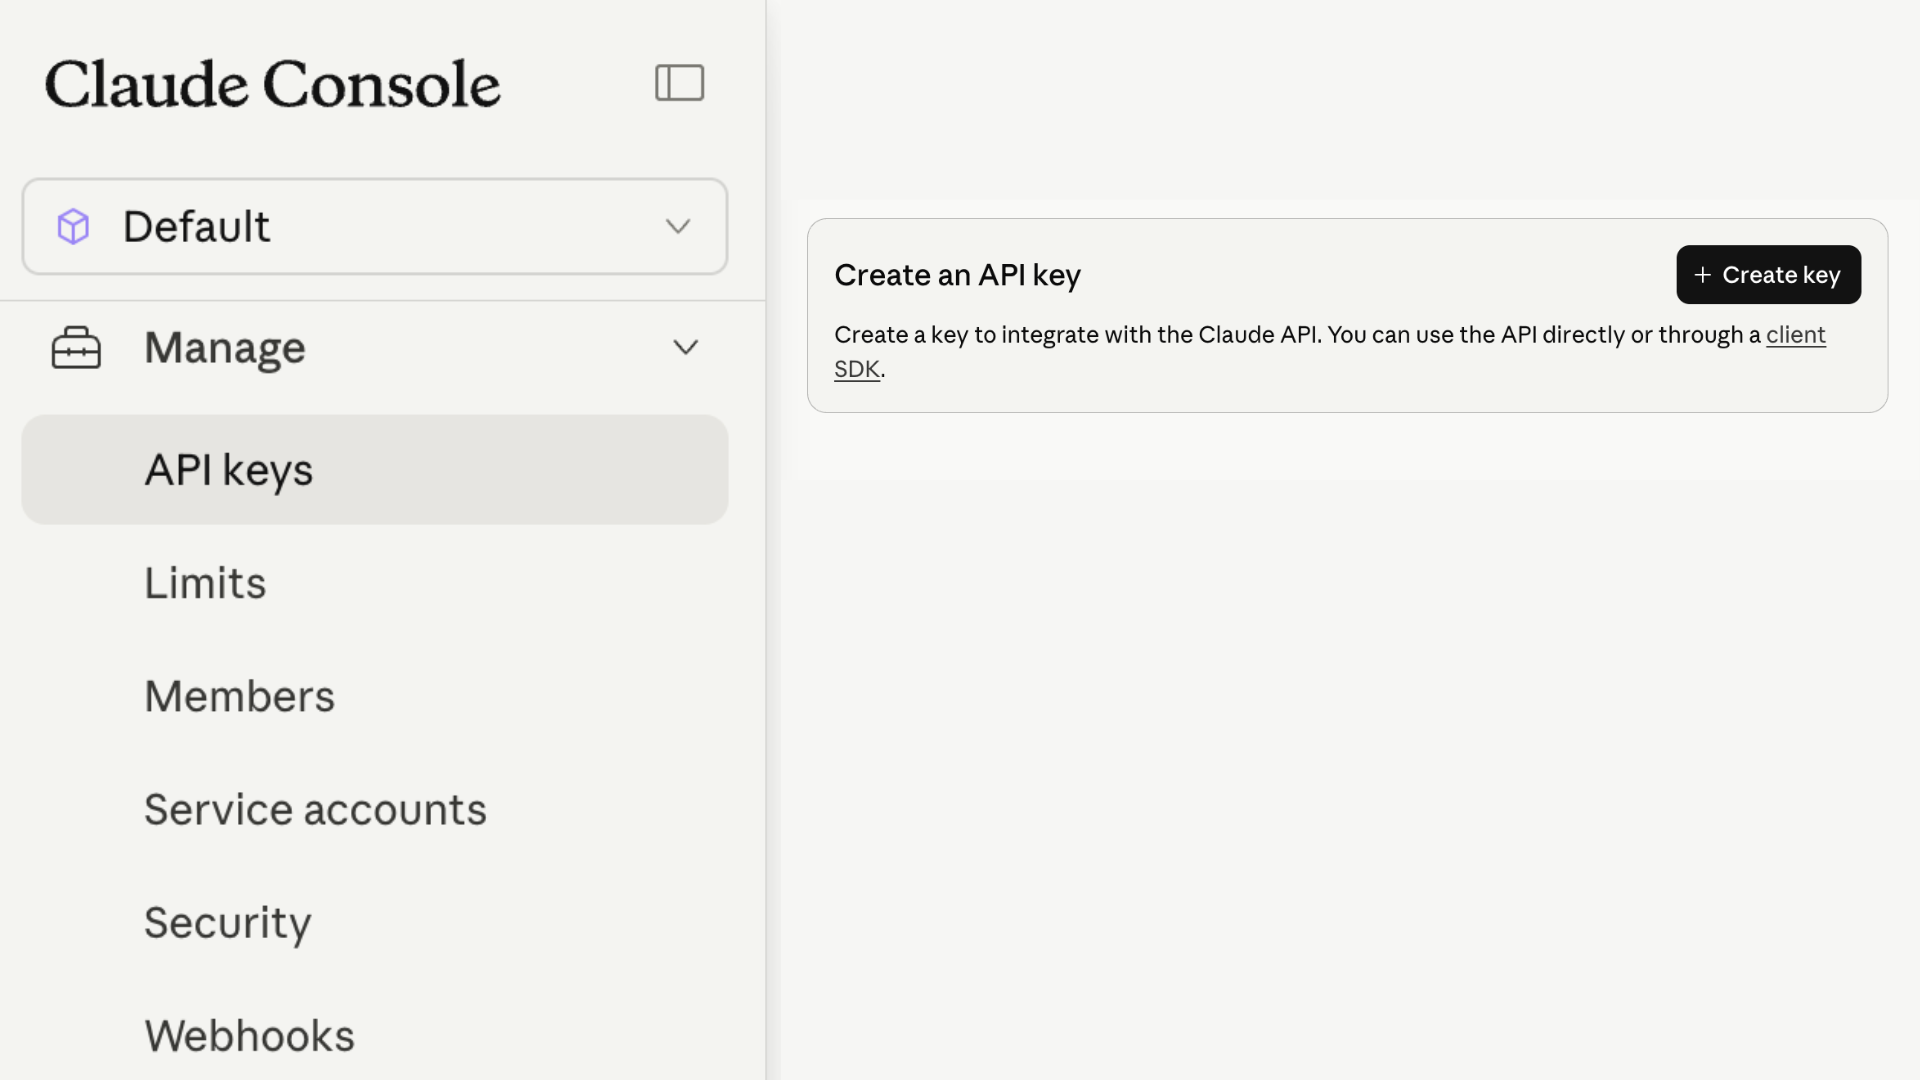
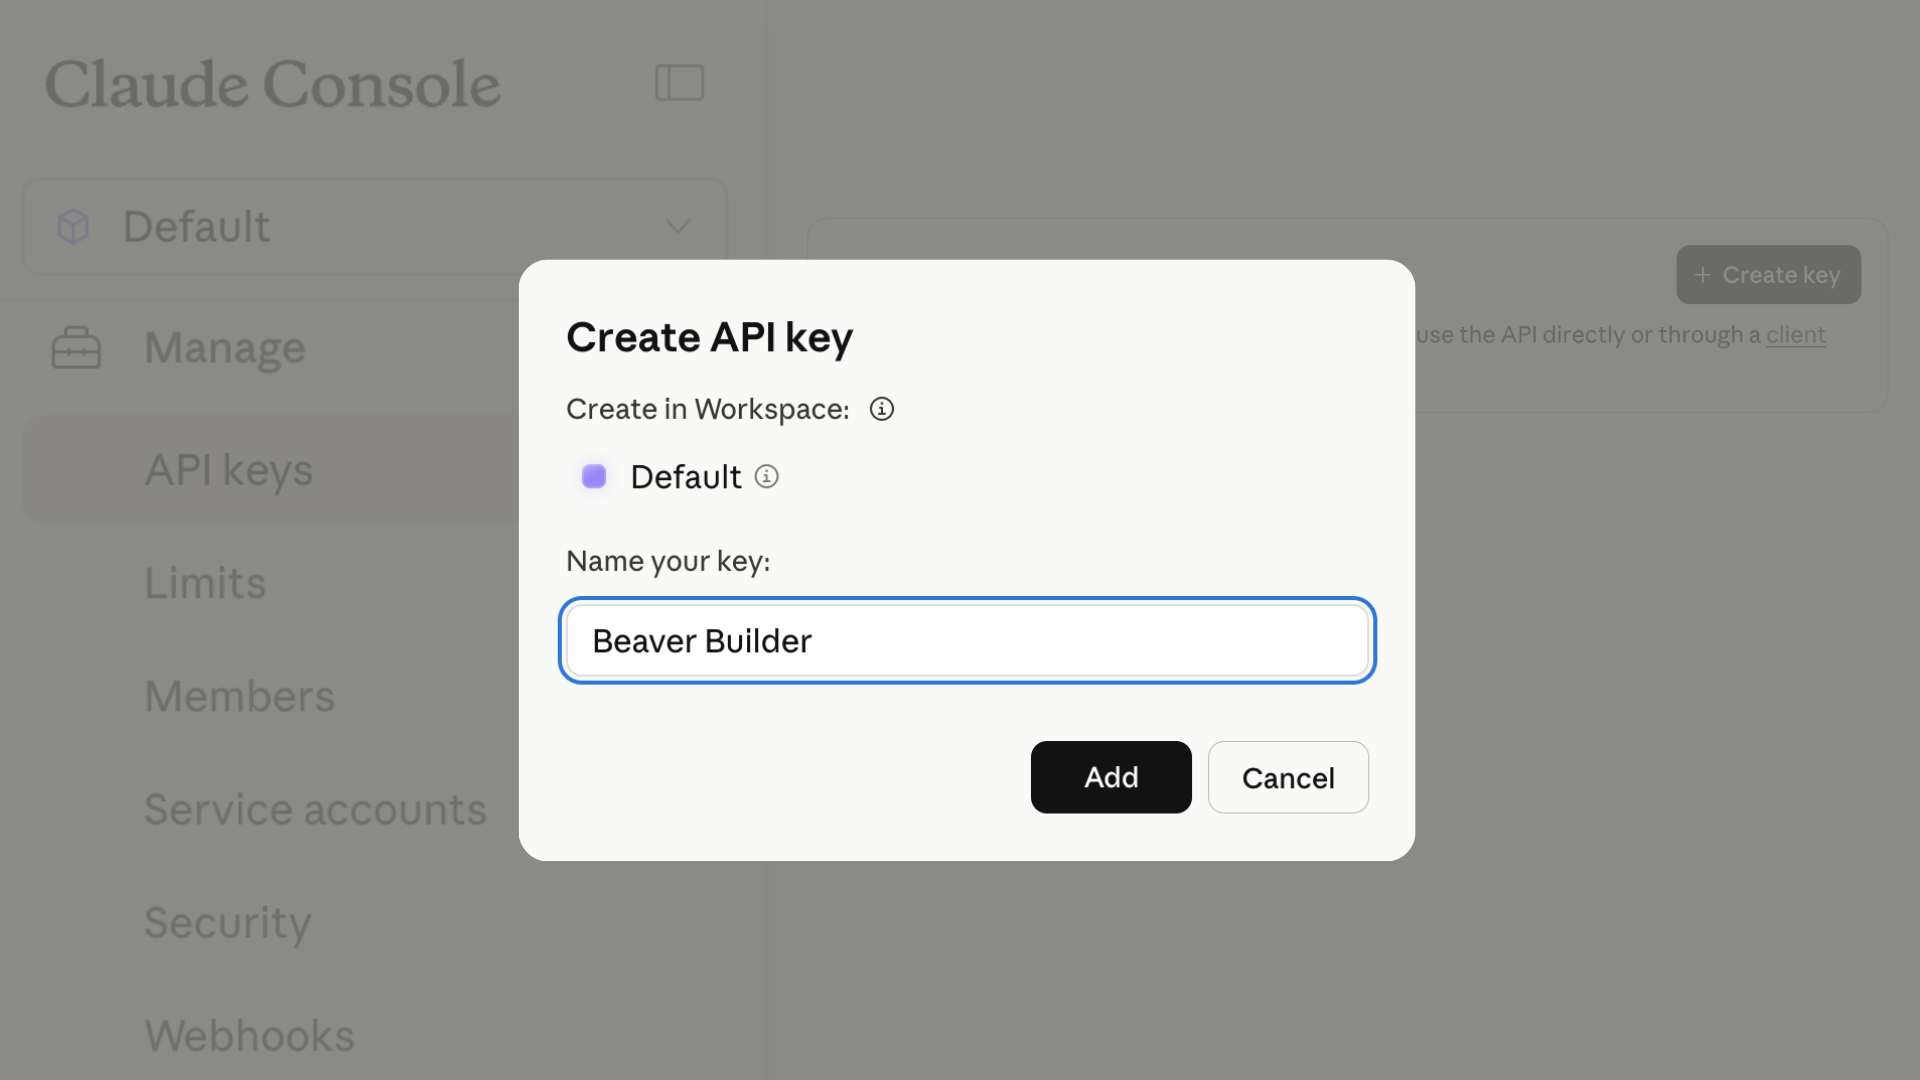
Click Create Key, give it a name, then click Add and copy the key:
Add the API key to WordPress
Now head back to your WordPress site to finish set up.
Go to Settings → Beaver Builder AI → Settings:
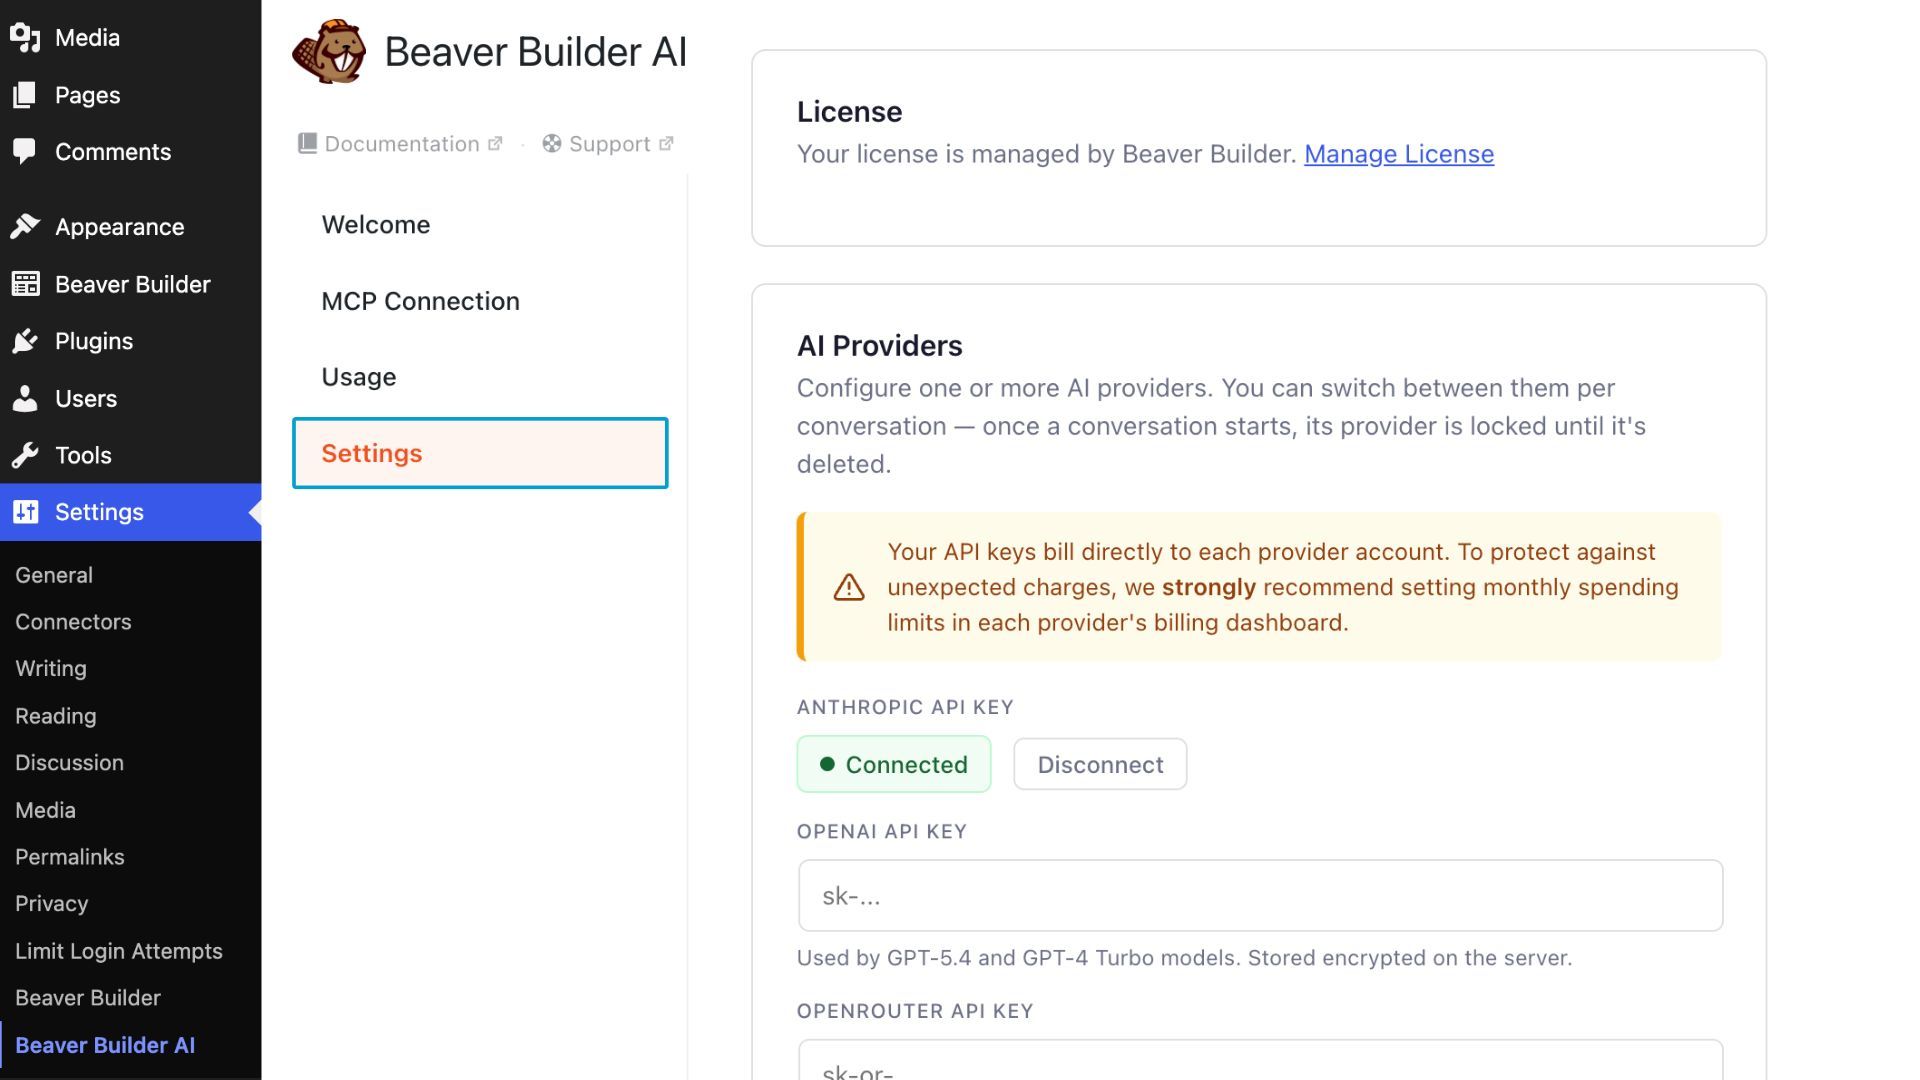
Paste your key into the API Key field. Click Save Settings.
The chat is now connected to Claude and ready to generate layouts.
Step 3: Active AI Provider
Choose which provider new conversations should use. Then select the preferred model for that provider from the dropdown menu:
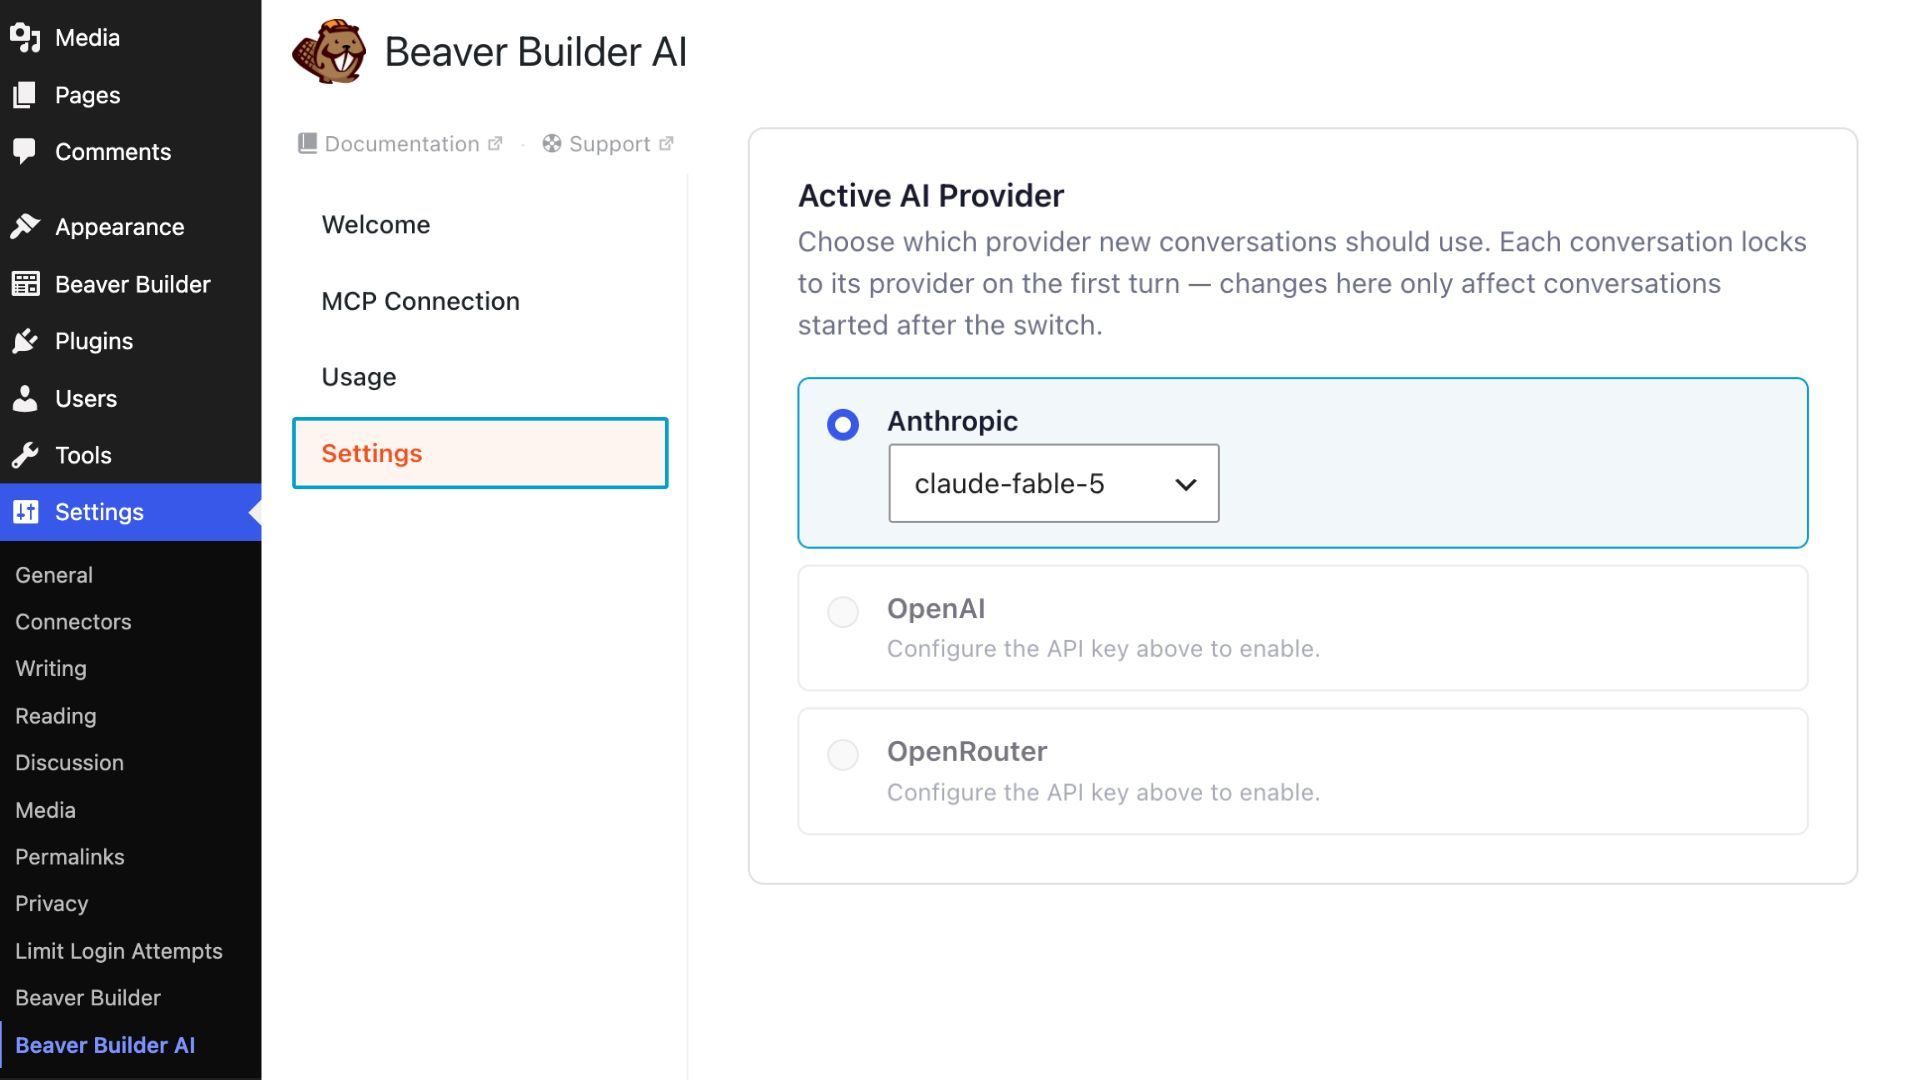
Each conversation locks to its provider on the first turn. Changes here only affect conversations started after the switch.
Step 4: Set Up Unsplash (Optional)
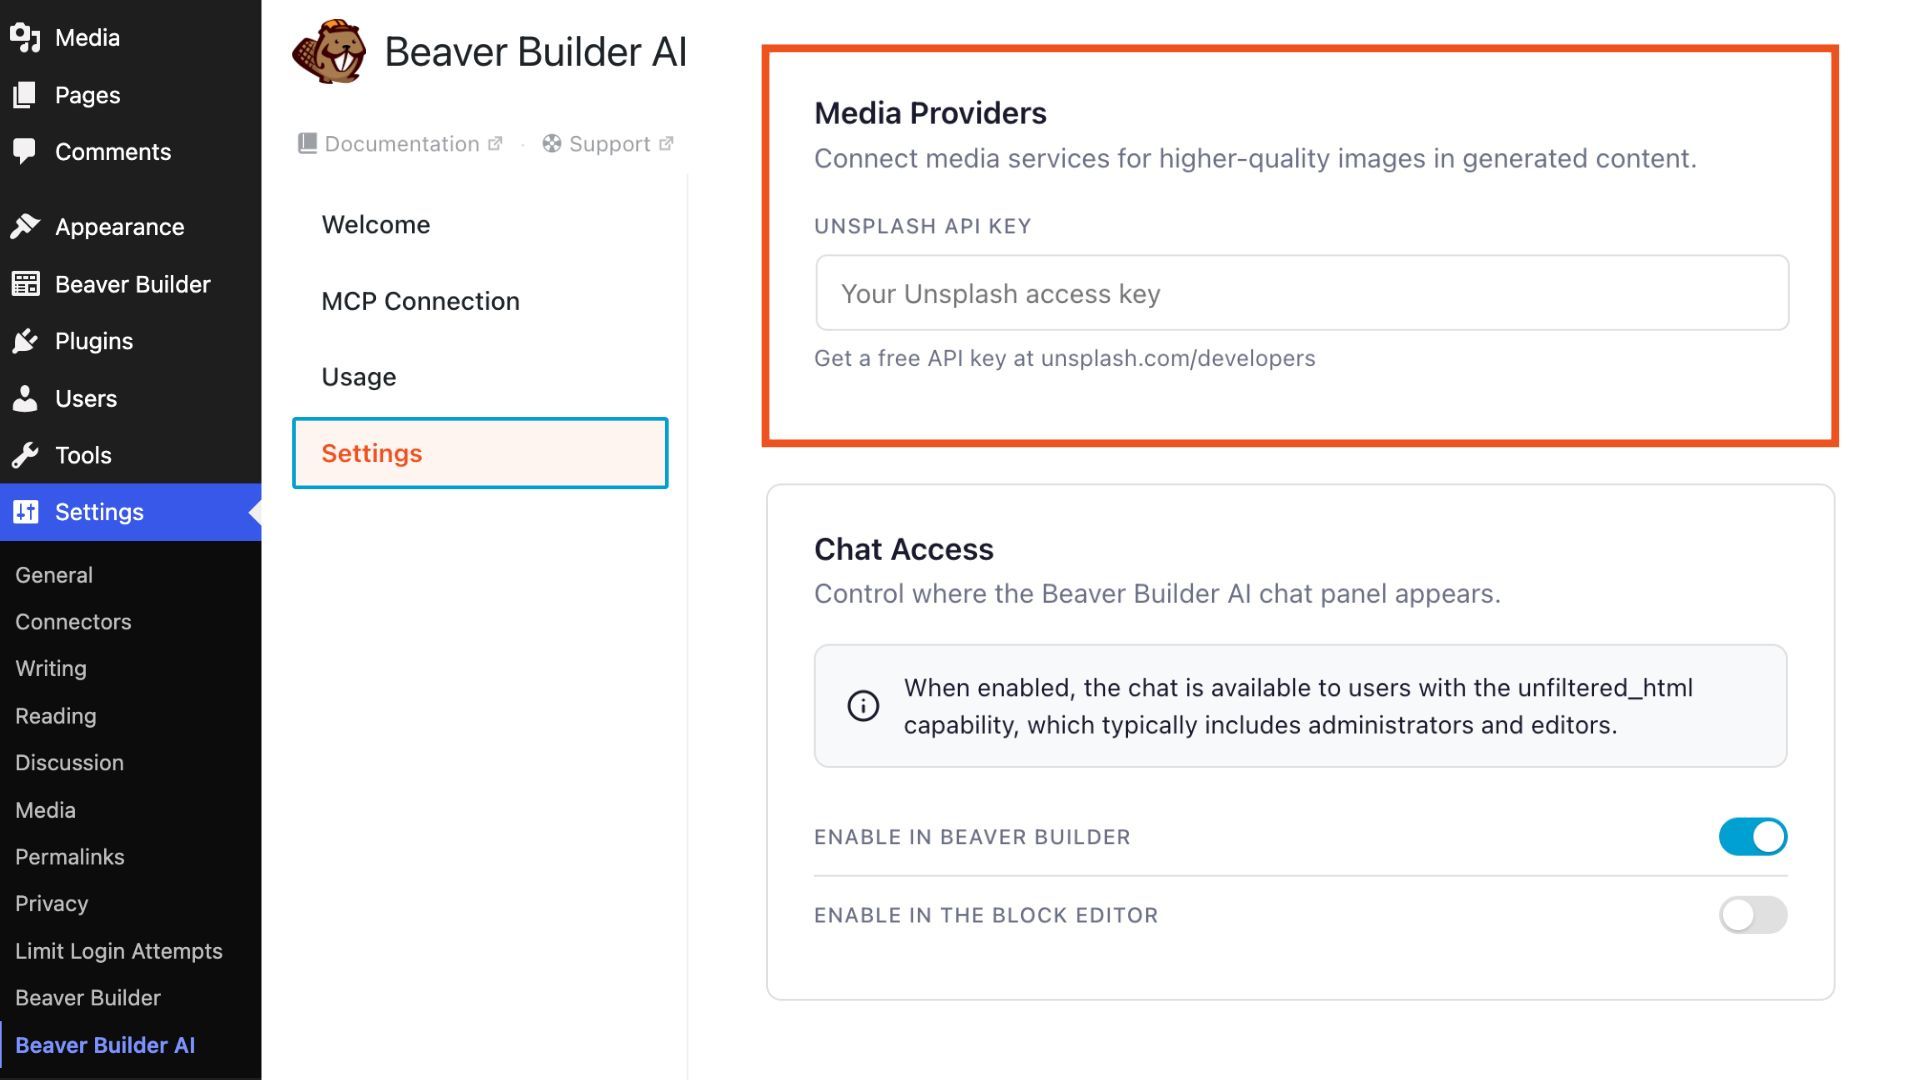
Without this step, Beaver Builder AI uses placeholder images in generated layouts. Connect Unsplash and it automatically pulls in real, contextually relevant photos instead:
Get a Free Unsplash API key
- Go to unsplash.com/developers and sign in or create an account.
- Click Your Apps → New Application.
- Accept the API terms, name your app, and submit.
- Copy your Access Key from the app dashboard.
- Paste your Unsplash Access Key into the Unsplash API Key field.
- Click Save Settings.
From here on, every generated layout includes real photos from Unsplash. You can swap any image after generation if you want something more specific.
Step 5: Enable Chat Access
Beaver Builder AI chat can be enabled in the editors where you want to use it. Enable Beaver Builder and/or the Block Editor depending on your preferred workflow:
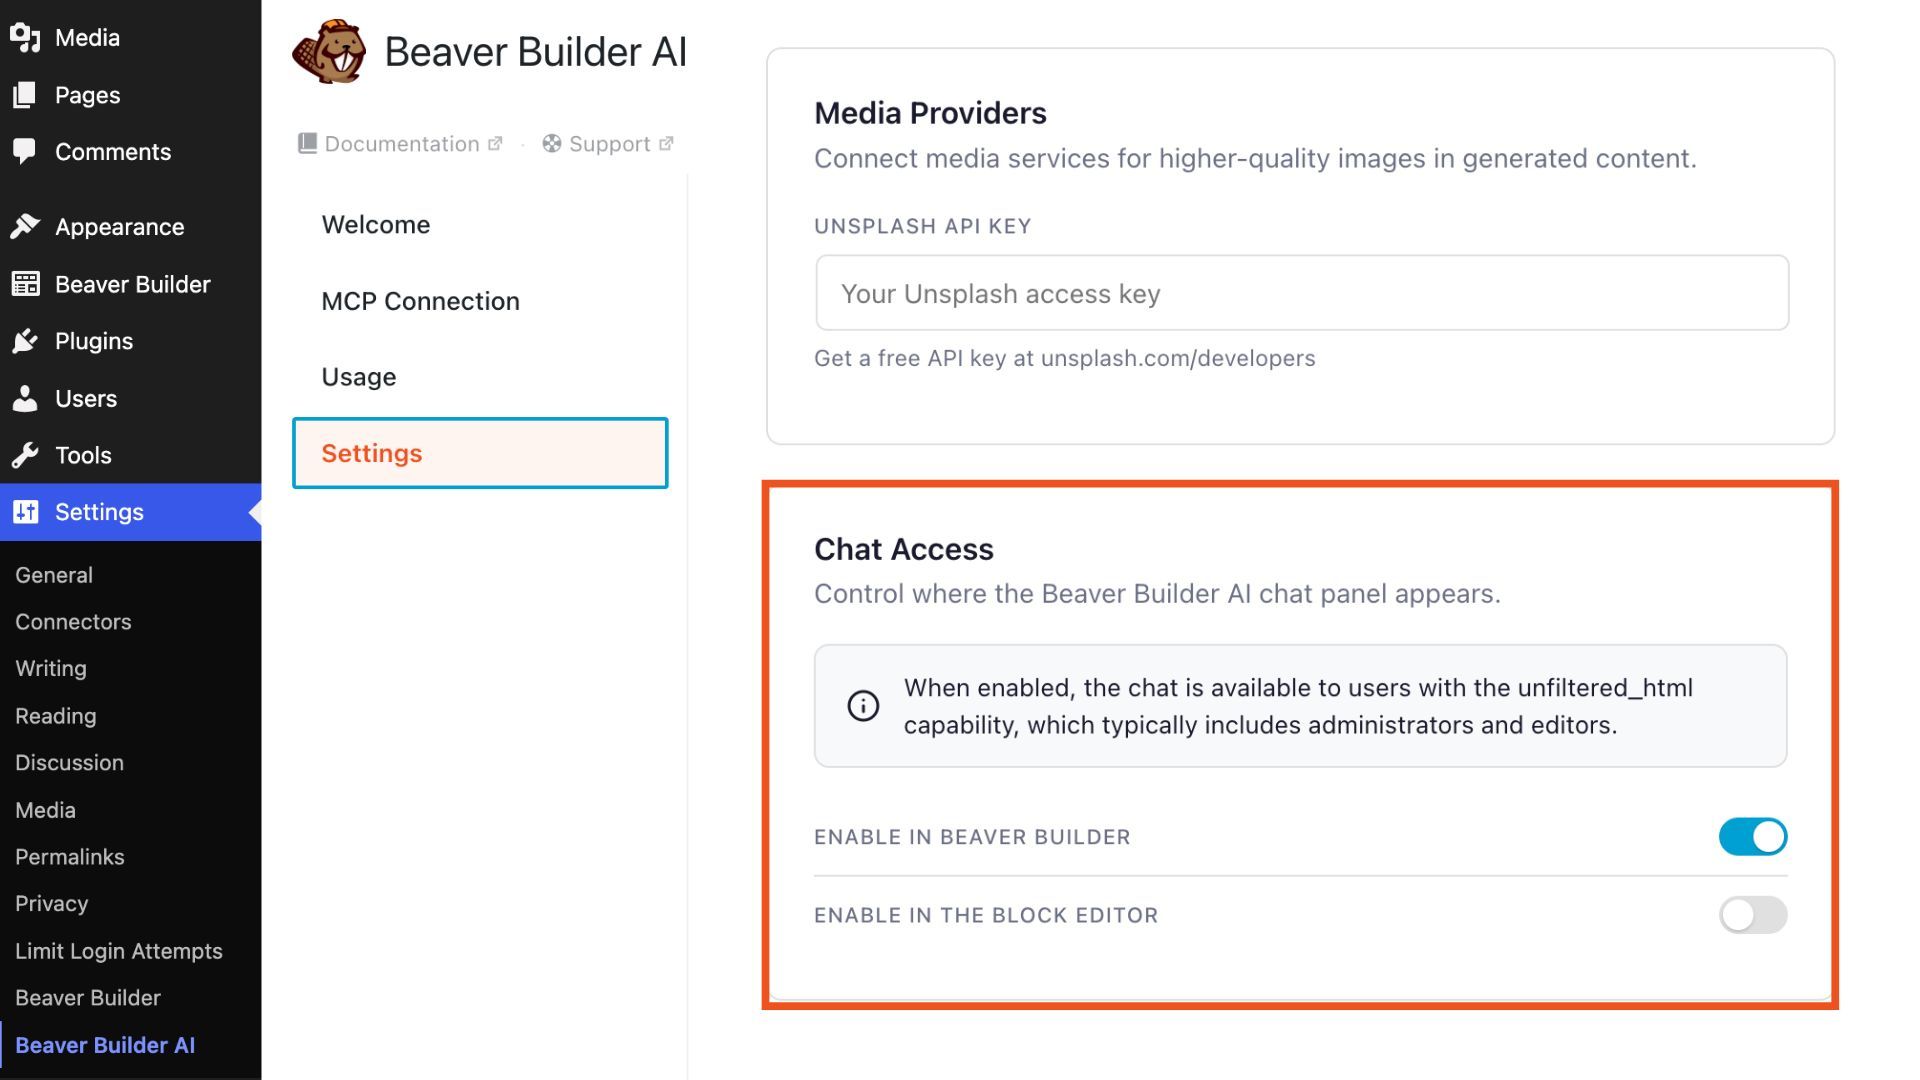
For client sites or agency workflows, review these permissions to make sure AI access is available only to the users who should be able to generate and modify content.
You’re Ready to Build
That’s everything you need to start using the built-in chat. Open any page in Beaver Builder or the Block Editor and click the chat icon in the top navigation to open the AI chat panel:
From here, you can use the chat to generate a new layout, add sections to an existing page, or make changes to content and design. Start with a simple description of what you want to build, then refine the result with follow-up prompts until you have a layout that fits your project.
Beaver Builder AI Resources
For more information on getting started, check out these resources:
- Beaver Builder AI Demo Site: Try Beaver Builder AI →
- Beaver Builder AI Course: Start the Course →
- Beaver Builder AI Documentation: Explore the Docs →

Start here

Beaver Builder AI Demo
Build a page with AI on a site that already has Beaver Builder and Beaver Themer installed. Free AI credits included.
Our Newsletter
Our newsletter is personally written and sent out about once a month. It's not the least bit annoying or spammy.
We promise.
Try Beaver Builder Today
Related articles
How to Build an Editable WordPress Header and Footer With AI
-
October 2, 2026
Headers and footers are among the most repetitive parts of building a WordPress website. AI can speed up the process,…
How to Convert a ChatGPT Site to WordPress (Beaver Builder AI)
 -
October 1, 2026
-
October 1, 2026
Hey everyone! If you’ve built a website design in ChatGPT, you’ve probably wondered how to get your ChatGPT site to…
Beaver Builder AI MCP Settings: Layout Mode and Layout Structure Explained
-
September 23, 2026
Beaver Builder AI has two MCP settings that shape AI-built pages. MCP Layout Mode controls what AI builds with: Native…
Join the community
We're here for you
There's a thriving community of builders and we'd love for you to join us. Come by and show off a project, network, or ask a question.


Since 2014
Ready to build?
The WordPress page builder agencies and freelancers have trusted since 2014. Now with AI.