
By default, WordPress has built-in tools for exporting and importing your entire website or just your posts and pages. Fortunately, this process just got a lot easier. With Assistant Pro, you can save any WordPress page to an Assistant Pro Library and easily transfer it to another website.
Exporting and importing pages in WordPress allows you to migrate and reuse your content on another website. You can do this in 3 steps using Assistant Pro:
- Install the Assistant plugin and connect to Assistant Pro.
- Save the pages you want to export to the Assistant Pro Cloud Library.
- Import the pages into a second WordPress site.
In this post, we’ll discuss why you might want to export or import your website’s pages. Then, we’ll show you how to do this with Assistant Pro. Let’s get started!
Why You Might Want to Export or Import Your WordPress Pages
If you work with WordPress websites, you may need to export and import pages at some point. WordPress includes built-in functionality for transferring all of your site’s content simultaneously. However, the Content Management System (CMS) doesn’t make it easy to do this for specific pages.
You can create WordPress export files (in .xml format) that include posts, pages, and/or tags. WordPress offers an Import option in the dashboard that can take an .xml file and recreate that content on a different website:
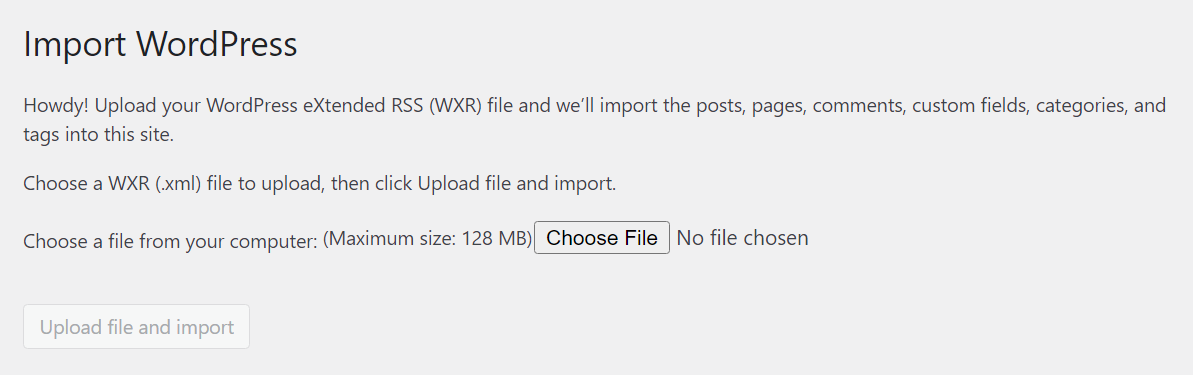
It’s also worth noting that exporting content using .xml files doesn’t download images and other media on your site. WordPress can import these files from the original website using its importing tool.
However, this process commonly causes errors because most modern websites use hundreds or even thousands of images. Plus, the basic WordPress import tool is pretty rudimentary, and it can’t handle your site’s design and settings.
With that in mind, the base WordPress export and import features can be helpful if you want to migrate a website’s content to a new host. They can also help you back up an entire site.
However, in some cases, you’ll want to export and import specific pages such as:
- Moving content from one website to another
- Creating partial site backups
- Recreating a page’s design on another website
- Working on specific page redesigns for a client
- Creating baseline designs and wireframes for starter content
Migrating an entire website or importing all its content is overkill for any of these situations. If you only want to import one or a handful of pages, you’ll need to use a more specialized plugin. This is where Assistant Pro comes in!
How to Export and Import Pages in WordPress (In 3 Steps)
If you’ve ever exported and imported web pages into WordPress before, you may have wondered if there is an easier way. Fortunately, Assistant Pro makes it easy to export and import pages into WordPress. Once you’ve saved your pages to an Assistant Pro Cloud Library, you’ll be able to import the content directly into a second WordPress website.
Step 1: Install the Assistant Plugin and Connect to Assistant Pro
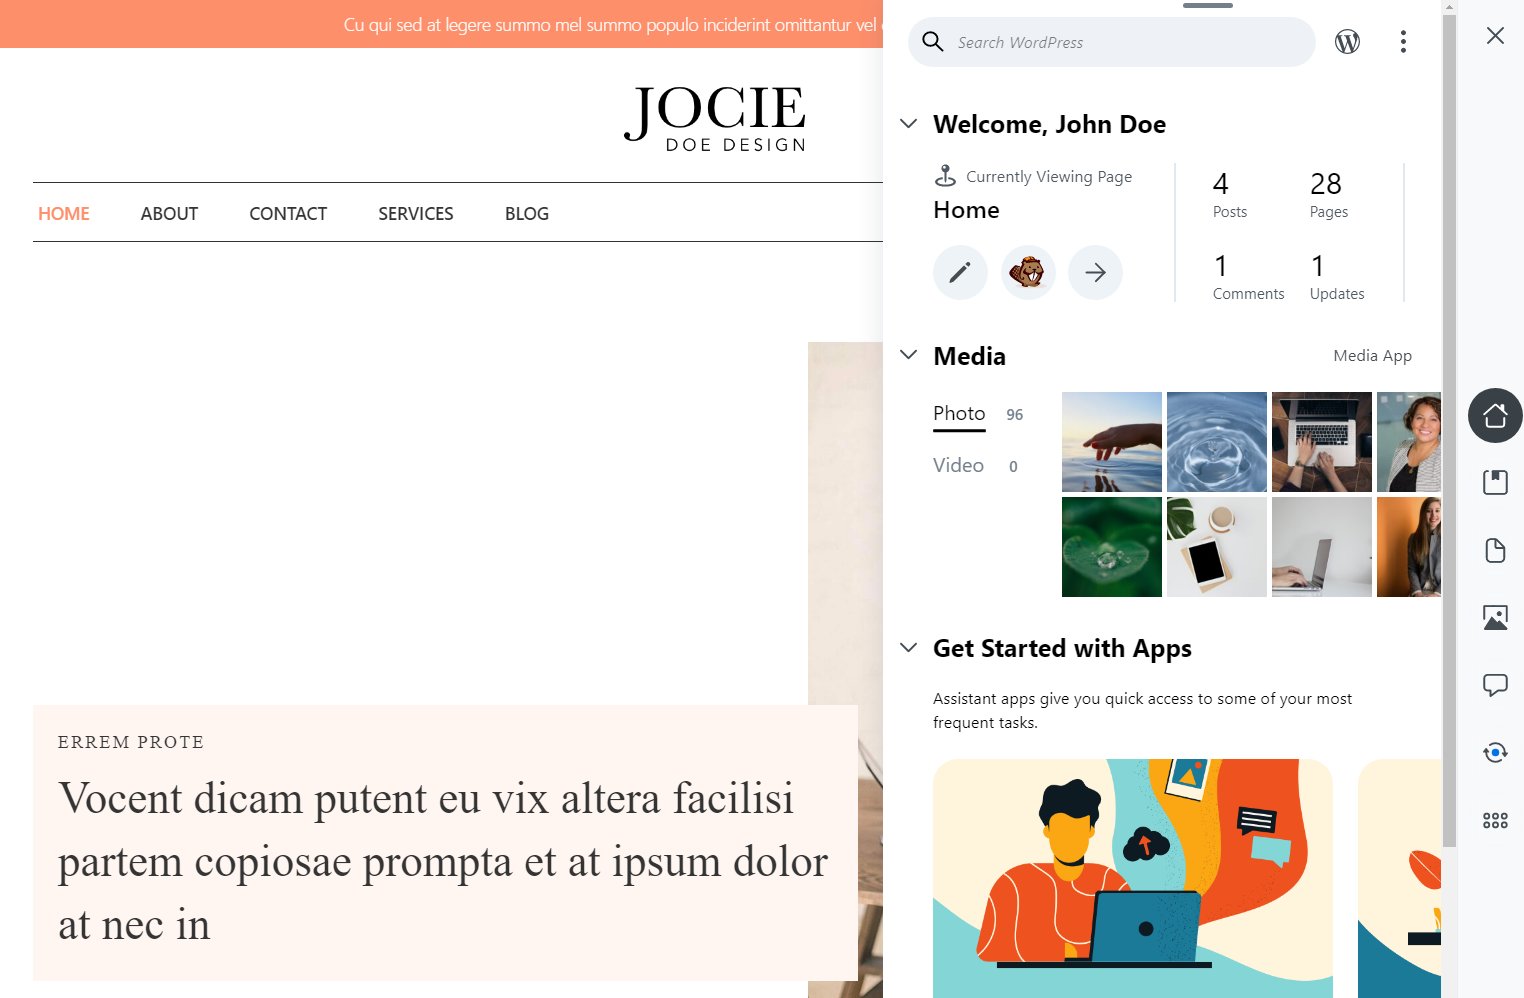
The free version of the Assistant plugin includes several powerful features, such as tools for uploading media files and replying to comments. You will also get access to the user-friendly Assistant UI when navigating your website’s front end:
With Assistant, it becomes easier to manage your WordPress website without jumping into the dashboard every five minutes. Assistant Pro includes a Libraries feature, which enables you to save pages, posts, and layouts to the cloud and import them into other sites.
To use this feature, you’ll need a free Assistant Pro account, which gives you access to public Libraries. Premium plans offer additional settings and the option to use private and team Libraries. These could be perfect if you share assets between websites or work as part of a design team:
To get started, install and activate the Assistant plugin on the original WordPress website. Navigate to your website’s front end and locate the Assistant button in the top-right corner of any page. Click on it, and you’ll get access to the Assistant UI:
Select the Libraries option under the Home icon in the right-side menu. The plugin will prompt you to connect to Pro or create an Assistant Pro account if you don’t have one yet:
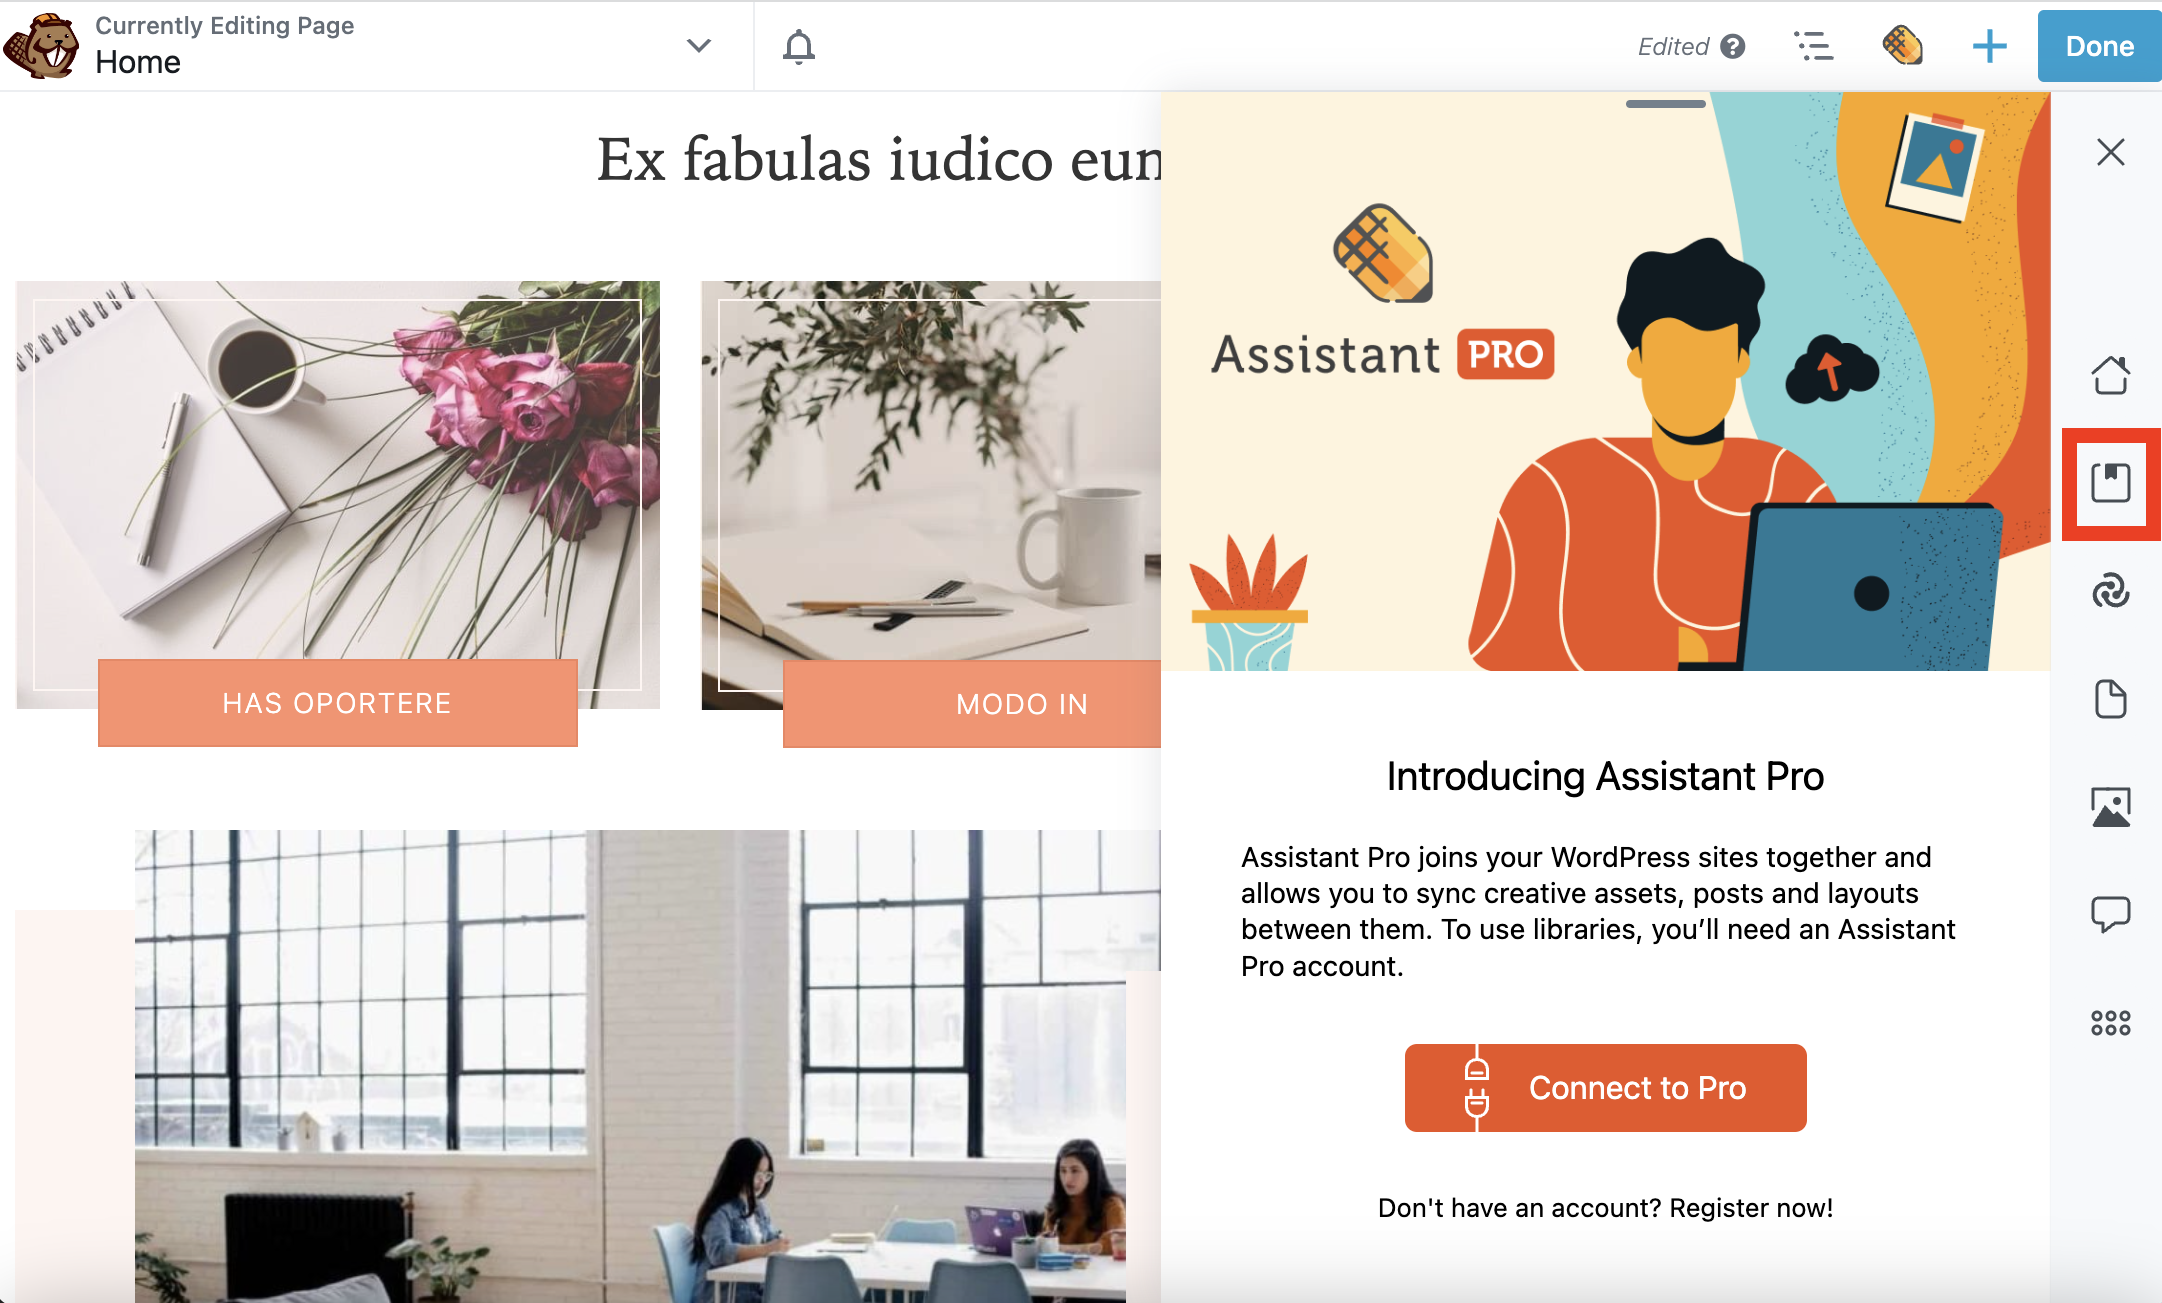
The signup process doesn’t require payment, and you’ll start with a free account. Once you’ve registered, you’ll get access to the Assistant dashboard.
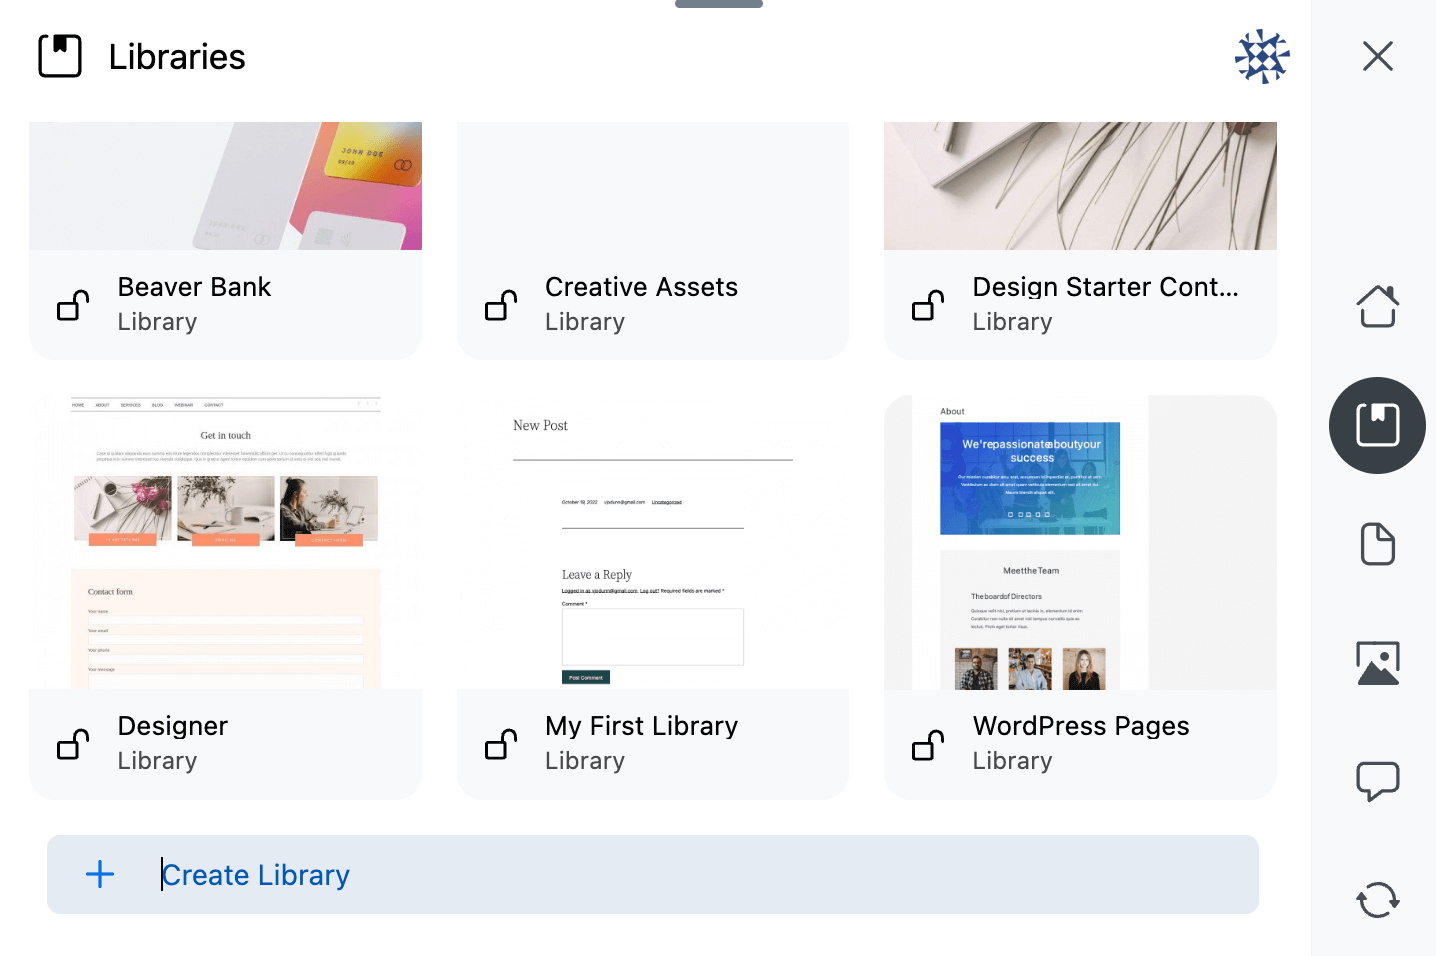
Here, you’ll be able to access assets from websites that you’ve connected to Assistant Pro, as well as your Libraries:
Now Assistant Pro is successfully connected to WordPress! If you want to learn more, you can visit the support documentation or watch our Assistant Pro Video Course. In the following sections, we’ll return to WordPress and show how the Libraries function works.
Step 2: Save Pages to an Assistant Pro Library
In Assistant Pro, you can save design assets like website pages into Libraries. These Libraries will help you organize content, share it with your design team, and even upload it to other WordPress sites.
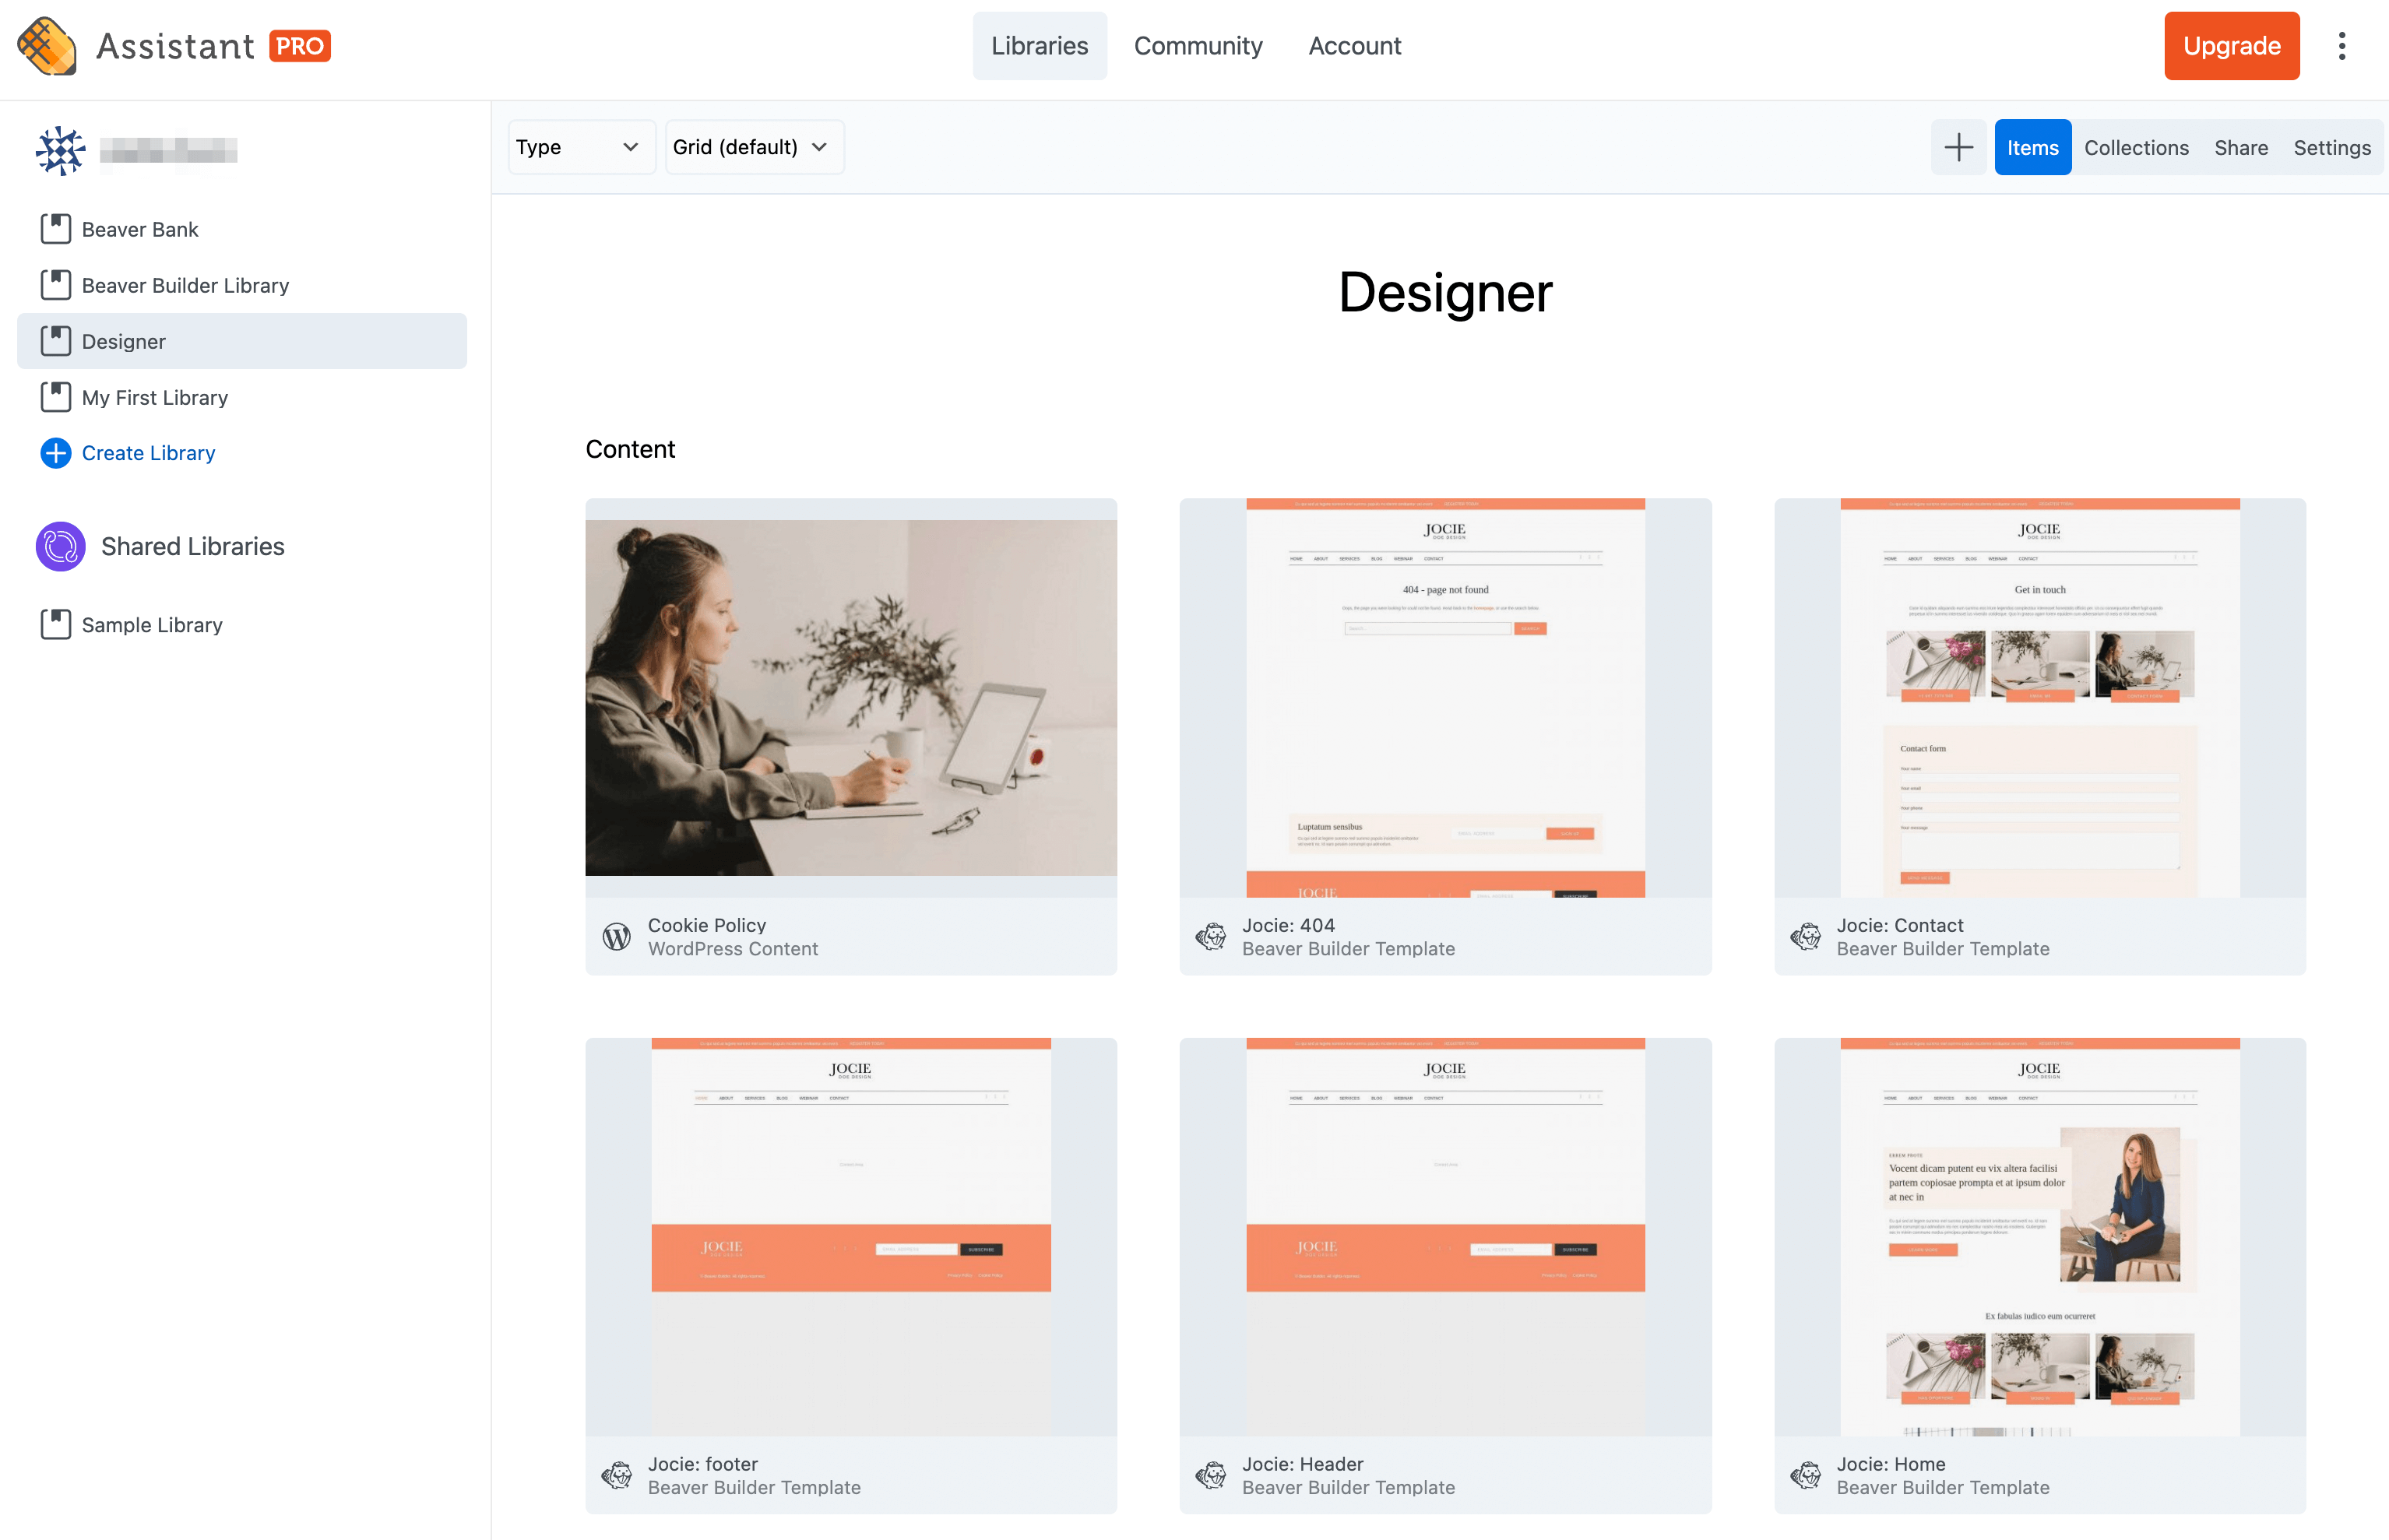
Once you’ve signed in to Assistant, the first thing you will want to do is create a new Library to store your pages. Open the Libraries tab in the Assistant menu and enter a title in the Create Library text box. You could also select the My First Library option, which is available by default:
Next, navigate to the Content tab in the Assistant menu. If you select either Posts or Pages tabs, you’ll see a list of the content you can upload to the Library from your website. To work with a page, hover over the page name and click on the pencil icon:
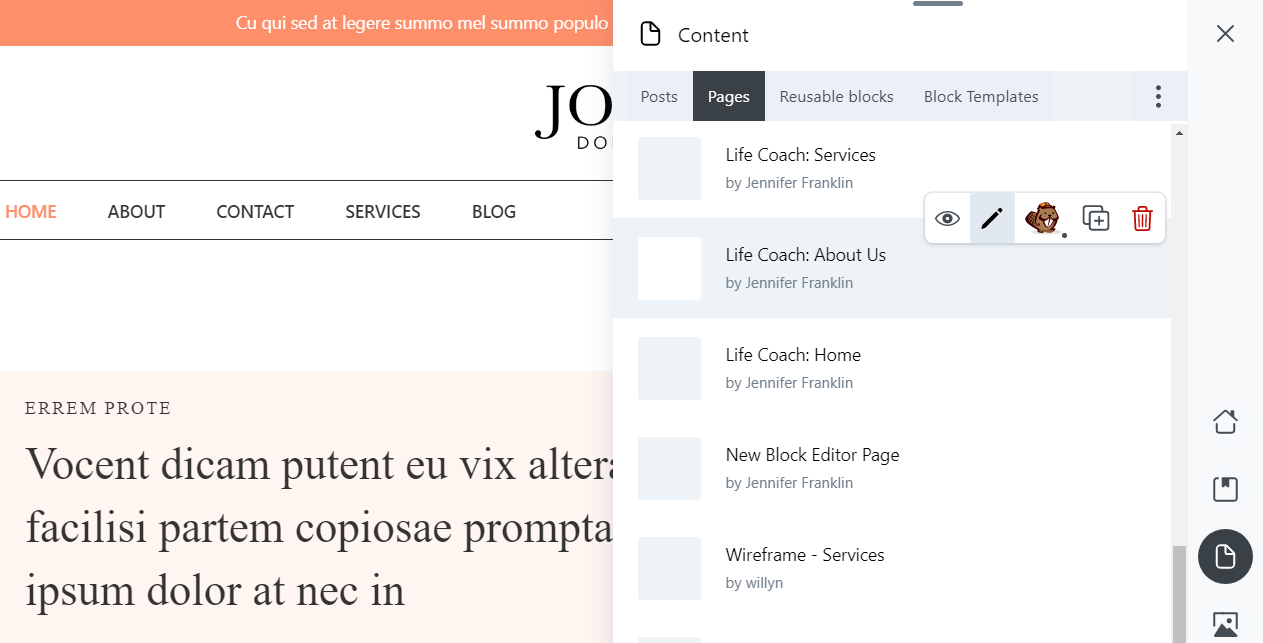
Then, scroll down to the Actions section. This menu will give you a few different options for exporting the page:
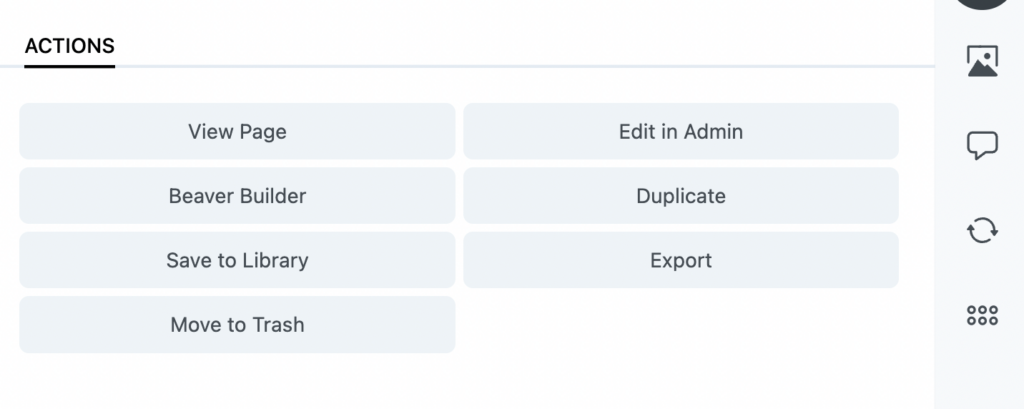
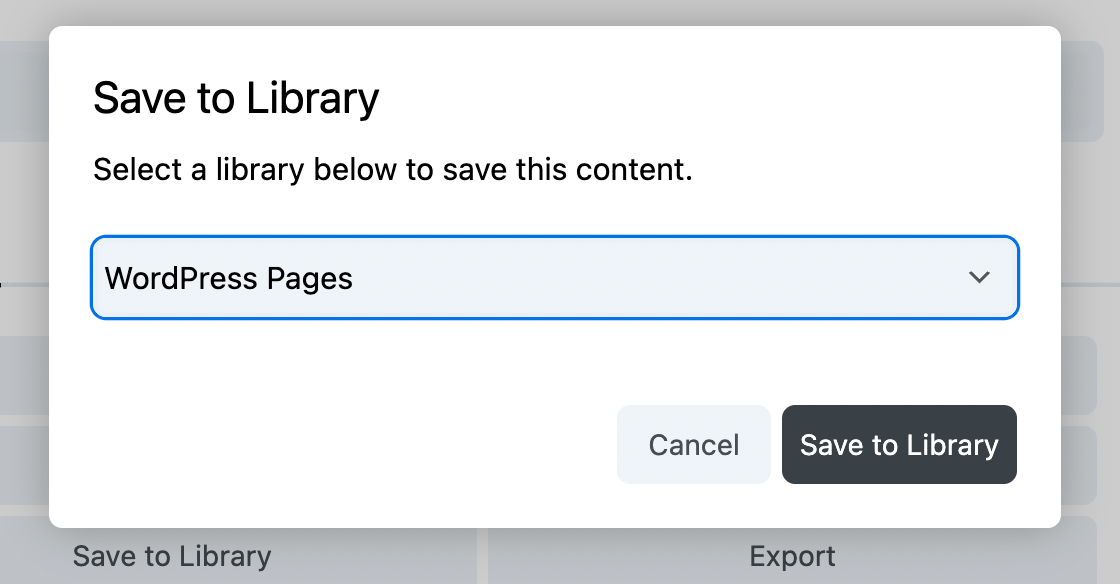
First, you can simply upload the content to an Assistant Library. To do this, click on Save to Library. Select one of your Libraries and hit Save to Library again:
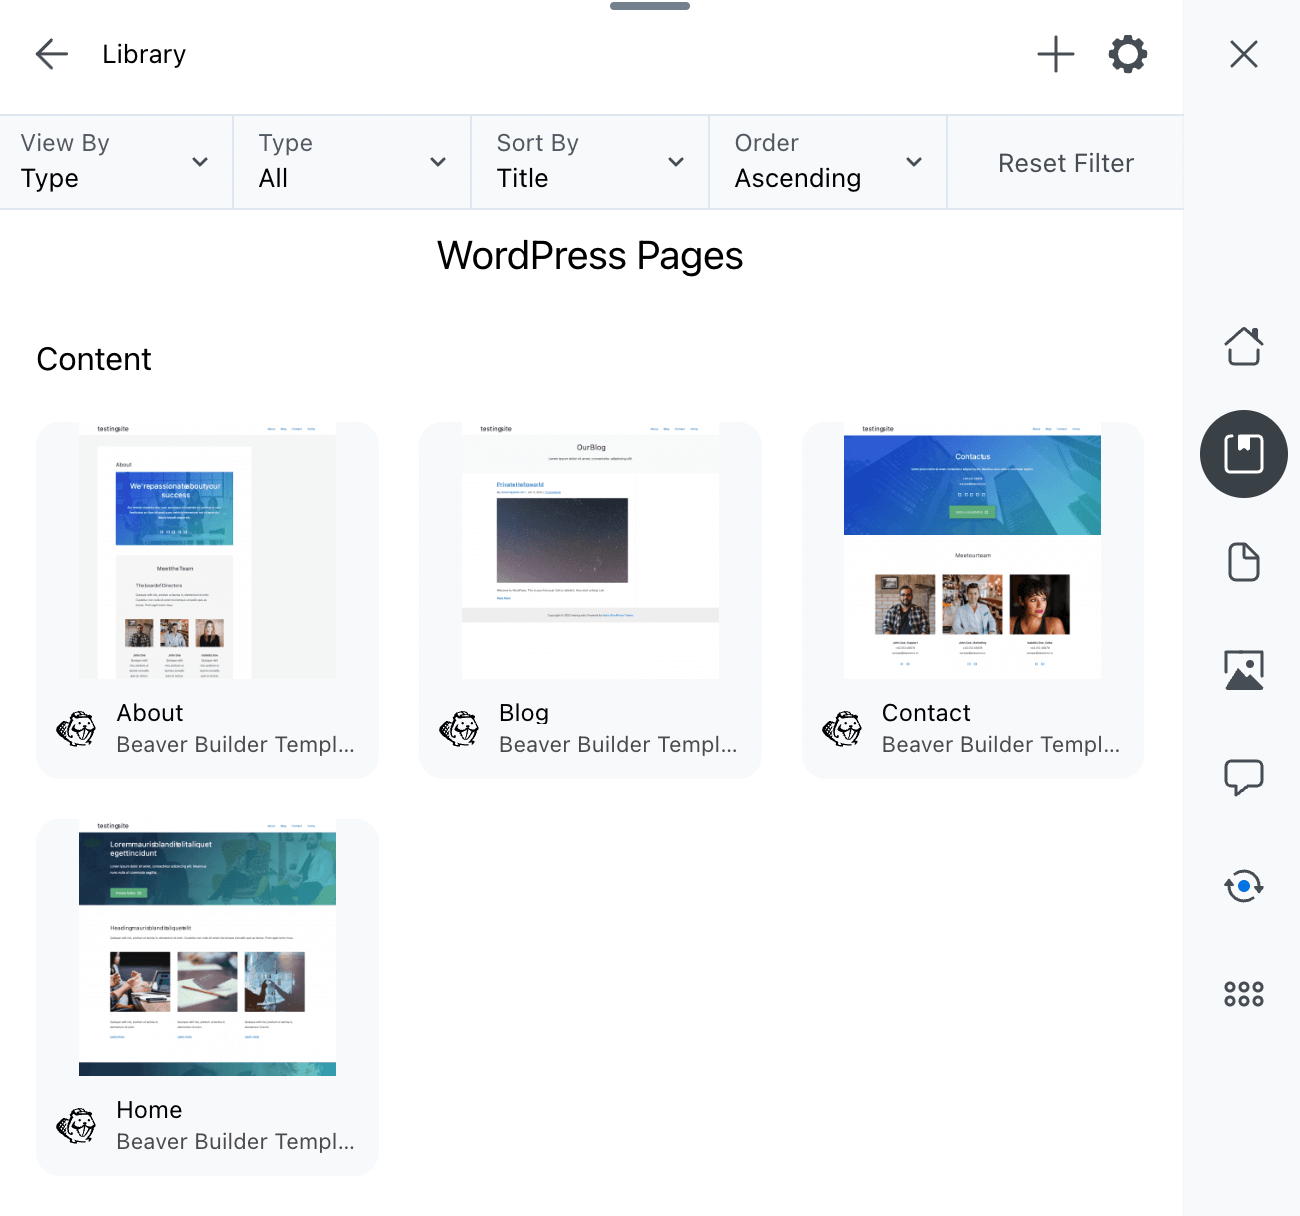
Repeat this process for every page that you want to export. This will make your content readily available in the Assistant Pro cloud.
Alternatively, you’ll see an Export button. Like the WordPress exporter, this button will download the page as an .xml file. However, it requires using the WordPress importer.
Step 3: Import Pages to a Second WordPress Site
Now that you’ve exported your pages to an Assistant Pro Library, you can import them into any WordPress website. To get started, you’ll need to activate the Assistant plugin on the second site and sign back in to your Assistant Pro account.
Next, click on the Assistant Libraries app. You’ll need to open the Library where you saved the core web pages:
Select one of the pages and look for the Import button in the Actions menu at the bottom of the Assistant tab:
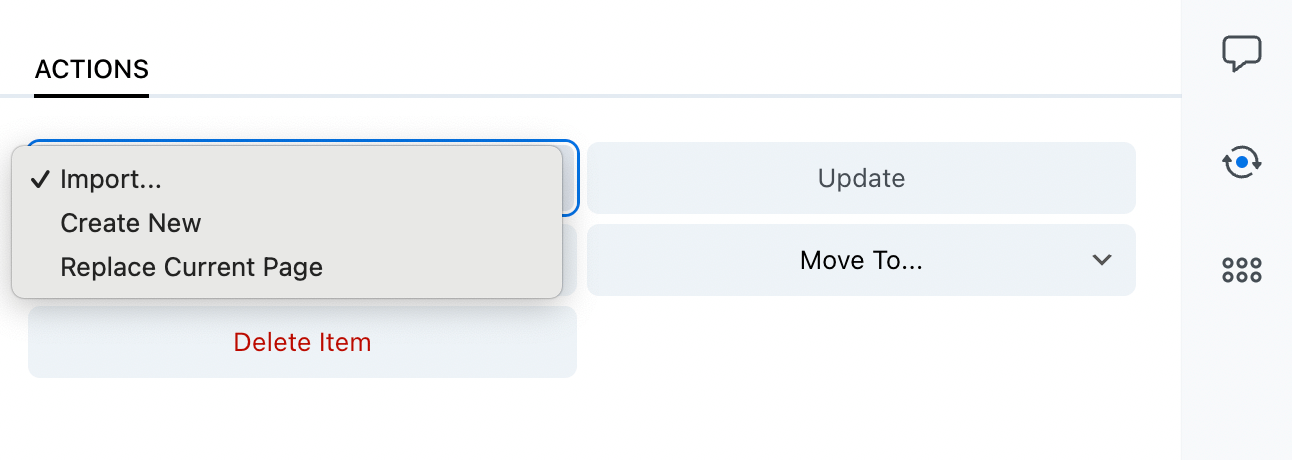
If you’re currently editing a page, you can replace it with this imported page by clicking Replace Current Page. Or you can choose Create New, and WordPress will automatically make a new page for the imported content and add it to the website.
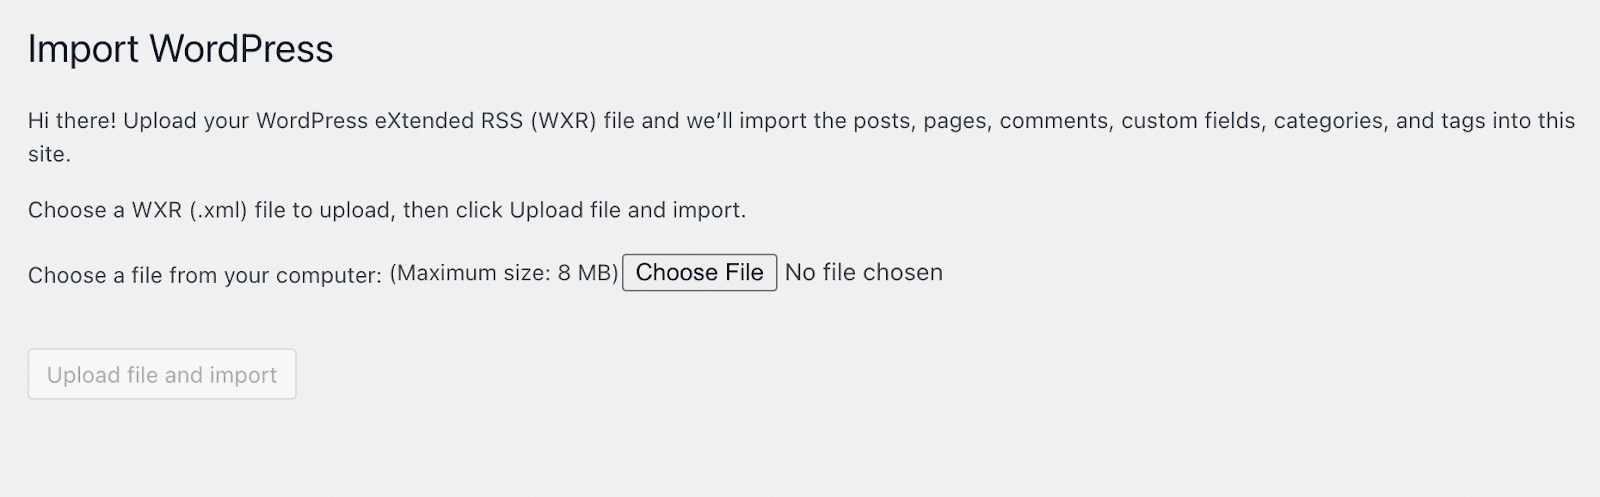
If you chose to export the page or post as an .xml file in the previous step, you’ll need to go to Tools > Import. Click on Choose File and find it on your local device. Then, upload it by selecting Upload file and import:
Although Assistant Pro makes it easy to export pages using .xml files, we recommend using the Library features instead. In addition, Assistant Pro lets you connect multiple websites to the same Libraries.
Moreover, you won’t need to download and re-upload media files when importing content (which you will have to do with .xml files). Instead, the plugin takes care of that process for you.
Conclusion
As a developer or designer, you’ll need easy ways to export your client’s core web pages and import them into another WordPress website. With Assistant Pro, you can add any page to an Assistant Pro Cloud Library. This content will then be available to import into any WordPress dashboard.
To recap, here’s how to import and export your core web pages in WordPress:
- Install the Assistant plugin and connect to the Assistant Pro Cloud.
- Save pages to an Assistant Pro library.
- Import pages to a second WordPress site.
Start saving more time today. Get started for free at Assistant.pro.
Our Newsletter
Our newsletter is personally written and sent out about once a month. It's not the least bit annoying or spammy.
We promise.
Try Beaver Builder Today

Related articles

How Beaver Builder Products Work Together to Build Flexible WordPress Websites
Building a WordPress website often means stitching together a theme from one developer, a page builder from another, and a…
Growing a Facebook Group to 14,000 Members: Community Management Tips with David McCan
David McCan grew the Dynamic WordPress Facebook group to over 14,000 members. We sat down to talk about his moderation...
What Is Assistant Pro? Two Easy Ways to Connect with Beaver Builder
Assistant Pro is a cloud-based platform that helps WordPress users store, organize, and reuse templates, media, and content across multiple…
Join the community
We're here for you
There's a thriving community of builders and we'd love for you to join us. Come by and show off a project, network, or ask a question.
Since 2014
Build Your Website in Minutes, Not Months
Join Over 1 Million+ Websites Powered By Beaver Builder.