
If you’ve ever built a page with our Beaver Builder plugin, you’re probably well aware of its site-building potential. However, you may have a specific need that is not addressed by our modules. If you’re wondering how to get more utility out of Beaver Builder, you’ll be pleased to know that there’s an easy solution. By using the third-party plugin PowerPack Beaver Addons, you can take your web design to the next level with a wide selection of advanced features.
In this article, we’ll introduce you to the basics of the PowerPack Beaver Addons. After that, we’ll take a look at why you might want to use it. Finally, we’ll walk you through three easy steps to get started with this plugin. Let’s dive right in!
An Introduction to PowerPack Beaver Addons
The PowerPack Beaver Addons plugin is a third-party tool designed to work in harmony with Beaver Builder. If you purchase the software, you’ll get access to over 50 drag-and-drop modules, with over 350 ways to design them:

Another powerful benefit of the PowerPack Beaver Addons plugin is its ease of use. It integrates seamlessly with the Beaver Builder system and uses the same drag-and-drop functionality that makes creating a website a very straightforward process.
In other words, if you’re already comfortable with Beaver Builder, you won’t need to learn a new interface or juggle multiple tools. This means you can think less about how to operate the plugin and more about how you want to design your next stellar site.
Why the PowerPack Beaver Addons Plugin May Be Right for You
This plugin has been designed to help you get the most out of your page creation. For example, thanks to modules built for WooCommerce, you can enhance a digital store with ease and increase conversions with a dedicated Call To Action (CTA) button.
Additionally, you can use the plugin’s features without having to enter a single line of code. There’s no need to spend hours tweaking your CSS or adjusting settings – just drag and drop your modules wherever you need them.
Furthermore, you don’t need to worry if you have to do some troubleshooting. PowerPack Beaver Addons comes with a robust knowledge base. This means you’ll have access to a wide range of helpful articles if you ever encounter any problems.
Finally, this plugin is a smart choice if you like to experiment. Thanks to its array of design and function combinations, there’s a whole world of possibilities to be had when it comes to creating professional pages. If you like to tinker with your tools, you may find entirely new ways to impress your clients.
Overall, this program is an effective way to expand your design horizons. Its intuitive design and wealth of creative options can help you build even better websites in even less time.
Get Started With PowerPack Beaver Addons for Beaver Builder (In 3 Steps)
If you’re ready to dive into this plugin, you can follow these three steps to get started.
Step 1: Purchase, Install, and Activate the Plugin
The first step: do a quick setup. Start by choosing your pricing plan. There are three options available: the WooPack, the PowerPack, and the Combo.
The $59 per year WooPack provides modules that serve ecommerce needs. These include features like the Product Grid module for dynamic displays, as well as the Add to Cart module, which helps to speed along purchases. You can also white label the plugin and use it on an unlimited number of sites.
To get modules that are not focused on WooCommerce, opt for the $69/year PowerPack. This option gives you access to over 65 modules, more than 350 templates, and a cloud-based template library.
If both tiers sound good to you, you can opt for the Combo plan for $99 per year. This includes all features from both options. All plans include a full year of support and updates.
After you’ve chosen your plan, download the plugin. Be sure to grab your license key too. Then go to your WordPress dashboard and navigate to Plugins > Add New > Upload Plugin:

Choose the plugin’s zip file and click Install Now. After the plugin is installed, activate your license. Since this is required for important updates, it’s best to do it right away.
Navigate to Settings > PowerPack and enter your license key, then click Activate License:
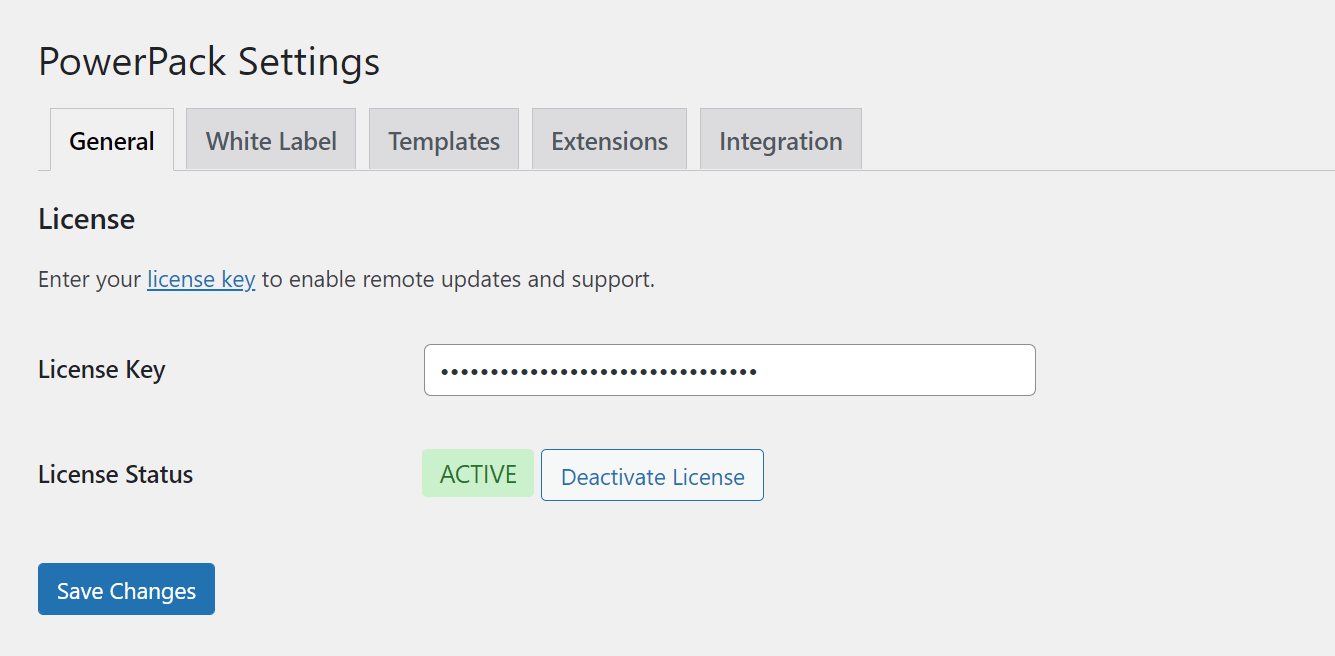
When you’re done, remember to click Save Changes. Your plugin is now activated and ready to use.
Step 2: Start Building Your First Page
We’ll begin with a template sourced from the plugin’s expansive library. Choosing one of these templates will give you stunning designs to start with. You can then customize it as needed.
First, go to Settings > PowerPack. Switch over to the Templates tab:
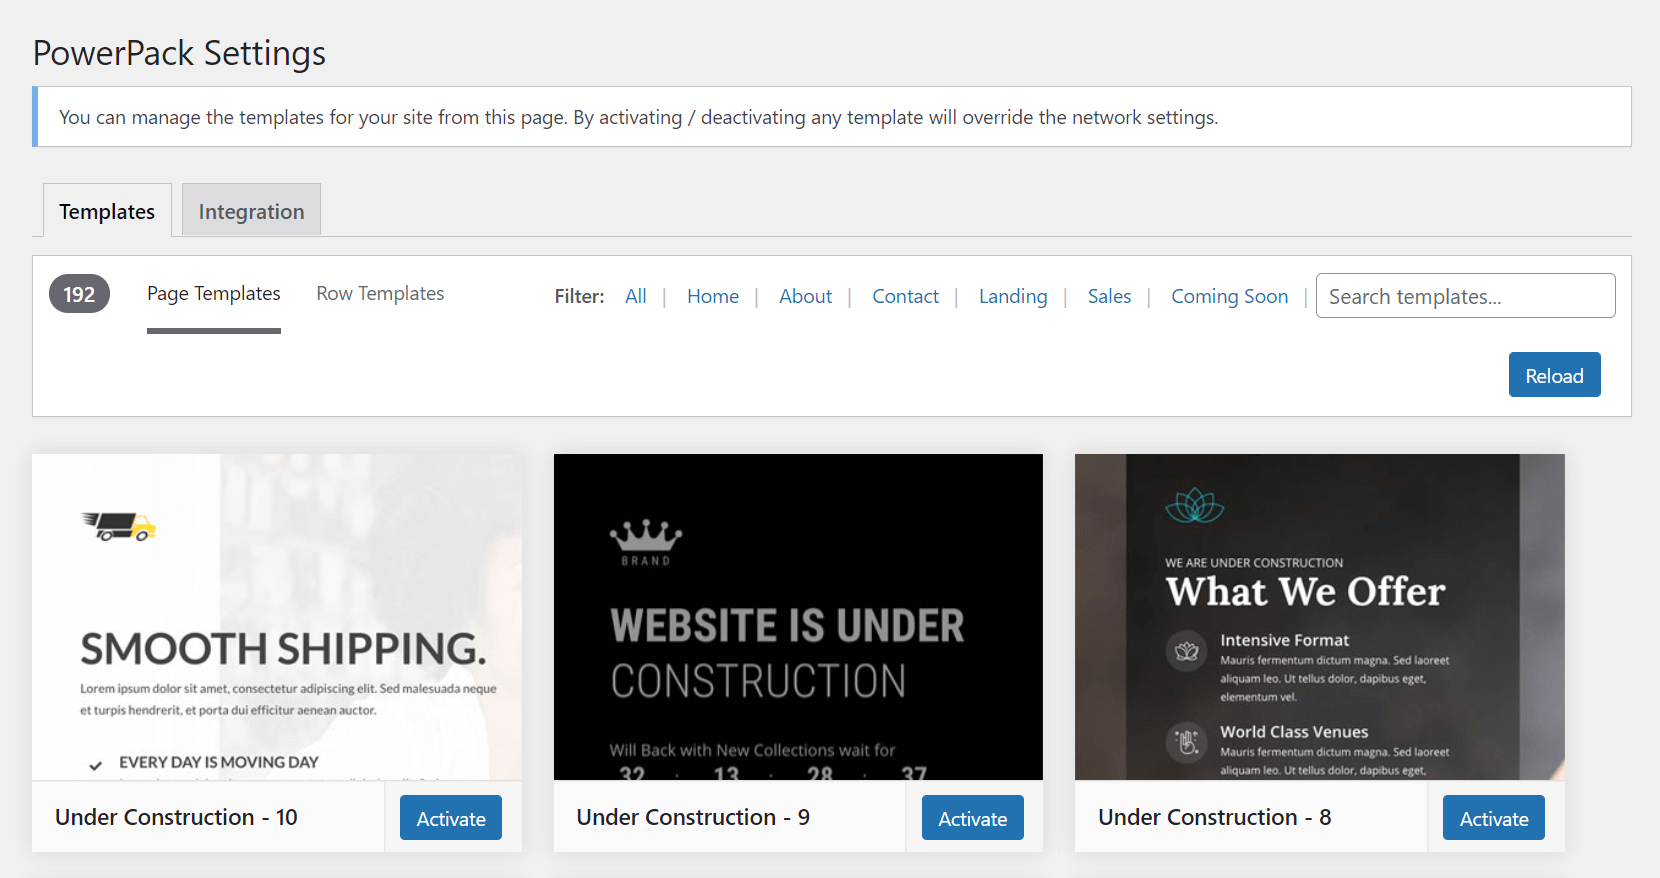
If you hover over a template, an option appears to preview the design. The preview is helpful if you want to get an idea of what the template looks like on a full screen. Browse around to find your favorite template, then click the corresponding blue Activate button.
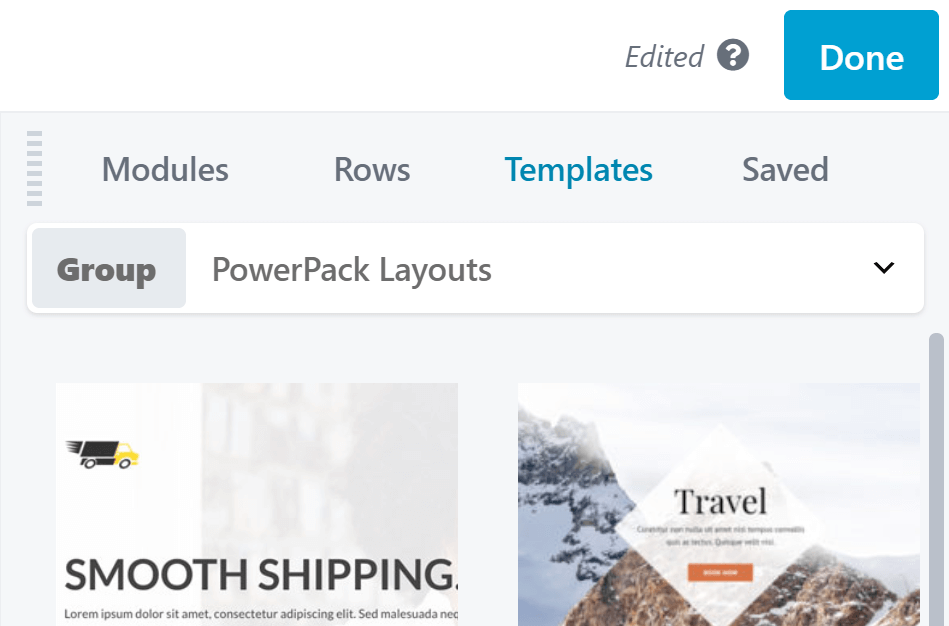
Then add the template to the intended page. Launch Beaver Builder on the page you want to edit, either from Pages > All pages in the WordPress admin panel or from the WordPress admin bar at the top of the page. On the right side of the screen, click the Plus icon to access the Content panel and go to the Templates tab:

In the Group drop-down menu, choose PowerPack Layouts to display the PowerPack templates:
Click to add your template of choice. A pop-up asks if you want to replace the current layout or append the new choice to an existing layout. Select your preferred option.
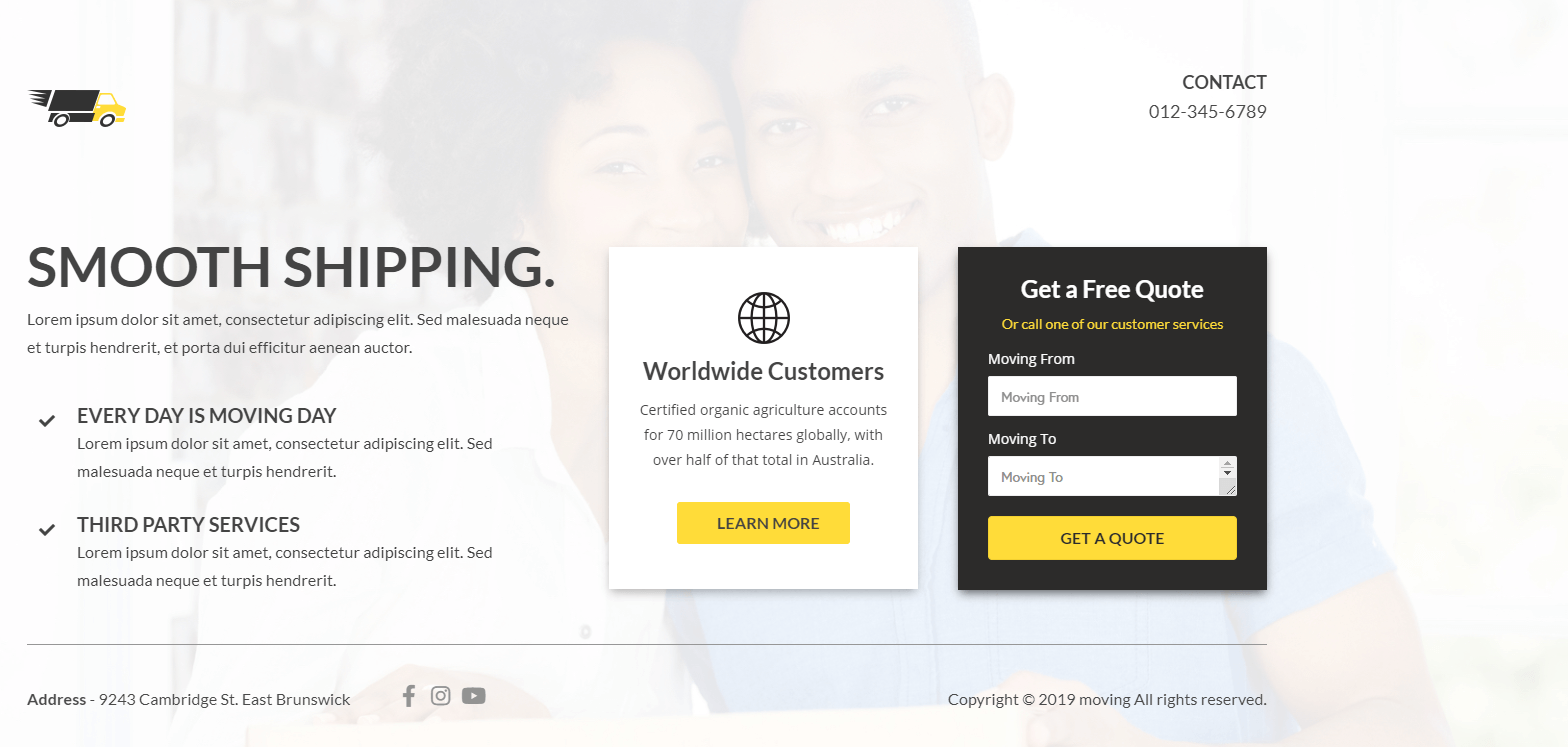
Here’s an example of a template selected from the plugin’s library:
You can modify the template in any way you like: add or delete modules, move things around, change the settings.
Here’s how to add a PowerPack Beaver Addons module to your layout. Open the Content panel again and click the Modules tab. In the Group dropdown, choose PowerPack Modules:
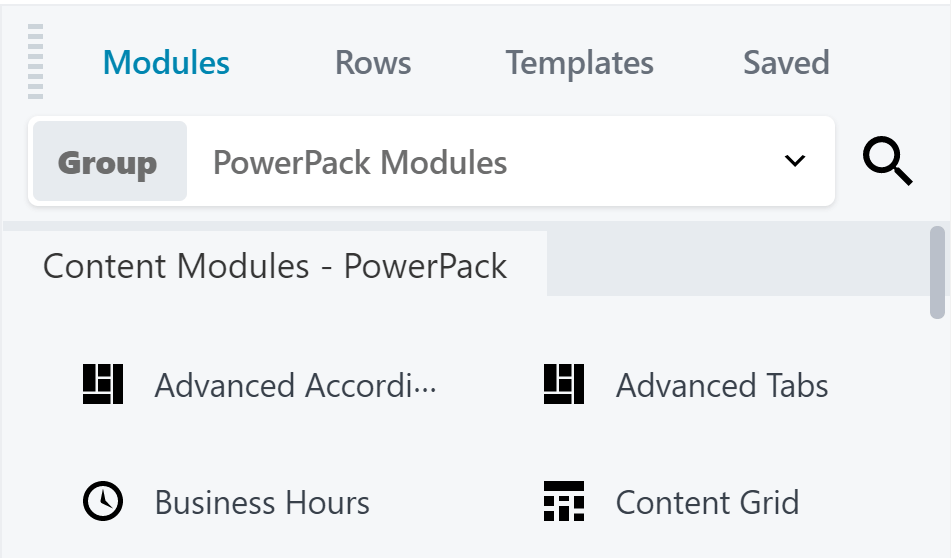
For this example, we’re using the Price Table module. Drag and drop the module anywhere on your page. The module’s Settings panel opens after you’ve dropped the module.
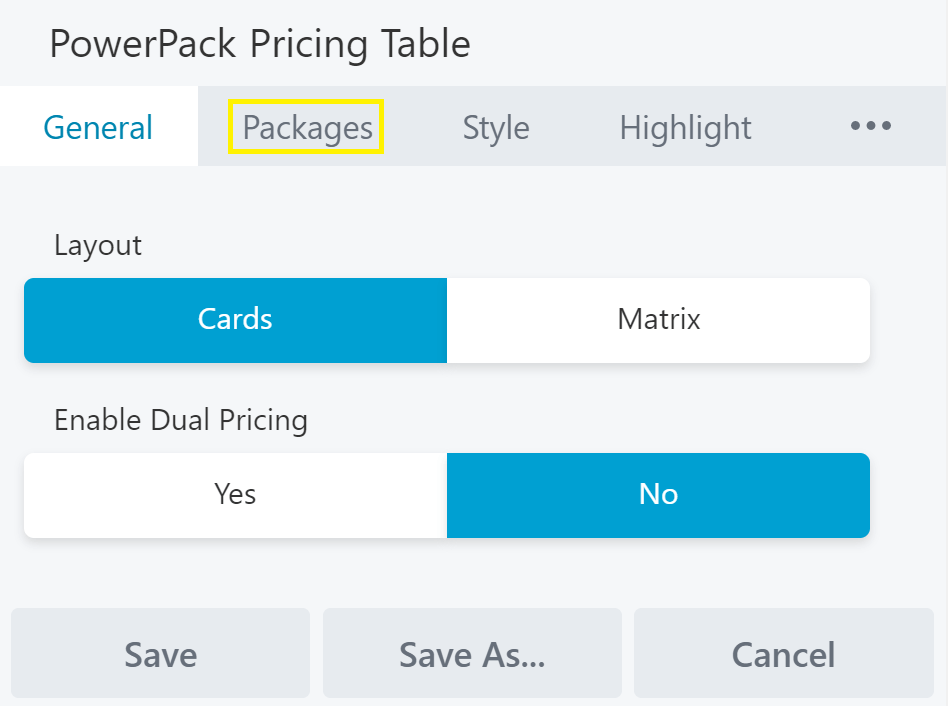
Modify the module settings as necessary. Remember to click Save when you’re done.
Step 3: Enhance Your Site With Advanced Features
Now we can move on to the more advanced features of the plugin. These options can help you further personalize your site.
We’ll start with white labeling, which is a feature that can help you project a professional image. From your WordPress dashboard, navigate to Settings > PowerPack > White Label:
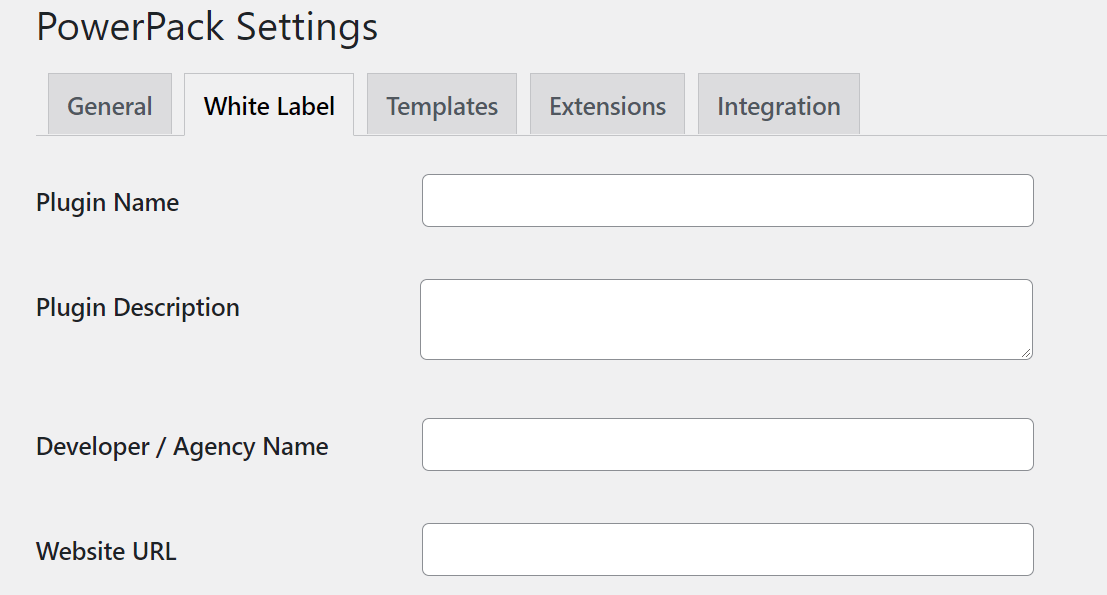
Here, you can adjust the fields to change what your clients will see. We recommend adding your name and URL to the program. This will make it easy for clients to spread your work or contact you if they need to.
Next, we’ll take a look at the global settings. Changing these will affect default traits such as content width, margins, and padding. This can be useful if you routinely use resources that are far above or below the default sizes.
To access these settings, go to any page being edited with the Beaver Builder. In the top left, click on Currently Editing Page, and scroll down to find the Global Settings option:
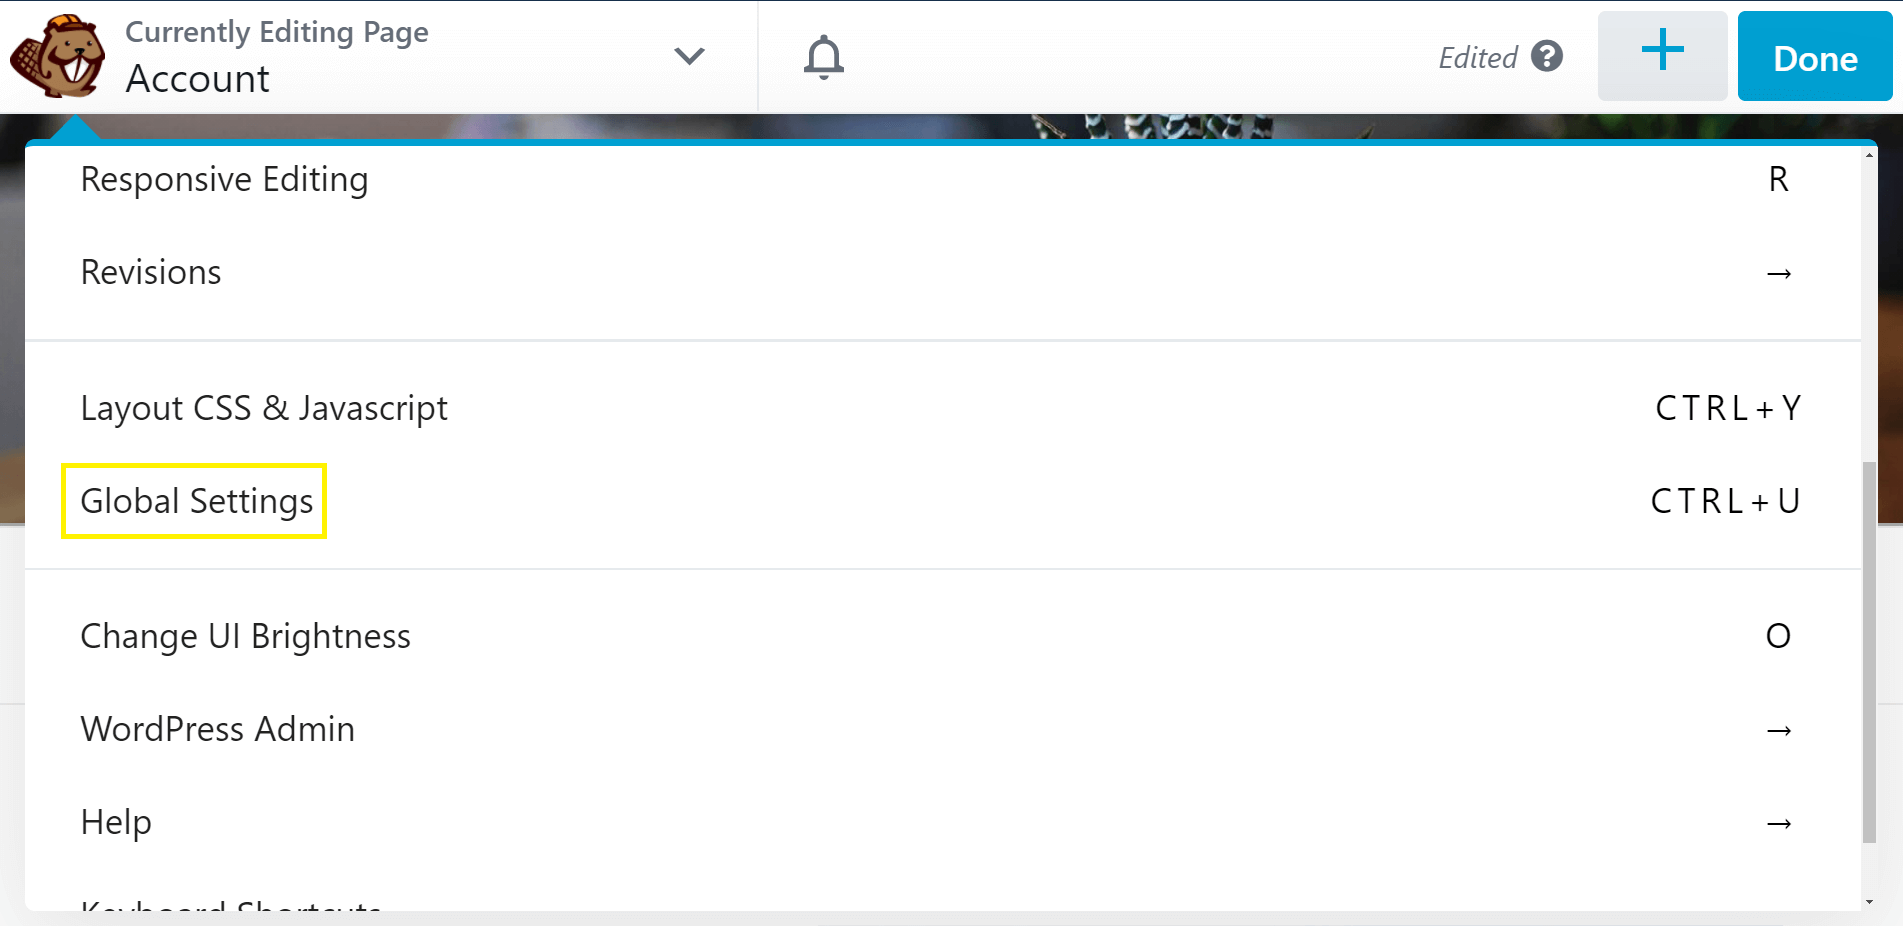
Add your preferred defaults. Note that these settings change the defaults throughout the Beaver Builder editor You can override the defaults by changing settings for individual rows, columns, and modules.
Finally, you can disable specific modules so they don’t appear in the Content panel. Doing so can speed up your site slightly and optimize your experience. From your WordPress dashboard, navigate to Settings > Beaver Builder > Modules. Scroll down to find the specific options related to the PowerPack Beaver Addons:
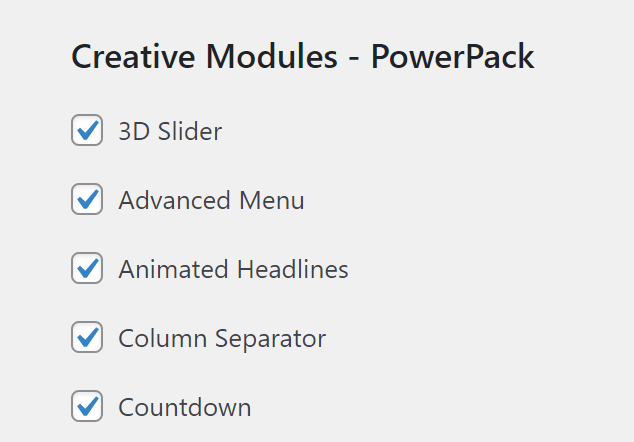
Remove the checkmark from any of the options you don’t want and save your work. If you change your mind, you can always come back and check the appropriate boxes.
Conclusion
Our Beaver Builder plugin is a very efficient tool. However, that doesn’t mean that the plugin can’t get even better. With the help of PowerPack Beaver Addons, you can further customize your site and add new features to your pages.
In this article, we covered the main steps to help you get started with this plugin:
- Choose your pricing plan, then install and activate the software.
- Start building your first page with templates and modules.
- Adjust your site’s settings for a more personalized experience.
Do you have any questions about using the PowerPack Beaver Addons plugin? Let us know in the comments section below!
Our Newsletter
Our newsletter is personally written and sent out about once a month. It's not the least bit annoying or spammy.
We promise.
Try Beaver Builder Today

Related articles

How Beaver Builder Products Work Together to Build Flexible WordPress Websites
Building a WordPress website often means stitching together a theme from one developer, a page builder from another, and a…

From Azeroth to WordPress: How Warcraft Tavern Uses Beaver Builder
Since releasing Beaver Builder 12 years ago, a feeling will come up from time to time that just never gets…
How to Build Card Layouts in Beaver Builder (Flexbox + Box Module Tutorial)
If you’re using the Beaver Builder Box Module to build responsive layouts, you’ve likely noticed two things: it’s incredibly powerful…
Join the community
We're here for you
There's a thriving community of builders and we'd love for you to join us. Come by and show off a project, network, or ask a question.
Since 2014
Build Your Website in Minutes, Not Months
Join Over 1 Million+ Websites Powered By Beaver Builder.