
Building and customizing a WordPress website with the default editor or the recent WordPress 5 block editor (often called Gutenberg) can be quite taxing. It serves as a good reminder of how useful a drag-and-drop page builder can be.
Beaver Builder was created to give WordPress site owners complete flexibility and control over creating and editing their pages. Beaver Builder works on the frontend of your site and lets you create templates, add columns, design layouts, and so much more. As one of our customers rightly said, “WordPress is fun. Beaver Builder makes it fun and EASY!”
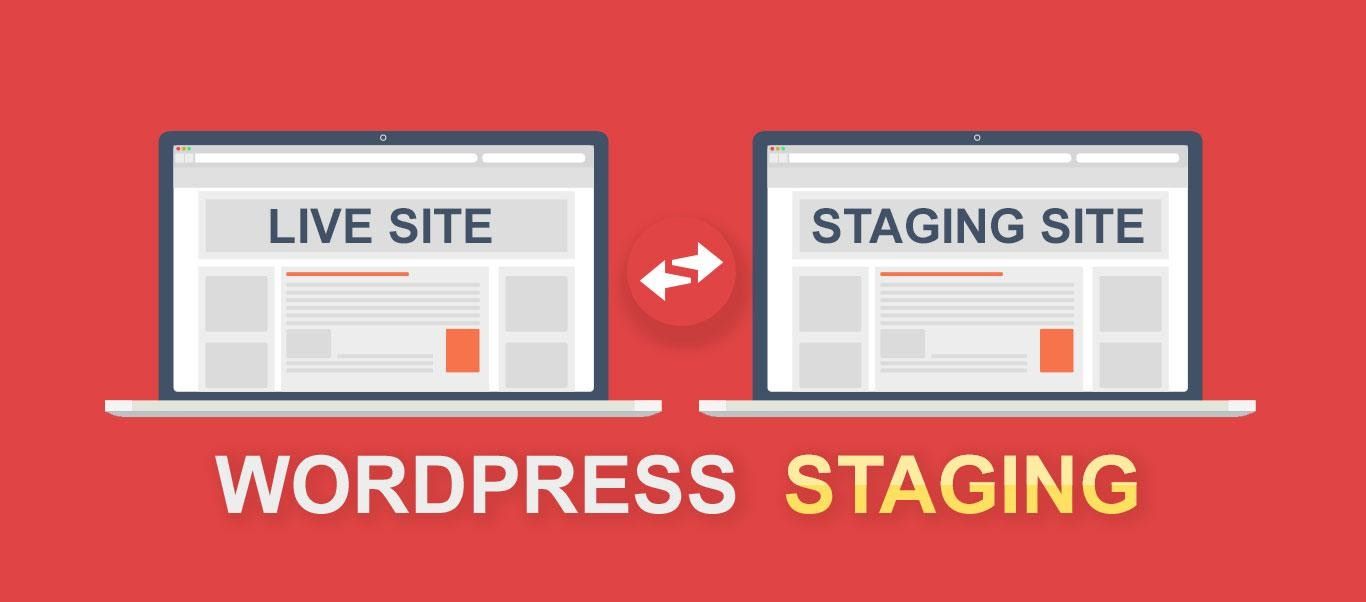
Know what’s not fun or easy though? Seeing your site broken, right after making some major changes. To avoid such a situation, it is recommended to use a staging site. In this article, we will explore the different ways to create a staging site and then attempt to answer the question: is staging necessary?
What is Staging?
A WordPress staging site is a replica of your WordPress website. It can be used to test website changes and updates without any impact on your live site. It’s ideal if you want to experiment with various Beaver Builder functions or check out Beaver Themer. If you’re happy with the results, you can merge the changes onto your live website.
How to Set Up a WordPress Staging Site
You can create a staging site for your WordPress website in any of the following three ways:
- Through your web host provider
- Through automated staging using a plugin
- Through manual staging
Let’s discuss each of these methods in more detail.
Staging through Your Hosting Provider
Most web hosts provide website staging as part of their hosting package. Depending on your provider, you can configure a staging environment using an easy one-click staging or through command-line tools.
For example, the Beaver Builder website is hosted on Pagely, which offers managed
Other popular WordPress hosting providers that include website staging in their plans are Bluehost and Siteground.
Alternatively, you can opt for web host companies like Flywheel and WP Engine that include website staging in all their plans.
Automated Staging Using a Staging Plugin
If your web host does not provide staging in their package or if you don’t possess the technical know-how for manual staging, it’s best to opt for a WordPress staging plugin. It’s the easiest and fastest way to create a secure staging environment.
While there are many staging plugins available, be careful when selecting one for your website. Staging plugins have been known to cause some issues like:
- Overloading your website server, thus impacting your website performance
- Incompatibility issues with existing plugins
- Incompatibility with multisite networks or websites with subdomains
To avoid such issues, use a staging plugin like WP Staging or BlogVault. BlogVault combines backup and restore services with staging functionality. It’s easy to set up and BlogVault hosts the staging site on its servers, thus ensuring no extra load on your web server.
Create a staging site using BlogVault:
- Register with BlogVault and log in to your dashboard with your user credentials.
- Install and activate the plugin on the website.
On activation, BlogVault automatically makes a complete backup of your specified website. - From the dashboard, click the Add Staging Site button to create your staging site in a matter of minutes.
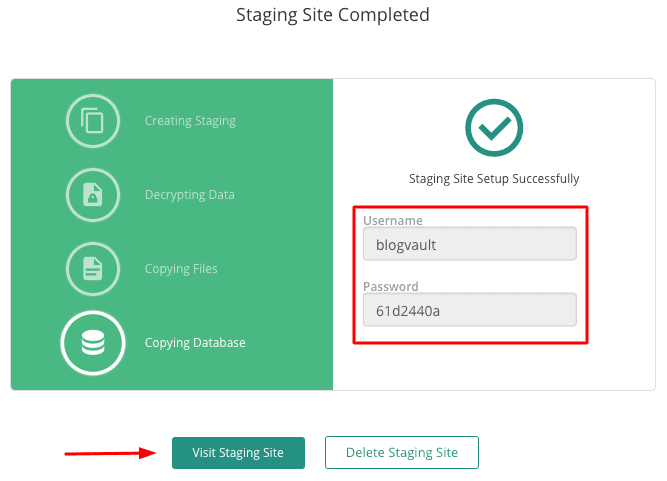
- Enter your username and password for accessing the staging site and then click Visit Staging Site.
- Use the staging site to make all the changes and updates.
- To merge these changes with your live website, navigate back to your BlogVault dashboard and click Merge.
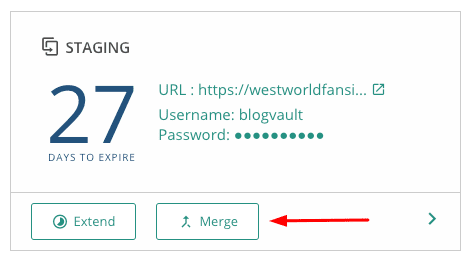
With this easy one-click button, you can merge all your staging site changes with your live website.
Manual Staging
If you like to do it yourself, you can opt for manual staging, where you can configure and set up the entire staging environment on your own. This method is recommended only for WordPress experts who have the necessary technical knowledge and experience.
Here are the steps that you need to undertake to manually create a staging website:
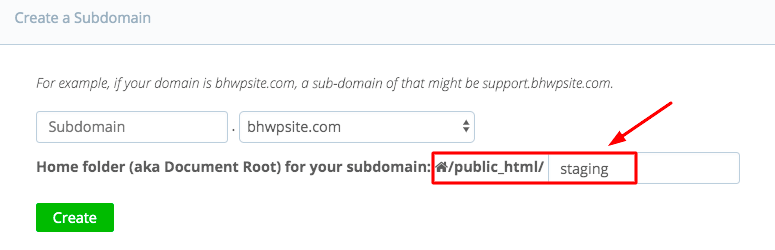
1 Create a subdomain of your live website
Create a subdomain of your WordPress website folder that will serve as the staging site. To do this, navigate to Subdomains in your hosting provider’s cPanel and create a subdomain. In this example, we’ll call this subdomain “staging”.
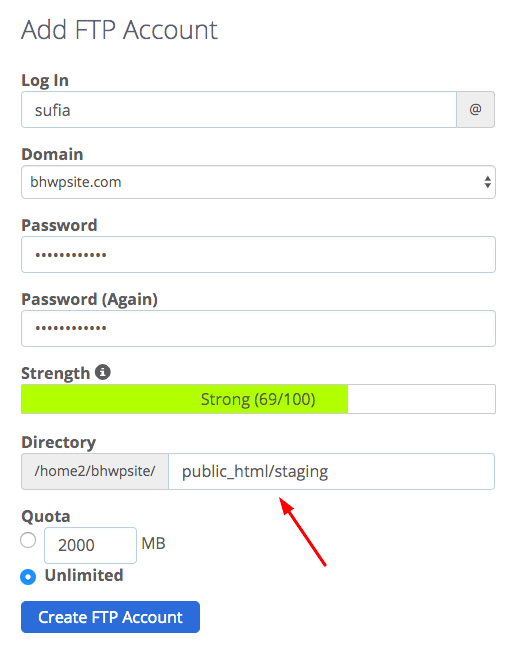
2 Create an FTP account for your subdomain
Add an FTP account for your subdomain so you can upload your current website files to the staging site. Use the “FTP Accounts” page in cPanel. Ensure that the Directory field matches with the subdomain you just created, as shown in this screenshot:
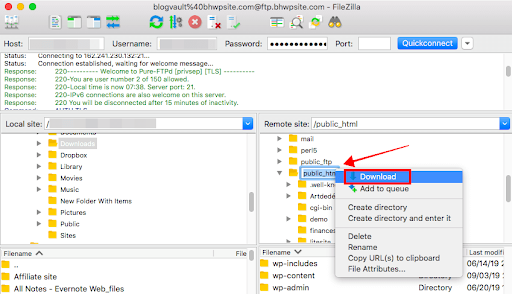
3 Download the current WordPress and database files
Download your existing WordPress and database files for your live site. You can use an FTP tool like FileZilla to download the files. For the database, select the phpMyAdmin tool (provided by your web host) to export the files, then download and save them locally.
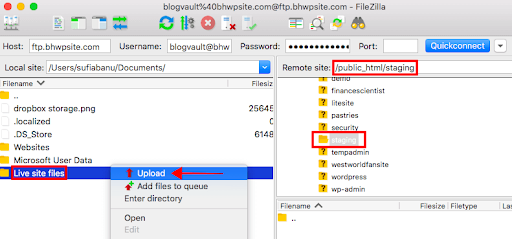
4 Upload the WordPress and database files to the staging site
Upload the WordPress files from your local system to the staging site. Similar to the downloading process, you can use an FTP app like FileZilla to log into your staging site’s FTP account. Navigate to the public_html > staging folder, then upload the WordPress files.
To upload the database files, follow these steps.
- Log in to your hosting account.
- Navigate to Databases > MySQL Databases > Create New Database.
- Create a new MySQL user for your new database.
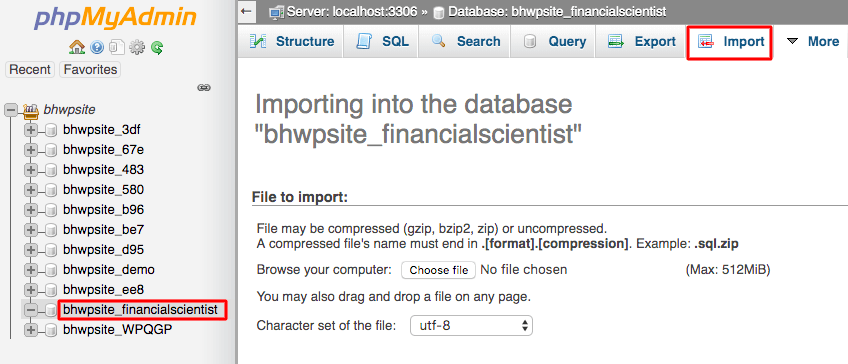
- Open phpMyAdmin from the hosting dashboard.
On the left, select the database you just created and then click Import and select the database that you downloaded to your local system.
5 Connect the new database with the staging site
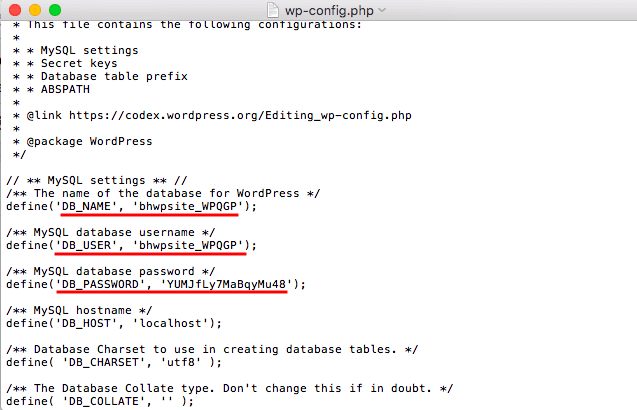
Modify the existing wp-config.php file in your WordPress installation to connect the staging website with the new database. That file still has information about the database of your live site, so replace it with the new database information by using FTP to access the wp-config.php in the WordPress root directory on your staging site. Open it for editing and replace the existing database name, username, and password with the database information that you set up for your staging location, as shown in this screenshot:
6 Hide your WordPress staging site from search engine indexing
Ensure that your staging website stays hidden from search engines like Google and is not indexed by search engines. You can achieve this by installing the “Hide My Site” WordPress plugin and configure this setting once you have activated the plugin.
After performing these six steps, you can update your site on the staging server. After you have completed the modifications, perform these tasks in reverse to download the staging website and database files and then upload them to your live website.
Is Staging necessary?
Now that we’ve seen the different ways to stage, the question remains: is staging necessary? Let’s take a look at the pros and cons of WordPress staging.
Staging Pros
- Staging acts as a testing ground for your website without any real-time impact.
- Staging can be used to test updates and backups efficiently and avoid an incompatibility. This reduces the probability of a website crash that could further impact your business sales or incoming traffic.
- Staging enables you to remodel or redesign your WordPress website to make it more responsive and make the best use of tools like Beaver Builder.
Staging Cons
- Staging through a plugin or your web host provider can be an additional expense.
- Depending on the staging tool, you could sometimes lose website changes when trying to merge it from the staging to the live site.
- Some methods like manual staging can be very complicated and time-consuming. You need some technical know-how to set up a staging site. Replicating changes tested on a staging site can be laborious.
Conclusion
We evaluated creating a staging website using your web host provider, using the manual process or a staging plugin. Here’s what we observed:
- Staging through our web host provider can attract additional expenses if this service is an add-on.
- The manual staging method can be cheaper to execute but requires technical expertise for completing the entire process. Moreover, it requires working with important website files and any error could result in a failure to migrate the site back and forth from staging to live.
- A WordPress backup plugin that combines backup with a built-in staging feature is ideal owing to its simplicity and speed.
A tool like Beaver Builder helps you transform your website with beautiful layouts. By creating a safe environment that doesn’t impact your current site in any way, you can experiment with various website design features until you’re happy with the results and ready to take it live.
Which of these methods did you like the most? Which one will you try today? Let us know in the comments!
2 Comments
Our Newsletter
Our newsletter is personally written and sent out about once a month. It's not the least bit annoying or spammy.
We promise.
Try Beaver Builder Today

Related articles

How to Sell Websites to Clients (Without Talking About Tools)
Struggling with how to sell websites to clients without getting lost in tech talk? Learn how to communicate the real…
Case Study: How One Freelancer Built a Web Design Business with Beaver Builder
Wondering about Beaver Builder for freelancers? Cami MacNamara operates WebCami Site Design, a successful solo web design business in West…
Best Practices for Managing Web Design Clients
Managing web design clients effectively is one of the most crucial skills for a web designer, agency, or freelancer. Whether…
Join the community
We're here for you
There's a thriving community of builders and we'd love for you to join us. Come by and show off a project, network, or ask a question.
Since 2014
Build Your Website in Minutes, Not Months
Join Over 1 Million+ Websites Powered By Beaver Builder.
Thank you, Anthony, for this post. I’ve been creating staging (never heard that word before in this context ;)) environments manually for years and never thought this could be done easier. BlogVault and WP Staging look like a solution for me. I believe it will let me do my development work easier and faster. Thanks again!
Glad the article was helpful Bartek =)