
How to Display an Instagram Feed in WordPress (In 4 Steps)
Since WordPress discontinued oEmbeds in 2020, you’re not able to insert your Instagram feed into content simply by pasting a link. Therefore, you might be looking for a user-friendly way to display an Instagram feed on your WordPress site.
Displaying an Instagram feed in WordPress is easy using PowerPack for Beaver Builder. This is a great way to keep on top of your social presence. Plus, by adding a feed to your site, you can direct traffic between both platforms to keep users engaged.
In this post, we’ll take a closer look at the benefits of displaying your Instagram feed on your site. Then, we’ll guide you through four simple steps to help you achieve this. Let’s get started!
Table of Contents
- The Benefits of Displaying an Instagram Feed on Your Website
- How to Display an Instagram Feed in WordPress (In 4 Steps)
- Step 1: Set Up an Instagram App with Meta for Developers
- Step 2: Configure Your App Settings and Add a Test User
- Step 3: Generate Your Instagram Access Token
- Step 4: Add Your Instagram Feed to Your Page
- Conclusion
- Related Questions
The Benefits of Displaying an Instagram Feed on Your Website
By displaying an Instagram feed on your website, you’ll always have fresh content for users to engage with. Plus, a regularly-updated feed means that even when people re-visit your site, it will always look slightly different and have something new to offer.
What’s more, adding an Instagram feed is a quick and easy way to spruce up your page and enhance your WordPress web design. Since it maintains itself, it’s a more convenient solution than paying for extravagant themes or constantly uploading images to impress customers.
Additionally, you might display an Instagram feed with user-generated content of real customers using your products:

In these posts, you can demonstrate your company’s presence and values by interacting with users in the comments. Better yet, an Instagram feed like this can act as social proof, enabling you to build trust and increase sales.
Finally, the most significant benefit of including an Instagram feed on your website is that it’s a great way to drive traffic toward your social accounts. This is particularly useful if your social media pages are relatively new and you’re looking for a way to gain more followers.
How to Display an Instagram Feed in WordPress (In 4 Steps)
The easiest way to display an Instagram feed in WordPress is with PowerPack for Beaver Builder:
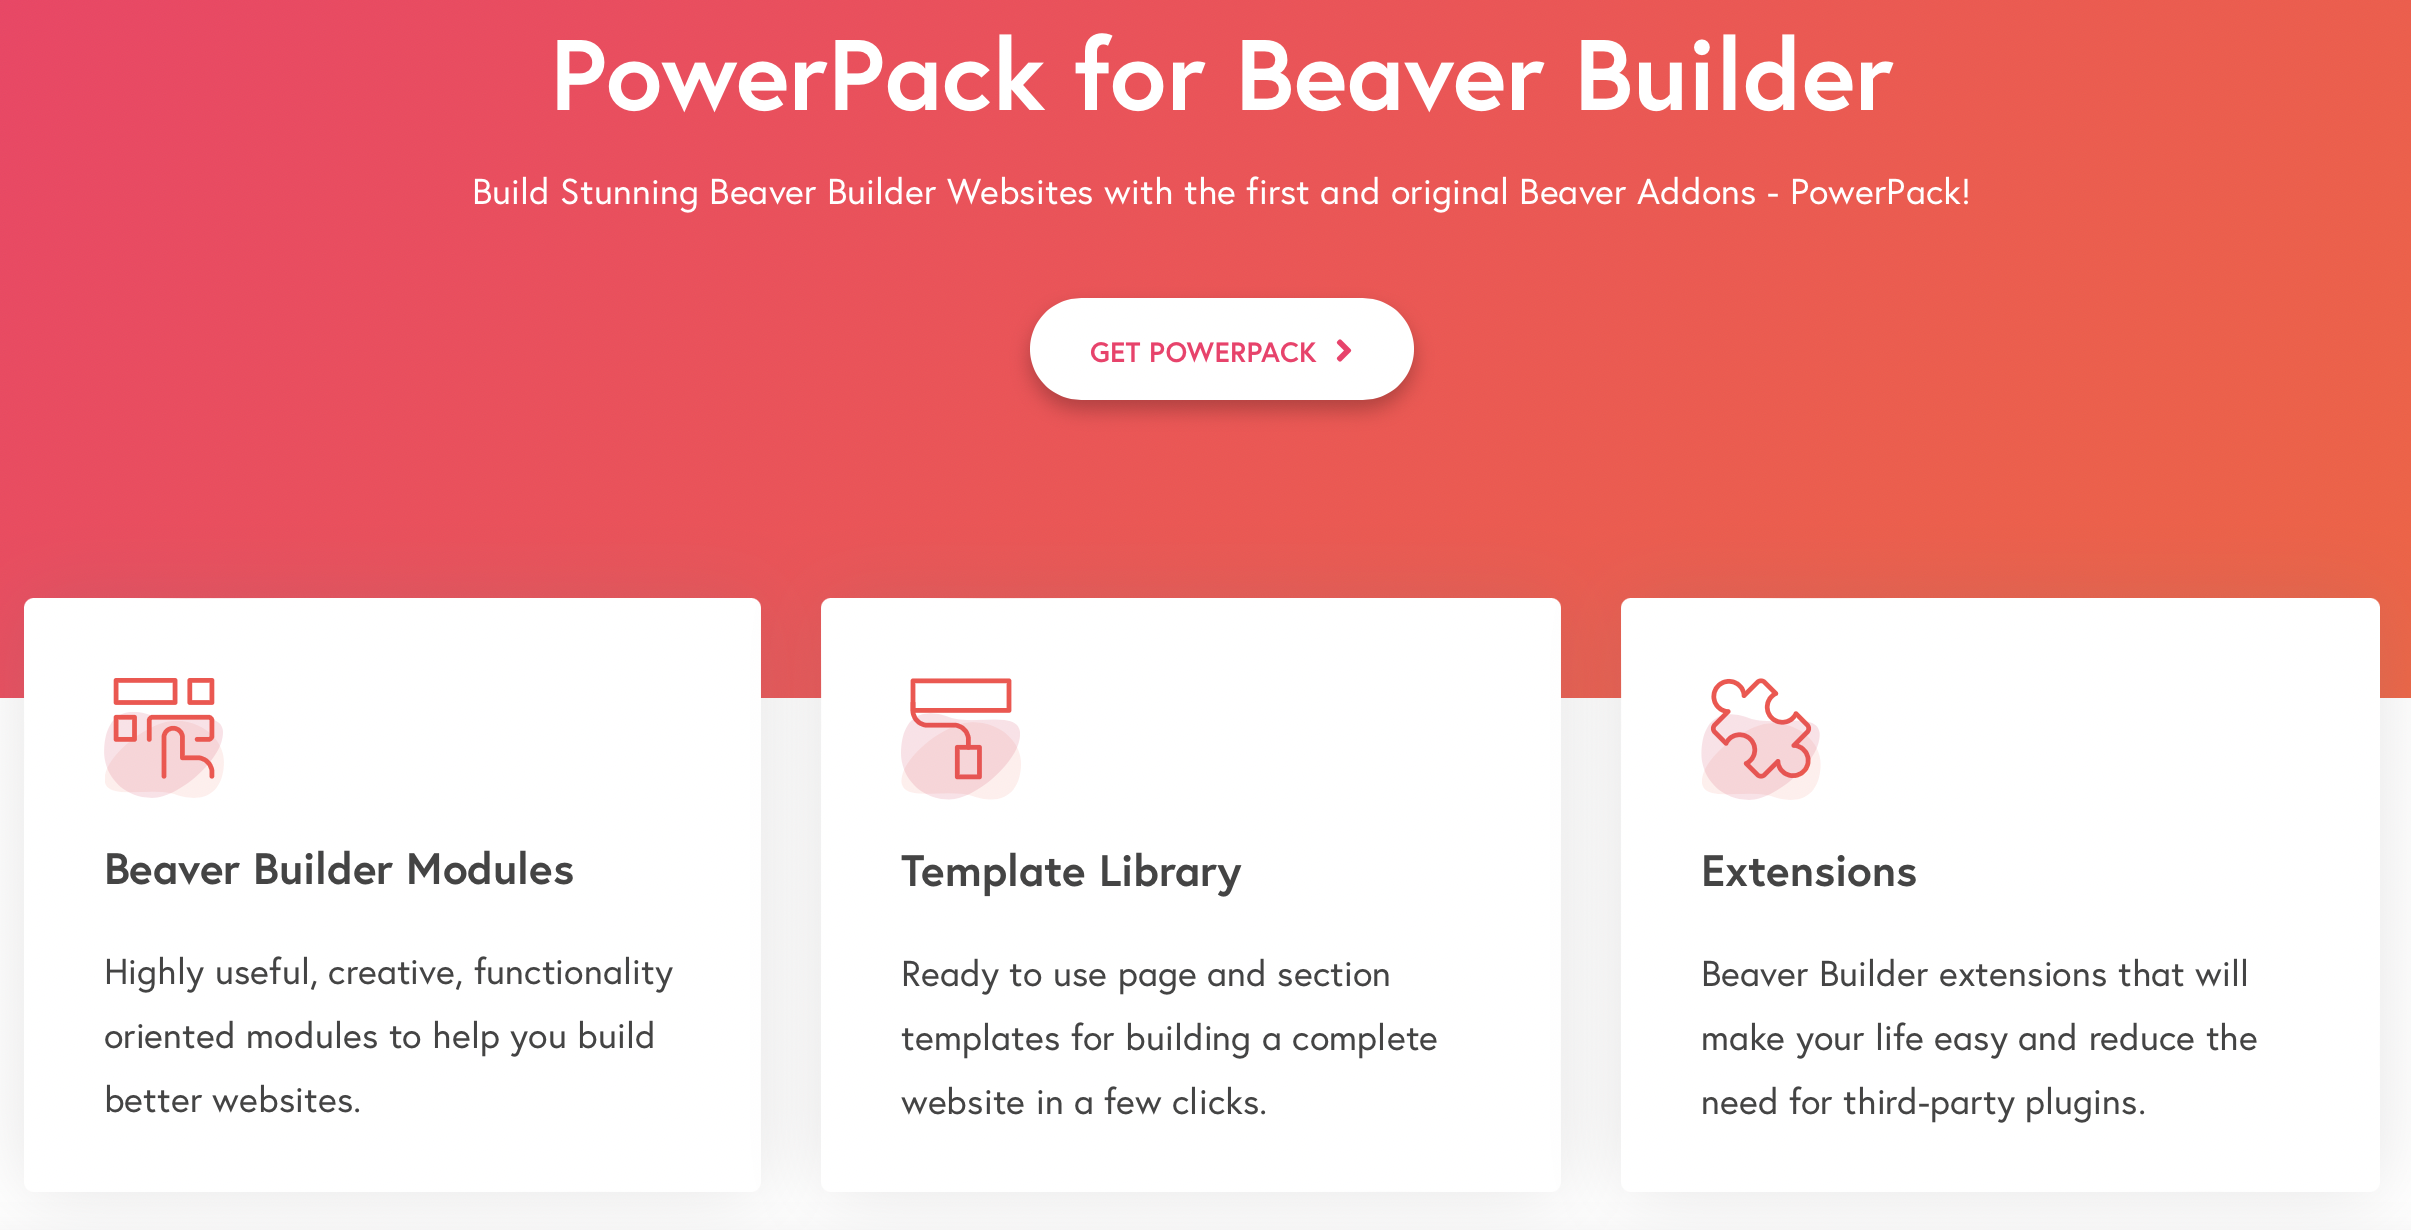
Once the plugin is installed, you’ll be able to choose from a bunch of functional and creative modules, including advanced menus, card sliders, and search forms.
You can also make the most of pre-designed templates to speed up your web design work. Better yet, you’ll benefit from plenty of useful integrations, reducing the need for third-party plugins.
To install PowerPack, you’ll need our Beaver Builder page builder plugin activated on your site. Then, you can upload the PowerPack plugin to WordPress by navigating to Plugins > Add New > Upload. Finally, head to PowerPack and enter your license key.
Step 1: Set Up an Instagram App with Meta for Developers
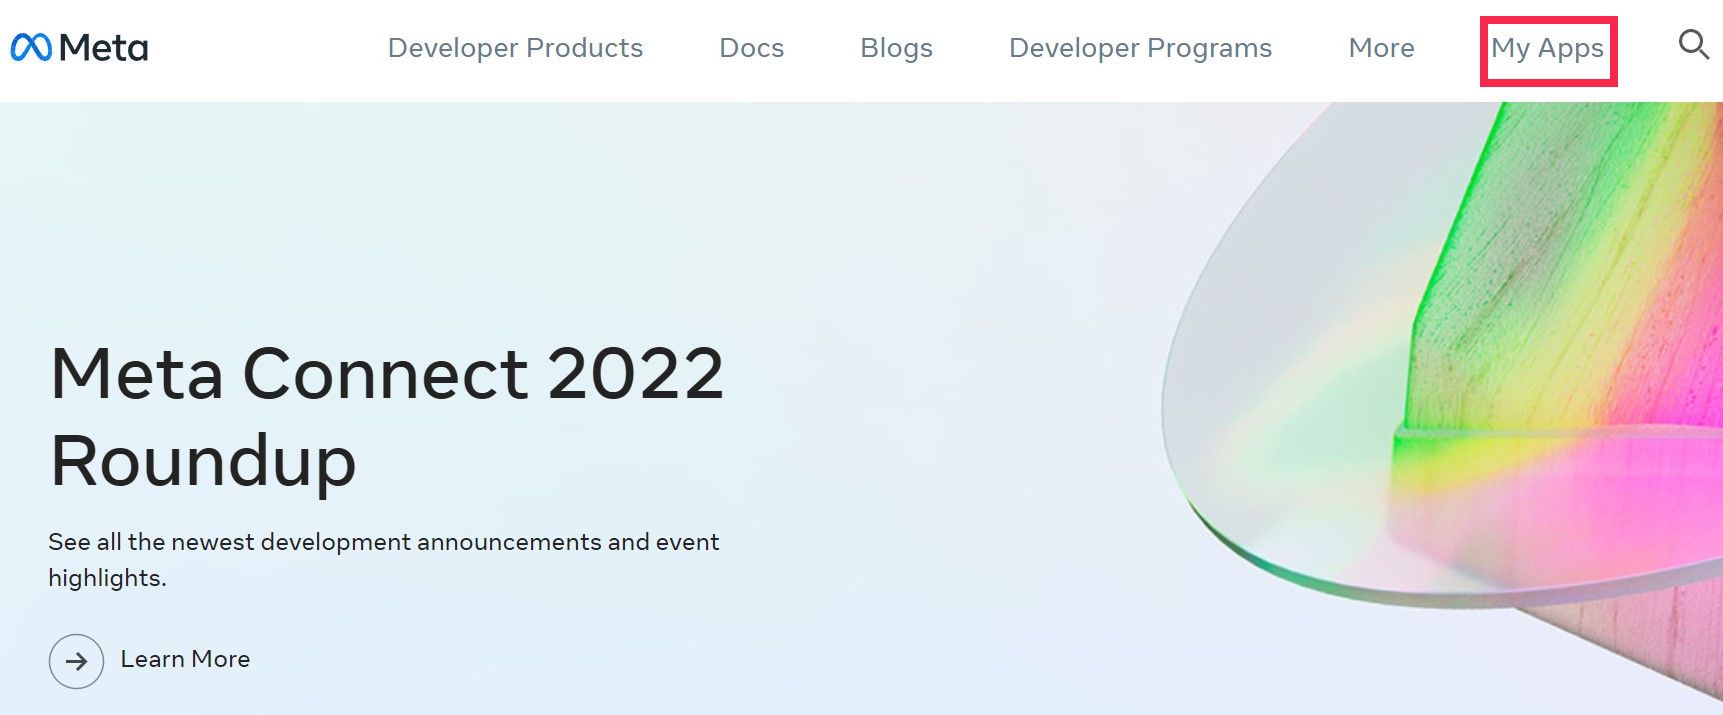
To get started, you’ll first need to create an account with Meta for Developers. If you already have an account, sign in to the website. Once your account is all set up, click on My Apps:
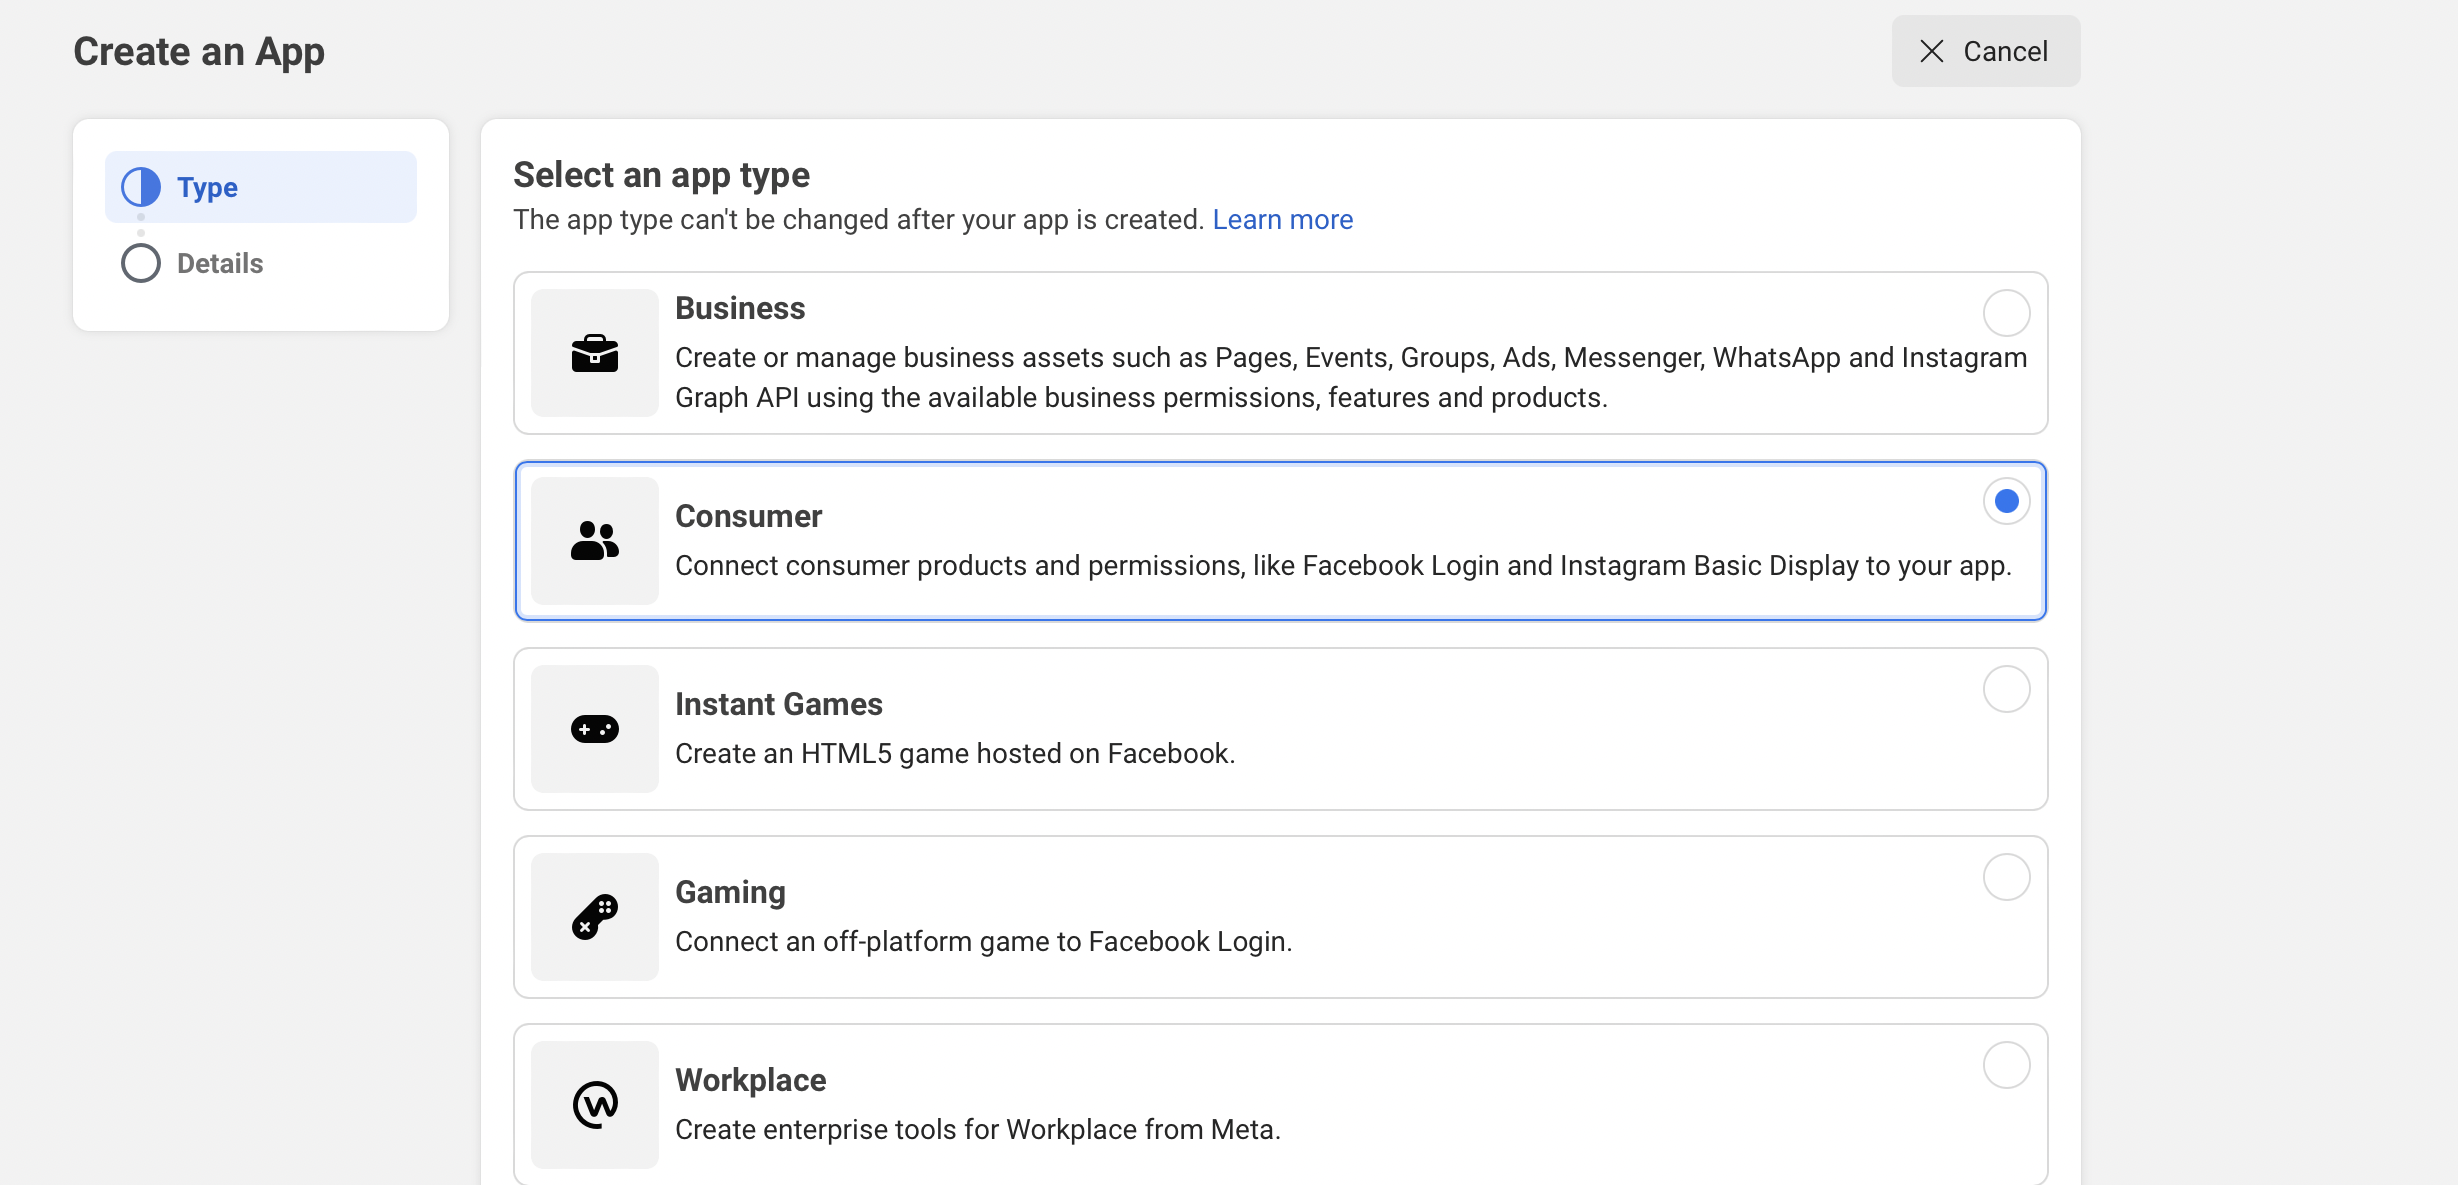
Select Create App, and you’ll be taken to a new screen. Here, choose Consumer and then hit Next:
At this point, you’ll be presented with a form where you can enter your app name and confirm your email address. Next, click on Create app:

You’ll be asked to re-enter your password to finish setting up your app.
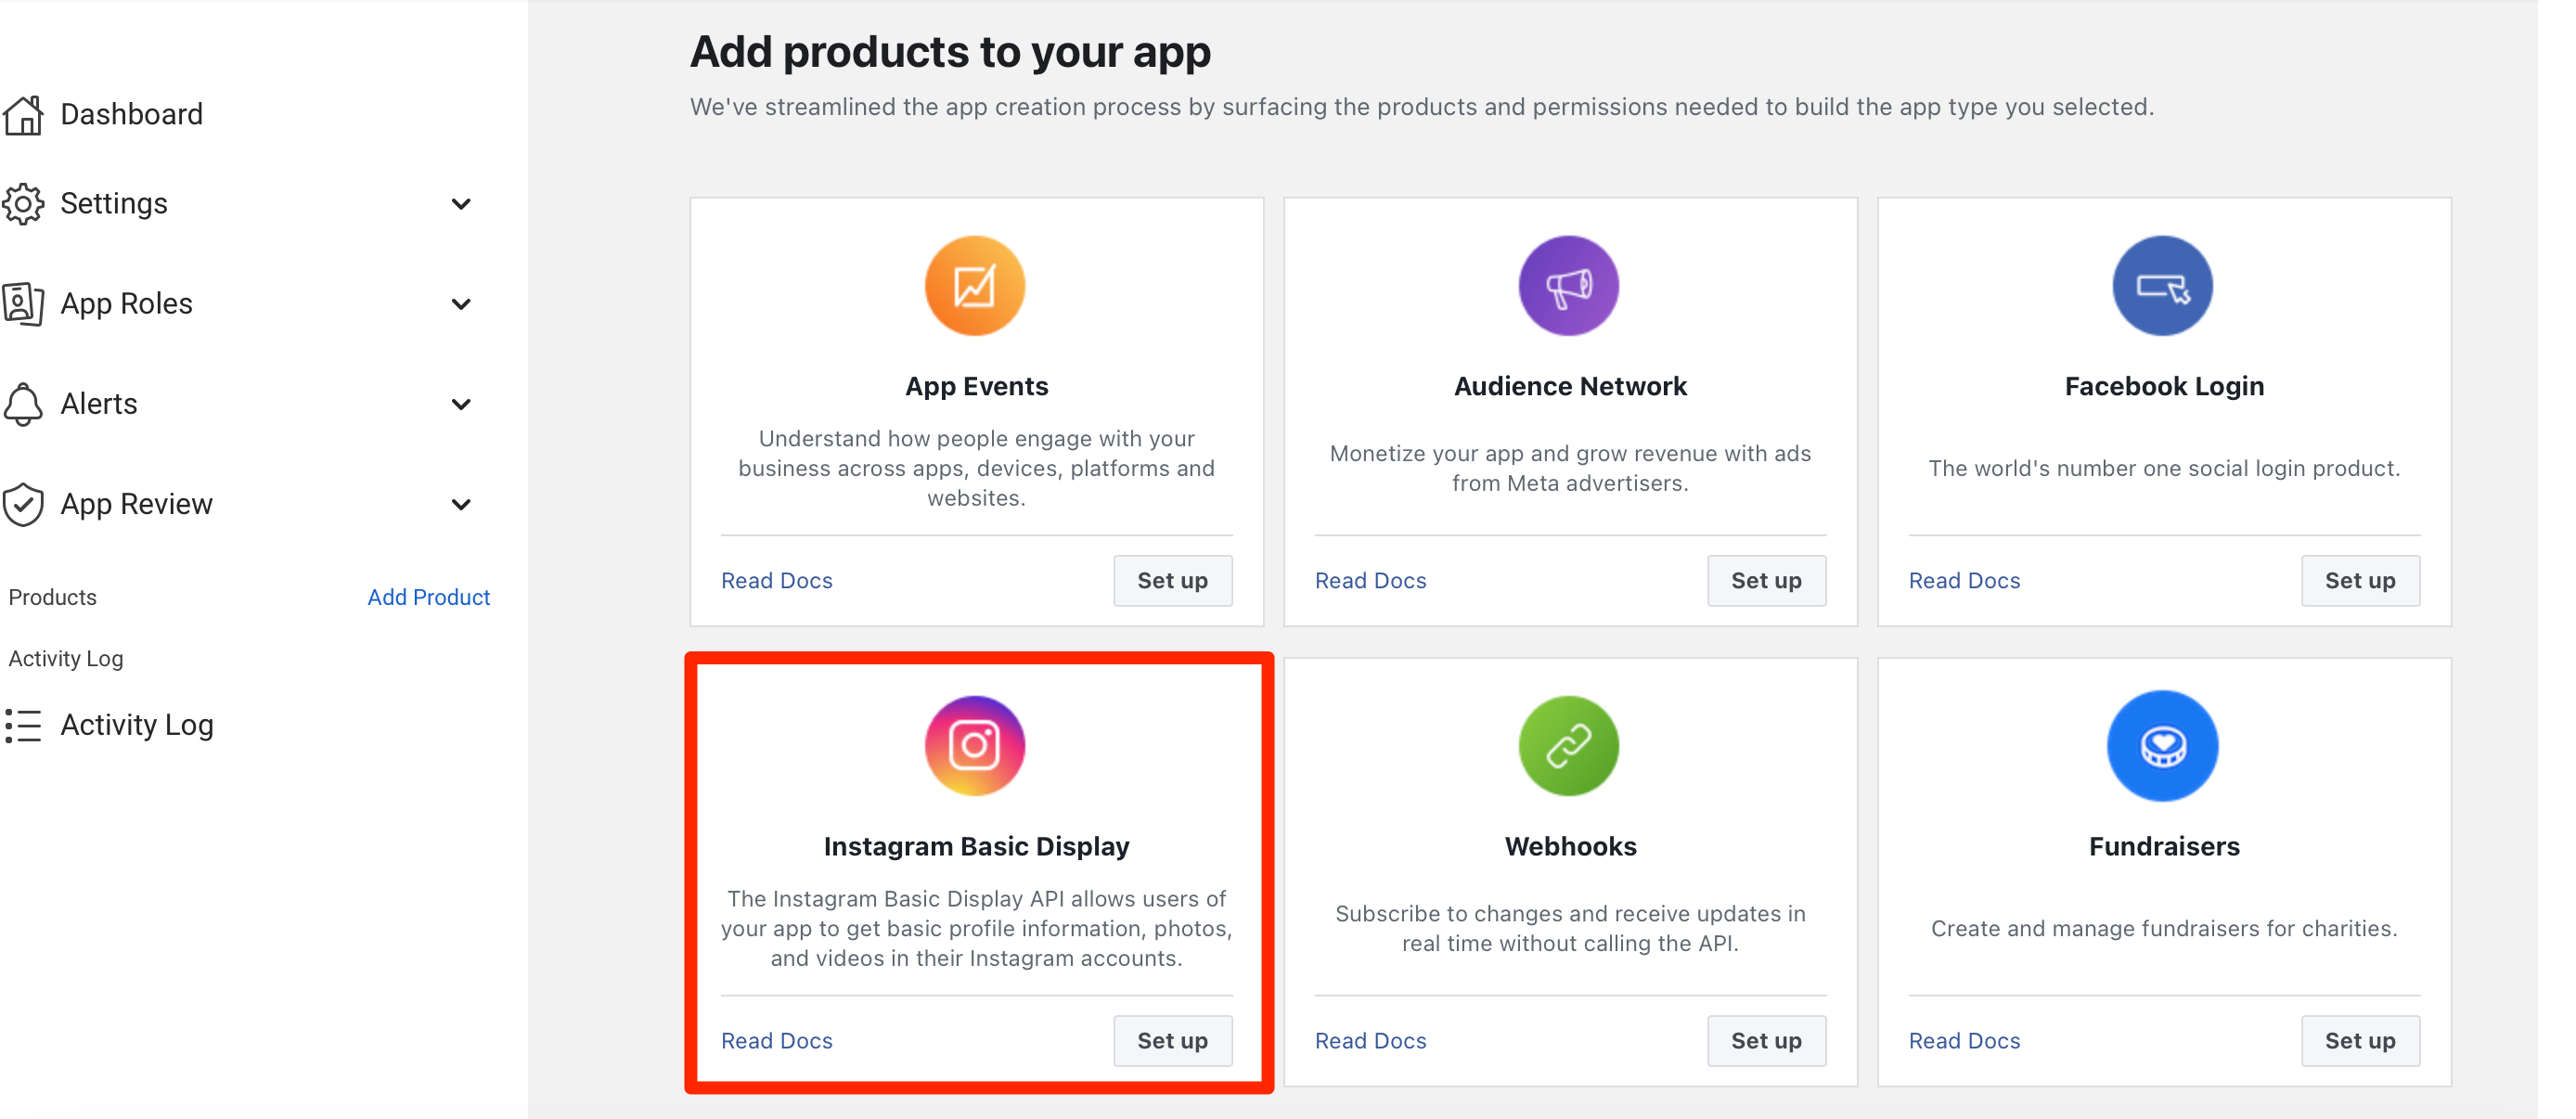
You will now see a list of all available apps like Facebook Login, Fundraisers, and Webhooks. Find the Instagram Basic Display option and click Set up:
Next, you’ll be presented with some information about the display of your app, use cases, and permissions. Scan these details and then click Create new app. A pop-up will appear for you to enter a new Instagram app ID:
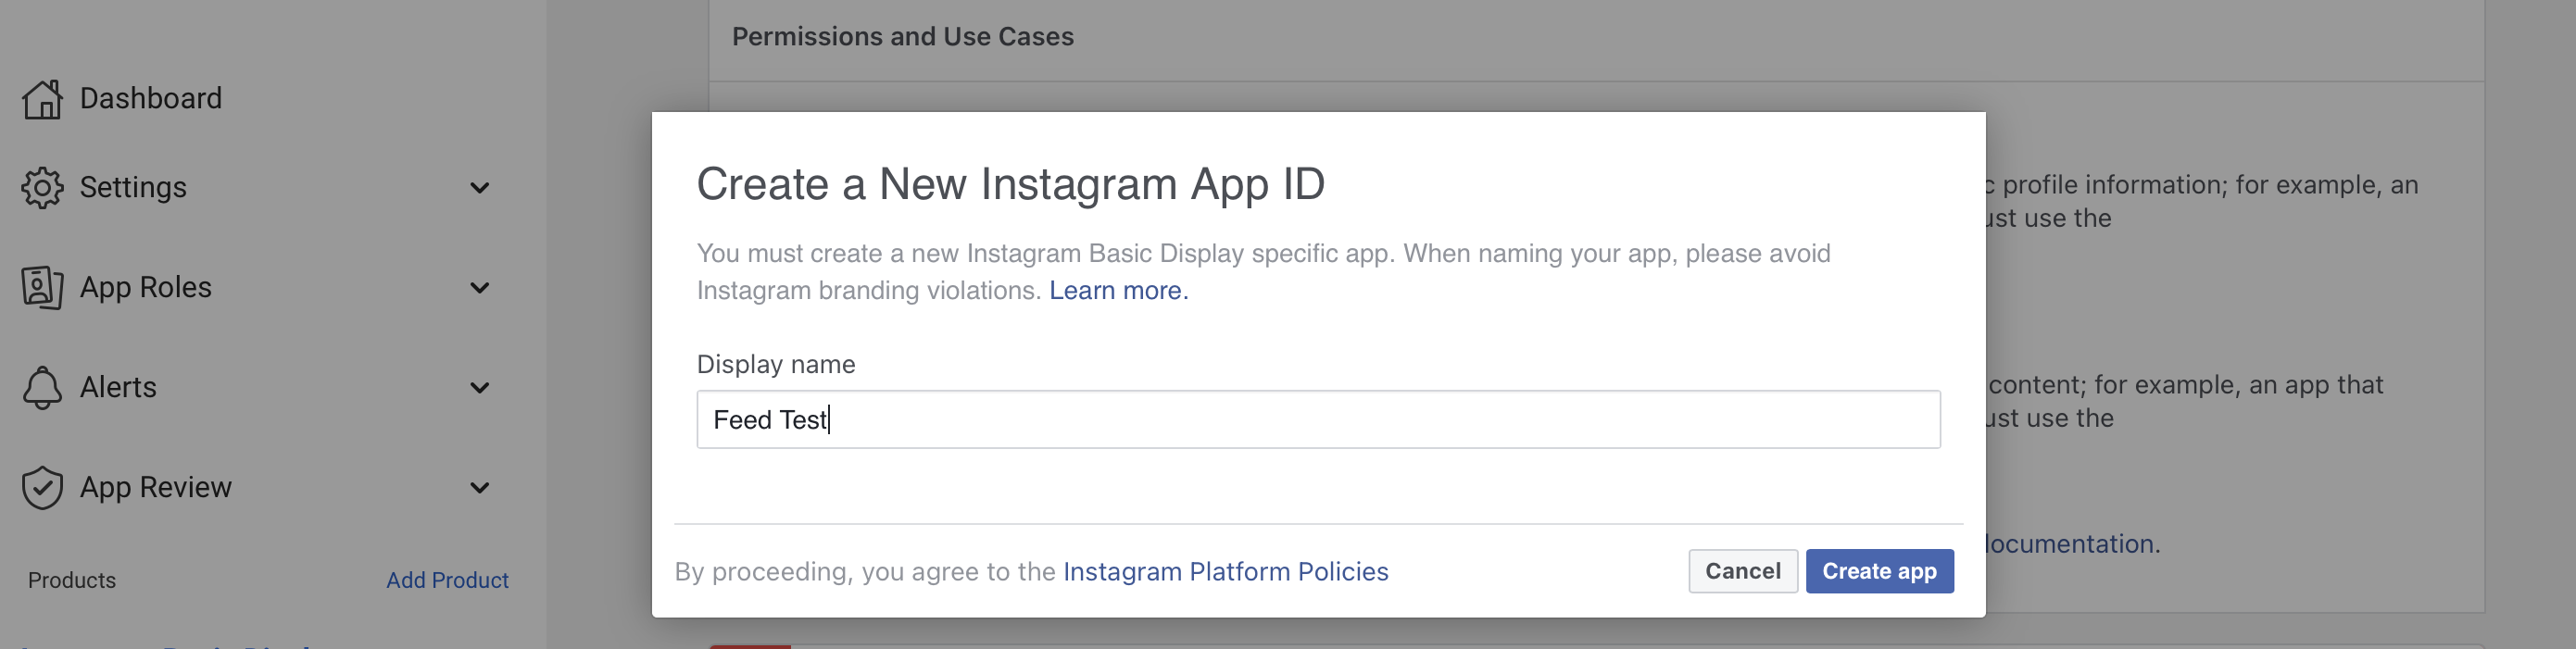
It’s a good idea to visit the link provided in the popup to avoid Instagram branding violations. Then, in the Display name box, enter a new Instagram app ID and hit Create app.
Step 2: Configure Your App Settings and Add a Test User
Now that you’ve set up your app, you’ll need to configure your app settings and add a test user from your Meta for Developers dashboard.
From this area, navigate to Settings > Basic:
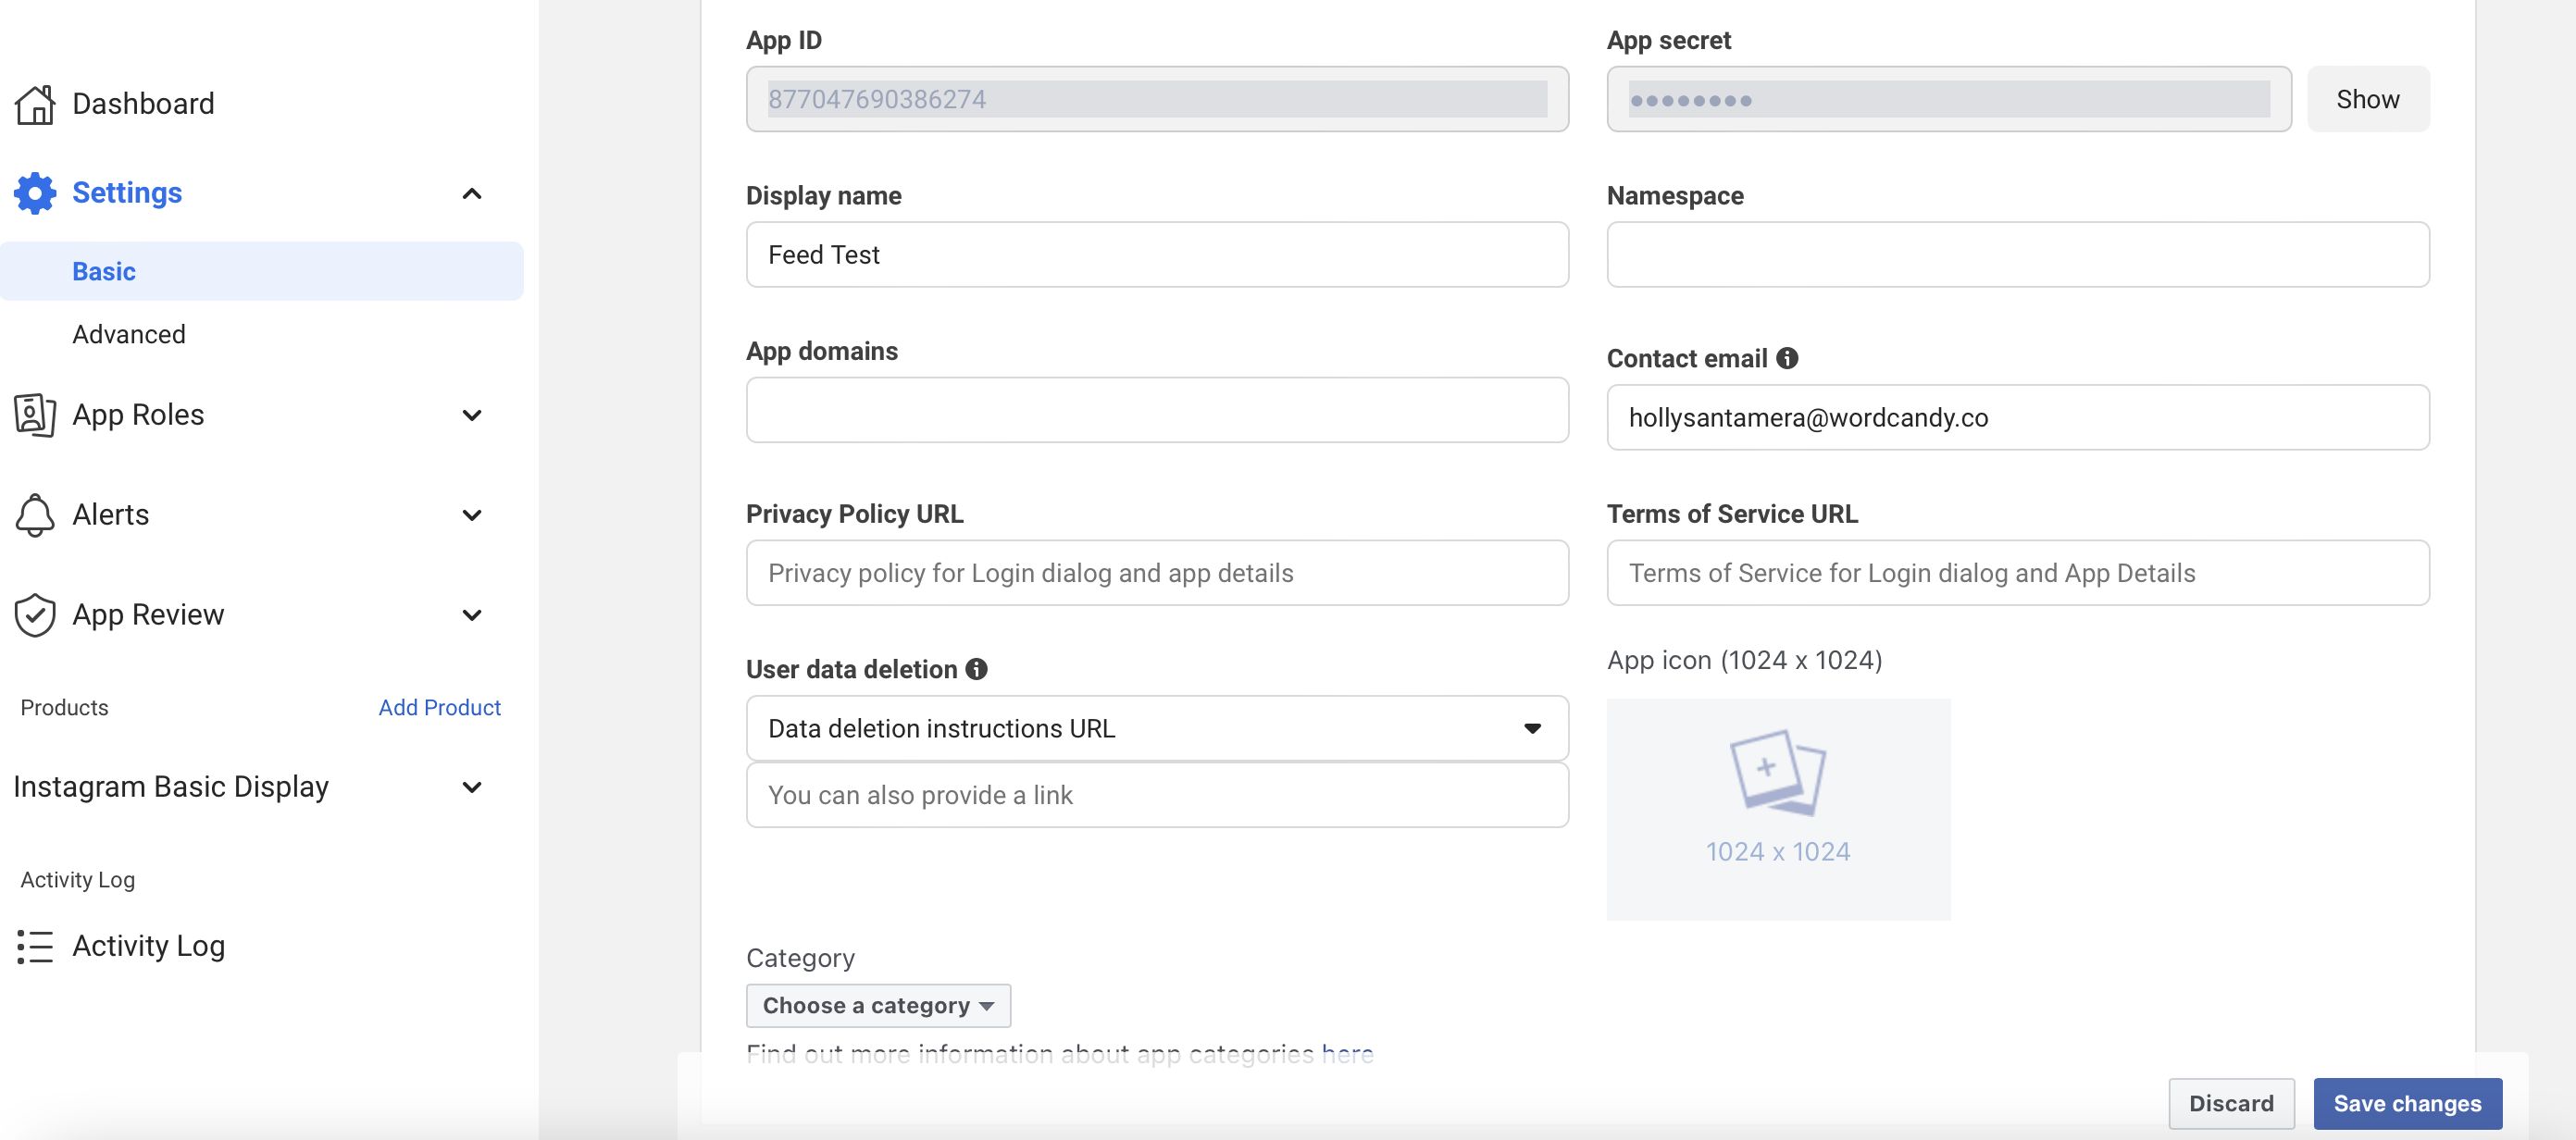
You’ll be directed to a new screen with fields for you to complete. Some of the fields are already filled in, such as your App secret and App ID. Complete the remaining fields that are applicable to your app and company.
In the Category dropdown menu, select Business and pages. Then save your changes.
You’re now ready to add a test user to your app. To do this, head to App Roles > Roles and scroll down to find Add Instagram Testers:

A pop-up will appear where you can add your Instagram username:
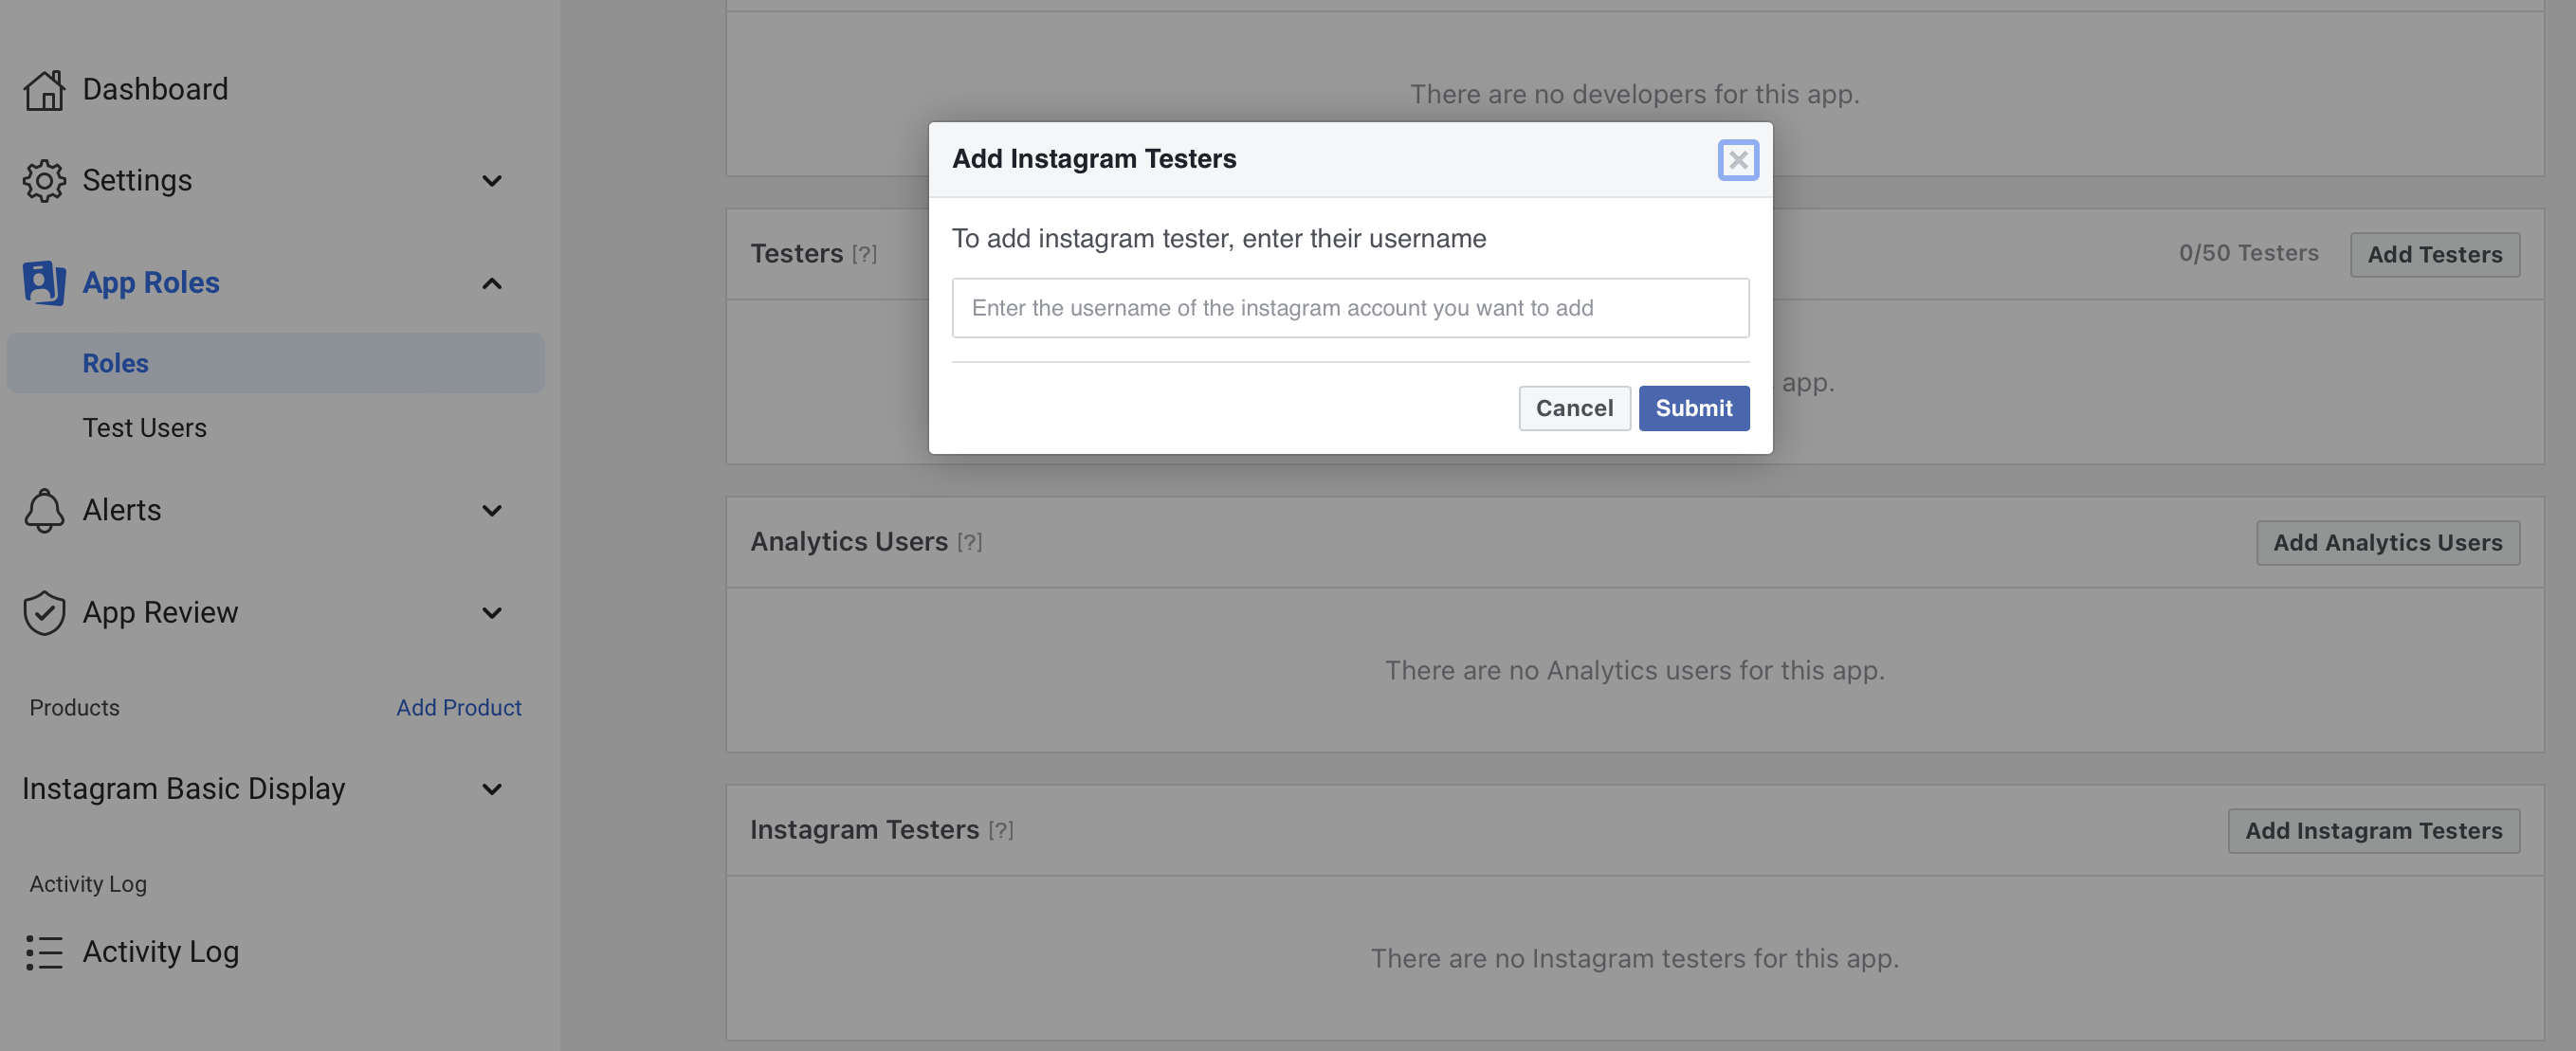
Click on Submit to send an invite to your chosen Instagram account.
Now, you’ll need to accept the invitation, so head across to your Instagram account. Go to Settings > Apps and websites > Tester Invitations:
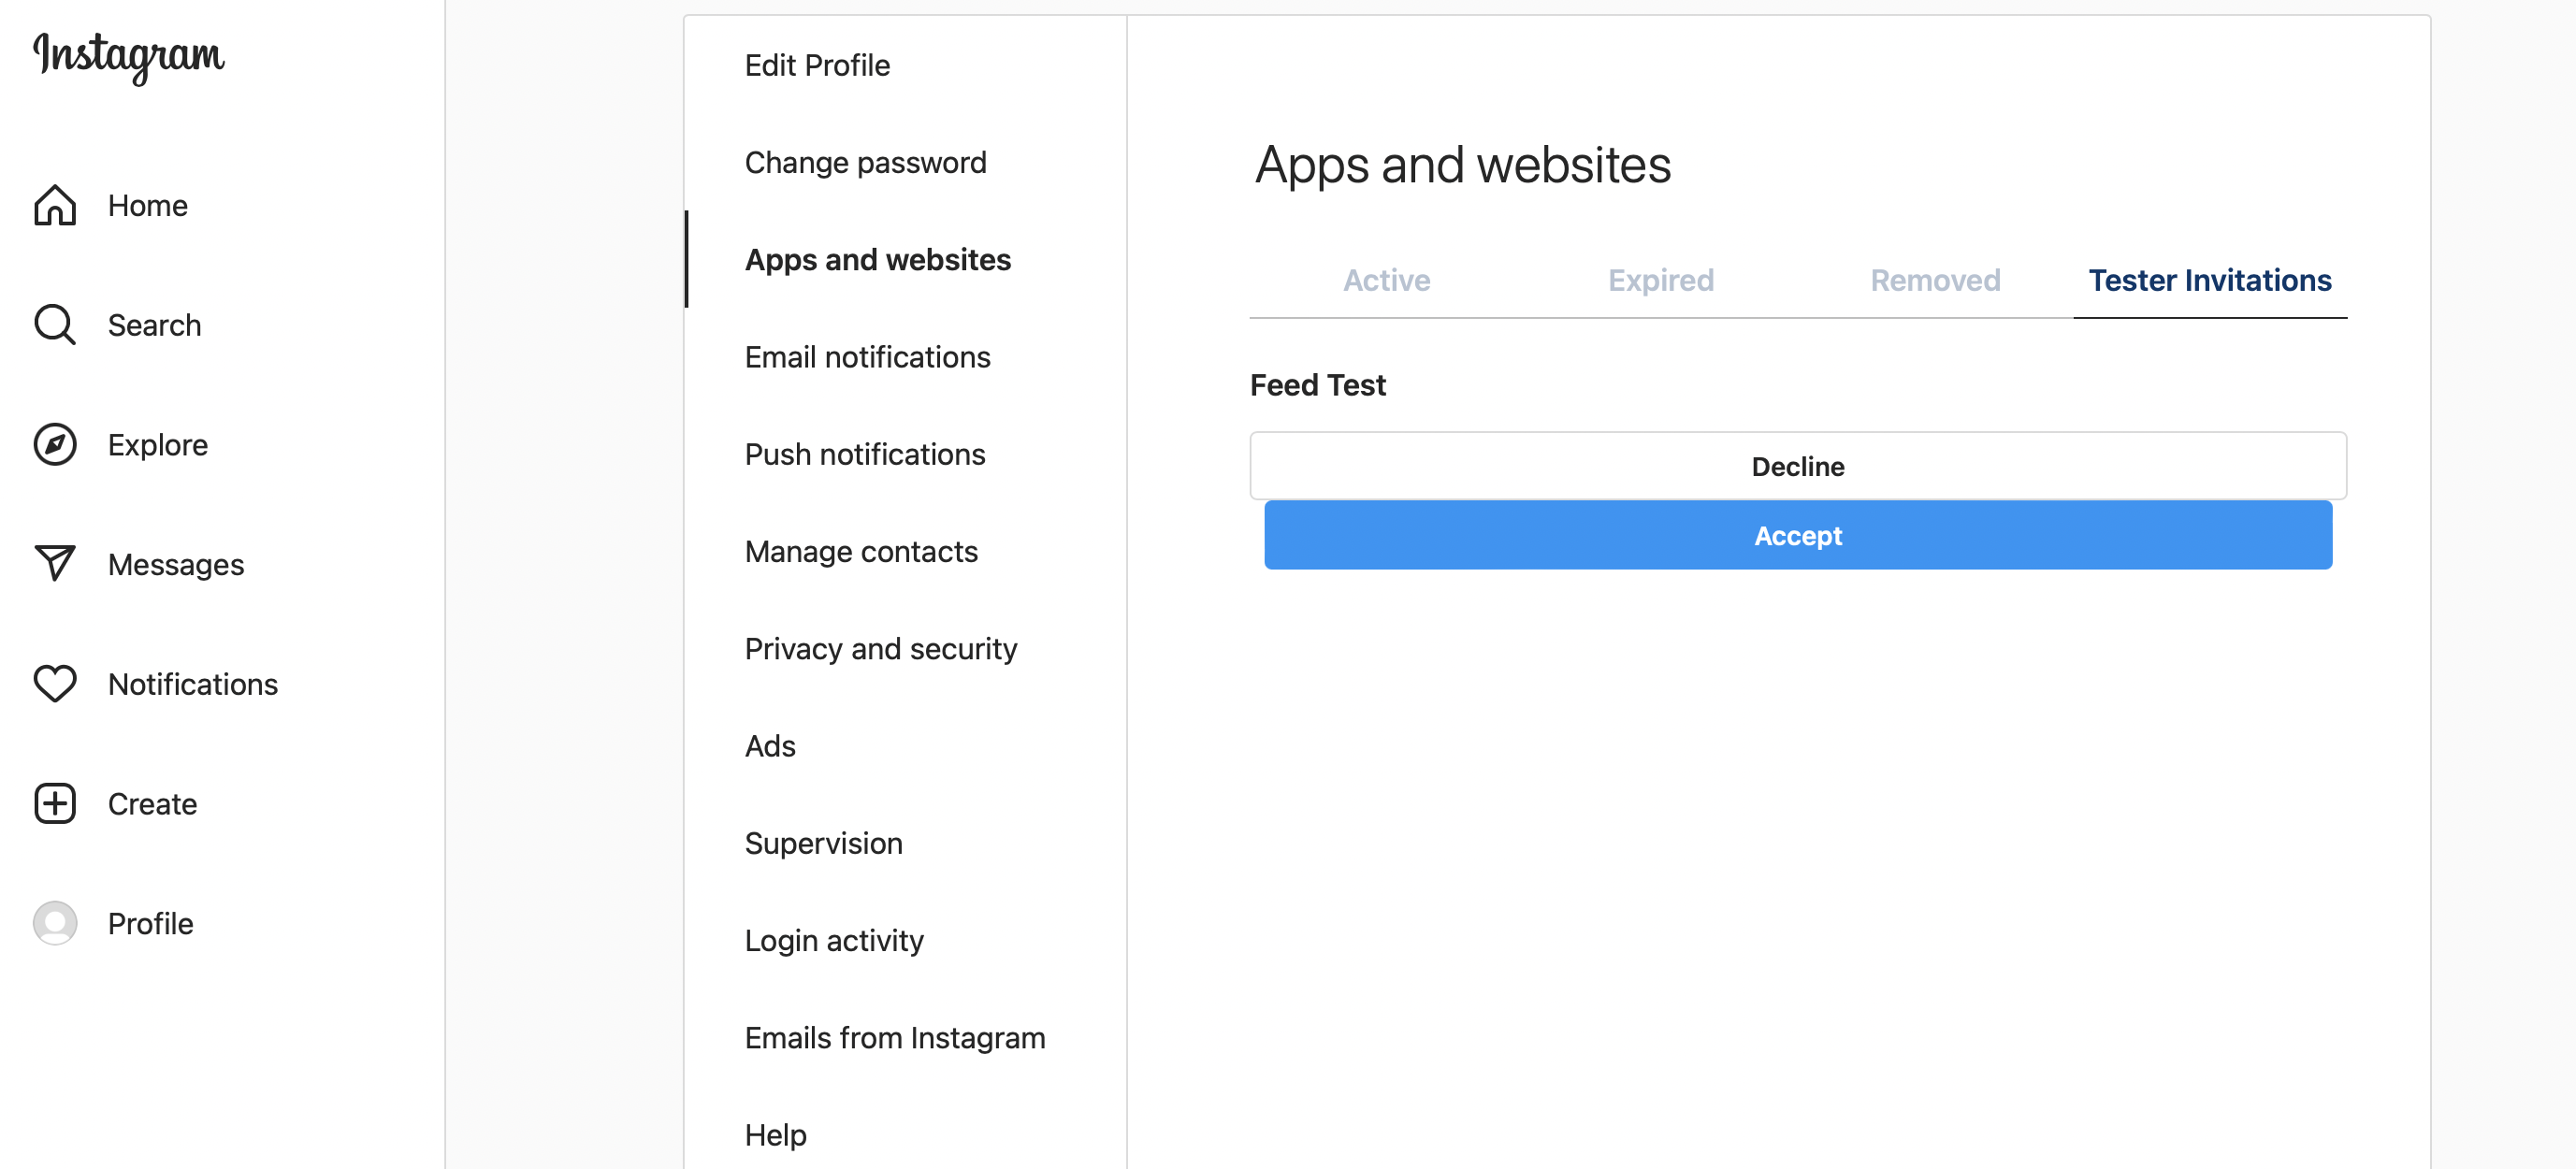
Then, accept the invitation. It’s important to note that this step must be completed on a desktop computer and won’t be successful if you’re using the mobile app.
Step 3: Generate Your Instagram Access Token
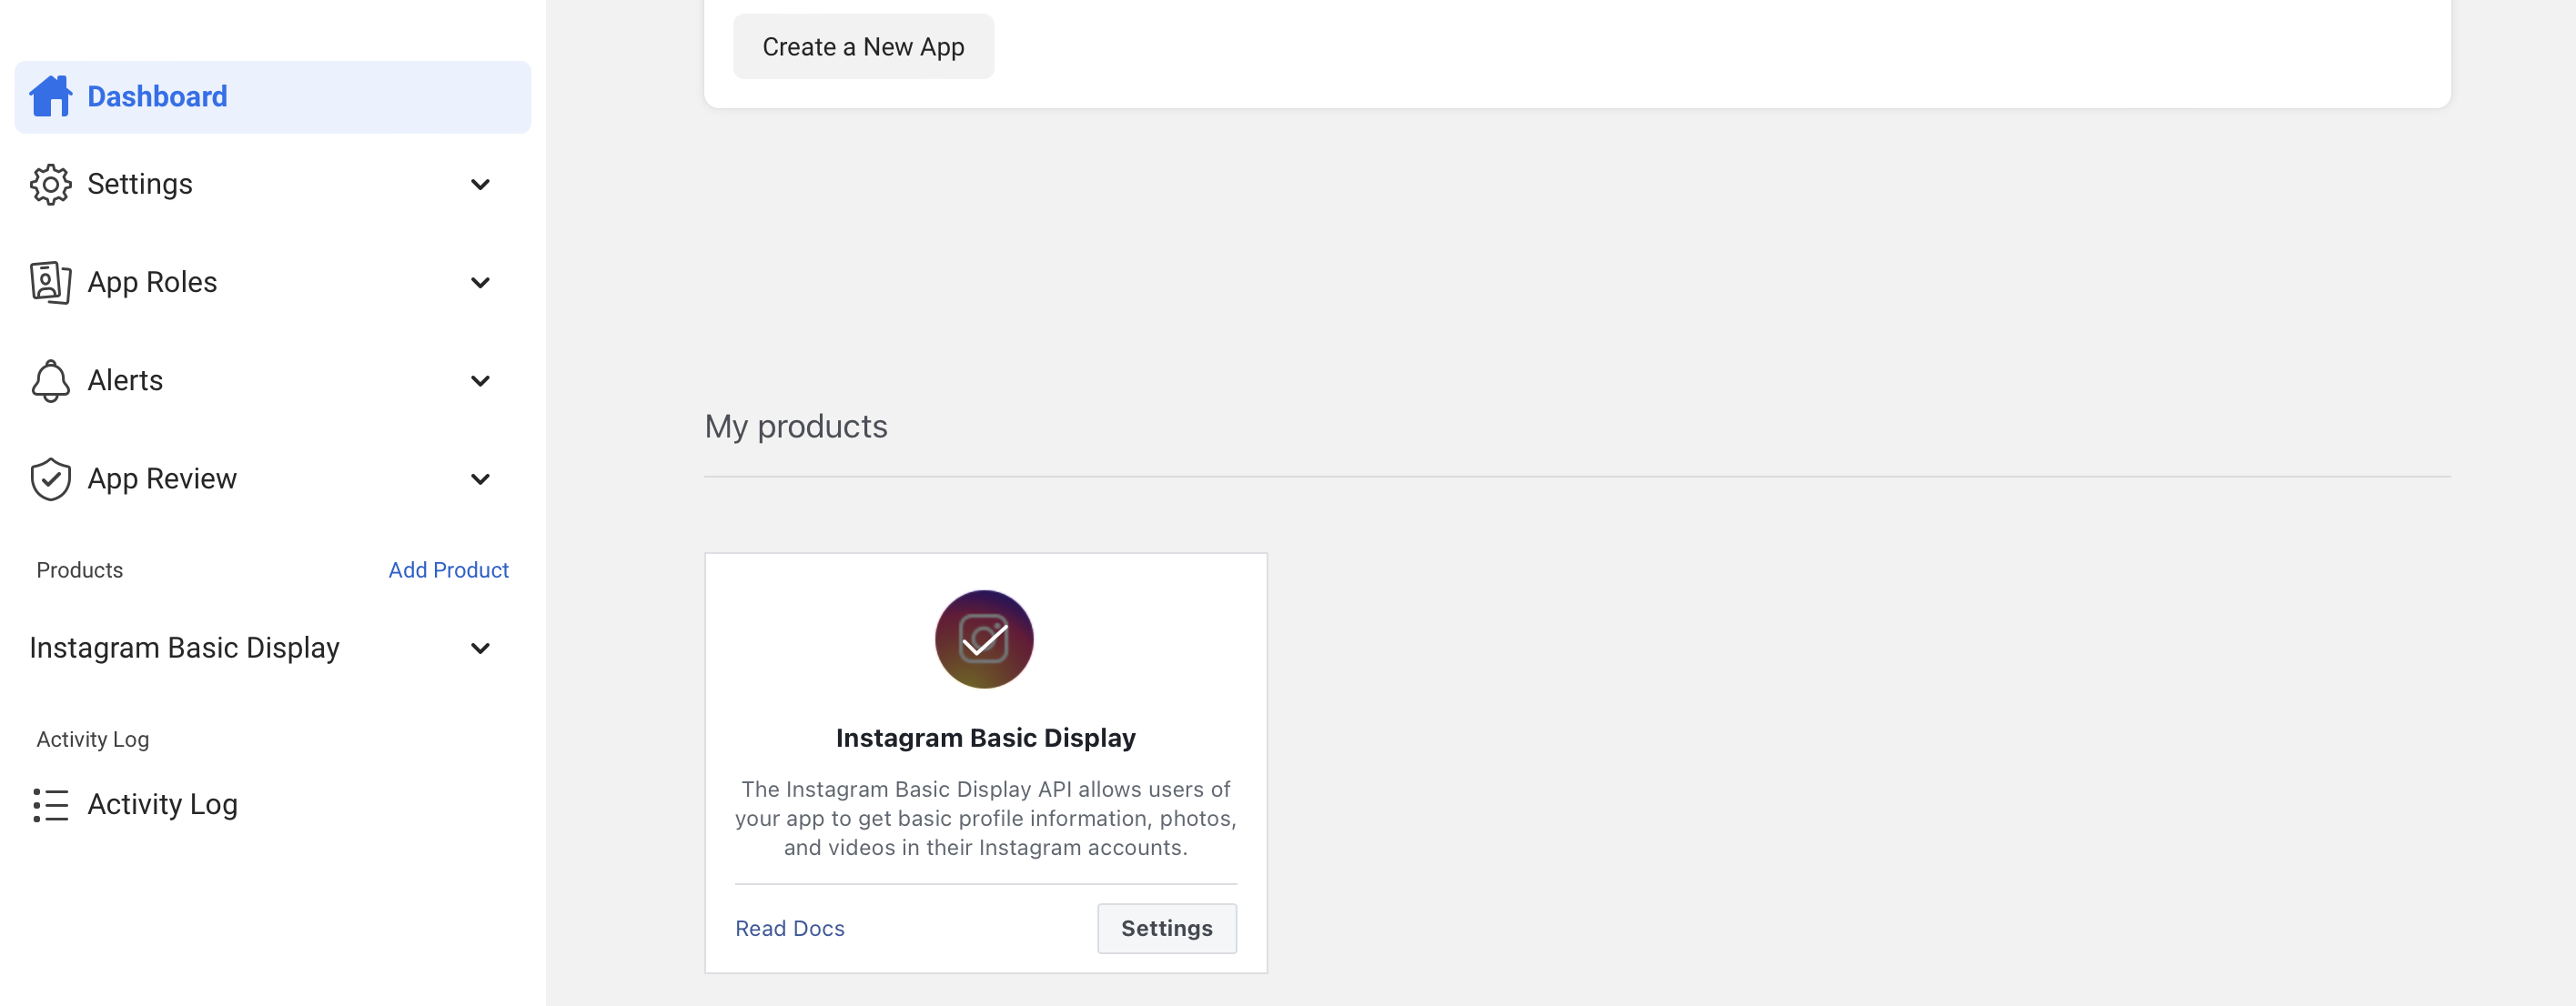
At this stage, you’re ready to generate your Instagram access token. So, switch back to your Meta for Developers dashboard. Scroll down until you see My products:
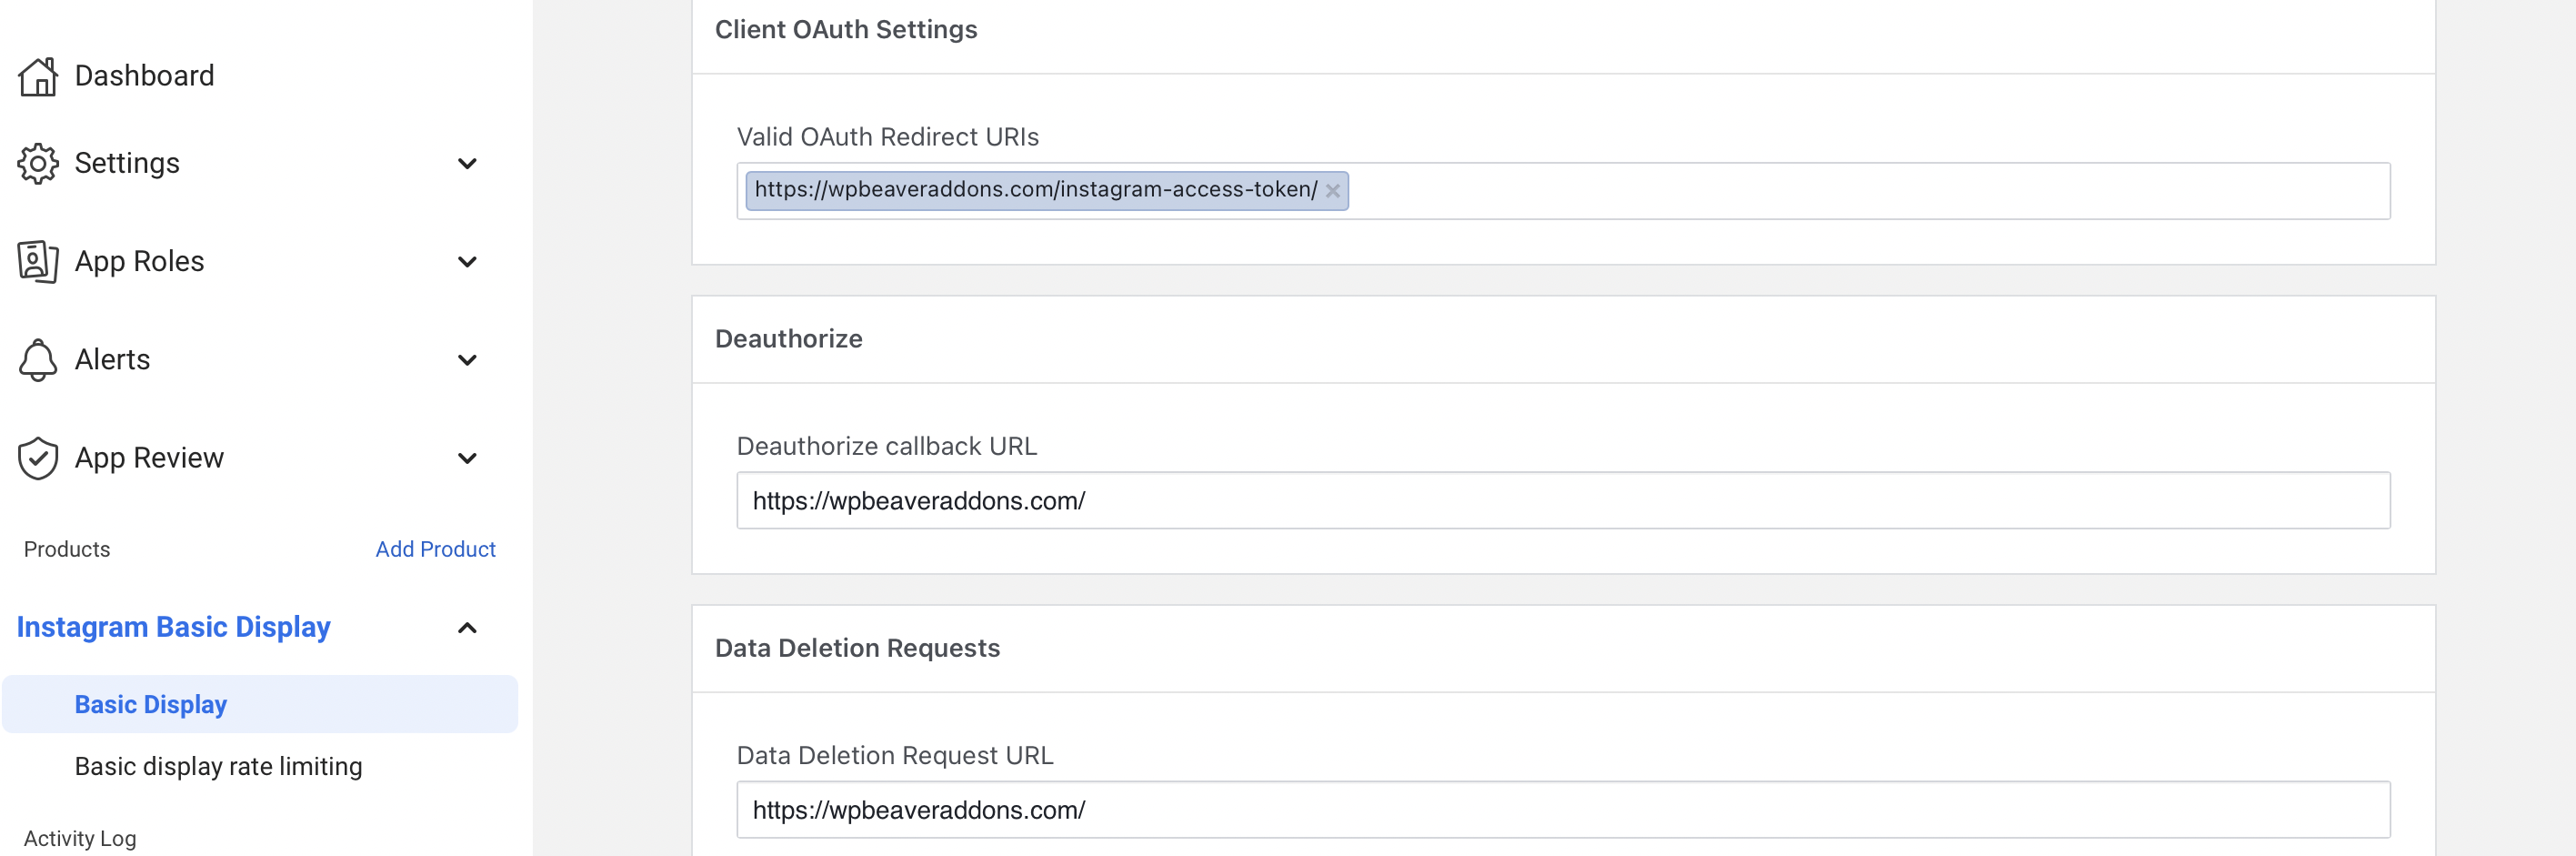
Click on Settings and scroll to Client OAuth Settings. In this box, enter the following URL: “https://wpbeaveraddons.com/instagram-access-token/”.
Where it says Deauthorize Callback URL, input this address: “https://wpbeaveraddons.com/”. For the Data Deletion Request URL, use the same URL as above. Then, save your changes:
Now, scroll down to User Token Generator and select Generate Token:
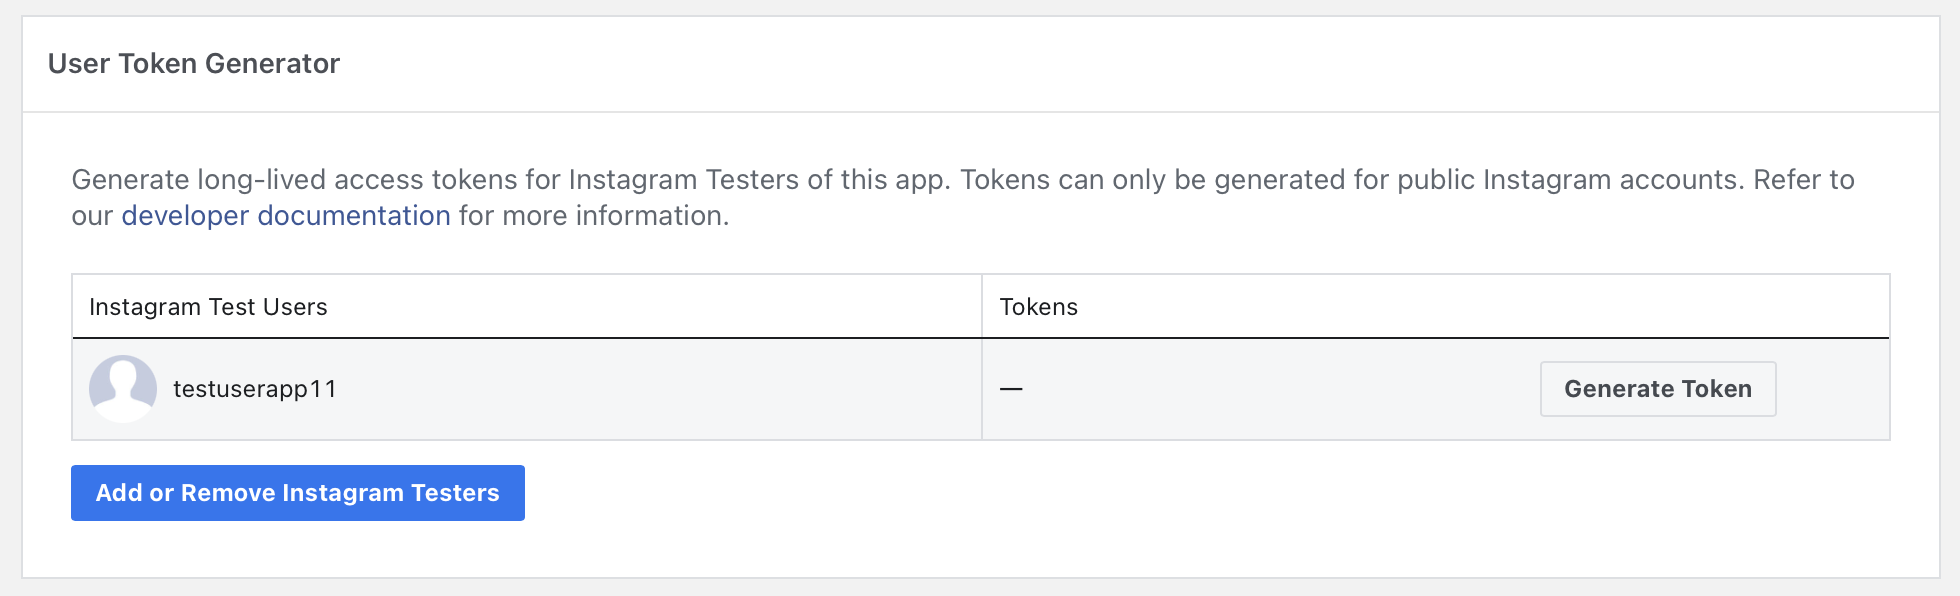
You may need to log back in to your Instagram account if your session has ended. Then, click on Allow in the new window to generate your access token:
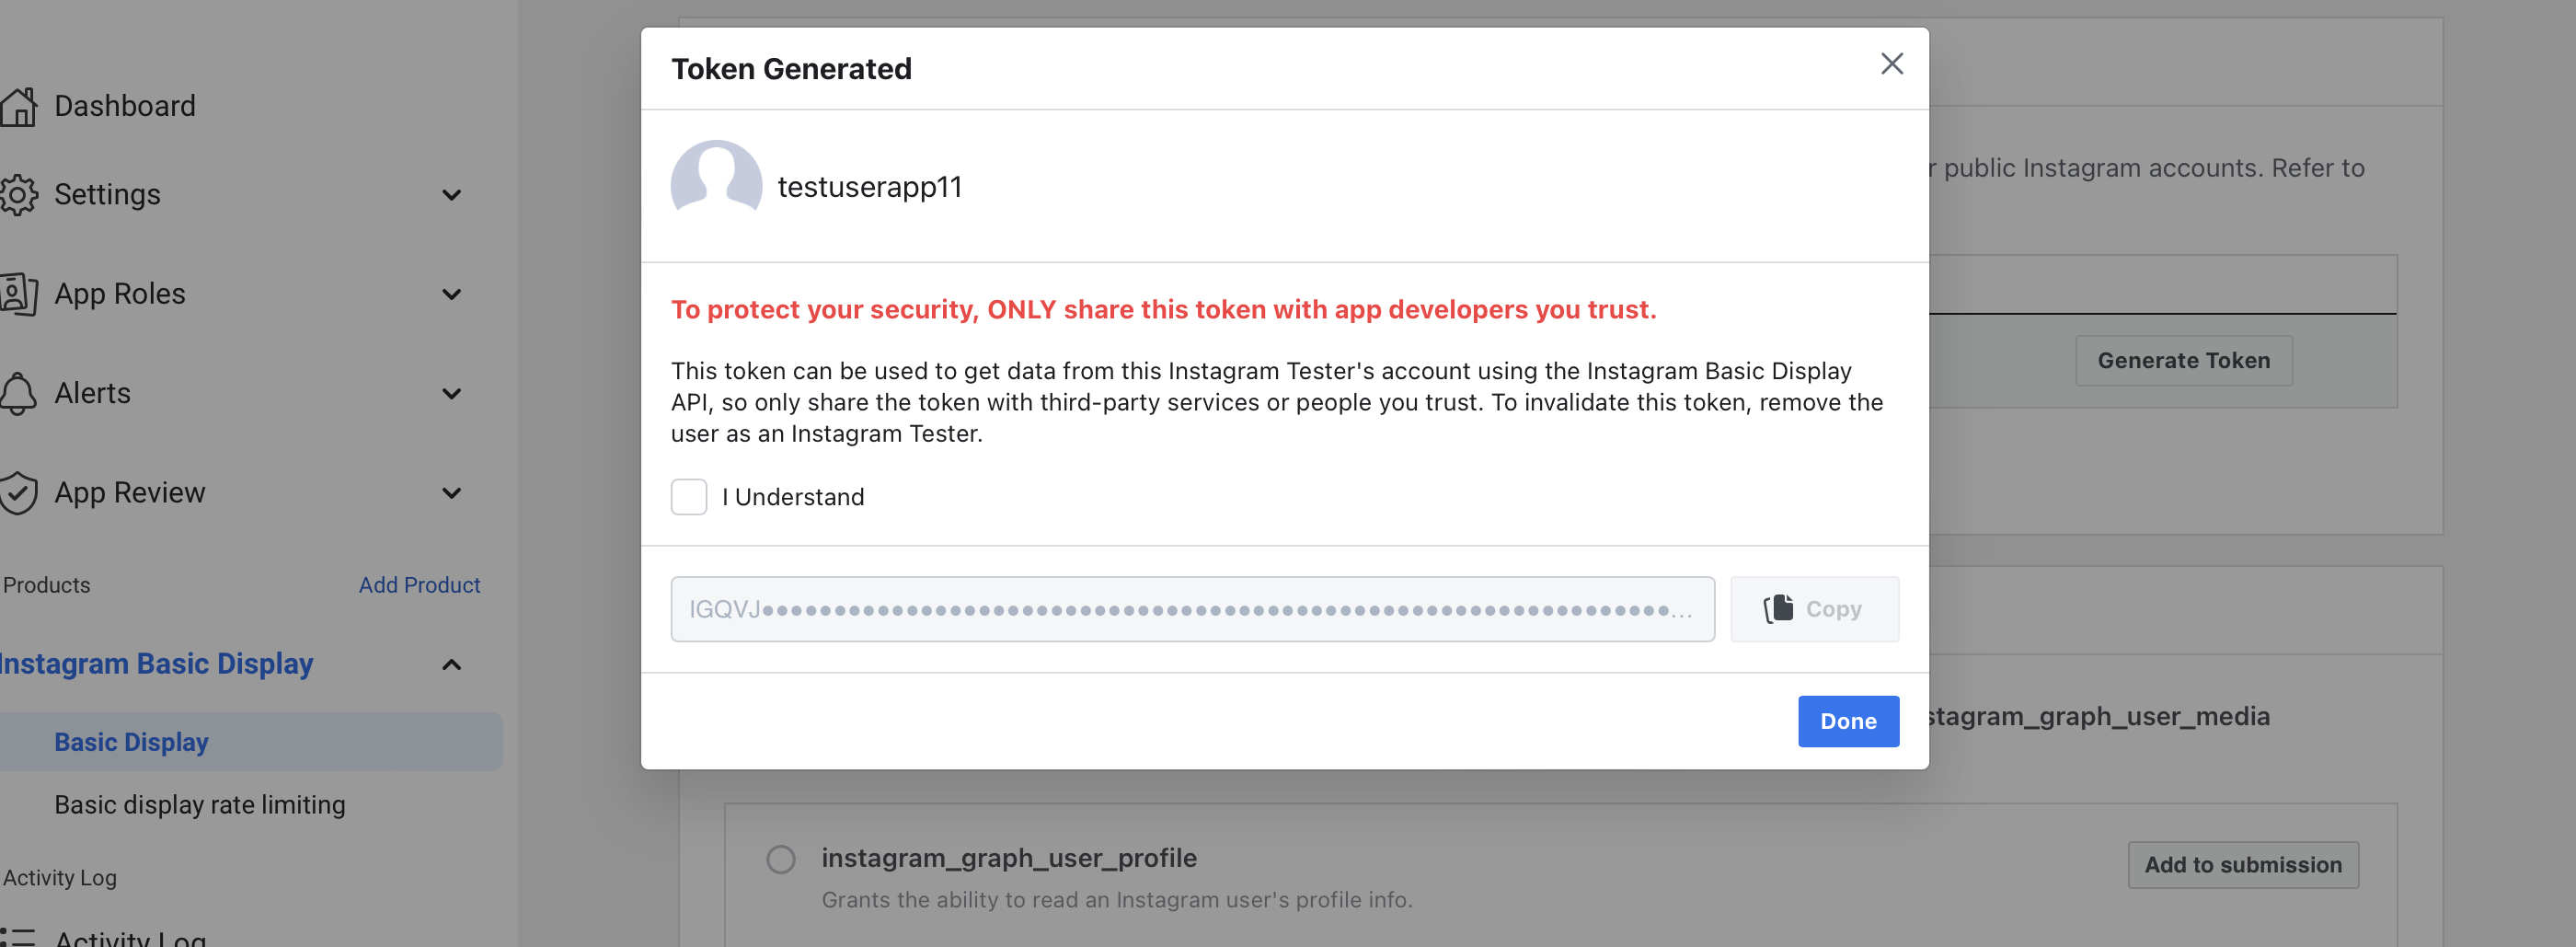
Tick the checkbox to show that you understand the conditions. Then, copy the token to your clipboard and hit Done.
Step 4: Add Your Instagram Feed to Your Page
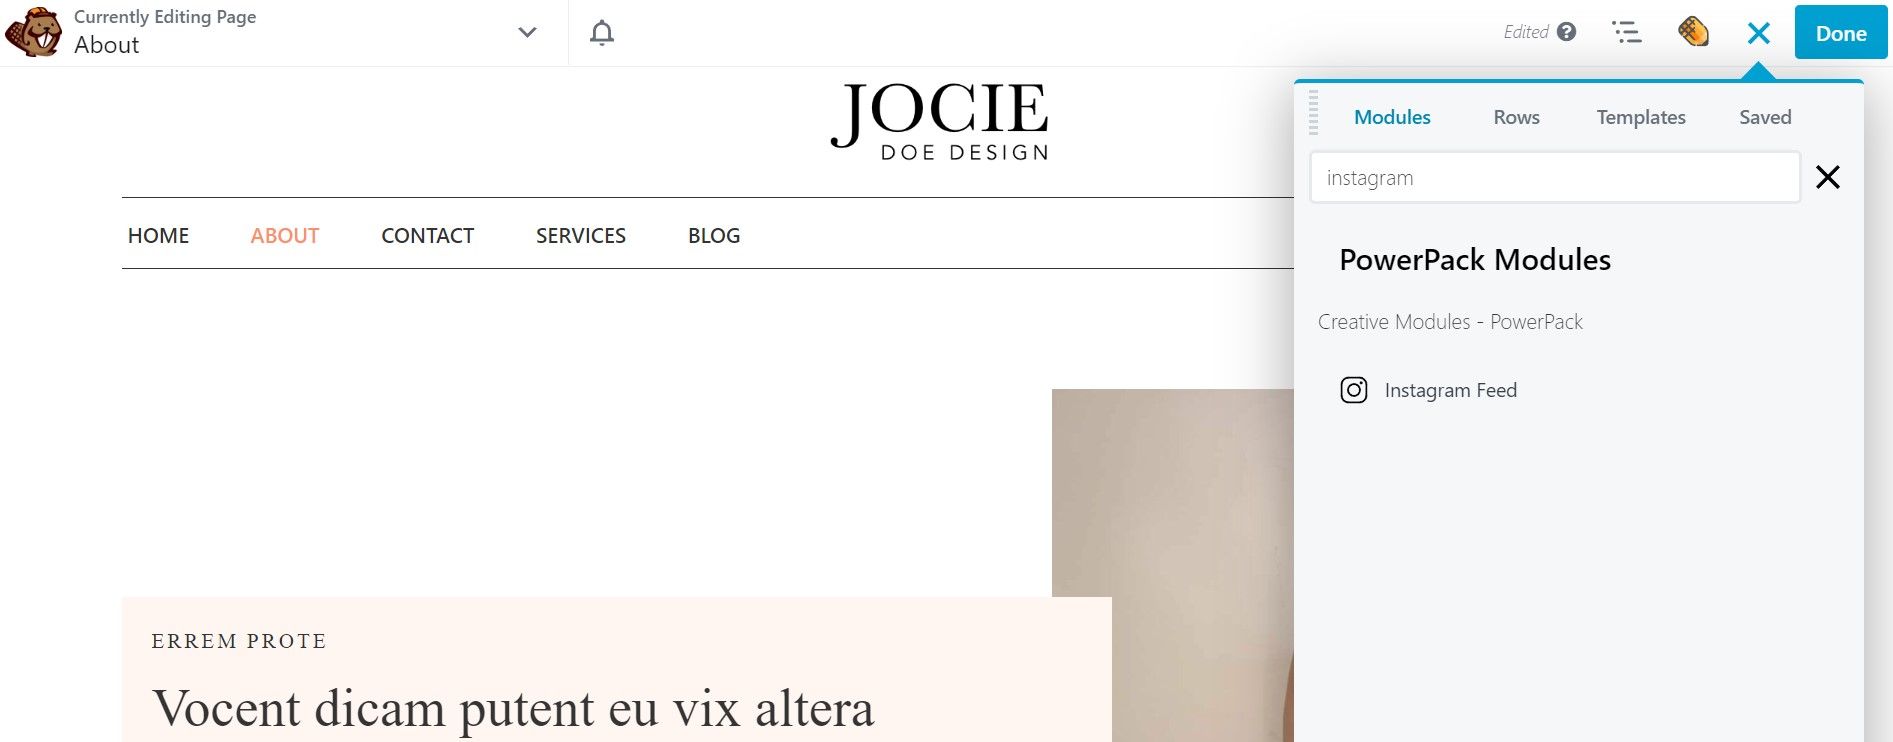
It’s now time to add the Instagram feed to your page or post in WordPress. Launch the Beaver Builder editor and access the modules via the sidebar. Then, select the PowerPack Instagram Feed module and drag it onto your page:
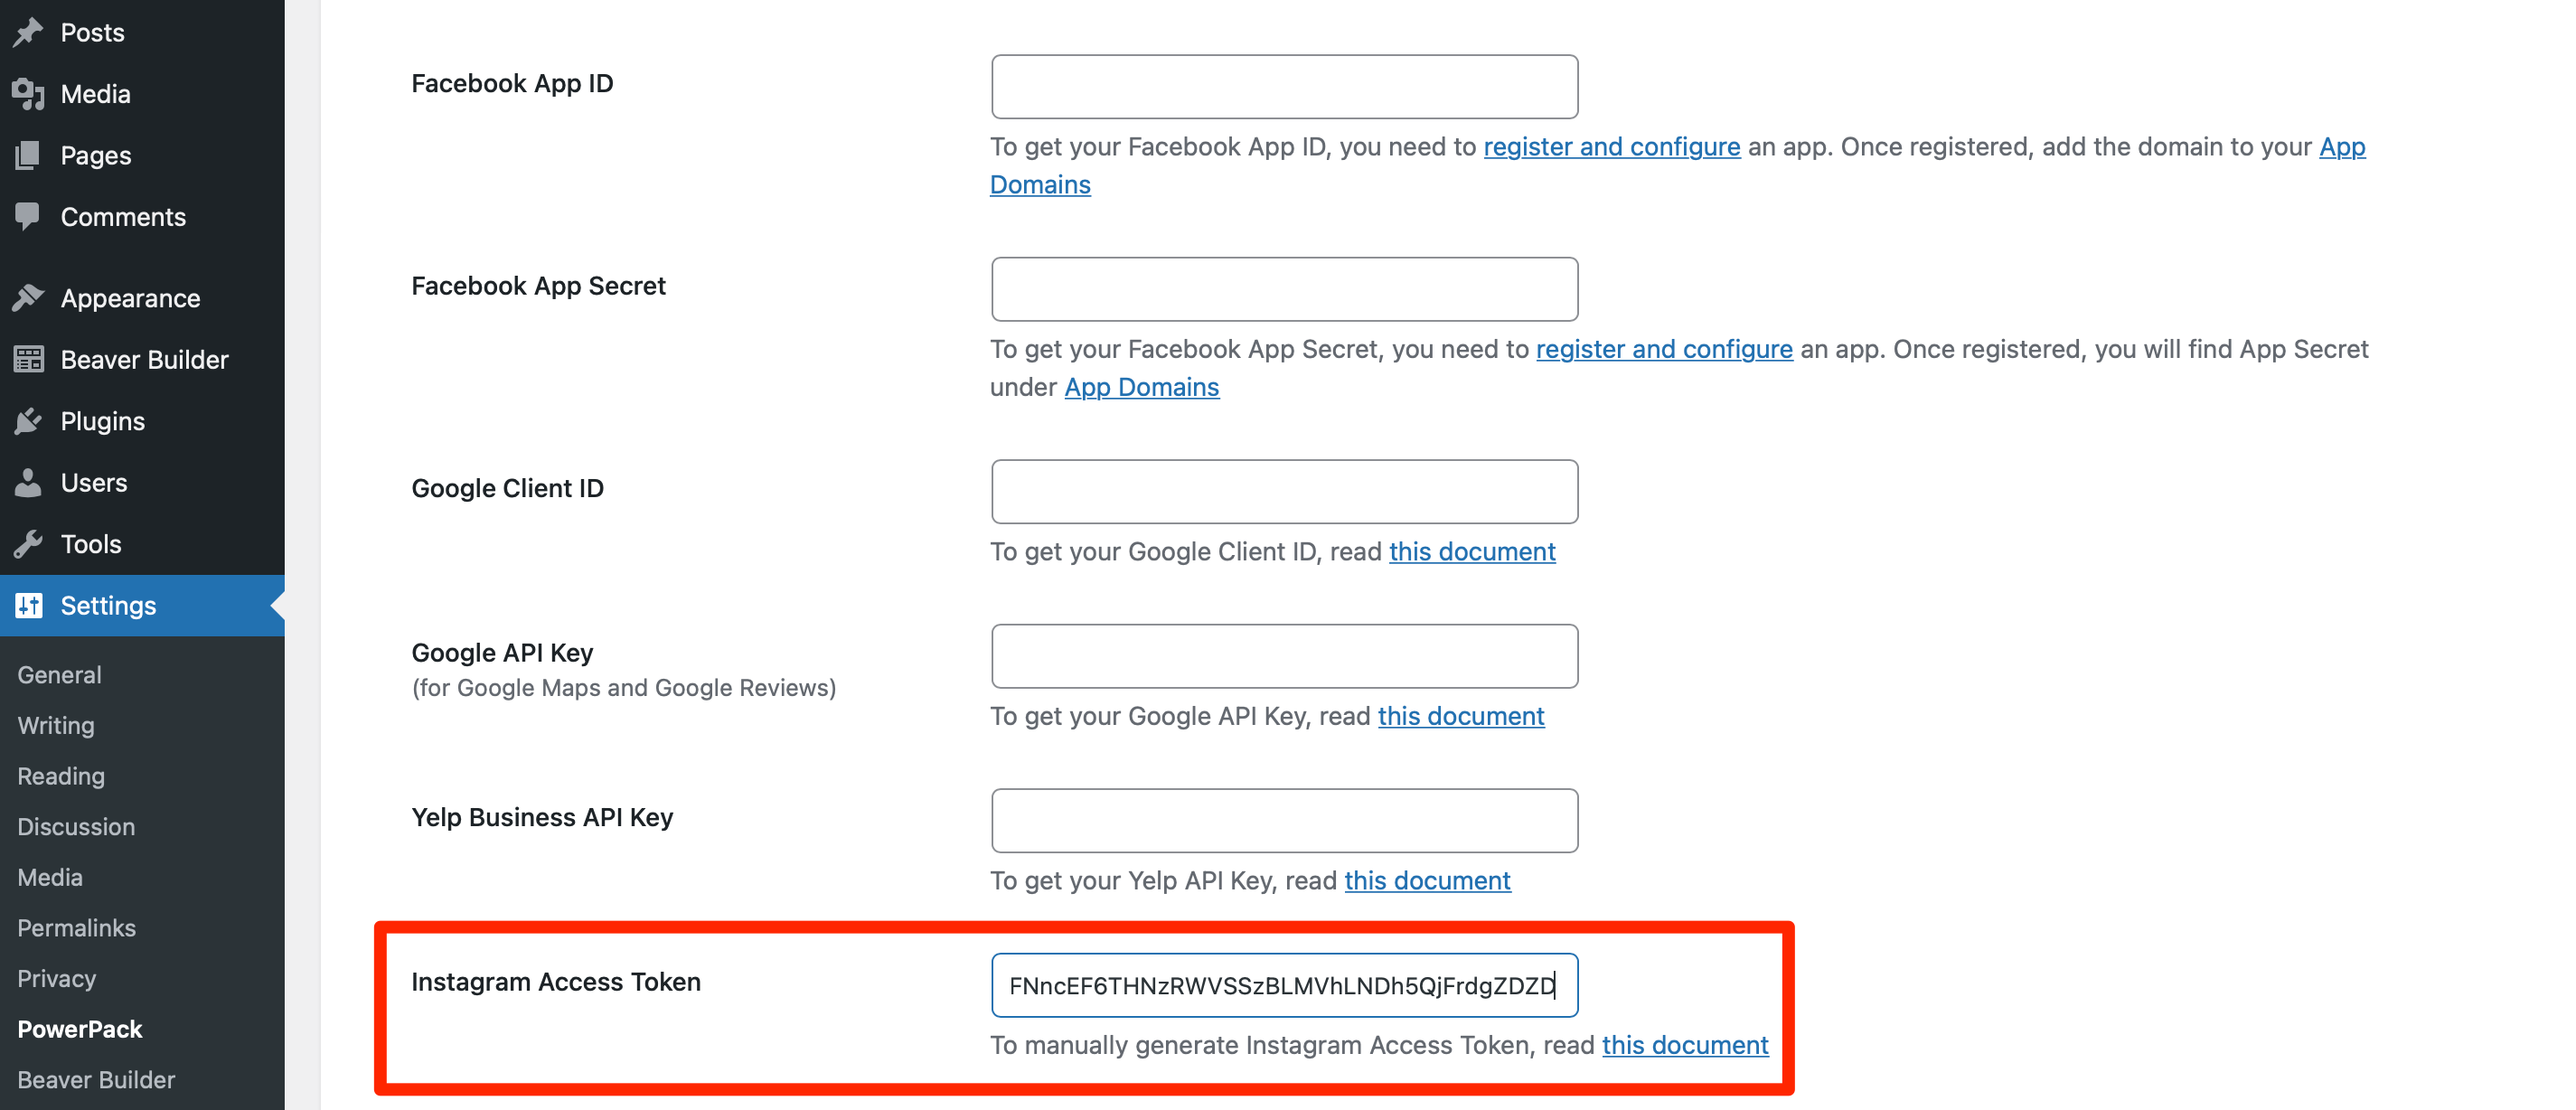
In the General tab of the module’s settings, you’ll see a link that says, Your Instagram Access Token is missing, click here to configure. Follow this link to your PowerPack Integration settings and paste the Access Token that you copied earlier:
Now, head back to your WordPress page or post, and you will see your Instagram photos appear.
Furthermore, with PowerPack Add-ons, you can even adjust your feed’s display settings using the many customization options. To begin, hit the wrench icon and select Instagram Feed Settings:

Here, you can limit the number of images that are displayed in your feed. You may also adjust the resolution and change the order of your posts, showing your most recent photos first.
Under Layout, you’re able to modify the format of your images, choosing between masonry, columns, or a carousel:
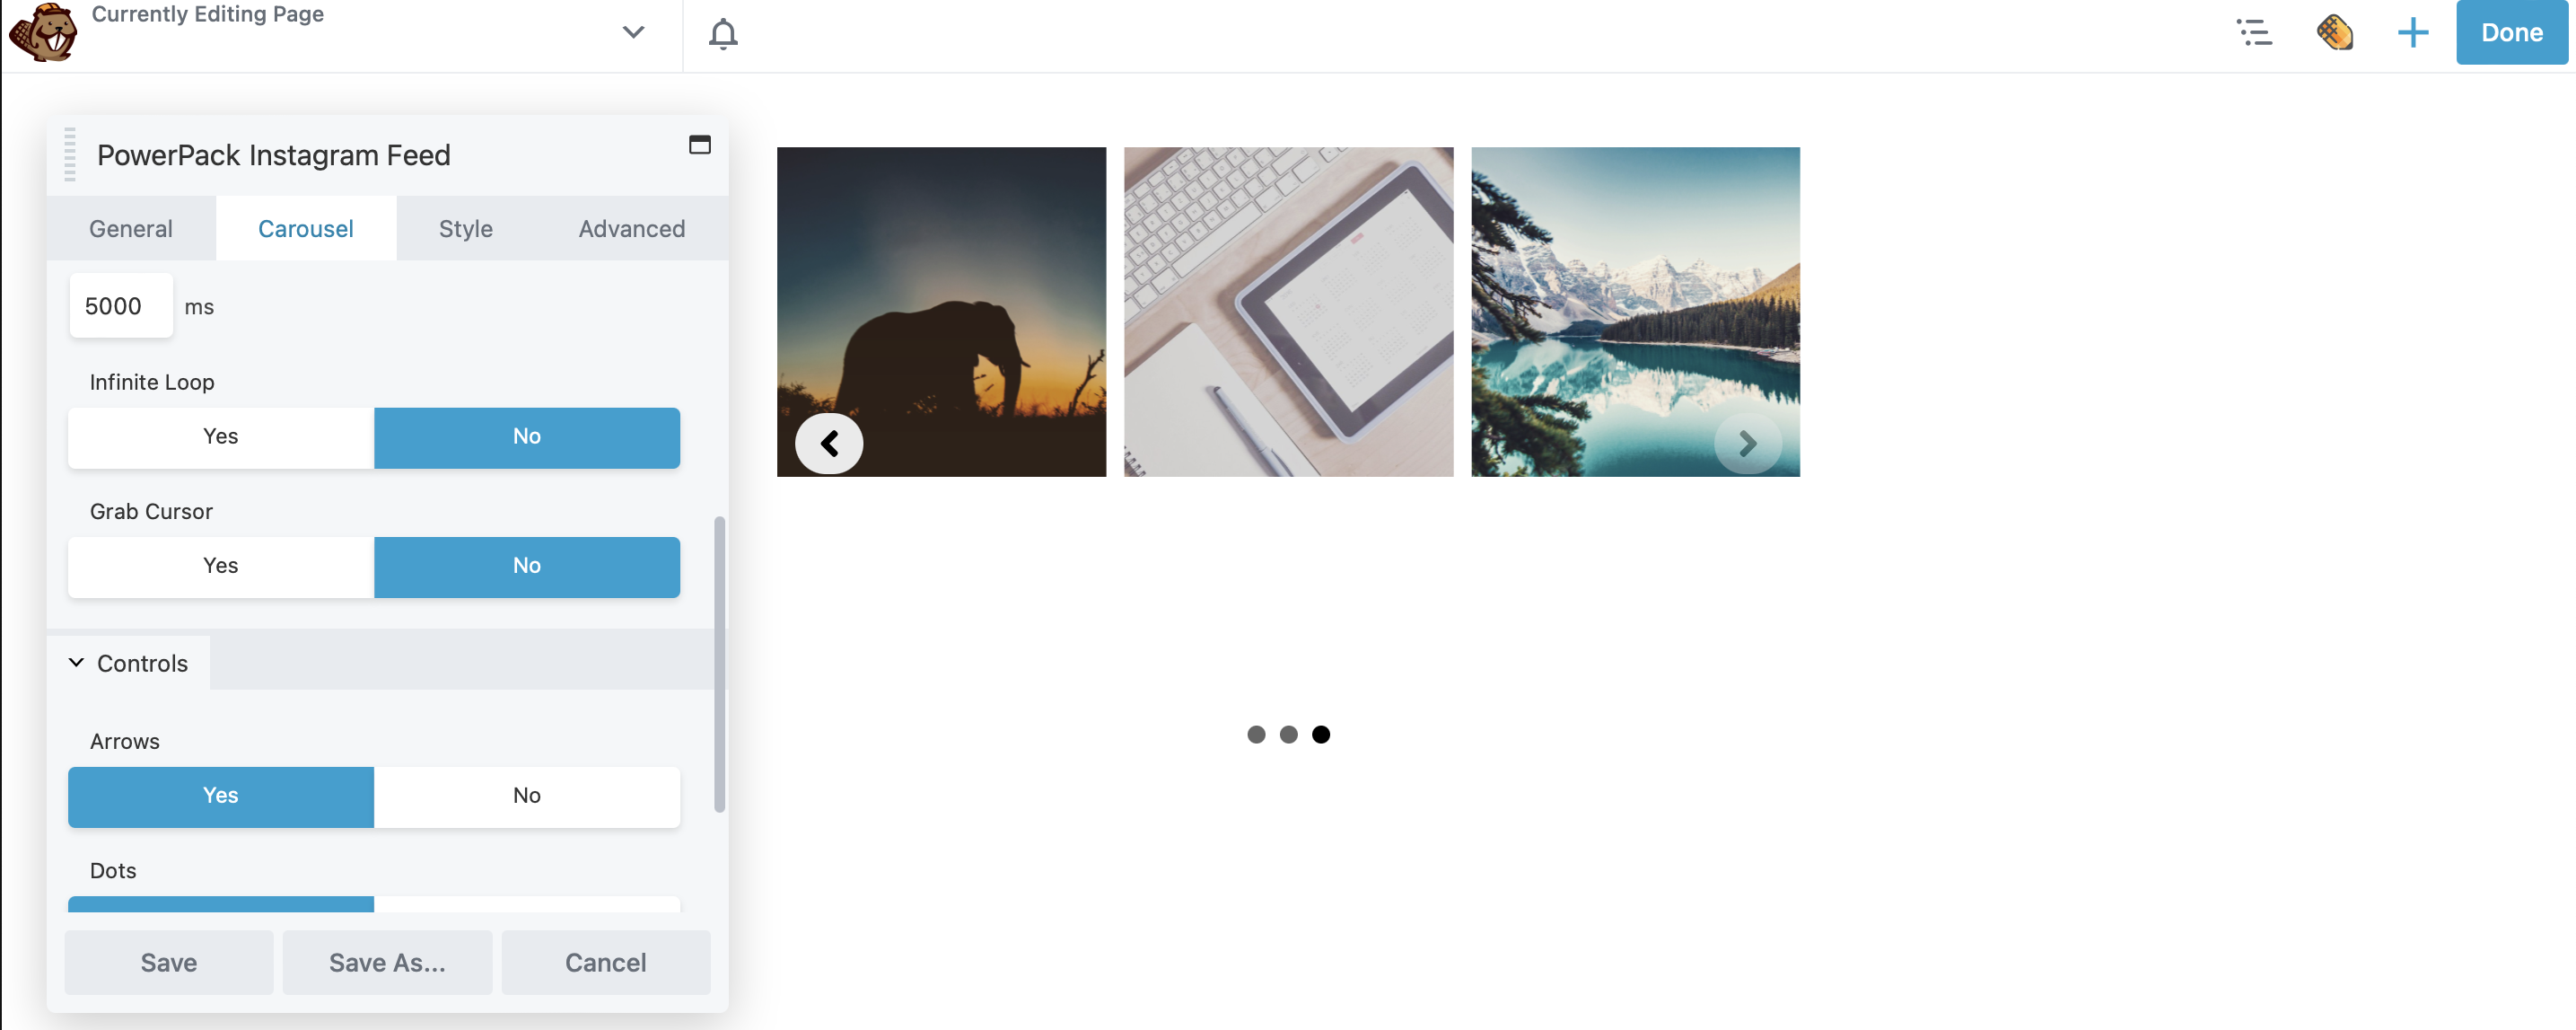
If you choose the Carousel option, you can autoplay your feed, change the control buttons, and adjust the play speed within the Carousel tab.
At the bottom of the General settings, you may also choose to display a link to your Instagram profile. Meanwhile, under the Style tab, you can add overlays or grayscale to your images.
Once your feed is looking exactly the way you want, click Save. Then, Done > Publish to publish your page.
Conclusion
Integrating your website with social media sites is a great way to drive visitors between both platforms. However, it might seem difficult to implement at first. Fortunately, with PowerPack for Beaver Builder, you can easily display your Instagram feed on your pages.
To recap, here are four steps to display your Instagram feed in WordPress:
- Set up an Instagram app with Facebook for Developers.
- Configure your app settings and add a test user.
- Generate your Instagram access token.
- Enter your access token in the Instagram feed module and configure the feed’s display settings with Beaver Builder.
Related Questions
How Do I Show Social Media Feeds on WordPress?
The easiest way to display your social feeds on WordPress is to use a plugin. PowerPack for Beaver Builder is a really simple solution. You can use it to insert a Facebook Like Box, Facebook Timeline, Twitter Grid, Twitter Buttons, Instagram Feeds, and more.
Why Can’t I Embed Instagram in WordPress?
In 2020, WordPress discontinued oEmbeds for Facebook and Instagram, making it impossible to embed an Instagram feed just by pasting the link. However, the good news is that with a plugin like PowerPack for Beaver Builder, you’re able to easily display your Instagram feed on your pages.
Our Newsletter
Our newsletter is personally written and sent out about once a month. It's not the least bit annoying or spammy.
We promise.
Try Beaver Builder Today

Related articles

Beaver Builder AI: Build WordPress Layouts with AI (Now in Alpha)
Hey everyone! Big news. After a long time of building behind the scenes, Beaver Builder AI is here. The alpha…

How Beaver Builder Products Work Together to Build Flexible WordPress Websites
Building a WordPress website often means stitching together a theme from one developer, a page builder from another, and a…

From Azeroth to WordPress: How Warcraft Tavern Uses Beaver Builder
Since releasing Beaver Builder 12 years ago, a feeling will come up from time to time that just never gets…
Join the community
We're here for you
There's a thriving community of builders and we'd love for you to join us. Come by and show off a project, network, or ask a question.
Since 2014
Build Your Website in Minutes, Not Months
Join Over 1 Million+ Websites Powered By Beaver Builder.