 Beaver Builder
If you’re building a website with a sign-in option, it’s important to make sure your login page looks the part. Unfortunately, the default WordPress login screen leaves a lot to be desired. However, you can use additional tools like page builders to create a login page that looks professional and offers a better user experience.
In this post, we’ll take a closer look at the benefits of including a custom WordPress login page on your clients’ sites. We’ll then show you how to create one using our Beaver Builder plugin and the PowerPack addon.
Why You Might Want to Create a Custom WordPress Login Page
Every WordPress website has a login page. You can access this by adding /admin/, /login/, or /wp-admin/ to the end of your site address.
Here’s what the default WordPress login page looks like:
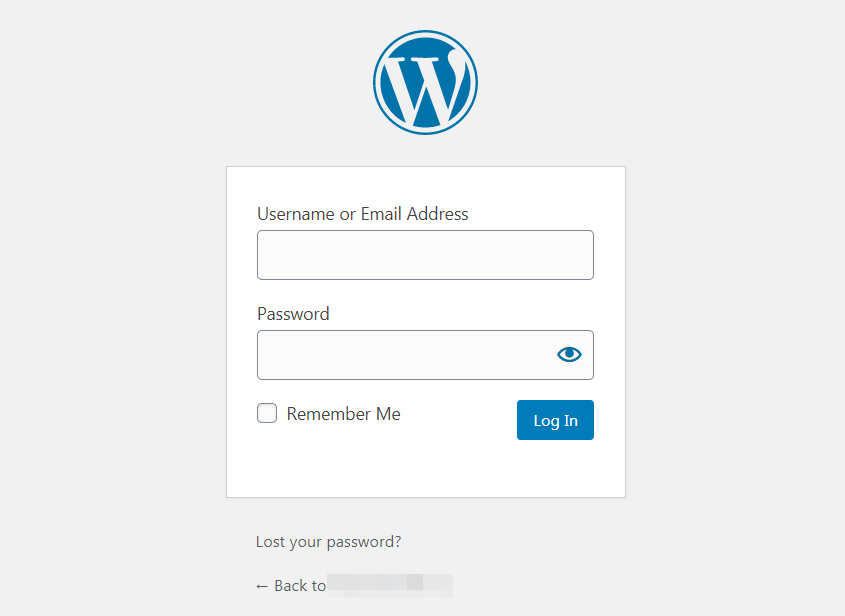
As you can see, this login page is pretty basic. It shows a very simple form with the WordPress logo and branding. This is not a big deal if your client will only use it to access the back end of their site.
However, if you’re building a website for a business that enables users to log in to their own accounts, such as a membership site or an e-commerce store, you may want to use a more personalized alternative. Customers expect to see a login page that fits the website as a whole.
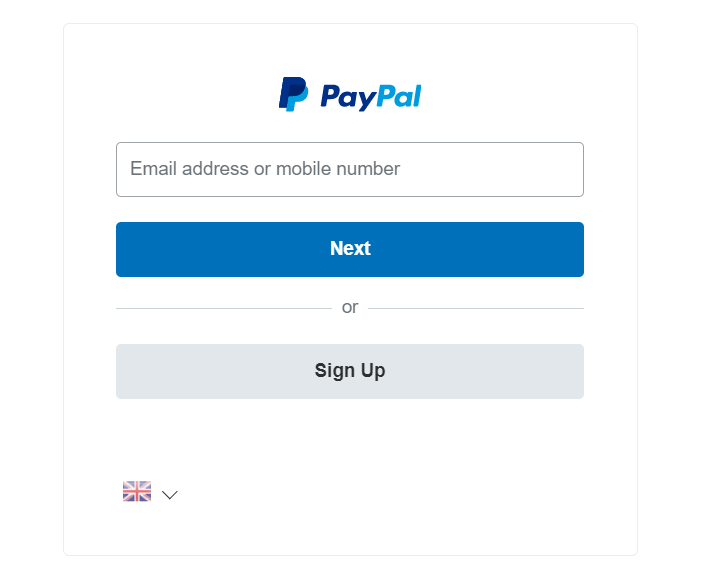
With a custom login page, you can display your client’s branding. Here’s an example of a customized login page on PayPal that uses the company’s logo and style:
There are several benefits to creating a custom WordPress login page for your client’s site. For starters, it can make visitors feel more at home. A login page that matches the business’ brand colors and the overall style of the website provides a more seamless customer experience.
Using the default WordPress login page might make the site look a bit suspicious, which can deter visitors from creating an account or putting in their personal details. Therefore, a professional login page can help your clients build trust and increase their conversions.
A custom login page doesn’t have to be limited to a static form. You can add other elements to it, such as promotional offers and an effective Call To Action (CTA), turning the page into a marketing opportunity.
One of the easiest ways to create a custom WordPress login page is by using a page builder, such as our own Beaver Builder plugin:

Beaver Builder is a drag-and-drop page builder for WordPress. It enables you to quickly and easily create beautiful, responsive pages entirely on the front end, and view any changes you make in real-time. You can use it to design any kind of content from scratch, including stunning landing pages and login forms.
How to Create a Custom WordPress Login Page (In 5 Steps)
Now that we’ve covered why you’d want to use a custom WordPress login page, let’s look at how to do it. In this tutorial, we’ll show you how to quickly design your own login page using Beaver Builder and the PowerPack addon.
Step 1: Install and Activate the Beaver Builder Plugin and PowerPack Addon
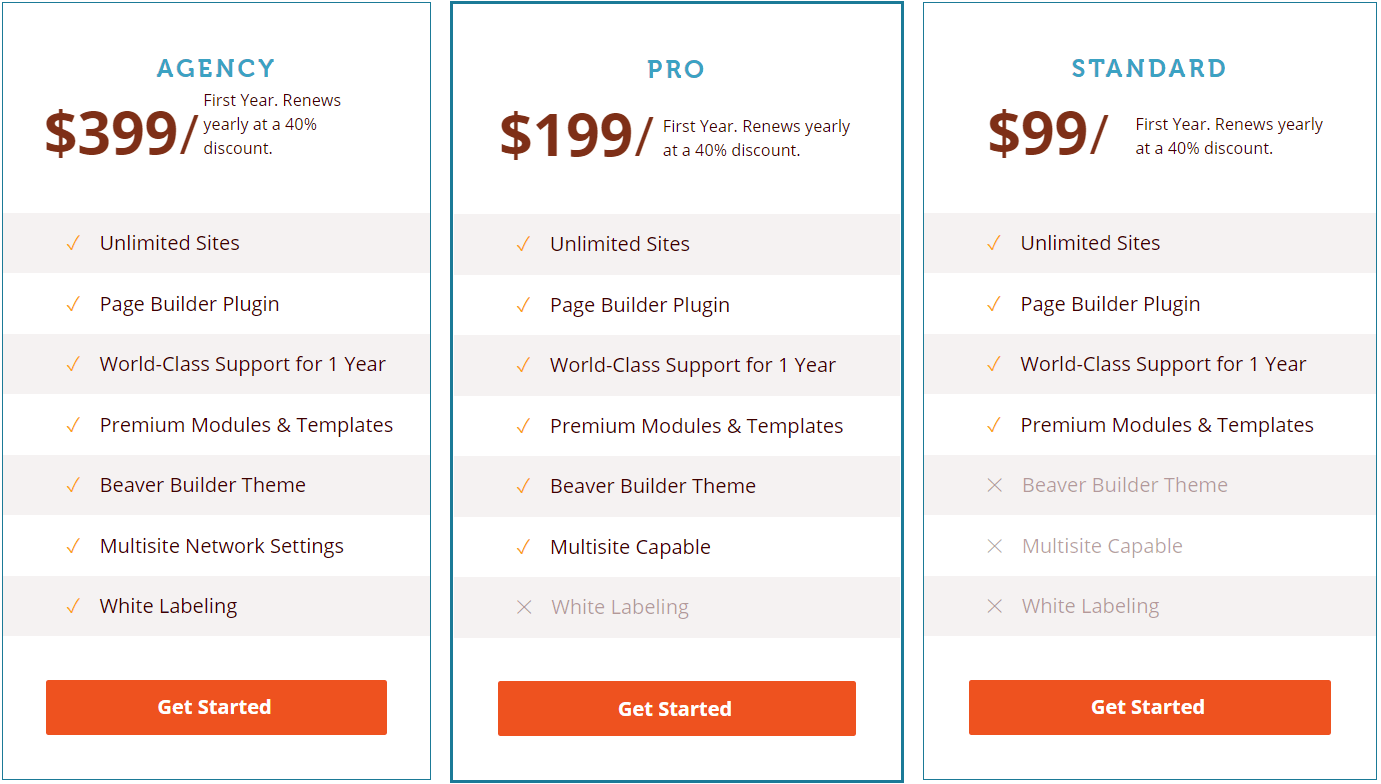
Creating a login page with Beaver Builder requires access to both our page builder plugin as well as the PowerPack addon. You can install the free version of Beaver Builder via the WordPress plugin page. Alternatively, you can purchase the full version by signing up for one of our pricing plans:
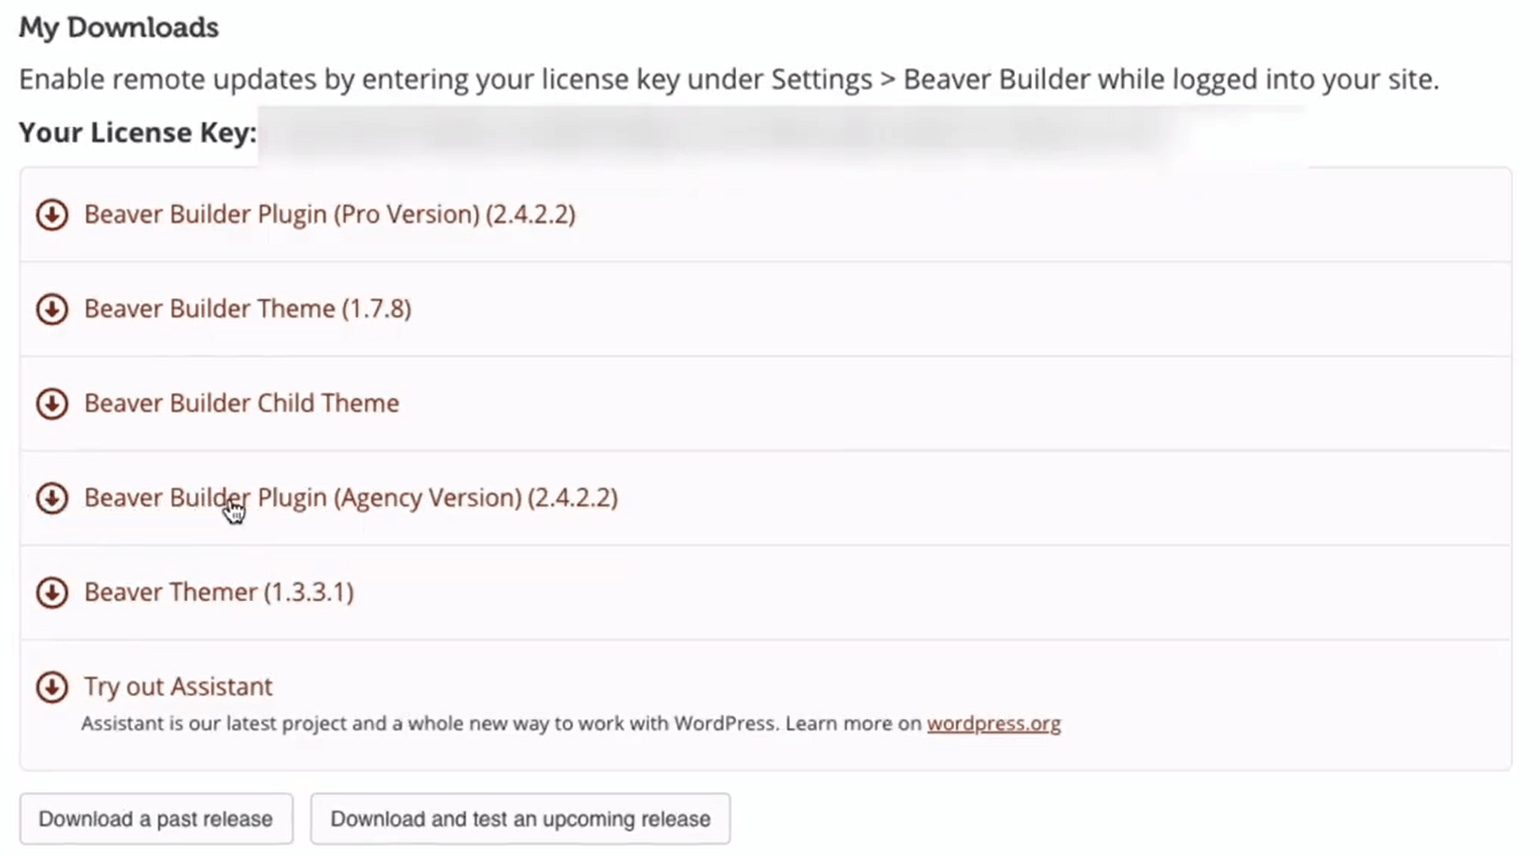
Once you’ve signed up, you can download the plugin from your My Account page. To do so, head over to our home page. In the top navigation bar, click on Account and select Login:

Here you’ll see a list of available downloads, as well as your unique license key. Click on the Beaver Builder plugin link to download it.
While you’re on the page, copy your license key and paste it somewhere for easy access (you’ll need it in a few moments):
Next, log in to your WordPress dashboard and navigate to Plugins > Add New. At the top of the page, click on the Upload Plugin button and select Choose File:
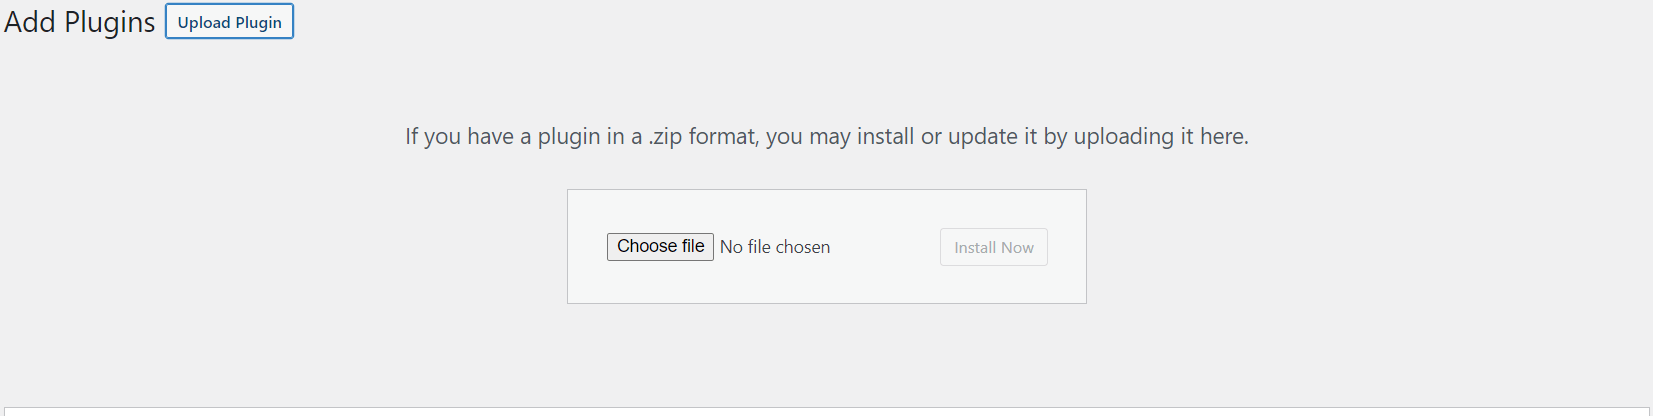
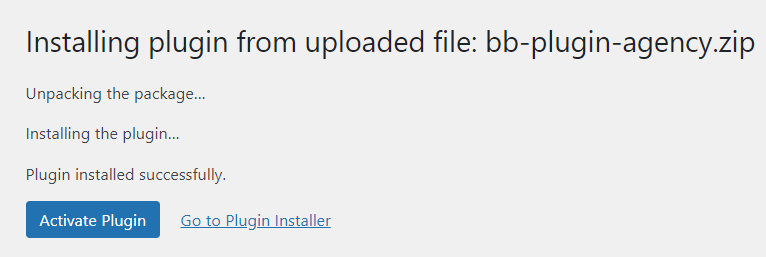
Next, select the plugin .zip folder you downloaded earlier, and click Install Now. After it’s installed, click on Activate Plugin:
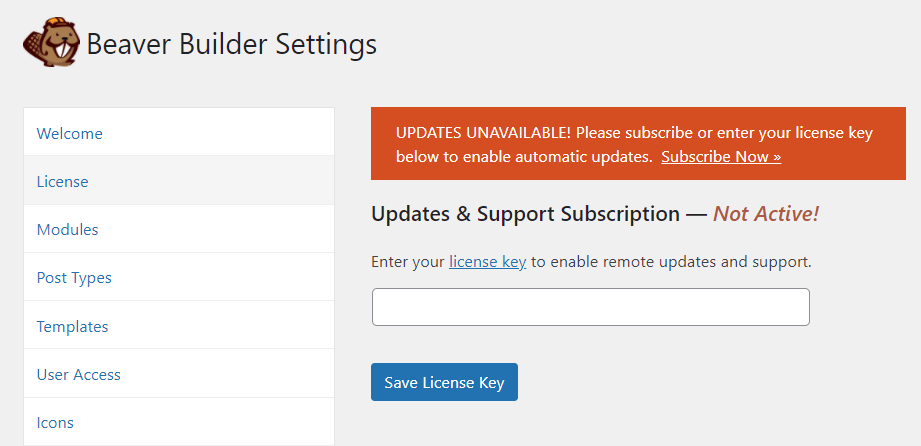
After actiation you’re redirected to the Beaver Builder settings page. If not, you can access it from the sidebar in your WordPress dashboard.
On the settings page, click the License tab in the side menu and paste the license key you copied earlier. Then click Save License Key:
Beaver Builder is now fully installed and activated on your website. As we mentioned earlier, you can use Beaver Builder to create all sorts of pages and content. Here though, we’ll focus specifically on building a custom login page.
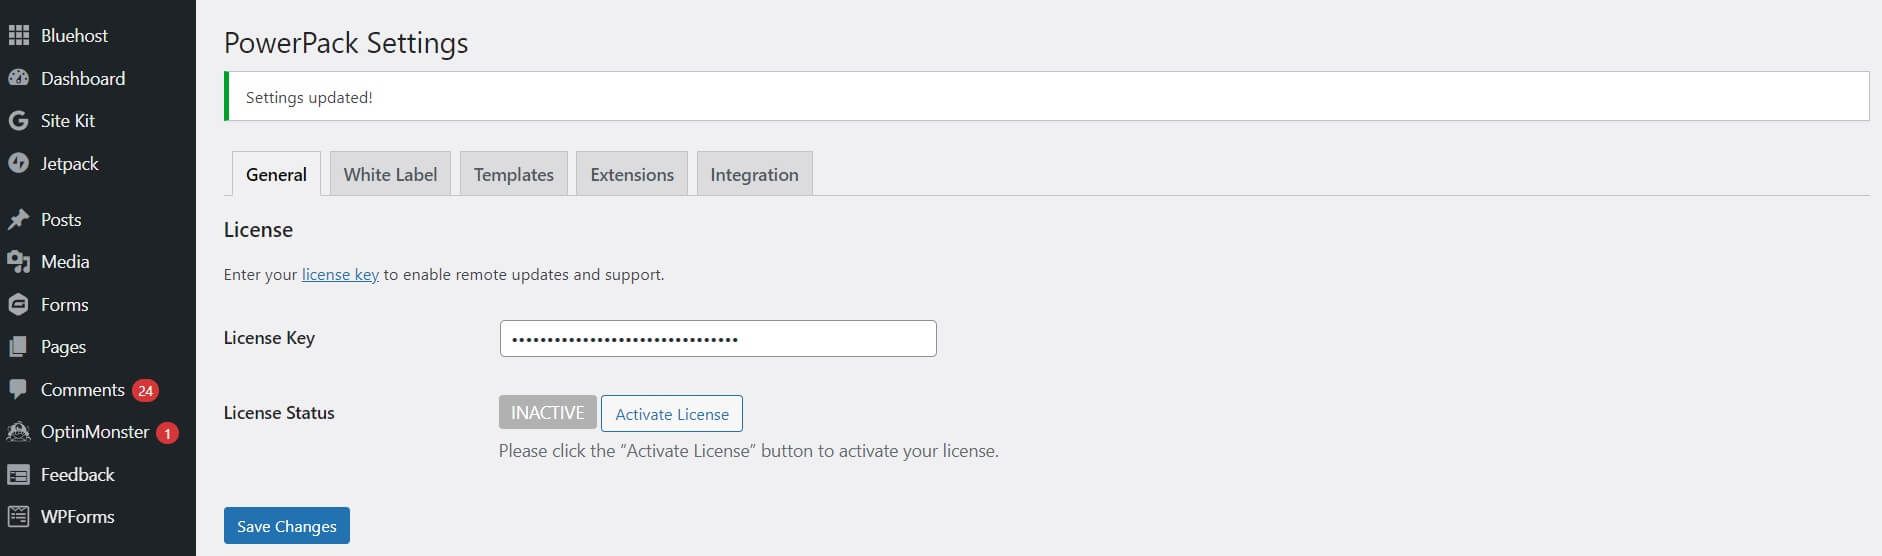
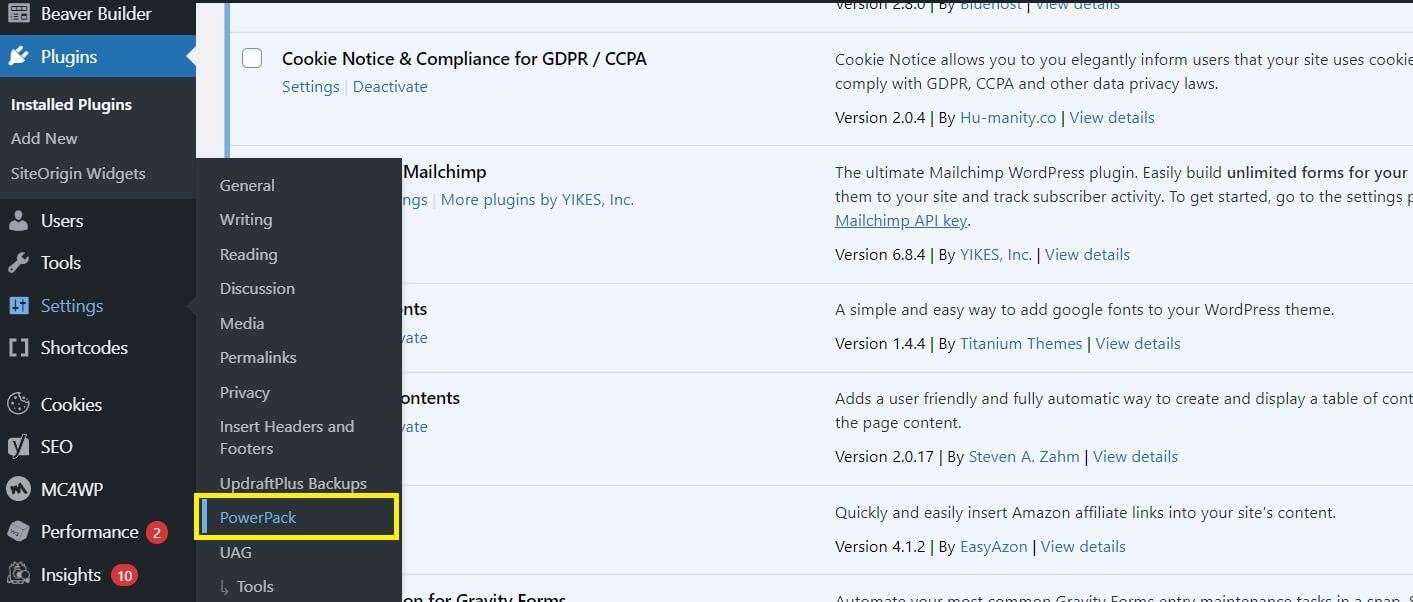
Before we move on, you’ll want to repeat the same steps to install and activate the PowerPack addon. Just download the zip folder, and upload it to the WordPress plugin page. Once it’s installed, go to Settings > PowerPack. Then enter your license key and update the addon plugin to the latest version:
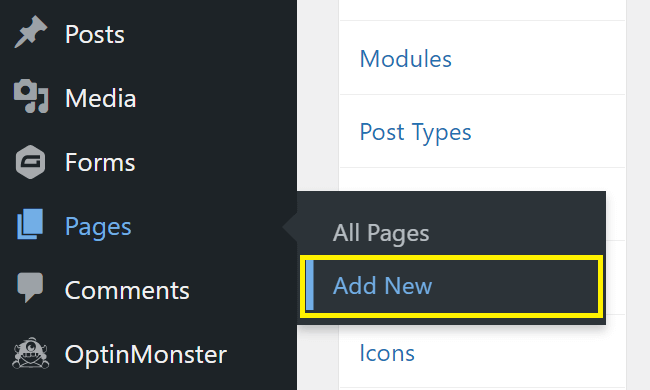
Step 2: Create a New Page in WordPress
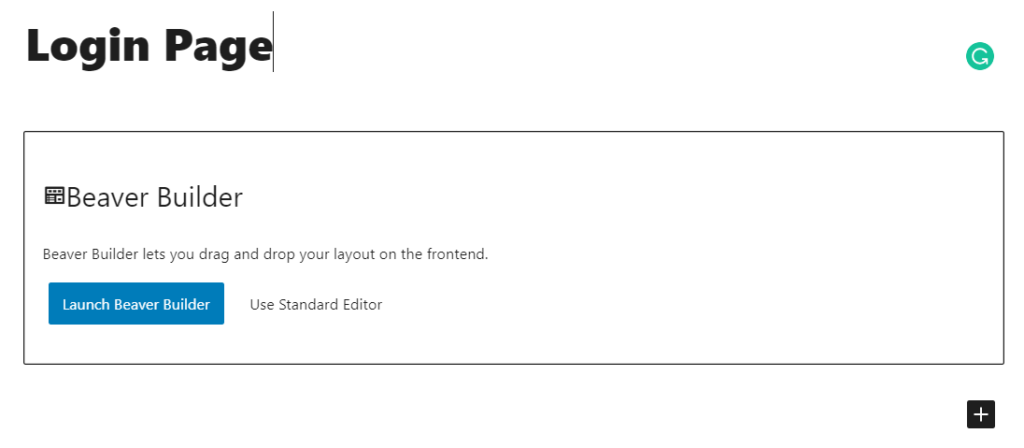
Now that you have everything set up, you can create your login page. From your WordPress dashboard, go to Pages > Add New:
Next, give your new page a name. For this tutorial, let’s just call it “Login Page”. When you’re ready, click Launch Beaver Builder:
This brings up the Beaver Builder front end editor, which gives you a live preview of the page layout. Now that you’ve created the login page, the next step is to customize it.
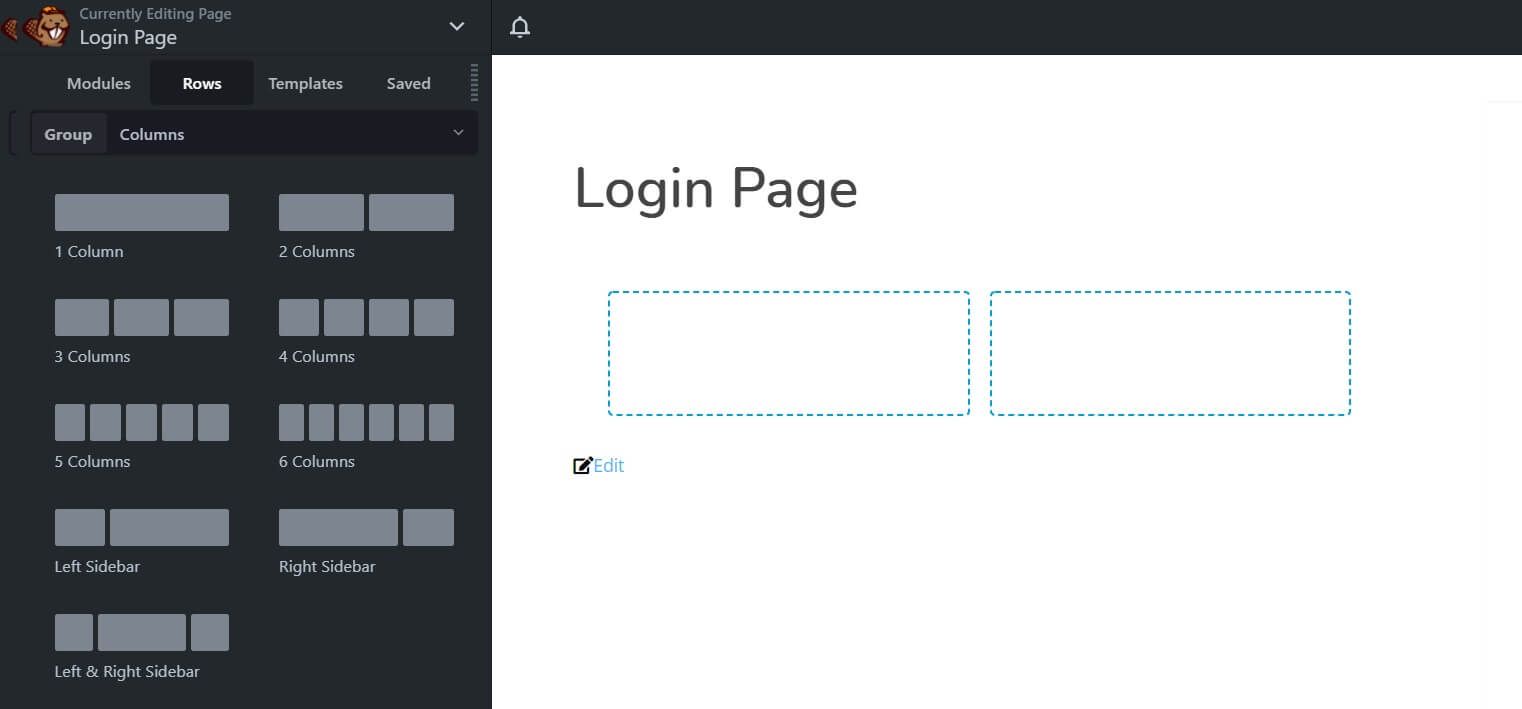
Step 3: Customize Your Login Page using Beaver Builder
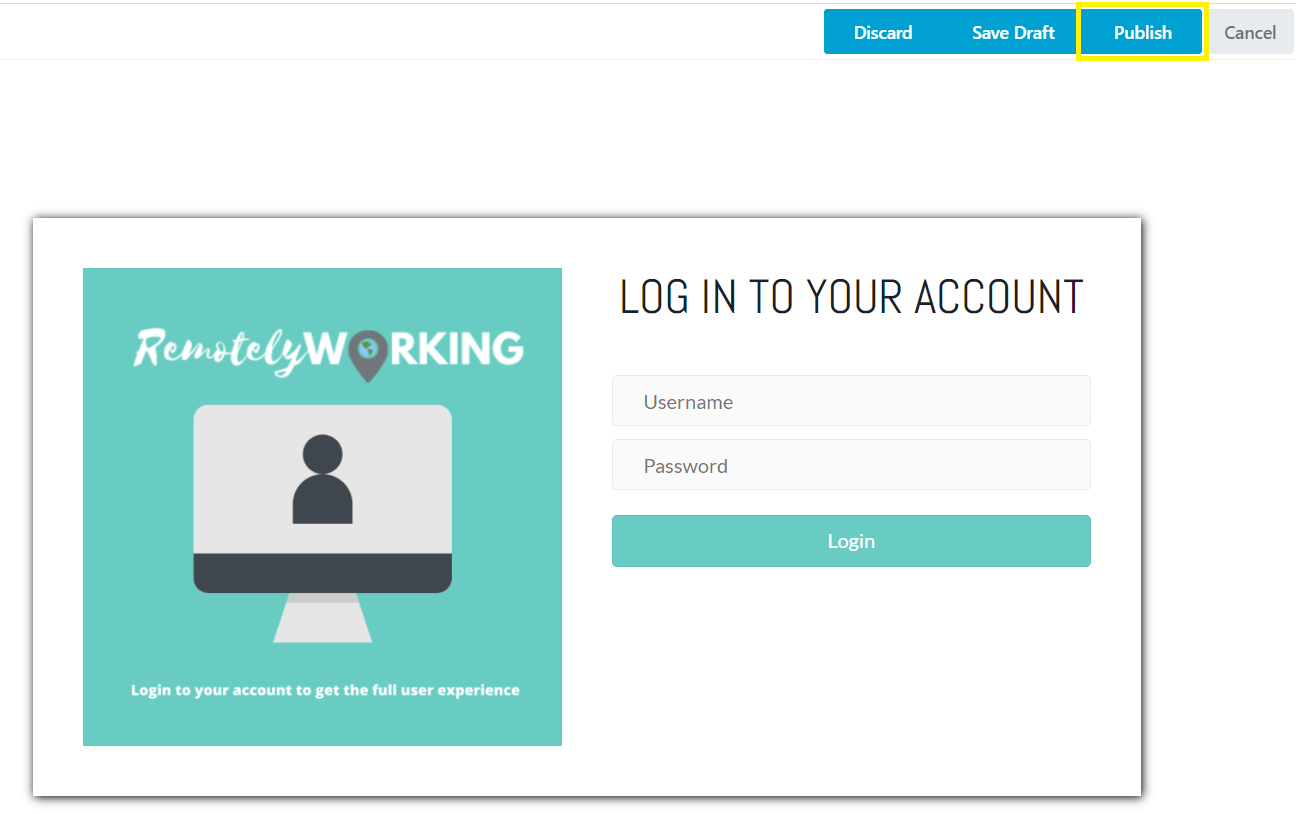
There’s a lot you can do in the Beaver Builder editor. To keep things simple, for our example we’re going to create a basic two-column login page layout.
To follow along, start by clicking on the Rows tab in the side panel, then drag and drop the 2 Columns element onto the page:
Now we’re going to add an image to the left column. Go to the Modules tab, select the Photo module, and drop it into the left column. In the Photo’s settings panel click Select Photo and upload an image you want to display on your login page:

For instance, you could choose your client’s logo or a custom graphic. You can also resize the image and adjust the margins as needed.
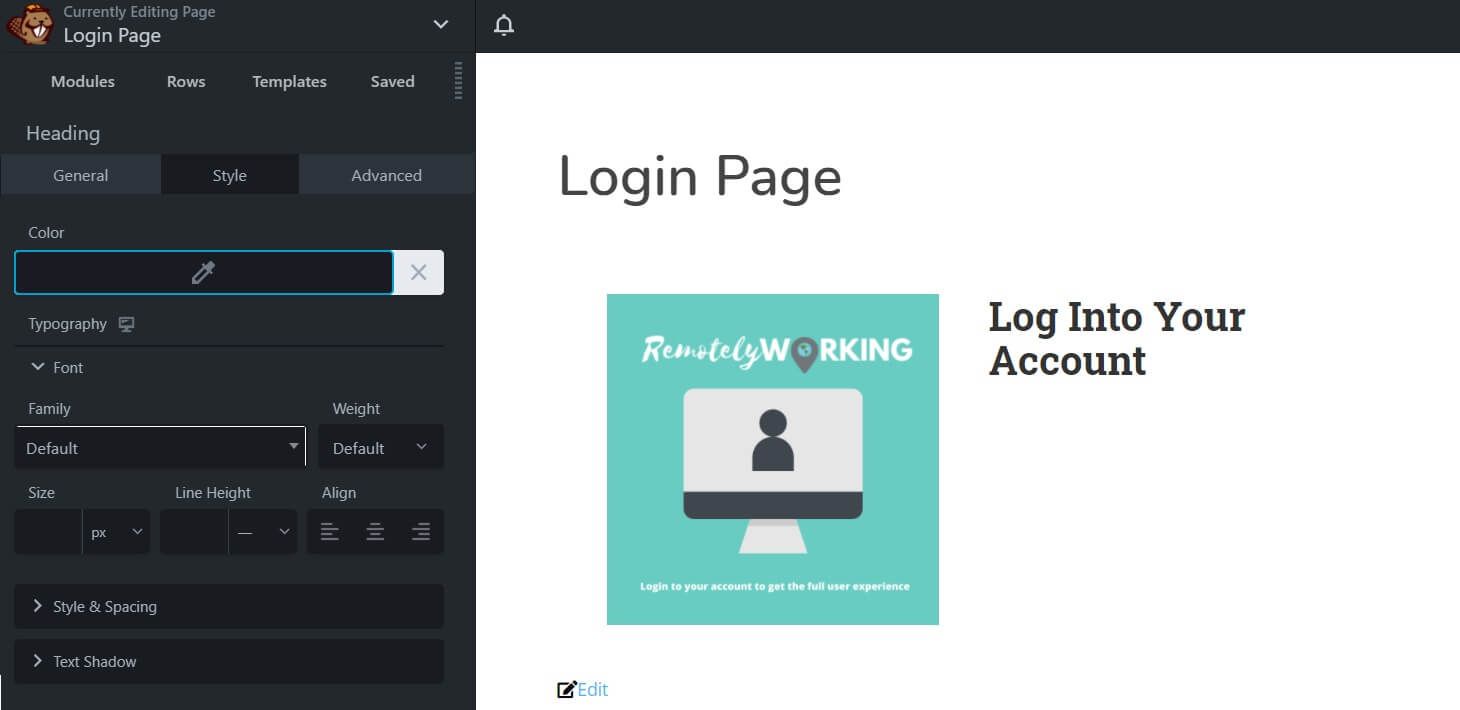
In the right column, insert a Heading module and change the text to whatever you want it to say:
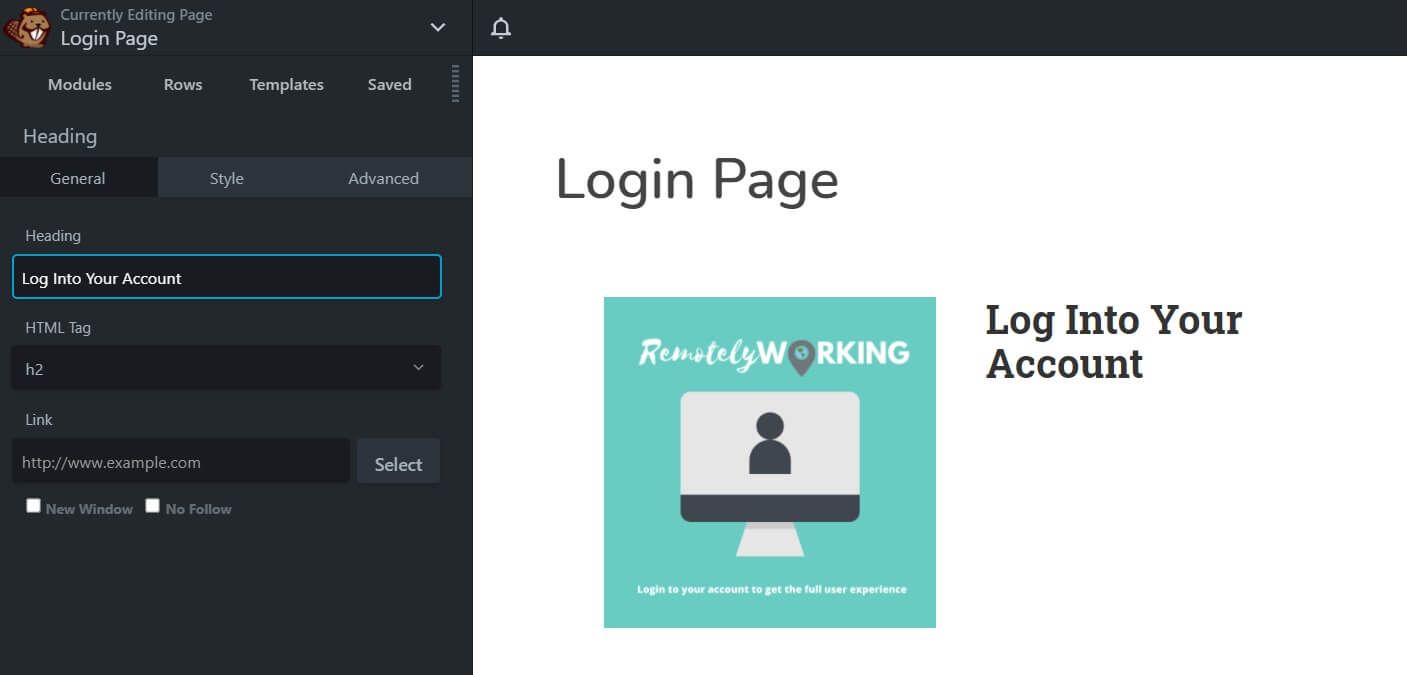
Click the Style tab to adjust the font, color, size, weight, and other characteristics:
Next, add the login form. Go back to the Modules tab and search for “Login Form” by clicking on the microscope icon next to standard modules. There, choose the Login Form module listed under PowerPack Modules and add it beneath the heading:
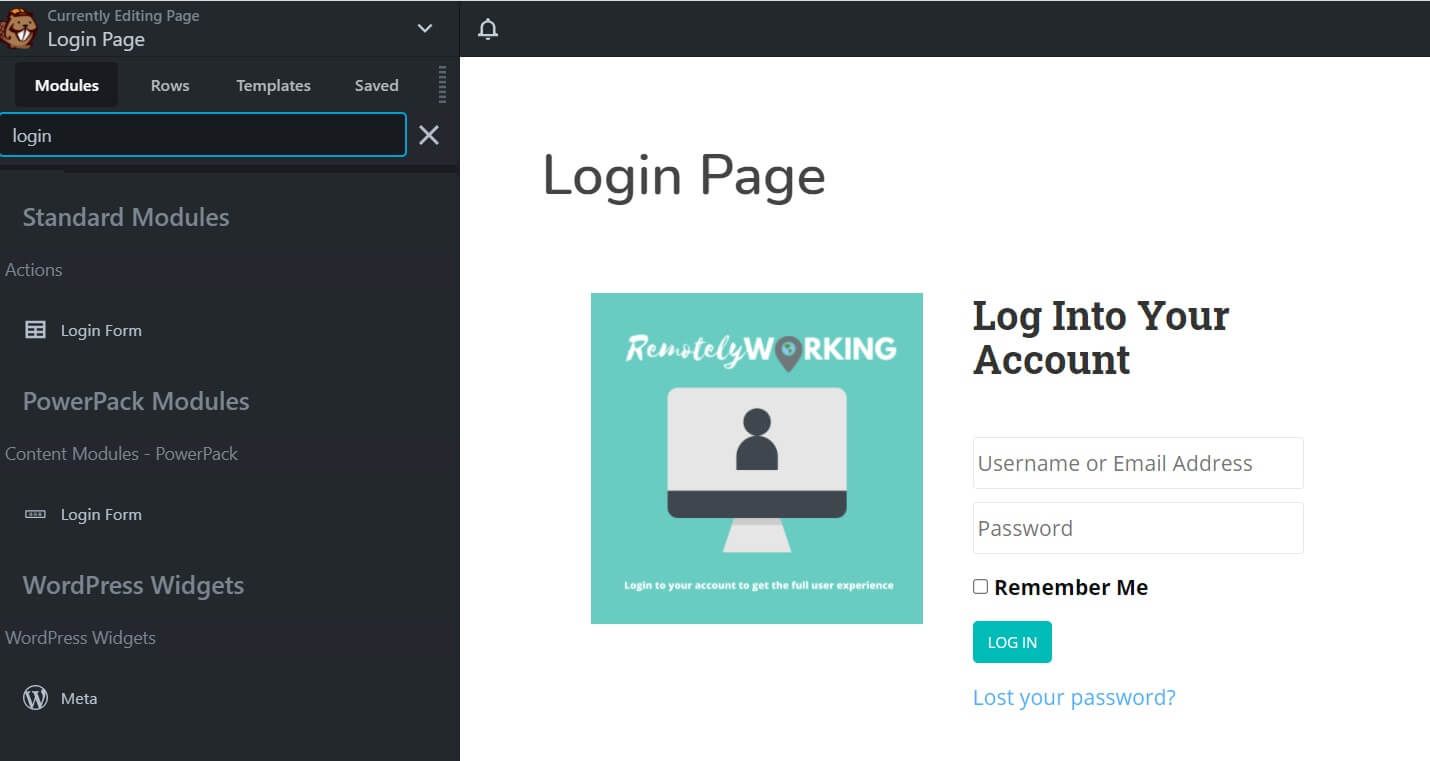
At this point, you should have all the elements you need for a simple custom login page. Feel free to change the layout and add any other modules you want to use.
Step 4: Tweak the Design
The final step is to make your login page look a little more visually appealing. Beaver Builder is a very flexible and powerful tool, so you have almost limitless options when it comes to customizing the look and feel of your pages.
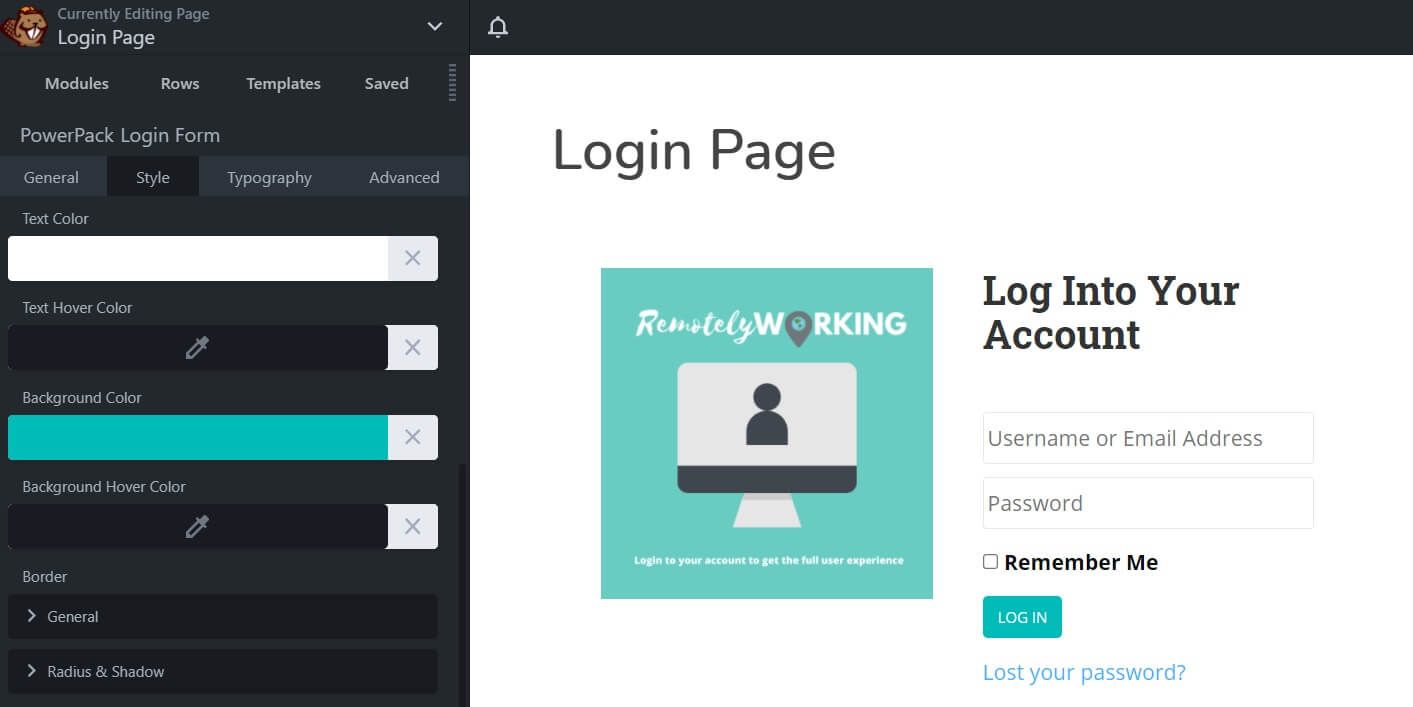
For example, you can change the background and hover color of your login button to match your branding:
Here are some other style changes to consider:
- Adjust the visibility of the Remember Me button in your login form.
- Change the spacing, coloring, border, margin, padding, and radius of different on-page elements.
- Add a border or box-shadow to the columns to give your page some visual depth.
There’s a lot you can do, so we recommend that you spend some time familiarizing yourself with all the different settings that are available. You can also play around with the styling elements to make your login page look exactly the way you want it.
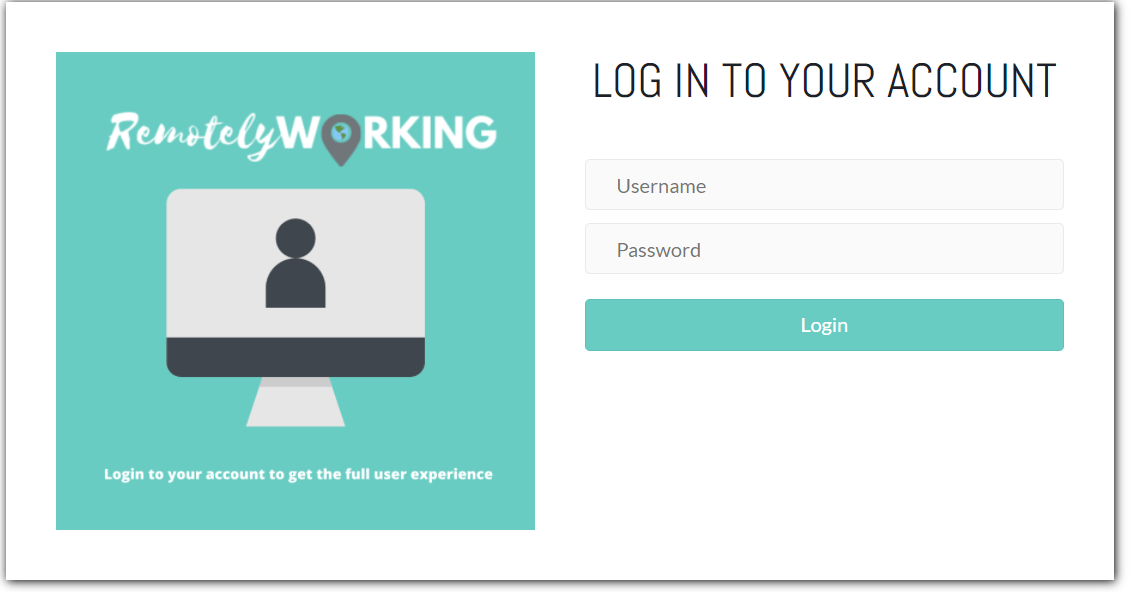
For instance, here’s what your finished page might look like after a bit of tweaking:
When you finish making your changes, all you have to do is click Done in the upper right corner and then hit Publish:
Congratulations – you’ve finished creating and designing your custom WordPress login page! All that’s left to do is set your new page as your default WordPress login page.
Step 5: Set Your Custom Page as Your WordPress Login Page
In order to set your new custom login page as your WordPress login page, you will need to change it in your WordPress settings. To do this, navigate back to your WordPress dashboard and click on Settings > PowerPack:
Then select Login/Register in the top right-hand corner. Choose the Login Page drop-down menu, and pick your newly-created login page:
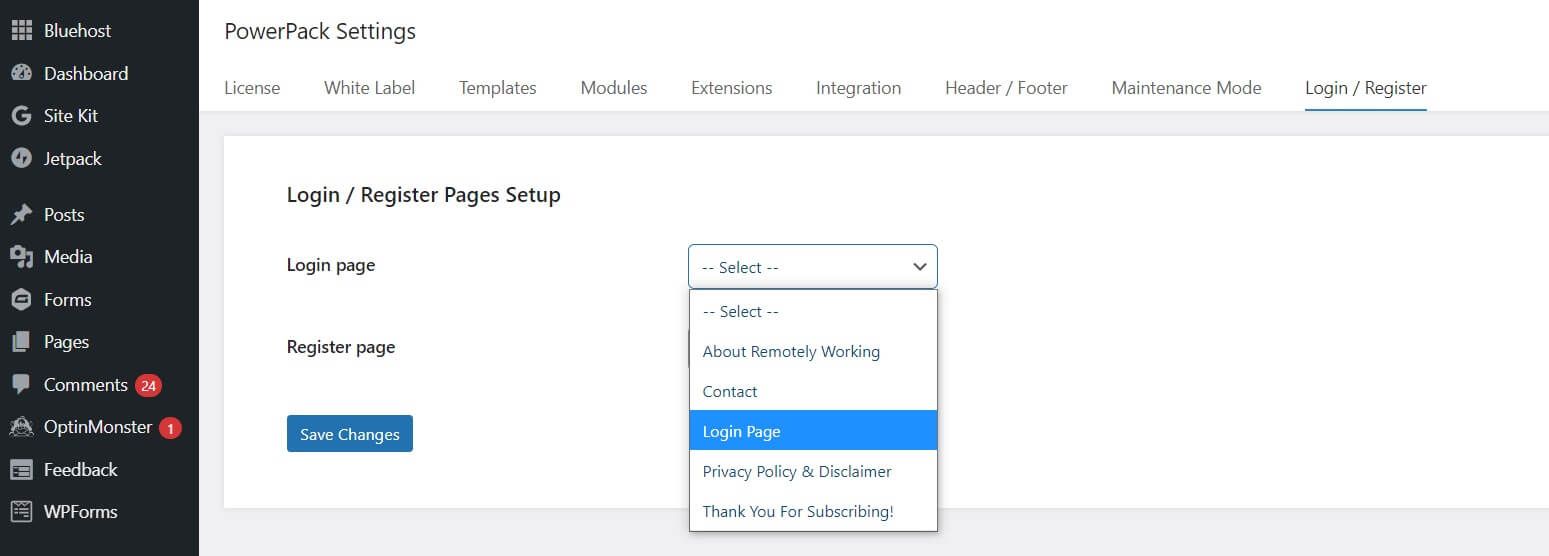
Hit Save Changes and you’re done! This will set your new page as your WordPress login page. You can also follow this same process to set up a custom registration page.
Conclusion
If you’re building an e-commerce store, membership site, or any other website with customer accounts, creating a custom WordPress login page is essential. A well-designed page can improve the user experience, help with your client’s branding efforts, and even boost conversions.
Let’s recap how to create a custom WordPress login landing page with Beaver Builder and PowerPack in five steps:
- Install and activate Beaver Builder and PowerPack.
- Create a new page.
- Customize your login page by adding a header, photo, and login form.
- Tweak the design so it matches your branding.
- Set your custom page as your WordPress login page.
Do you have any questions about creating a custom WordPress login page? Let us know in the comments section below!
2 Comments
Our Newsletter
Our newsletter is personally written and sent out about once a month. It's not the least bit annoying or spammy.
We promise.
Try Beaver Builder Today

Related articles
Dev-Focused Page Builder for Modern WordPress Development
Looking for a dev-focused page builder that works with you, not against you? The problem is that many visual editors…
Visual Development with Beaver Builder: Building WordPress Sites That Scale
What’s the secret to building flexible, scalable WordPress sites that adapt to any project? Visual development is changing the way…
Case Study: How One Freelancer Built a Web Design Business with Beaver Builder
Wondering about Beaver Builder for freelancers? Cami MacNamara operates WebCami Site Design, a successful solo web design business in West…
Join the community
We're here for you
There's a thriving community of builders and we'd love for you to join us. Come by and show off a project, network, or ask a question.
Since 2014
Build Your Website in Minutes, Not Months
Join Over 1 Million+ Websites Powered By Beaver Builder.
Thank you Will, for this very timely blog post. I’m just about to build my first membership directory. One thought , is there an easy way to disable the /wp-admin/ login page?
Excellent article! We use PowerPack with all our websites!