
Beaver Builder: The Ultimate Drag and Drop Landing Page Builder
A high-converting landing page is a crucial tool for your website, whether you’re trying to make more sales or convince visitors to sign up for your email list. However, nailing down the ideal design can be tricky and time-consuming. Fortunately, a drag and drop landing page builder can make it a lot simpler.
Beaver Builder and Beaver Themer, especially when used together, enable you to drag and drop your way to an effective layout.
What does Beaver Themer add to Beaver Builder?
With the Beaver Builder page builder, you can create layouts in the content area of a WordPress page. With the Beaver Themer theme builder plugin, you can use the same page builder to add custom layouts to parts of the page that are normally controlled by your theme.
For your landing page, this would mean you can construct a custom header and footer just for that page.
Themer also lets you create custom layouts for posts, archives, search and 404 pages, and even custom banners that you can insert at various positions on pages at whatever website locations you choose.
You can build a landing page without Beaver Themer, but in the last step, we’ll show you how to build a Themer custom header specifically for your landing page.
In this article, we’ll have a look at what makes a strong landing page. Then we’ll walk you through how to create one using Beaver Builder and Beaver Themer. Let’s get started!
Understanding What Makes a Strong Landing Page
A landing page is a single page created for a specific marketing campaign. It’s where visitors will arrive on your site when they click a link related to that campaign.
The content it includes is geared towards converting these leads into paying customers:
There are a few characteristics all effective landing pages have. First, the layout should be organized and straightforward. You don’t want a lot of clutter distracting visitors from your product or service and why they should purchase it.
This offer should be clear and conveyed through powerful headlines and descriptive copy.
Your landing page is an excellent place to include some social proof, such as testimonials from past clients. You’ll also want a strong Call To Action (CTA) to guide leads to the next step of the sales funnel and towards conversion.
Finally, you’ll want limited exit points on your landing page. Fewer links result in higher conversion rates, so it’s smart to prevent visitors from easily moving away to other areas of your site. It’s not uncommon for the CTA button to be the only link on the page.
How to Build a Page Using a Drag and Drop Landing Page Builder (In 6 Steps)
With an idea of what makes an effective landing page in mind, you can start building one of your own. We’ll show you how to do so easily with Beaver Builder and Beaver Themer.
Our page builder and its official theme builder make creating high-quality content a breeze through a user-friendly, drag-and-drop interface.
You can include several pre-built elements that are integral to effective landing pages, and even use one of our templates to guide your design choices. Here’s how it works.
Step 1: Install and Activate Beaver Builder
The first step is to install the Beaver Builder plugin if you haven’t already. After you purchase the plugin as part of a premium plan, go to your Account page, download the Beaver Builder plugin zip file, and copy the license key.
Navigate to Plugins > Add New in your WordPress dashboard and click the Upload Plugin button:
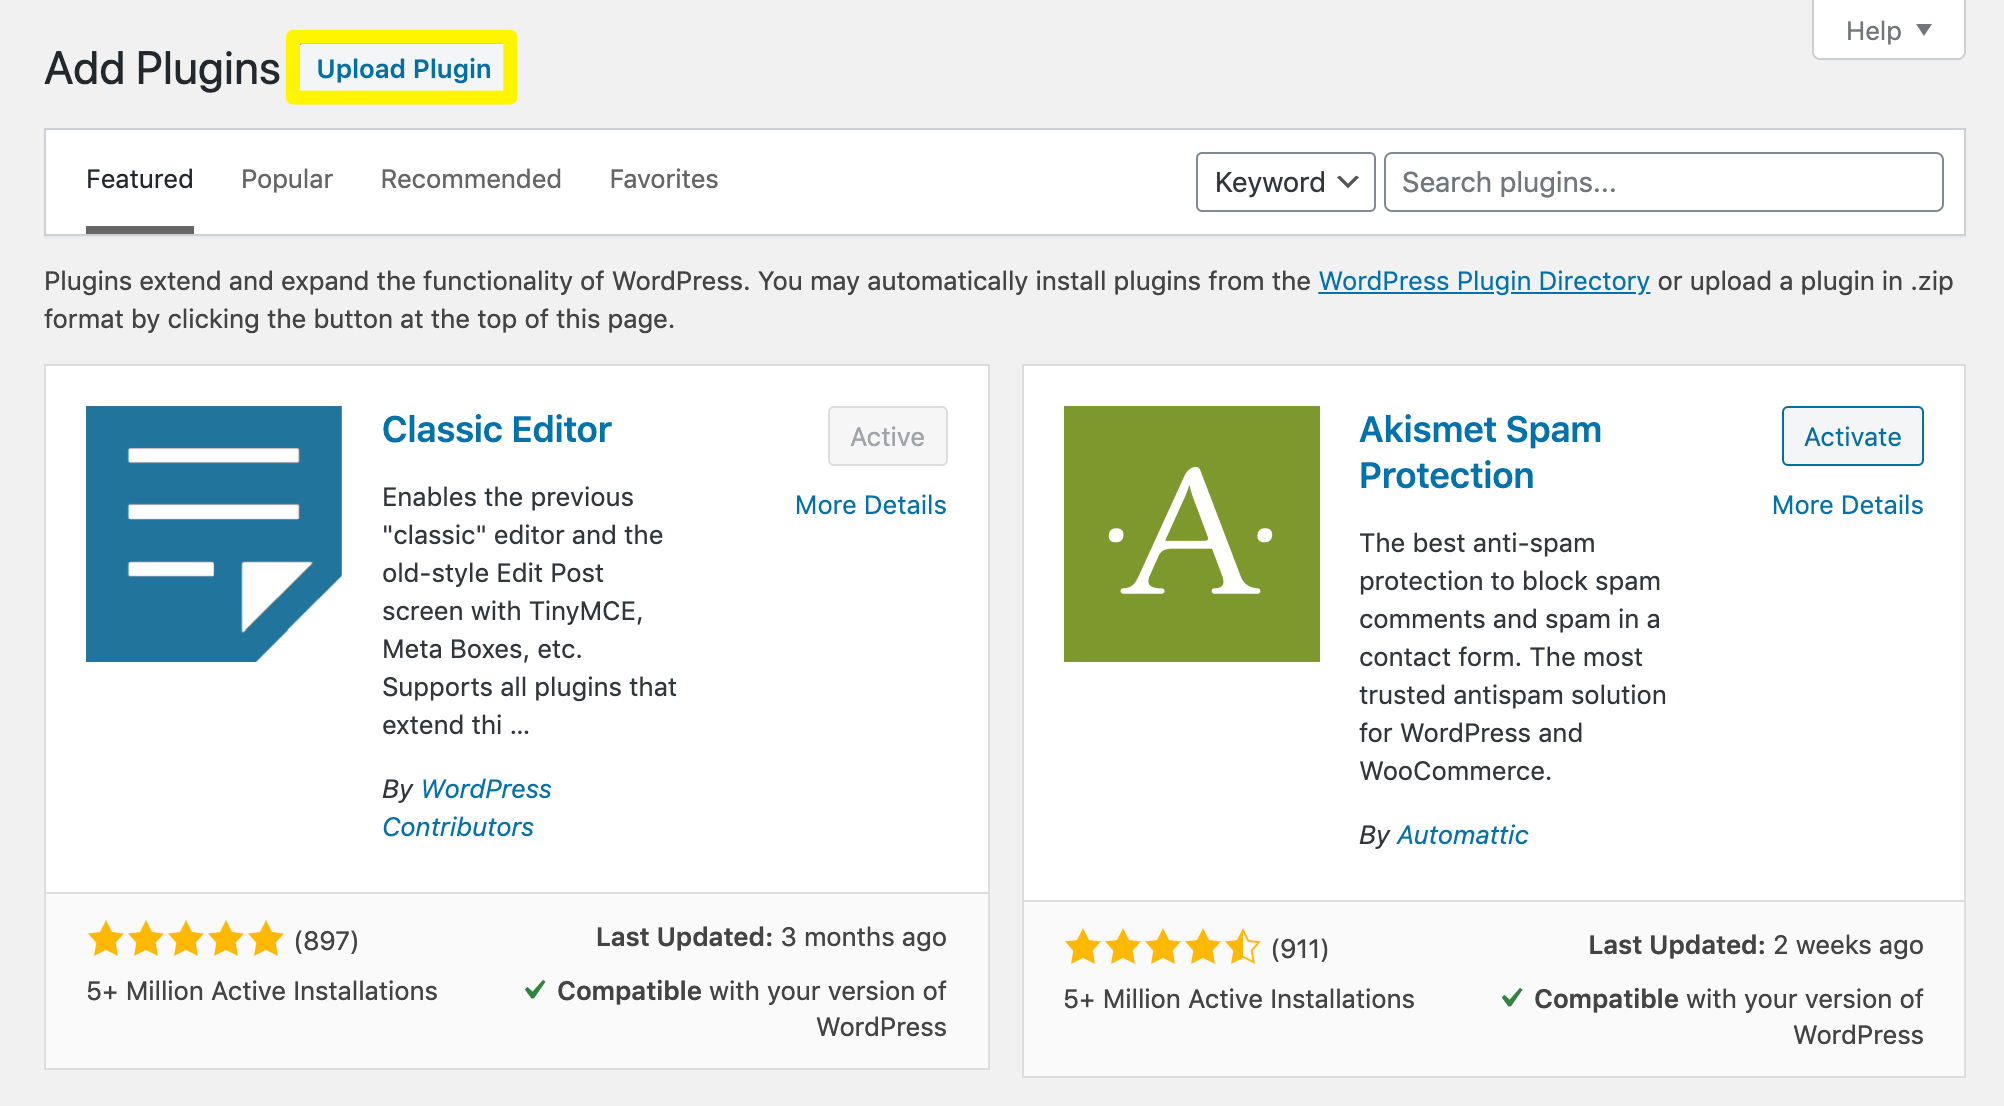
Click Choose File and navigate to the Beaver Builder .zip file you downloaded. Then click Open. After installation is complete, you’ll be on the Settings > Beaver Builder page. Click the License tab and enter your license key.
Step 2: Create a New Page
Set up a new page that you can use as your landing page. Navigate to Pages > Add New and add your title. Then click Launch Beaver Builder:
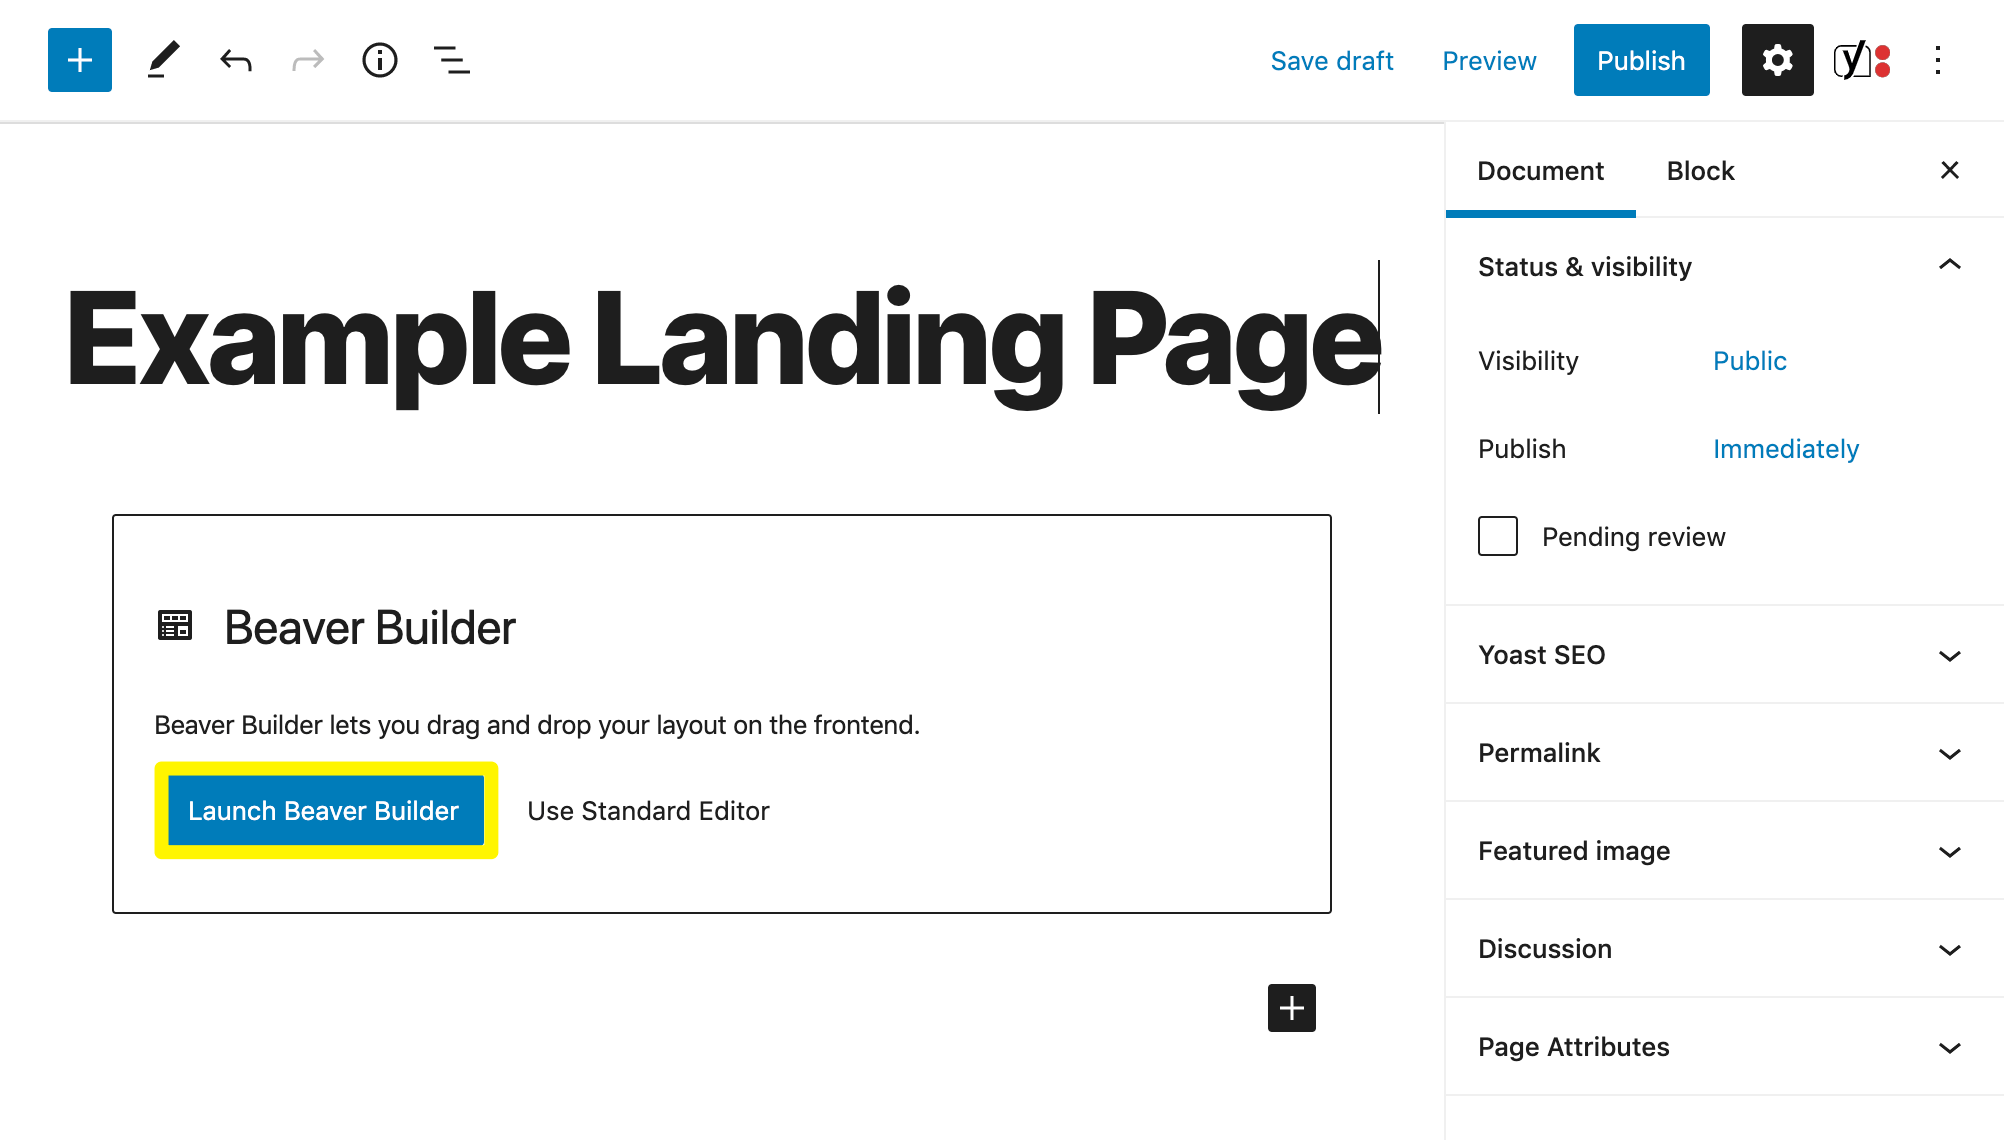
With the builder launched, your page will appear as it does on the front end. As you make changes, you’ll see precisely how they affect your landing page.
It may look a bit sparse at the moment, but we’ll change that in the next step.
Step 3: Add Your Landing Page Content
Now it’s time to add some content to your landing page. If you’d like to work off a prebuilt template, you can do so by clicking the plus (+) sign in the top right corner of the screen.
Click the Templates tab, select Landing Page from the Group dropdown, then take your pick of the available layouts:
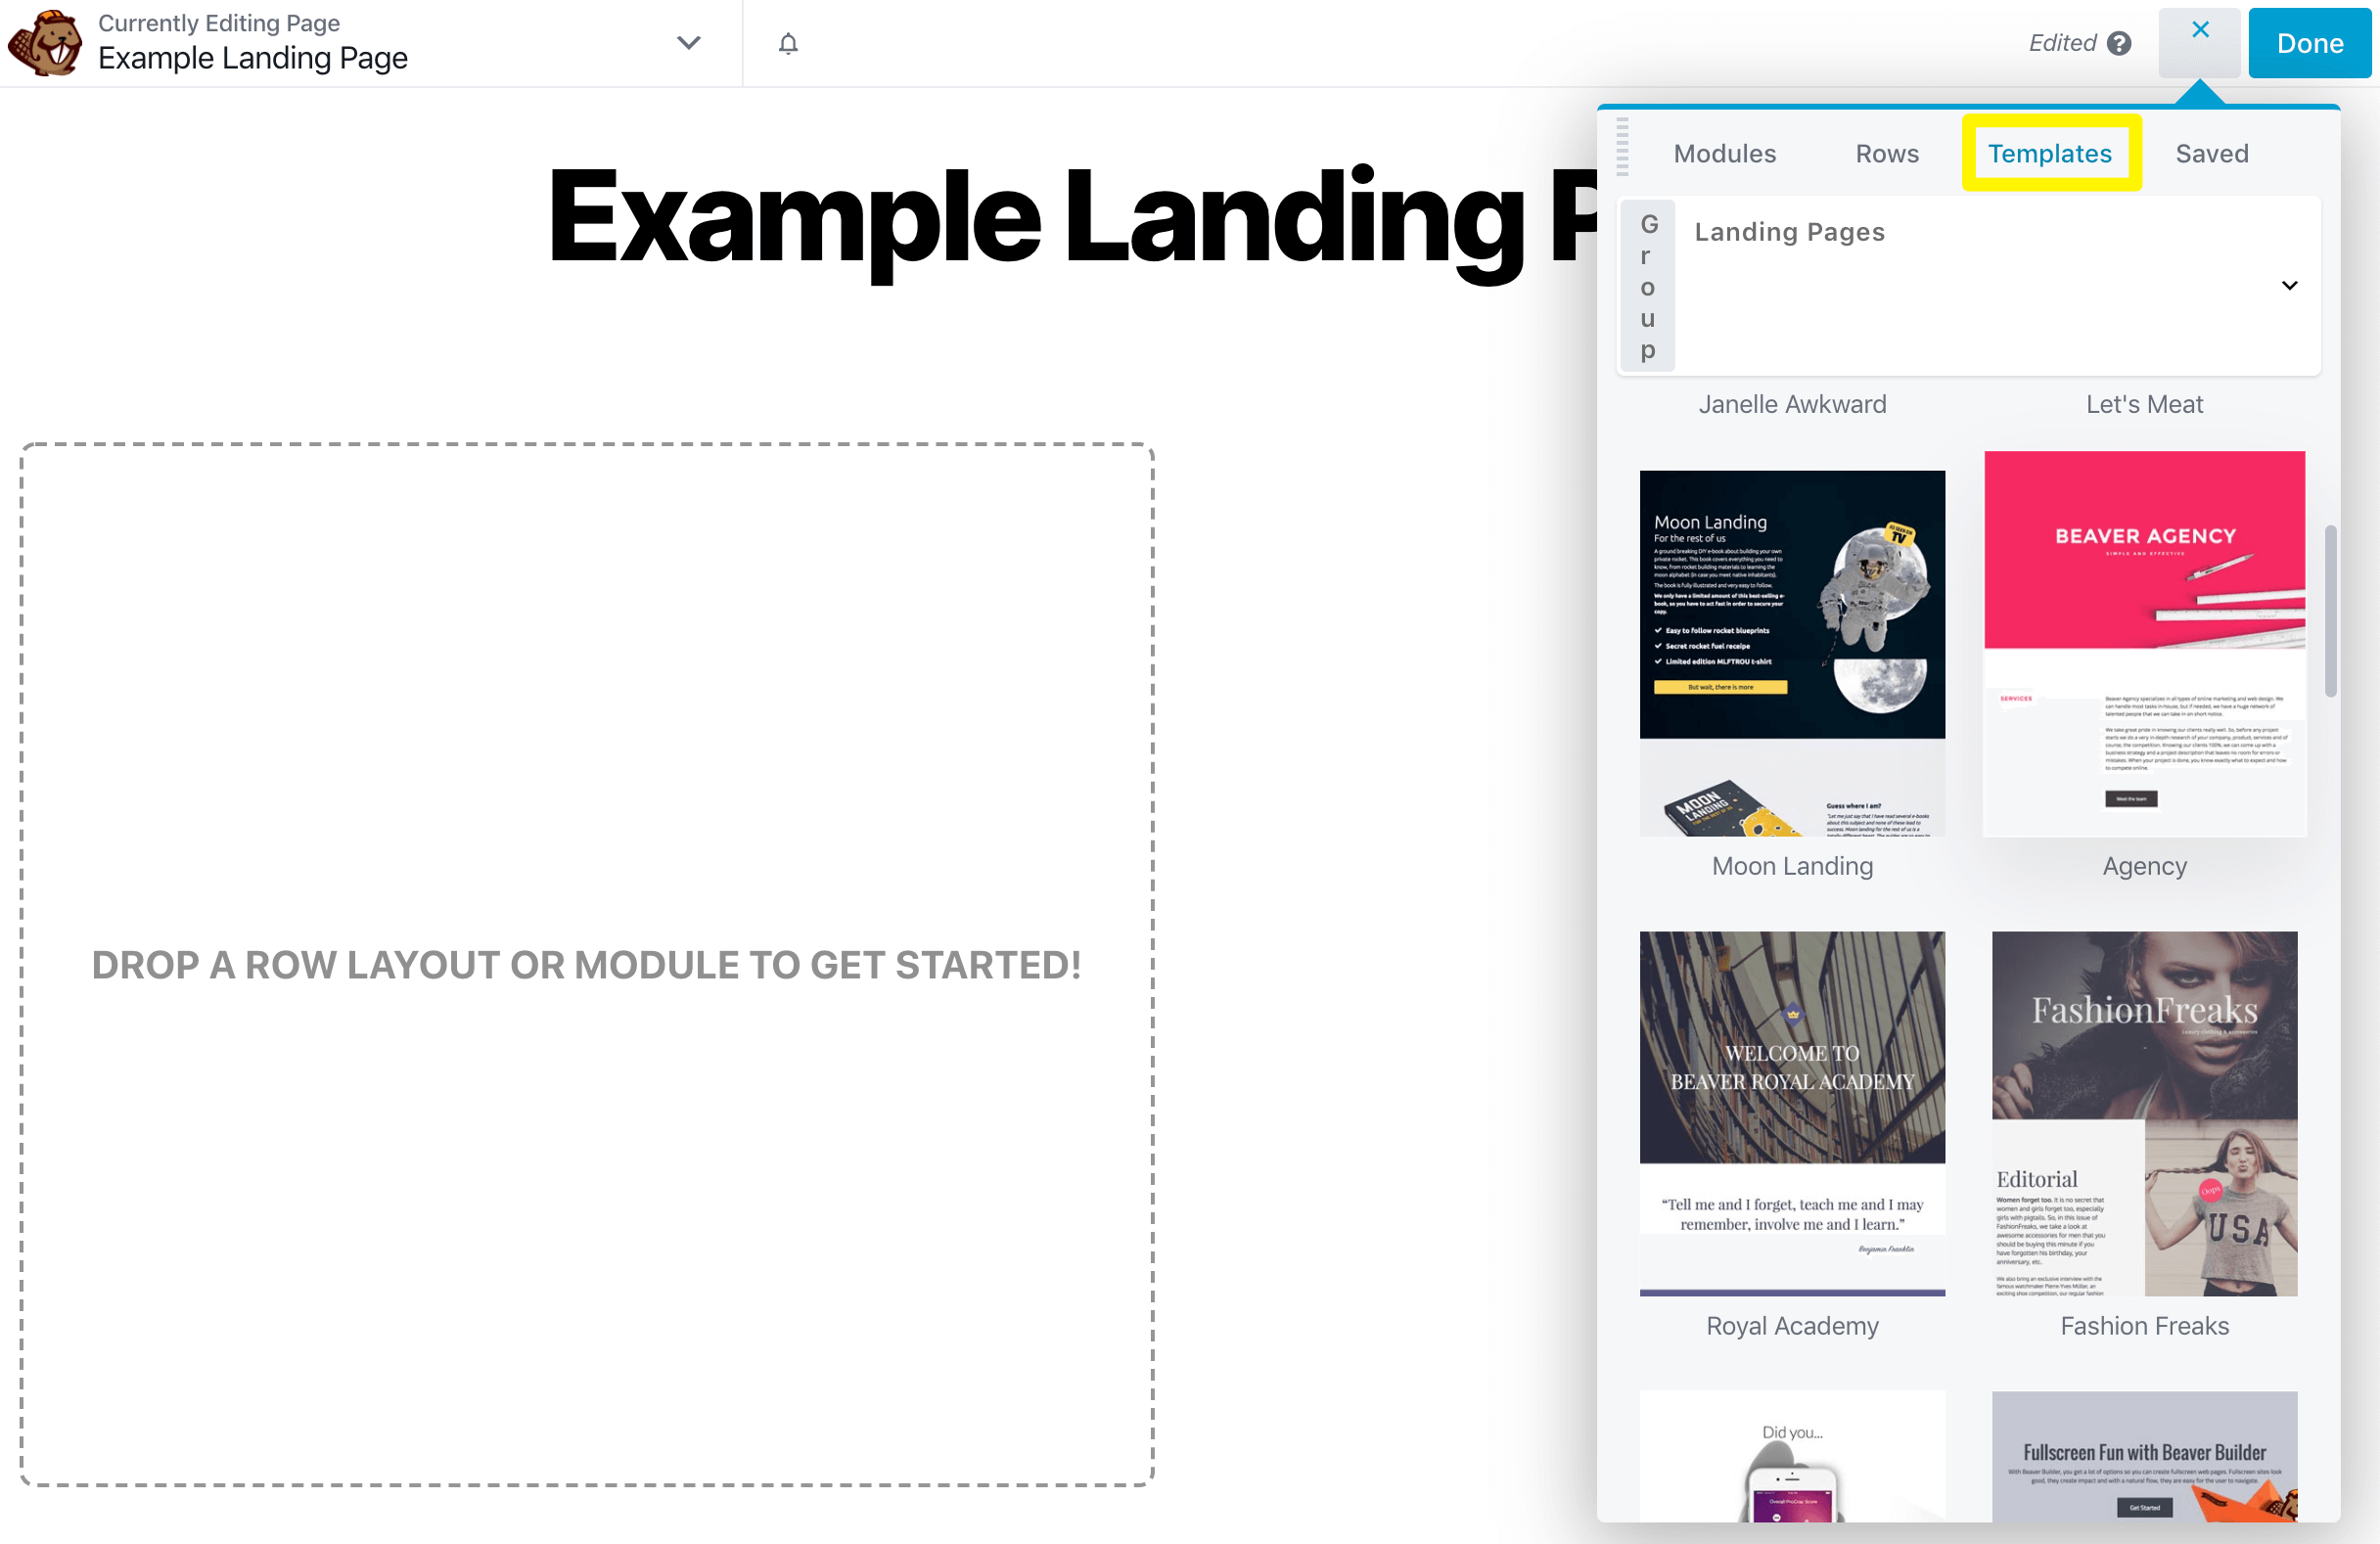
Keep in mind that you’ll be able to fully customize any layout you choose. Alternatively, you can start from scratch and build a fully customized layout.
Beaver Builder’s modules enable you to add text, video, and other elements to your landing page. Just click the plus (+) sign in the top right corner to open the menu and navigate to the Modules tab:
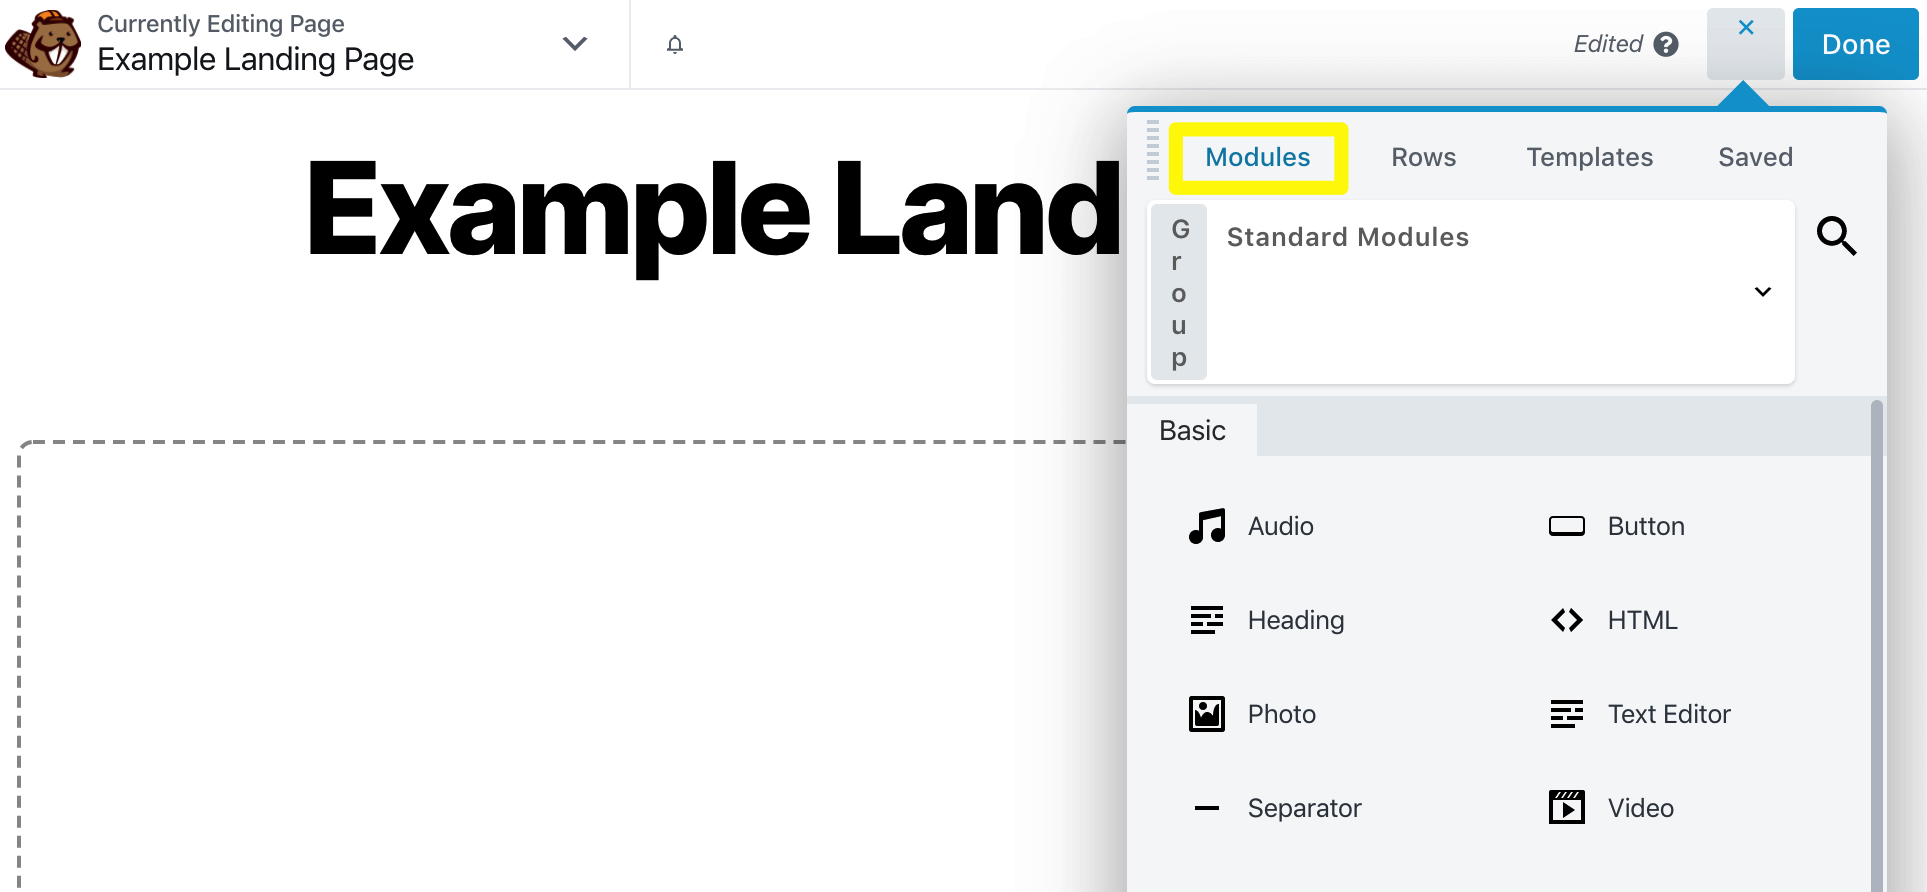
The modules are organized into categories, which should make it easier to find what you’re looking for. You can even save your favorite modules, columns, and layouts for later use.
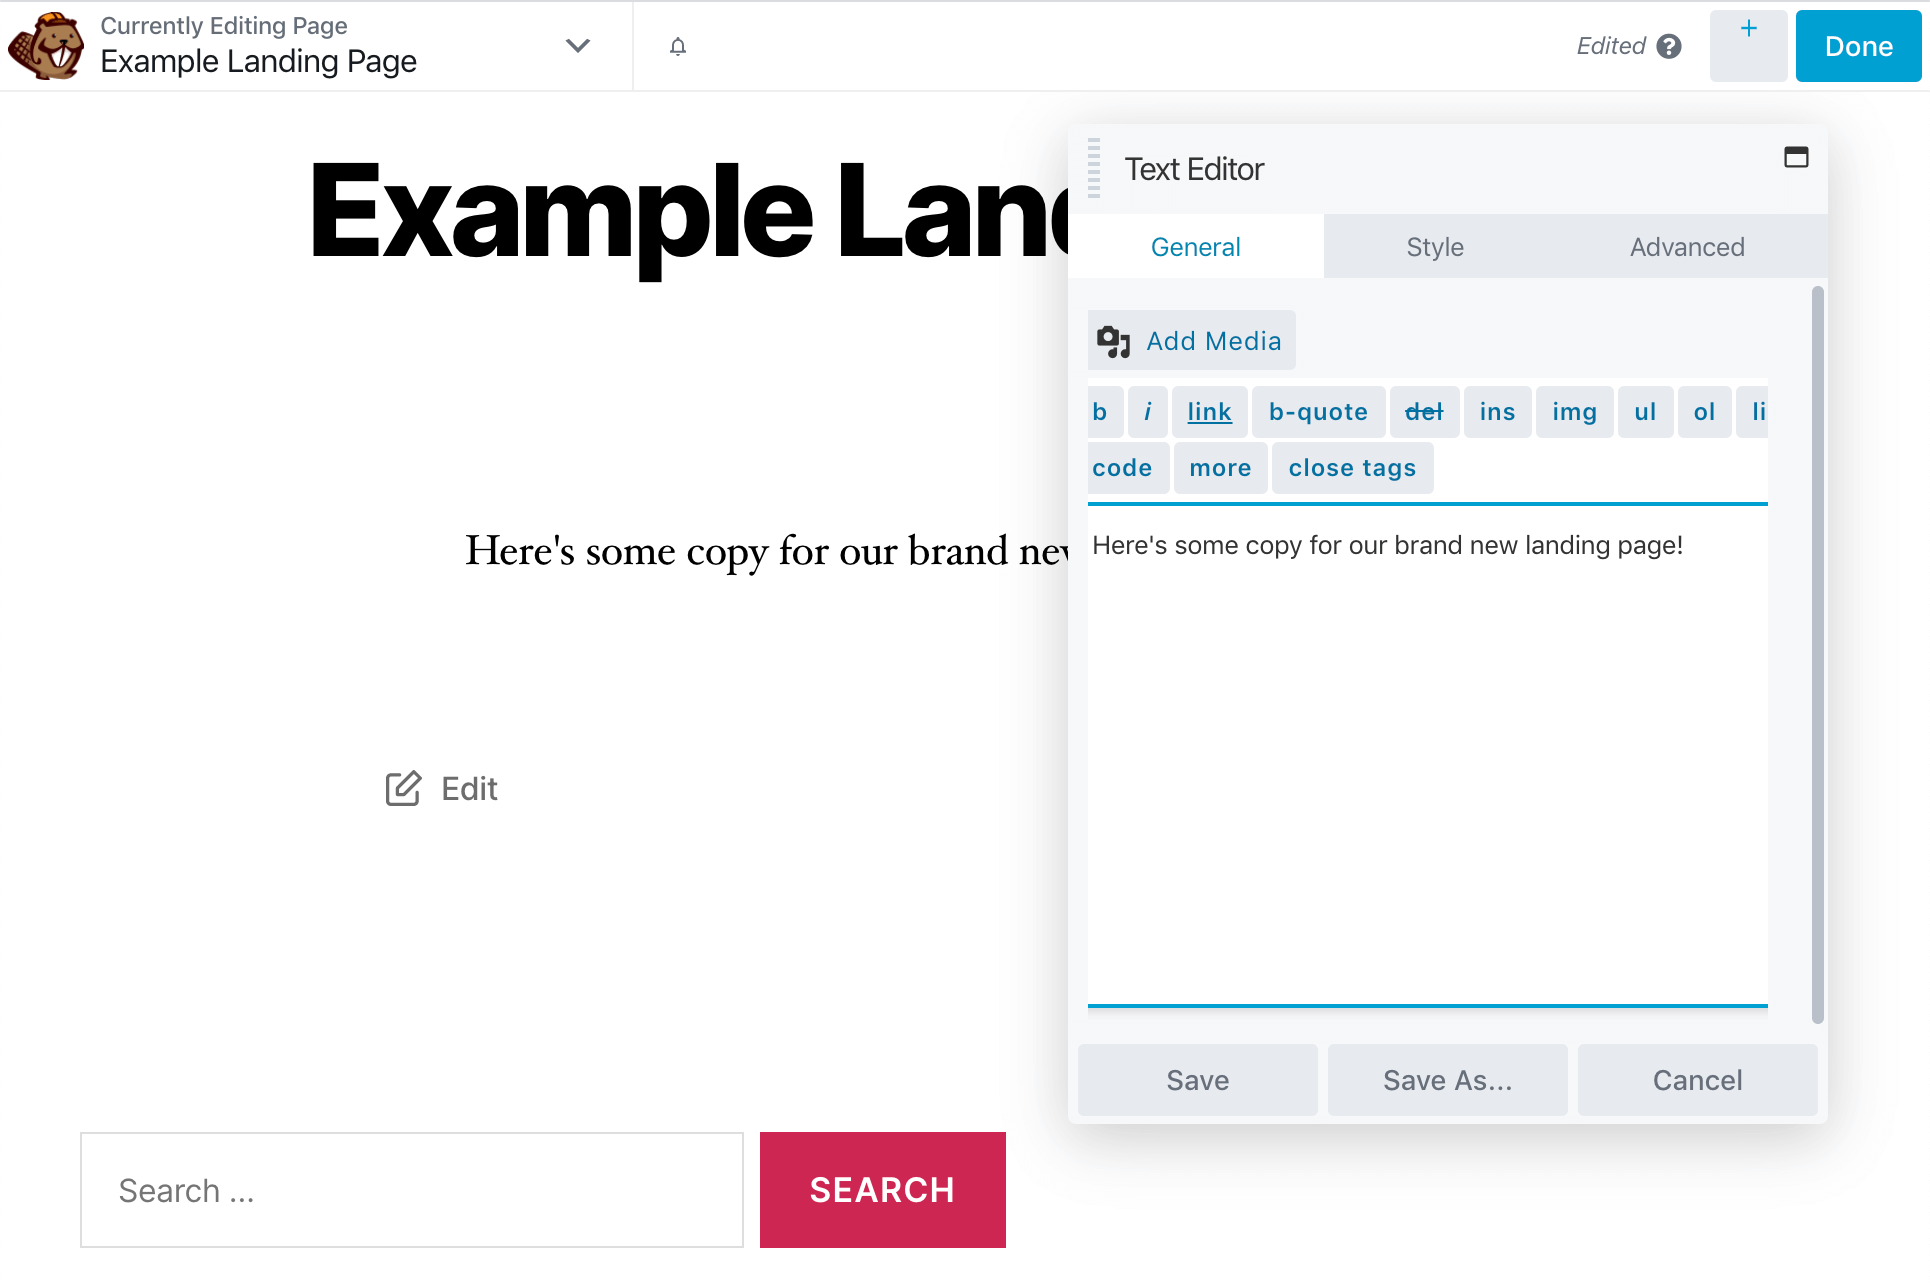
To add a module, all you have to do is drag it to where you’d like it to appear and drop it in place. A new window pops up with settings for you to add content, modify the style, and add other features such as animation.
For example, here’s the settings pane for the Text Editor module:
When you’re adding your content, remember to keep it organized and scannable. Some other modules that are highly effective when building landing pages include:
- Video: Video content may boost your landing page’s conversion rate.
- Testimonials: An easy way to add social proof to your landing page and build trust with leads.
- Pricing table: This module can help your visitors understand your pricing options.
Ultimately, which modules to include and how to format your landing page are up to you but one module you’ll want to be sure to feature is Call to Action.
Step 4: Build Your CTA
Your CTA plays an important role in converting your visitors. You can include one or more at a few different points throughout your landing page, especially if it’s long. When a visitor decides to take the next step, you don’t want them to go hunting for the correct button.
The CTA varies depending on the kind of conversion you’re after. No matter what your goal is, you can find a Beaver Builder module to help you out:
- Call to Action. The Call to Action module enables you to add a heading, text, and button all in one module. There’s a tremendous amount of customization options available, including colors and icons.
- Callout. This module is similar to the Call to Action module, but it enables you to add a photo and a link rather than a button. Use it to bring special attention to a service or product feature.
- Subscribe Form. If your CTA is to collect email addresses for future contacts, create a CTA using this module. It supports a large number of mail lists, you can tweak the fields and the button, and you can add a Terms and Conditions checkbox.
- Contact Form. This module gives your visitors a way to reach out to you without leaving the landing page. You can choose what fields you want to include and add a captcha to prevent spam.
When working with these modules, remember that your goal is to make it easy for your visitors to perform the action you’re targeting. For example, if you’re building a subscribe form, don’t ask them for any more information than you need.
Similarly, keep your button text clear and compelling. “Buy Now” doesn’t leave a lot of room for interpretation, so users will know exactly what to expect.
Step 5: Publish and Save Your Landing Page Template
When you’re done tinkering with your landing page, you can save your work as a draft or publish it immediately. First, click the Done button in the top right corner of the screen to see your choices:

You can discard the page if you’re not happy with it and want to delete it. To save your work without publishing, select Save Draft. If you’re ready for the page to go live, click Publish.
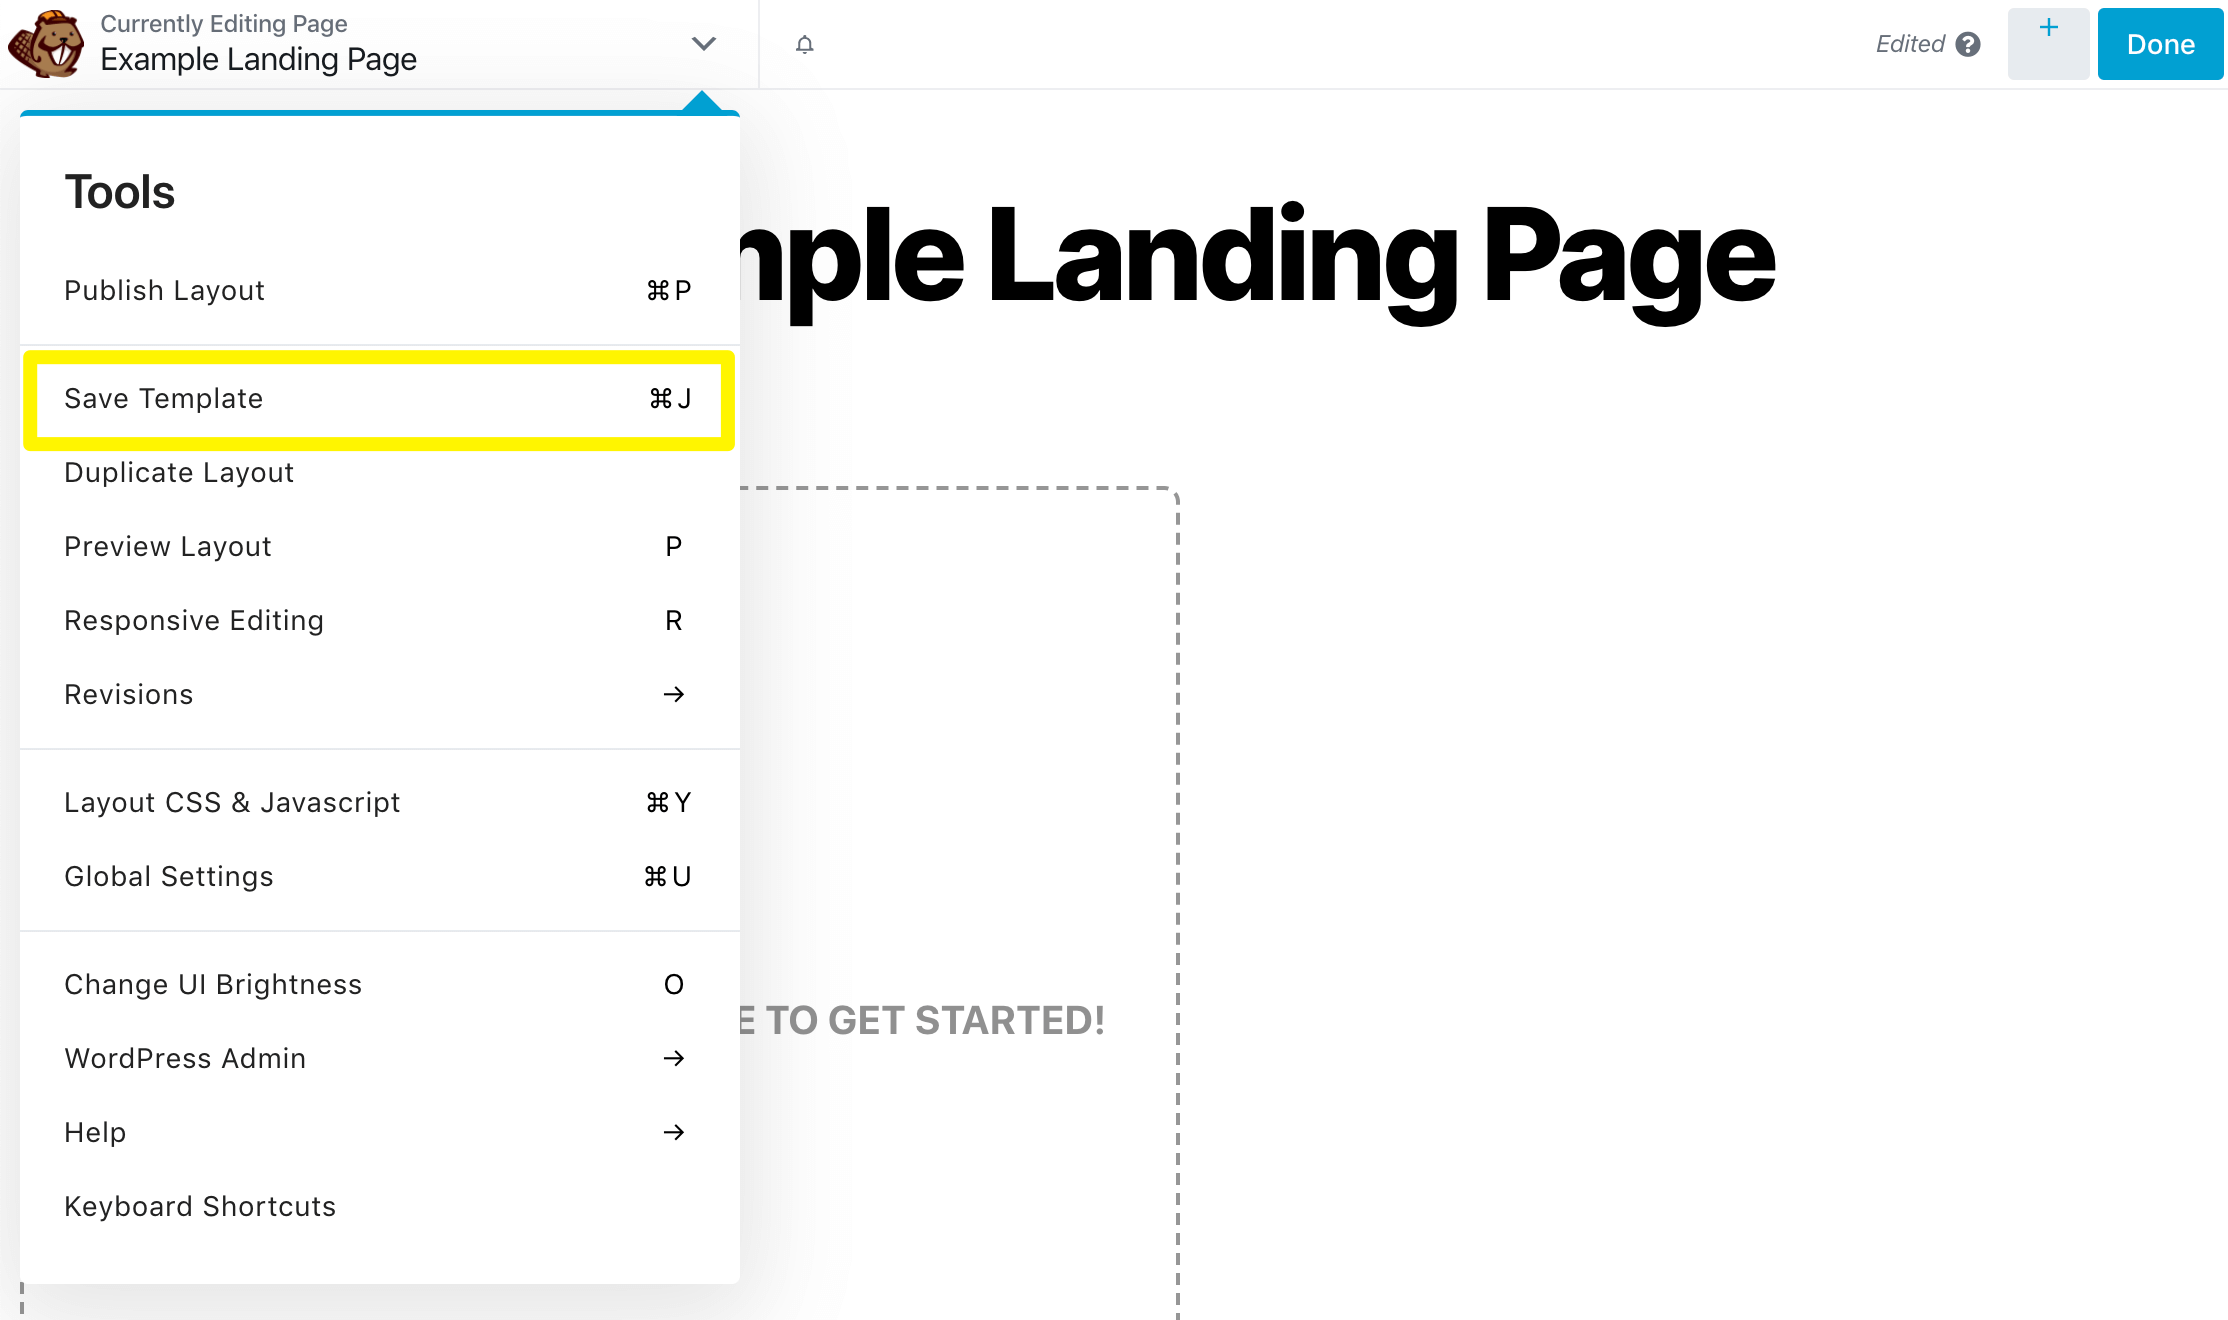
You can also save your landing page as a template to use in the future. Open the Tools menu by clicking the down-arrow in the top left corner of your screen and choose Save Template:
Give your template a name and click Save. When you’re ready to apply this template to a new page, open the content panel by clicking the plus (+) sign in the top right corner of the Beaver Builder editor.
Click the Templates tab, then select the Saved Templates group in the dropdown. Click the layout you want to apply to your landing page.
Step 6: Use Beaver Themer to Create a Custom Landing Page Header
Usually, you’re stuck with your theme’s header options unless you want to edit your site’s code. However, it can be beneficial to create a custom header or footer just for your landing page to minimize exit points and focus visitors’ attention on your content.
This is where Beaver Themer comes in handy. Here are the basics of creating a custom header with Beaver Themer.
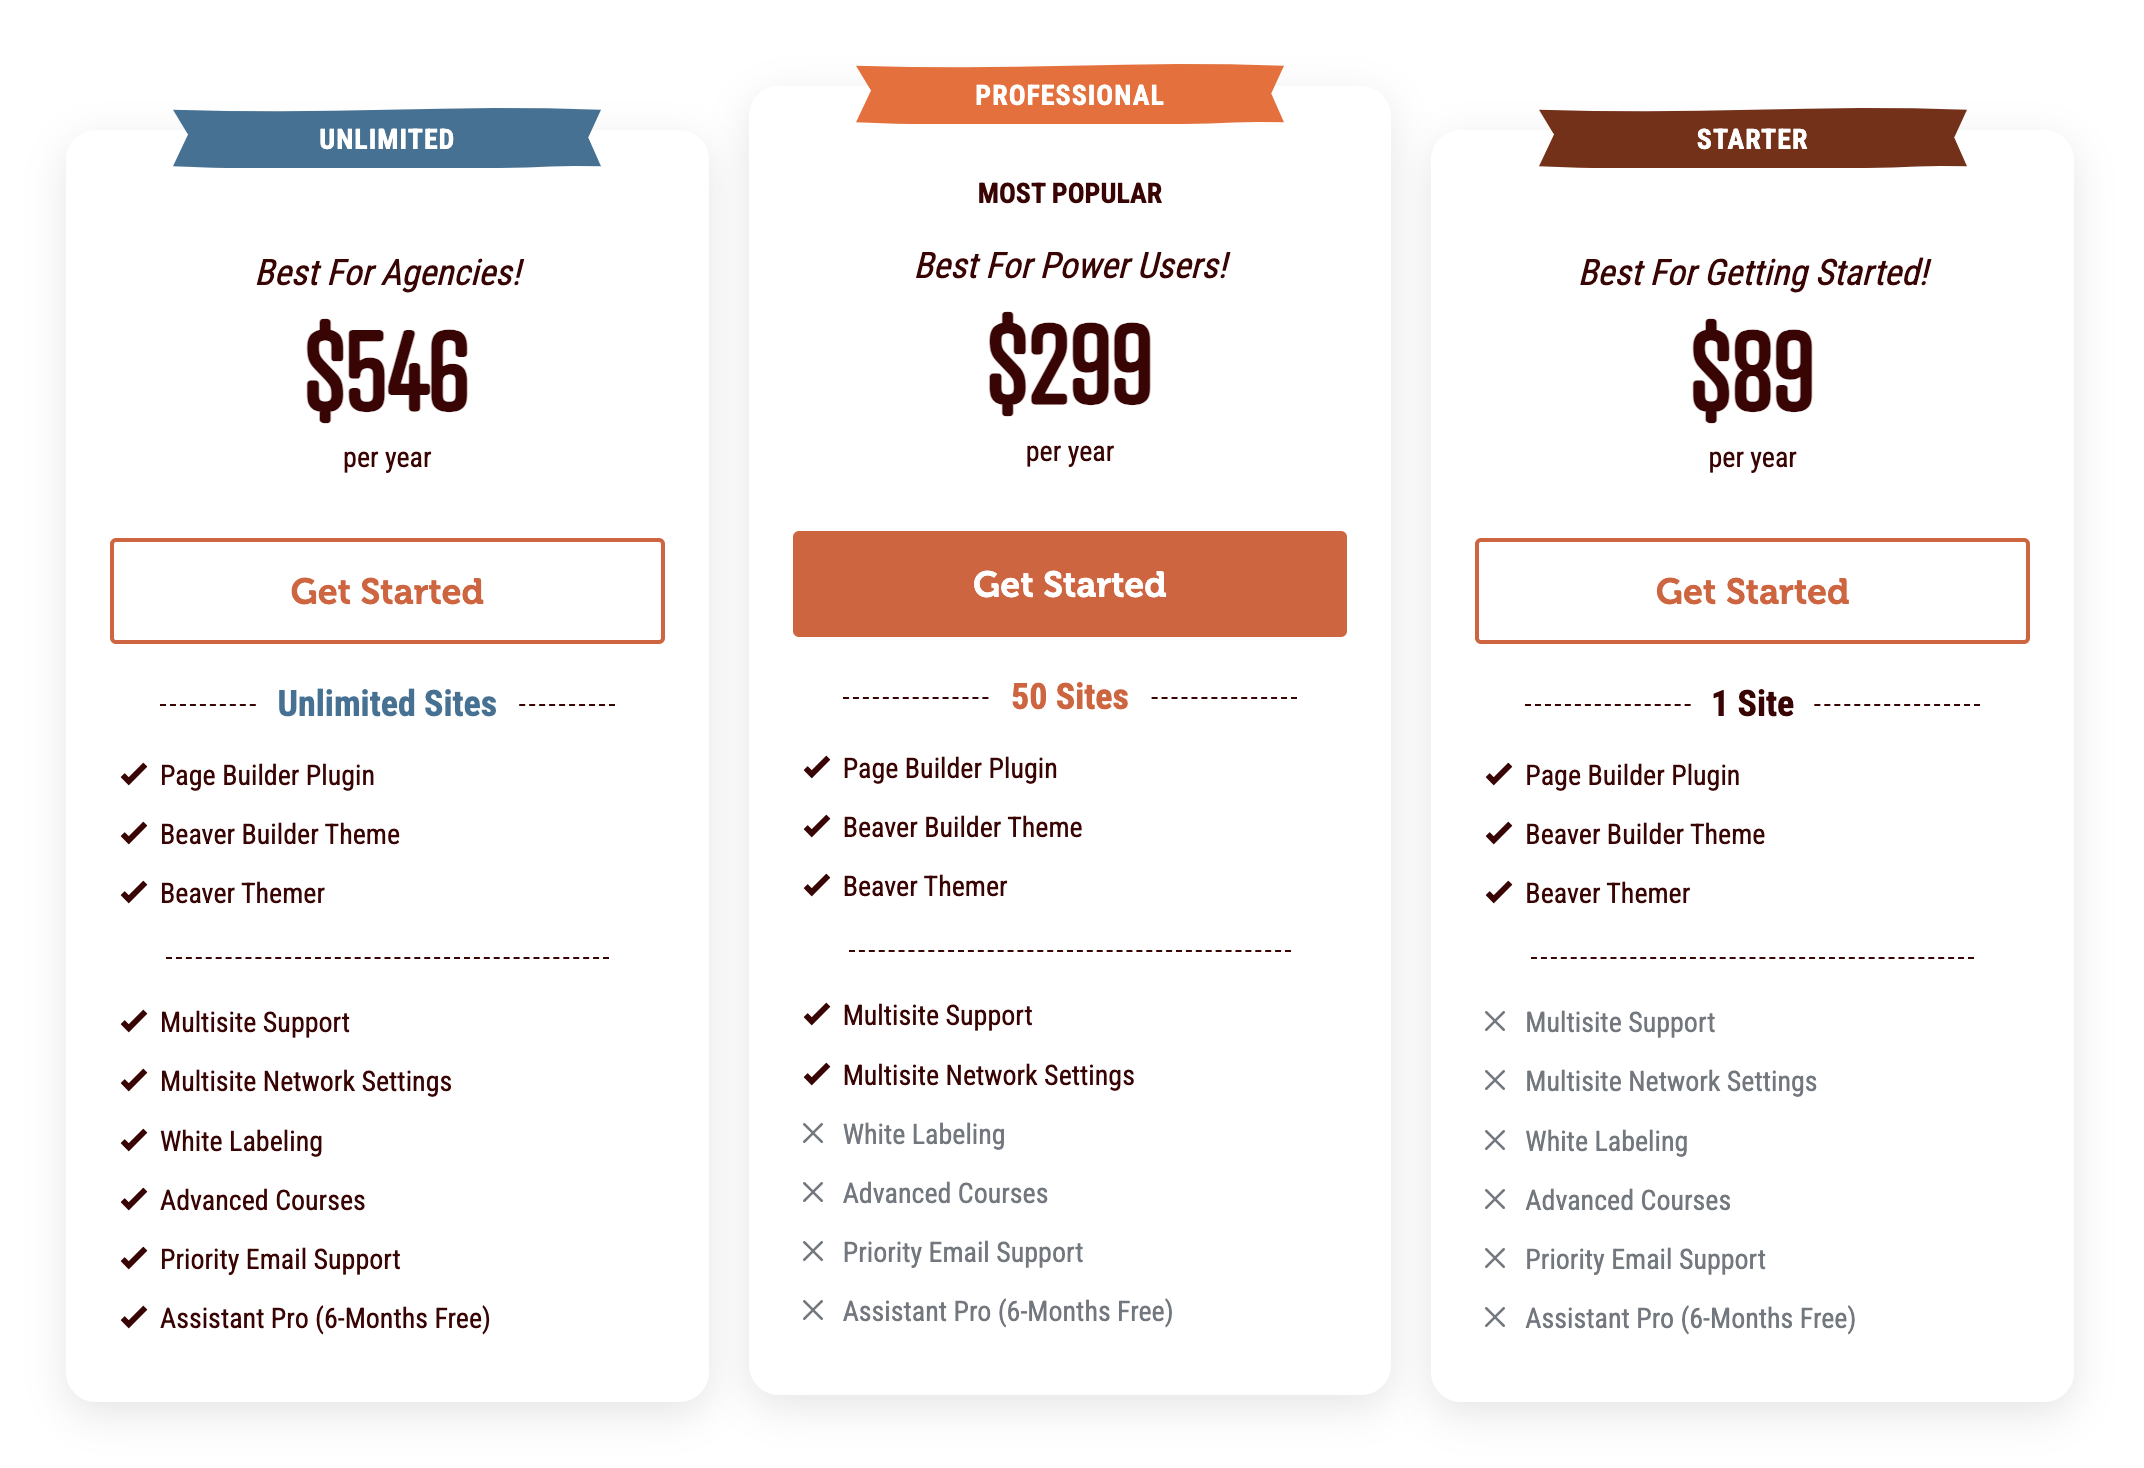
The Beaver Themer plugin is included with all three premium plans: Starter, Professional, and Unlimited:
Download the plugin and install it following the same procedure you used for the page builder plugin. The Beaver Themer license is bundled with your Beaver Builder license so you won’t need that extra step after installation.
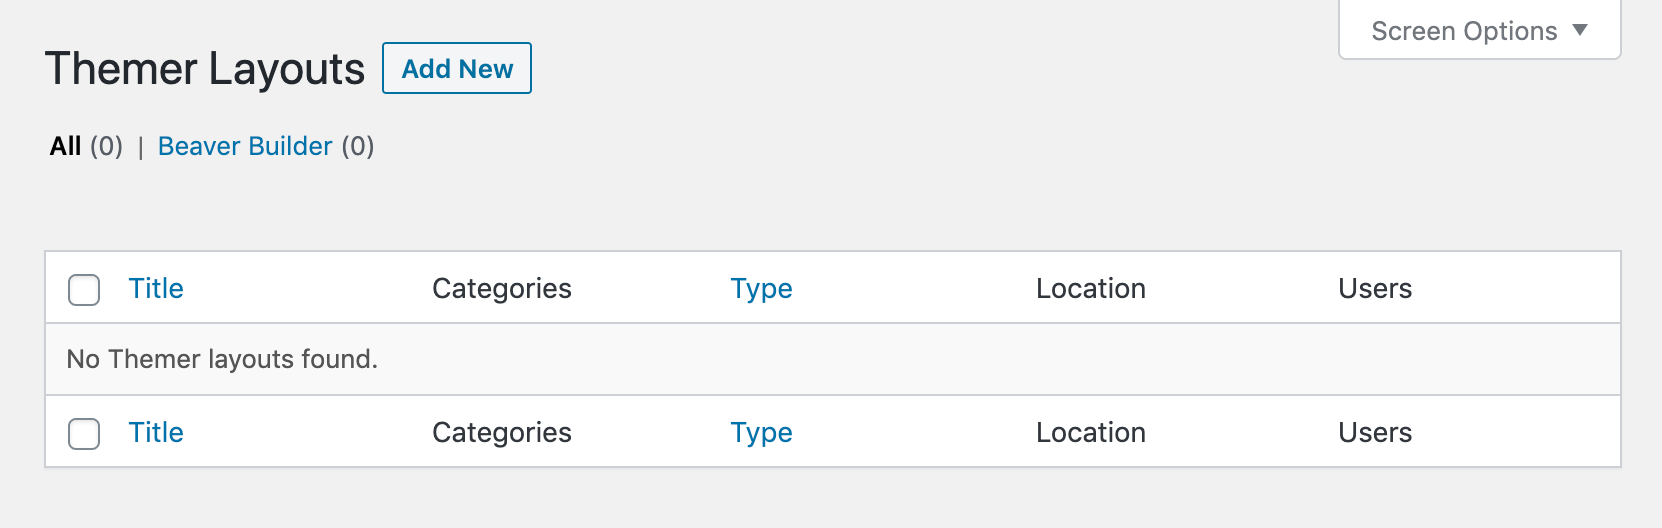
From your WordPress dashboard, navigate to Beaver Builder > Themer Layouts. Then click Add New:
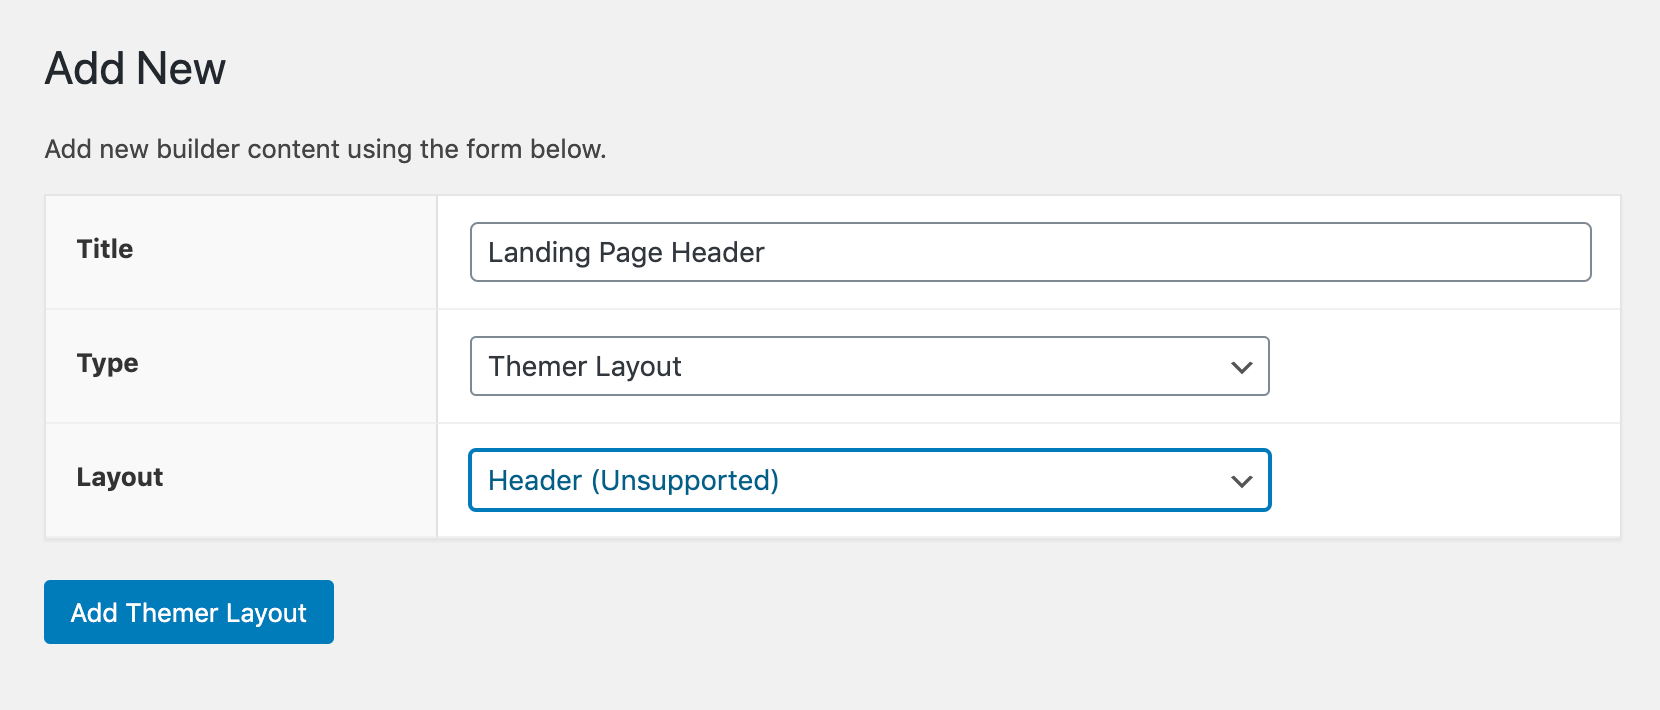
Enter a title for your layout and select Themer Layout in the Type dropdown and Header in the Layout dropdown. Finally, click the Add Themer Layout button:
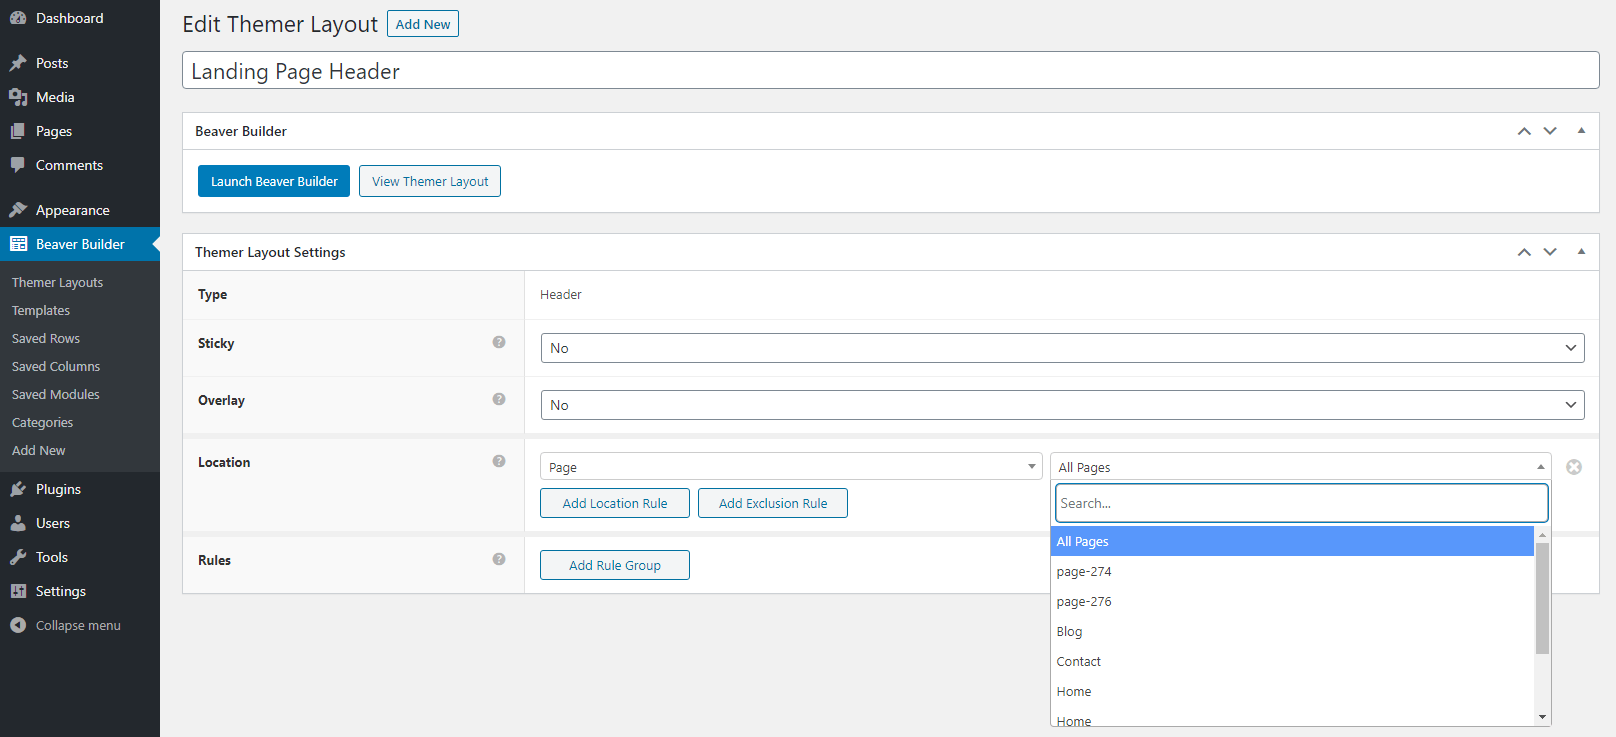
You can set some options for your header on the next screen, including whether you’d like it to be sticky or not.
The Location setting is where you add the header to your landing page.
Choose Page from the first dropdown and your landing page from the second:
When you’ve finished, click the Publish button. Next, click Launch Beaver Builder to edit your header.
Since the header is specifically for your landing page, you probably can remove a lot of the default content, such as the navigation menu.
To do this, hover over the module and click the X to delete it:

Beaver Themer populates some modules using field connections. In this case, the heading module is connected to the Site Title field.
This means that if you ever change your Site Title in your WordPress settings, the header will automatically be updated.
If you’d like to display something other than the site title, you can easily change the field connection by opening the module’s settings.
On the General tab, click the plus sign next to the Heading field, which opens the field connection options:
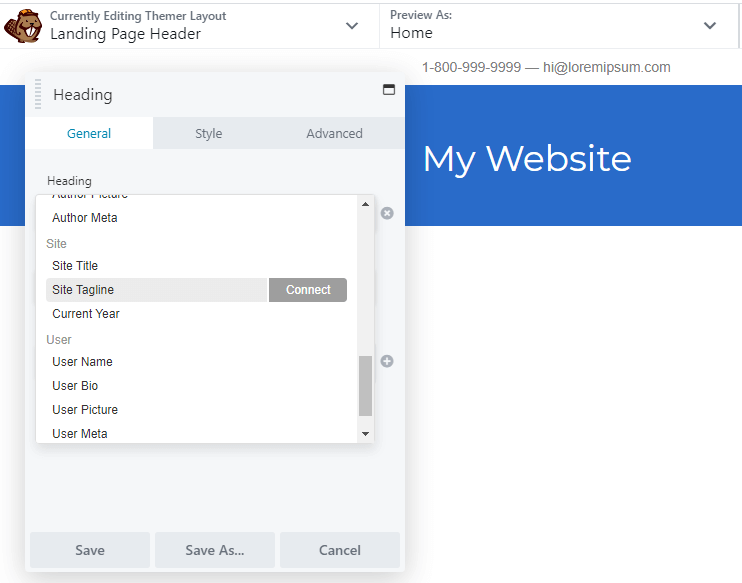
Then click the Connect button next to your desired field connection. If you don’t like the field connection options, you can just add text to the Heading field.
When you’re satisfied with your landing page header, click Done > Publish. This should replace the default header on your landing page.
Conclusion
Crafting an effective landing page is no small feat. It requires time and attention to detail to get it right. A drag and drop landing page builder can make the process easier by providing pre-built elements, templates, and custom headers to set you up for success.
In this guide, we walked you through how to build a landing page with Beaver Builder and Beaver Themer:
- Install and activate the Beaver Builder plugins.
- Create a new page.
- Add your landing page content, including elements such as testimonials and video.
- Build your CTA and any forms that you need to include.
- Create a header that minimizes your landing page’s exit points.
- Save your landing page template for future use.
Do you have any questions about using Beaver Builder or Beaver Themer as a landing page builder? Ask away in the comments section below!
Our Newsletter
Our newsletter is personally written and sent out about once a month. It's not the least bit annoying or spammy.
We promise.
Try Beaver Builder Today

Related articles
Beaver Builder Maintenance Mode: How to Set It Up
Beaver Builder Maintenance Mode helps you keep your website looking professional while you work behind the scenes. Whether you’re redesigning…
Beaver Builder 2.11: Popup Module, Maintenance Mode, and Settings Snapshots
Beaver Builder 2.11, also known as Kariba, is now available and delivers some exciting updates: a new Popup Module for…

Beaver Builder AI: Build WordPress Layouts with AI (Now in Alpha)
Hey everyone! Big news. After a long time of building behind the scenes, Beaver Builder AI is here. The alpha…
Join the community
We're here for you
There's a thriving community of builders and we'd love for you to join us. Come by and show off a project, network, or ask a question.
Since 2014
Build Your Website in Minutes, Not Months
Join Over 1 Million+ Websites Powered By Beaver Builder.