
If you use Beaver Builder on your site and need to display a list of events, you can use the events calendar plugin, EventKoi.
EventKoi integrates directly with Beaver Builder’s Loop module (which is part of the Themer add-on), which means you can design a fully custom events list using the same drag-and-drop tools you are already familiar with:
This tutorial walks through the full setup, from installing EventKoi to a published, styled events list built with the Loop module.
Table of Contents
- Why Build an Events List This Way?
- What You’ll Need
- A Quick Look at How EventKoi Works with Beaver Builder
- Step-by-Step Tutorial
- Conclusion
Why Build an Events List This Way?
There are three key reasons for using the Loop module and EventKoi to build your events list:
- Your events list should look like the rest of your site. Most events plugins give you a pre-built widget or shortcode that drops a list onto your page. This means that the list will never quite look like the rest of your site unless you’re able to override the design with CSS.
- You need to display specific events. EventKoi hooks into the Loop module and lets you control which events to display based on timeframe, order, and even filter recurring events.
- The list needs to stay current without ongoing maintenance. Because the Loop Module pulls directly from your EventKoi data, the page updates automatically whenever you add or edit events. There’s nothing to update on the page itself. Add a new event in EventKoi and it appears in the list according to your query settings.
What You’ll Need
- Beaver Builder Page Builder
- Beaver Themer (the Loop module is a Beaver Themer feature)
- EventKoi Pro (the Beaver Builder Themer integration is a Pro feature)
A Quick Look at How EventKoi Works with Beaver Builder
When EventKoi is installed alongside Beaver Builder and Beaver Themer, it extends the Loop Module in two important ways.
- It hooks into the Loop Module’s queries so that when you set your post type to EventKoi events, you get access to EventKoi-specific queries. That includes recurring event instances, event-aware date ordering, and filtering.
- Use EventKoi dynamic tags in Beaver Builder. These let you pull in data like the event date and time, location, image, title, and more. So you can display your actual event data without any manual input.
The result is that you design your event card once using standard Beaver Builder modules, connect the fields, and the Loop Module repeats it automatically for every event in your query.
Step-by-Step Tutorial
Step 1. Install and Set Up EventKoi
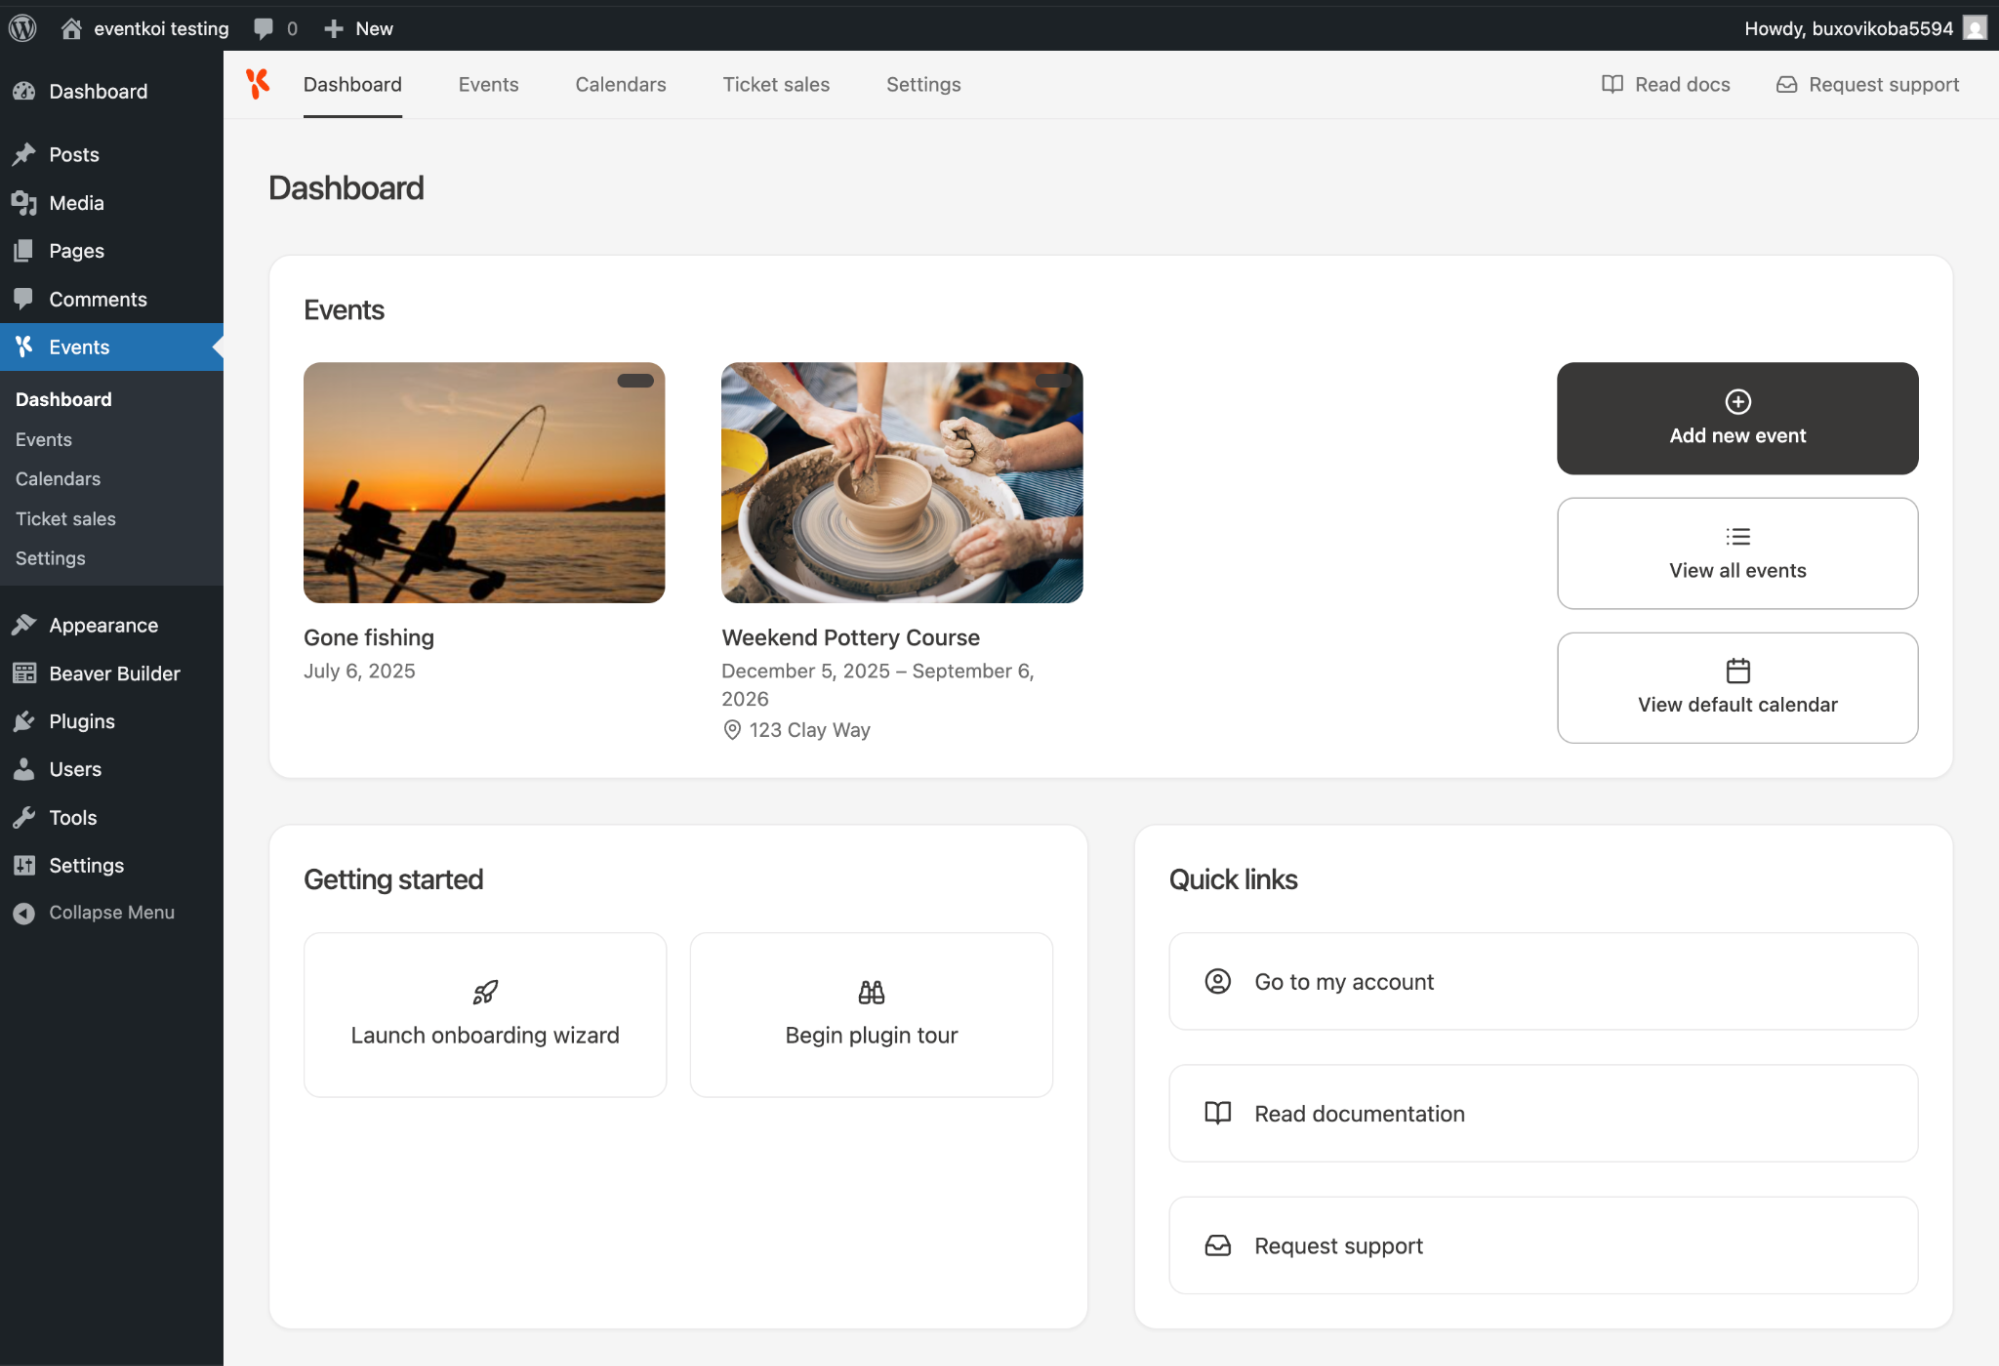
If you haven’t already, install EventKoi Pro and upload the zip from your account. After activation and completing the onboarding wizard, head to Events and add a few events to work with. Give them real future dates, since the default query ordering surfaces upcoming events first:
Step 2. Open Beaver Builder on Your Events Page
Create a new page for your events (or use an existing one) and open it in Beaver Builder:
Step 3. Insert the Loop Module
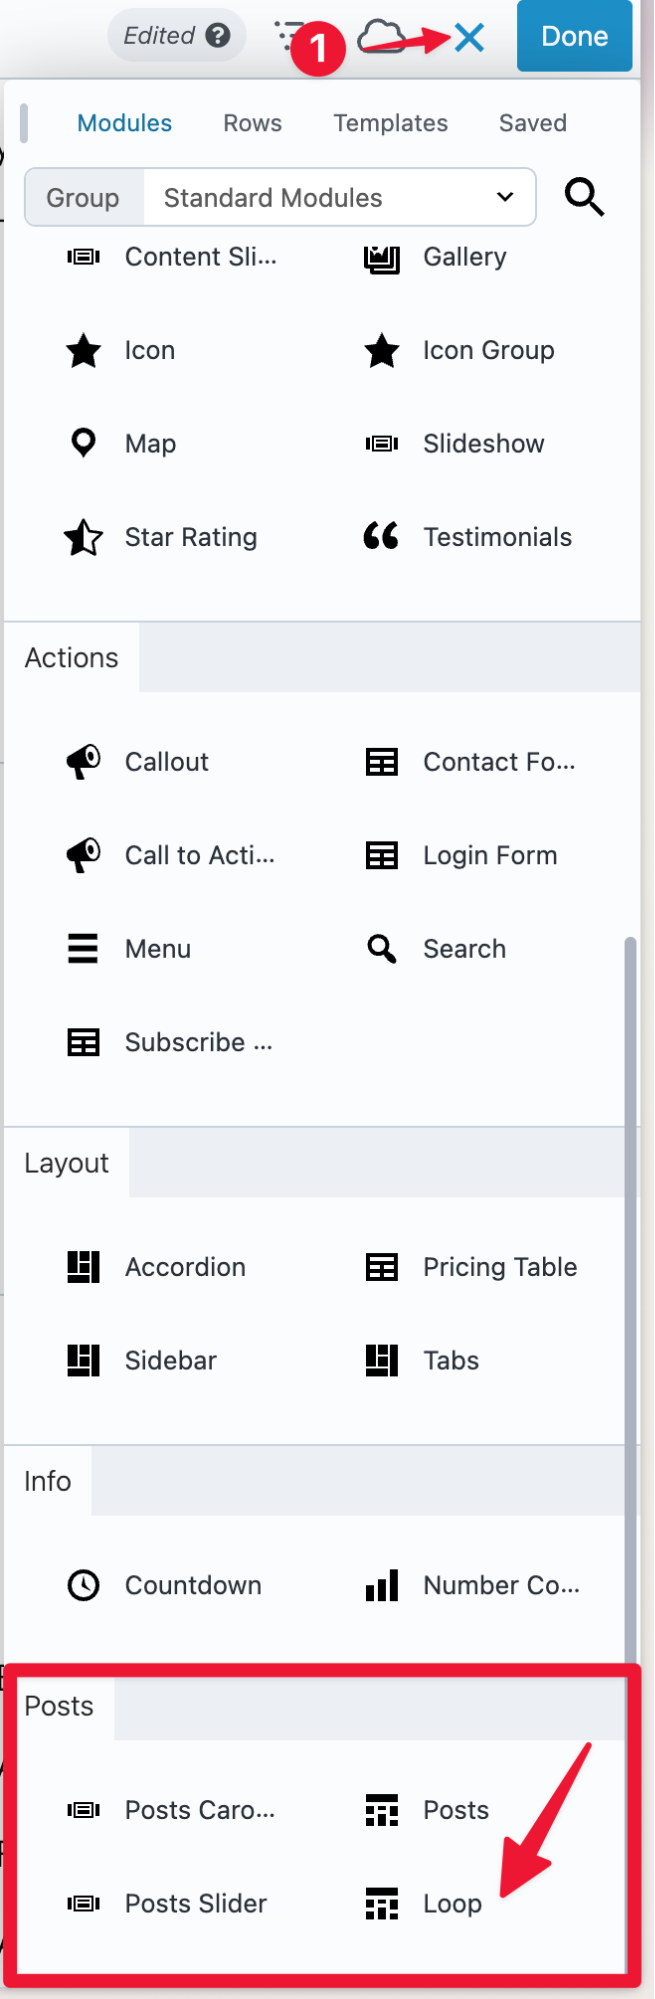
Open the Content panel and look under Posts category for the Loop module. Drag it onto your layout wherever you want the events list to appear:
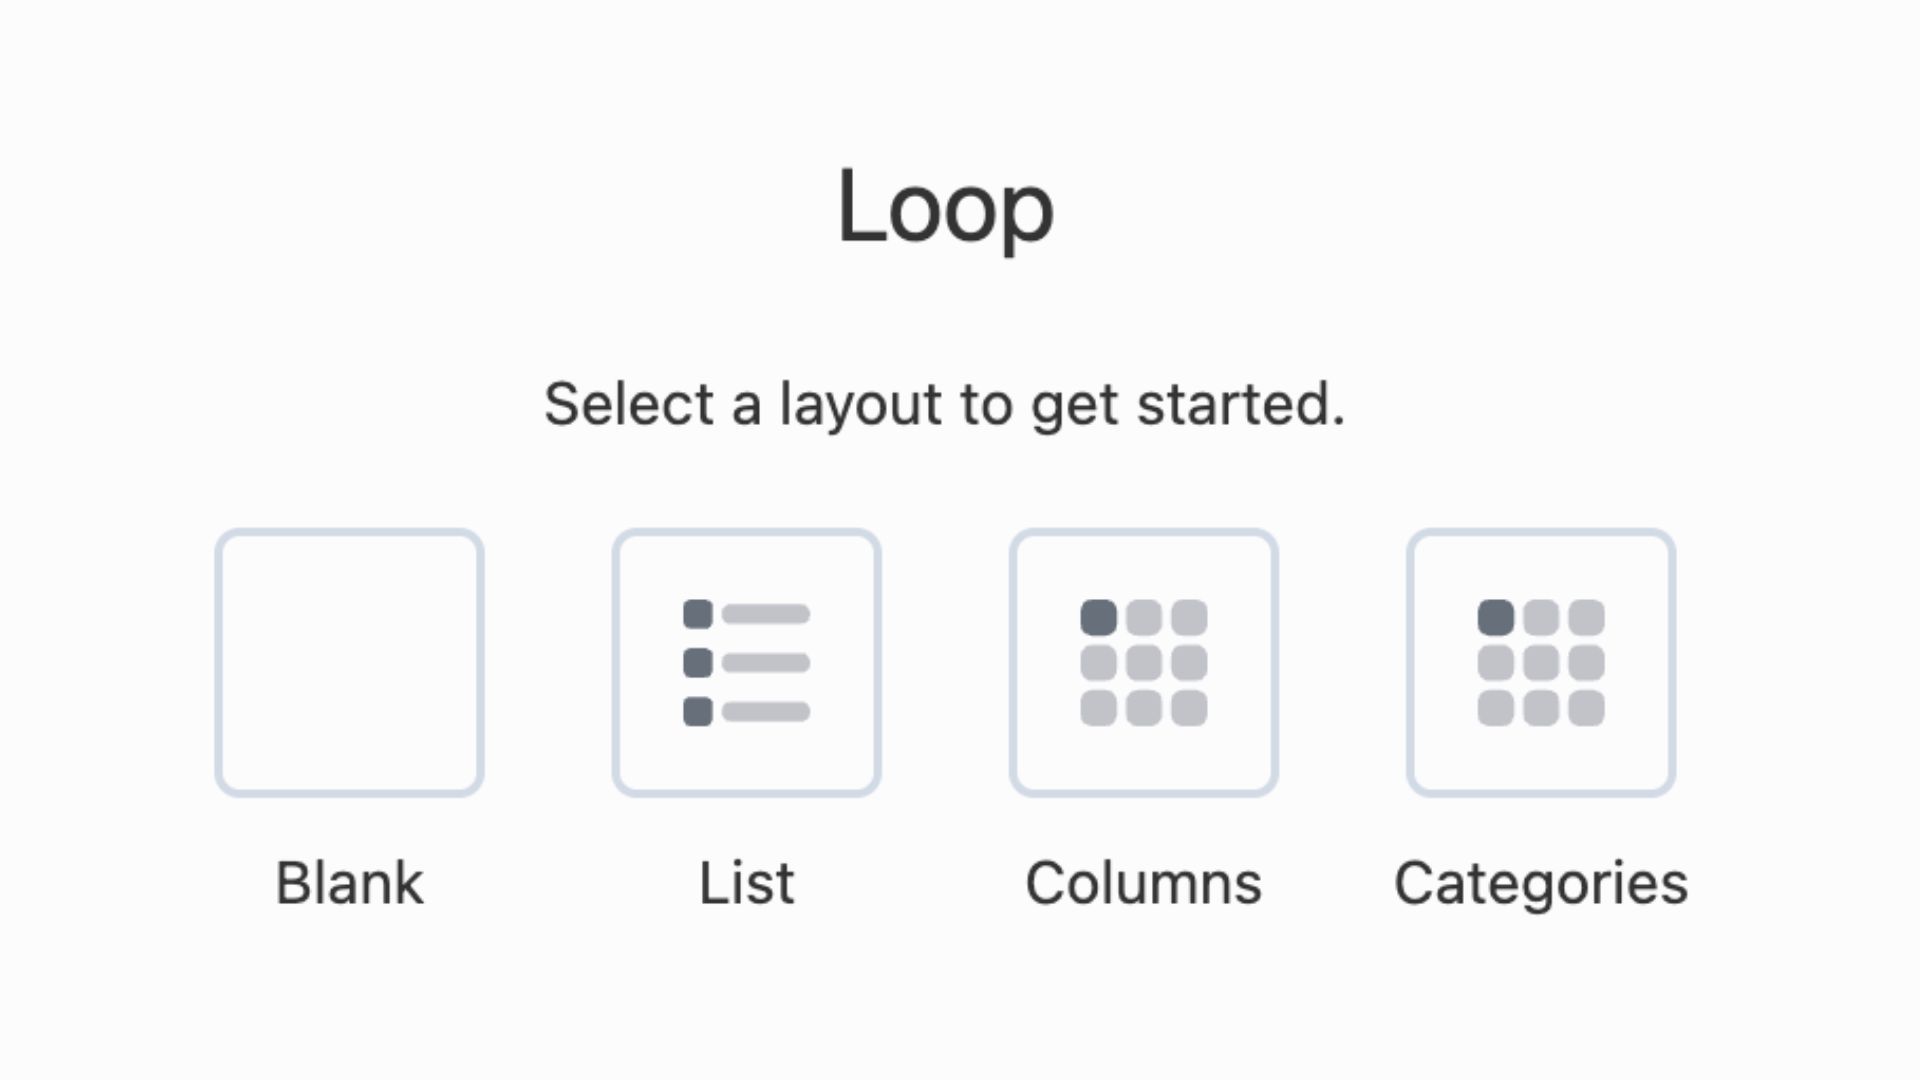
When the module is added, you’ll be prompted to choose a preset layout. You can pick List as a starting point or choose Blank if you want to build the event card entirely from scratch. Either way, you’ll be customizing it fully in the next steps:
Step 4. Configure the Query to Pull EventKoi Events
Open the Loop Module settings.
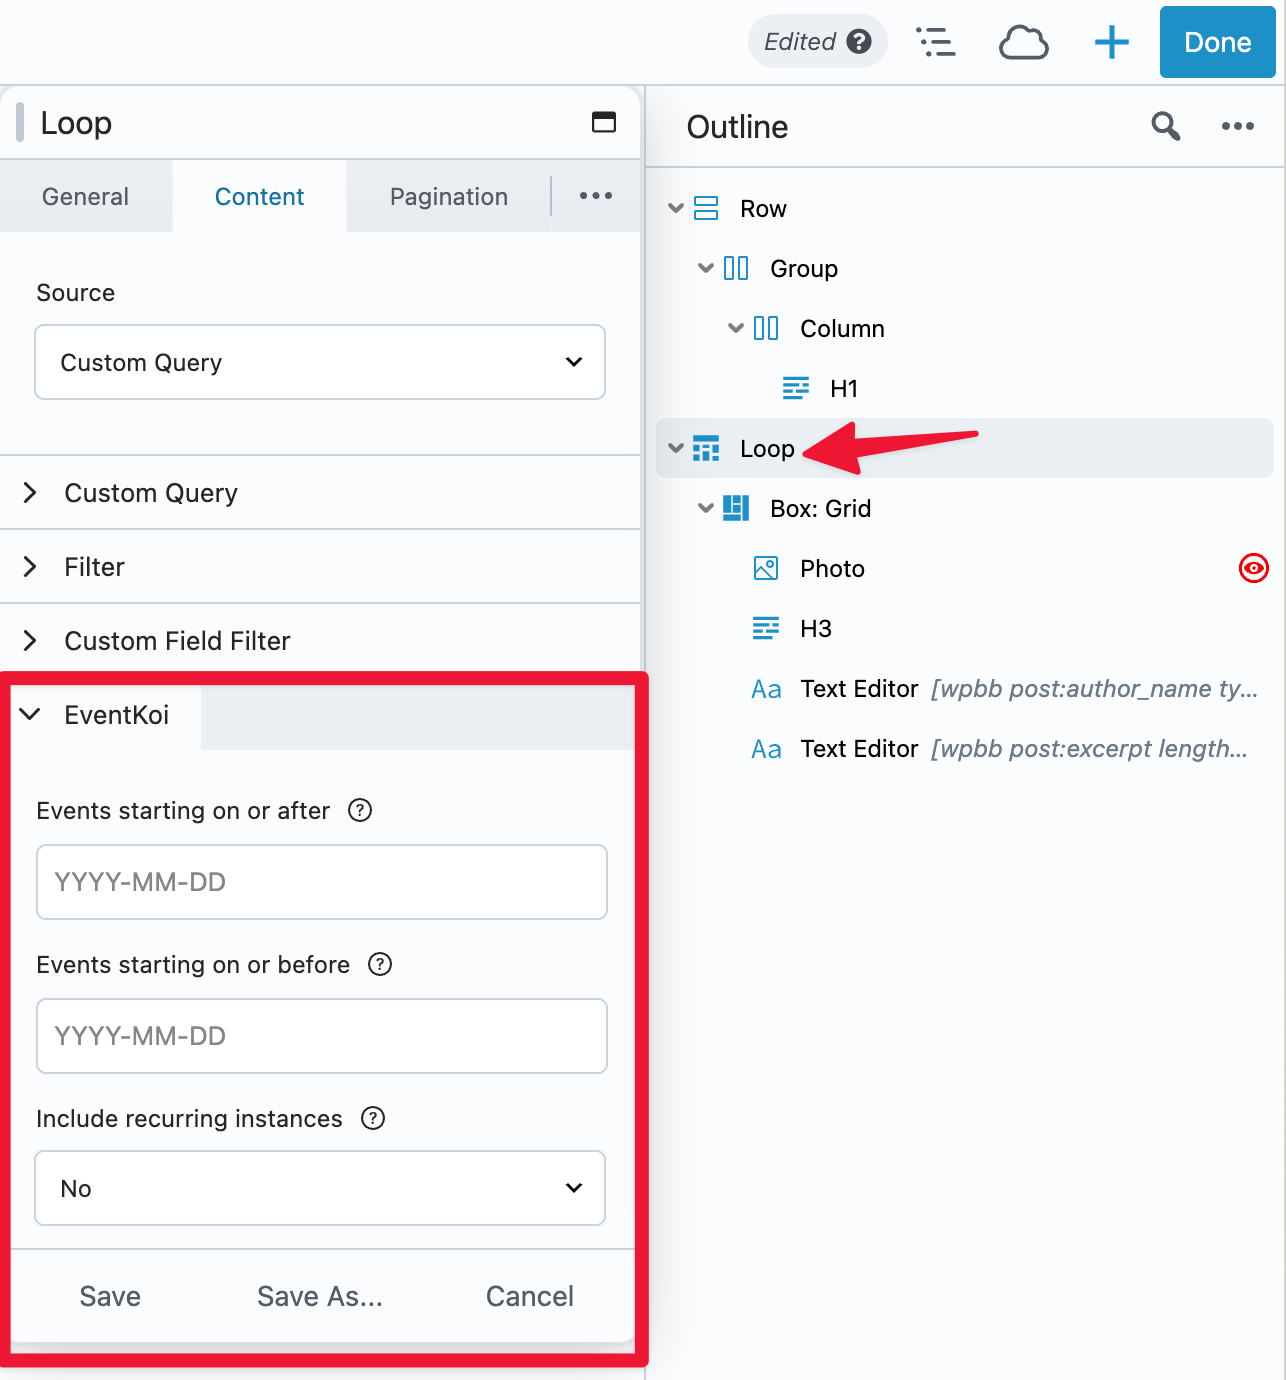
If it’s not already open, click on Outline, then double click on Loop to open the settings:
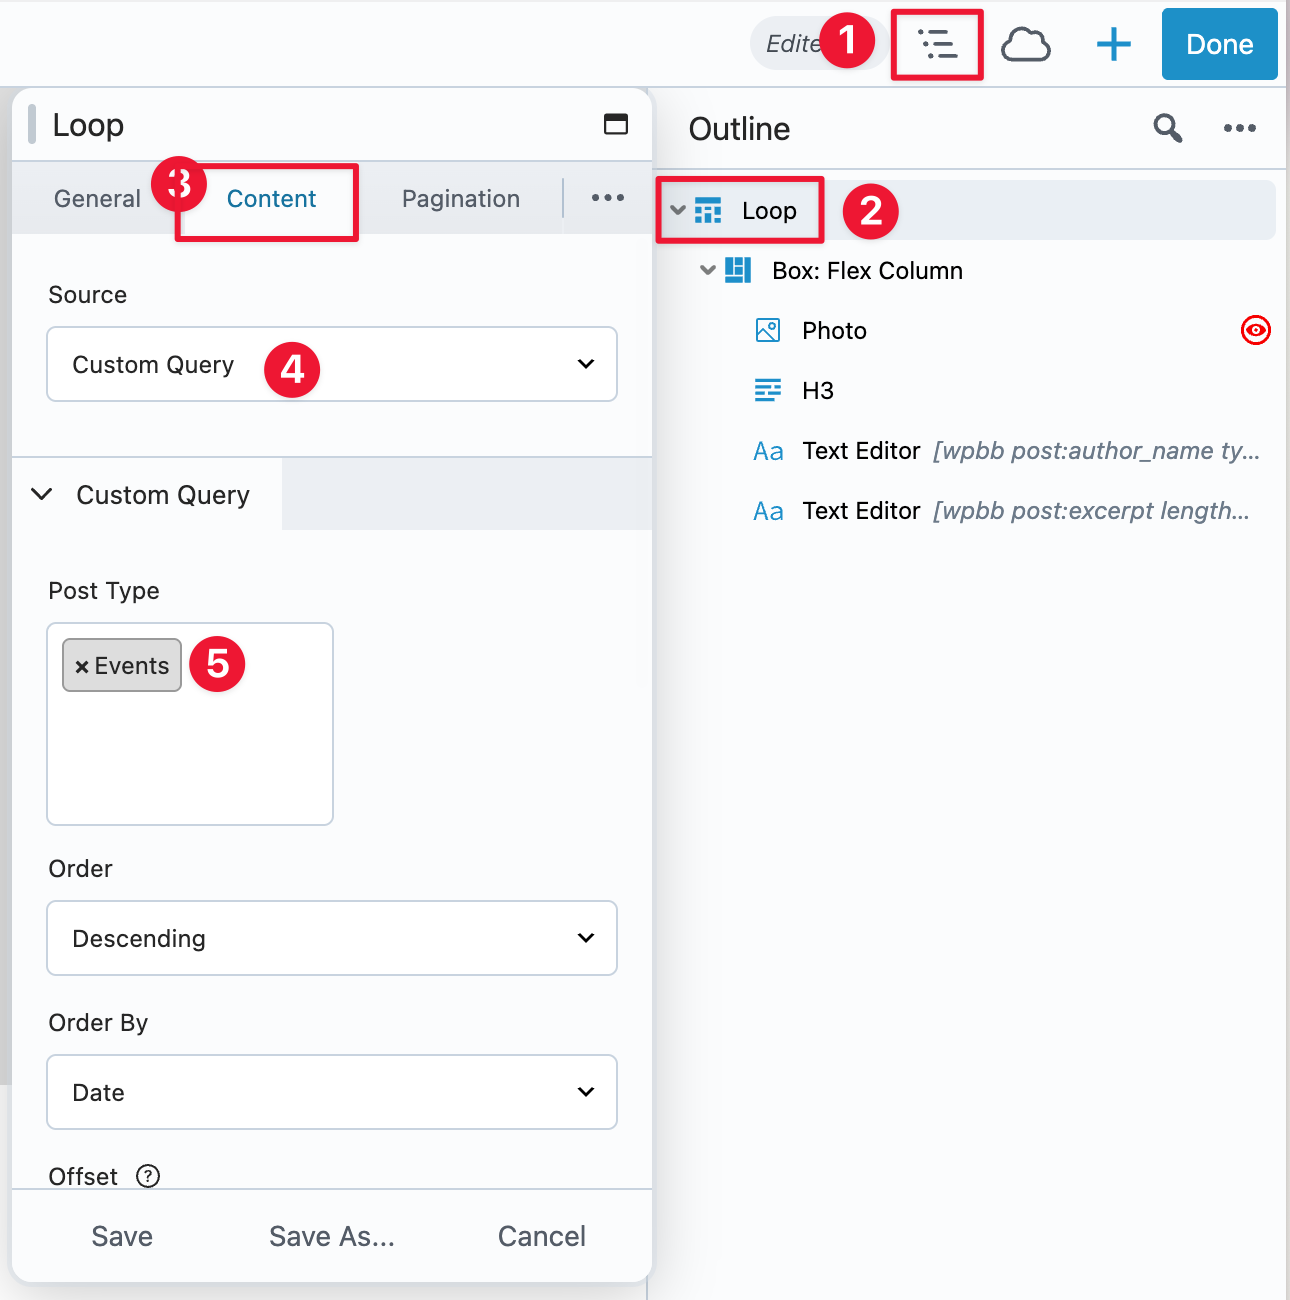
Set the Source to Custom Query, then set the Post Type to Events.
Once you’ve done that, you’ll see the following EventKoi query options:
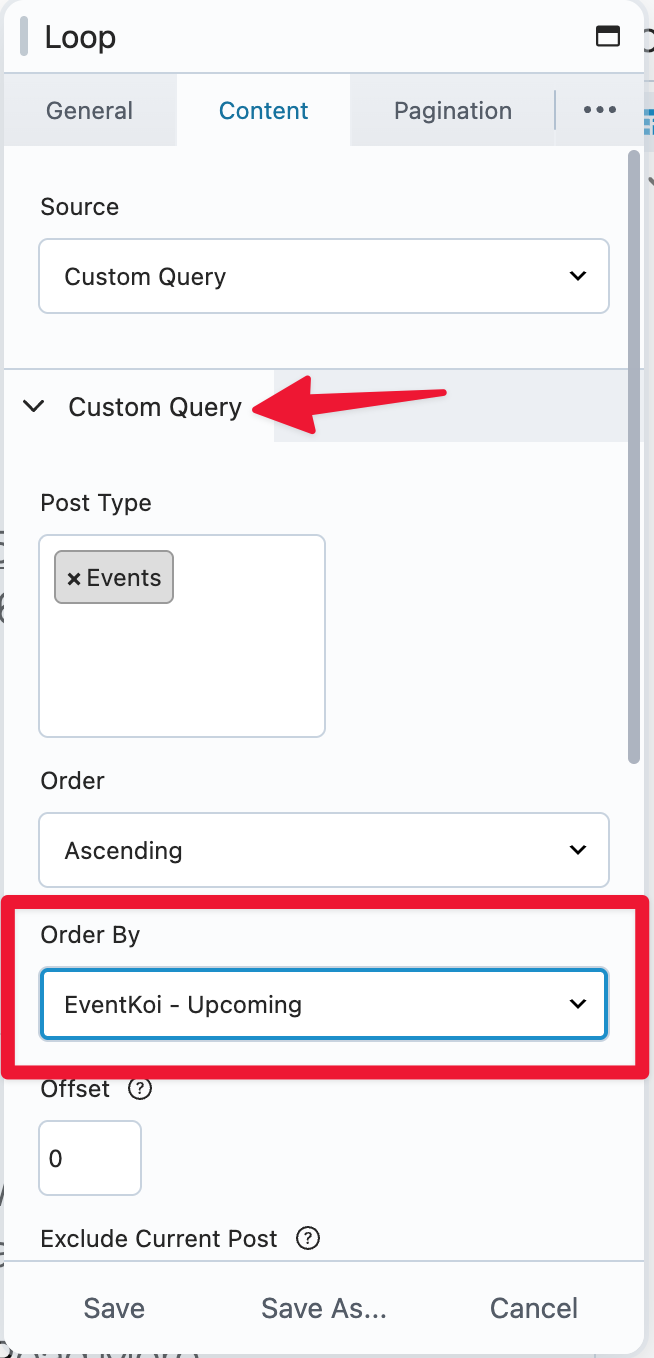
1. In Custom Query, you have Order by options. You can choose to display upcoming events only, or events after a specific date:
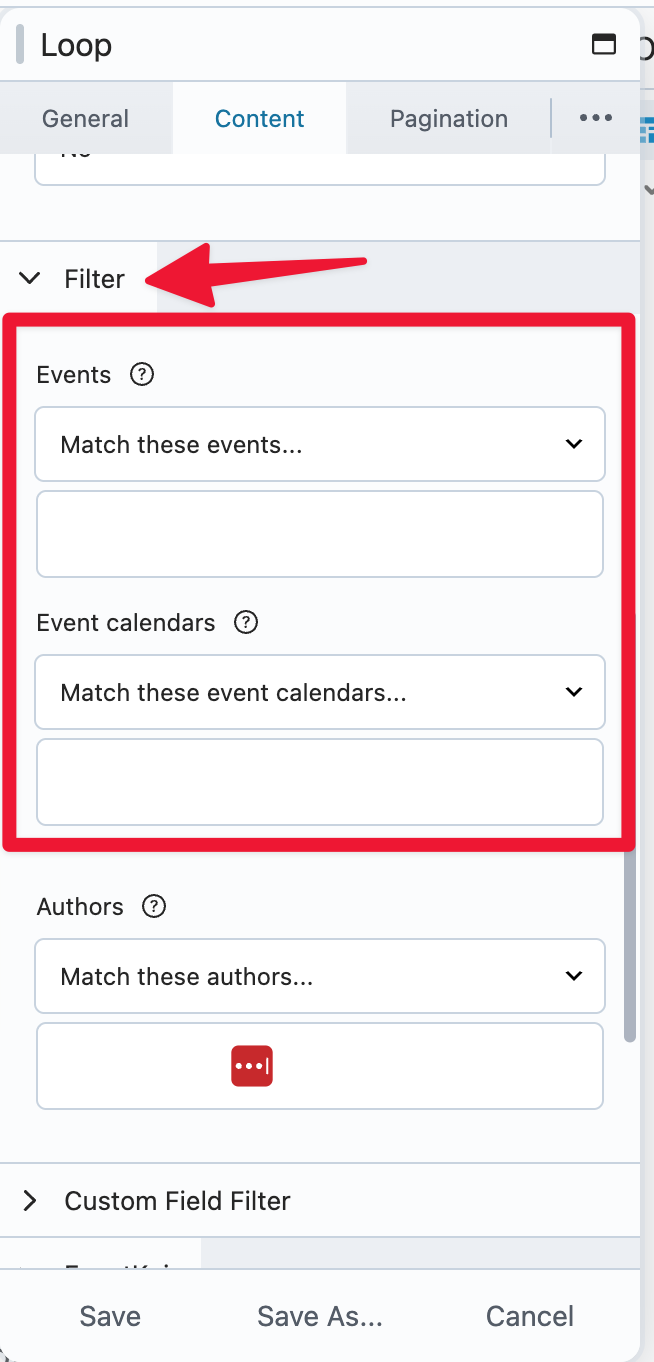
2. In Filter, you can select specific events or calendars to display:
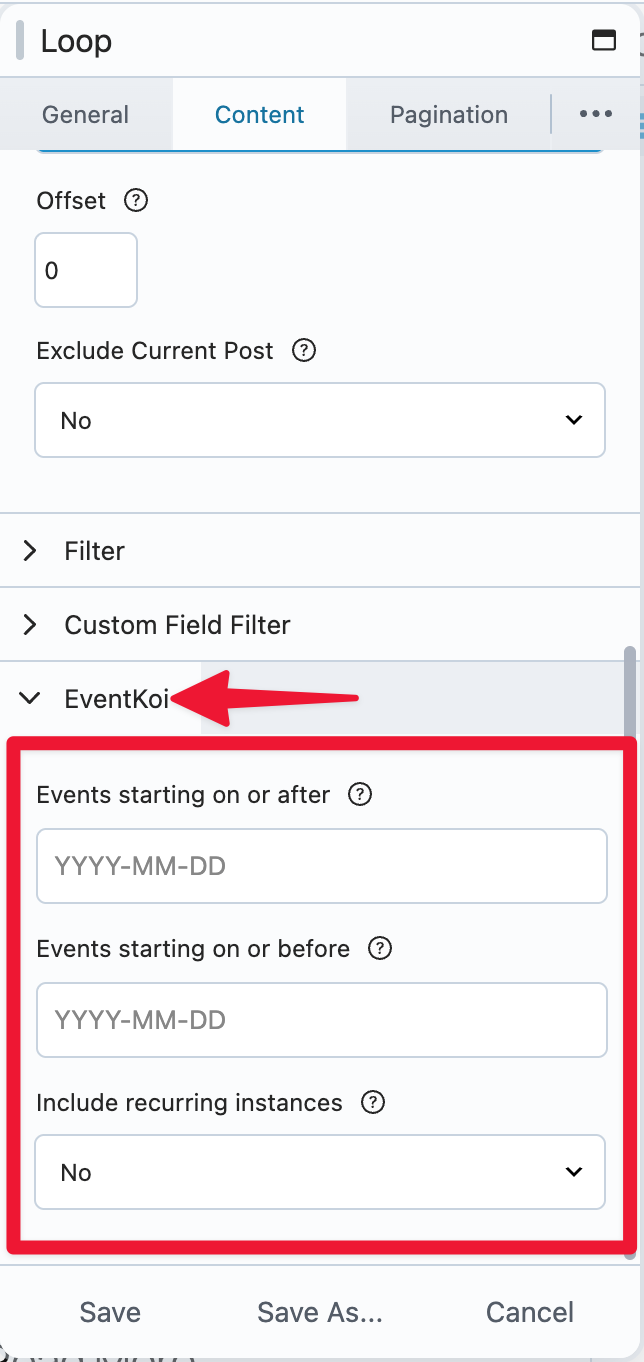
3. There is also an EventKoi section, which gives you the options to display events within a timeframe, and also opt to display individual recurring instances:
Click Save once the query is set up the way you want.
Step 5. Build your Loop layout
Inside the loop, you’ll see a single event card that represents the repeating layout. Add whatever Beaver Builder modules you want to build out the card: a Photo module for the event image, a Heading module for the title, a Text module for the date and location, a Button module for a registration link, and so on.
Step 6. Connect EventKoi Dynamic Data
With your modules in place, click into each one and connect it to live EventKoi data using field connections. Click the dynamic data icon (the plus sign next to any field) and you’ll see an EventKoi group in the connections panel:
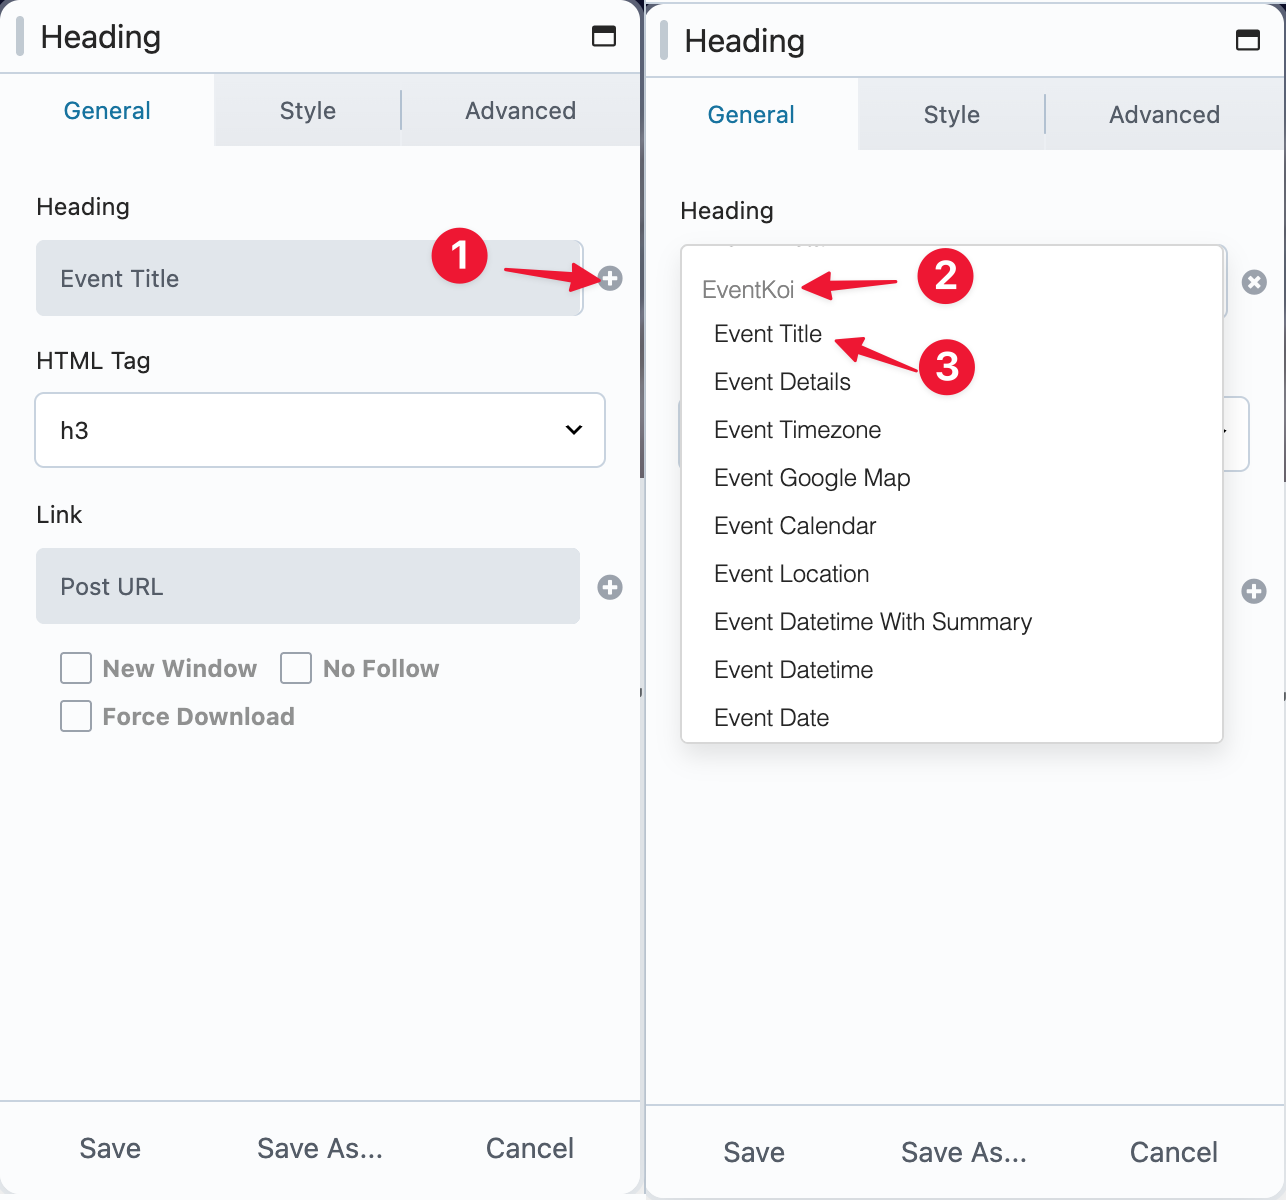
The available tags include:
- Event Title
- Event Details
- Event Timezone
- Event Google Map
- Event Calendar
- Event Location
- Event Datetime with Summary
- Event Datetime
- Event Date
- Event Time
- Event Rule Summary
- Event RSVP/Tickets
- Event Instance Datetime
Connect each module to the relevant tag. For example, set the Heading module source to Event Title, the Photo module source to Event Image, and wire a Button URL to Event URL. Once connected, the modules in the builder will show placeholder labels, but on the published page they pull the real data from each event automatically.
Step 7. Style It to Match Your Site
With the layout and field connections in place, style the card using Beaver Builder’s standard styling controls. Adjust typography, spacing, colors, borders, and backgrounds the same way you would on any other layout. Since the loop repeats the card for every event in the query, any styling you apply here applies consistently across the entire list.
This post won’t go into details on design. For more information, check out this article: How to Use the Loop Module in Beaver Builder: The Ultimate Guide.
Step 8. Preview and Publish
Click Done > Preview to see the events list as your visitors will see it.
If something looks off, go back into the module settings and adjust.
When it looks right, click Done > Publish.
Conclusion
Beaver Builder’s Loop Module is a flexible tool for building dynamic content layouts, and EventKoi’s integration seamlessly makes it work for event lists and grids. You set the query to pull from your events, design the card layout visually, connect the EventKoi dynamic tags, and the rest handles itself. The events list stays current automatically as you add or update events, with no manual page edits needed.
If you’re already using Beaver Builder and Beaver Themer and want to add events to your site, EventKoi Pro is worth a look. You can try the plugin out with EventKoi Lite first to see how event management works, then upgrade to Pro when you’re ready to connect it to your Beaver Builder layouts.
Our Newsletter
Our newsletter is personally written and sent out about once a month. It's not the least bit annoying or spammy.
We promise.
Try Beaver Builder Today

Related articles
Why You Should Avoid Nulled WordPress Plugins and Themes
When you’re building a site, whether for yourself, a business owner, or a client, premium WordPress plugins can feel like…
How to Design Responsive Web Design Without Code
Responsive web design is no longer a “nice-to-have.” People move between phones, tablets, laptops, and desktops all day, and they…
25 Best Digital Marketing Tools to Grow Your Business Online
Digital marketing evolves quickly, and businesses that want to scale need the right set of tools to simplify workflows, automate…
Join the community
We're here for you
There's a thriving community of builders and we'd love for you to join us. Come by and show off a project, network, or ask a question.
Since 2014
Build Your Website in Minutes, Not Months
Join Over 1 Million+ Websites Powered By Beaver Builder.