
Are you wondering how to create a sticky header on your WordPress site? Sticky headers keep your website’s navigation easily accessible to users, even as they scroll down the page. By eliminating unnecessary scrolling, you enhance your website’s User Experience (UX).
In this post, we’ll introduce you to sticky headers. Then, we’ll show you how to create one using Beaver Themer in four simple steps. Let’s get to it!
Table of Contents:
What Is a Sticky Header?
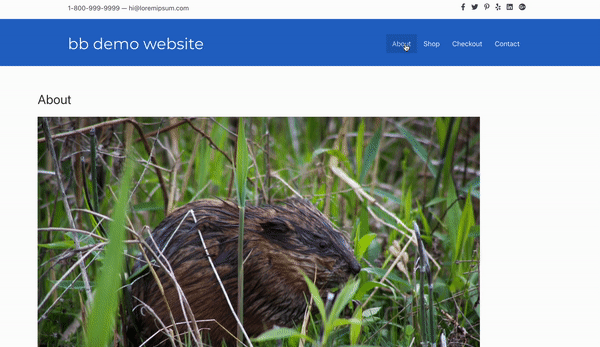
Before we dive into what a sticky header looks like, let’s first look at a traditional, non-sticky one:

In the above example, the website’s header features a neat navigation menu with links to other pages. From left to right, they are: Home, News, Schedule, About, and Contact Us.
It’s a straightforward and effective header, even featuring an eye-catching logo on the far left. However, the header disappears entirely when you scroll down the screen.
That means users will have to scroll all the way back up the page to access the menu again. This layout can create a negative UX, especially if your site features lots of content.
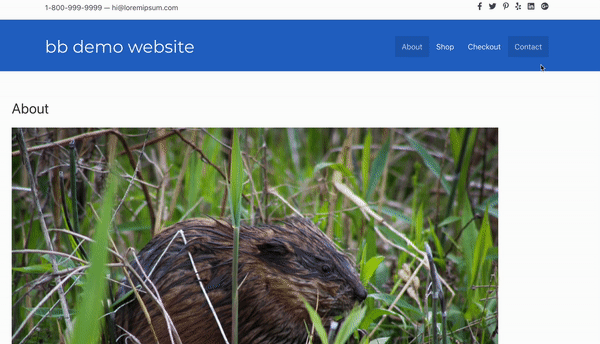
Enter: sticky headers. A ‘sticky’ header, also known as a persistent or fixed header, doesn’t move when a user scrolls down (or up) on a web page. As the name suggests, it ‘sticks’ to its permanent location on the screen, usually at the top:

You’ll usually find that sticky headers are highly popular among e-commerce stores in particular. That’s because online stores often promote multiple popular categories or products on their main pages.
For an e-commerce site, scrolling can simulate walking around and browsing in a physical store. To continue the metaphor, a sticky header allows you to instantly return to a particular location (or find a new one) without retracing your steps.
Sticky headers can benefit pretty much any type of larger website, from non-profits to educational institutions. Smaller businesses may even want to implement sticky headers on their mobile sites. Overall, a sticky header can significantly enhance the UX of your site.
How to Create a Sticky Header with Beaver Themer (In 4 Easy Steps)
Now that you know a bit more about sticky headers and their advantages, let’s explore how to make one. For this tutorial, we’re going to create a sticky header using our Beaver Builder plugin and Beaver Themer add-on. Keep in mind that you’ll need one of our premium page builder plans to use this feature.
Step 1: Set Up Your Header Elements
Before we configure our sticky header in Beaver Themer, we’ll start by creating a menu.
To add a menu, simply navigate to your WordPress dashboard and go to Appearance > Menus:
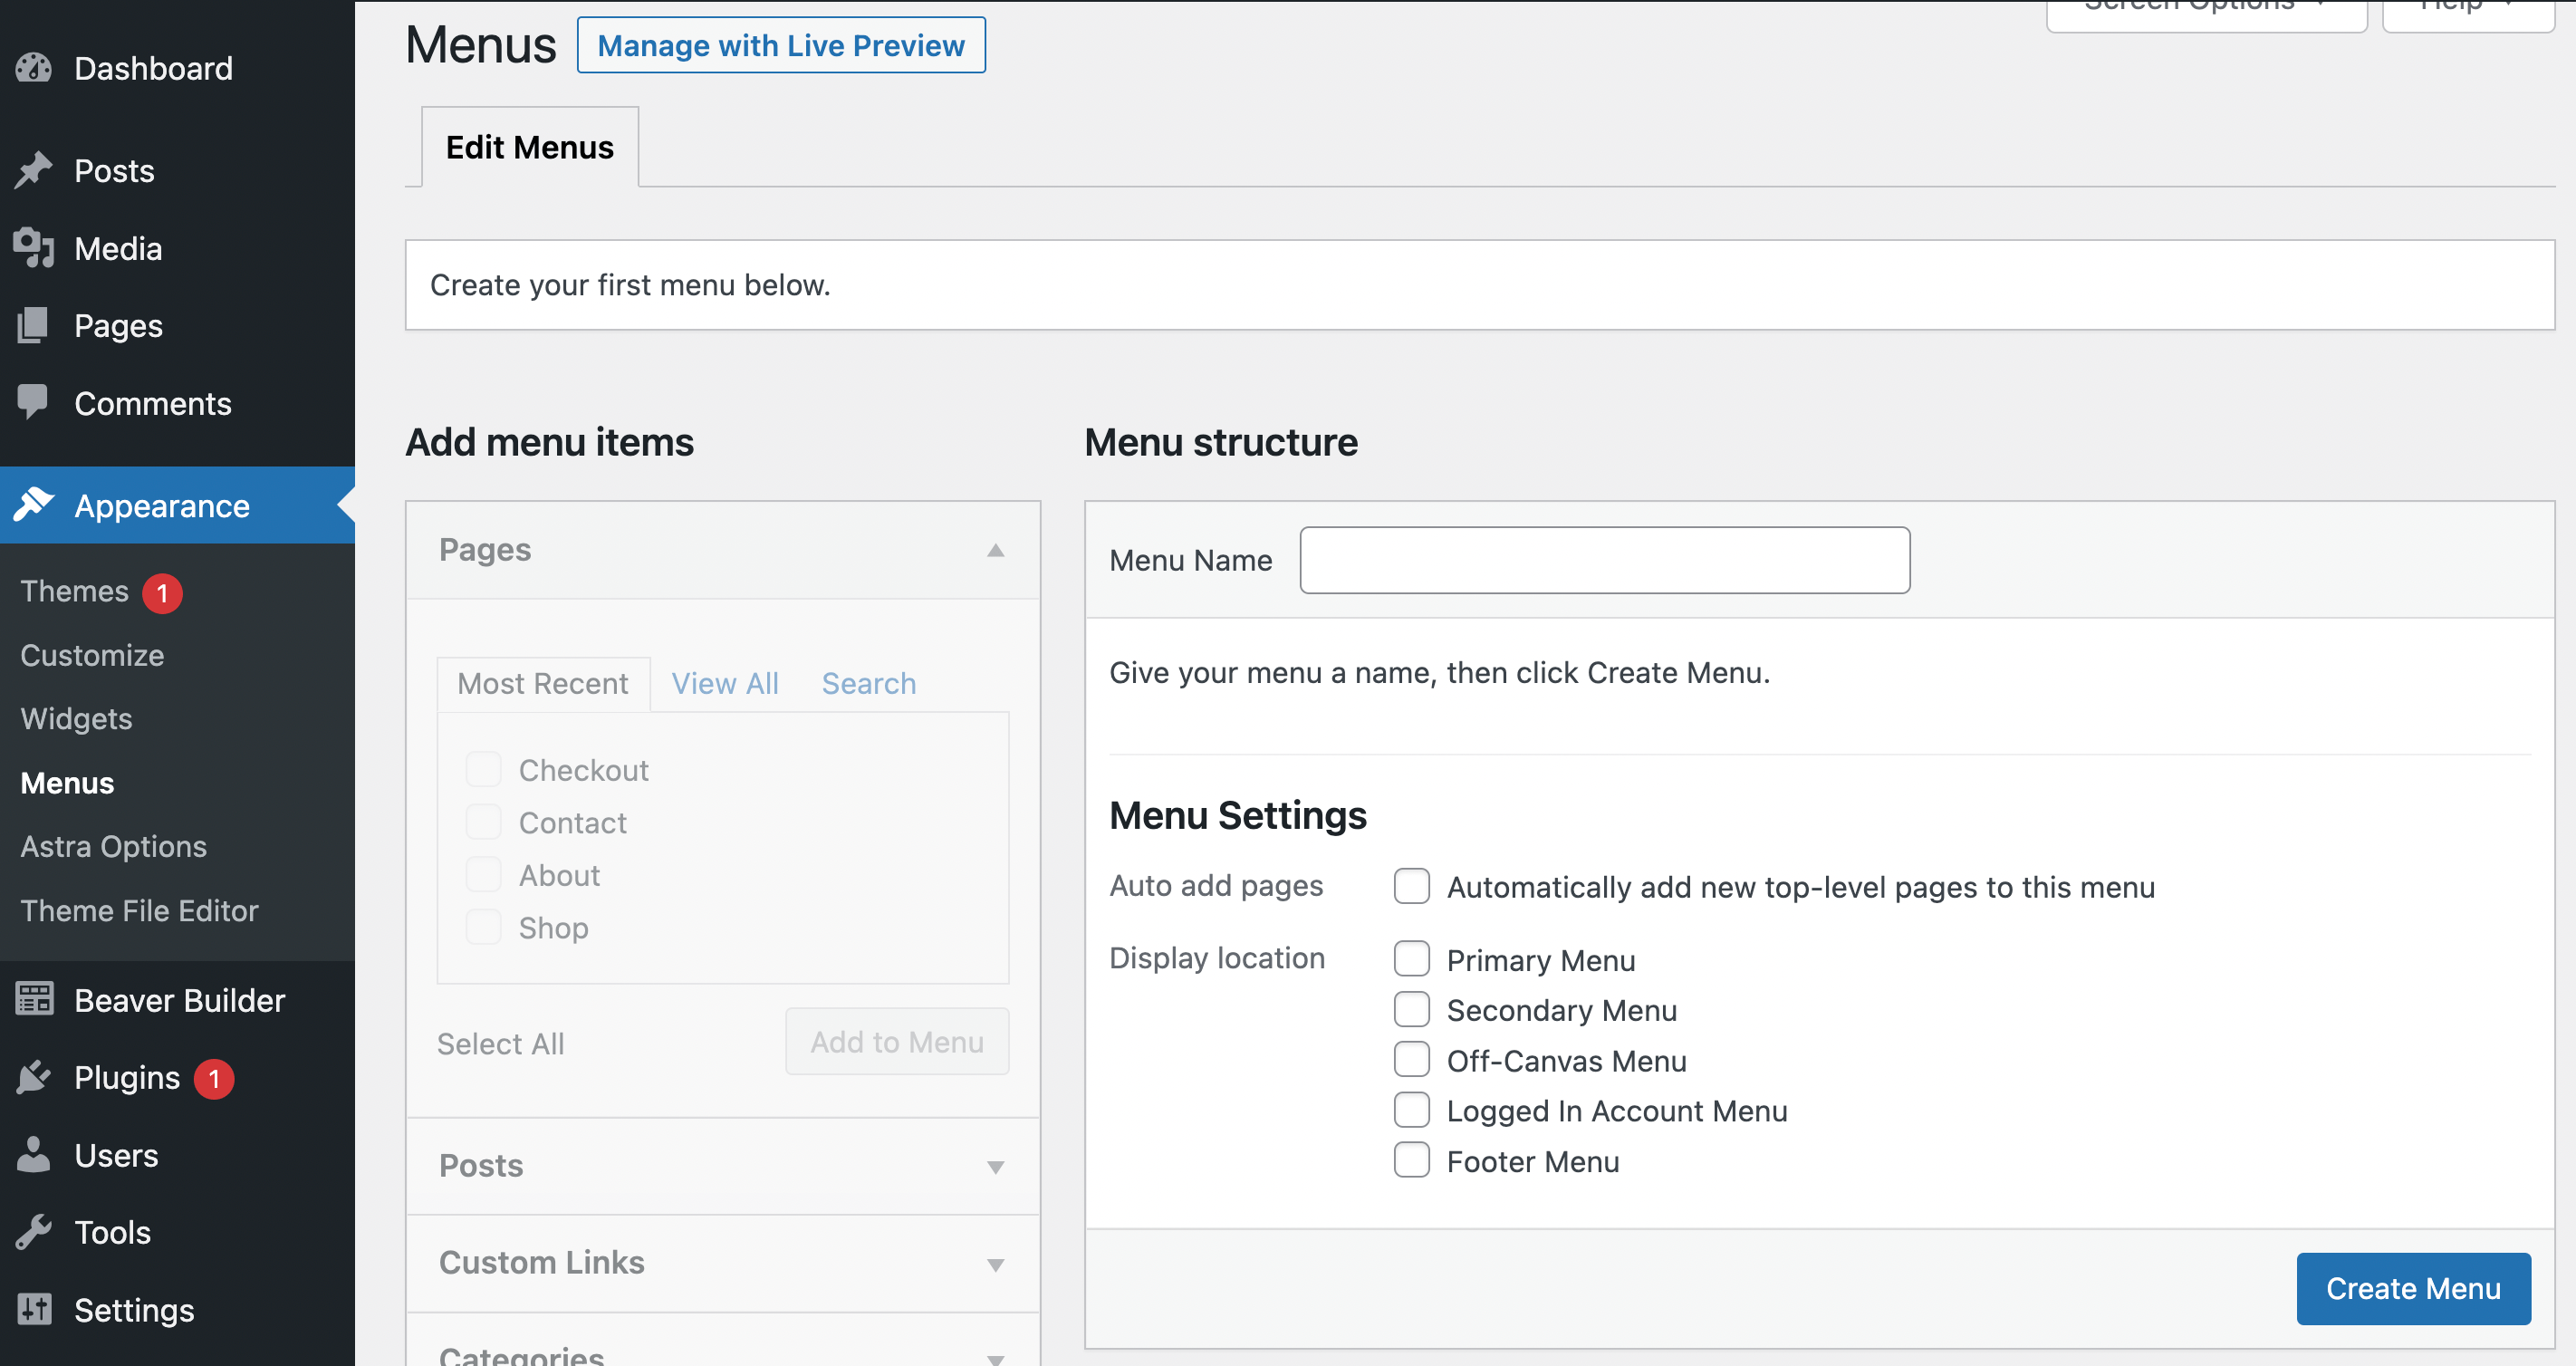
Give your menu a name and choose where you want it to be located. In this case, we’ll go with Primary Menu, so it appears in our header. Next, click on Create Menu:

Now you’ll need to add menu items. Select the pages you want to include in your menu from your Pages panel on the left. We’re going to add all four pages from our Most Recent list:
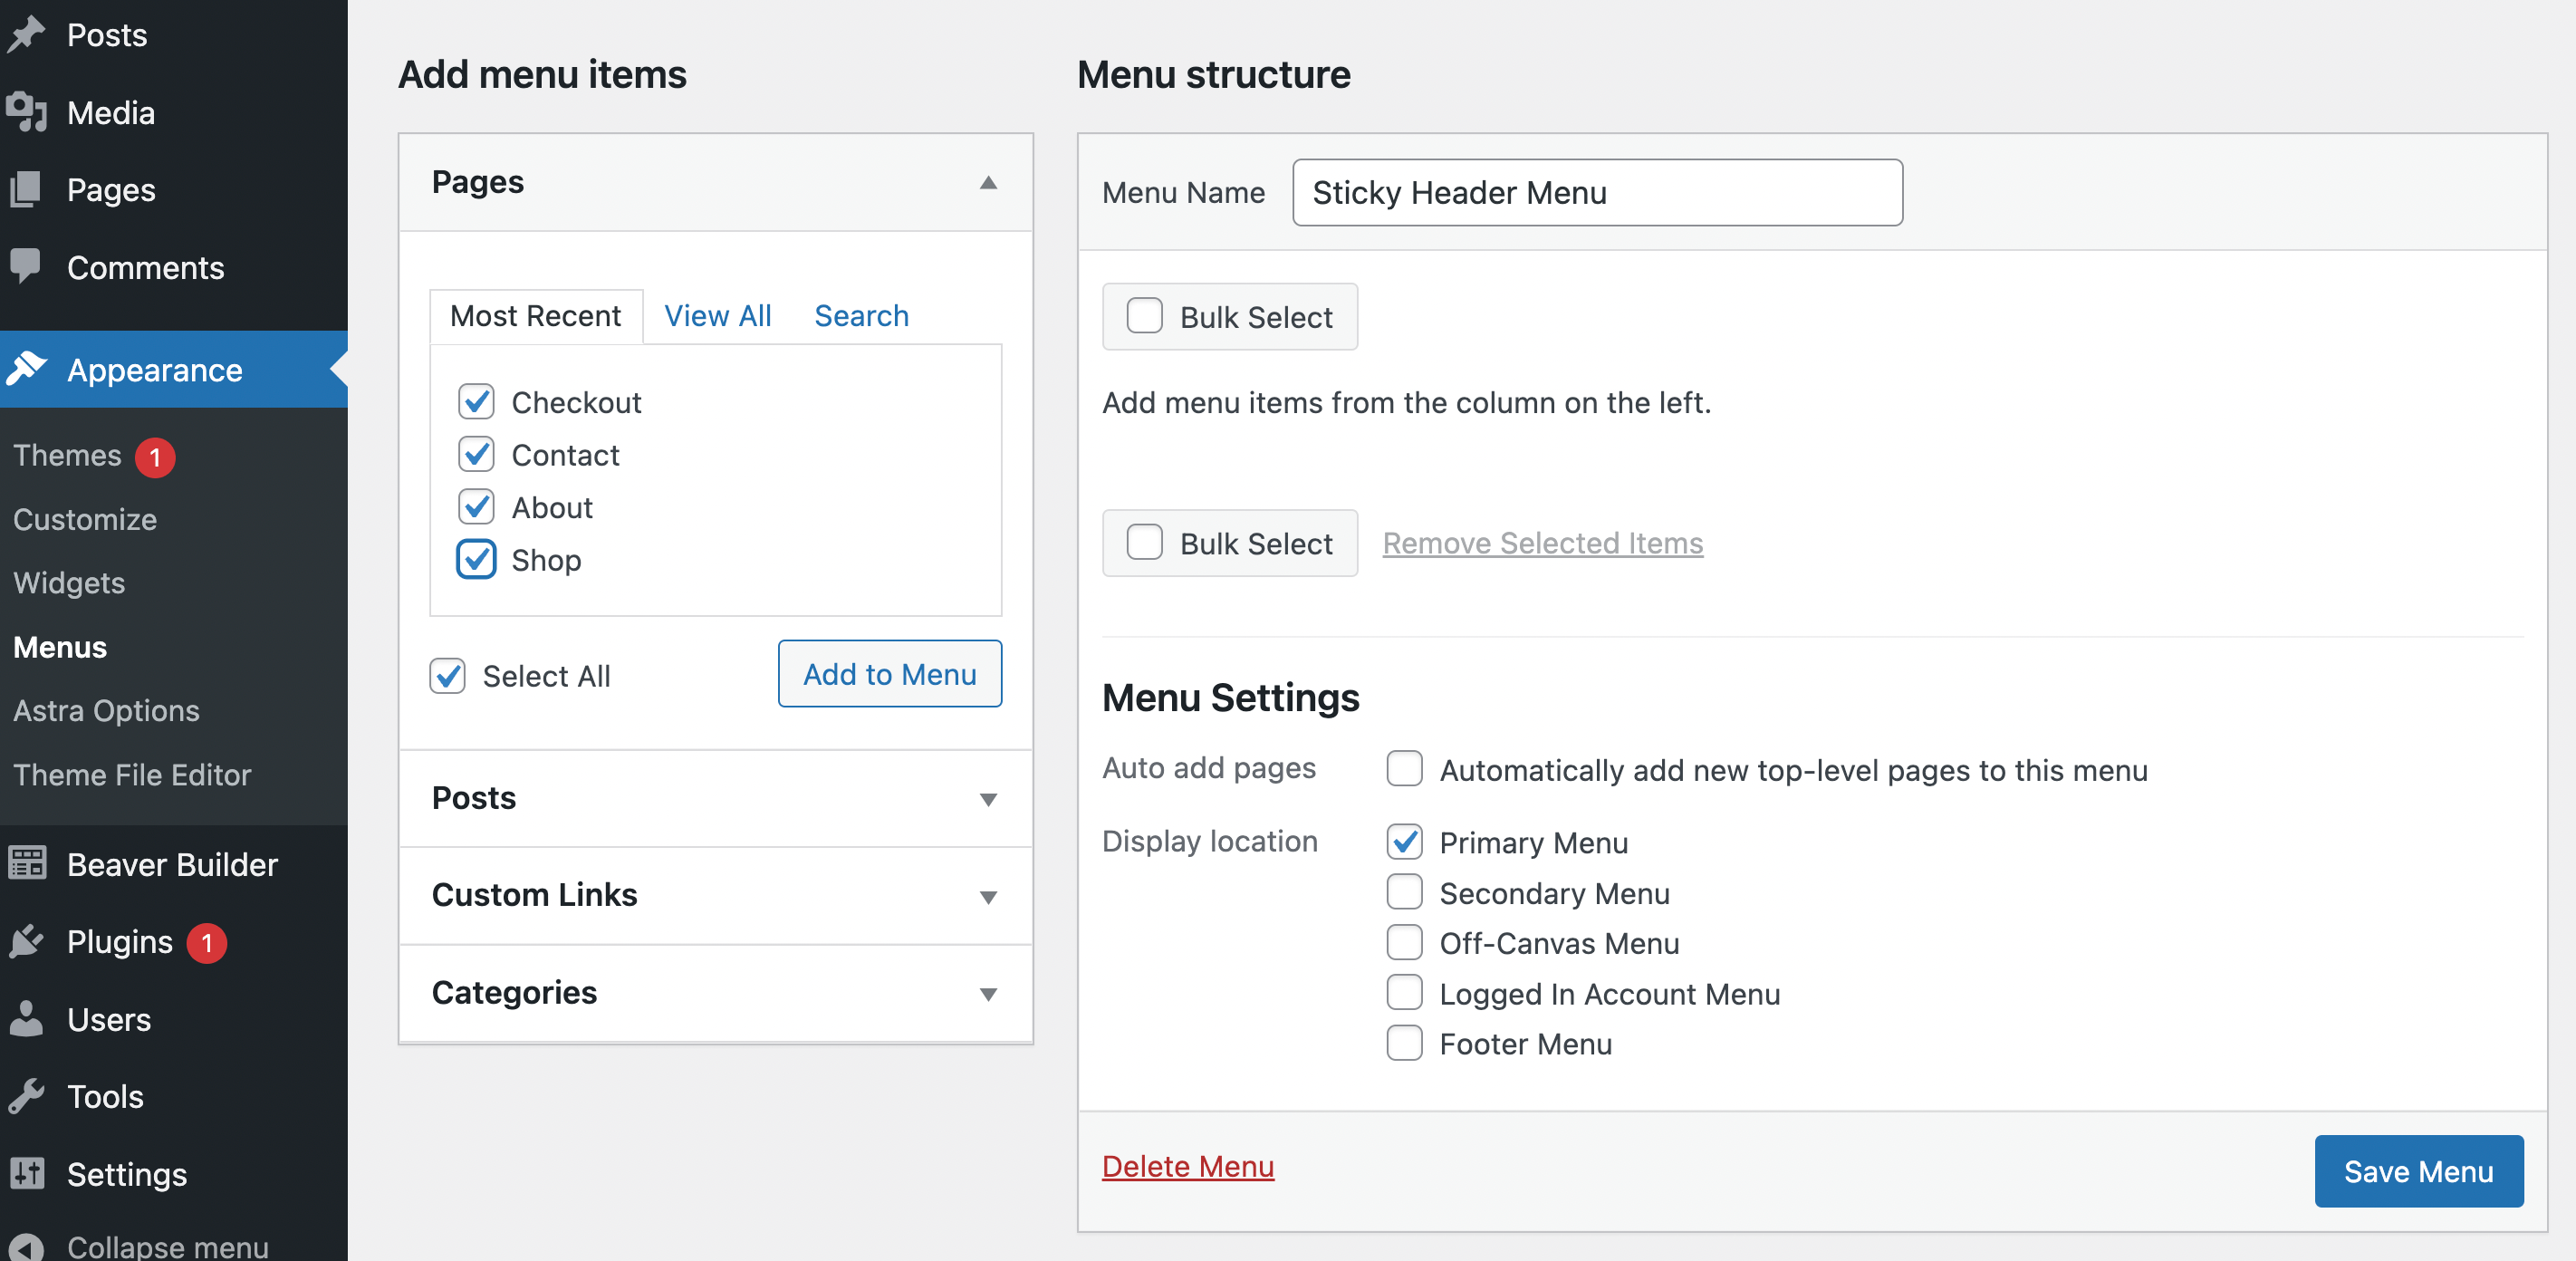
After you’ve made your selections, click on Add to Menu. Once you’ve added your pages, you should now see them on the right-hand side:
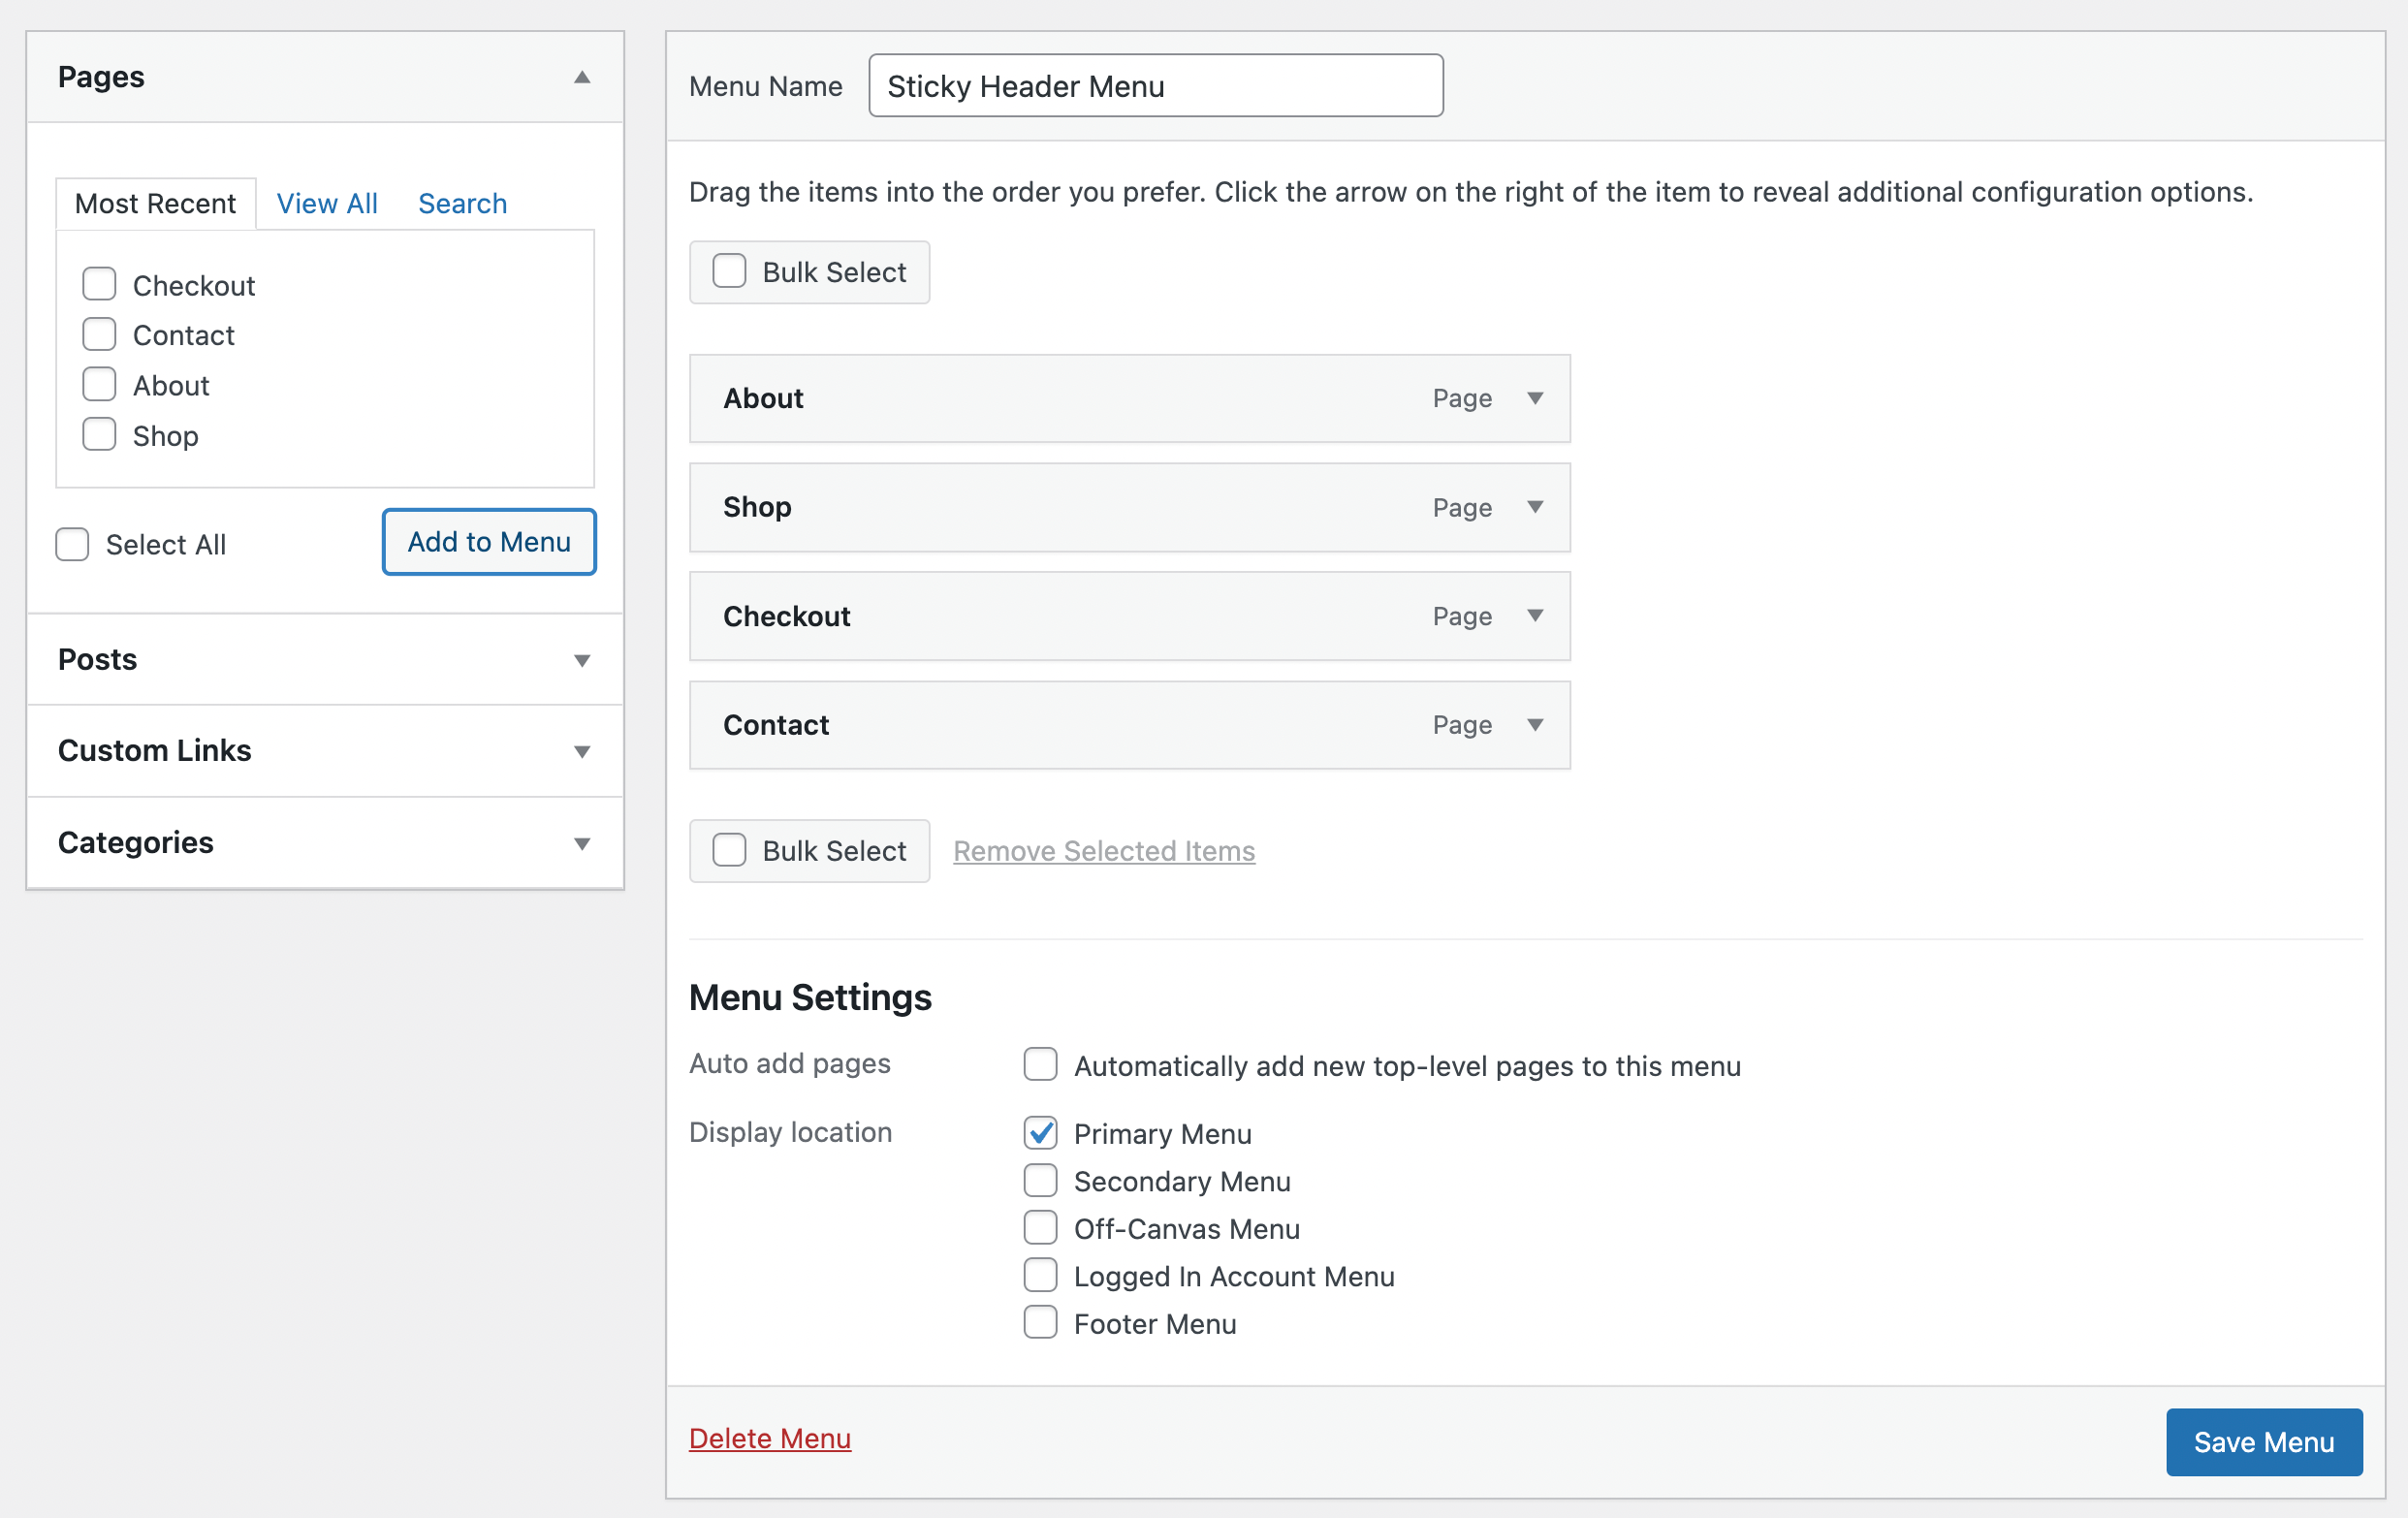
At this point, you can go ahead and drag and drop the pages (or use the arrows) to organize them in the order that you want them to appear. Then hit Save Menu in the bottom right corner.
Remember that you can always customize this menu in Beaver Builder before making it sticky. For instance, you could implement custom CSS to transform your menu items into buttons. After you’ve finished with any customizations, you can move on to the next step!
Step 2: Create a ‘Header’ Themer Layout
Until now, we’ve only worked in the standard WordPress dashboard, but you’ll need Beaver Themer from here on out. If you’re unfamiliar with the tool, don’t worry! It’s highly accessible and beginner friendly. Plus, we’re going to walk you through the entire process.
Still, if you’d like to get some practice in before using it, you can always check out our free Theme Builder Course. Otherwise, head to Beaver Builder > Themer Layouts > Add New:
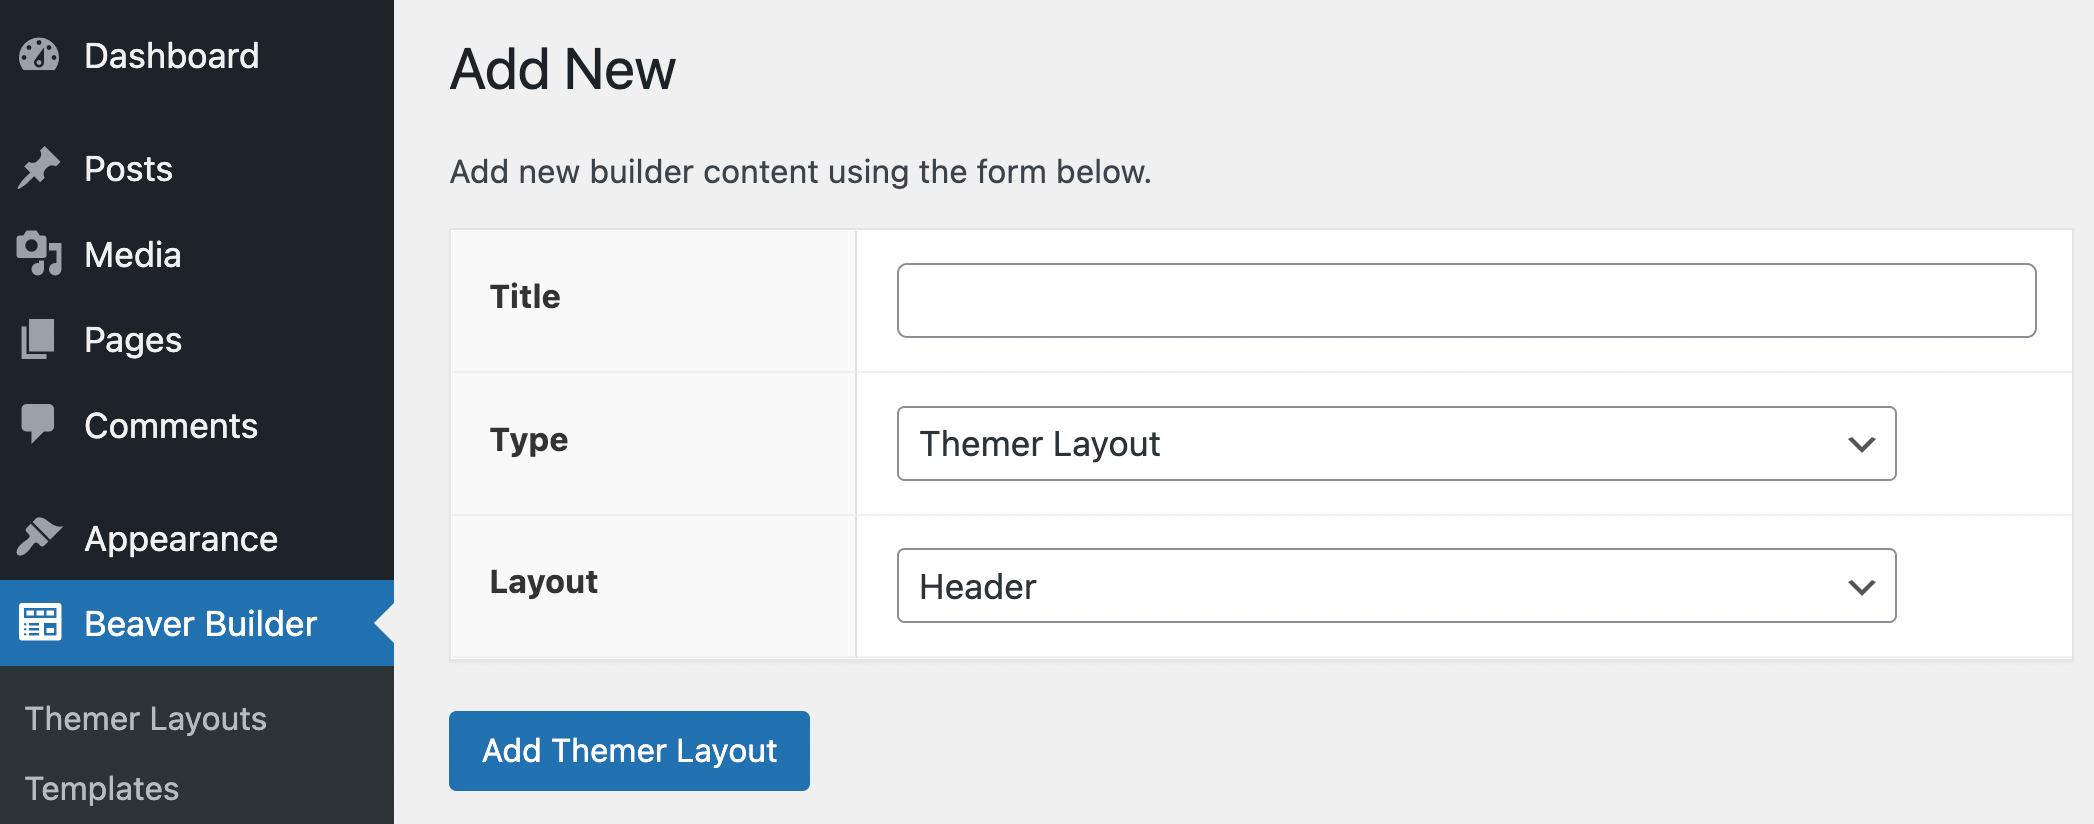
On this screen, you’ll need to give your new Themer layout a name. Then, make sure Themer Layout is selected under Type and Header is selected for Layout:
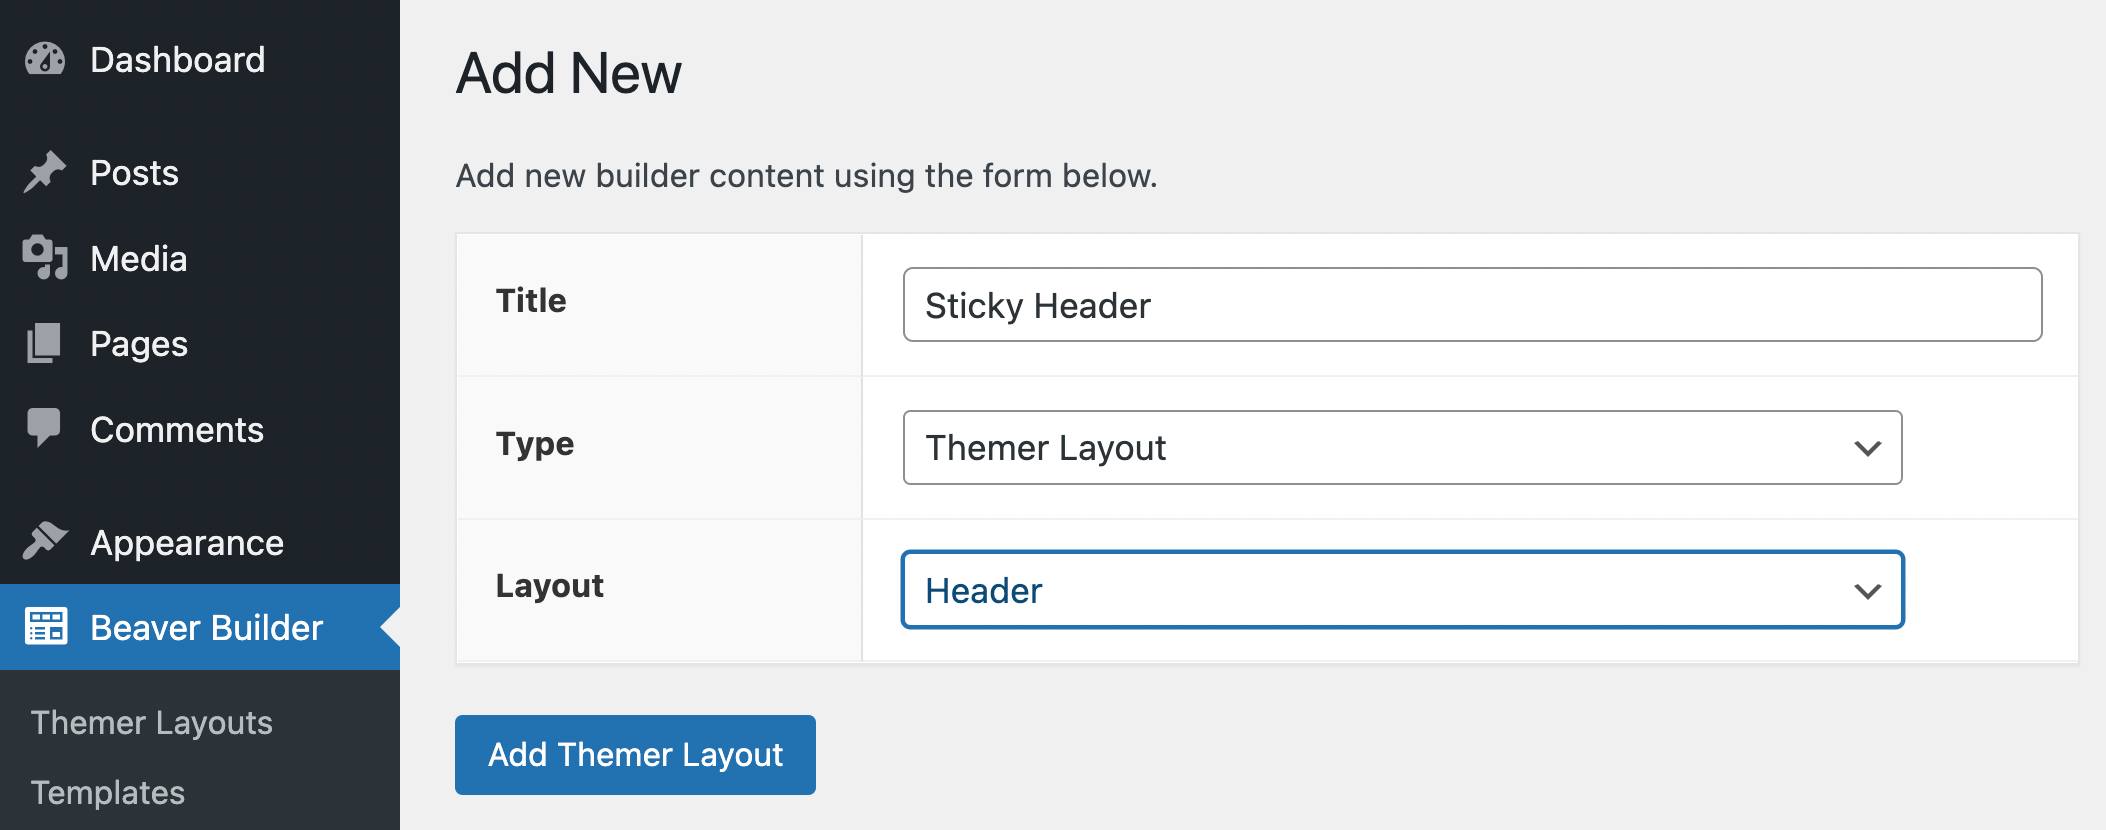
After that, click on Add Themer Layout.
It’s important to note that if you see Unsupported next to any of the options in the Layout dropdown, this is likely because your theme is not compatible with Beaver Themer or Beaver Builder.
To avoid this issue, we recommend using a compatible WordPress theme such as our very own Beaver Builder Theme, which is designed specifically to work with all our Beaver Builder tools.
Step 3: Make Your Header Layout Sticky
Once you’ve created your new header Themer layout, you’ll automatically be led to a screen where you can edit its settings:
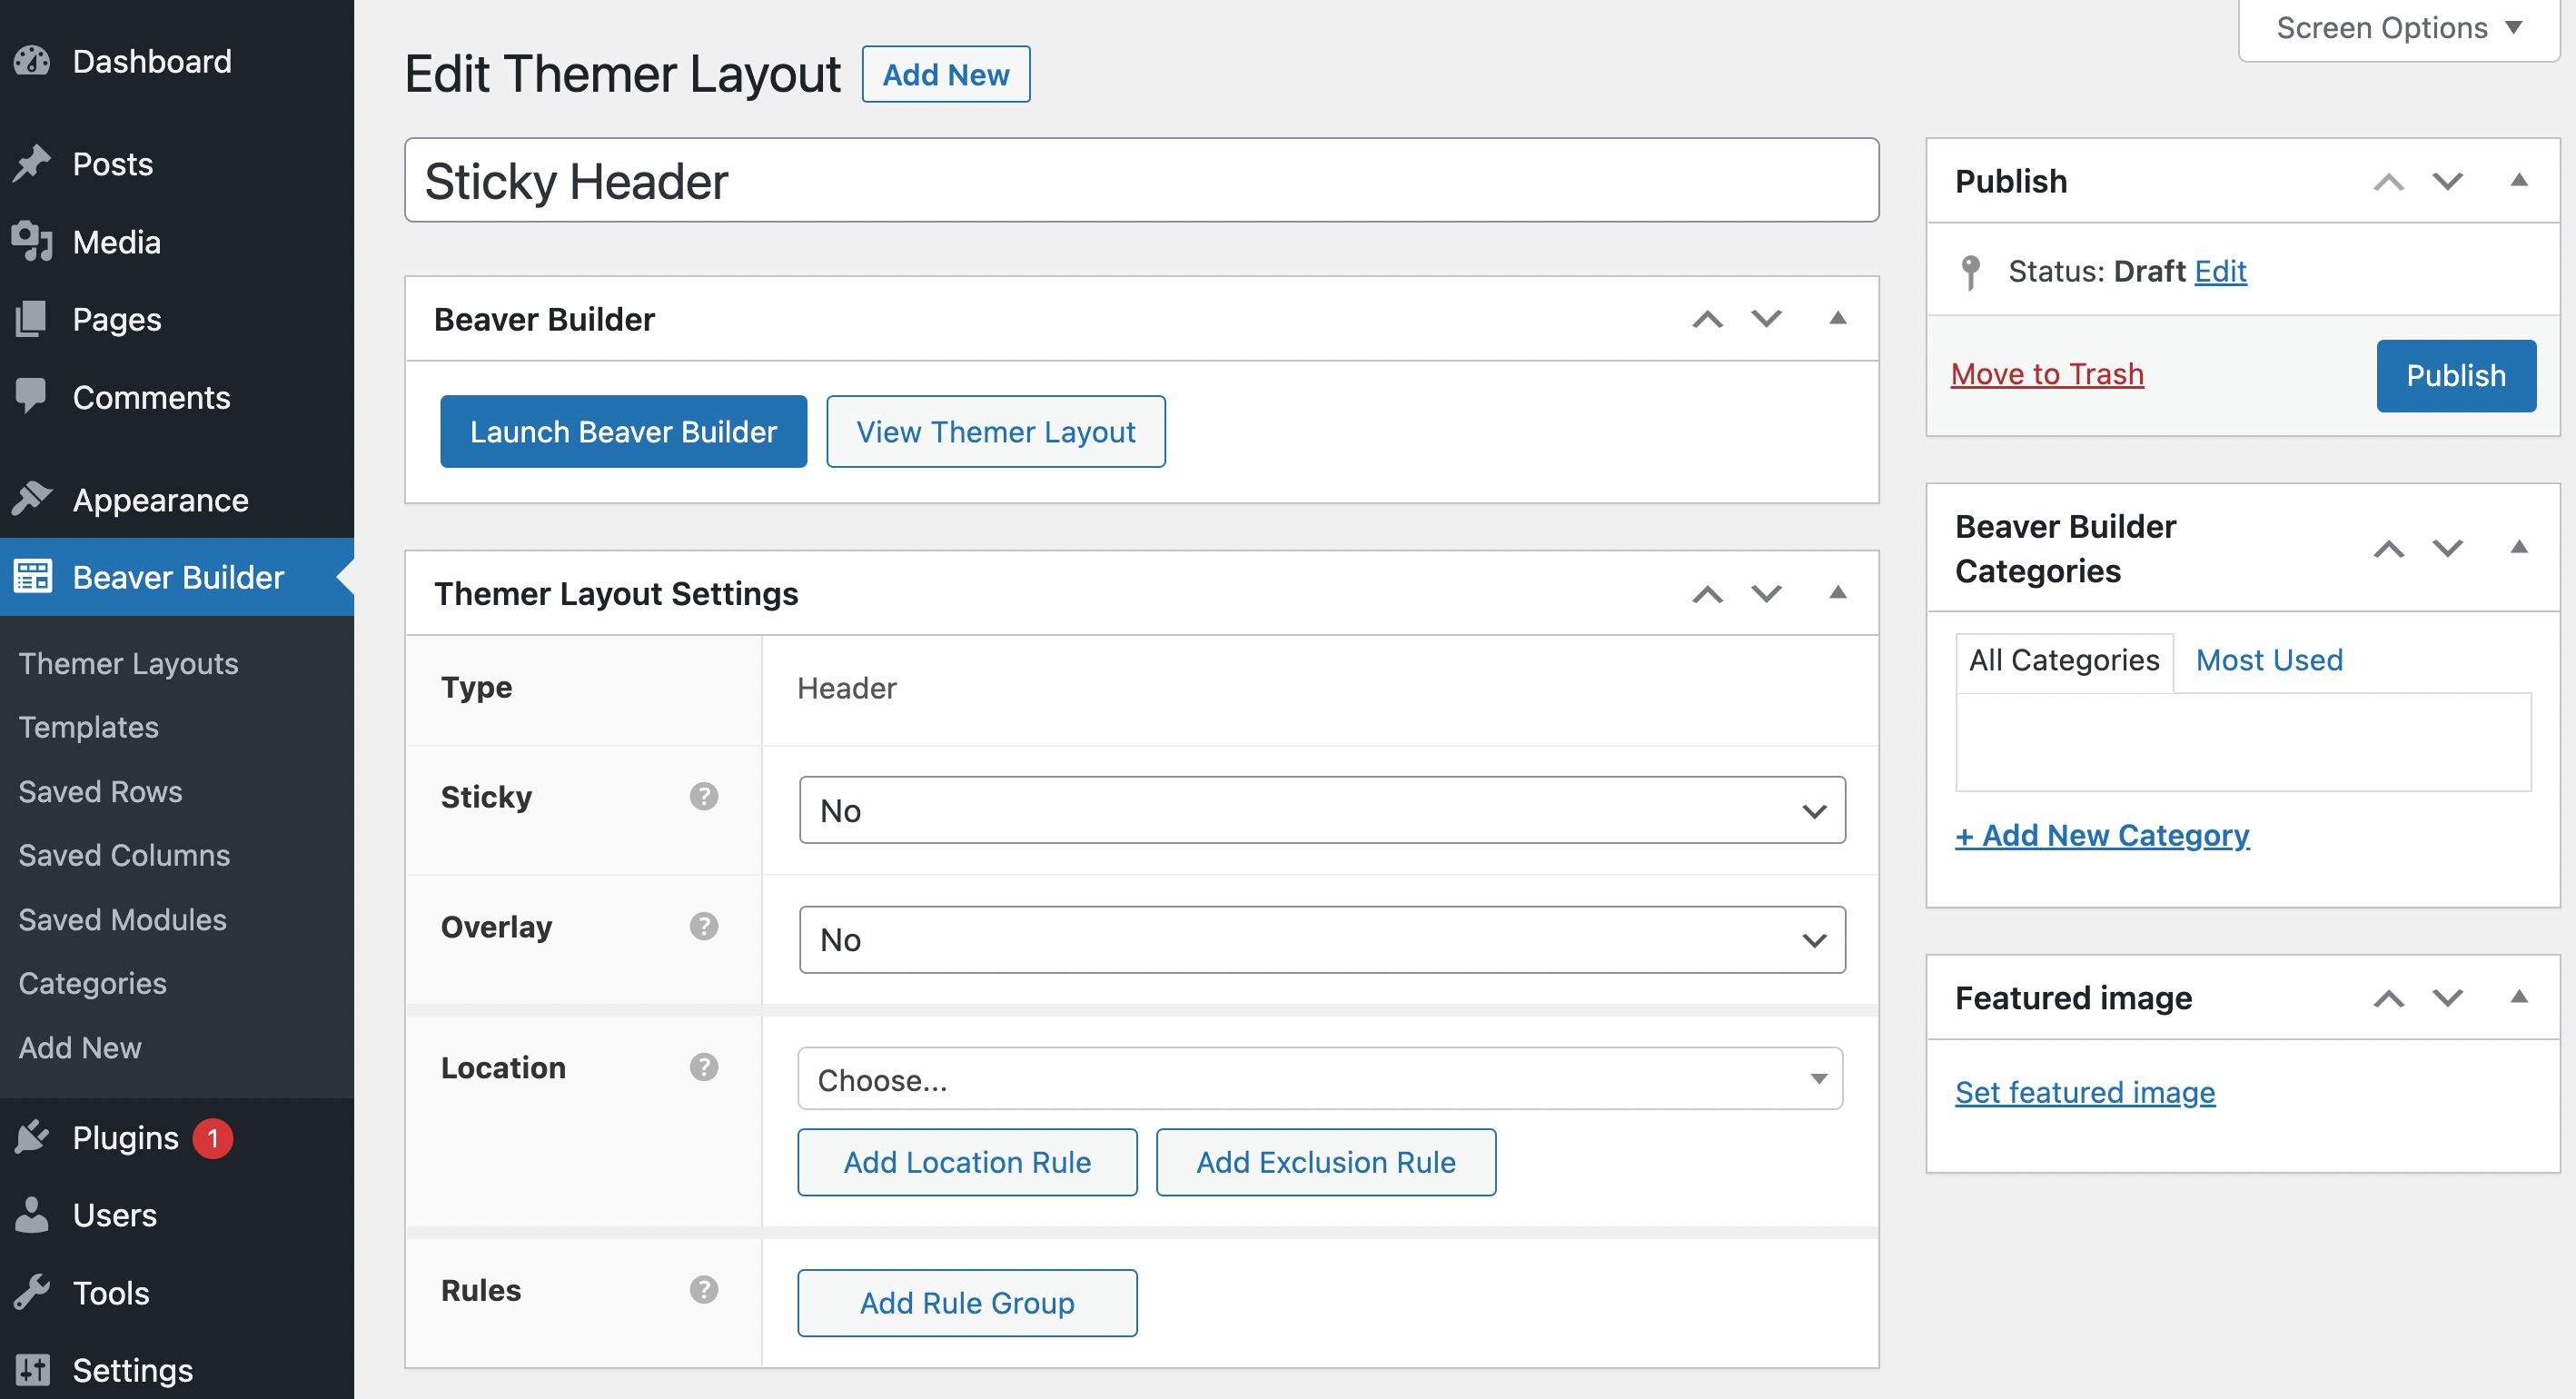
This is where you can make your layout sticky. Simply locate the Themer Layout Settings panel. Then, next to Sticky, select Yes in the dropdown menu:
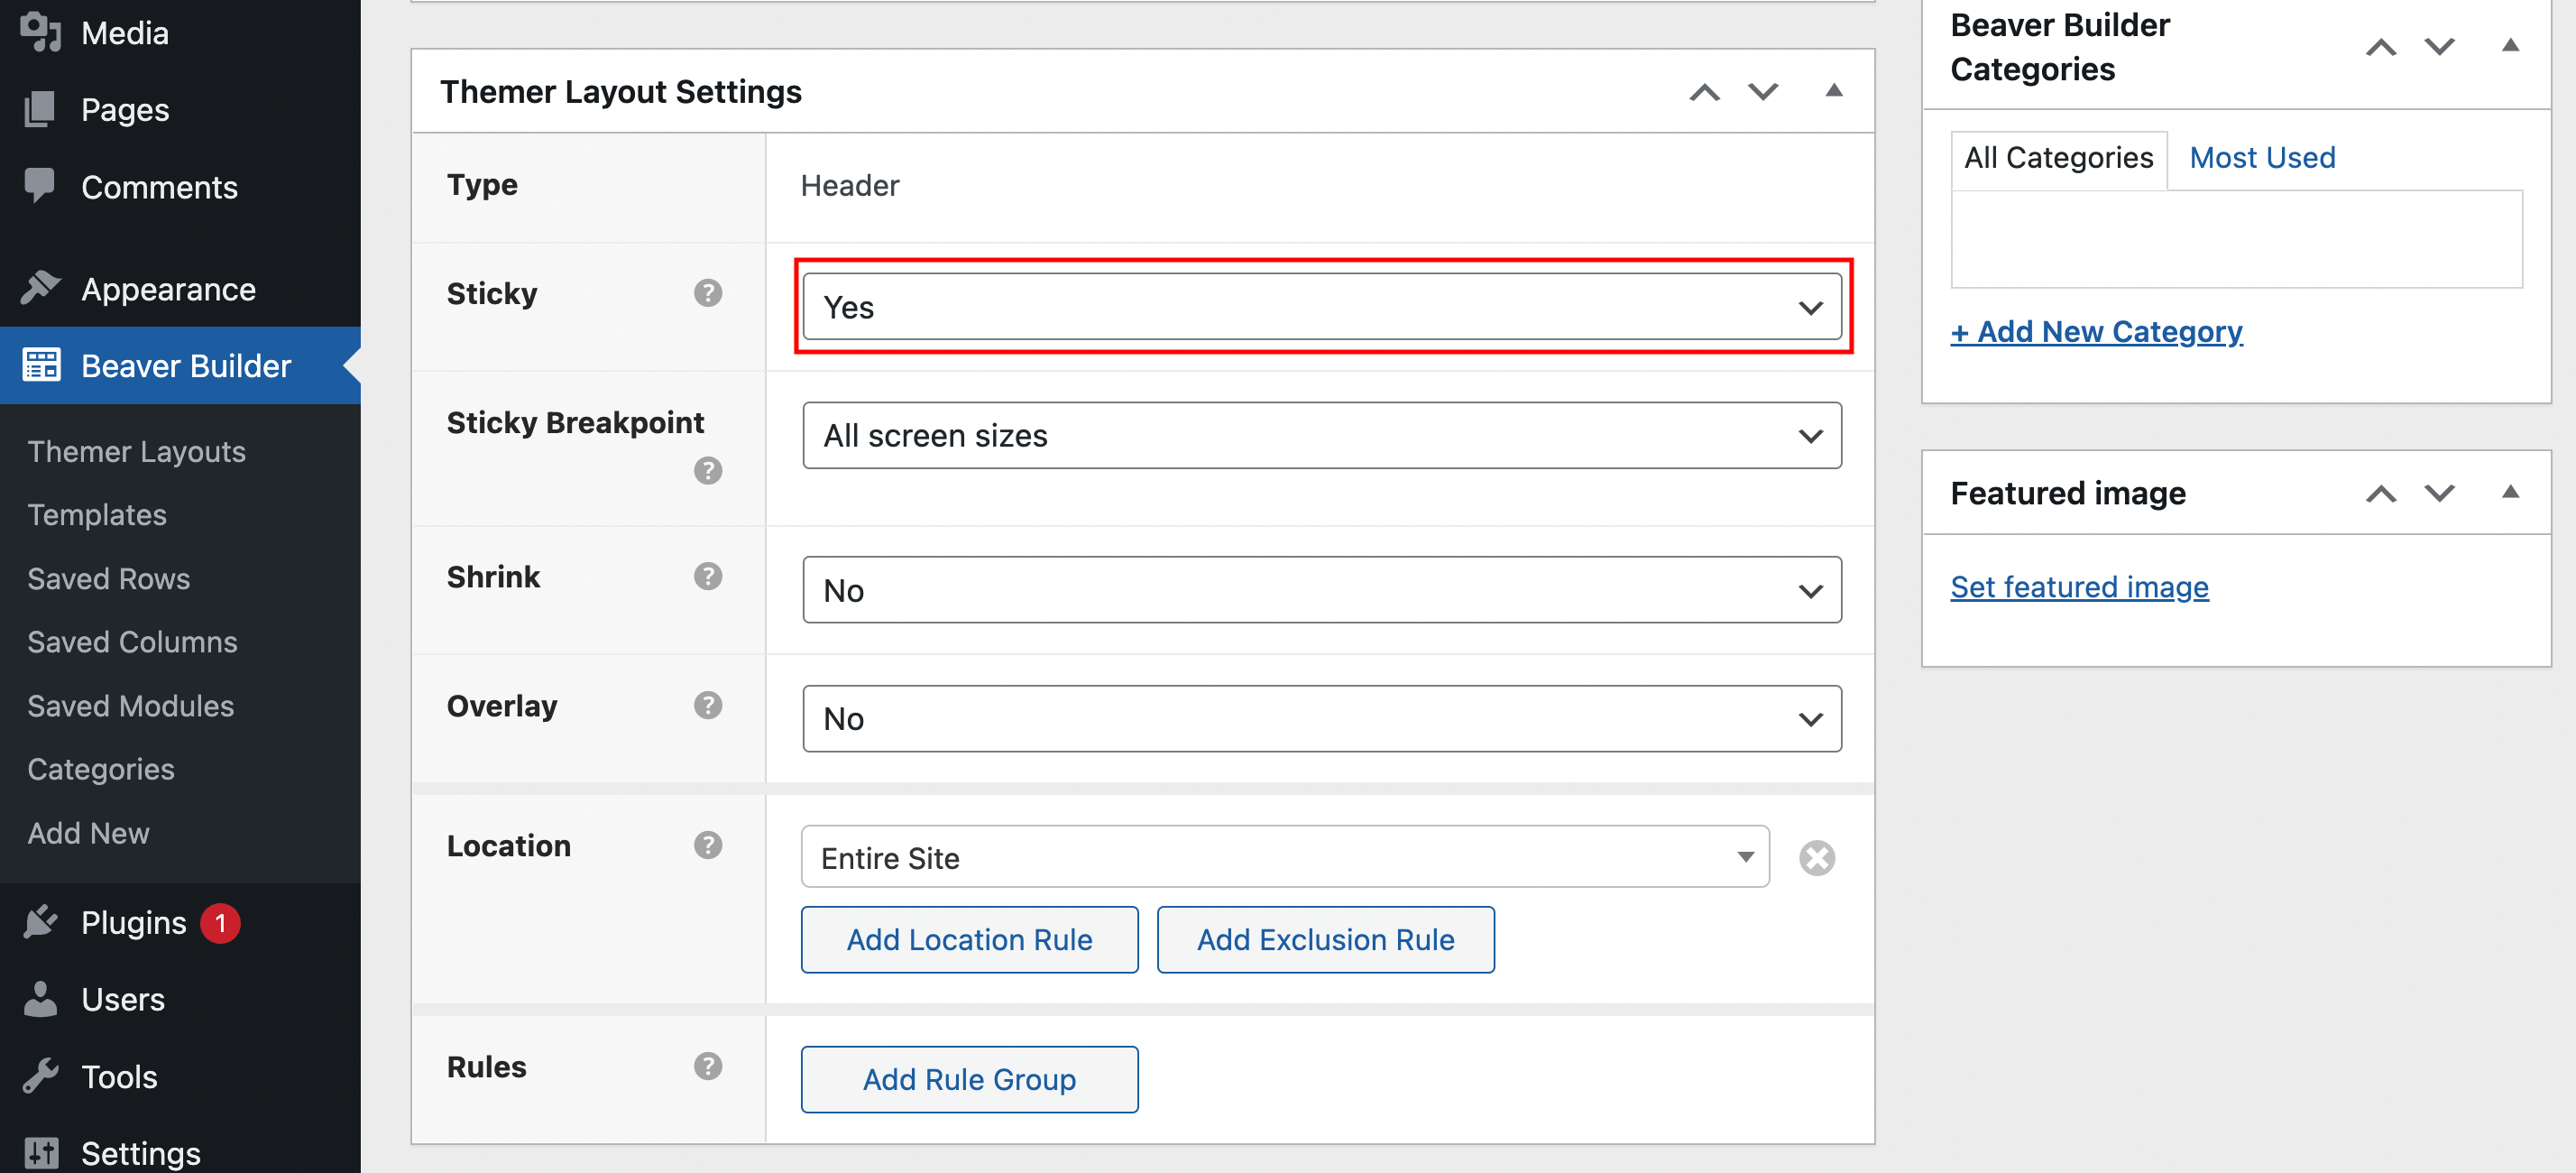
You’ll also need to choose key configurations like the Sticky Breakpoint and Location of your layout. For this example, we’re going to implement our sticky header for All screen sizes and make it appear on our Entire Site:
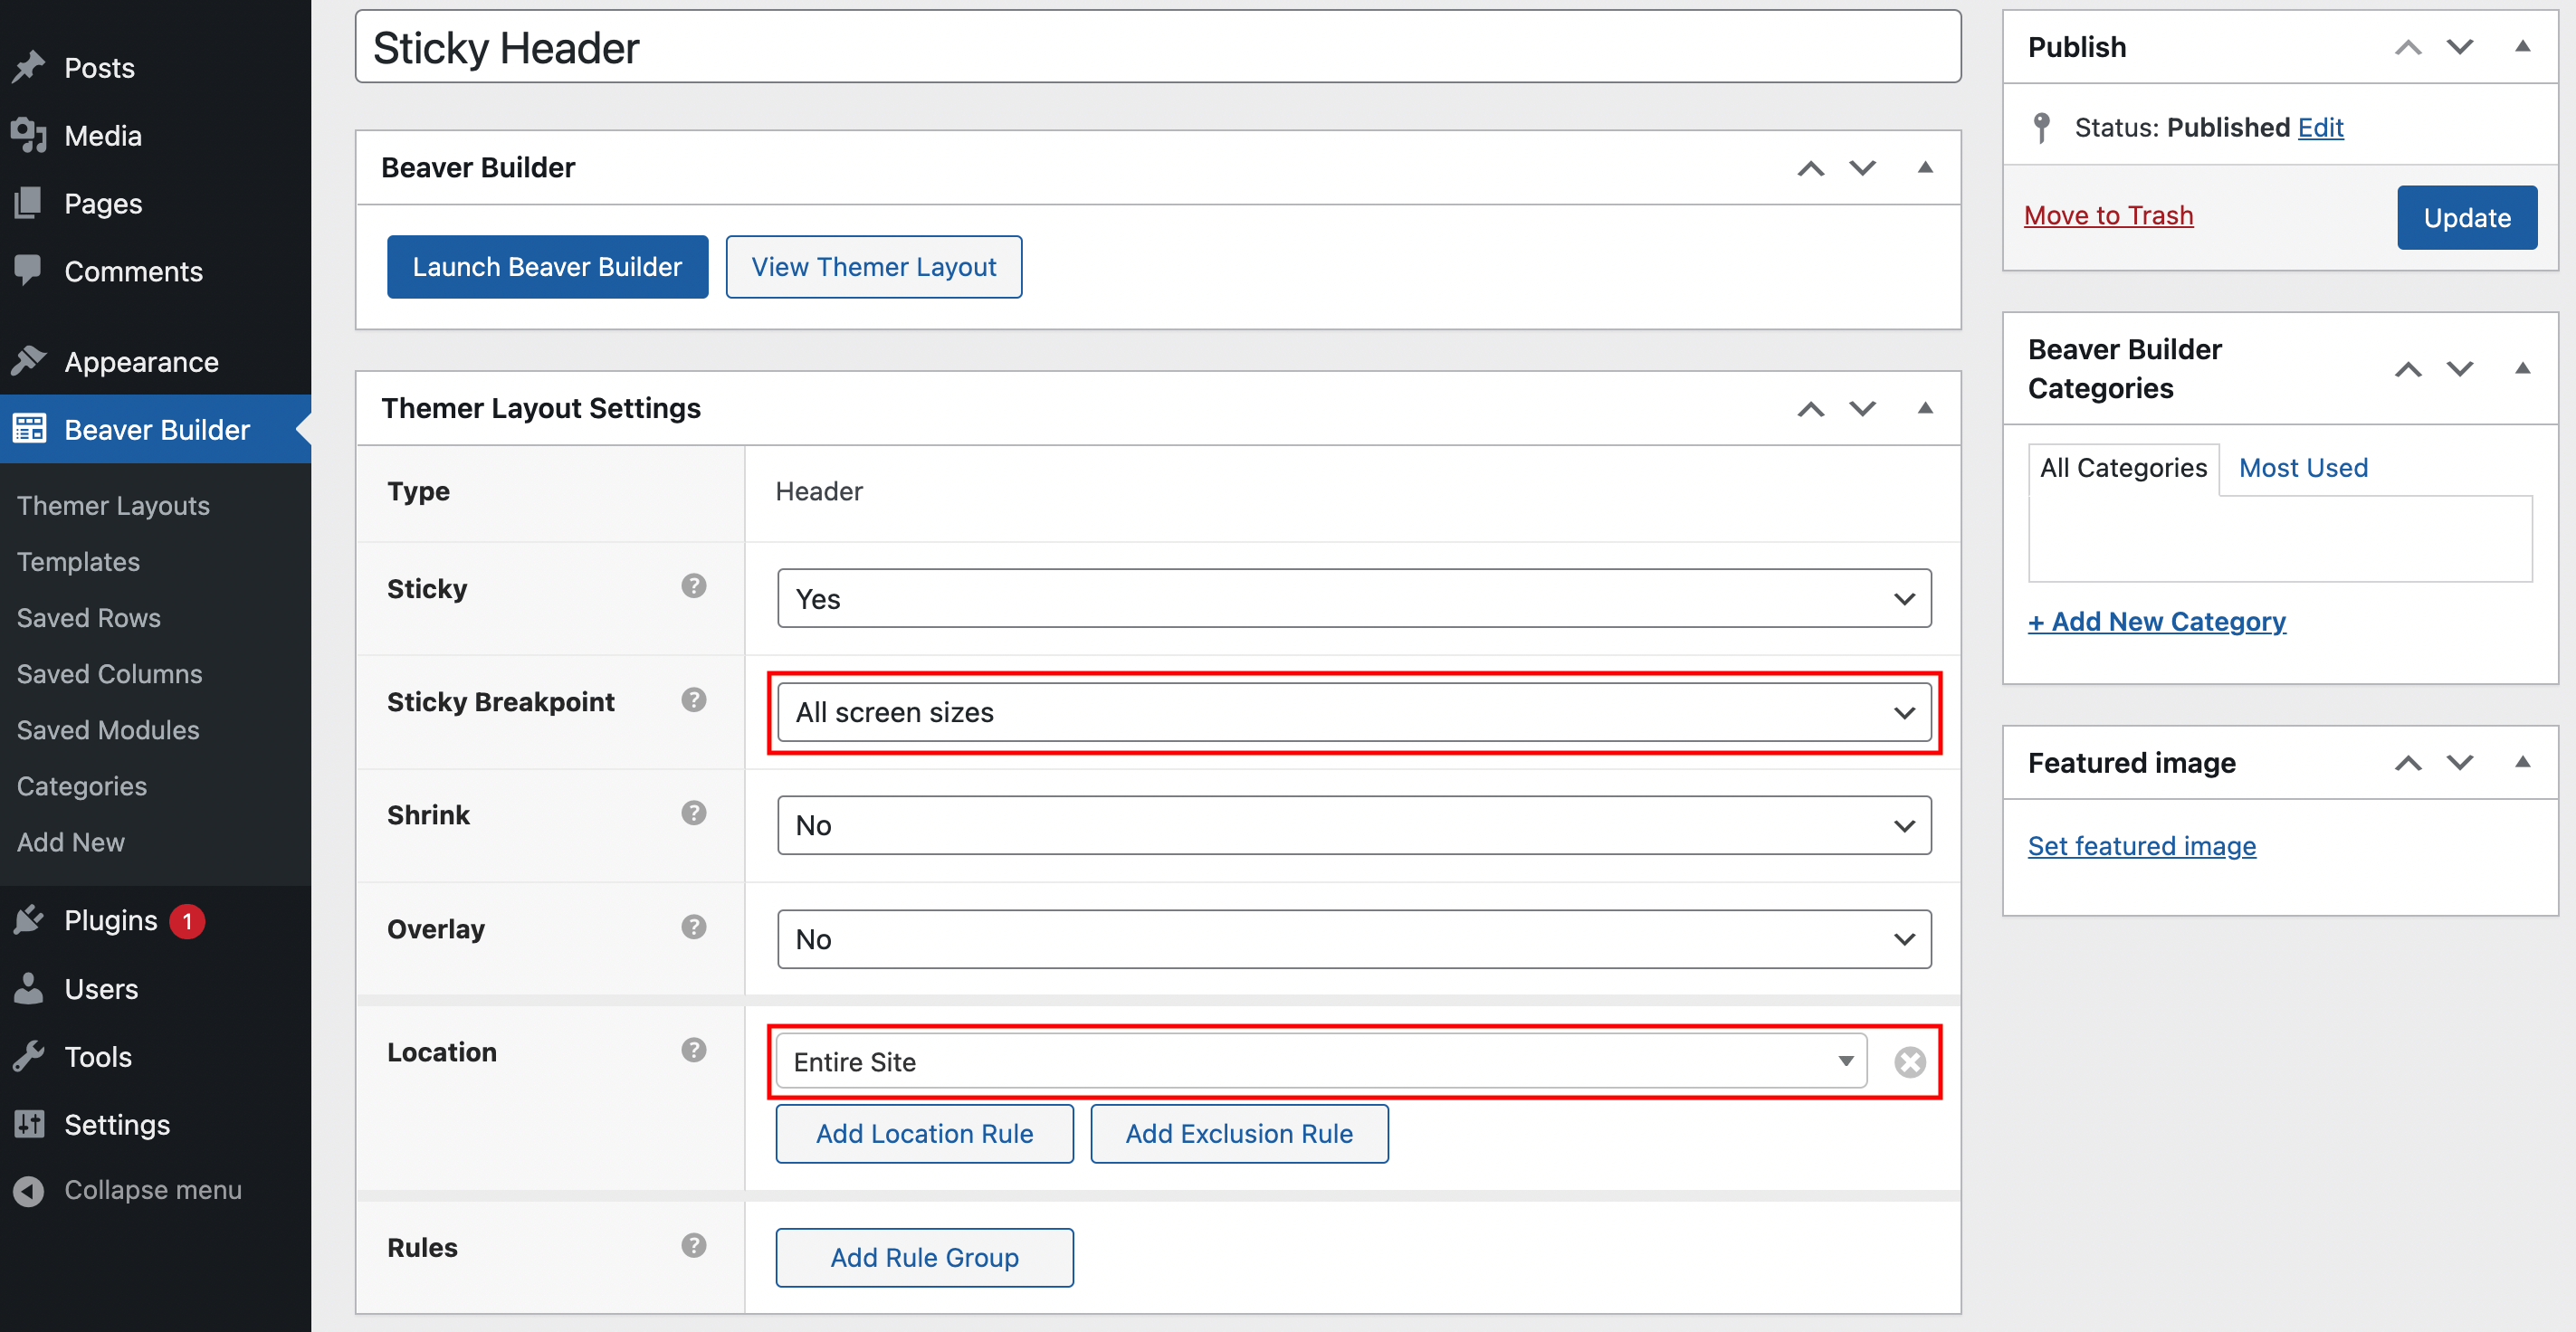
You can even create more advanced rules (or rule groups) that dictate how your sticky header behaves. When you’re done making your selections here, click on Publish.
Then, you can preview your site on the front end to see your results:
As you can see in our example, the header is now sticky! Remember, if you’re not totally happy with the results, you can always go back and edit your Themer layout further. Otherwise, it’s time to customize your sticky header’s settings.
Step 4: Customize Your Header Layout Settings
As we mentioned, Beaver Themer not only enables you to make your header sticky, but it also lets you use advanced sticky header features. For instance, you can make your sticky header shrink.
To do this, simply return to your Themer layout settings screen and select Yes in the dropdown menu next to Shrink. In this scenario, here’s what your sticky header would look like:
As you can see, our blue sticky header shrinks and expands depending on scroll behavior. This feature can instantly elevate your site by making it look more professional. Plus, this shrinking header will allow users to see more of the screen at once.
Alternatively, you could return to your Themer layout settings and apply an overlay effect. This will give the header a transparent background. Just remember to click on Update in the upper right-hand corner to save your changes.
Conclusion
Sticky headers can be a great way to improve your site’s UX because they make your header navigation available to users no matter what part of the page they are browsing.
To recap, here’s how you can create a sticky header with Beaver Themer in four steps:
- Set up your header elements.
- Create a ‘header’ Themer layout.
- Make your header layout sticky.
- Customize your header layout settings.
Related Questions
How do you make the sticky headers using Beaver Builder theme?
If you want to enable a sticky header in the Beaver Builder Theme, go to Customize > Header > Header layout. It gives you advanced control over both your header and footer.
What Other Design Elements Can Help Improve My Site’s Navigation?
If your site features many pages, you might consider transforming your sticky header menu into a mega menu. You can set one up using the Beaver Builder Mega Menu add-on. Furthermore, adding anchor links to your content can help visitors navigate your pages quickly and easily.
Our Newsletter
Our newsletter is personally written and sent out about once a month. It's not the least bit annoying or spammy.
We promise.
Try Beaver Builder Today

Related articles

How to Create Headers and Footers with Beaver Themer
Page builders are great for creating beautiful pages, but they often don’t extend customization to headers and footers. This limitation…
How to Customize WordPress Website Header
Many elements make up a well-designed website. Your WordPress website header is particularly important because it’s the first thing visitors…
How to Use a Header Template in WordPress
Customizing a WordPress header isn’t often an easy process. If you’re not comfortable editing theme files, there aren’t many ways…
Join the community
We're here for you
There's a thriving community of builders and we'd love for you to join us. Come by and show off a project, network, or ask a question.
Since 2014
Build Your Website in Minutes, Not Months
Join Over 1 Million+ Websites Powered By Beaver Builder.