
If you build client websites or large WordPress sites, you know the struggle: keeping layouts consistent while allowing edits on individual pages.
Beaver Builder Components (Dynamic Global Templates) solve this problem by letting you lock design elements while marking specific fields as editable.
This guide is the second article in a 3-part series:
- Part 1: What Are Beaver Builder Components? Beginner’s Guide to Reusable Layouts
- Part 2: How to Build Beaver Builder Components: Step-by-Step Tutorial ← You are here
- Part 3: How to Nest Components in Beaver Builder (Made Simple)
In the last article, we covered the basics: What are Beaver Builder Components? Beginner’s Guide to Reusable Layouts. In this tutorial, we’ll take the next step and show you how to build a Component so you can start using them in your client projects today:
Step 1: Build Your Beaver Builder Layout
Start by designing the layout you want to reuse. For this example, we’ll use a pre-built hero section:
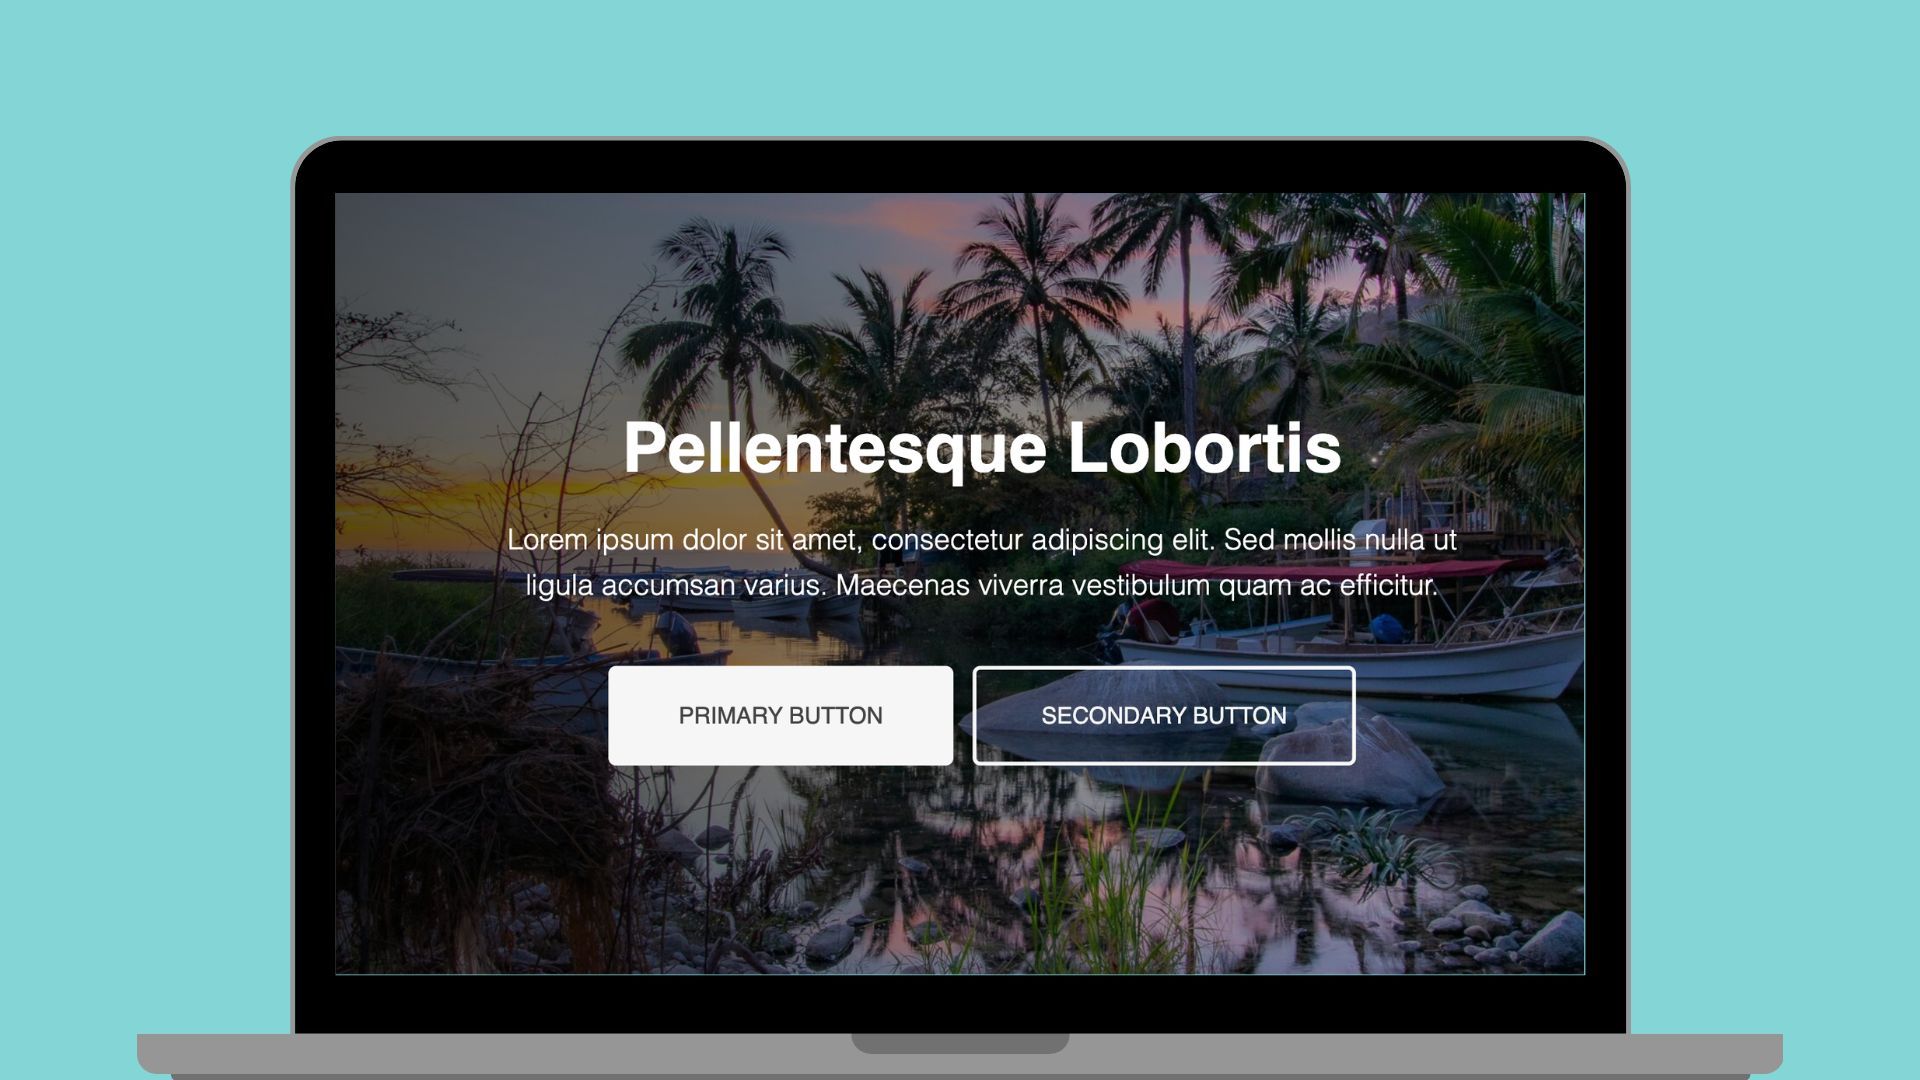
To add this pre-built hero to the page:
- Open the Beaver Builder editor.
- Click the Content Panel.
- Click Template → Pre-Built Modules.
- Drag your hero section onto the page.
Otherwise, build your layout to fit your needs, then move on to the next step where we will save this layout as a component.
Pro Tip: Keep your layout simple at first. Focus on what content might need to change across pages, such as headings, buttons, or images, but don’t overcomplicate it.
Step 2: Save Your Layout as a Component
Once your layout is ready, we will now save it as a Component:
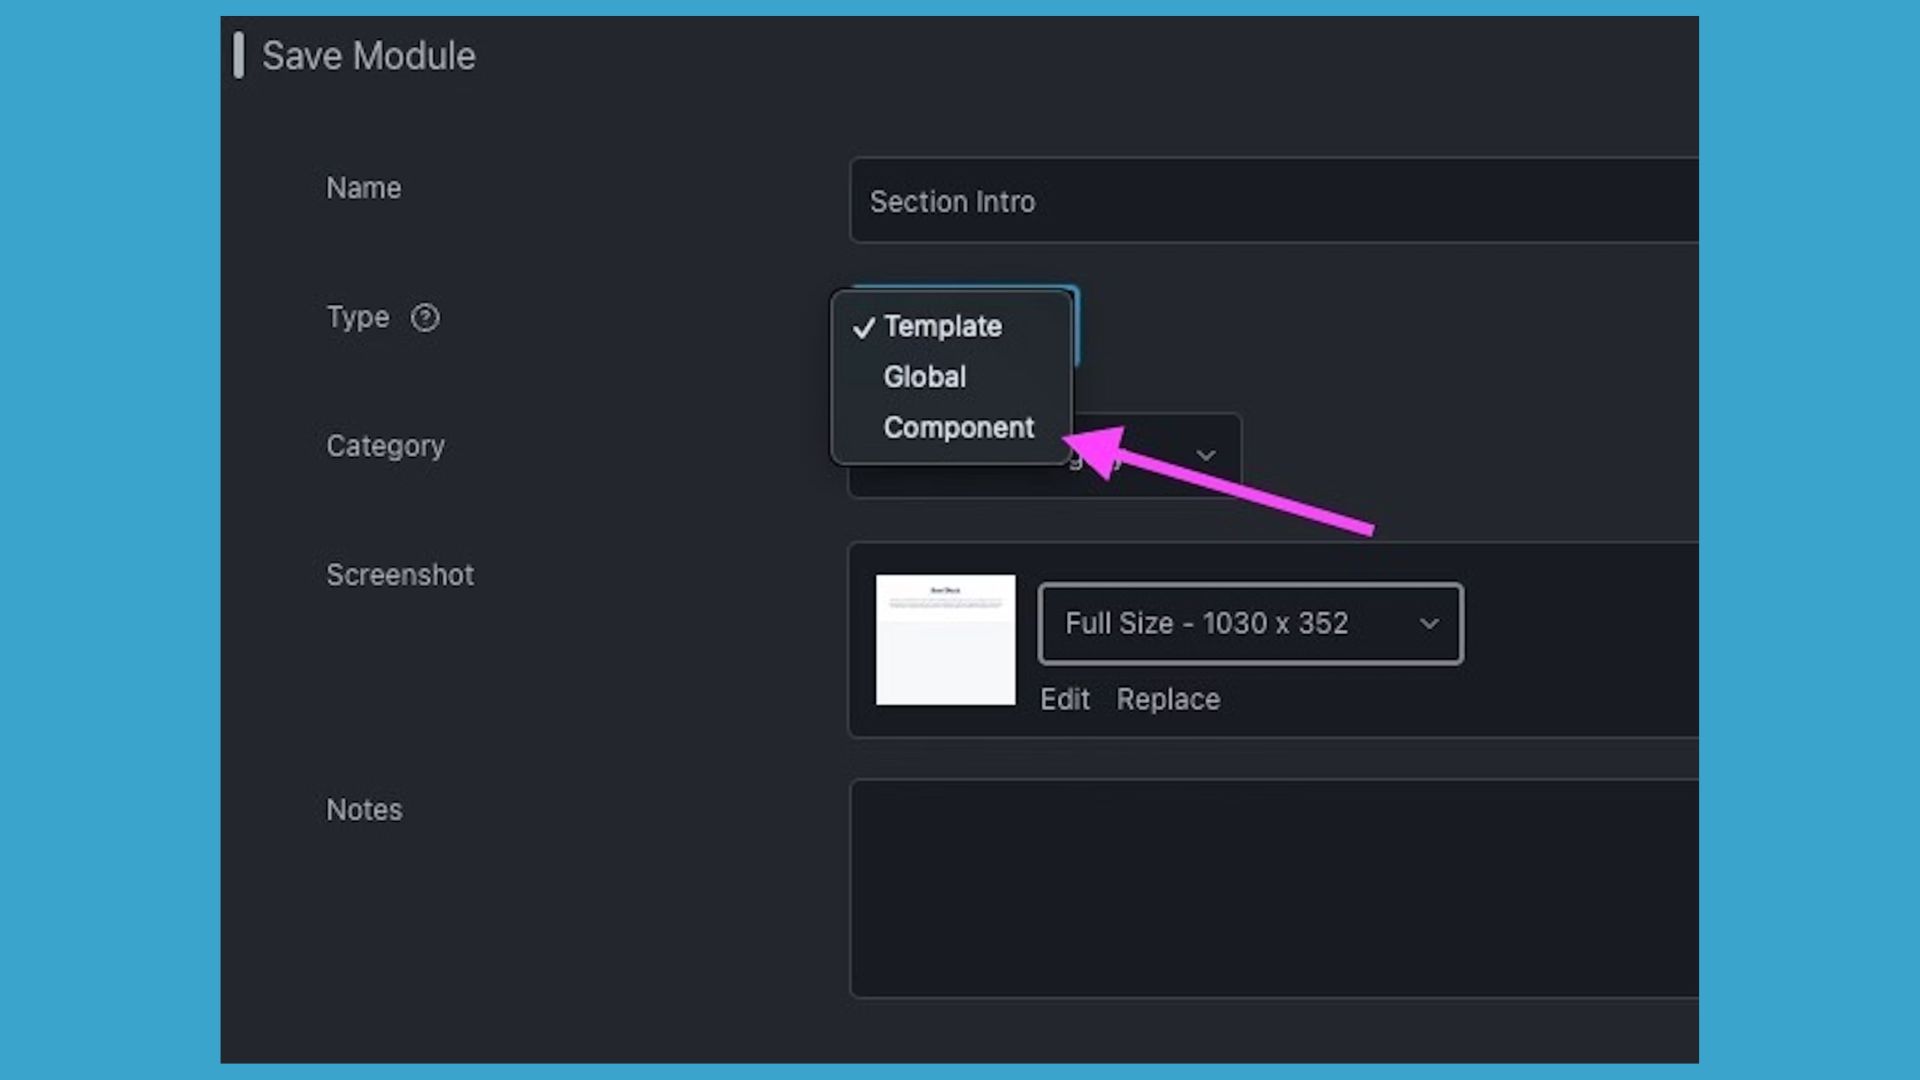
- Open the settings for your top-level container module (e.g., a Box Module, row, column, etc.).
- Click Save As.
- Enter a descriptive name for your Component.
- Change Type → Component.
- Add a Screenshot and Notes (optional).
- Click Save.
Your Component will open in a new editing tab, ready for customization.
Step 3: Make Component Fields Editable
The next step is to decide which fields can be changed on individual pages. We will make those fields editable by clicking the plug icon to enable editable fields:
In this example, we
- Click the wrench icon to open the settings popup for a module.
- Select the plug icon to enable editing for a particular field. Blue = active.
- Leave all other elements locked to protect your design. Gray = locked.
- Click Done → Publish to save your Component.
Tip: Only enable fields that need to be editable in the future. This keeps your component simple and protects your layout.
Next you will add your component to a new page so that you can see how components work to update only the fields that were enabled.
Step 4: Add Your Component to a New Page
Now that you have saved your layout as a component and enabled the fields for editing, your component is now ready to be used on a new page:
- Open a new page.
- Click to open the Content Panel, then click the Saved Tab.
- Drag your Component onto the page.
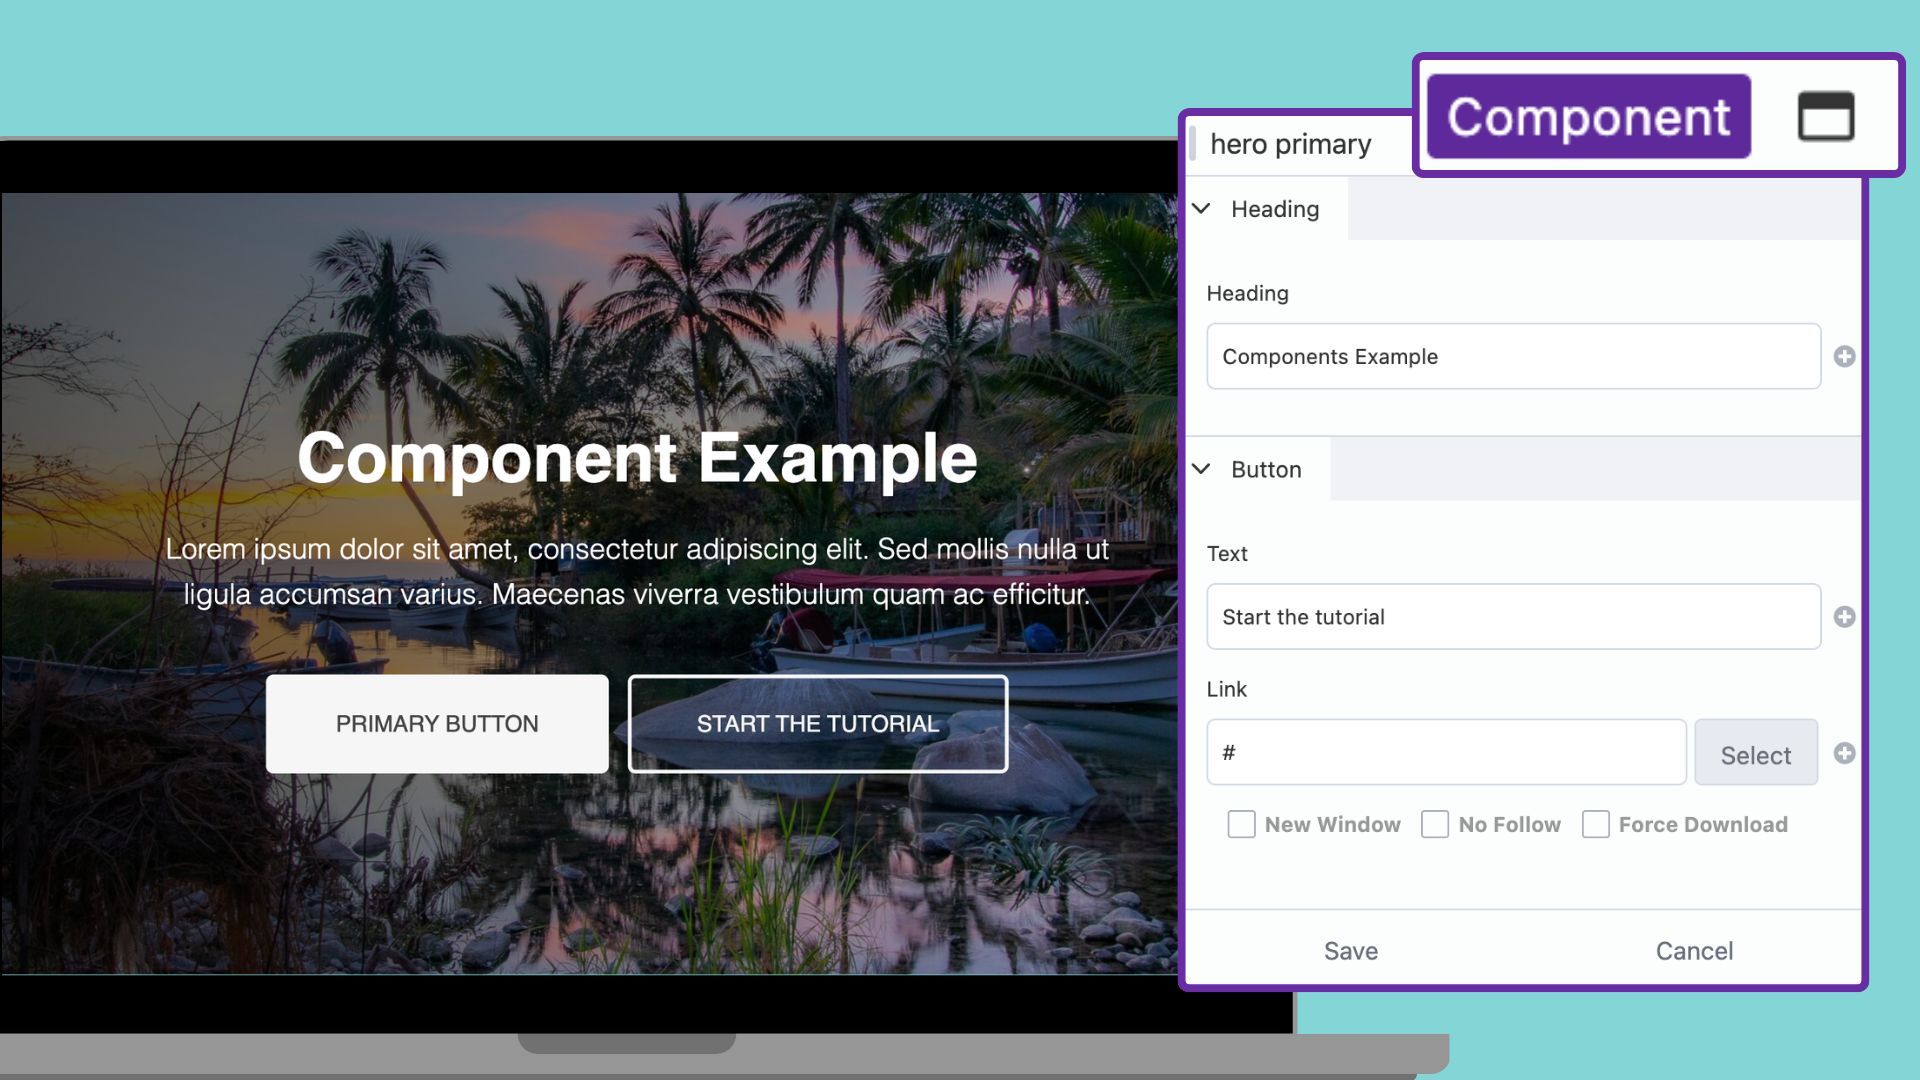
Note that components are labeled with a purple tag for easy identification.
When editing:
- Only editable fields appear (heading, button, link)
- All other elements such as colors, spacing, and layout remain protected
Next Step: Nesting Components
Once you comfortable, you can take it further by nesting Components. This allows you to combine multiple Components into larger layouts, saving even more time and maintaining full control of your web design projects.
In Part 3, we’ll walk through how to nest components. You’ll see how to build a design system using components as the building blocks.
Continue reading: How to Nest Components in Beaver Builder (Made Simple)
Our Newsletter
Our newsletter is personally written and sent out about once a month. It's not the least bit annoying or spammy.
We promise.
Try Beaver Builder Today

Related articles

How Beaver Builder Products Work Together to Build Flexible WordPress Websites
Building a WordPress website often means stitching together a theme from one developer, a page builder from another, and a…

From Azeroth to WordPress: How Warcraft Tavern Uses Beaver Builder
Since releasing Beaver Builder 12 years ago, a feeling will come up from time to time that just never gets…
How to Build Card Layouts in Beaver Builder (Flexbox + Box Module Tutorial)
If you’re using the Beaver Builder Box Module to build responsive layouts, you’ve likely noticed two things: it’s incredibly powerful…
Join the community
We're here for you
There's a thriving community of builders and we'd love for you to join us. Come by and show off a project, network, or ask a question.
Since 2014
Build Your Website in Minutes, Not Months
Join Over 1 Million+ Websites Powered By Beaver Builder.