
Create a Professional Portfolio with Beaver Builder and Beaver Themer
Recently I searched online to find examples of artist websites. What I found was a lot of sites demonstrating works by creative professionals that were a disaster. Pages that took minutes to load, websites that weren’t complete, portfolios that weren’t nicely laid out, functionality that didn’t work well.
Many of the sites didn’t pass Google’s Mobile-Friendly Test or took over a minute to download, flaws that affect search performance.
You might go looking for a specialty platform or a plugin to help you build a portfolio website but I have a secret to share. It’s really easy to create a professional portfolio site, or a portfolio section of a larger site, using WordPress, Beaver Builder, and Beaver Themer.
A portfolio that looks beautiful and is responsive, and one that’s easy to add, remove, and categorize portfolio content in the back end without touching the layout at all.
This means that if you’re a web designer you can easily turn the site over to the artist to maintain.
Best of all, you have the flexibility to create a great layout with exactly the content you want. Even better, if you want to modify the layout or style of your portfolio, you can make simple changes to the Beaver Themer layout without touching the content.
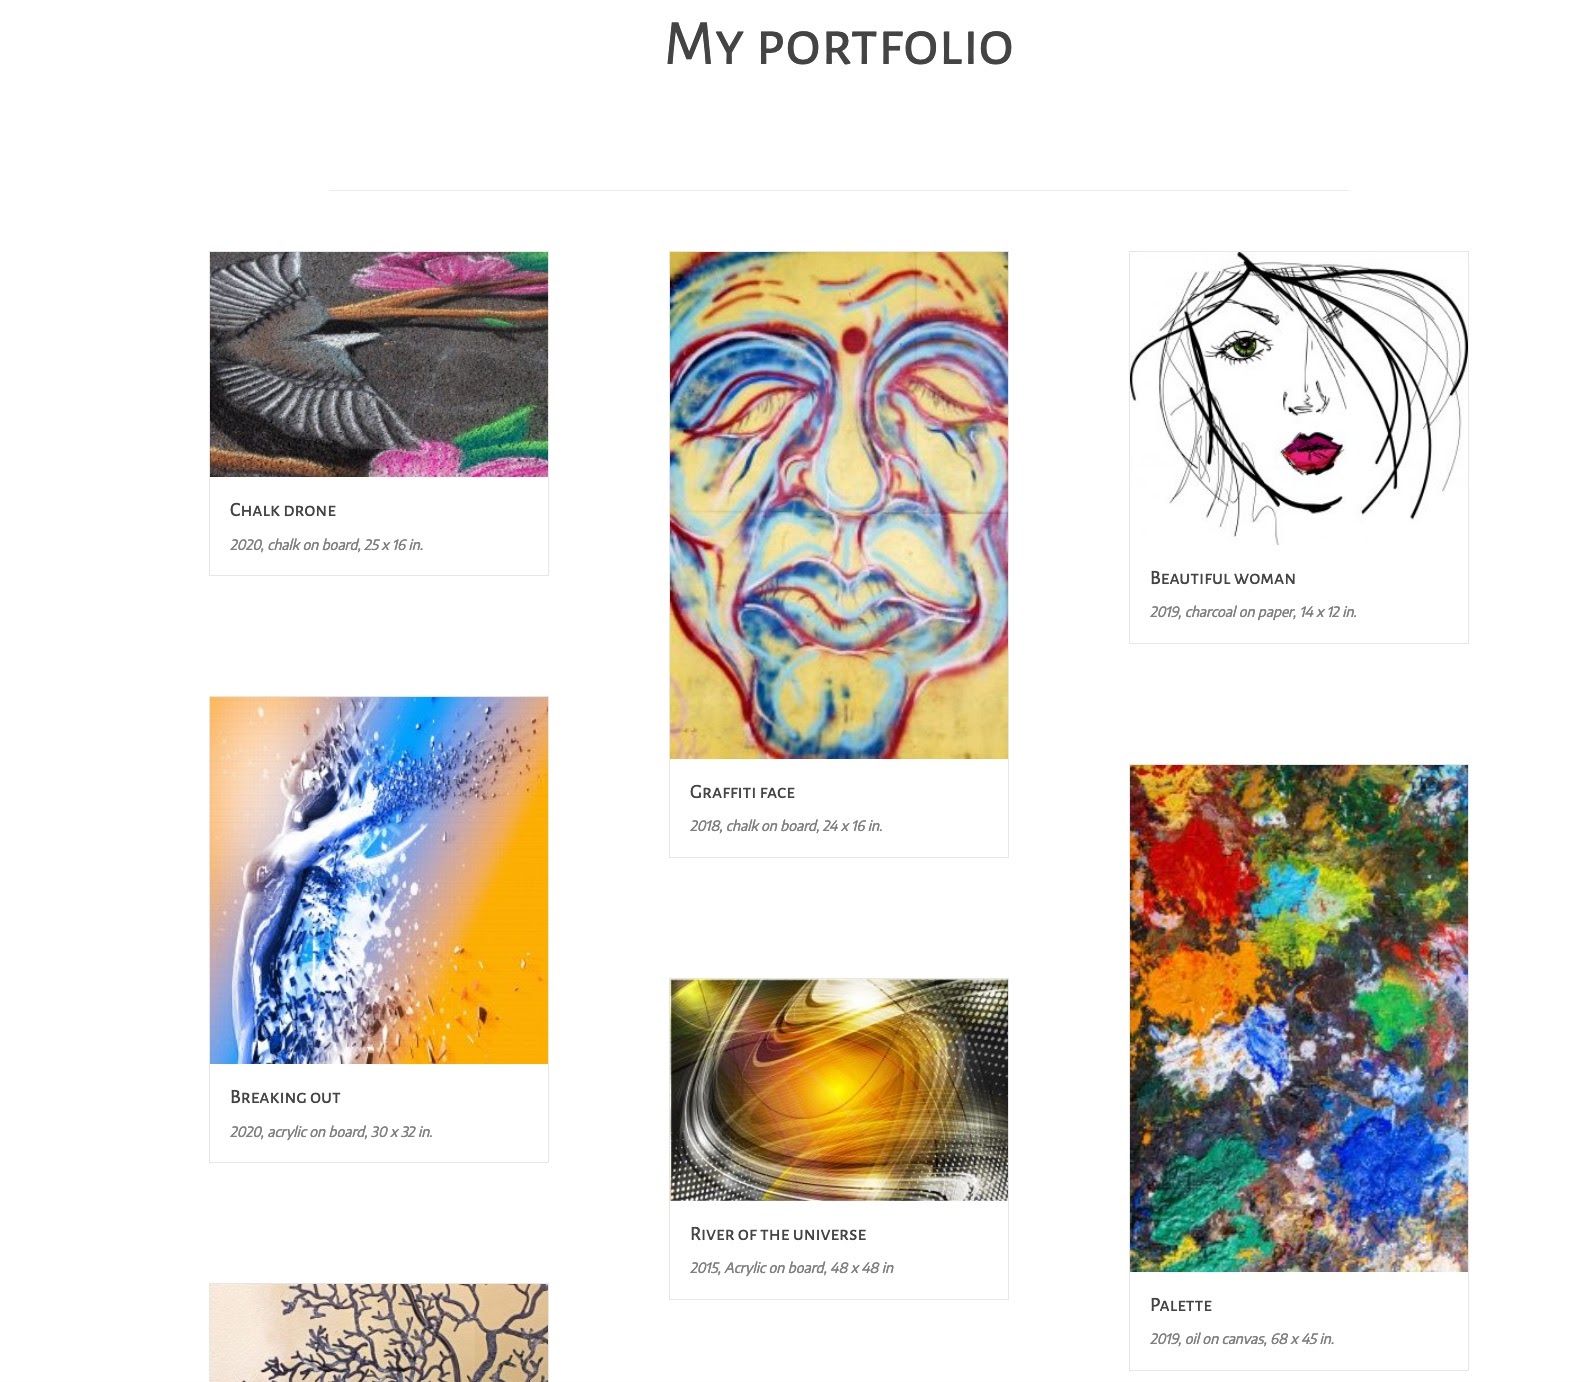
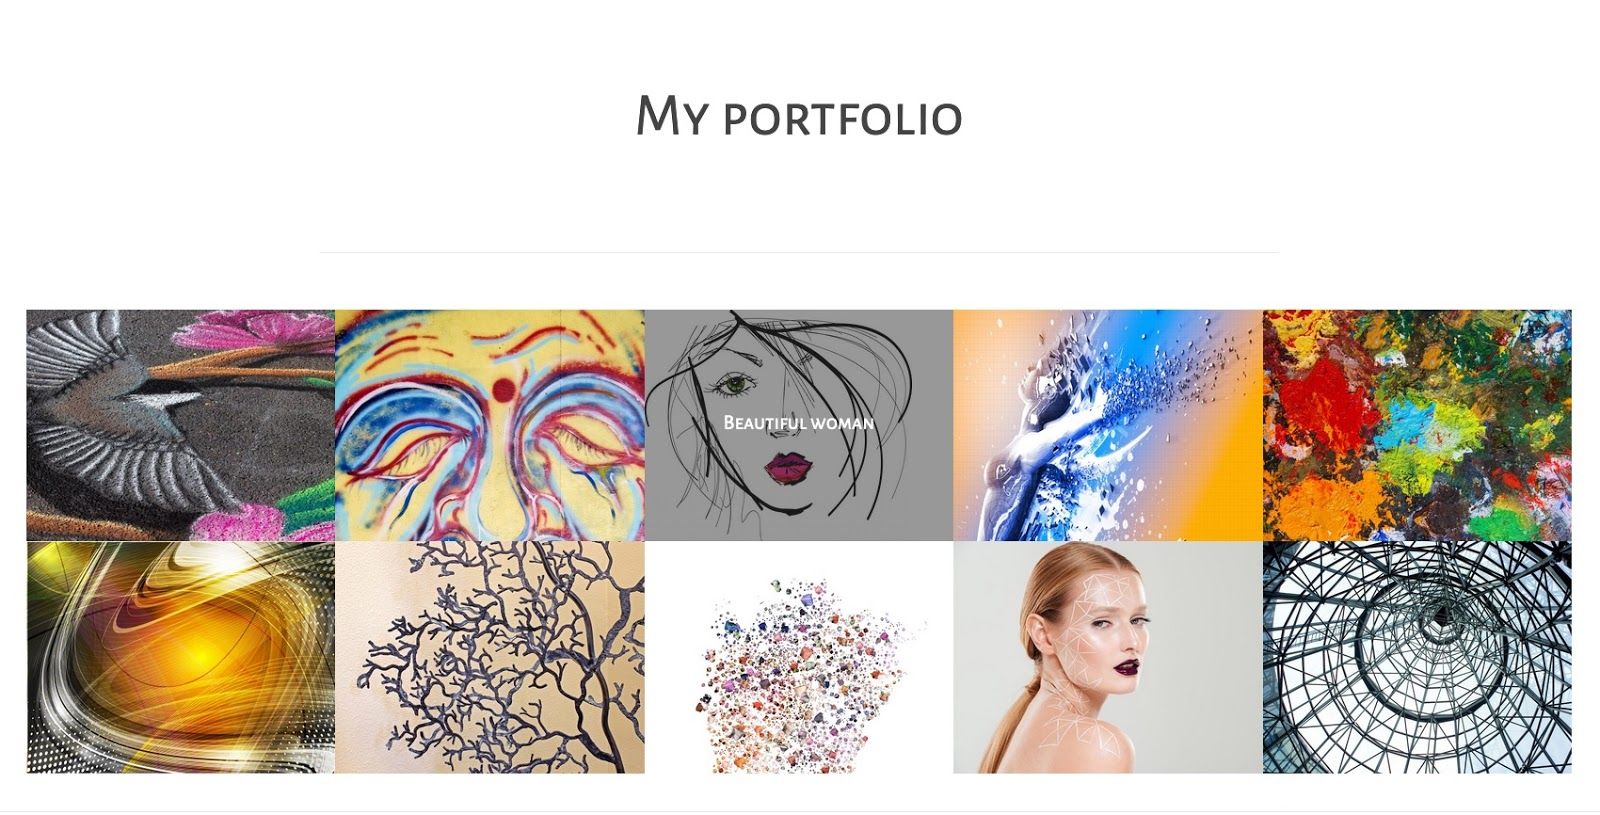
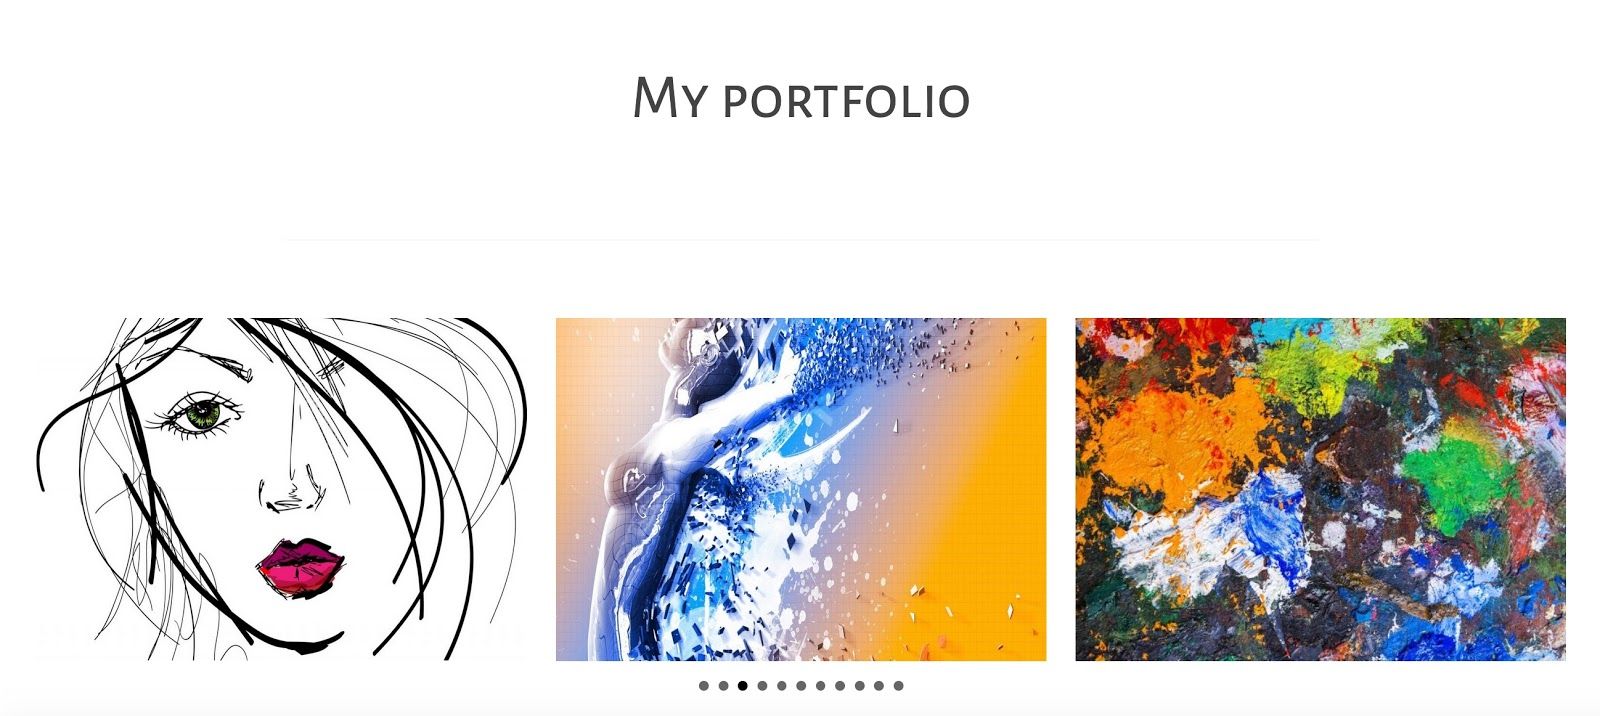
In this post we’ll show what it takes to set up a basic portfolio layout like this:
We’ll start by using standard posts and a Themer layout.
From there we’ll give you a path to learn some advanced techniques to structure your content better in the back end and give you more options to make your content unique: custom post types, custom fields, categories and tags, and custom taxonomies.
How can this be so easy?
If you’re thinking of how you can display the images in a portfolio, your first thought might be to use an image gallery, but there’s often information about each work, such as the title, date created, and materials used to make it, perhaps even a description, that most image galleries don’t have the flexibility to handle.
There’s a better way to create a portfolio: create a post for each item.
If you’re used to thinking of WordPress posts as a typical blog entry, it might be hard to imagine, but you’ll see how well it works when you have Beaver Themer.
You can create an Archive-type layout to create one or more gallery pages and a Singular-type layout to present all the information for each individual item.
The image in the last section shows a simple portfolio on a typical WordPress archive page built with Beaver Themer, which uses the Beaver Builder editor to construct the page.
If you’re familiar with Beaver Builder modules, the layout uses a Posts module with a masonry layout. The number of columns automatically adjusts according to screen size, so it’s responsive without your lifting a finger.
Any item that you click in the portfolio opens to its own page, also controlled by a Themer layout:
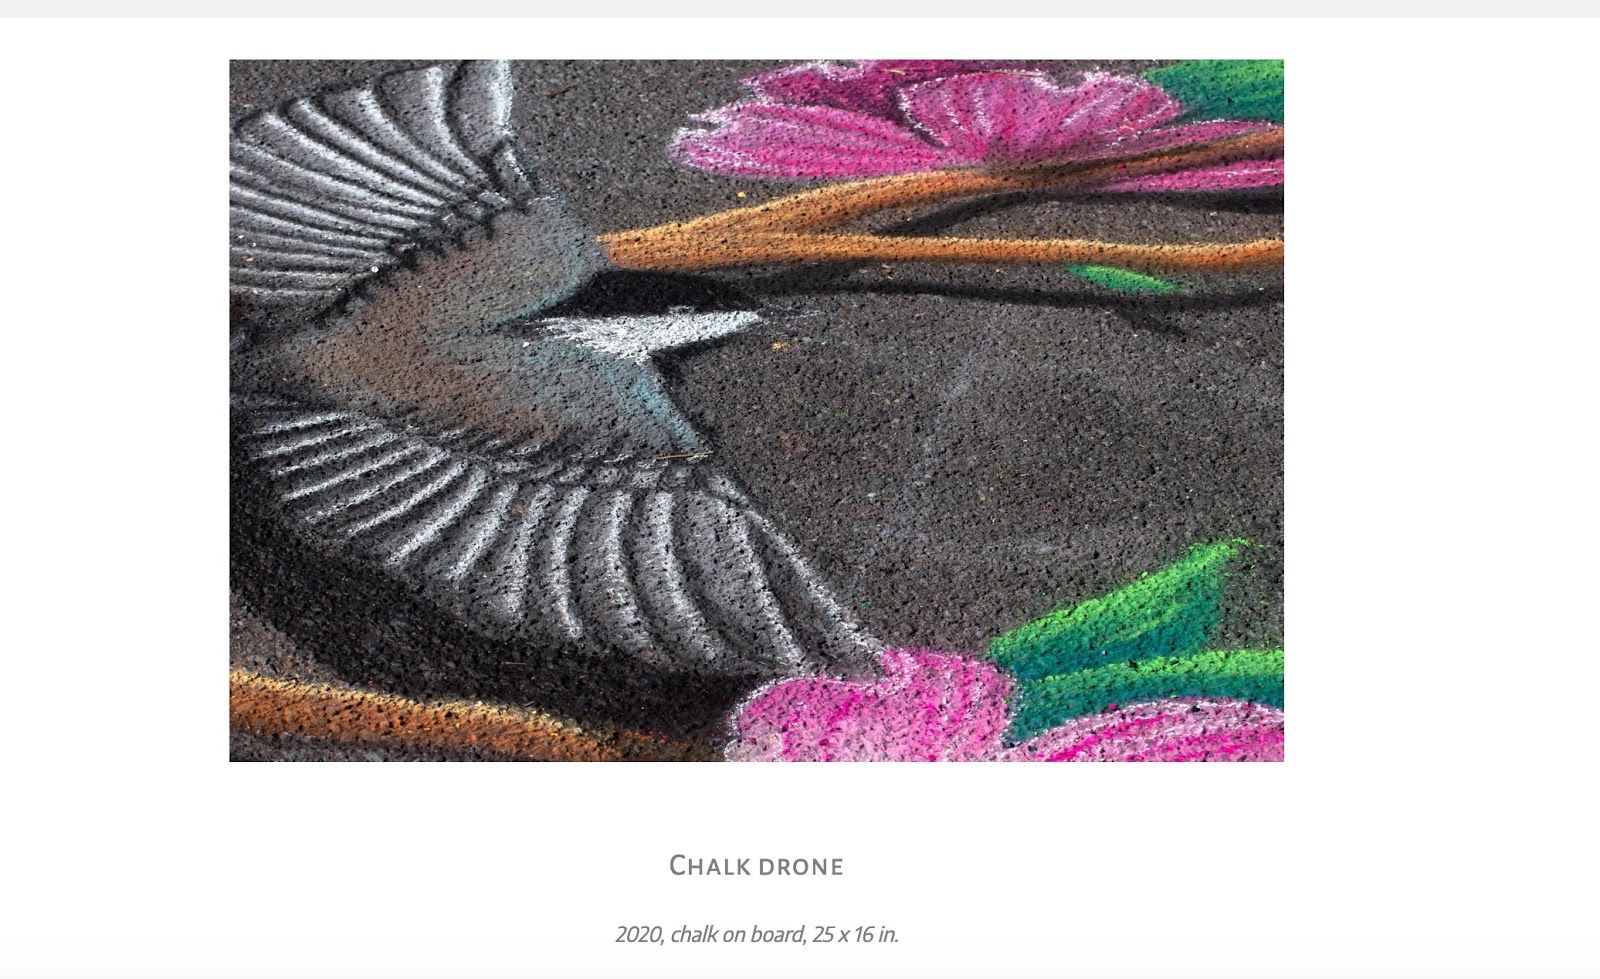
In this example, the artwork title is the post title and the description is the post content.
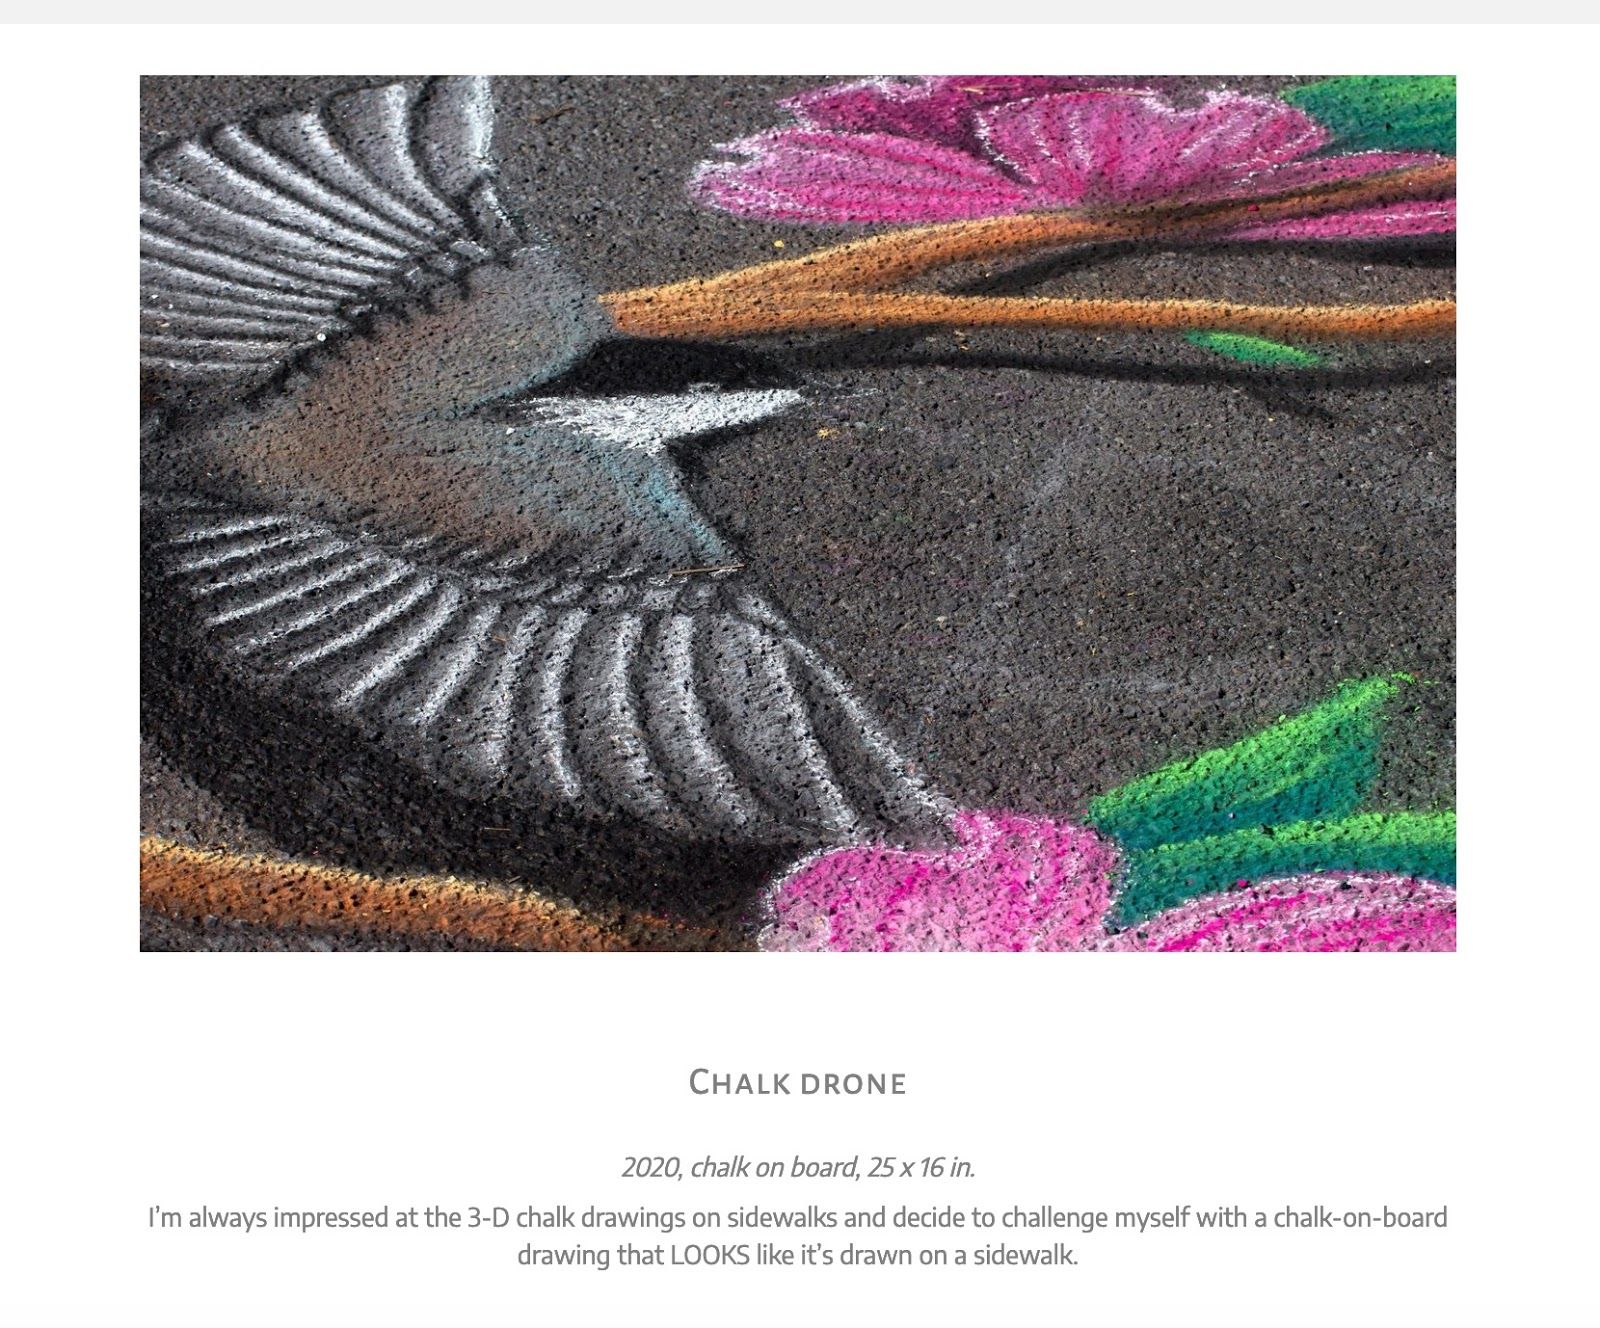
You could also include a description on this page if you wanted, and later we’ll show you how to use custom fields to separate the artwork information from a description, as shown here:
You can also create categories for the items in your portfolio so that you can group them and display individual categories.
We’ll start by showing you how to create the portfolio items in the back end, then talk about how to create the Themer layouts to display the portfolio gallery and single items in the portfolio.
Step 1. Create a post for each portfolio item
If your site doesn’t have a blog and you don’t plan to have a blog in the future, you can use standard posts to create your portfolio.
If you do have a blog, or if you’re creating a site for a client and want to keep the back end tidy, you can create a custom post type. We’ll cover that later.
Note that for the posts, you’re going to use the WordPress editor, either the block or classic editor, because we’re going to create a Themer layout for these single posts and you can’t use a Themer layout and a Beaver Builder post layout together.
To create your standard posts:
- In the WordPress admin panel, go to Posts > Add New.
- Add a title for the post, which will be the artwork title you want to display.
- Set the featured image for your post by clicking Set Featured Image, then upload the artwork image to the Media Library and select it.
Be sure to add Alt text and a friendly Title for the image while you’re in the Media Library because this is important for accessibility and search and appears in the HTML page code. - Add any information about the post in the WordPress Block Editor or the WordPress Classic Editor.
- Save the post and repeat for each portfolio item.
Step 2. Create the location for your portfolio
If you don’t want your portfolio to appear on the home page of your site, you have to create the page where you want it to appear. If you do plan to dedicate the home page to your portfolio gallery, skip to the next section.
- On your WordPress admin panel, go to Pages > Add New.
- Create a title for this page, such as “My Portfolio,” and save it.
The content for this page will be generated by WordPress, you don’t need to add anything yourself.
Step 3. Adjust the WordPress settings to point to your portfolio page
Now adjust your WordPress settings to point to your “blog,” which in this case is your portfolio page.
- In your WordPress admin panel, go to Settings > Reading.
- If your portfolio will be on your home page, choose Your latest posts. If your portfolio is on the page you created in the previous step, choose A static page, and in the Posts page field choose that page title.


Now if you look at the page you selected for your portfolio or your home page, you’ll see an unformatted WordPress “archive” of all of your portfolio items.
This archive is generated by WordPress and the formatting and content are controlled by your WordPress theme.
That’s fine for now. If you’re new to WordPress, here’s some basic information about how standards posts and archives work.
Step 4. Create a Themer layout for your Portfolio archive
Now we’ll design the layout for that WordPress-generated archive page by creating a Themer layout. If you need to install Beaver Themer, follow these instructions.
First, create an Archive-type Themer layout:
- In your WordPress admin panel, choose Beaver Builder > Themer Layouts.
- Click Add new.
- Enter a title, such as My Portfolio Archive.
This title only appears in the back end. - In the Layout field, choose Archive.
- Click Add Themer layout.
Now add the location for your Themer layout:
- In the Location field, click in the Choose box and choose Post archive.
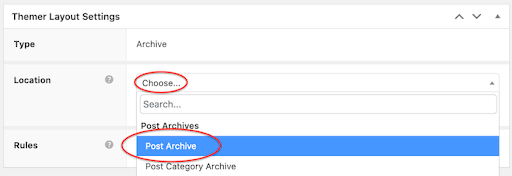
- Click Publish.
- Click Launch Beaver Builder.
The Themer layout opens with an initial template that contains two modules: a Heading module and a Posts module.
Open the Heading module and you’ll see that the title being used is a field connection to the Archive Title:
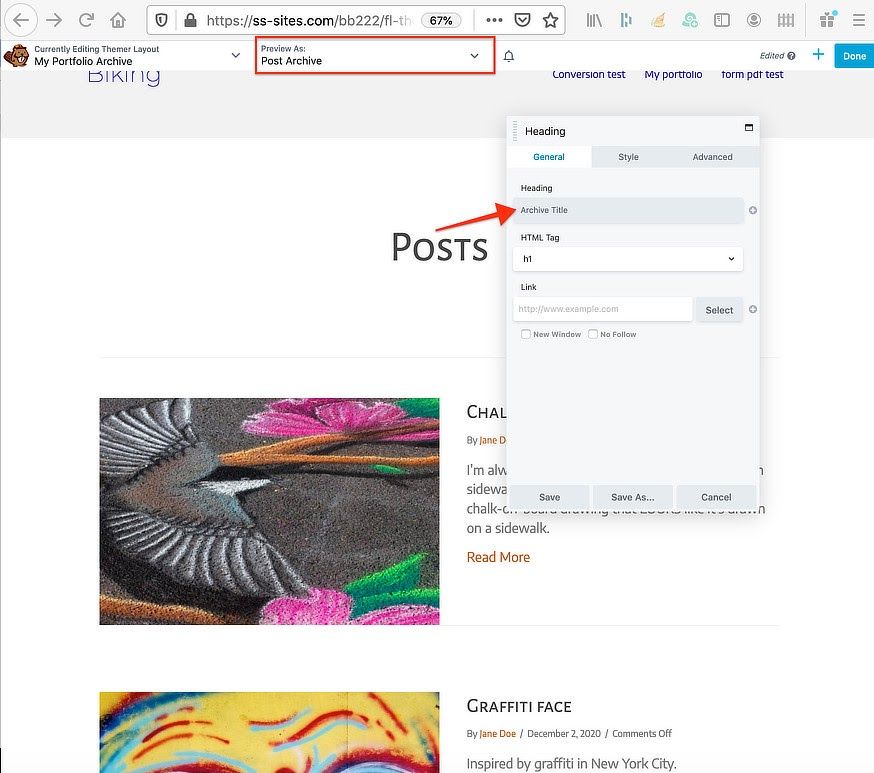
The field connection means that whatever type of archive you’re viewing (post, post category, post tag, etc.) you’ll see the correct name for the archive type.
However, you want this archive to reflect your portfolio, so remove the field connection in the Heading field and enter your heading, such as My portfolio.
Open the Posts module beneath the heading. This is where you’ll make the changes that will set the content and style of this page.
Let’s change the settings to match the screenshot shown in the first section of this article.
- On the Layout tab, set the Layout field to Masonry.
- In the Featured Image section, set Image to Hide.
- In the Post Info section, set Author to Hide.
- Set Date to Hide.
- In the Post Content section, set Content to Hide.
- Set More Link to Hide.
Now you should be seeing the correct information for your portfolio: a masonry layout where each item has a featured image, a title, and whatever you entered for post content. - Save the module and publish the page.
Now you can check the page on your site that you designated as your portfolio, and you should see your Themer layout.
Step 5. Create a Themer layout to display single portfolio items
If you view any of your individual items, you’ll find they’re also displayed as default blog posts, with settings coming from your theme.
Let’s create a Themer Singular-type layout that will format the page with layout and content more suitable for your portfolio.
Create a Singular-type Themer layout:
- In your WordPress admin panel, choose Beaver Builder > Themer Layouts.
- Click Add new.
- Enter a title, such as My Portfolio Items.
- In the Layout field, choose Singular.
- Click Add Themer layout.
Add the location for your Themer layout:
- In the Location field, choose Posts and then All Posts.
- Click Publish.
- Click Launch Beaver Builder.
The layout opens with a template, but just go ahead and delete all those rows.
Here’s what we’re aiming for, the post featured image, the post title, and post content, with instructions below:

Beaver Builder has special modules when you’re building Themer layouts, which save some steps, so we’ll use those.
1. In the Beaver Builder editor, click the plus sign to open the Content panel, then click in the Group field and choose Themer layouts from the dropdown. 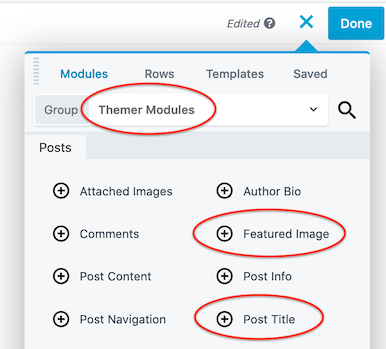
2. Drag the Featured Image module to form a new row, then save it.
You don’t need to make any changes to this module.
3. Drag the Post Title module into a new row. You’ll see the heading text display whatever post you’re previewing, but the heading is left-aligned and possibly the type is too large, so let’s fix that.
4. On the General tab, change the HTML tag to match what fits on that position on your page. Here we’ve selected h2: 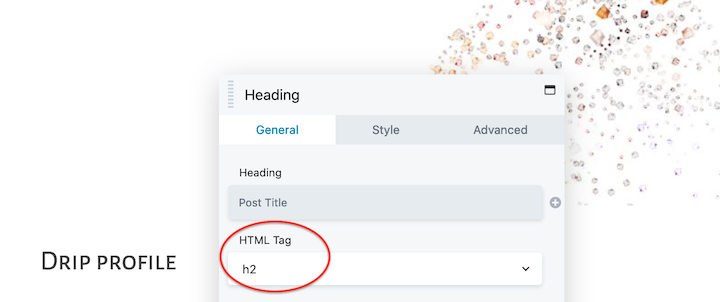
5. On the Style tab, in the Typography section click Font to open that subsection and change the Align setting to the center toggle, then save the module.
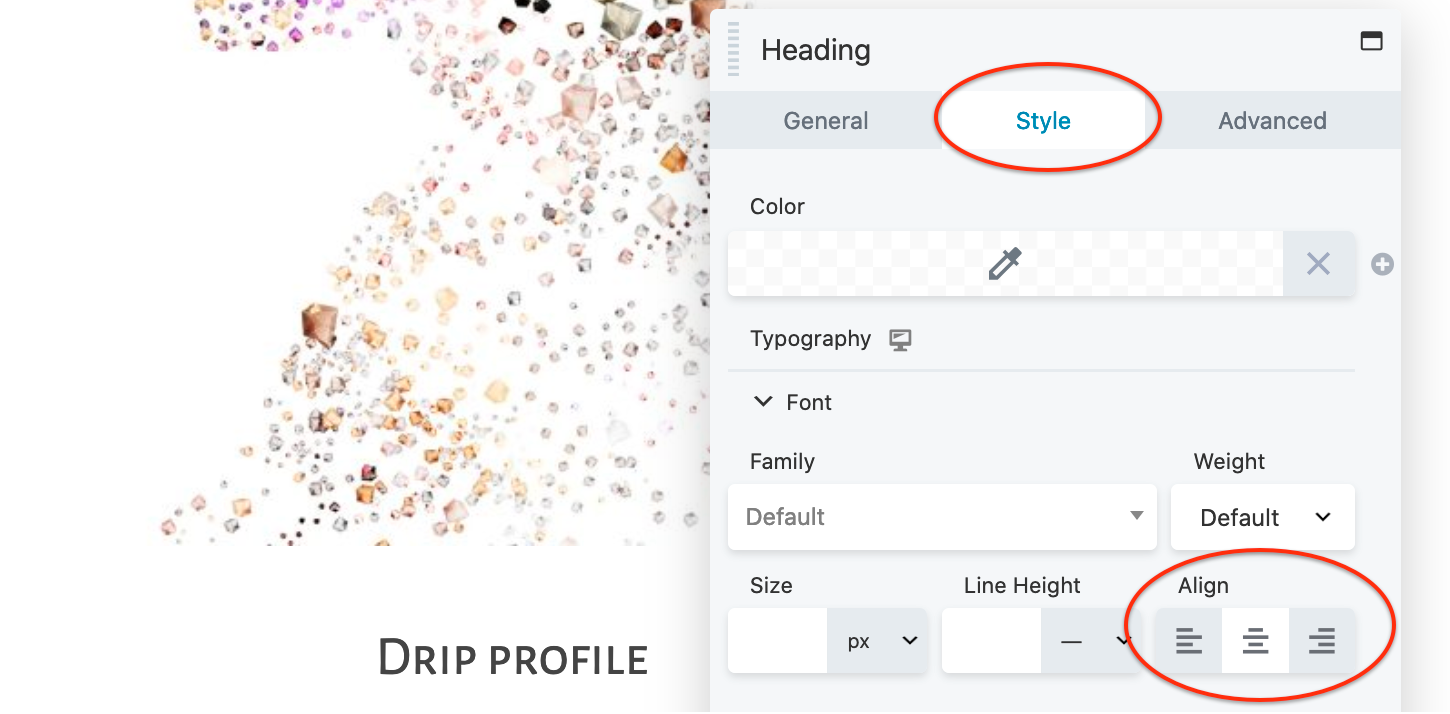
You can change any other typography settings here if you wish.
6. Open the Content panel, click in Group to change to Standard modules, then drag a Text Editor module into the same row below the post title and open it for editing.
7. Click the plus sign next to the Visual and Text tabs to open the field connection list. 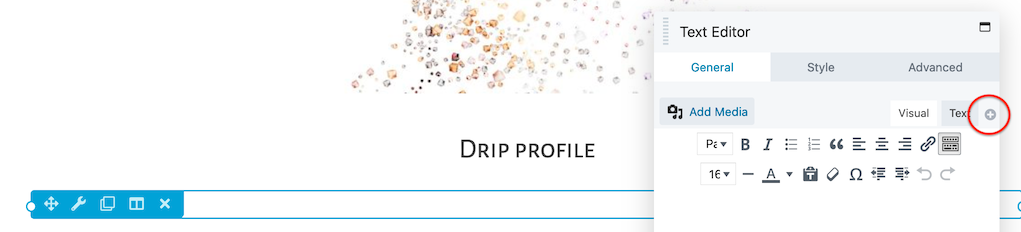
8. Choose Post Content.
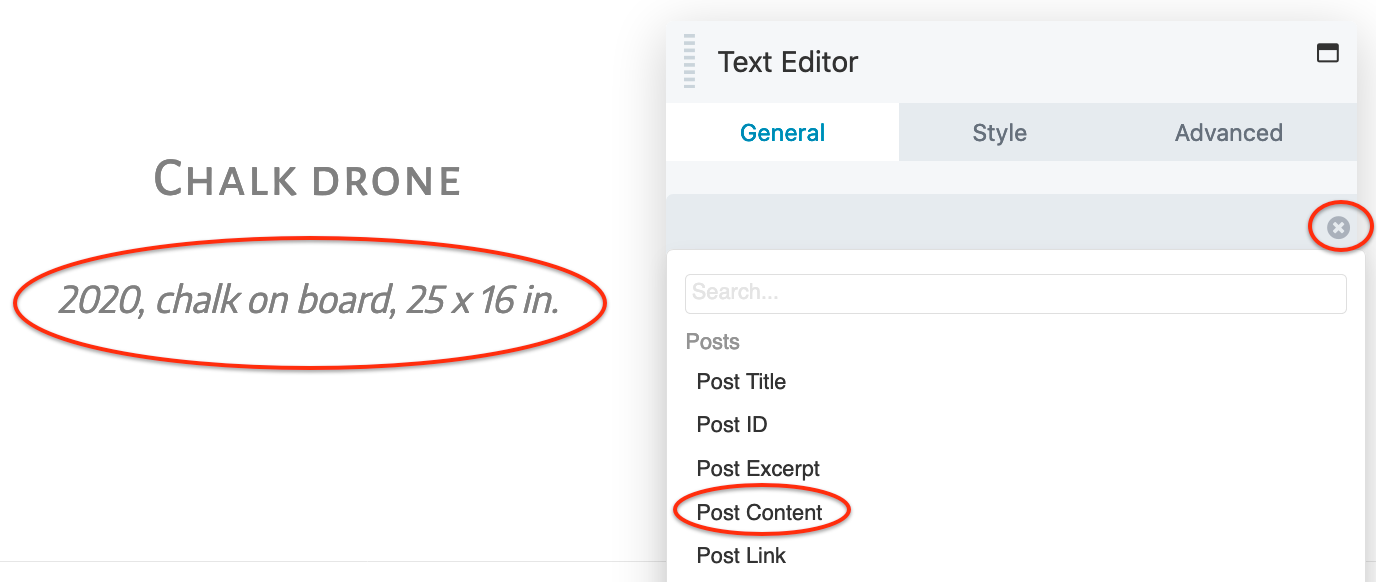
You’ll see the post content appear for the item that you’re previewing.
9. Save the module.
Now let’s add some navigation at the bottom of the post so your visitors can go directly from item to item.
1. On the Modules tab in the Content panel, select the Themer modules group and drag the Post Navigation module into a new row at the bottom of your layout. 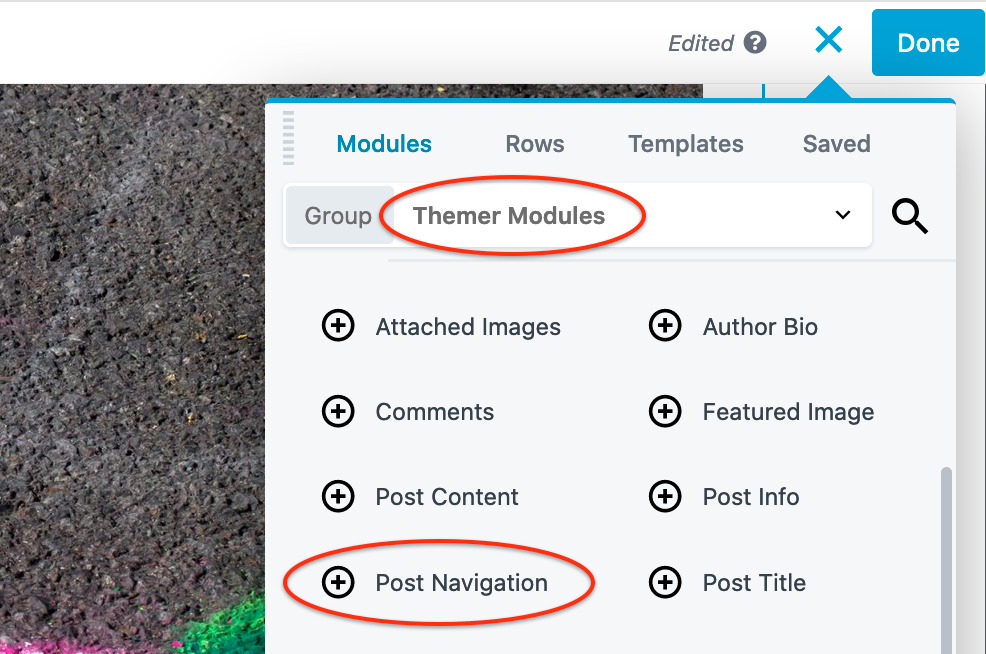
2. Save the module without changing any of the settings.
3. Publish the Themer layout.
To view your layout in action, go to your gallery archive page and click any of the items on display.
That’s it! You’ve created a basic portfolio. Change Style with a Few Clicks
Portfolio variations
Now that you’ve created a basic portfolio framework, you have the full power of Beaver Builder behind you to create style and layout variations with just a few clicks. Here are some examples.
Change the post layout
With a single change to the Posts module, you can switch to a columns layout, where the tops of each column layer line up horizontally, or a gallery layout, where the title is displayed over the image on mouseover, as shown here:
You can also create animation by using a Posts Carousel or Posts Slider module. Here’s an example of a carousel (minus the animation):
Change the background
Prefer dark backgrounds? Change background and text colors in the rows and you have a whole new look.
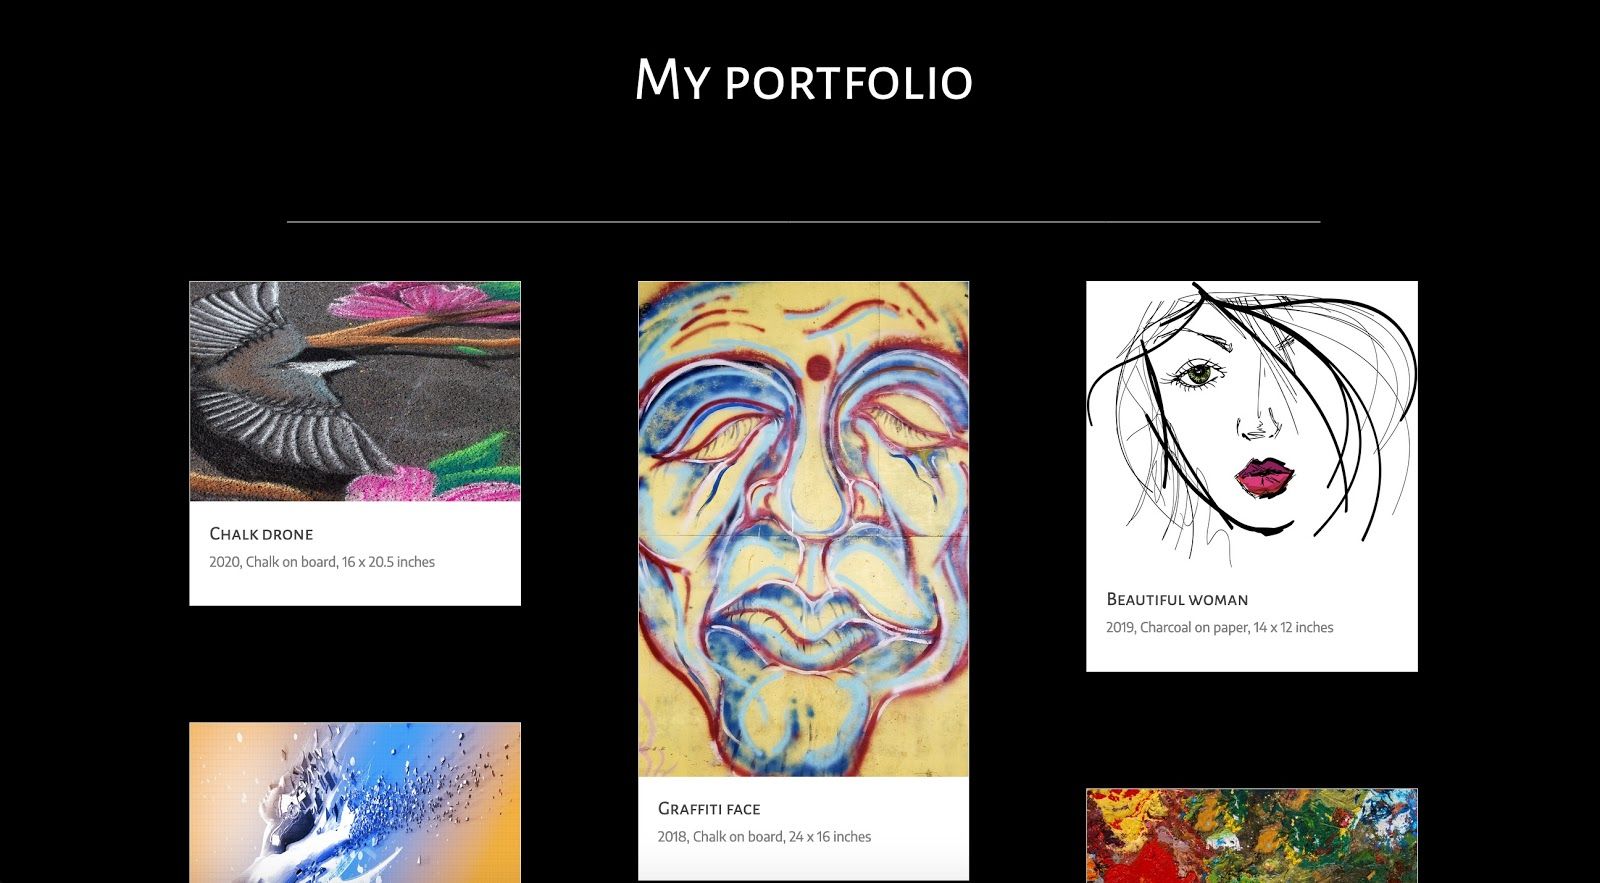
You can also change the post background and text inside the Posts module if you wish, plus many other options, such as image size, the spacing between images, and text color.
More advanced portfolio architectures
Here are some other ways you can set up your portfolio. We won’t show you all the steps to set up these features but just want to give you some ideas of how flexible and sophisticated this system can be.
Create a custom post type
Instead of using a standard post for your portfolio, you can create a custom post type (CPT).
It’s easy to create custom post types with a free plugin like CPT UI, and we recommend you learn how to do this because we can almost guarantee you’ll think of many other uses for CPTs.
We created a CPT called “My Portfolio,” which appears in the WordPress admin menu:
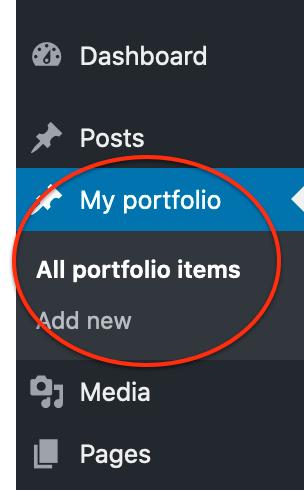
You can see that this improves usability on the back end because it’s easy to see where to go to manage your portfolio.
When we configured the CPT, we set up the portfolio items to include the title, featured image, and content area like standard posts, so the UI for entering content is familiar.
Create custom fields
You can add custom fields to your standard or custom post types, which also facilitates data entry on the back end and standardizes data presentation on the front end.
In our example, the content area for each portfolio item contains three pieces of information: the year, the medium, and the dimensions for that piece of art.
Suppose that instead of typing that information into the post content area, we create three custom fields for this information.
You can choose from many custom field types, allowing, for example, free text entry or radio buttons or checkboxes.
You could offer a choice of year and medium so users could enter that data with a mouse click instead of free-typing information in a uniform format every time.
You can make the fields obligatory if you want to ensure that these details are not forgotten.
Custom fields offer several advantages:
- They make data entry easier.
- They remind you to provide that information for every post.
- The information is consistent, and consistently formatted, on the front end.
In our example, using custom fields frees up the content area for other information, such as a description or story about the piece of art.
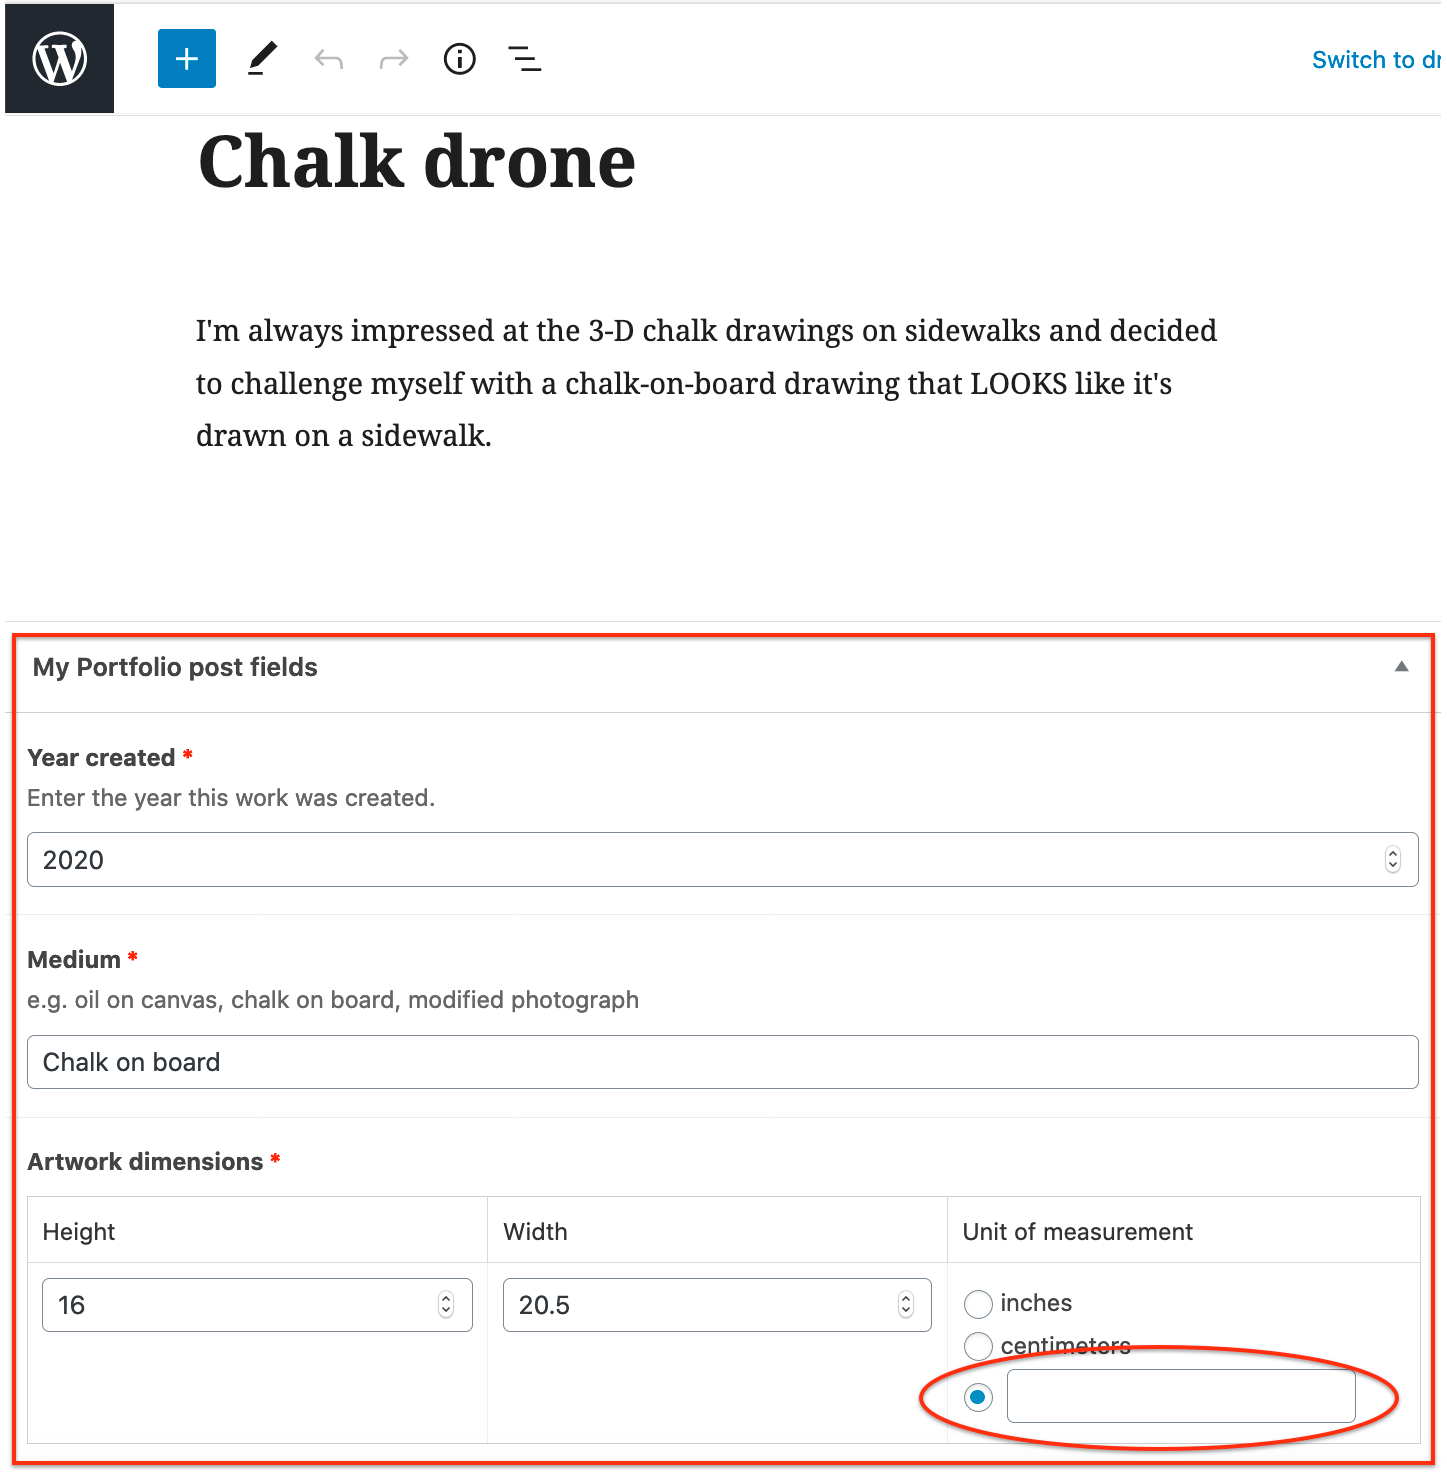
Here’s a screenshot of one of our custom posts in the WordPress block editor. You can see that the three custom fields appear below the text editor.
The Dimension field was set up so users can add additional units of measurement and it will be saved after adding.
Beaver Themer supports the Advanced Custom Fields plugin as well as WordPress custom fields and the Pods plugin, which means that in your Themer layouts you can easily set up field connections to display those custom field values.
You can also use field connection shortcodes, which return a text value so you can use more than one field value, or text plus a field value, into a Beaver Builder editor setting.
To create a shortcode, you click that same plus icon for the field connect but choose Insert instead of Connect.
Then a screen appears so you can specify information about the custom field and the shortcode is created and inserted automatically.
Here we’ve added a Text Editor module to the Themer Singular layout, as shown in this screenshot.
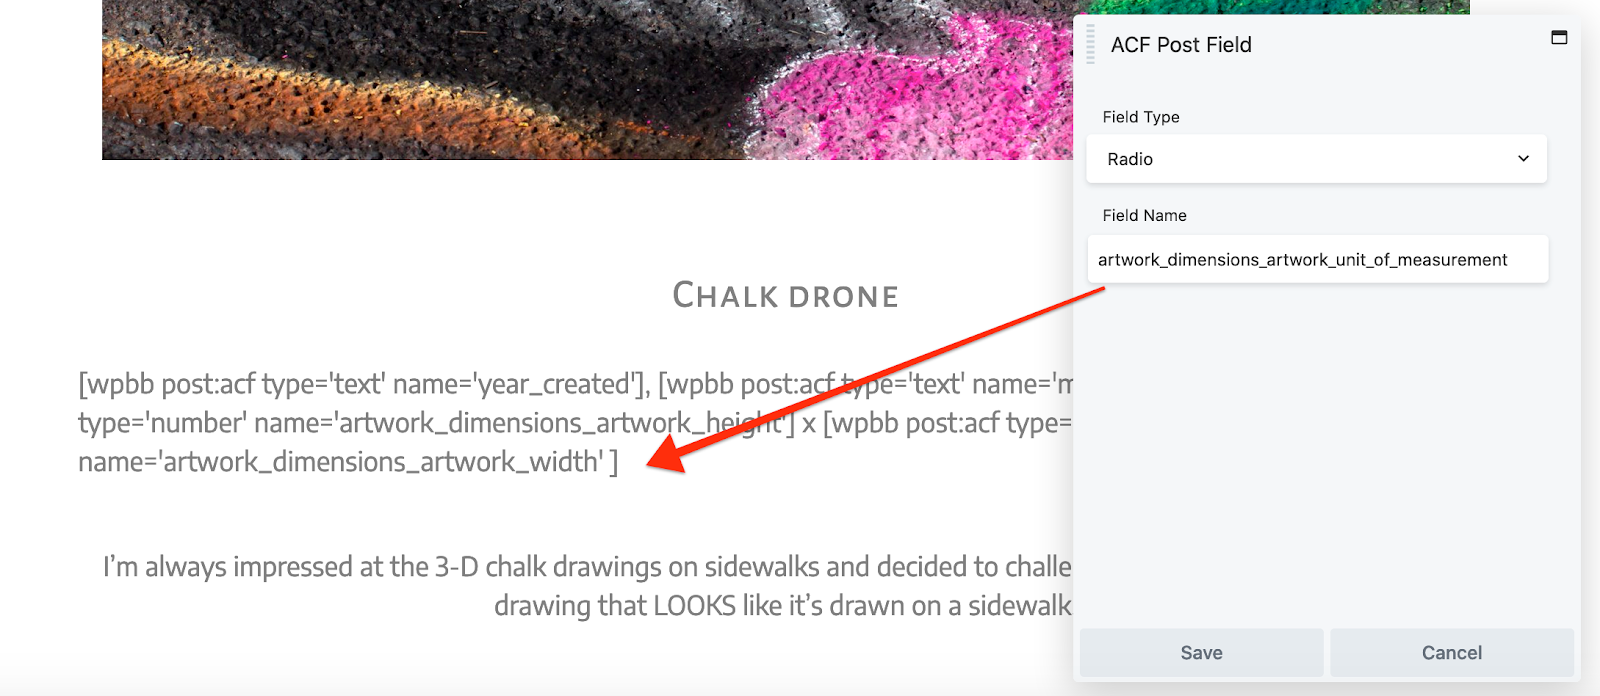
The string is long but was constructed one shortcode at a time (in square brackets) with commas or the times sign (x) separating the fields. When viewed after saving, the editor displays what you’ll see on the front end:
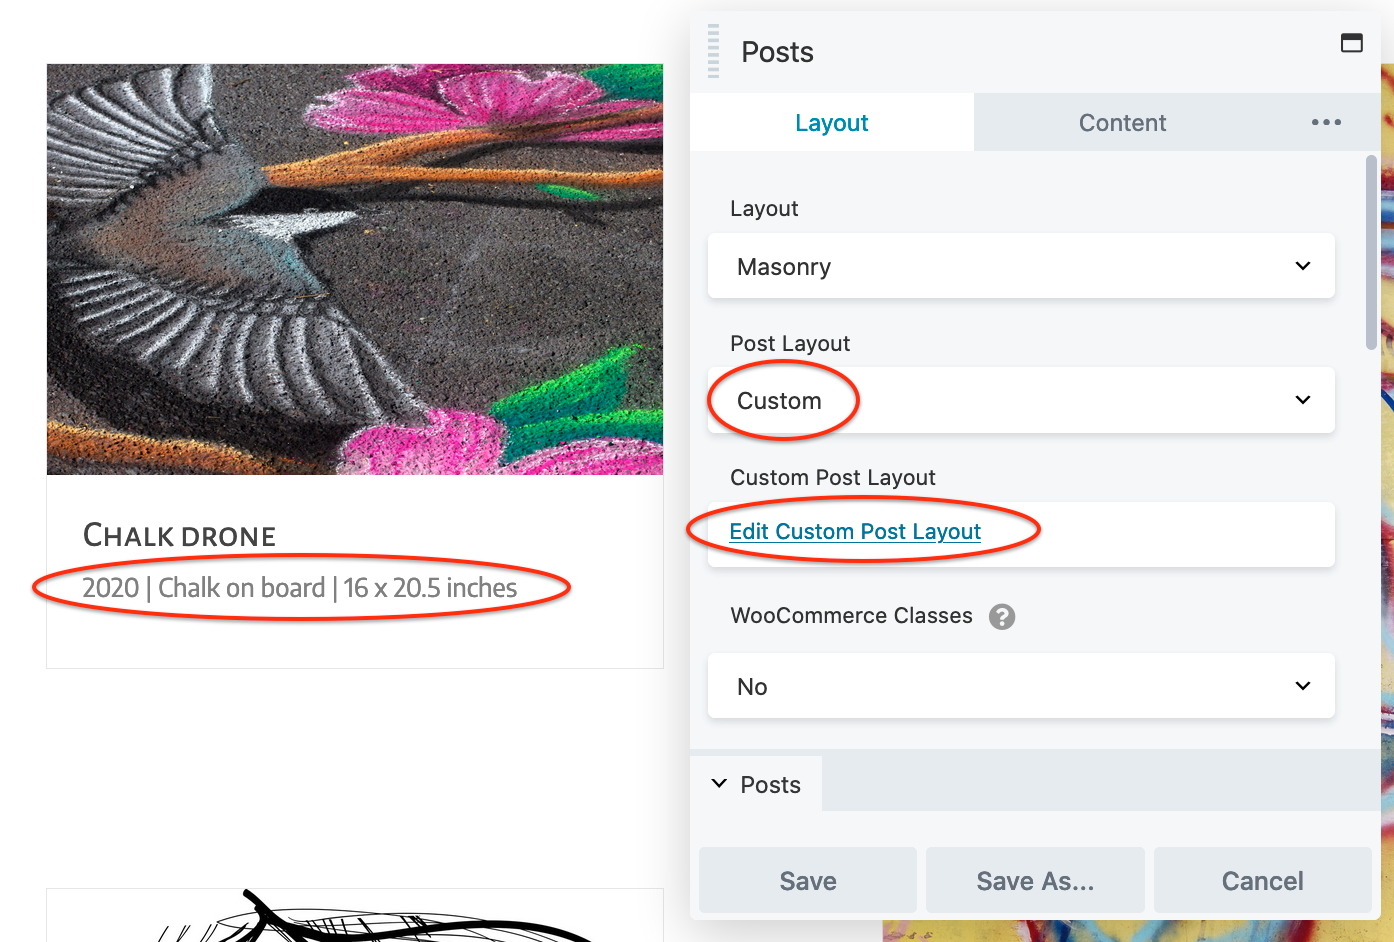
To display these custom field values in your portfolio, you can tweak the standard HTML output in the Posts module to include custom fields.
As shown in the following screenshot, change the Post Layout field to Custom, then click Edit Post Custom Layout.
The default HTML layout is displayed and you can modify it from there to add the custom field shortcodes.
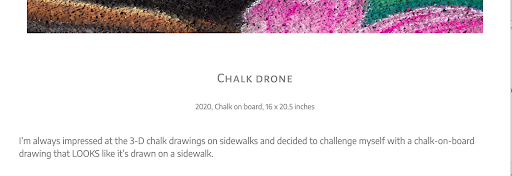
In our custom layout, we used a pipe to separate the three custom field values, as shown in the output.
Create categories, tags, or custom taxonomies
In our example portfolio, we’ve got photographs mixed with oil on canvas mixed with chalk, human faces mixed with abstract drawings.
Suppose you want the ability to categorize your art in various ways so you can group or filter what’s displayed.
In WordPress, there are two built-in taxonomies: categories, which can be hierarchical, and tags, which are not. You can create any categories or tags you want for use with standard posts.
If you have a custom post type, you can apply the same categories and tags that you’re using for standard posts, but in many cases, it makes more sense to create one or more custom taxonomies.
A custom taxonomy can be hierarchical like categories or nonhierarchical like tags, but in WordPress terminology, any custom taxonomy has “terms” rather than “categories” or “tags.”
You can use the CPT UI plugin or other plugins or the manual method to create custom taxonomies.
Then define your actual terms from the WordPress admin dashboard, just as you do for categories and tags.
Whether you use categories, tags, or terms from custom taxonomies, WordPress automatically creates an archive page for each term and you can add a location for your Themer Archive layout so it applies to these archive pages as well.
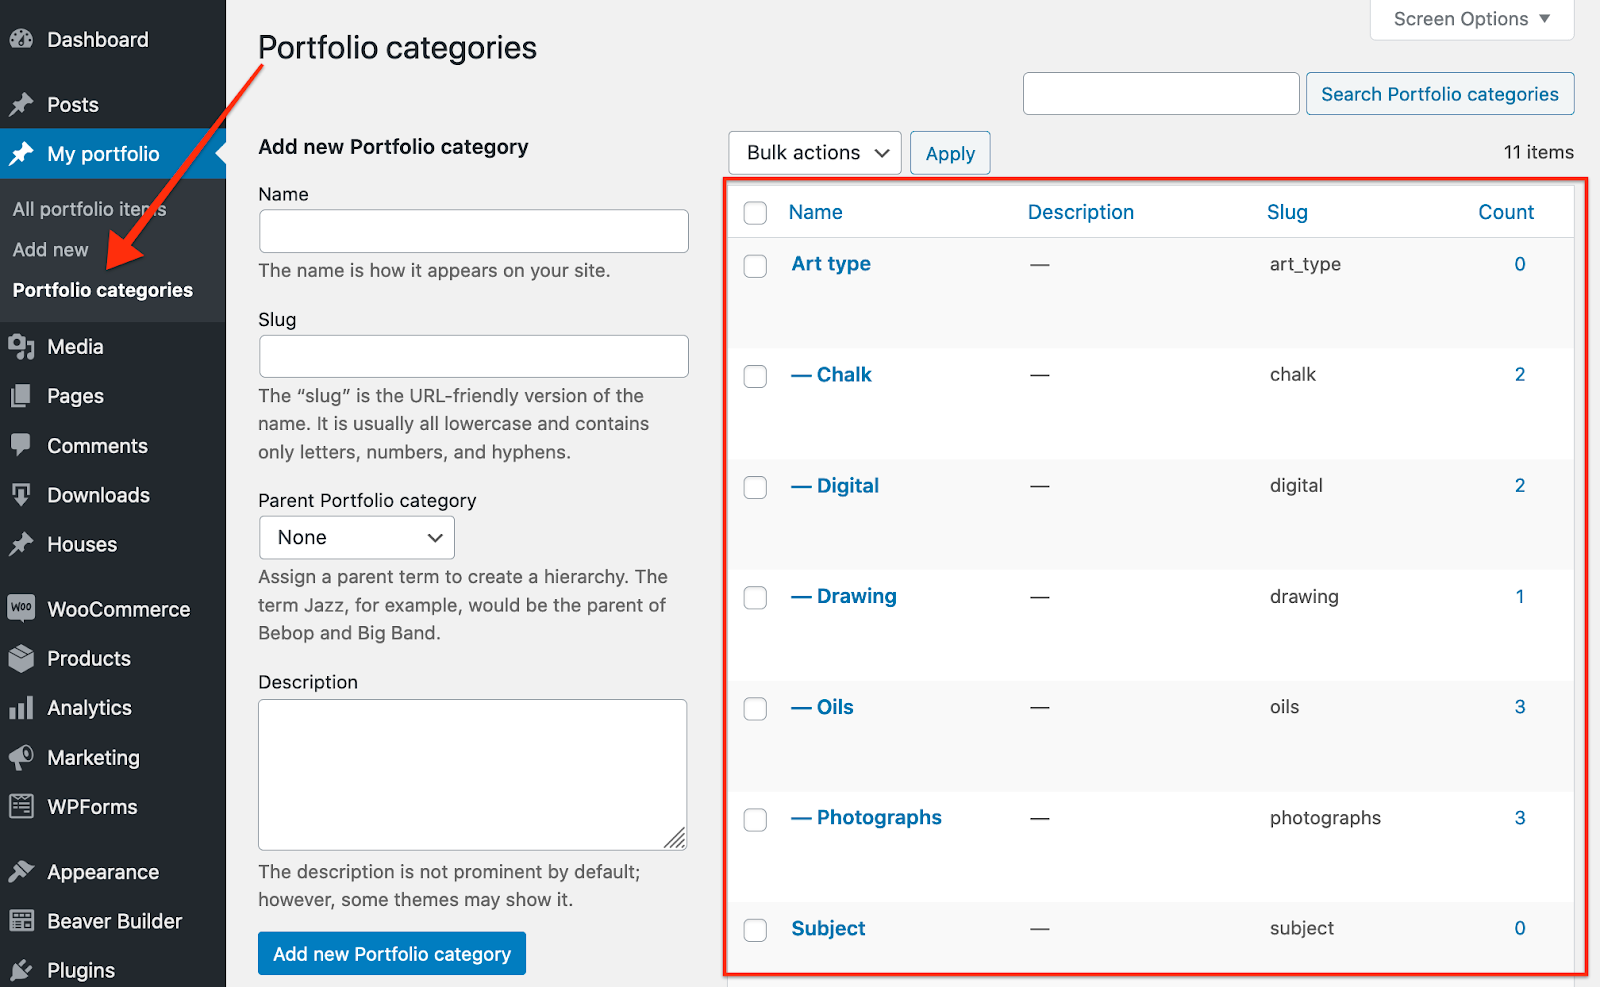
Here’s an example. We created a custom taxonomy called Portfolio categories and assigned it to the My Portfolio CPT.
As this screenshot shows, the custom taxonomy appears in the WP admin panel under the CPT.
We created two hierarchical sets of terms:
We went back through the portfolio posts and assigned the appropriate terms to each one.
Then in the Themer Archive layout, we modified the custom post layout to add a row that would display the post terms for each item.
We followed the procedure to add a field connection shortcode and got this panel of display options to choose from:

We set the Location for this Archive layout to include Post Category archives, and now when you click one of those category links on the archive pages, the category archive opens with the correct title and the correct post formatting:
Summary
In this post, we showed you the basic steps to creating a beautiful, responsive portfolio with Beaver Builder and Beaver Themer.
We showed you Themer basics of specifying locations and using field connections to easily create your portfolio. We showed how easy it is to change the style and layout of these pages.
We also ventured into the advanced territory: creating custom post types, custom fields, and custom taxonomies.
We didn’t include every step of how to make these work but hope that if you’ve never used custom post types in WordPress you’ll be inspired to dig in and do more learning.
Do you want to create your own portfolio? Give it a try and let us know how it goes!
1 Comment
Our Newsletter
Our newsletter is personally written and sent out about once a month. It's not the least bit annoying or spammy.
We promise.
Try Beaver Builder Today

Related articles
How to Create Headers and Footers with Beaver Themer
Page builders are great for creating beautiful pages, but they often don’t extend customization to headers and footers. This limitation…
How to Customize WordPress Website Header
Many elements make up a well-designed website. Your WordPress website header is particularly important because it’s the first thing visitors…
How to Use a Header Template in WordPress
Customizing a WordPress header isn’t often an easy process. If you’re not comfortable editing theme files, there aren’t many ways…
Join the community
We're here for you
There's a thriving community of builders and we'd love for you to join us. Come by and show off a project, network, or ask a question.
Since 2014
Build Your Website in Minutes, Not Months
Join Over 1 Million+ Websites Powered By Beaver Builder.
Great walkthrough! Thanks, Nancy!