Add a Video Background to a WordPress Page with Beaver Builder
Hey all! This post is by our friend Kevin Muldoon and it’s been sitting on the backburner for a bit. In 2017, we’re hoping to publish a bit more on the blog here and invite some more folks on to write guests posts.
To kick things off, Kevin wrote a great tutorial here on using Beaver Builder’s video background feature. Since writing this article, we’ve added the ability to link directly to a YouTube or Vimeo video and the ability to link to a video hosted on a different server. Hope you enjoy!
A video background can add a touch of professionalism to your website. Video backgrounds are common in corporate websites, portfolios, and online galleries.
If you have been searching for a new design for your website you will have undoubtedly seen video backgrounds being used. WordPress theme developers are always looking at ways of showing off their designs and frequently use a video background to showcase what their design can do.
Thankfully, you do not need to spend money on a new WordPress theme in order to add a video background to your website. By activating Beaver Builder you can have a professional video background on any page on your website in minutes. If you prefer, you can only display a video background on parts of your page.
In this tutorial I would like to show you how you can add a video background using the Beaver Builder visual page builder WordPress plugin in three easy steps.
Step 1: Find a Suitable Background Video
Adding a video background video using Beaver Builder is incredibly straight-forward.
You will find that the most difficult part of this tutorial is choosing which video to use on your website as there are thousands to choose from.
Choose a video that helps you set the tone you want to put across. For example, a video of a busy office with people working away looks great on a corporate website, whilst a calm nature video would work well with a health website.
There are a number of places online in which you can find free and premium videos for backgrounds.
My favourite place to find videos is Coverr. All the videos look professional and are free to download and use. There are seven new videos added each week across several categories so you are bound to find a video you love. Each video can be previewed before you download the zip file.
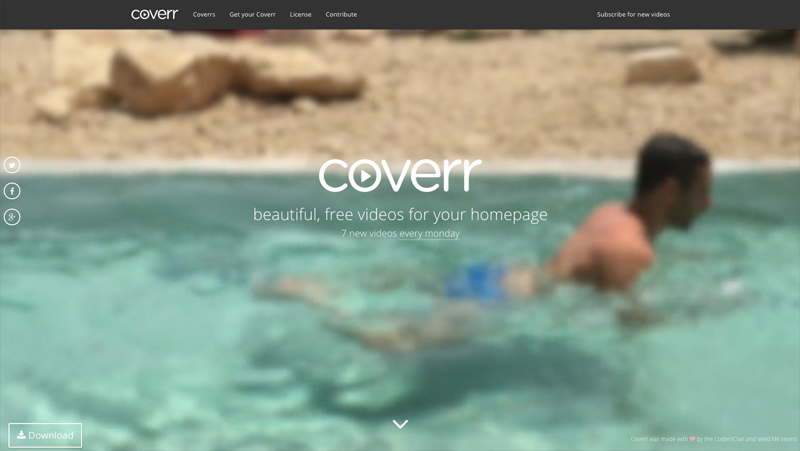
Coverr has a great selection of video backgrounds and they are all free to download.
Other good websites to check for free video backgrounds include (in no particular order):
- Mazwai
- Videezy
- Vidsplay
- Clipcanvas
- XStockvideo
- Pexels Videos
- IgniteMotion
- The Tanuri Experiment
- Beachfront B-Roll
- Stock Footage for Free
- Free HD Footage
- Distill
- Fancy Footage Club
- Splashbase
- Free Video Footage
You will find videos on video services too. On YouTube will come across channels like OrangeHD that provide video backgrounds. There are great videos to be found on Vimeo too via resources such as FreeHD and Life of Vids.
You will also find footage across some social services. Checkout subreddits such as Footage and Stockfootage on Reddit. Flickr is worth a look too, but be sure to select Creative Commons as the license.

Tens of thousands of video backgrounds can be found on VideoHive.
Premium video backgrounds won’t break the bank. Pricing on VideoHive starts from only $8 per video. There are over a quarter of a million stock footage files available on VideHive and over thirty-six thousand of them are suitable for video backgrounds.
Stock image and stock video services such as Shutterstock and VideoBlocks tend to be a little more expensive unless you subscribe on a monthly basis, but if your budget can stretch a little further you will find many great videos there.
Step 2: Prepare Your Video File
Once you have selected a video background, you need to prepare your file.
Your main video file should be saved in MP4 format. This should not be a problem as that is the file format which the vast majority of video websites use i.e. the file you downloaded will already be saved with the extension .mp4.
You will also have to upload your video in the WebM video format since Opera and Firefox browsers use this.
WebM is a royalty-free video format that is developed by Google (it was initially developed by On2 Technologies). It is used by Opera and Firefox instead of the HTML5 video tag <video>.
You will find many plugins and free and commercial tools to help you convert your video file to the WebM video format on the tools page of the Official WebM Project website.

Converting a small video file should not take long.
There is also a great online WebM conversion tool available from Online-Convert.
You can upload your file to the tool directly or link to a URL of the video file if you have already uploaded the video to your website. Video settings such as resolution, bitrate, and framerate, can be adjusted using the tool. You can also rotate and flip the video.
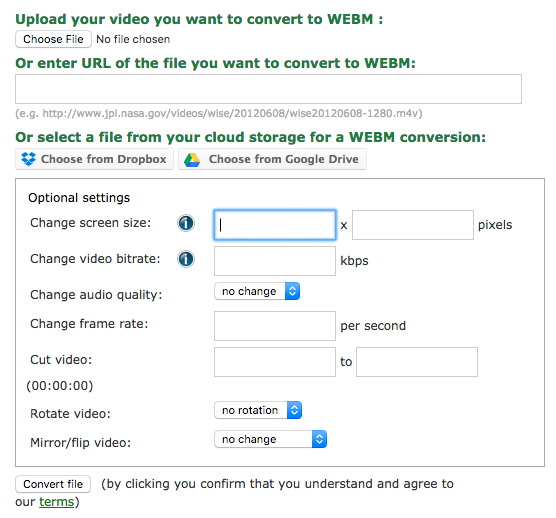
The file conversion tool from Online-Convert is a great resource.
The last thing you need to do is prepare a “Fallback Photo”. This background photo will be displayed if for any reason the video background cannot be displayed. For example, if the visitor is using an outdated browser that does not have the correct video codec.
If you want the fallback photo to match your video background, open the video on your computer and take a screenshot using the “Print Screen” key on your keyboard. Then paste the image into a photo editor and save the file. Alternatively, use a unique photo that has a similar look and feel to your video background.
I noted in the last section that my favourite resource for video backgrounds is Coverr.
One of the reasons I like Coverr is because the downloaded zip file provides you with everything you need.
Each zip contains the video in MP4, OGV, and WebM video formats. A full photo snapshot of the video at full HD resolution (1920×1080) is also provided.
Therefore, when you download a video background from Coverr, you will not need to use a video conversion tool or photo editor to prepare your video file.
Step 3: Assign Your Video to a Page with Beaver Builder
Now that you have two video files and a fallback photo, you can assign the files to a page using Beaver Builder.
There are two ways in which you can launch Beaver Builder for a page on your website (be it a blog post, page, or other post type).
The first option is to access the editor for the page in question. Once you are in the WordPress editor, simply click on the “Page Builder” tab to launch Beaver Builder for that page.

An example of the WordPress page editor.
Alternatively, you can launch Beaver Builder from the frontend of your website.
In order to do this you need to be logged into your website so that the admin bar is displayed at the top of each page. Then simply find the page you want to add a video background to and click on the “Page Builder” link at the top of the page.
You can load Beaver Builder when browsing your website.
Both examples above assume that you are modifying an existing post or page on your website. If you would like to create a page from scratch, create a new page on your website and then load the blank template from the Beaver Builder templates box. This allows you to start creating your page with a blank canvas.
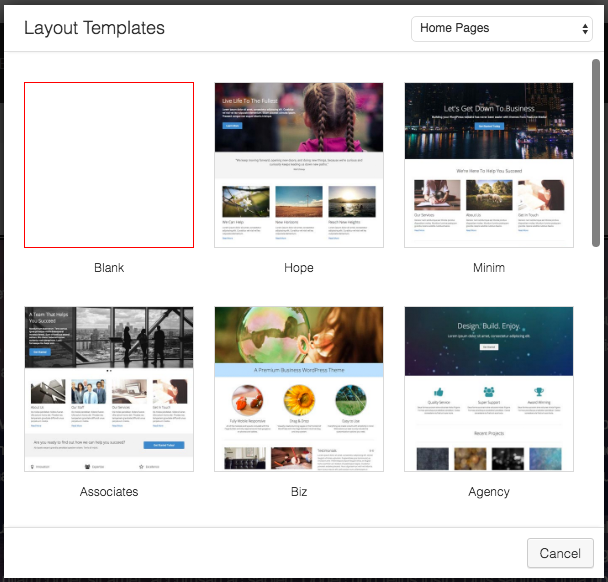
Click on the “Templates” link in the Beaver Builder toolbar to load the layout templates selection box.
In the example below I am adding a background video to an existing page of content.
With Beaver Builder now activated, hover over the area you want to add a video background to and you will see a list of icons displayed at the top of the row.
Click on the spanner icon to load row settings.
Select the row settings icon.
When the row settings box is loaded it will default to the style tab.
Scroll down to the section entitled background. You will see six options available in the dropdown box: None, Color, Photo, Video, Slideshow, and Parallax.
Select Video.
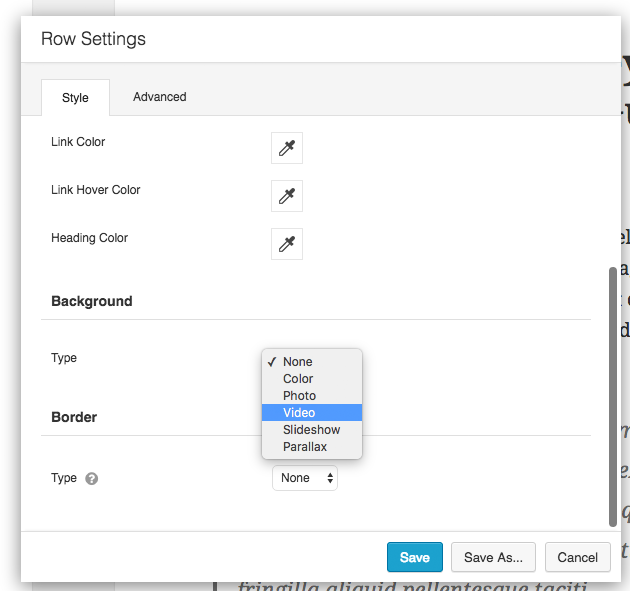
Select video as your background via the row settings box.
This brings up options to upload your video in MP4 and in WebM format and to upload your fallback photo.
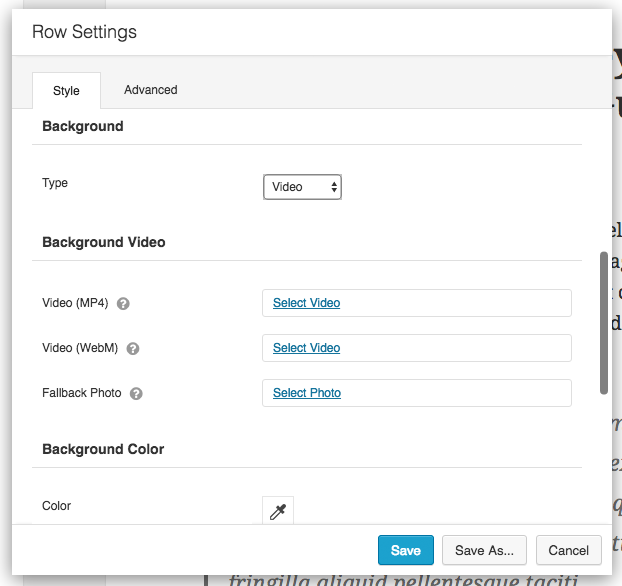
Three different fields are displayed.
Clicking “Select Video” or “Select Photo” loads up the WordPress media library. You can upload each file or select them from your media library if the files have already been uploaded.
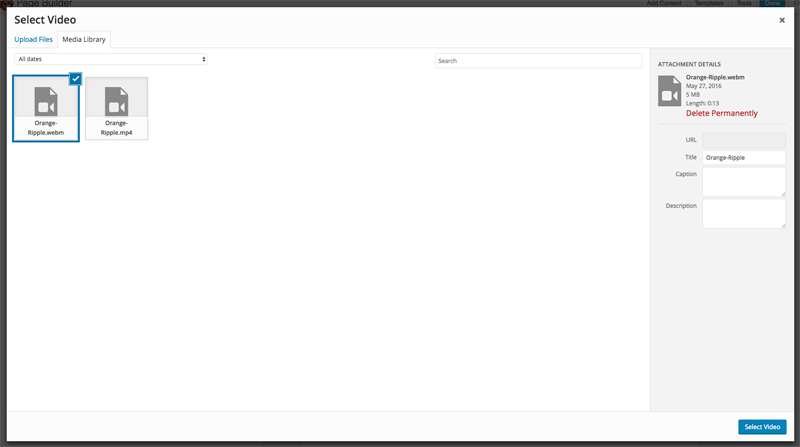
Upload both video files and the fallback photo.
Once you have uploaded all files the row settings box should look something like this.
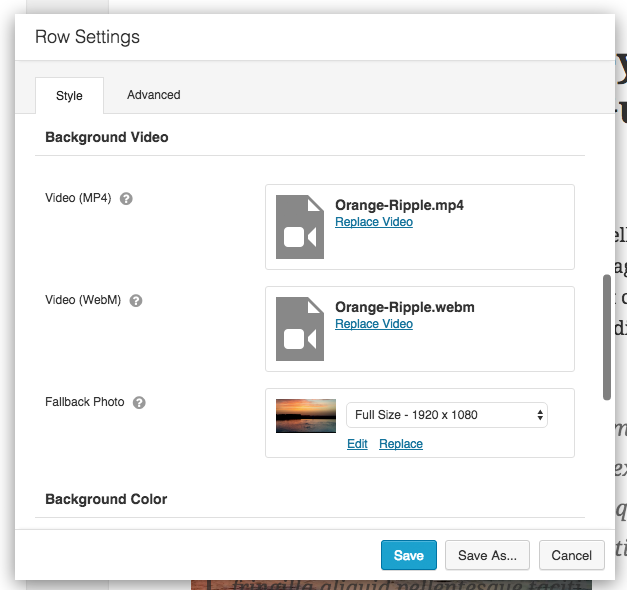
All files have now been uploaded.
At this point you can save the row settings box. If you wish, you can also save the row settings box as a template and make it global across your website.
As you can see below, the video is now displaying in the background of my text.
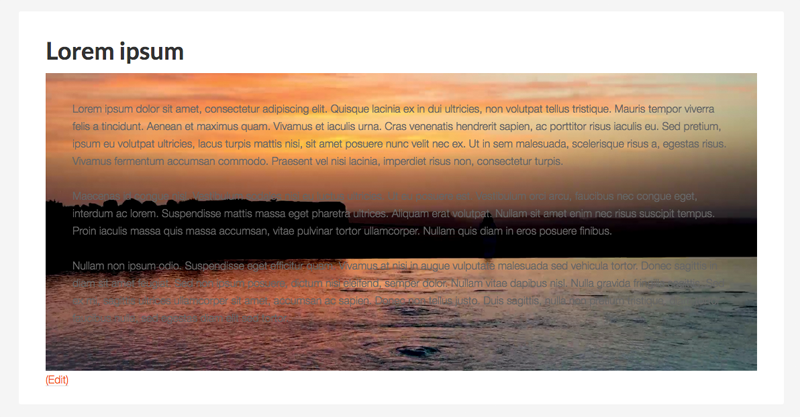
How my page looked once I set my video background.
If your background video does not span the full width of the content area (e.g. due to the theme you are using), change the content width to full width in the settings box. You can also adjust the page width and row height from this area.
Should you need to change the layout more, check out the advanced tab as it allows you to change the padding and margins of your row. You can also define how the layout looks on mobile devices and apply CSS selectors from this area.
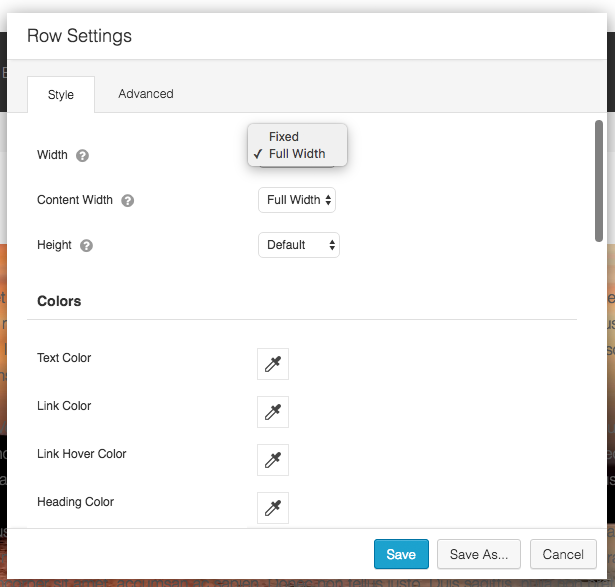
Adjust the width of your page to full width if necessary.
In the example of my video background I showed previously you may have noticed that the text on the page does not stand out against the video background.
You can resolve this by adjusting the colors that are used in the row. The text color, link color, link hover color, and heading color, can all be changed.
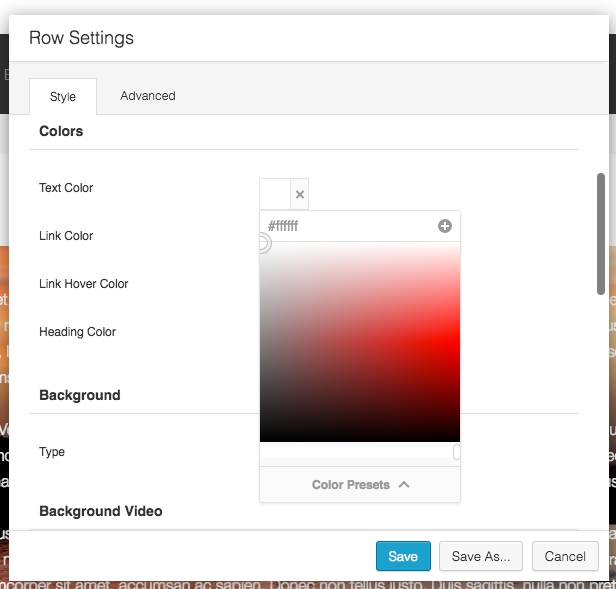
Adjust your colors to help your content stand out.
A background overlay will help your video stand out or fade into the background. This is incredibly useful as it will help you display your video exactly how you want it.
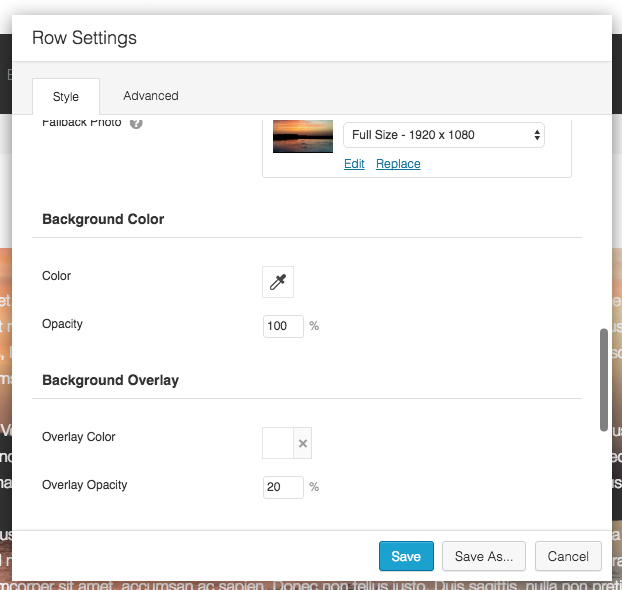
A background overlay is an effective way of modifying the look of your video.
I encourage you to play around with the overlay color and opacity until you achieve the look you want. In the screenshot below you can see how my video background looked when I applied a red overlay color with an opacity of 50%.
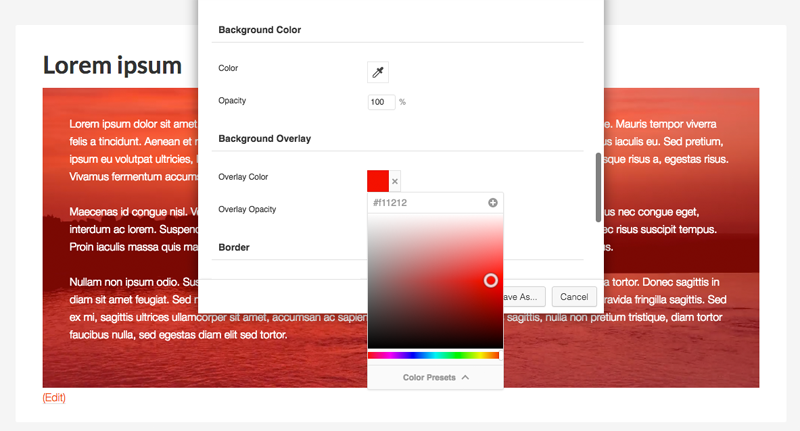
Be sure to take advantage of Beaver Builder’s opacity feature.
A border can also be applied to your row. You can select a solid, dashed, dotted, or double border. The color, opacity, and width of the border can be defined too.
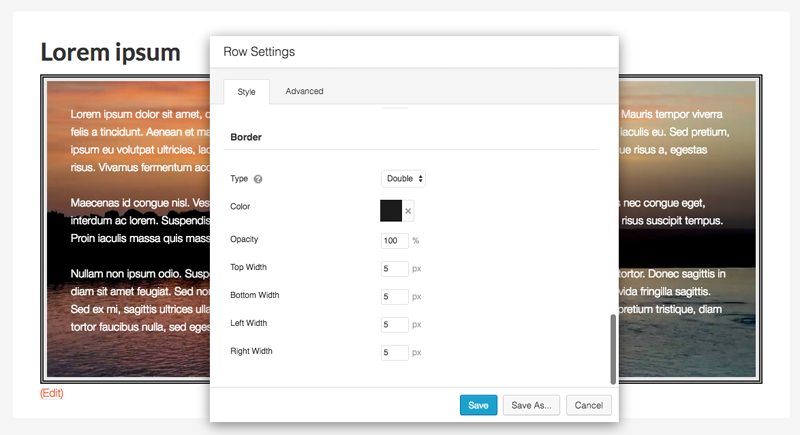
Borders can be placed around your content area.
Beaver Builder is a responsive solution that works on all modern browsers, however it is still wise to check your page on different browsers to make sure that your page looks exactly how you want it.
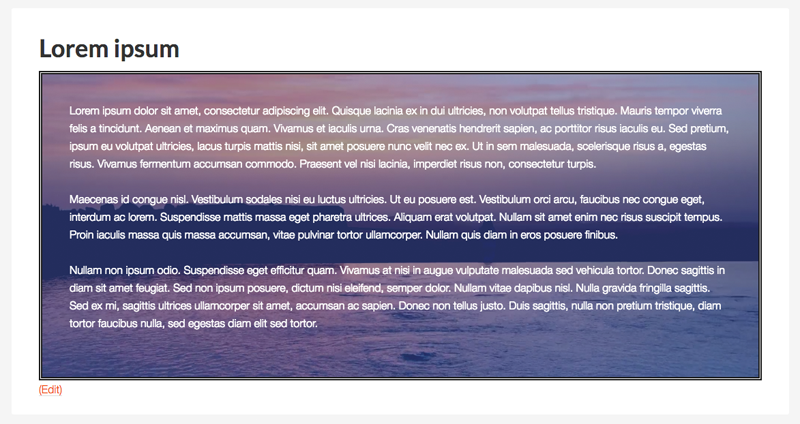
Video backgrounds can help your pages come alive.
Once you understand how video backgrounds can be added using Beaver Builder, you will be able to apply video backgrounds to pages in a manner of minutes. I recommend downloading a dozen or so videos initially so that you can test a variety of videos on your website and see what works and what doesn’t.
Final Thoughts
I have only scratched the surface on how video backgrounds can be used on your website.
Beaver Builder allows you to create a unique layout on your pages and populate them with dozens of content modules and WordPress widgets. In the example above I showed how a video can be applied as a background behind some text, however video backgrounds could be applied to anything.
For example, you could display a video as the background of a content slider, a gallery, a pricing table, a post carousel, or as part of your landing page. There really is no limit to what you can do.
I hope you have enjoyed this tutorial and found it useful. If so, I encourage you to follow us on Facebook, Slack, and Twitter.
Be sure to check out the Beaver Builder blog over the coming months as we have some fantastic content and tutorials scheduled 🙂
Good luck.
Kevin
17 Comments
Related articles
Case Study: How One Freelancer Built a Web Design Business with Beaver Builder
Wondering about Beaver Builder for freelancers? Cami MacNamara operates WebCami Site Design, a successful solo web design business in West…
Beaver Builder Keyboard Shortcuts (Double Your Design Speed)
Want to build pages faster in Beaver Builder? You don’t need extra plugins, just your keyboard. These 10 essential Beaver…
Beaver Builder Outline Panel: The Key to Faster Page Building
If you’ve ever found yourself endlessly scrolling to find that one specific element buried deep in your web page design,…
Join the community
We're here for you
There's a thriving community of builders and we'd love for you to join us. Come by and show off a project, network, or ask a question.
Since 2014
Build Your Website in Minutes, Not Months
Join Over 1 Million+ Websites Powered By Beaver Builder.
 Beaver Builder



Excellent Informative Inputs Kevin! Thanks!
Great tutorial! Thanks!
But how do we get a video to work in the background on a mobile browser?
Hey Dave. I believe we disable background videos on mobile. The reason for this is most mobile connections are slower and many folks pay for their data. I believe you’ll have to add the video to the row manually, using code, to work around this. Sorry for the trouble.
The video doesn’t work well responsively.
Awesome post! Very informative and just what I was looking for. Please continue to publish these type of posts. Thank you for sharing.
Background videos don’t seem to work too well for me. My MP4 file is only 9.5mb and it takes a long time to load ( about 5 seconds) and seems to stutter quite a bit. I’ve got mp4 and webm (1.7mb) versions uploaded. Any ideas? What am i doing wrong?
Hey Darryl! Sorry you’re having trouble. You might want to check out this article and see if you can optimize the video?
http://rigor.com/blog/2016/01/optimizing-mp4-video-for-fast-streaming
Can you make the video parallax?
Hey Steven. It’s not possible to do that with Beaver Builder, sorry.
hi – what version of Beaver Builder is this? I don’t get all the options for different file types when I try to load a video header.
Anyone got any ideas pls 🙂
If I use a background video from a Youtube url the quality is always 480p. It there anyway to change this?
The latest version does not give an option to use a video as a background. Any suggestions?
Hey Sheila! Are you using the free or a paid version of BB? We added some additional options in the background selector, but video should still be there. If not, shoot us a message via our support or contact page and our support team can take a look. 🙂
The background video is still displaying on mobile, but it is not displaying well responsively. What is the solution to this? Looks beautiful in a browser but does not convert when viewing on my mobile device.
I have uploaded a 3MB mp4 video to play on my home page header which works when I am in edit mode with Beaver Builder. Once I publish the change, the video will still continue to play until I navigate to another menu page. Upon returning to my home page where the video is, the video no longer plays in the header. What could be the problem?
How can I get the video to pause after it’s played through once. Then it should freeze on the final frame…
I don’t believe this is possible without implementing the background video with custom code. Sorry.