
It’s difficult to succeed in business without keeping up with your customers. Otherwise, how can you offer a product or service that consistently meets their needs? Fortunately, surveys can help you better understand your buyers, build brand loyalty, retain customers, and improve your service. Keep reading to learn how easy it is to create a customer survey for WordPress.
In this post, we’ll discuss some of the benefits of customer surveys before taking you through the different ways you can utilize them on your site. Then, we’ll share our four-step guide to creating a customer survey for WordPress using Gravity Forms and Beaver Builder. Let’s dive in!
Table of Contents
- The Benefits of Customer Surveys
- An Overview of the Different Types of Customer Surveys
- How to Create a Customer Survey in WordPress (In 4 Steps)
- Install and Activate the Gravity Forms Plugin and the Gravity Forms Survey Add-On
- Create Your Customer Survey Form
- Install Beaver Builder and Create a New Landing Page
- Add the Customer Survey to Your New Page
- Conclusion
The Benefits of Using Customer Surveys
There are many benefits to using customer surveys. They’re so popular that 97% of businesses use customer satisfaction metrics to improve their companies.
For example, they help you determine areas to improve. If a consumer has a negative experience on your site or with your business, you can use their feedback to prevent further issues. Surveys can identify everything from User Experience (UX) issues to poor customer service.
Furthermore, you can improve customer relationships and foster consumer loyalty. Thoughtful surveys help your audience feel heard and appreciated and show that you care about the customer experience.
Responses to customer surveys can also serve as free marketing materials. Positive feedback can become reviews or testimonials on your site to build trust with your audience:
Finally, if you design your survey well, you can use it over a long period to monitor your progress. Your questions are likely to remain the same. Therefore, you can compare the data and see whether you’re improving.
An Overview of the Different Types of Customer Surveys
Customer surveys can function in a variety of ways on your site. Therefore, you might want to design and use a few different kinds to get varied feedback.
For example, product or service feedback surveys help you gain insight into the customer experience. You might utilize a Customer Satisfaction Score (CAS) to identify improvements you can make to your products and your overall UX:

You might also include a Net Promoter Score (NPS). This survey can help you discover how likely customers are to recommend your business or products. Alternatively, customers can rate you according to the Customer Effort Score (CES), which addresses how easy it is to interact with your service.
Moreover, you might use a churn survey. In an ideal world, you’d never lose clients, but unfortunately, it happens. Gaining feedback from customers who are leaving your site or terminating their relationship with your business can help you identify areas for improvement and retain users.
Customer surveys can also help you with market research. You can gain valuable data about potential or existing customers. If you’re clever with your questions, you can even use them to size up your competitors.
Plus, you can feature customer surveys on your WordPress site in various ways. For example, you might embed your forms within landing pages, include them in popup boxes, or create links within your email marketing content. You can get creative with your customer surveys and find the right type to suit your business.
How to Create a Customer Survey in WordPress (In 4 Steps)
Now, let’s explore four steps to create a simple customer survey for a landing page on your WordPress website!
Step 1: Install and Activate the Gravity Forms Plugin and the Gravity Forms Survey Add-On
To get started with your customer survey, you’ll need a quality form-builder. We’re opting for Gravity Forms for our tutorial. With its easy drag-and-drop editor, you can create over 30 form types with Gravity Forms:

Select a plan, and download the plugin .zip folder onto your device. Then, head over to your WordPress dashboard and navigate to Plugins > Add New > Upload Plugin:
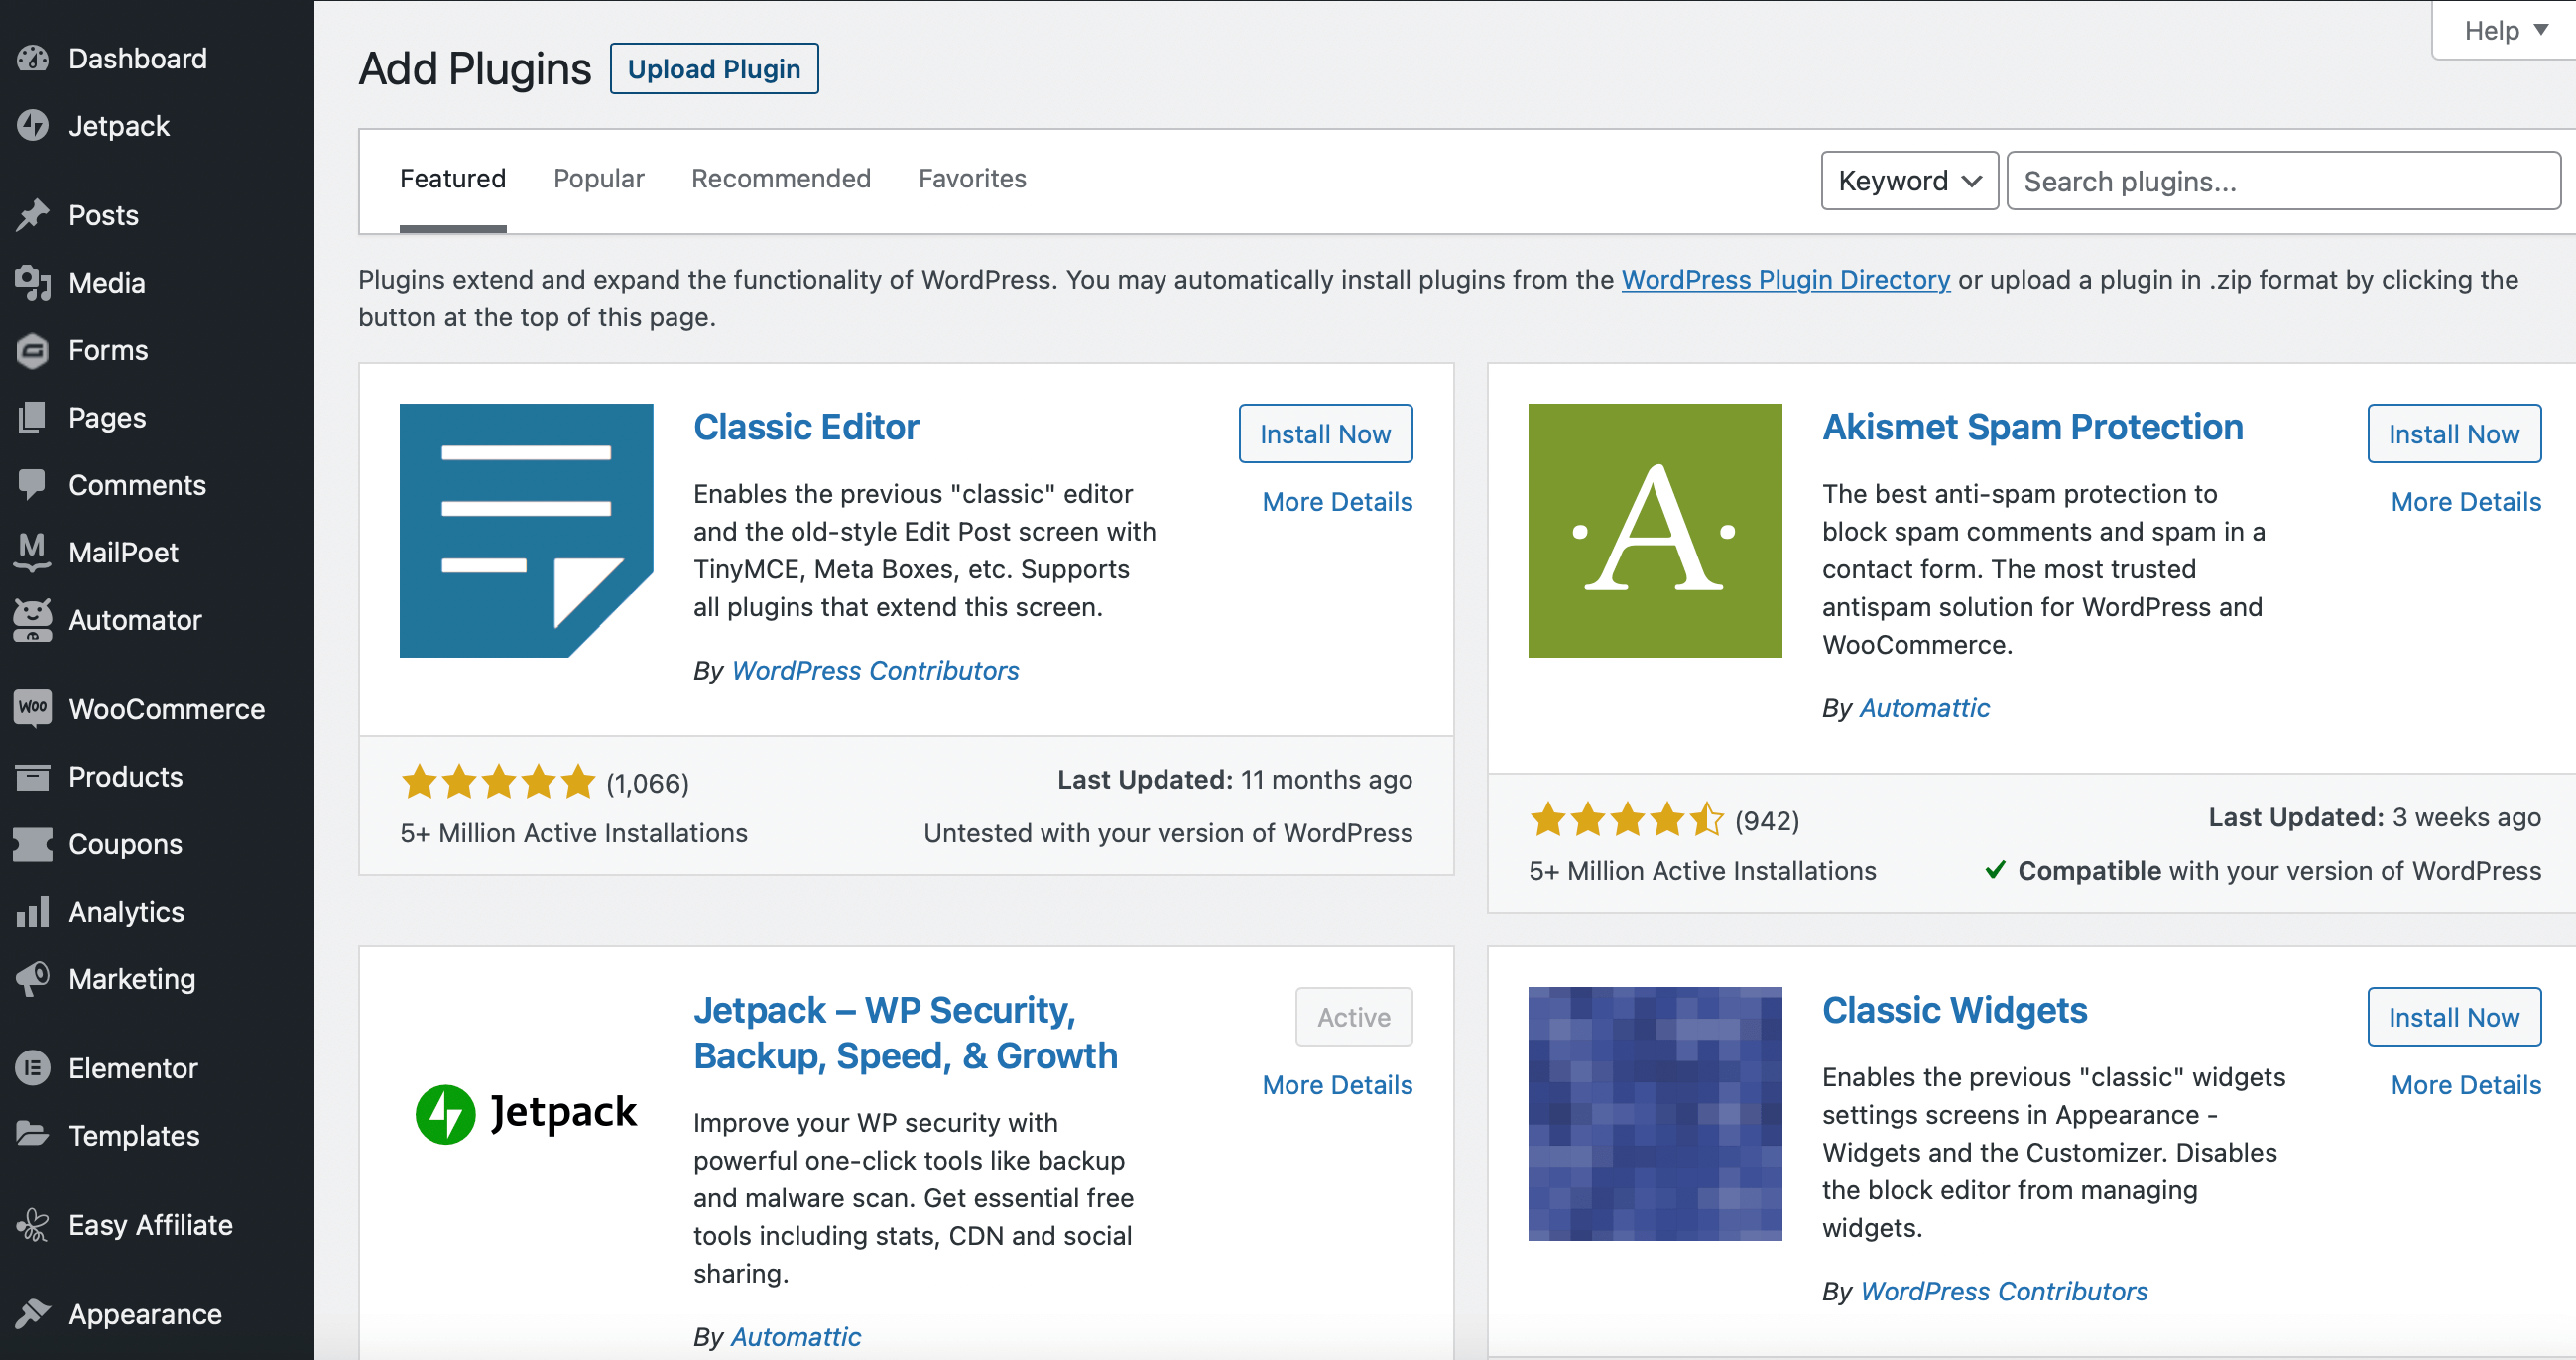
Upload the plugin file here, and then click on Install Now. Once it’s installed, go ahead and activate Gravity Forms.
You should see Forms appear in the left sidebar. You’ll need to input your license key for the plugin. Now, you’re all ready to start building forms!
Unless you purchased the Elite version of Gravity Forms, creating a customer survey is easiest with the Gravity Forms Survey Add-On, which you’ll need to download separately. Follow the previous steps to install and activate the add-on.
Step 2: Create Your Customer Survey Form
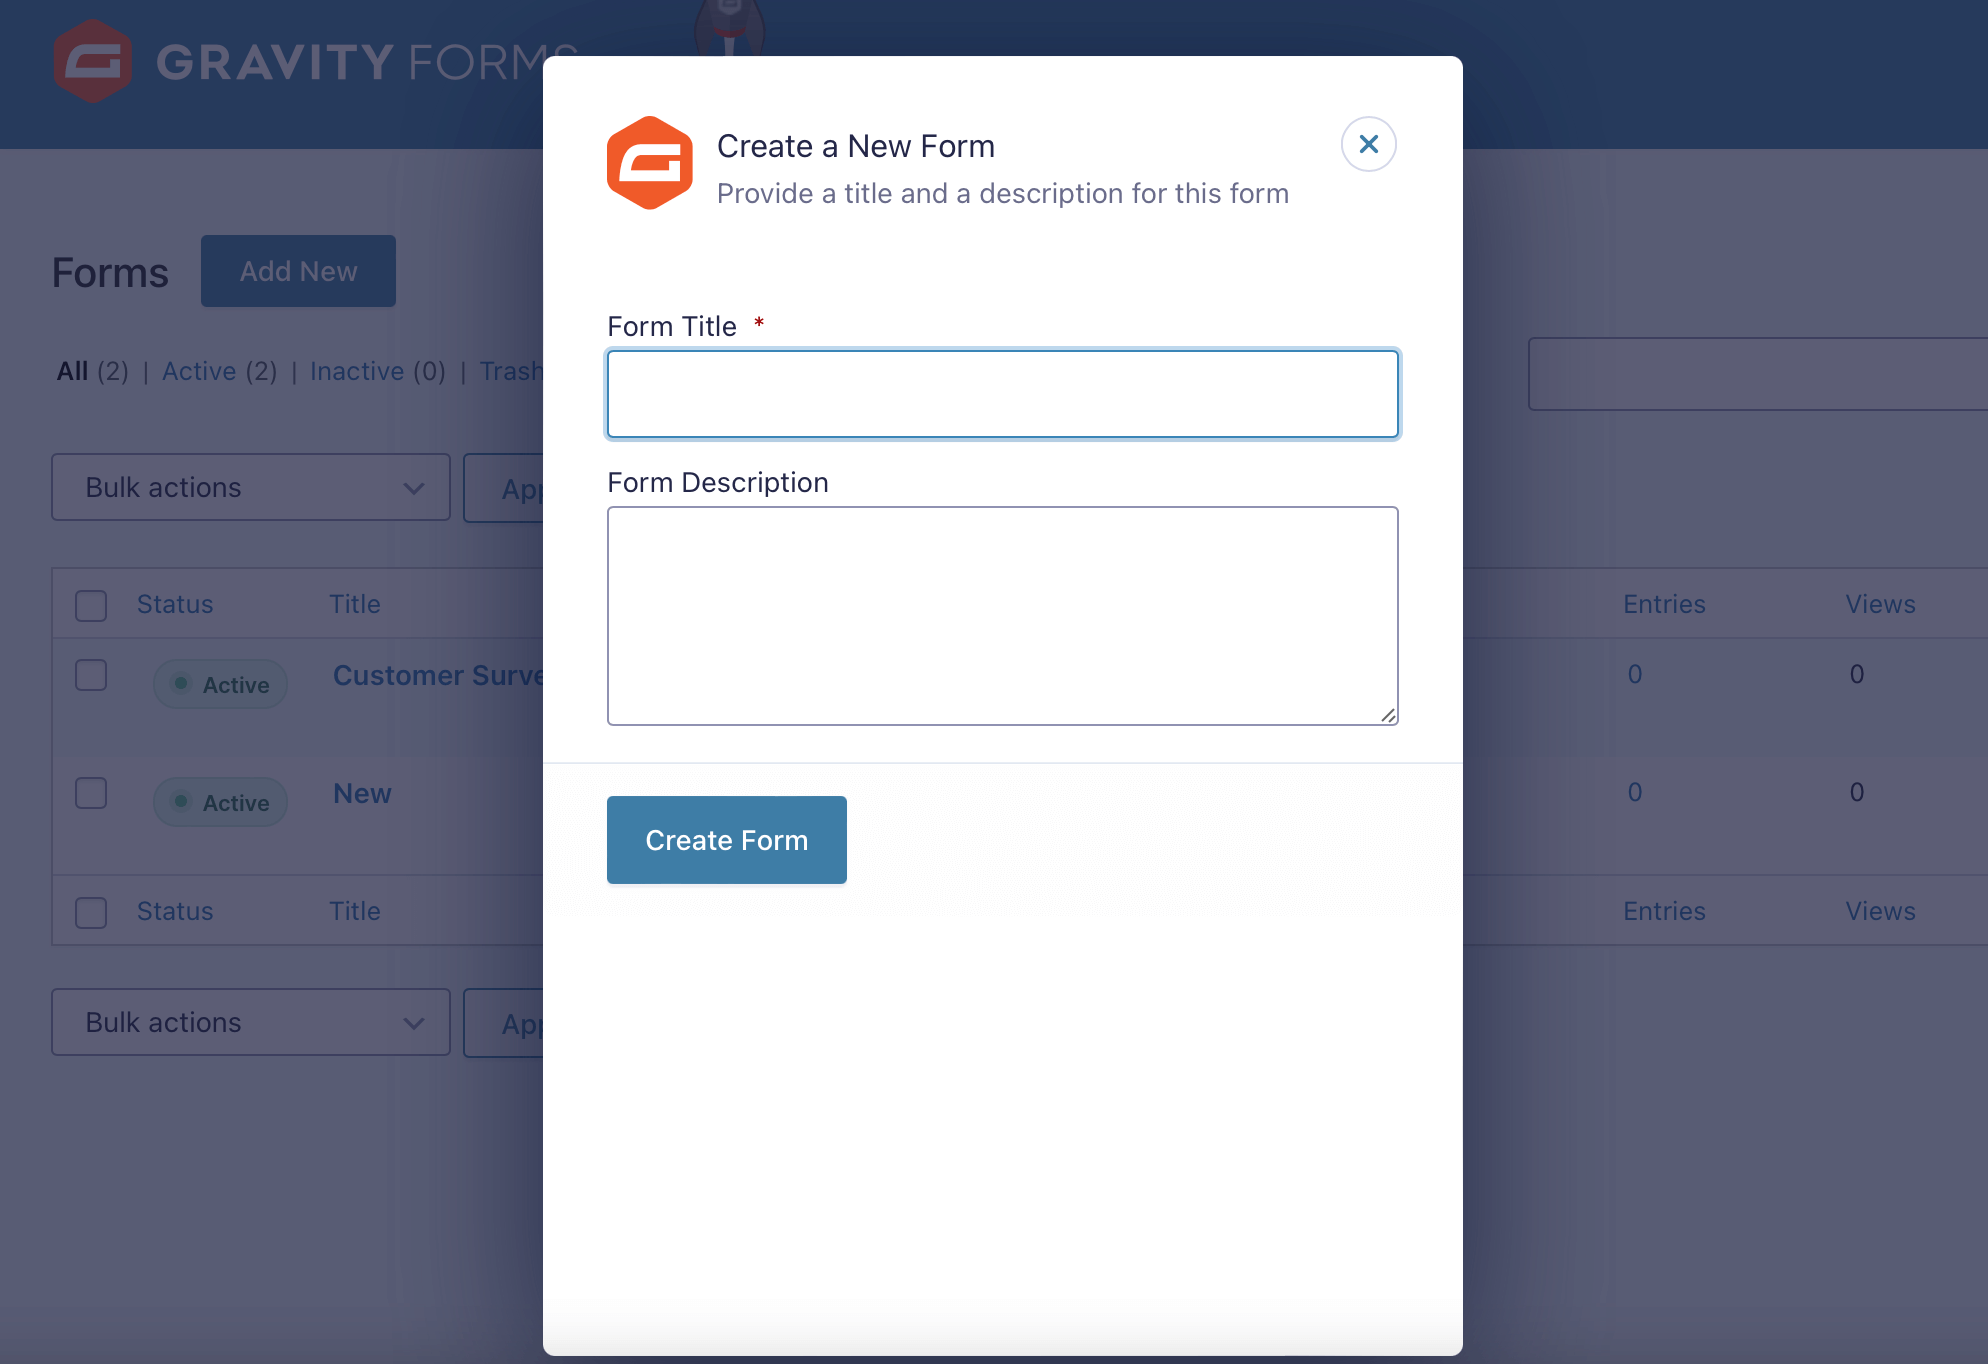
Now head to Forms > Add New:

A popup box will appear asking for a Form Title and Form Description. Once you’ve entered the text, click on Create Form:
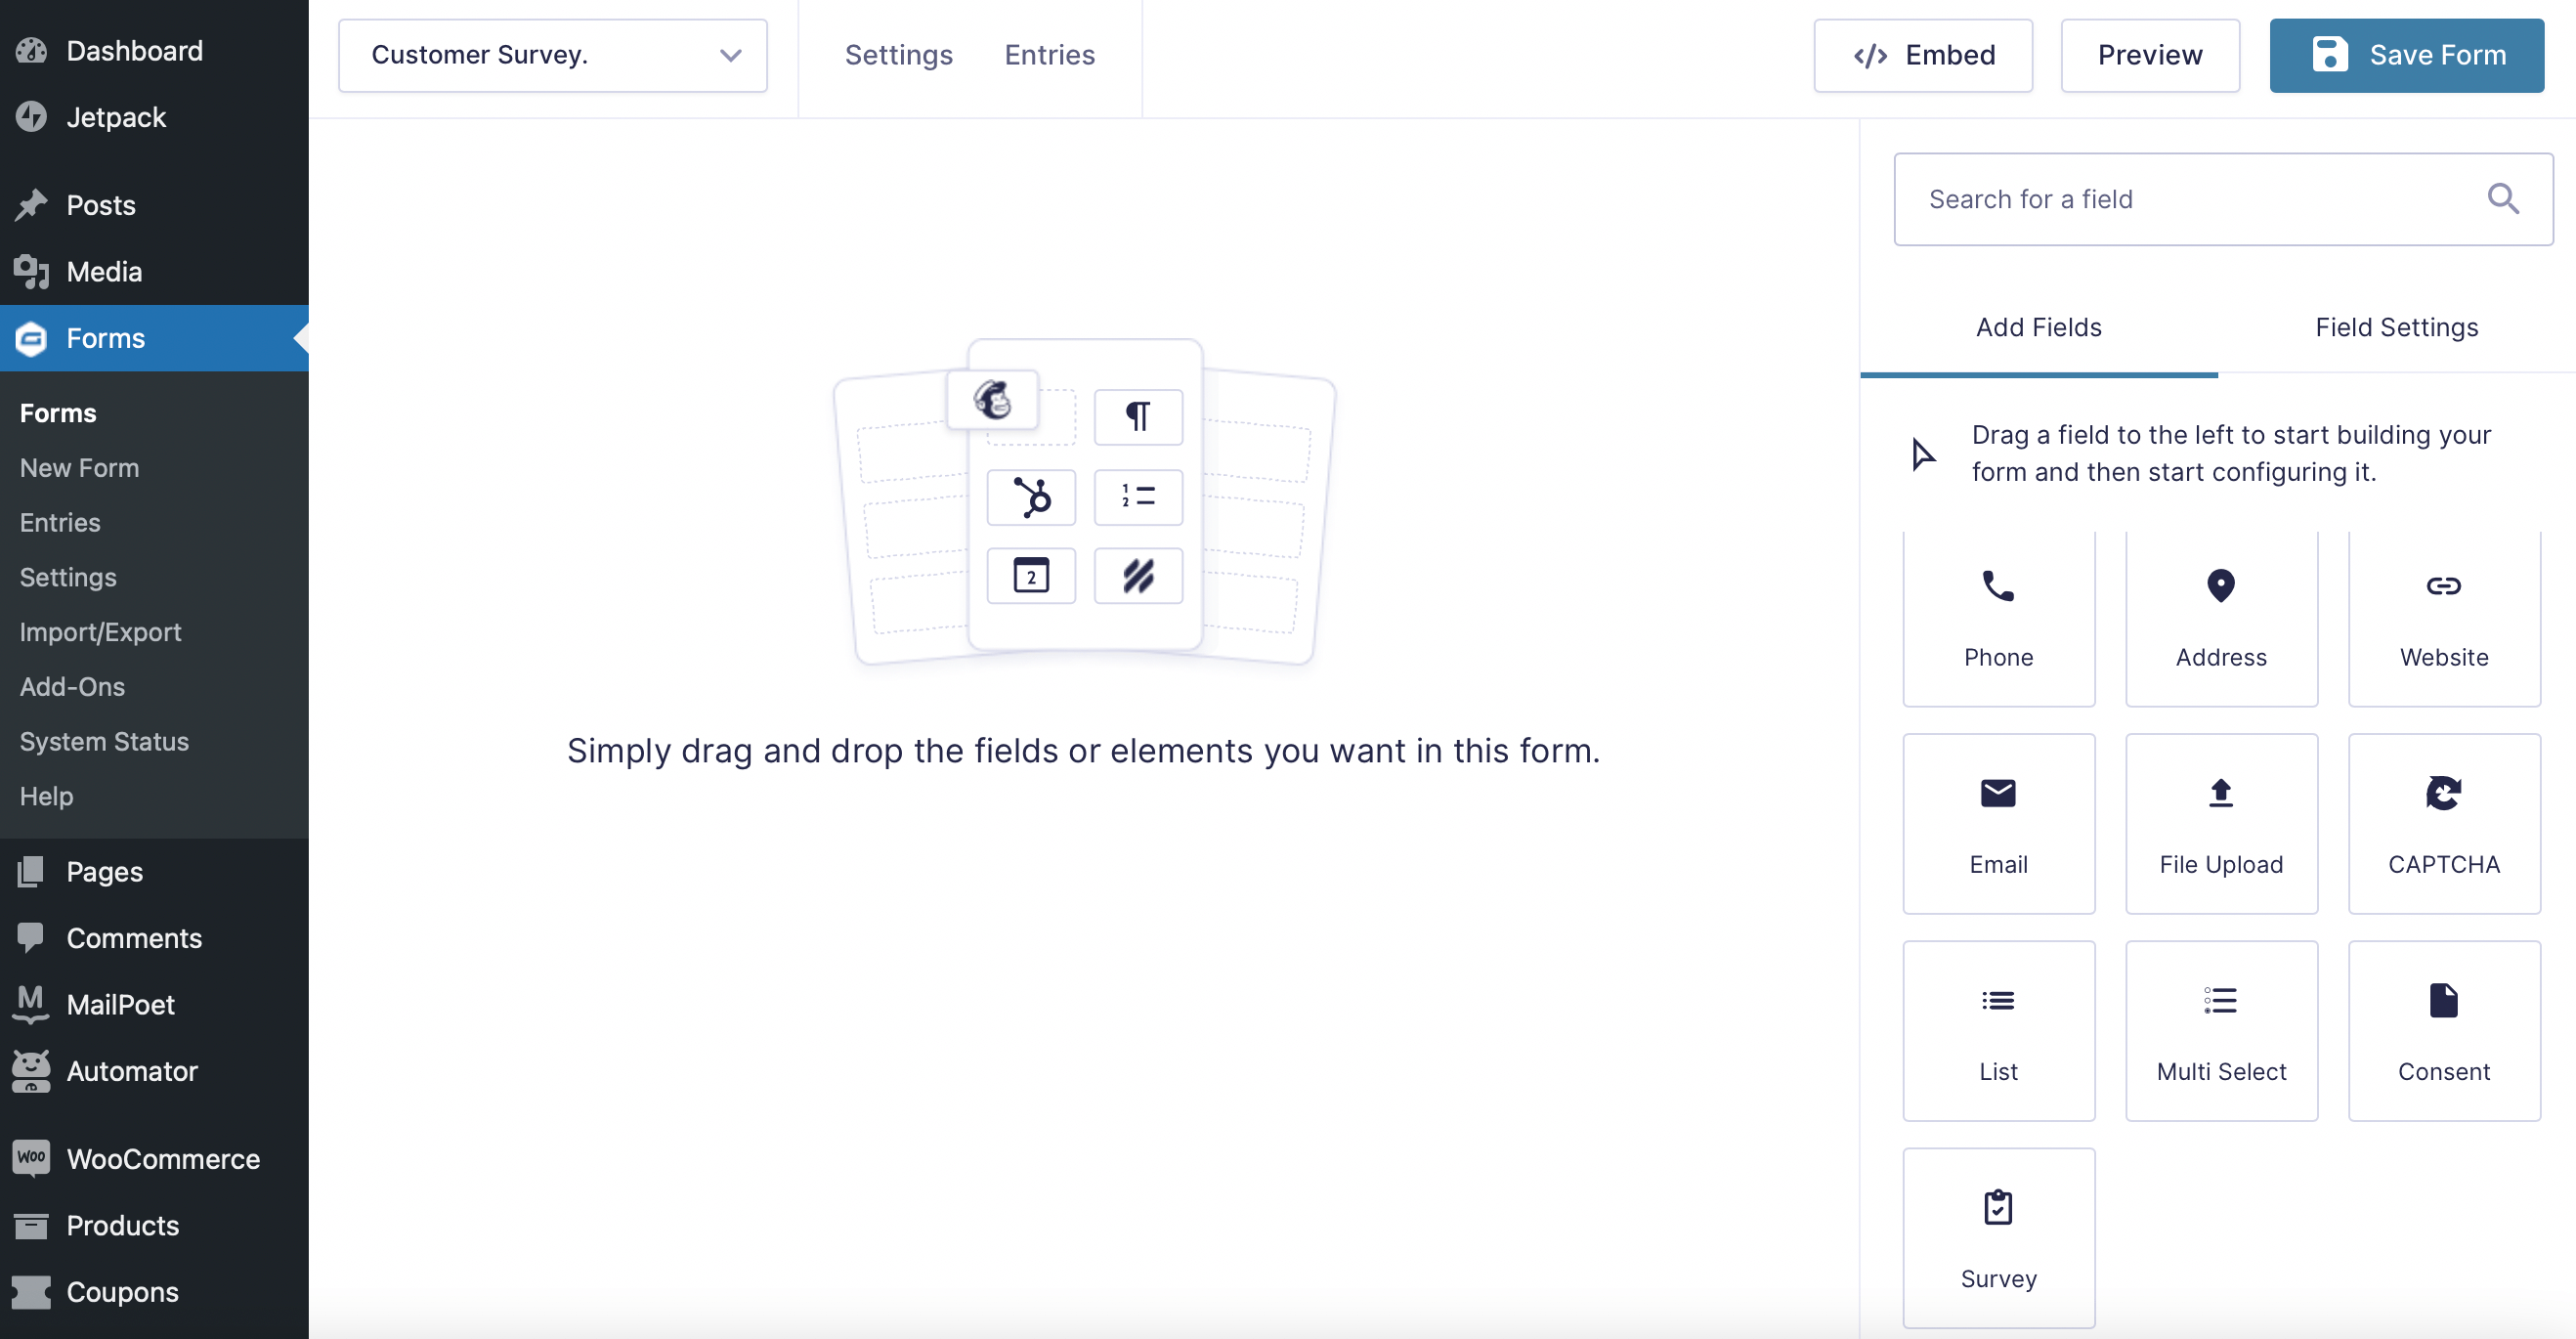
You should now arrive at the editing interface. Gravity Forms utilizes a drag-and-drop form builder, so you can start creating your survey using the fields to your right. There are Standard, Advanced, Post, and Pricing fields to customize your form:

If you’ve installed the Gravity Forms Survey Add-On successfully, under Advanced Fields, you should also see a Survey field:
Simply drag this field onto your page, and select the survey in the editor. To your right, you should see three tabs appear: General, Appearance, and Advanced:
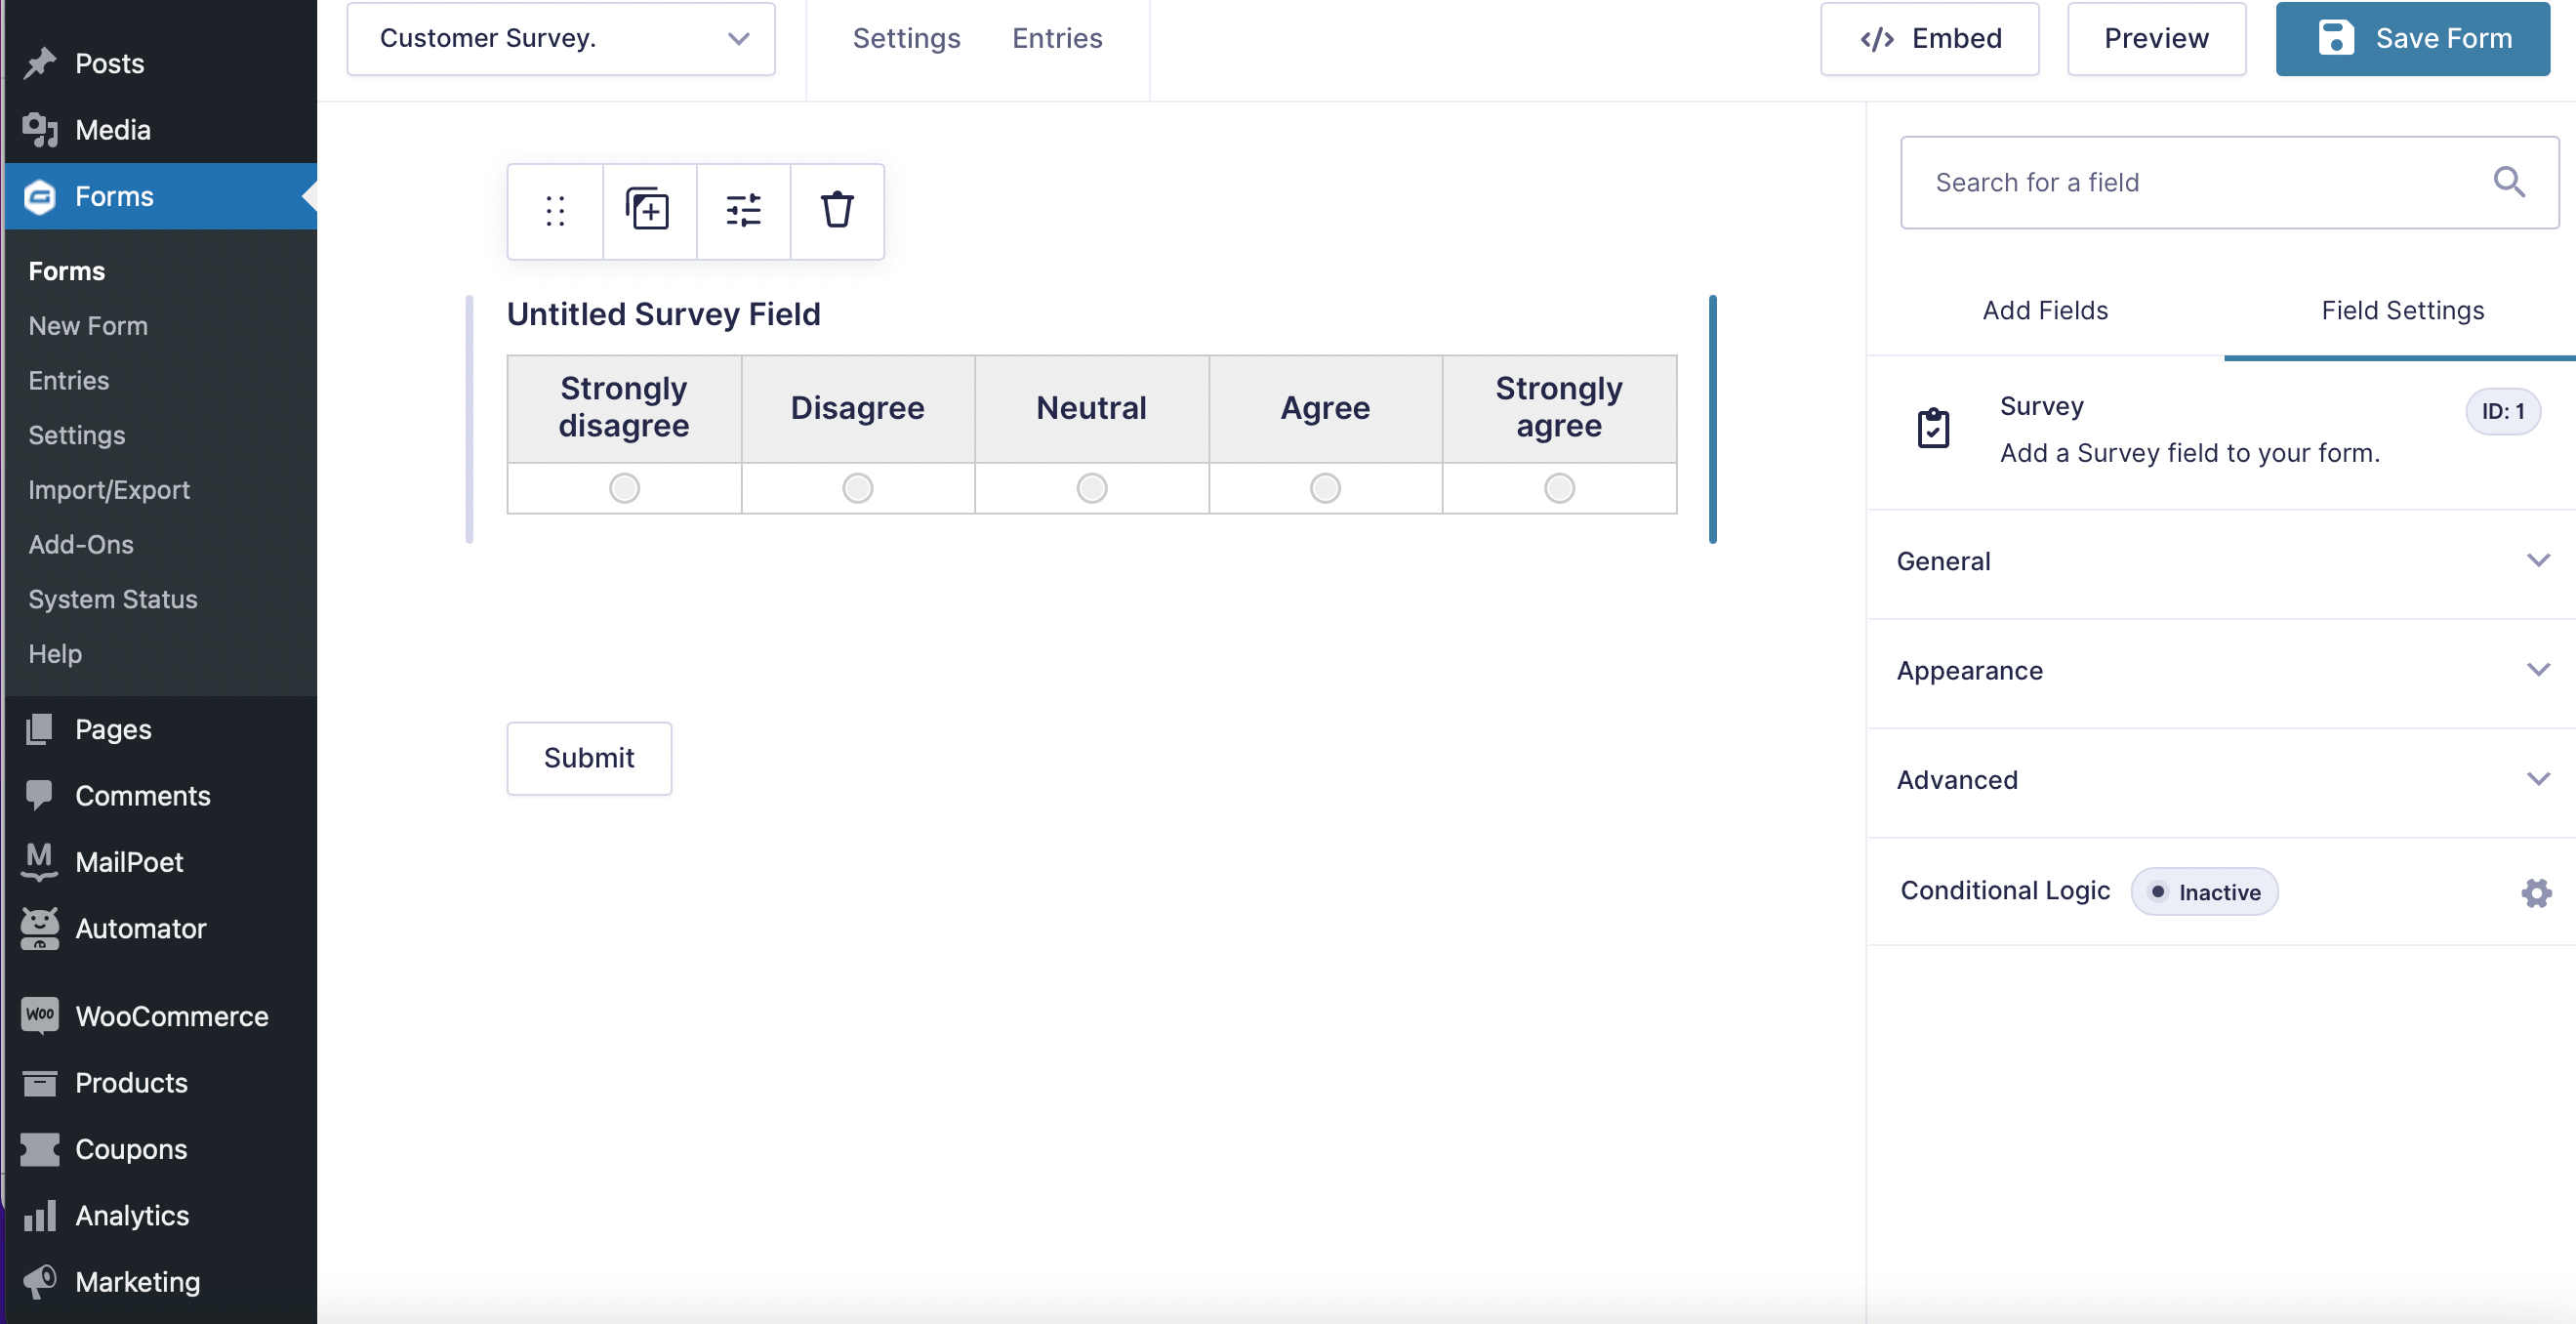
Under the General tab, you can change your survey’s questions and answers. You can also add multiple rows, which can be helpful if you’re creating an onboarding or churn survey.
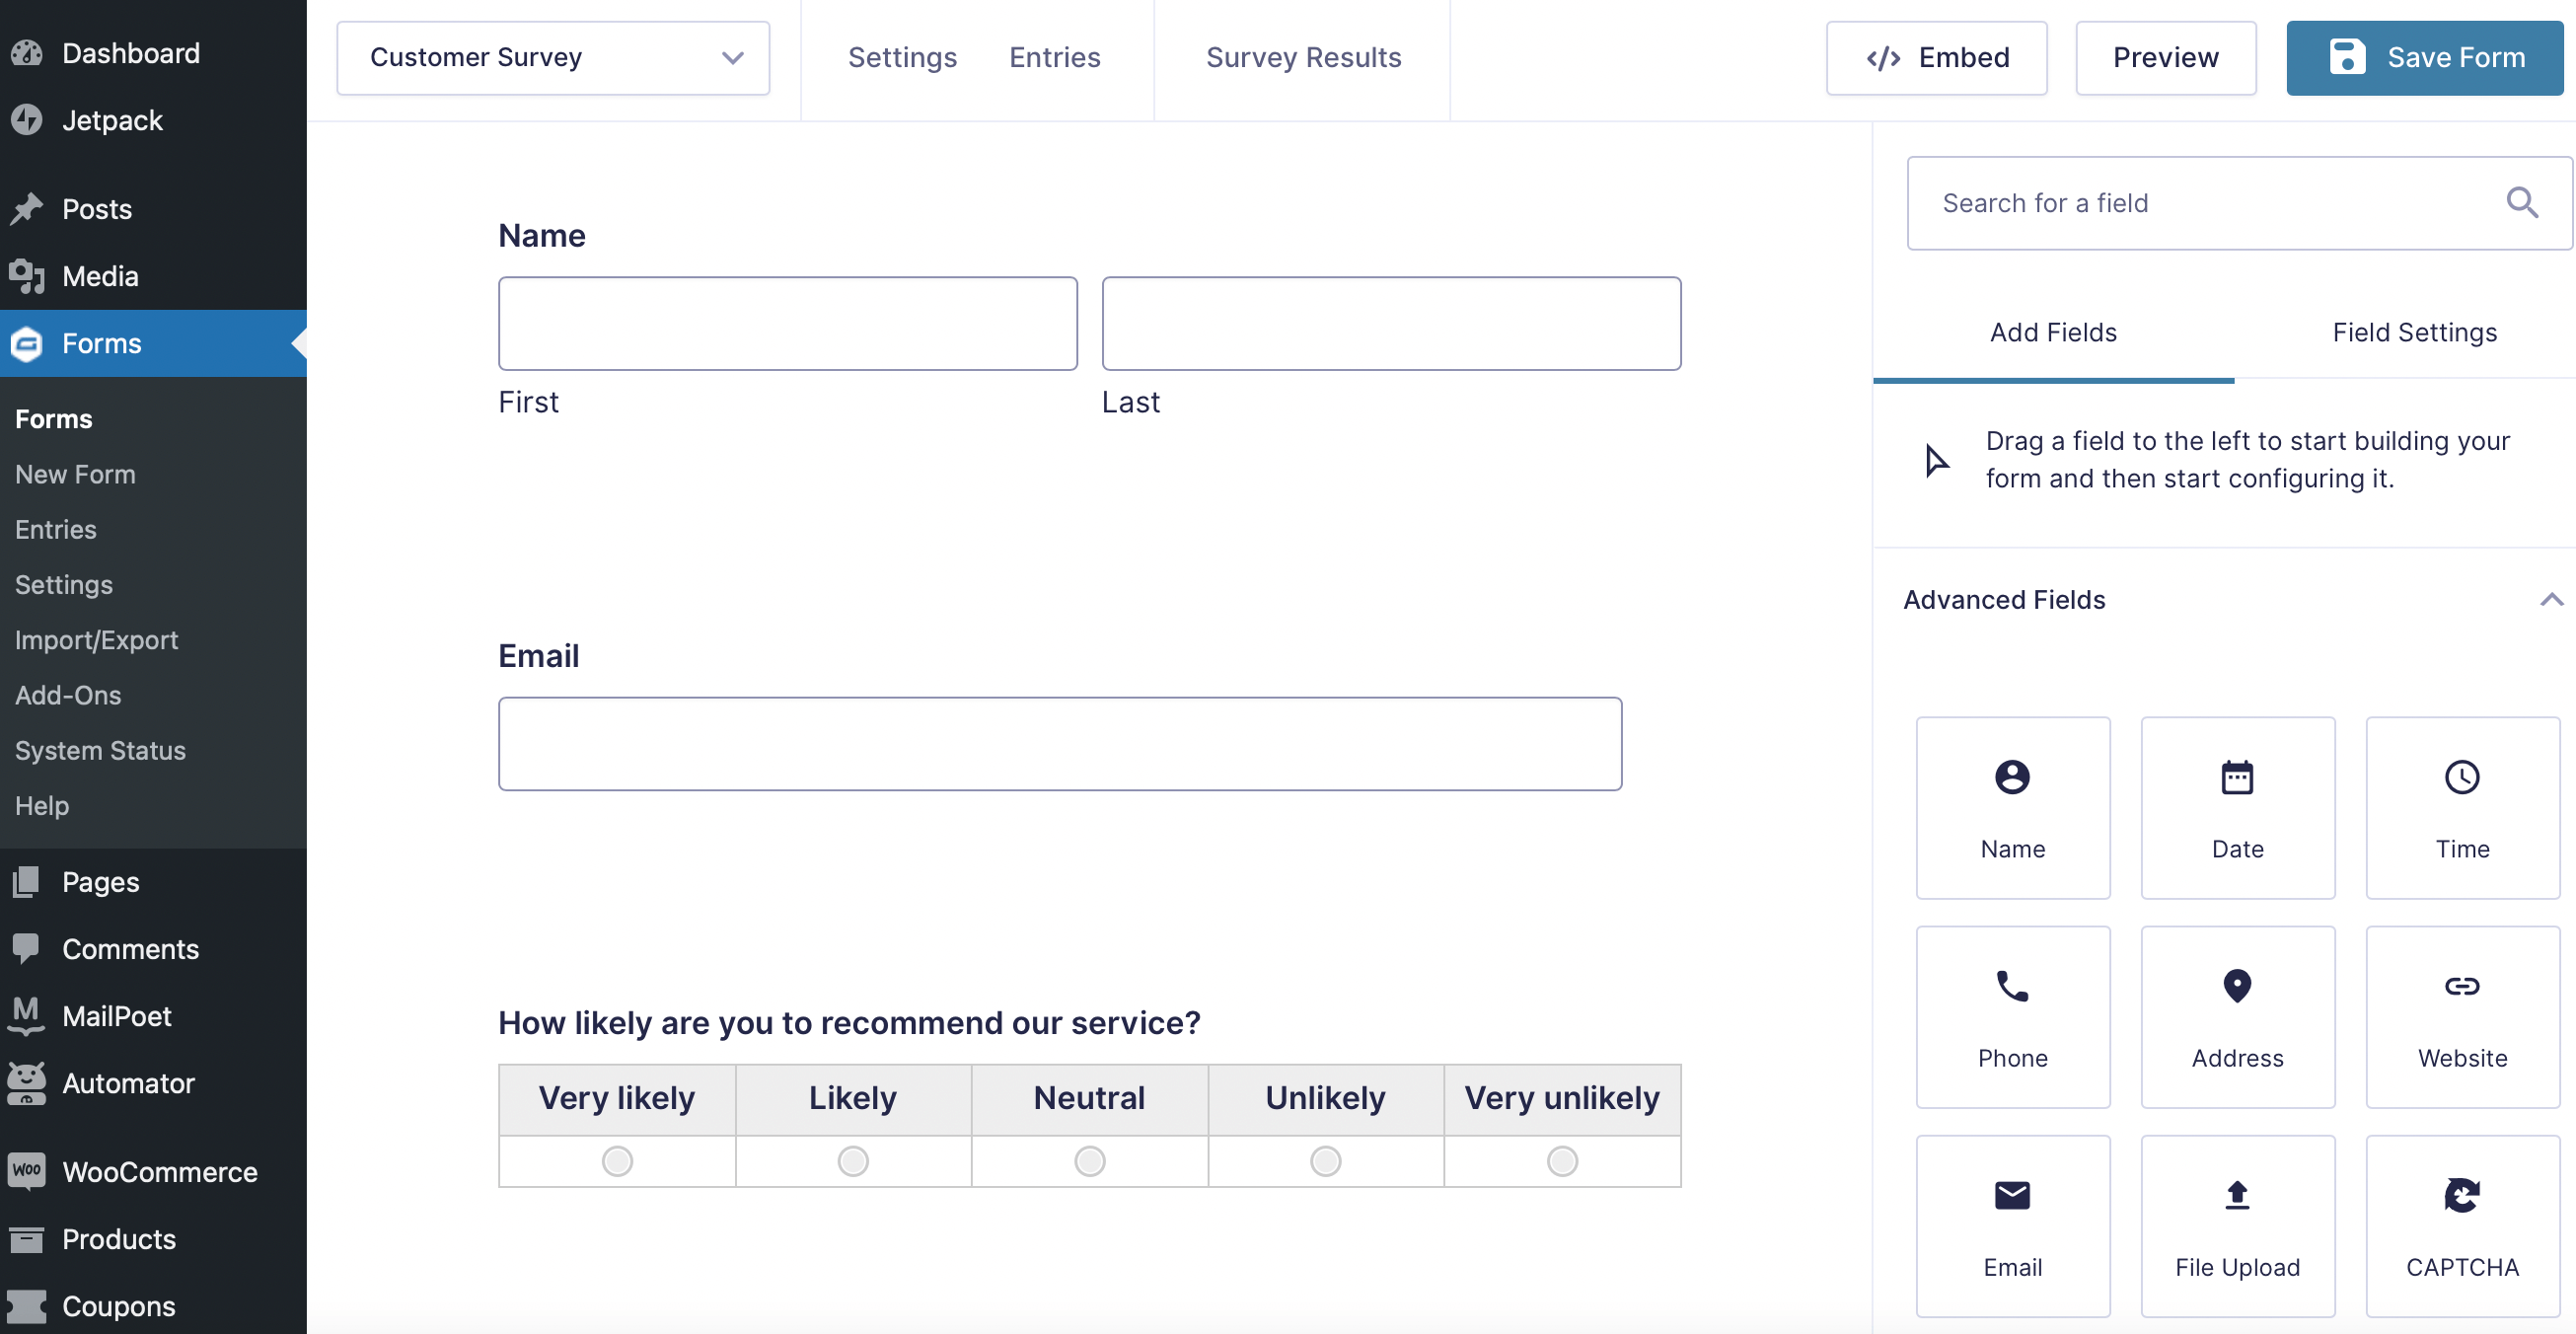
If you’re creating a customer survey for market research purposes, you may want to learn more about the users providing feedback. For example, you might choose to add a Name field and an Email field to your form. You can find these elements under Advanced Fields:
To see how your survey will look, hit Preview in the top right corner. Once you’re happy with it, click on Save Form:
Step 3: Install Beaver Builder and Create a New Landing Page
You can build your landing page with WordPress’s Block Editor. Still, page builders are excellent options for ease, efficiency, and style.
Our Beaver Builder plugin is designed to take the grunt work out of creating websites, allowing you to focus on the fun stuff. With clean code, fast loading times, and a nifty drag-and-drop editor, you can build any type of website easily.
Once you’ve signed up for a Beaver Builder pricing plan, install and activate the plugin. Then, head to your WordPress dashboard.
Navigate to Settings and scroll down to find Beaver Builder. Under License, you’ll need to paste your license key. You can find it by logging into your account:

To create a new landing page for your customer survey, head to Pages > Add New. This will take you to the Block Editor, where you have the option to Launch Beaver Builder:

You’ll find pre-designed landing page templates that you can use under Templates. Otherwise, you can build your page from scratch by dragging and dropping modules onto the page:

Keep designing your landing page until you’re happy with how it looks. For a more in-depth look at page-building with Beaver Builder, you can check out our guide on creating pages.
Step 4: Add the Customer Survey to Your New Page
Now it’s time to insert your customer survey into your landing page. Head to the Modules tab and open the drop-down box that says Group. Currently, it will be set to Standard Modules. Go ahead and change this to WordPress Widgets.
You should now be able to select a Form widget:

Drop the Form widget anywhere on your page. A popup box will now appear:
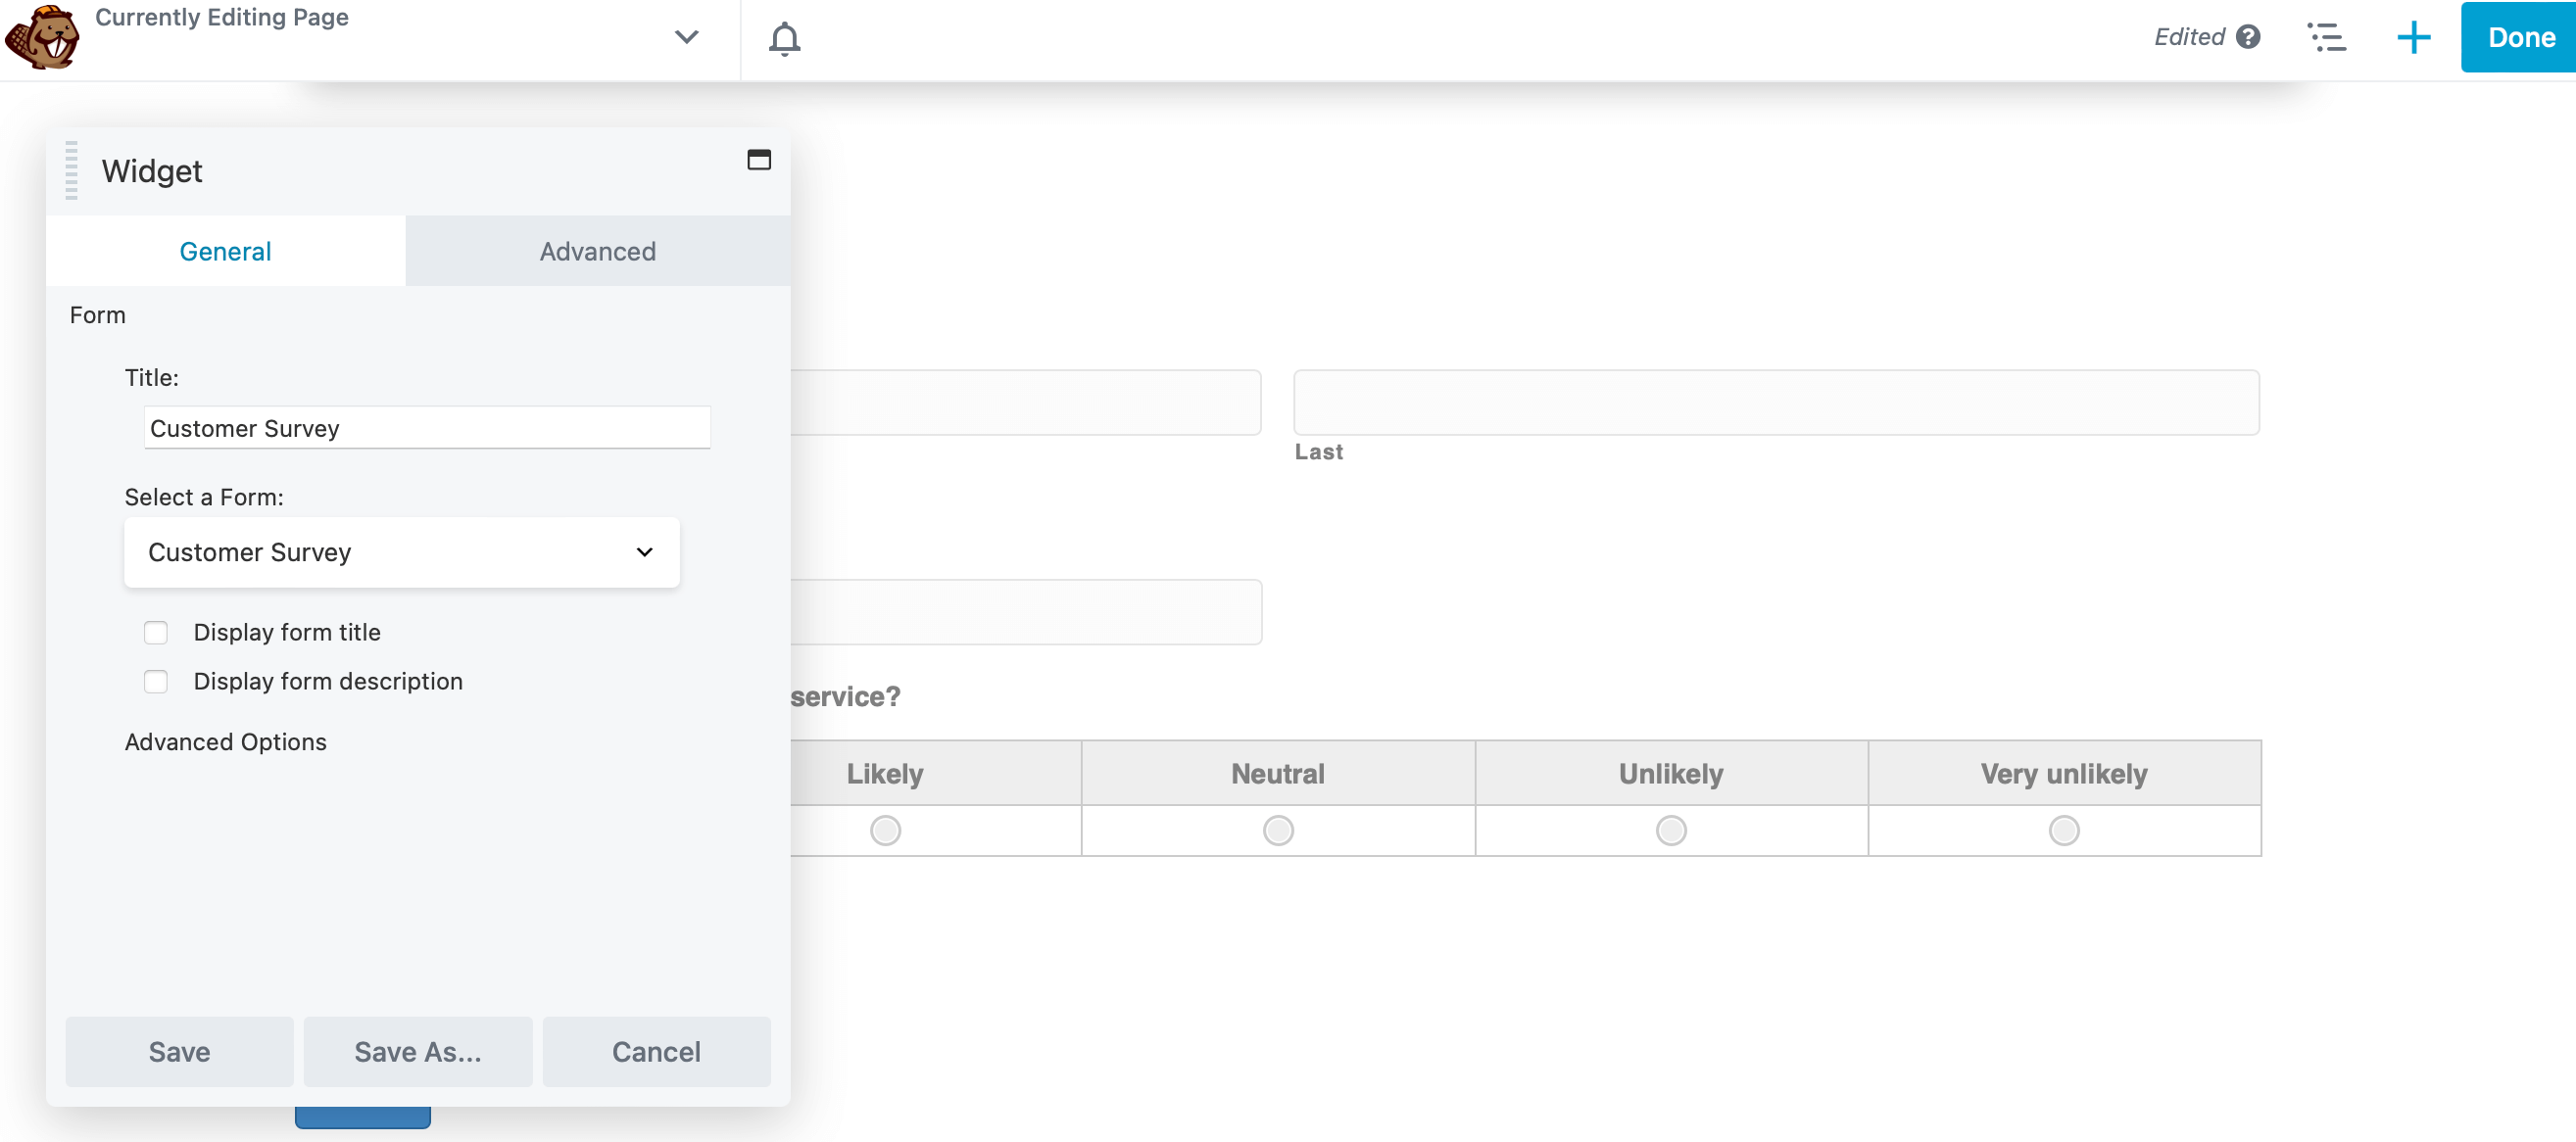
Navigate to the General tab and select your customer survey form from the drop-down menu. Use the tick boxes to adjust whether your visitors can see your form title and description, and then click on Save. At this point, your form should be embedded within your new Beaver Builder landing page:
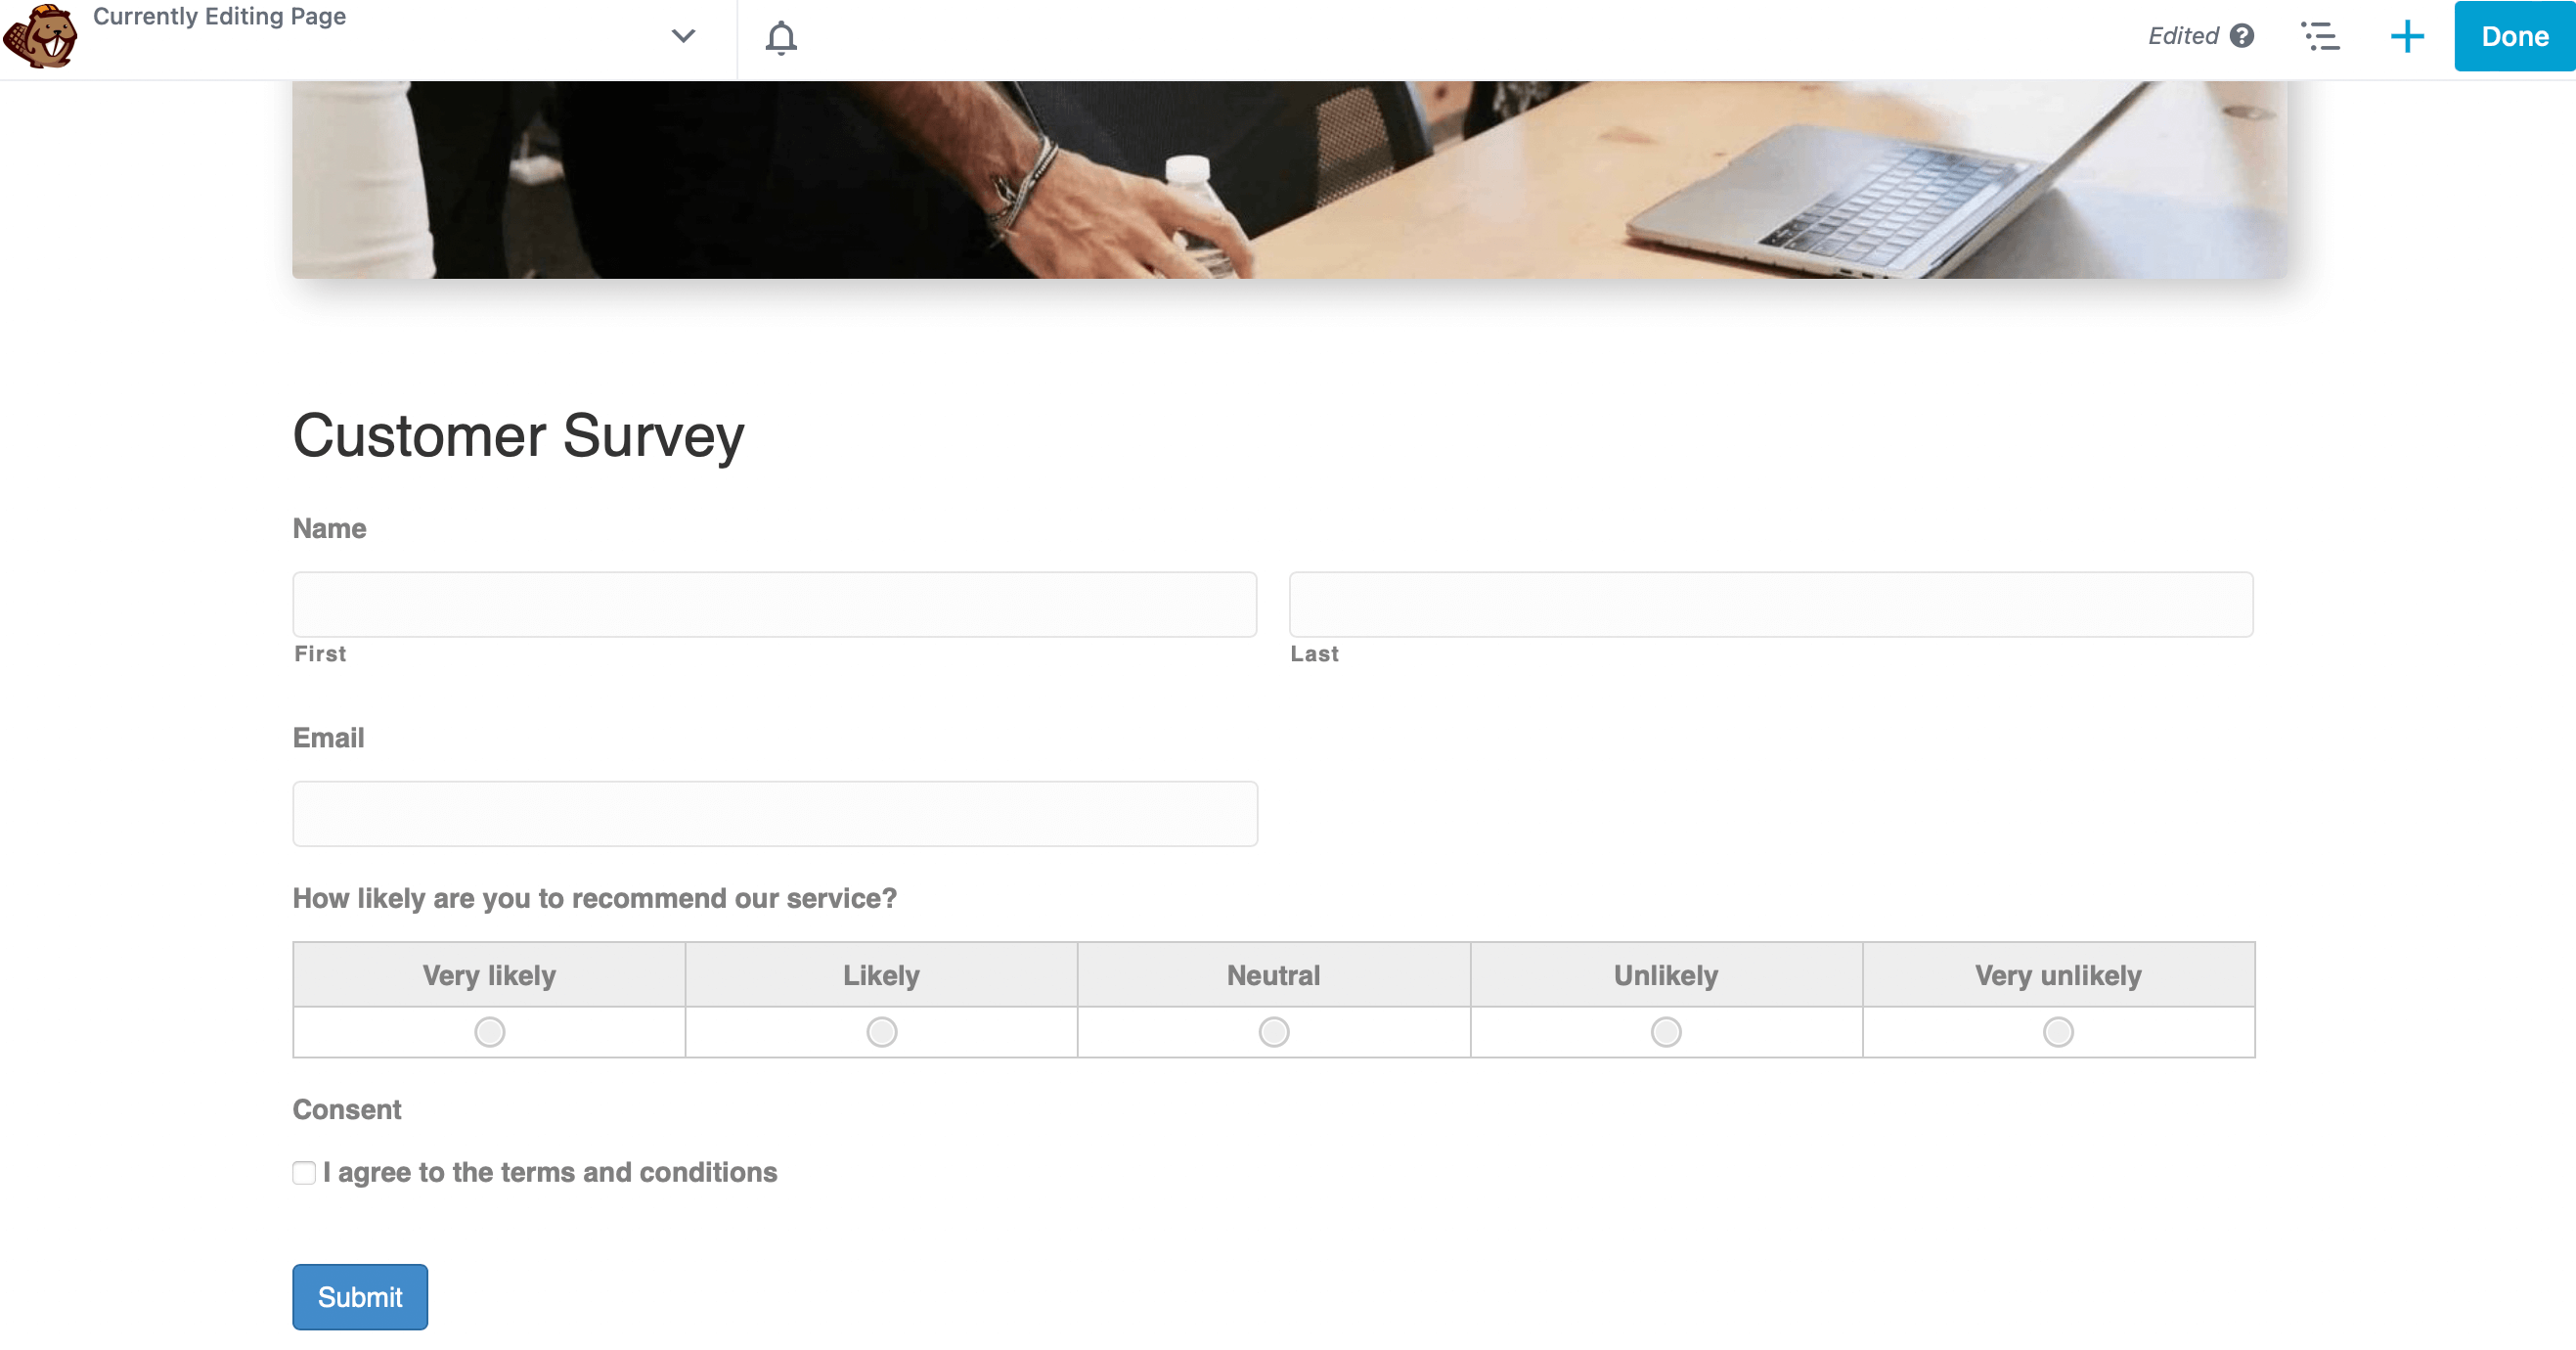
To save your changes, hit Done in the top right corner, then Save Draft. Since Beaver Builder enables you to preview everything on the front end, you can publish your page if you’re happy with how it looks.
Conclusion
Whether you’re a new business or a veteran merchant, your success boils down to your customers. If consumers aren’t satisfied with their experiences, you risk losing them to competitors. However, creating a customer survey for your site enables you to continually adapt to users’ evolving needs. Then, you can easily retain customers and improve your service for new clients.
Following these five steps, you can create your own customer survey for your WordPress site:
- Install and activate the Gravity Forms plugin and the Gravity Forms Survey Add-On.
- Create your customer survey form.
- Install our Beaver Builder plugin to build a new landing page.
- Add the customer survey to your landing page.
Do you have any questions about using customer surveys? Let us know in the comments section below!
Our Newsletter
Our newsletter is personally written and sent out about once a month. It's not the least bit annoying or spammy.
We promise.
Try Beaver Builder Today

Related articles

How To Add Content Restriction in Beaver Builder
Wondering how to restrict content in Beaver Builder? If you run an online business built around premium content or educational…

Best WordPress Black Friday Deals (2023)
Hey Beaver Builders! Are you looking for the best WordPress deals for this holiday season and Black Friday? We reached…

How to Redirect a WordPress Page (Manually and Using a Plugin)
In this article, we’ll dig into what redirects are and why you might need or want to use them. We'll...
Join the community
We're here for you
There's a thriving community of builders and we'd love for you to join us. Come by and show off a project, network, or ask a question.
Since 2014
Build Your Website in Minutes, Not Months
Join Over 1 Million+ Websites Powered By Beaver Builder.