
A Coming Soon landing page is often used to hide a website that’s in development. But besides that function, a Coming Soon page can add great value to your pre-launch by bringing in leads and creating a buzz about what’s coming.
In this post, we’ll show you how to create a simple Coming Soon page. We’d also like to show you a couple of ways that the PowerPack add-on plugin can enhance Beaver Builder, especially with its maintenance mode functionality that redirects viewers to a temporary page built with Beaver Builder.
Example of a Simple Coming Soon Landing Page
Beaver Builder has a built-in layout template for a very basic Coming Soon page, as shown in this screenshot:
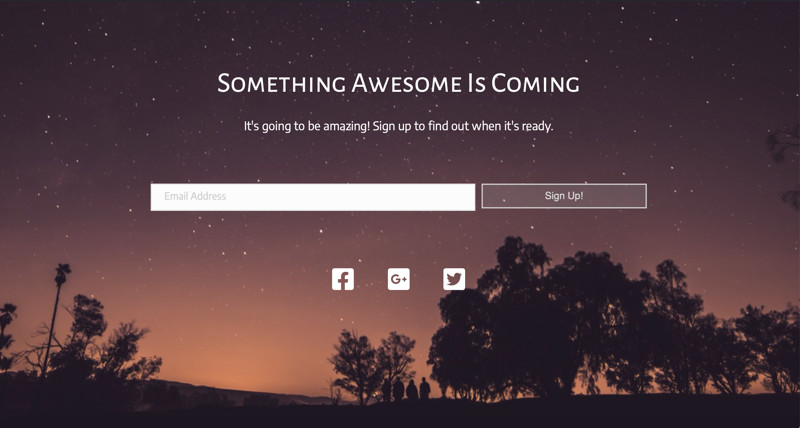
The template has the following elements:
- A background image with figures watching the sky, suggesting that something is about to happen.
- Some suspenseful text indicating that something is in the works and users should sign up.
- A subscription form to stay informed of what’s happening.
- Social media icons to the related pages for this site.
You can start with this template and modify it to fit your situation, or build your page from scratch, which we’ll show you how to do.
How a Coming Soon Page Can Be Conversion-Oriented
Here are some things a Coming Soon page can do:
- Mark your presence amongst search engines. Search engine bots can start crawling your site with an active Coming Soon page.
- Create a countdown buzz shortly before the website is fully ready when you have a firm date of launch.
- Share information about what you’re working on and capture leads from interested people.
- Carry out a pre-launch campaign.
- Build trust among prospective customers by sharing your personal information, previous experience, and success stories.
Of course, a Coming Soon section of your site can include more than one web page, but in this article, we’ll focus on a single landing page.
Tips for Creating a Conversion-Oriented Coming Soon Page
A great Coming Soon page should convey the right message and share information about what’s coming next and when. However simple the page looks, it can have several valuable components. Here are some tips for how to create a great Coming Soon page.
1. Keep it Simple
Ideally, a Coming Soon page should follow the famous KISS principle – Keep it Simple, Stupid. Usually, the idea of a Coming Soon page is to get people intrigued, get them to share the excitement, and get them to sign up.
2. Choose Interesting Words
Make sure that your Coming Soon page conveys the right message. Don’t use the title “Maintenance Mode” when you’re preparing for your launch. A simple “Coming Soon” title is boring. Get a bit creative and use something like “We are cooking up something delicious” or “Something Big is Coming Soon”.
3. Use Your Branding
Your Coming Soon page should follow your branding colors, logo, and typography. It will help you with the initial brand building if it’s a new business, or if you already have a known brand, it will help people associate the excitement with something they already know.
4. Introduce your Product or Services
Here are some ways you can introduce what’s coming:
- Provide brief and catchy copy.
- Use a video or infographic to add to the visual appeal.
- if you have any pre-launch users or customers, add a few quotes or reviews.
- Add a link to your roadmap.
5. Share the Launch Date
Share a launch date if you can. If it’s firm, you can use a Countdown Timer. Doing what you say you will do builds trust, so make sure you follow through on the launch date.
6. Add a Lead Capture Form
One of the most important elements of a good Coming Soon page is a Lead Capture form. Ask visitors to provide their name and email. To persuade visitors to share their information, offer a pre-launch discount, a freebie, or some educational content. These leads mean you’re ready to hit the ground running by the time you launch.
7. Share Contact Info & Social Profiles
If you want your website visitors to get in touch with you, share your contact information. Social Media is the easiest and most time-efficient way to share daily or weekly progress with your audience.
How to Build a Coming Soon Page with Beaver Builder
Now that you know the importance and essentials of building a Coming Soon page on your website, let’s see how you can easily build a compelling Coming Soon page with Beaver Builder. We’ll use the Beaver Builder page builder plugin and create a basic layout for a simple Coming Soon page. We’ll also show you how to funnel all of your visitors to this page temporarily using PowerPack or another plugin.
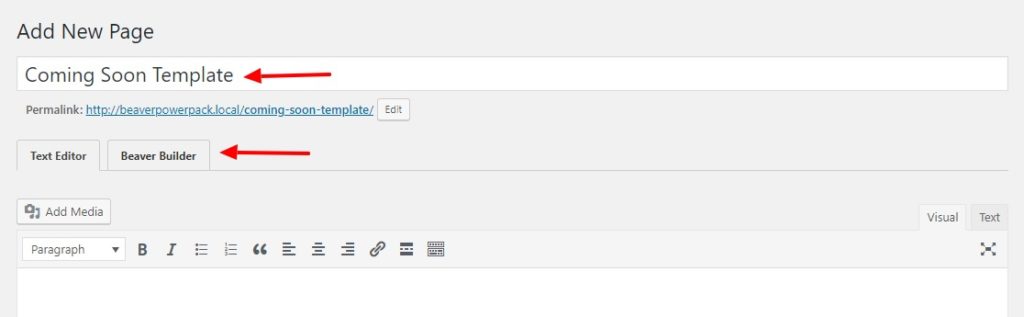
Step 1: Create a New Coming Soon Page
Log in to your WP Admin Dashboard and go to Pages. Now add a new page and give it a title. Launch the Beaver Builder editor by clicking the Beaver Builder tab.
Step 2: Design the Maintenance Mode Layout
We want our page to look professional yet very simple. Here’s the layout we’ll go for in this tutorial:

This is the point at which you could add the Coming Soon landing page template from the Templates tab in the Content Panel and modify it, but here we’ll show you how to create this layout from scratch.
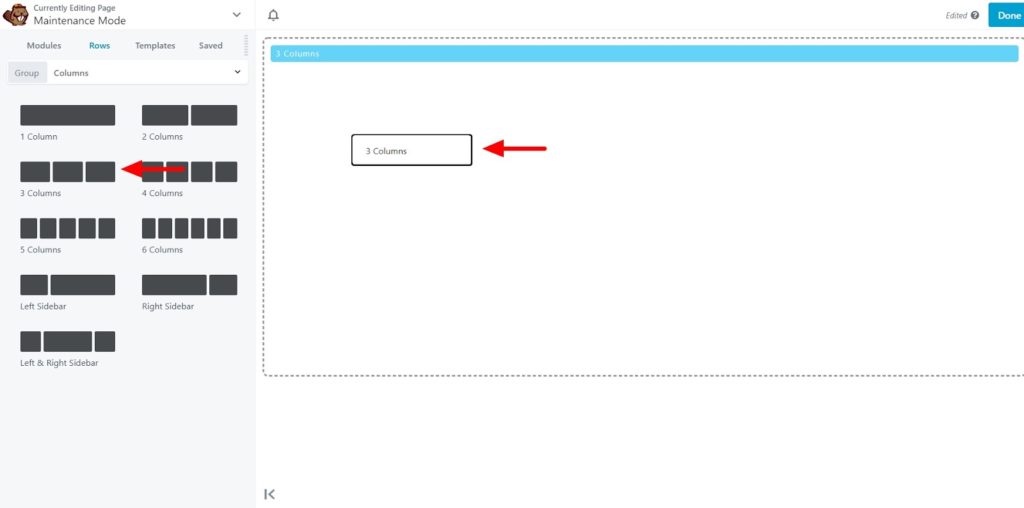
- Add Columns
First, add a three-column row on your page. In the Content panel, click the Rows tab and drag the three-column selection into your layout.
Resize the columns in the layout by dragging their side drag handles so the middle column is around 68% and the corner ones are around 16%.
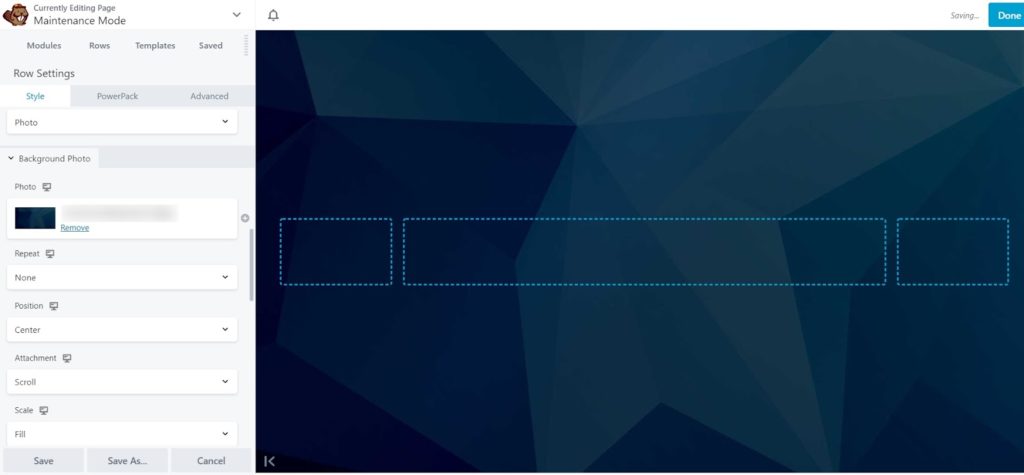
- Add a Background
To add a background, click the little wrench icon that appears when you mouse over the row. This opens the row settings. Scroll down to the Background section, select the type as Photo, and select the photo from your site’s Media Library. Now change the Height from Default to Full height. This increases the height of the row to that of the browser window.
So far, your page looks like the following screenshot. In our case, we chose a black row background, and you can see the outlines of the three columns faintly.
- Add Modules
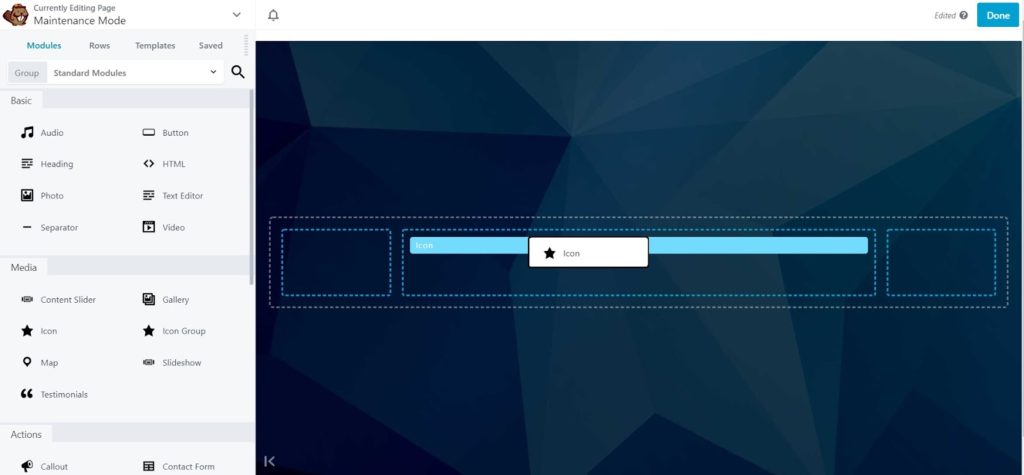
Let’s add the icon at the top. Drag and drop the Icon module into the middle column and choose an icon you want to display.
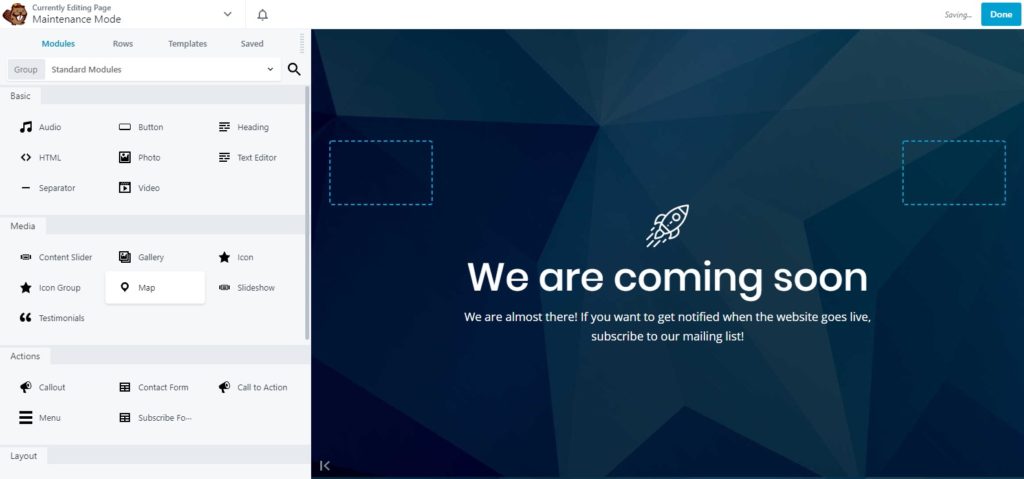
Now comes the message. Drag and drop the Heading module below the icon to create a new layer in the row. Change the text to something like “We are coming soon” and add styling as required. By default, the heading is rendered with <h2> tags, but you can change that if you want. You can also change the typography of the heading on the Style tab.
Add a Text Editor module below the heading and add some text informing the visitor when the website will be live and perhaps the reason for the delay. Use the Style tab to set the typography and alignment for the text.
Now drag and drop a Subscribe Form module into the layout. Open the module for editing and select a mailing list service (you’ll need to be registered with one of the services listed. Here we’ll choose ConvertKit. Type in the Account Name and the API key. Now, set the Name field to Hide, because we’ll just ask for their email address. Click the Button tab and change the text of the button.
Now go back to the General tab and change the success message by entering some text that suits a Coming Soon page. For example, you can add “Thank you for subscribing! We’ll notify you when the website goes live!”.
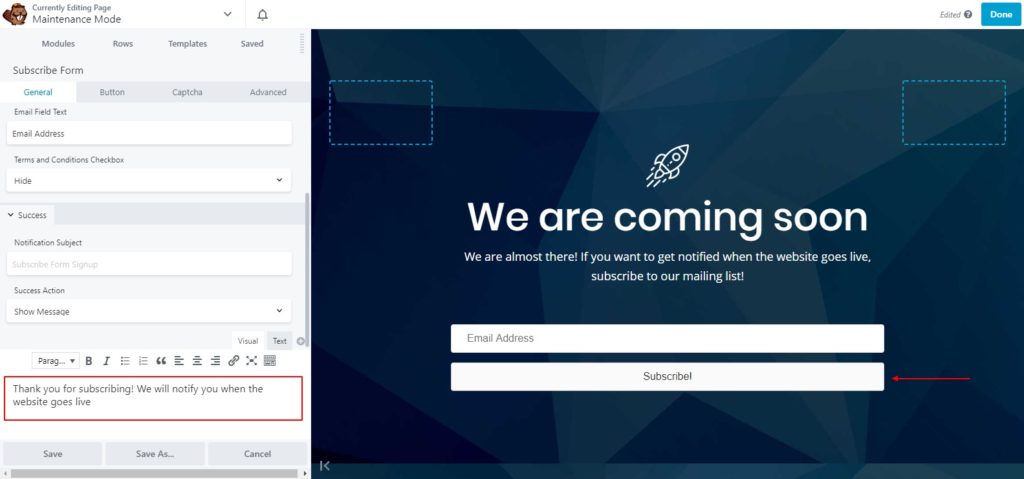
Change the typography and background color settings of the button and the field so it fits with the overall design.
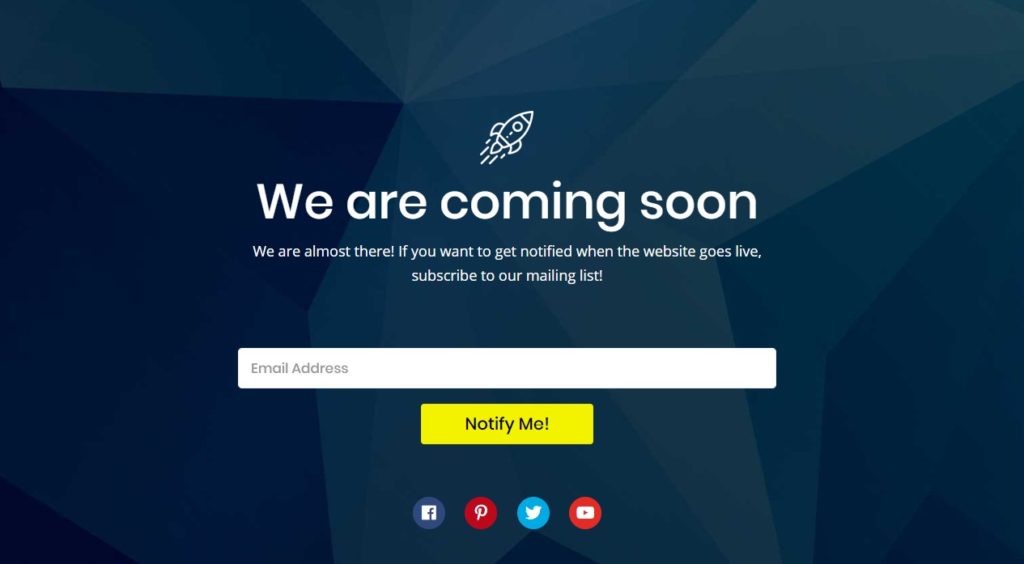
Lastly, add social icons. If you have the PowerPack plugin installed, you can drag and drop a Social Icons module on the page and enter the links to your respective social media accounts. If you don’t have PowerPack installed, use the standard Beaver Builder Icon Group module. Click Add Icon and choose the icon for each social media account you have and provide the link to the social media page. (Or if you prefer, download a free pack of royalty-free icons from Flaticon – just make sure they’re licensed correctly!)
In the upper right corner, click Done, then Publish.
Step 3: Send site visitors to the Coming Soon page
There are several ways to channel all of your site visitors to the Coming Soon page. The easiest is to use PowerPack’s “Maintenance Mode” feature, which automatically redirects visitors from any URL on your site to the Coming Soon page or any other page that you choose.
From the WordPress admin panel, go to Settings > PowerPack and click the Maintenance mode tab, shown in the following screenshot. Enable Maintenance Mode and select the type Coming Soon. Select the title of the Coming Soon page you created and click Save Changes.
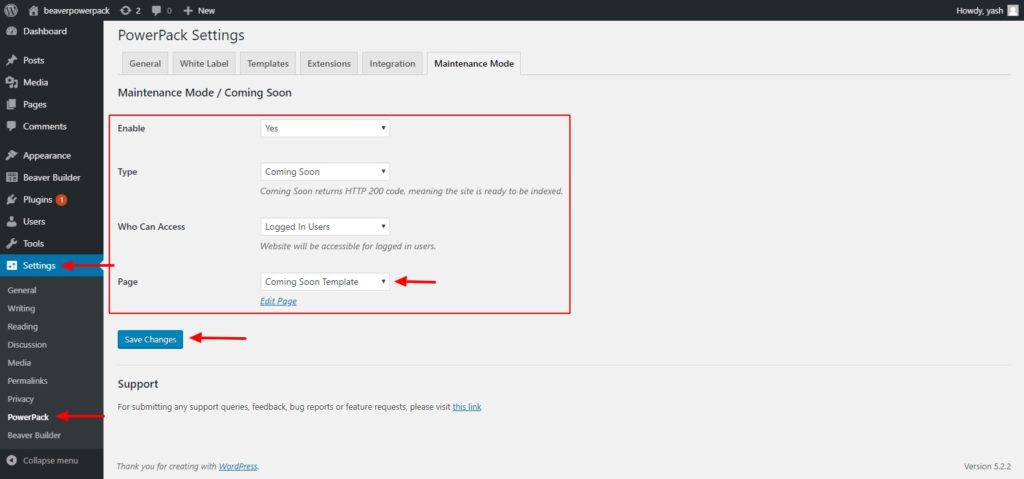
Your Coming Soon page is now applied to your website and every non-logged-in user will see this page. As the name “Maintenance Mode” suggests, you can use this feature for other purposes, like pointing to a “Sorry we’re down for maintenance” page you’ve created. The Maintenance setting is Ideal for a brief time (up to a few days) because it returns an HTTP 503 code, which tells the search engines to come back later and eventually discourages them from coming.
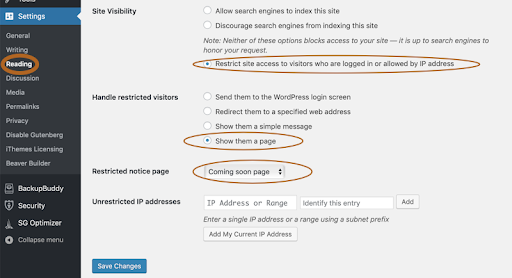
A fairly easy alternative to PowerPack’s Maintenance Mode is to install the Restricted Site Access plugin, which adds settings to the WordPress admin panel Settings > Reading page. As shown in the following screenshot, once you choose to restrict site access to logged-in visitors, you can select the page you want to show restricted visitors.
Over to you!
If you have ideas for Coming Soon pages or you try PowerPack’s Maintenance Mode feature, let us know what you think in the comments below!
5 Comments
Our Newsletter
Our newsletter is personally written and sent out about once a month. It's not the least bit annoying or spammy.
We promise.
Try Beaver Builder Today

Related articles

Beaver Builder Birthday: Celebrating 10 Years of Success!
Heyo! Can you believe it’s been 10 years since we kicked off this wild ride with Beaver Builder? Buckle up…
How To Add Content Restriction in Beaver Builder
Wondering how to restrict content in Beaver Builder? If you run an online business built around premium content or educational…

Craft High-Converting Popups: Popup Maker and Beaver Builder
Popups are a powerful tool for grabbing your website visitors’ attention and driving conversions. But crafting visually appealing and effective…
Join the community
We're here for you
There's a thriving community of builders and we'd love for you to join us. Come by and show off a project, network, or ask a question.
Since 2014
Build Your Website in Minutes, Not Months
Join Over 1 Million+ Websites Powered By Beaver Builder.
Thanks for the informative article, Puneet.
Even though I have used Beaver Builder on countless client sites, I never quite figured how to deploy the built-in ‘Coming Soon’ template on website builds until now 🙂 I always resorted to standalone third party ‘Coming Soon’ plugins and to be honest, most of them are atrocious and can’t be fully customized the same way you would when using Beaver Builder or Powerpack (premium)
Hello there! But how do I create a page without a Header, Footer and Sidebar?
Hello Bolat you can definitely create a page without a header, footer and sidebar. Here is an article that explains how you can configure the settings. https://docs.wpbeaverbuilder.com/article/137-remove-the-header-and-footer
Unfortunately this not longer seems to be an option with PowerPack.
Hi Craig, so sorry you are having trouble. We created a quick video tutorial here: https://youtu.be/sEzBnYT96RI
Hope this helps!